Fiero engine mount replacement / pics
Honest, the replacement of my Fiero engine mounts was not as bad as I thought that it would be. It’s done and I feel proud of myself. Ok, I have an 86, V-6 with a 4-speed transmission. It took about 4 hours leisurely but that is with everything including clean up and putting away the tools. I could have done it in less than 3 hours.
You will need the following,
Anchor 2466 Rear,
Anchor 2472 motor mount LH,
Anchor 2467 Transmission Mount Rear
Jack,
Car ramps or jack stands
Block of wood,
13MM wrench and 13MM sockets.
15MM wrench and 15MM sockets
Flex head ratchet
Safety glasses
Trouble light.
Tools to disconnect the battery and your dog-bone.
Pry-bar and a BF Hammer to help persuade rusty and stubborn bolts.
Permatex mechanics hand cleaner.
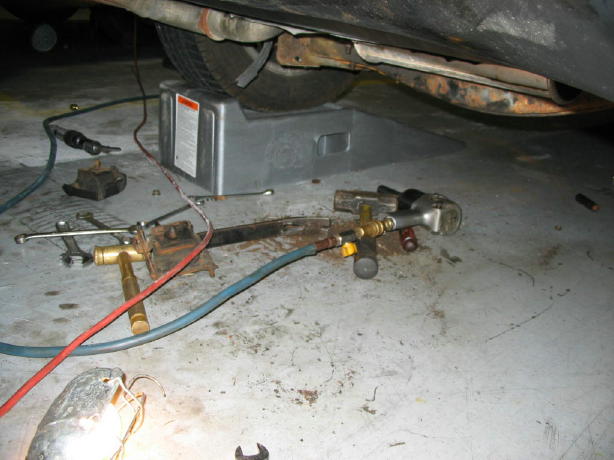
It was fairly straightforward, back car on ramps, and disconnect battery, dog-bone, and the lower nuts to all of the mounts. I have access to a High-Lo so I used that to raise the engine, looping a chain on the engine lift hooks. A jack with a 2x4 board under the oil pan will work fine, just a bit less maneuvering room. I did use the jack to lift under the trans case carefully at one point. The mechanic on station set me up with an air tool to loosen some of the mount bolts, man alive that was cool, fast too.
Hint,,,, Plan on replacing all three mounts at the same time, I attempted to replace mine in succession, but quickly figured out that I needed to un-fasten all of the frame bolts to all three mounts to raise the engine up.
Hint,,,,, The mechanic showed me the trick to reinstalling the LH rear mount, slide it in and drop the rear most bolt through the frame first, then the front bolt, it will plop right in. I’m so square peg in round hole, I couldn’t figure this out but he got it in about 11 seconds.
Hint,,,, Pick up some fresh washers prior to starting, there is no way that you will be able to reuse the old ones due to rust and wear. Figure on one for each bolt.
Hint,,,, The old LH front mount has two different sized bolts whereas the new Anchor mount will have two identical sized bolts, you will need to pick up an extra nut for this one. This is on the frame bolts on this mount.
I tightened up the mounts to engine first, then lowered it slowly into the frame. I wanted the weight of the engine to load up on the mounts evenly. I then fastened the all the frame to mount nuts.
Played tug of war for a couple of minutes to re-secure the dog-bone, re-attached the battery cable, put away tools and drove off into the sunset.
Hint,,,, My neighbor is so sweet, she cleaned the grease off of my camera with some “Citrus-wipes”. I’ll have to get some of those to clean up my tools next time.
A couple of notes about this. It wasn’t that bad of a job, everything was very accessible from underneath. Some of those fancy ratchet wrenches would have been nice but my socket wrench did fine. I took a short video of the mechanic demonstrating the trick to getting the LH Rear mount into place, I can email it to anyone who wants to see it.
I took about 50 some odd pictures for everyone, kind of like show and tell, the link to my photo page is here,
http://jetman.smugmug.com/gallery/851482/1/38285168 I'll keep this up for everyone for at least a year.
Now for a few pictures of the action starting with the chains on the engine.
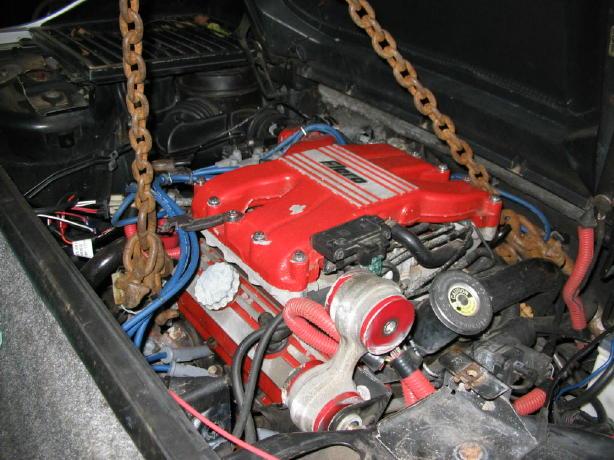
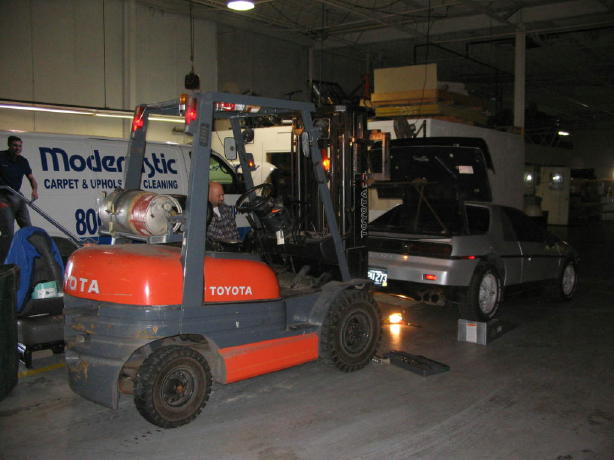
Lifting the engine the easy way!
A car jack will work or a ratchet strap on a large shade tree branch will do just fine.
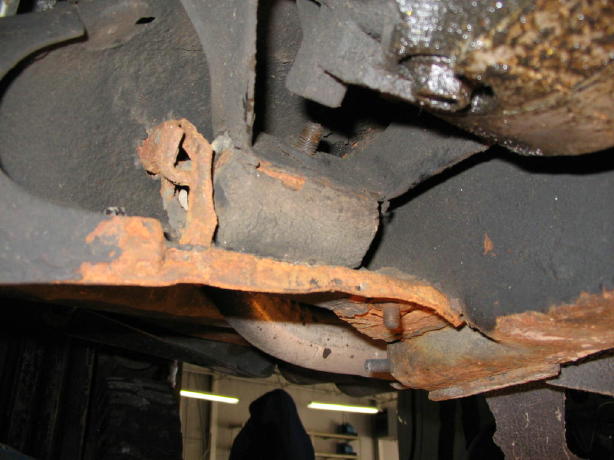
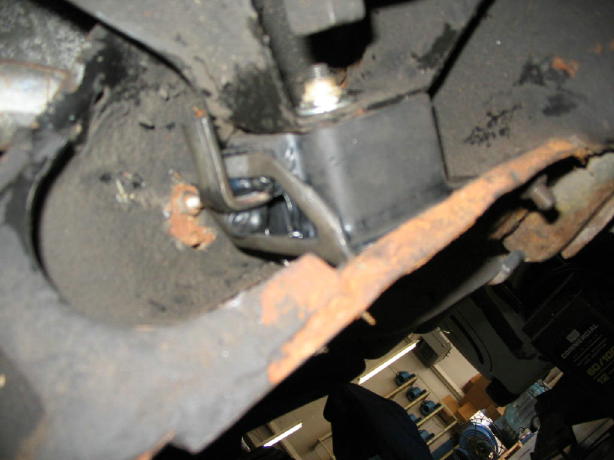
Wow, what a bad one! Nearly falls apart, no wonder the car felt funny.
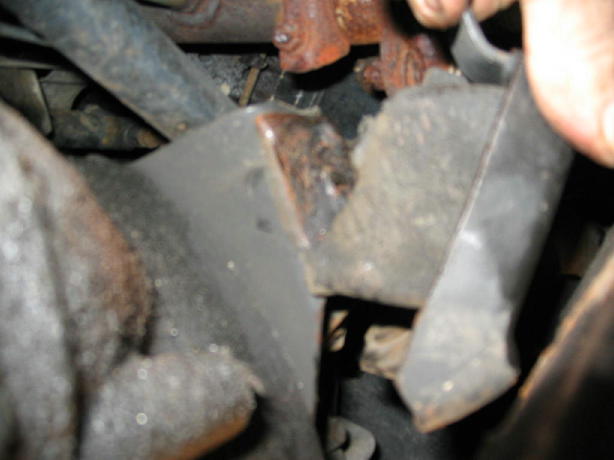
Before,,,,
After,,,,
Clean up time!
I hope that someday, one of my Fiero friends will be able to save himself or herself some time and aggravation by reading my little post about the Fiero motor mounts. Thanks for allowing me membership in our PFF community!
jetman
------------------
jetman
Silver 86 SE 2M6 4-speed, with "check wallet light"
TCC solenoid replacement tips
Exhaust manifold gaskets replacement
Main electrical harness inspection
Funny stuff Three Stooges quotes, My new bed, jetman vrs dishes,


