Do you think this car is worth saving from the crasher?
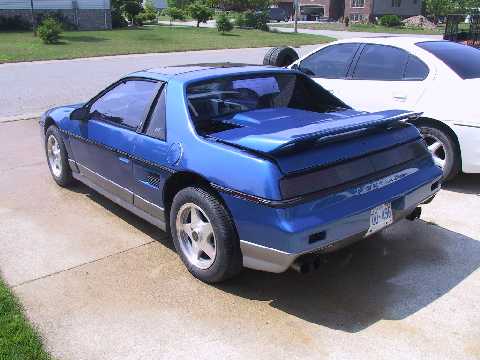
Even if it had cancer really bad? Like this?
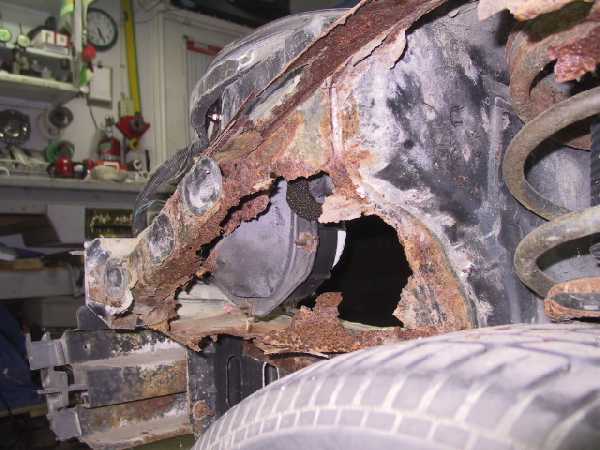
I think so. So, I decided to take pics to show that this car is worth saving. Notice that besides the trunk corner, the upper rail is also missing, gone, rusted, history, well you know what I mean. I will cover the upper rail in another thread
https://www.fiero.nl/forum/Forum2/HTML/068409.html
so lets concentrate on the trunk. You could lose a case of beer thru the hole and that could be seriuos. I want to make this statement, this is not the only way to fix this problem, but only one method. For the ones that want to attempt this do some searching on removing the rear clip to get it to this point. There are a few good ones written.
The first thing I made was templates out of cardboard, cerial boxes are great cuz they are not stiff. The first ones I made out of three pieces.
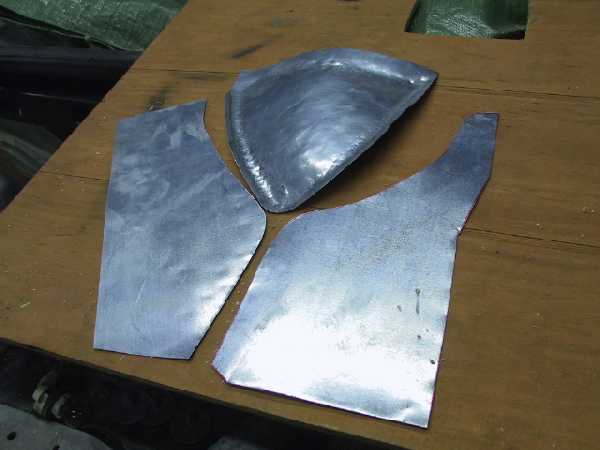
That meant I had another seam to overlap and weld. Too much freeken work, then I realized I could make the flat pieces out of one piece. Just cut to shape and fold.
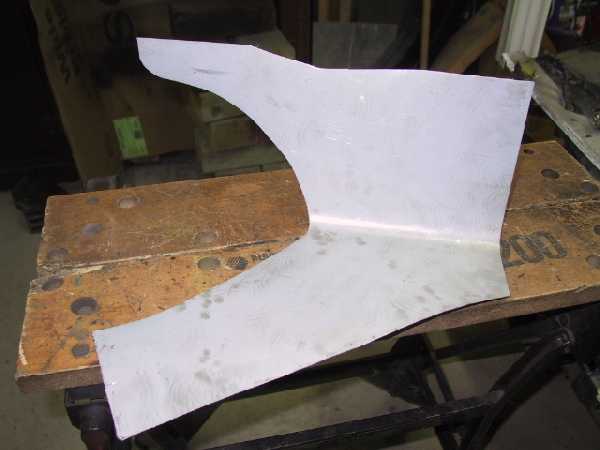
Much better. The trick to the pieces is to add 1/2" to each area on each seam to be welded. I spot weld every 1/2" along the edge on both sides. You can see the weld on one side and the heat zone from the other side. Believe it or not I was able to weld the corner on the bench and swing it into position in one assembly. To weld the corner in the trunk you have to have good metal to weld to. I did this after I replaced the upper rail. What you do is drill 3/16 to 1/4 inch holes every 2" (my preference) in the corner pieces ONLY, then puddle weld in the hole while applying pressure to the corner for a good weld. If you don't push down on the insert, you will burn the hole larger. Reduce the heat to get a good flow and fusion. I'm no expert and I managed. I did a lot of prototyping before I ventured on the final product. When finished, it should look as good as this or better.
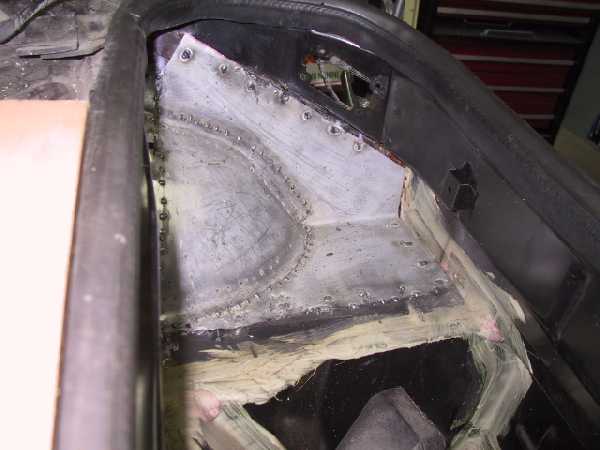
Then all I did was used underbody rubberized asphalt to seal all the gaps. Doing this restoration, I have saved eight cars from the crusher. Oh yeah, I forgot to explain how I did the spherical corner piece. I lay the corner piece that looks like an acorn when flat, on an old blanket, but for best results a sand bag or bean bag will do. Then I use rounded nose mallet, I have a 5LB, starting at the middle pound it out in a circle towards the outside and repeat the process till you get what you want. Don't be in a hurry or you will make a pretzel. If you had the right equipment it will come out looking professional. But I'm happy with what I got. You can see the hammer marks. Takes me about 30 minutes per corner to pound and at different times. Talk about building your arm muscles. Anyway I hope this will encourage others to attempt the fix. I have seen fiberglass pieces made and revited in place and look very nice. But I also heard the vibrations cause the revits to loosen and develop cracks in the joints. But they are just as good and less work.
Edited for spelling and adding the rail link

[This message has been edited by rubyredfiero (edited 11-11-2005).]


