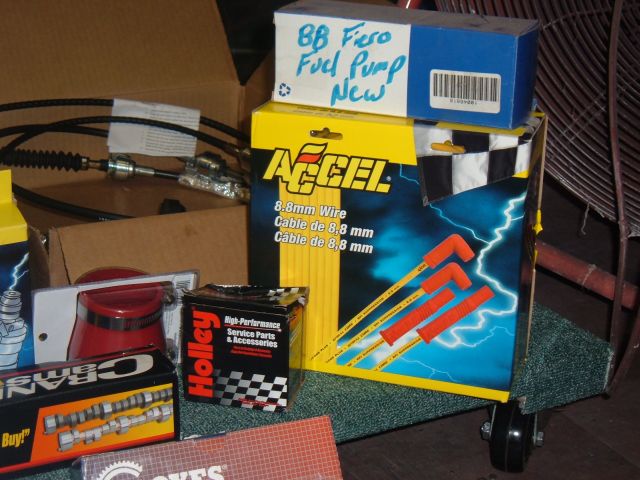
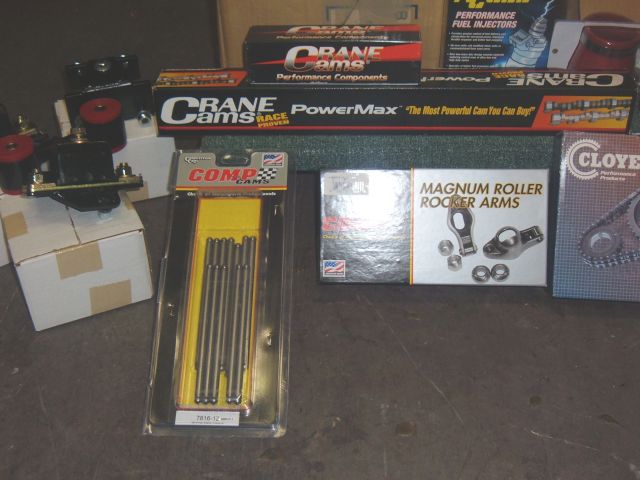
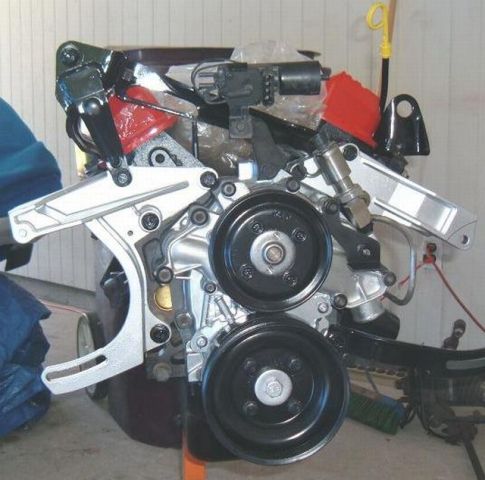
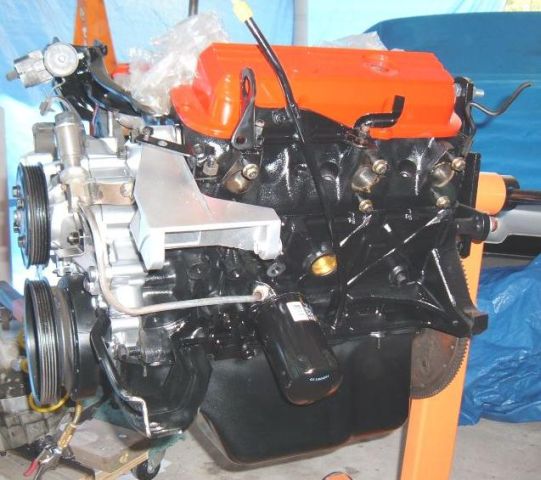
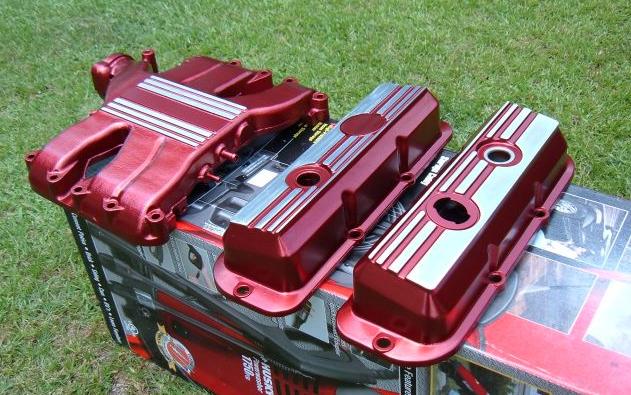
Finally decided to put another motor in my car. I am going with the 3.4L because it suits my driving style. Anyway , I will try and post pics of the progress once I get started. Probably within the next couple of weeks. I do have a few pics I can post to get started though. These are a few of the parts that have come in so far.
Almost forgot...won this on Ebay . New 88 Crossover. Darrell Morse is doing my TB, Plenum, and both middle and lower manifolds as well as a set of exhaust manifolds. Here is a link to his website.. http://www.thefieropage.com/Darrell_Morse/darrell_morse.html
[This message has been edited by Zoom88 (edited 03-26-2006).]
IP: Logged
02:26 PM
D B Cooper Member
Posts: 3141 From: East Detroit, MI Registered: Jul 2005
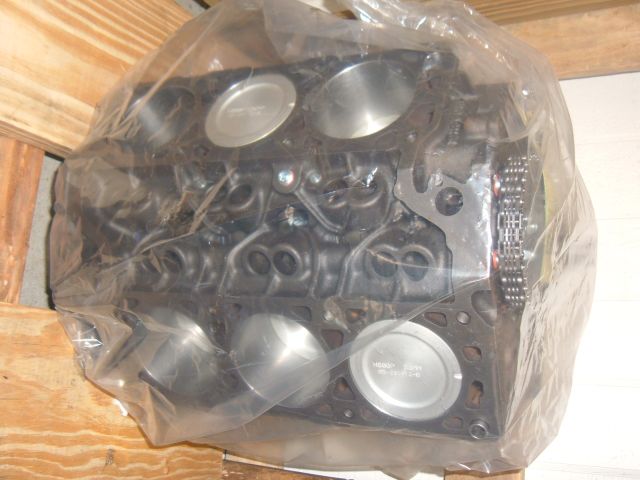
Good call on the shortblock. From what I've heard Grooms does top-notch work. At least the marine mechanics I used to work with seem to prefer a Grooms reman over a Jasper.
------------------
[This message has been edited by D B Cooper (edited 03-26-2006).]
Good call on the shortblock. From what I've heard Grooms does top-notch work. At least the marine mechanics I used to work with seem to prefer a Grooms reman over a Jasper.
Thanks, I have been looking into this for over a year now. I am real pleased with everything so far !! I haven't had any problems communicating with them.
IP: Logged
09:06 PM
1MohrFiero Member
Posts: 4363 From: Paducah, Ky Registered: Apr 2003
Zoom88, once again you are my hero. I am looking forward to your posts. How much did you pay for the Grooms short block? I sent them price inquiry just this morning. Thanks for sharing this project.
Zoom88, once again you are my hero. I am looking forward to your posts. How much did you pay for the Grooms short block? I sent them price inquiry just this morning. Thanks for sharing this project.
The cost for the short block was $1,184.00 I did not have a core to send them so I paid an extra $125.00 Shipping was $80.00 delivered here in Louisiana. So total was $1,389.00
If I had thought about it I would have asked them if they would have sent me one without the Cam, Lifters , timing chain, gears and oil pump. I bought after market high performance for all these items. I may have gotten it a lot cheaper. If you are going to replace any of the above items with High performance stuff you may want to ask them. Might save you some money or they may tell you they only sell the short block as a package deal...but never hurts to ask !! Thanks for the compliment, not a Hero though .... just trying to do my share for the Fiero community. I have had a lot of help from Orief , Dave Gunsul, Rodney Dickman and Darrell Morse from the forum as well as some local boys from Tim's Engines (doing my head work) and Thunder racing who are going to Dyno the motor for me when it is ready.
[This message has been edited by Zoom88 (edited 03-26-2006).]
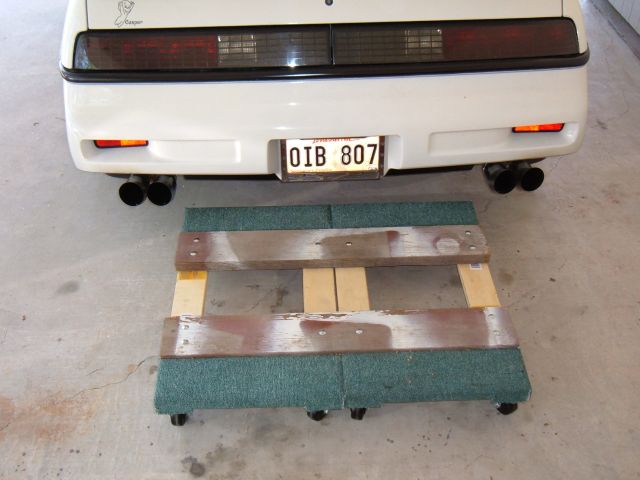
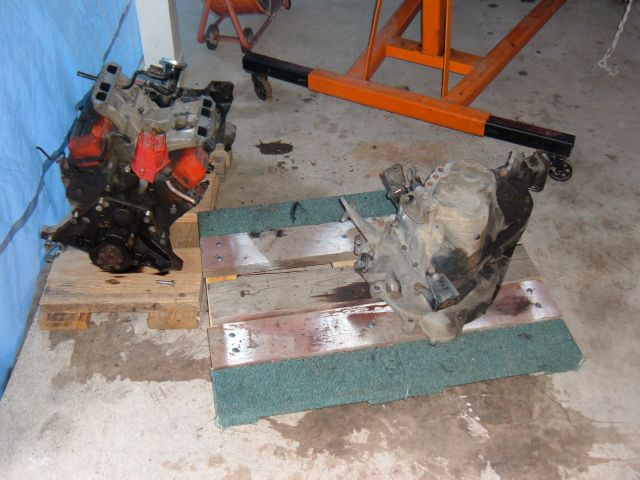
Started on the New motor. I bought 2 furniture dollies from Harbour frieght awhile back on sale. Connected them with 2 - 2X6's and some 5/16" carraige bolts as you can see in the pics below. (each dolly is rated for 1000 lbs. ) I had a third 2 X 6 I put in the center (last pic) when I actually dropped the cradle, but It is not bolted down. The set up worked great and was surprisingly easy to move !!
Sorry, I didn't get any pics when I pulled the motor but I will get some when I install it. I had never done it before and was busy trying to fiqure out exactly what it was going to take.
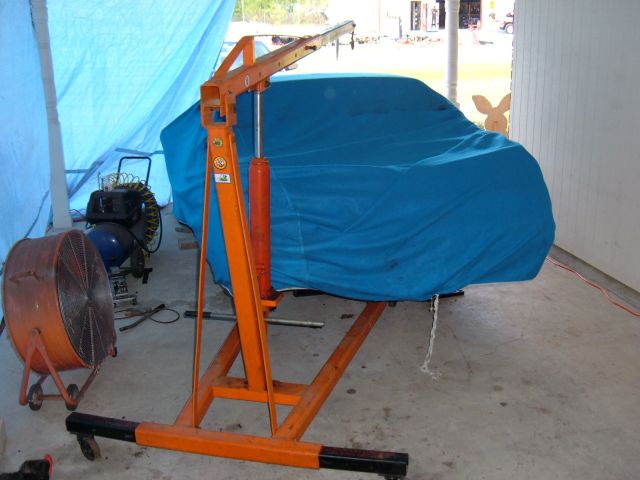
But everything worked out great and all it took was the dolly and a hoist !! Hardest part to me was getting everything disconnected !!
Next thing I am going to do is install the High volume oil pump and then the oil pan on the new short block so as not to get any shavings in it while doing the drilling to relocate the starter. I won't get time to do this until Saturday but will try to remember and get pics before I get all up into it !!
[This message has been edited by Zoom88 (edited 04-11-2006).]
IP: Logged
06:16 PM
carnut122 Member
Posts: 9122 From: Waleska, GA, USA Registered: Jan 2004
The oil pan has to be off to use Rodney's starter relocation kit. I used a garbage bag as an engine condom by taping it onto the shortblock except where I had to drill the block.
The oil pan has to be off to use Rodney's starter relocation kit. I used a garbage bag as an engine condom by taping it onto the shortblock except where I had to drill the block.
Hey thanks for that bit of info. Saved me the time of having to take it back off !! Any tips on using the kit, it looks pretty straight forward but ya never no !!. You got a + for saving me some time...Thanks
Would it be of any help to anyone if I posted a parts list with manufactures and prices ? Let me know.
[This message has been edited by Zoom88 (edited 04-11-2006).]
Here is a the parts list as it stands right now. Granted one can do without some of the things I ordered and I know a 3.4 can be installed a lot cheaper. I have no plans to do another motor swap so decided to put a little money into this one.
PARTS FOR NEW MOTOR
Total prices include shipping .
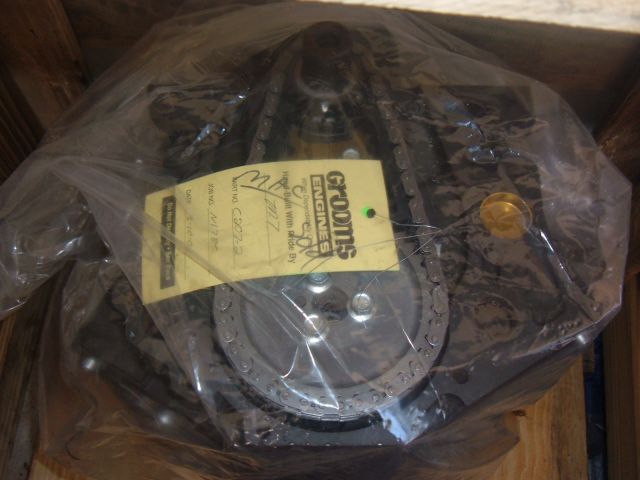
PARTS ORDERED FROM GROOMS ENGINE
http://groomsengines.com/index.html 93 � 95 3.4L V6 Short Block � C207-2 , ID # N178 - $1184.00 SHIPPING + CORE CHARGE = $1389.00 (if you have a core to send them there will be a $125.00 refund) ___________________________________________________________________________________________
Upper, Middle, Lower Intake manifolds and TB bored. Set of Exhaust manifolds bored � ( You need to call and talk to Darrell about pricing, depends on what all you want done ) _______________________________________________________________________________________
PART ORDERED FROM CLUTCH EXPRESS:
www.clutchexpress.com Spec II clutch - $260.10 _______________________________________________________________________________________
WON ON EBAY.
New 88 Exhaust crossover pipe. $ 73.07 ________________________________________________________________________________________
TIM'S ENGINES
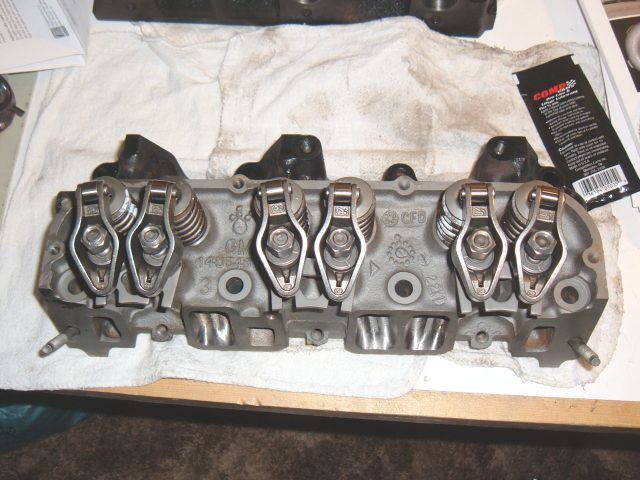
Head Work � work was done by Tims Engines www.timsengines.com (Denham Springs, LA) Stage 1 port work - Max port intake and Exhaust , Blend work around valves and runner, surfaced heads, 3 angle valve job, SS valves, guides, seals, valve locks, valve springs and removed 2 broken exhaust bolts, with Tax $805.07
[This message has been edited by Zoom88 (edited 05-24-2006).]
IP: Logged
06:07 AM
PFF
System Bot
1MohrFiero Member
Posts: 4363 From: Paducah, Ky Registered: Apr 2003
Hey Zoom, Are you going to have this done in time to go to the Swap meet at Ed Park's? I would love to see it.
Are yo using the heads from your 2.8?
Thanks for the parts list.
Dwayne
Hi , no I won't make it to Ed's I have several other items I am going to address while the motor is out. I want to clean up the engine bay, drop the gas tank and try to fix my gas gauge that has been lying to me and also put in a new fuel pump. Install new shift and select cables, new rear coil overs. Its been a long 4 years of work on this car, but after the new motor is in the AC will be the only thing on the car that isn't new, been replaced or repaired. That will have to wait until next year. I am definatly going to try and make some of the shows next year !!! Would love to meet the wonderful Pennock's people I have only been corresponding with through this forum up to this point, and see your cars !!!! And, yes I am using the 2.8 heads, they are at a race shop I asked them to do the works. But only what they thought would benefit the motor setup they are going on. Only thing I took them were a pair of blank heads a set of SS valves and the cam spec sheet.
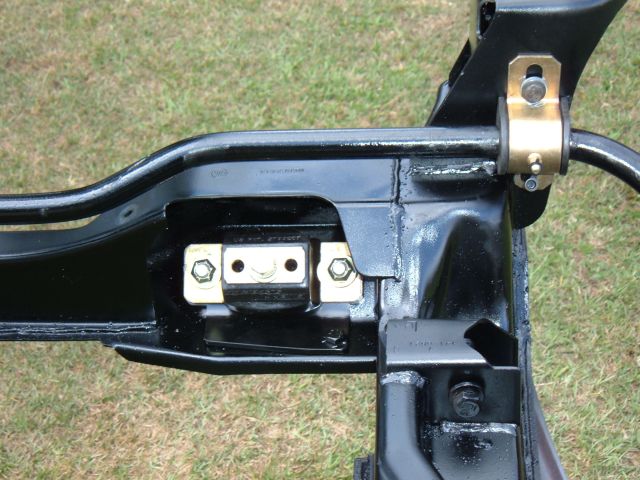
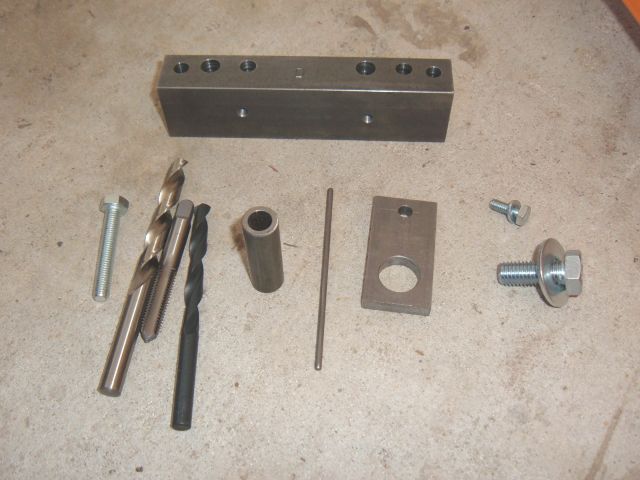
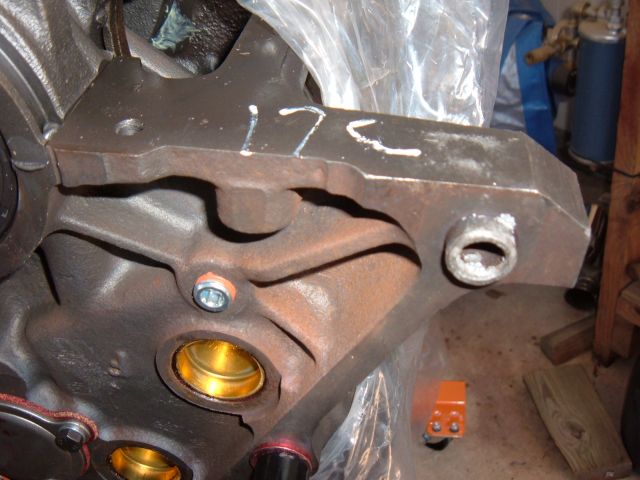
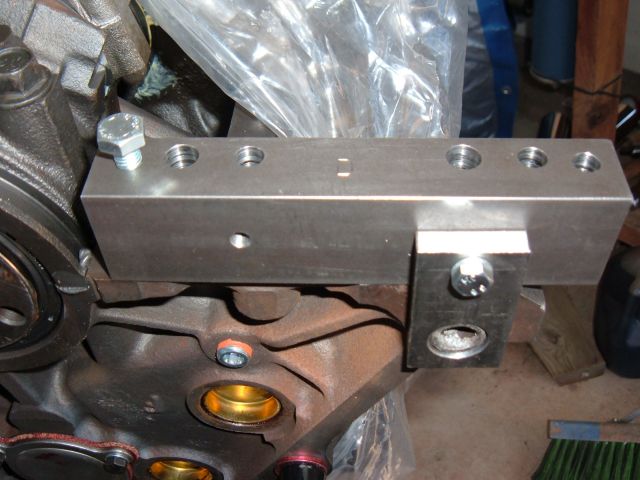
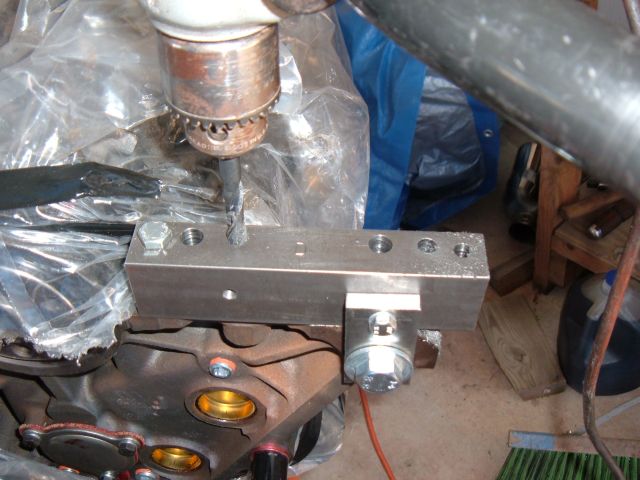
Here are a few pics showing what is involved when using Rodney's starter relocation kit. It does cost a few bucks but I Highly recommend it. It is easy to use, takes all the guess work out and you can do the work in under and hour easy. To me it was worth every penny for its ease of use and the confidence it gave me that I was not going to screw up on the short block I just shelled out 1300.00 for !!
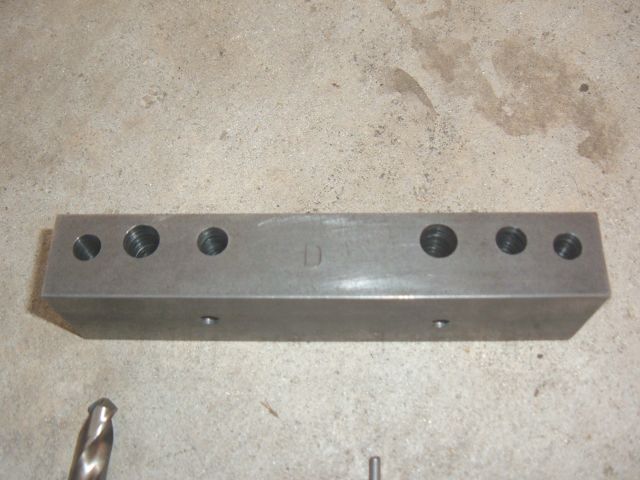
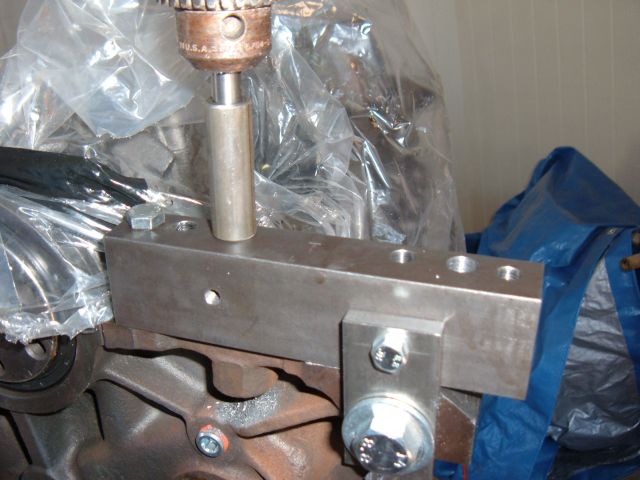
Once you have the holes drilled . you will need to remove the jig , flip it over and bolt it back up to the block . As you can see in the pic below there is a "T" stamped on this side. A larger (supplied) drill bit is used to drill some counterbore holes. It comes with a supplied spacer to make sure you drill the holes to the correct depth.
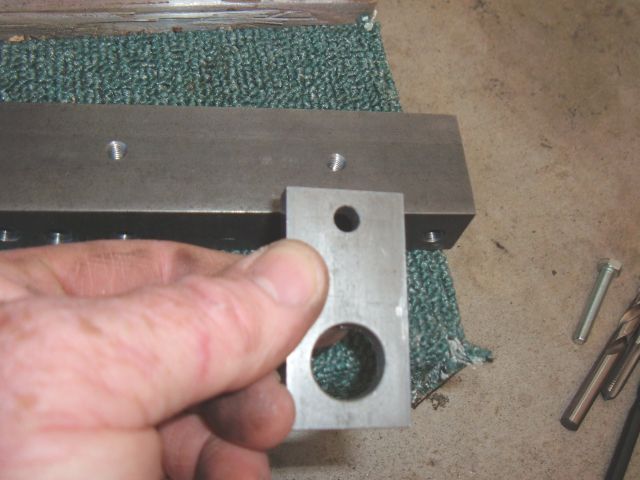
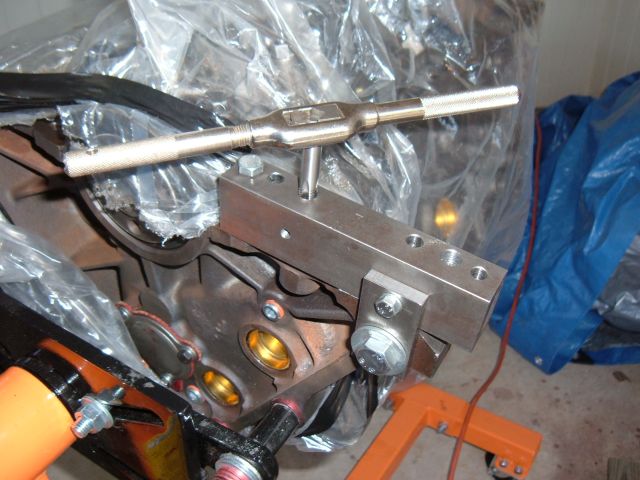
Once the holes are drilled you can start tapping them with the supplied tap.
You tap them as deep as you can with the jig installed and then remove the jig to finish tapping them. (you have to do this because the tap is to short)
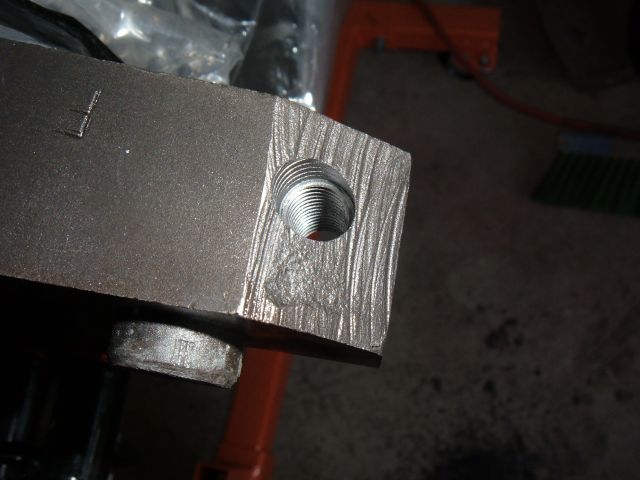
Final pic of one of the tapped holes. Job complete, thats all there is to it !!
[This message has been edited by Zoom88 (edited 04-15-2006).]
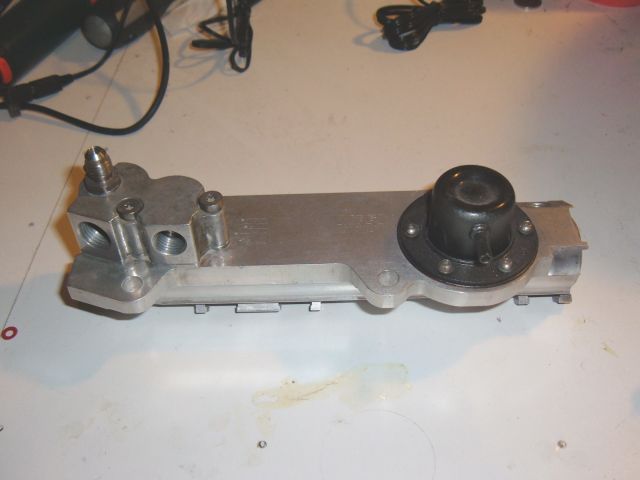
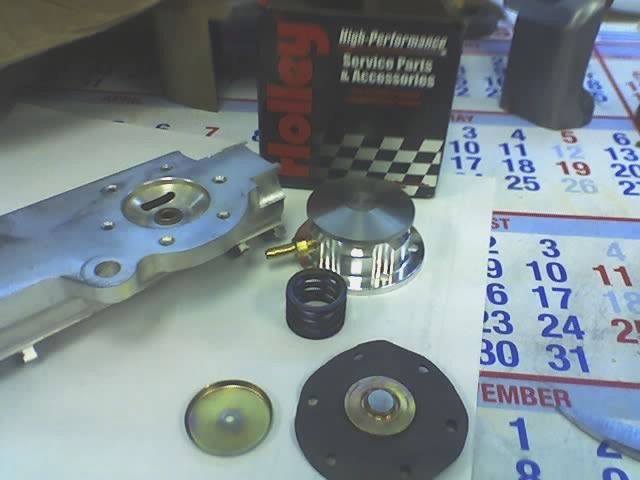
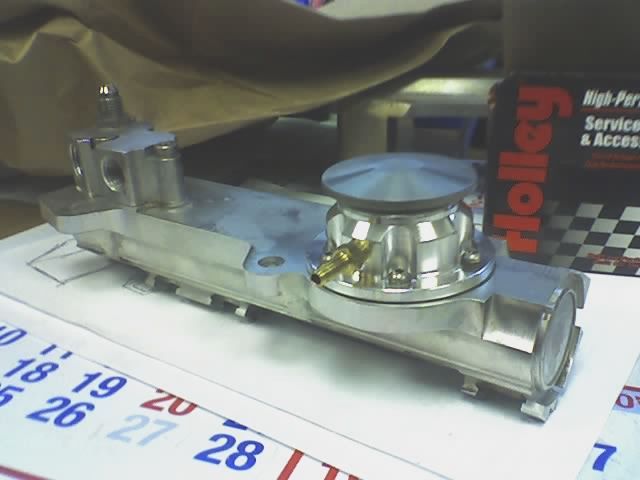
Installing a Holley adjustable fuel pressure regulator. Really not much to this but thought I would post some pics anyway. One thing I might mention is the screws have a Torx Head that also has a post in the center and takes a special Torx tool that is hollow in the tip to allow for the post. Since I could not find one I simple took a small screw drive and broke off the little post and now a regular Torx bit will work. The size needed is a T10.
The pressure regulator is located on the fuel rail.
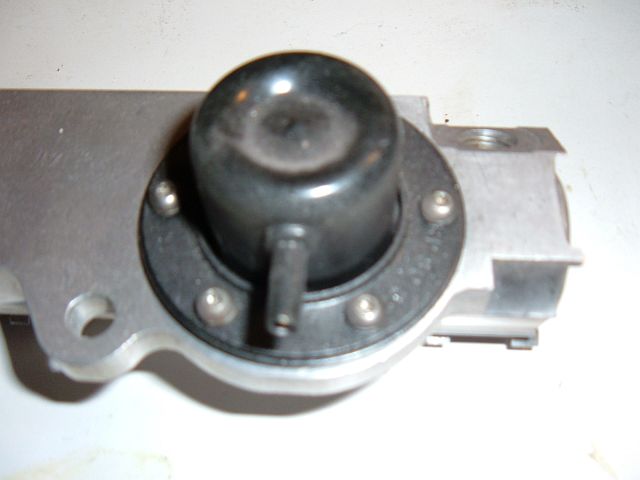
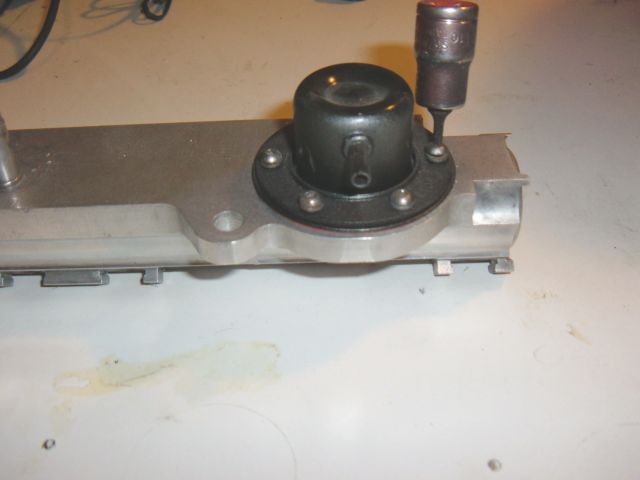
Remove the 6 torx screws.
Remove the cover ...the OEM regulator on my car was a one piece construction as you can see in the following Pics.
With the old one removed, and everything cleaned we are ready for the new one.
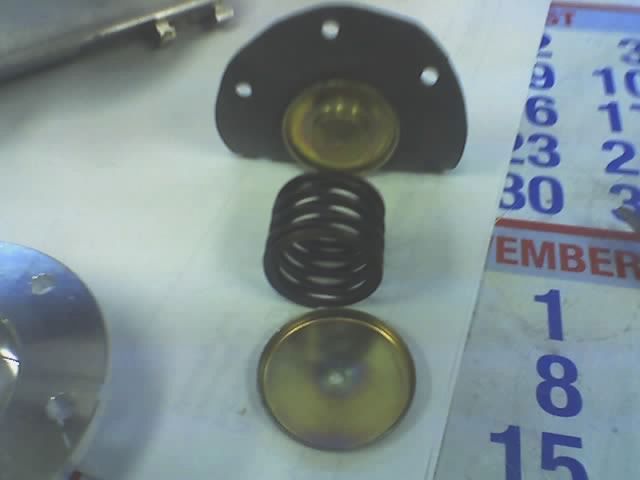
Below in the pic you will see the Holley consist of a 3 piece design. The instruction that come with it are very detailed and clear.
The next 2 pics show how everything is lined up in the order they will be installed or stacked.
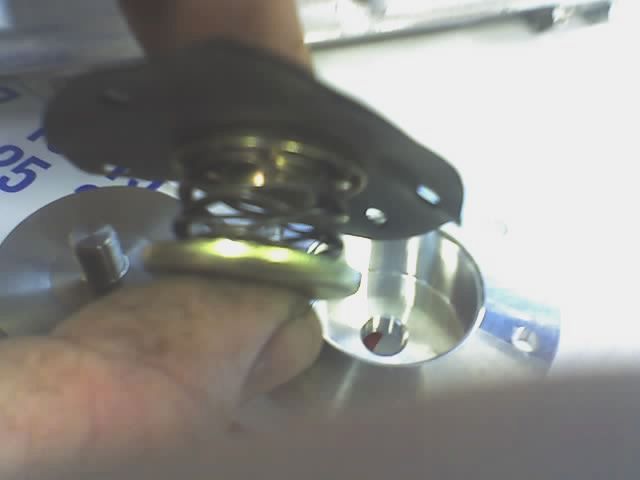
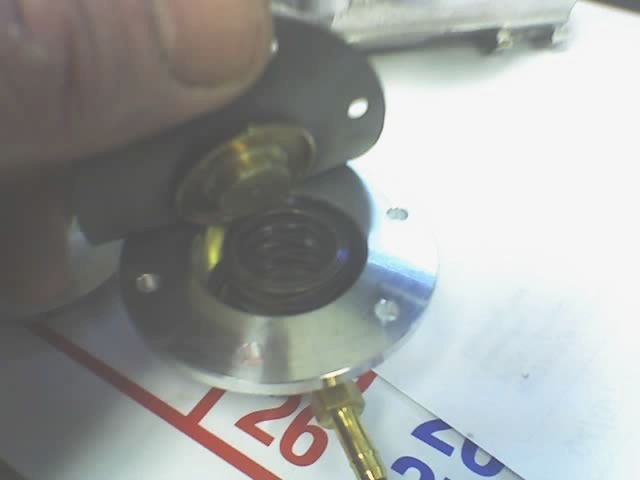
It does matter which side of the diapragm goes where, but the instructions are clear if you follow them.
Here we all are back together.
I know some of this is stuff most have done or seen before, but I am still sure there are those who have not done some of these things. Hopefully , you will find a little of it useful !! I personally have always found Pics helpful.
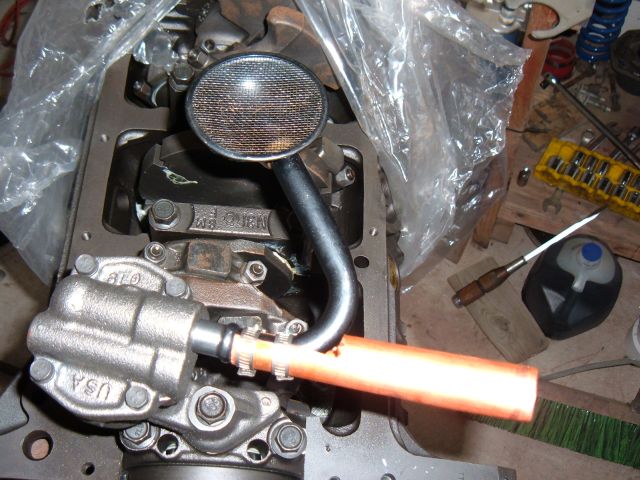
On my 3.4 I installed a High Volume Oil Pump along with a new oil pickup tube . I used the pickup tube for the 2.8 motor and will be using the 2.8 oil pan off my 88.
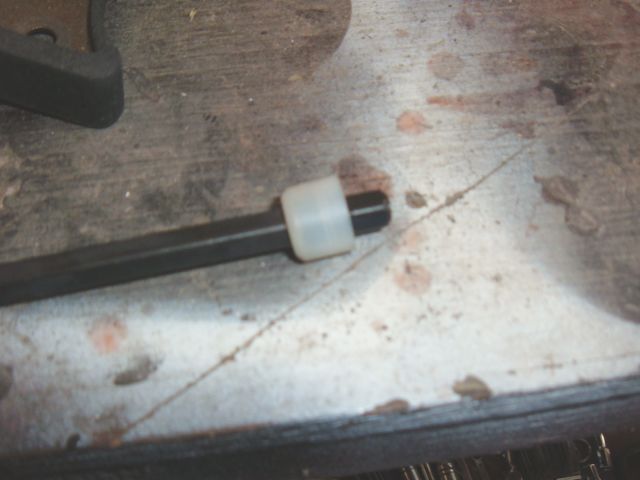
In the first pic you can see the tool I made out of a piece of 6" long 3/4" copper tubing to help install the Oil Pickup tube into the oil pump. I clamped it to the pickup tube using hose clamps. (I did not come up with the 3/4" copper tubing idea, I saw it in a book) I also placed the pickup tube in the Freezer for several hours to temporarily shrink it a little to help install it, placed some locktite on the end and then was able to tap on the end of the copper tubing until it was seated in the pump. It worked out pretty good. Just make sure the pickup tube is at the right height. I measured the one that was on my old 2.8 since I am using the 2.8 pan.
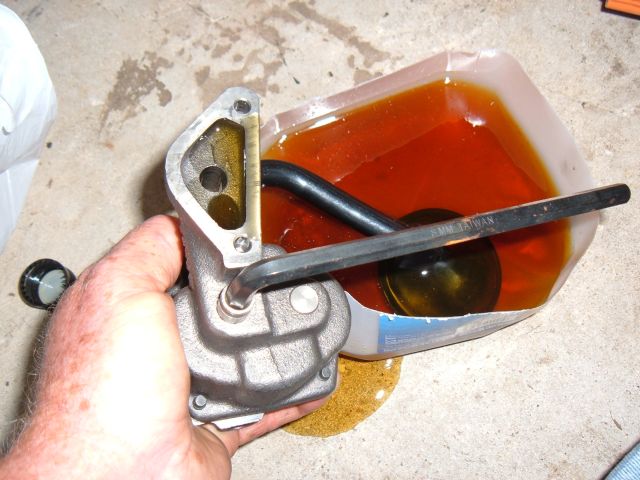
Once I had the pickup tube on I primed the pump by submerging the tube in some oil and rotating the pump driveshaft using a 8mm allen wrench until oil came out of the passage at the top of the oil pump neck.
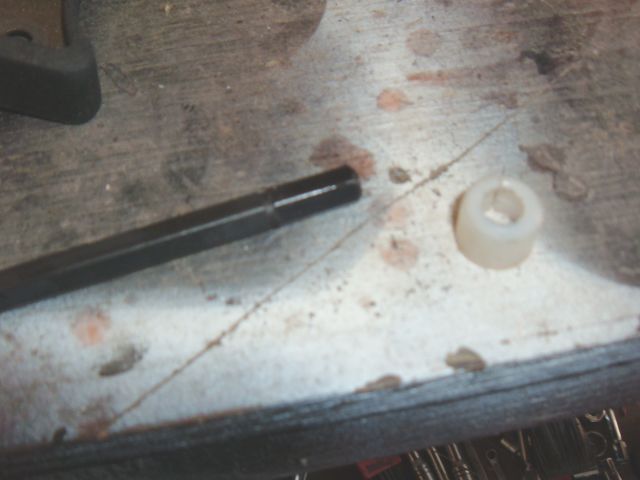
Once the pump was primed I installed the driveshaft , the one I installed is secured using a nylon retainer. Note that the proper end of the driveshaft to install into the retainer has the groove near its end and goes on the pump side.
[This message has been edited by Zoom88 (edited 04-24-2006).]
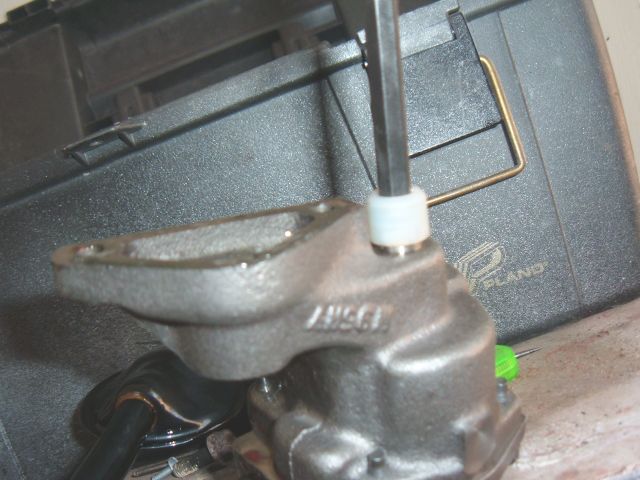
I then applied a light coat of Permatex non-hardening sealer to the pump flange on the bearing cap. Then positioned the pump to the alignment dowels in the bearing cap and bolted it up using Loctite 242 on the bolt threads. Torque the bolt to 30lb-ft.
Pump installed.
[This message has been edited by Zoom88 (edited 04-24-2006).]
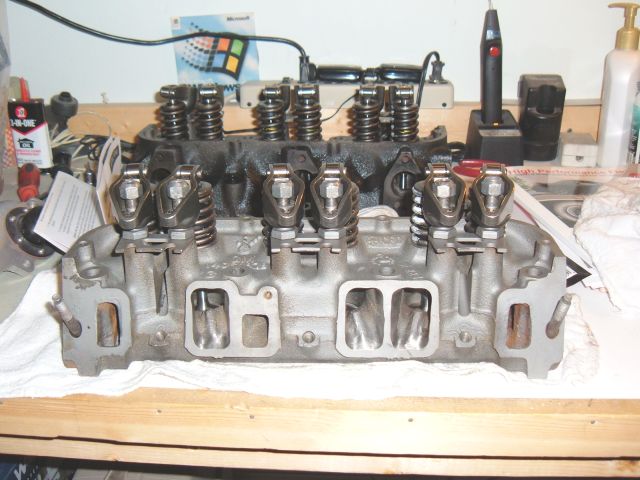
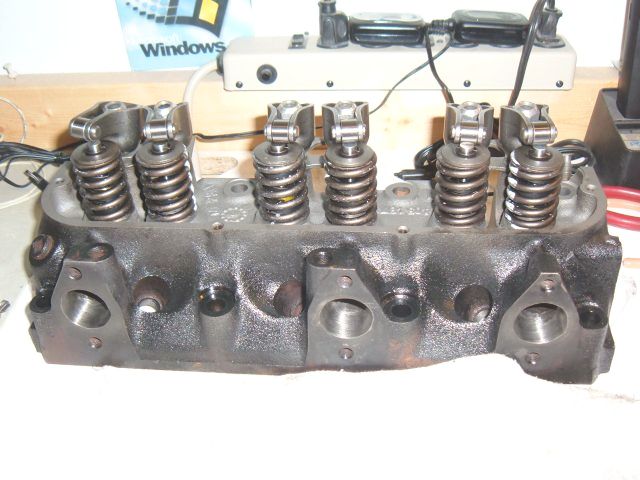
Finally got the Heads back from the shop. Used SS valves, Comp Cam Magnum Roller rockers 1413-12 with Crane Cams valve Springs 99848-12. $64.99 at Summit Valve Springs, Single, 1.255 in. Outside Diameter, 432 lbs./in. Rate, 1.153 in. Coil Bind Height Installed Height (in) 1.700 Seat Pressure at Installed Height (lbs) 114 Open Height (in) 1.200 Open Pressure (lbs) 340
[This message has been edited by Zoom88 (edited 04-25-2006).]
Another side project I have been juggling also. Set of Held Coilovers on KYB Struts. I am using 300 # springs. I really like this setup and the quality.
PLus for you, Nice build thread with good pics and info. I had a 3.4 fiero a few years back and it was super. I got 30mpg highway and that thing was very strong. Hope you enjoy!
Jeff
------------------ Proud Member of the North Florida Fiero club 4T60E Parks harness/ Rockcrawl chip-- more to come--
PLus for you, Nice build thread with good pics and info. I had a 3.4 fiero a few years back and it was super. I got 30mpg highway and that thing was very strong. Hope you enjoy!
Jeff
Thanks Jeff, I can only hope I get 30 mpg...that would be very nice !!
IP: Logged
12:01 AM
mcaanda Member
Posts: 3652 From: Grand Junction Colorado Registered: Mar 2003