Pennock's Fiero Forum
  Technical Discussion & Questions - Archive
  Removing Tint on a Rear Window

T H I S   I S   A N   A R C H I V E D   T O P I C
  

Email This Page to Someone! | Printable Version


Removing Tint on a Rear Window by Emc209i
Started on: 02-10-2008 03:08 AM
Replies: 15
Last post by: Jncomutt on 02-12-2008 04:28 PM
Emc209i
Member
Posts: 3091
From: Charlotte, NC
Registered: Apr 2005


Feedback score:    (15)
Leave feedback


Total ratings: 225
User Banned

Report this Post02-10-2008 03:08 AM Click Here to See the Profile for Emc209iSend a Private Message to Emc209iDirect Link to This Post
Hey guys. I did this tonight, and while the information is plentiful on the web, I thought it might help here. So here's a short write up.

I started with a pulled window out of an 86 SE. This window had a defroster which made things pretty tricky. Without the defroster, you could probably do this in about 30 minutes. It took me 3 hours to get this stuff off without damaging the defroster lines.

Here's the work station. I was getting tired of the garage . You can see the tint which has turned purple. The tint was obviously cheep and was fortunately attached with simi decent adhesive. I'd probably would have been at it longer if a decent glue was used.
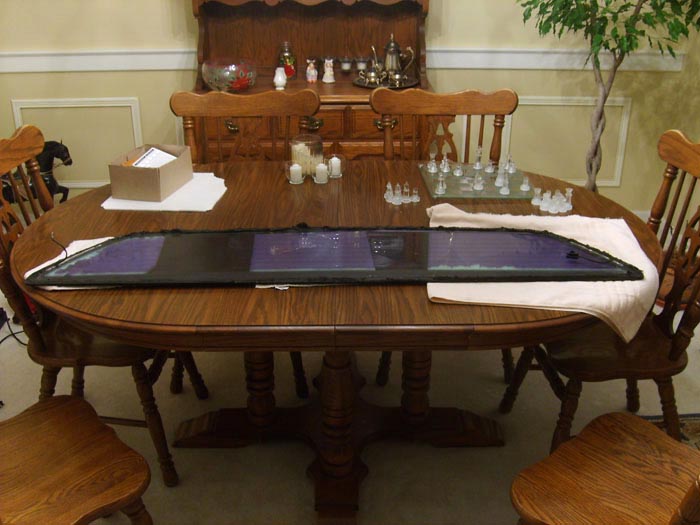

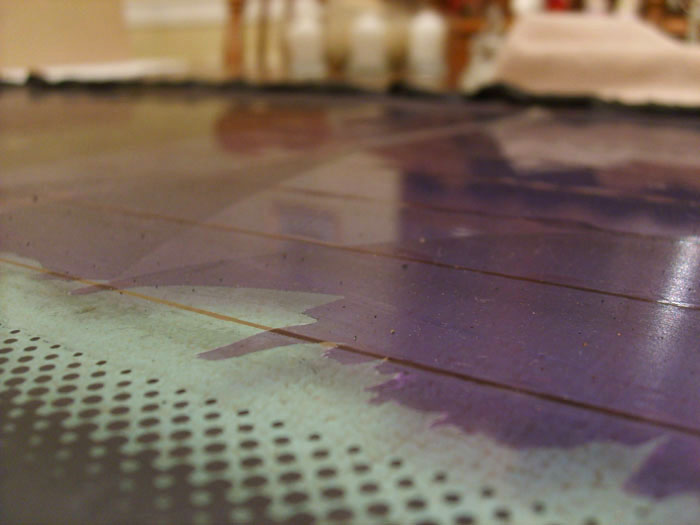
Tinting is made out of a two layer film of polyester. If you try to pull the tinting off without properlly soaking the tint and glue in ammonia, the layers will separate and make things more difficult. I tried doing that unknowingly and made things slightly harder than they would have been had I not messed with it. If you're getting ready to remove the tint take note not to pull at the edges.

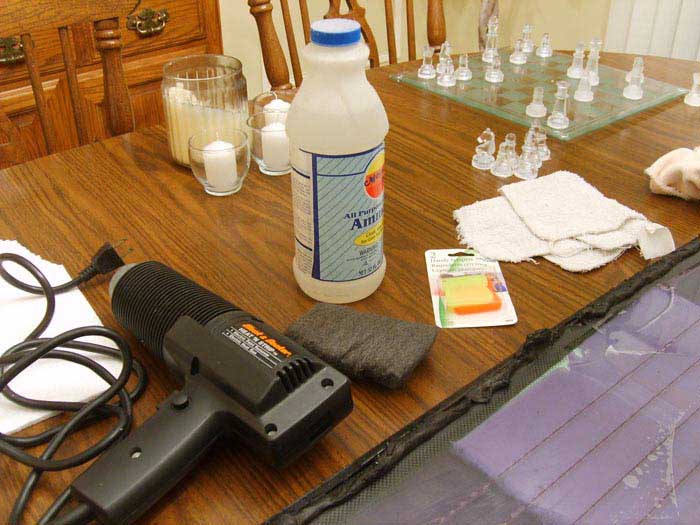
Here are the materials that you will need. 100% Ammonia (some diluted ammonia window cleaners can be sufficient I hear), a heat gun, razor blades, a towel to apply ammonia and one to remove excess. I read that I should use 000 steel wool to pick up small bits of remaining tint, but the wool can very easily chew into the defroster lines. I did use it to softly clean and polish the lines. If the window is still in the car, you can scratch the heat gun and replace it with several large black trash bags.

Begin by applying the ammonia with a rag. You need to apply a decent amount in order to solvent the glue.
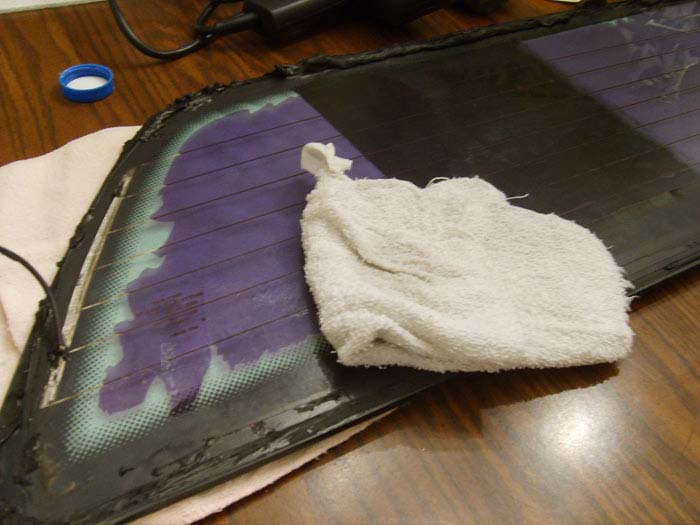

Let the solvent sit for a while, 5-10 minutes. Apply one more coat of ammonia and then hit the entire surface with the heat gun. Use heat until the surface ammonia vaporizes.
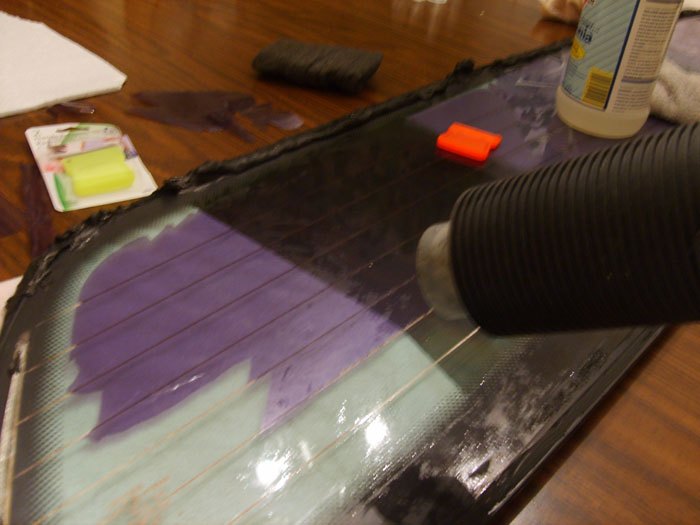

If the glass is still in the car *and its daylight*. Apply a coat of ammonia to the tinted side the glass. Cover the inside glass with a trash bag; this will cause heat to collect between the glass and tint, causing the tint to swell and come away from the glass. Point the tinted glass towards the sun and let the car sit for about an hour. Then return to remove the tint.

The heat is essential to removing the tint easily. I tried several different methods so that I could share what worked best for me; ammonia without heat, with heat, only heat and soapy water, soapy water only.... etc++. The heat causes the tint to soak up the ammonia. Somehow the glue also swells into the tint and leaves no traces behind after the tint it lifted. Areas that were not heated left heavy glue blotches. So use a gun, or allow the sun to do the work before trying to remove the tint.

If you cannot get a grip on the corner edge of the tint, you will need to coax it up with a razor blade.
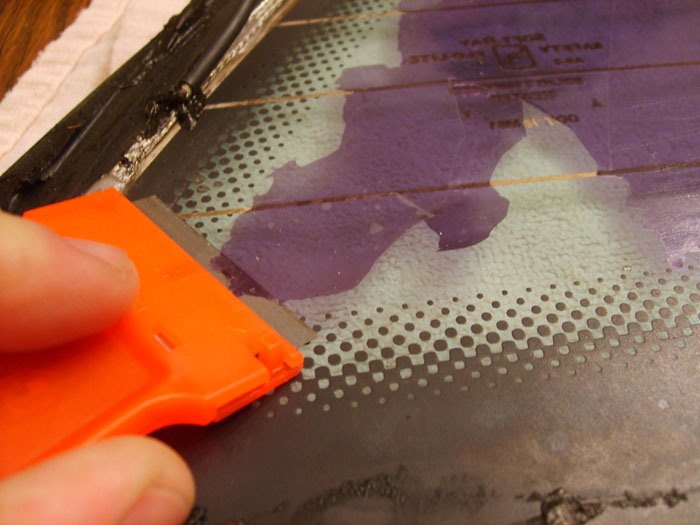

Gently lift the tint up, being sure not to let the tint tear. Using the razor blade to continue coaxing is sometimes beneficial.
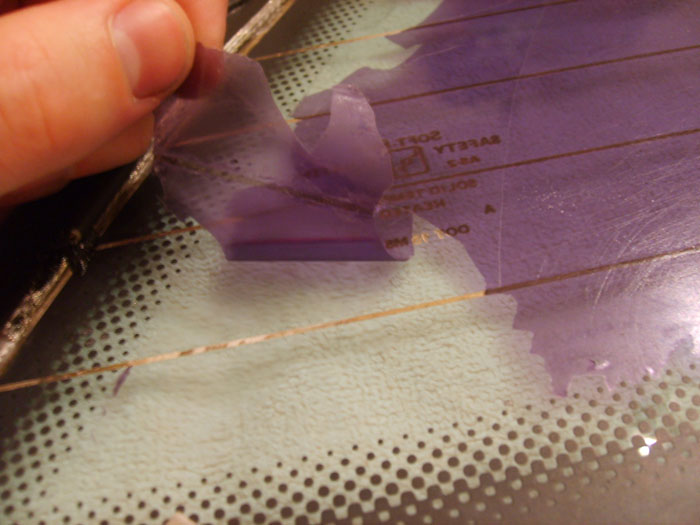

In my case, I was in a hurry, and so the tint did not have enough time to separate from the glass. The defroster lines also acted as anchors for the tint. So I had to go in between each row of lines.
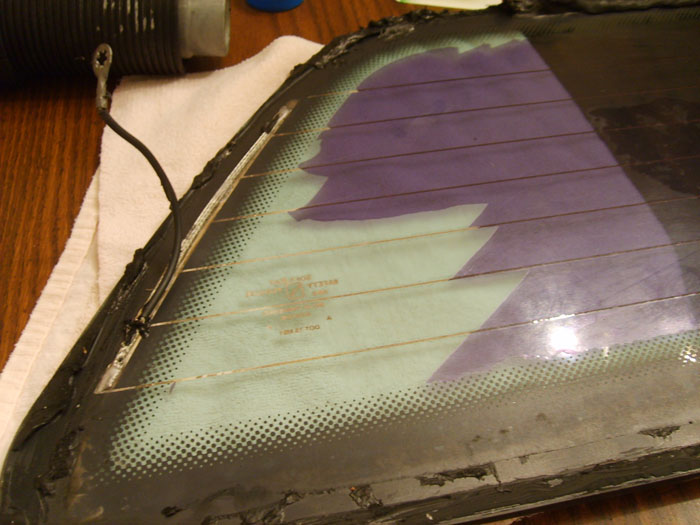
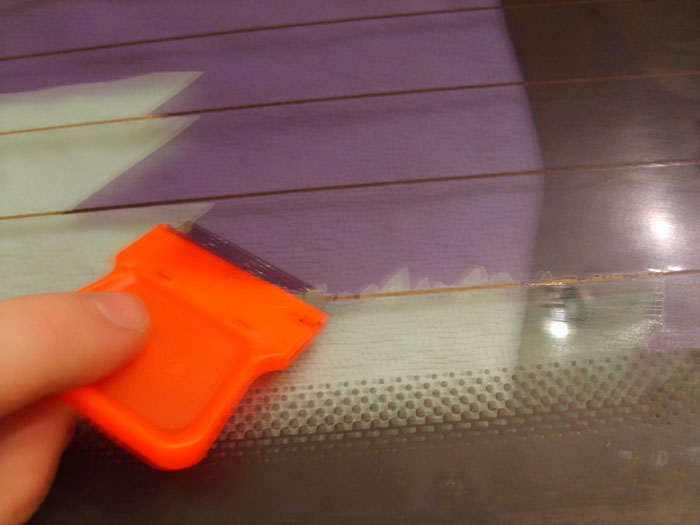


Just as predicted, several very small pieces of tint would not come up with the rest, sticking to the defroster lines.
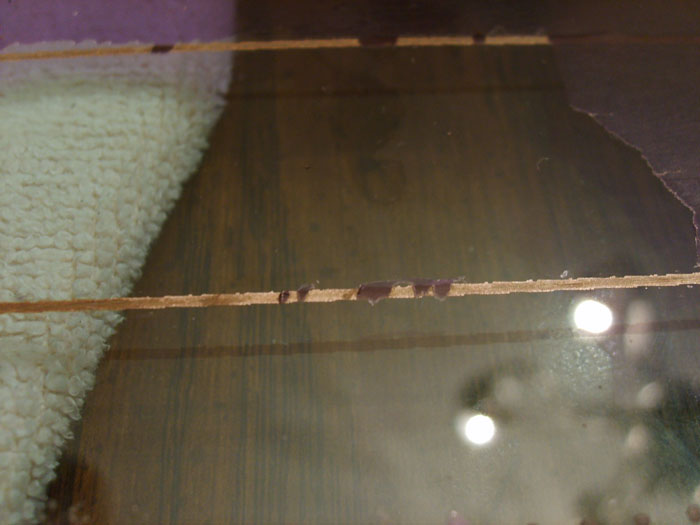

As mentioned before, another website recommended using the steel wool to remove these blotches. I learned very quickly that the wool was far too abrasive. So instead of using the wool, I used the application rag with the remaining ammonia. Fingernails also help a little when scrubbing.
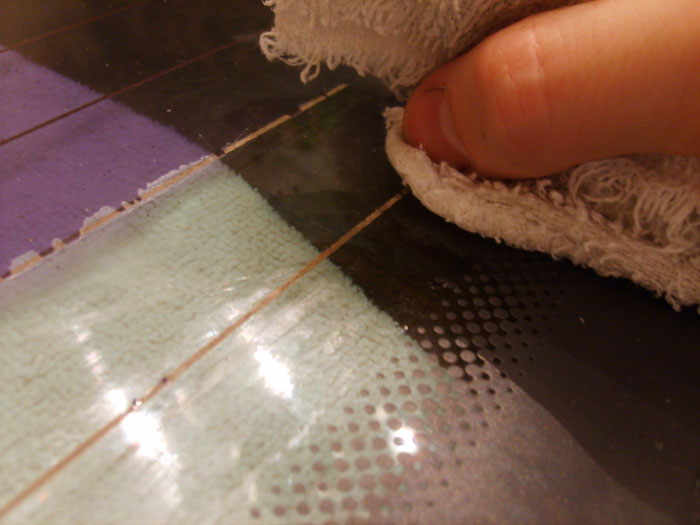

As good as new . The also went over the line softly with the wool, removing any dirt and grim. Shinny huh!
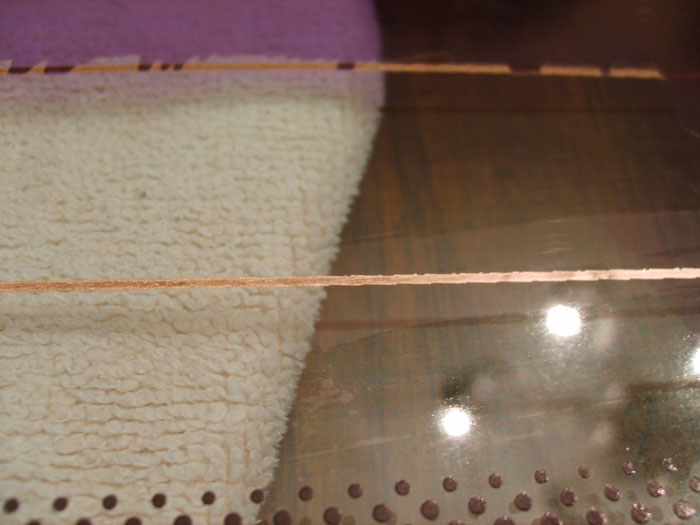

On the right side of the glass, the tint had not been tampered with, and so I soaked the area while I was working the left side. Here's what happens when you have patience and wait for the ammonia and heat to do its job:
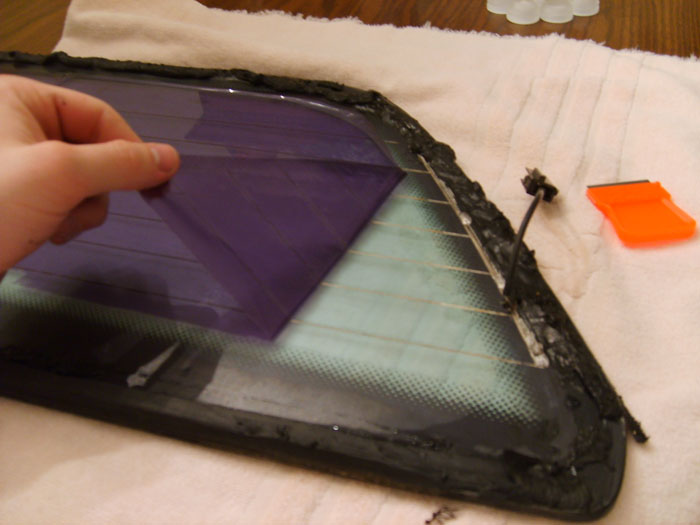

After getting the tint off, be sure to go back over the glass with ammonia and scrub up any remaining glue. Finally use another towel to remove the remaining ammonia & glue and polish the glass.
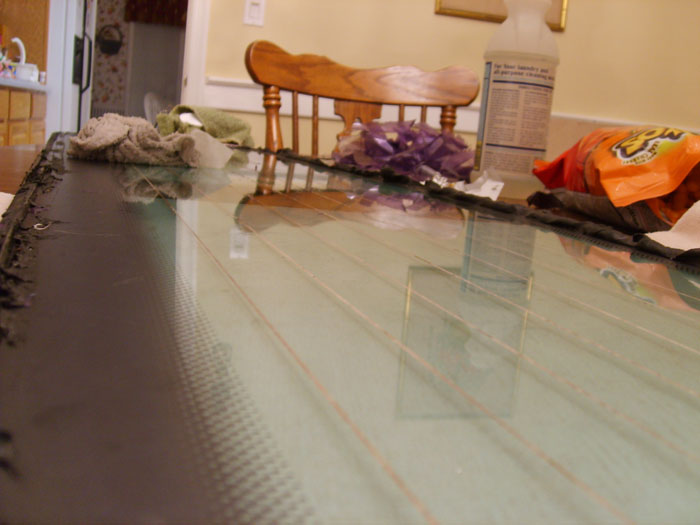
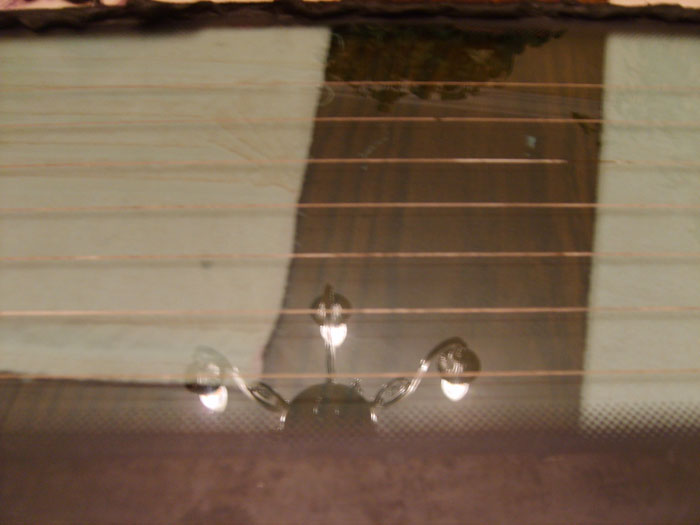


Once again, without the tint lines, this job would have been much shorter. If you do have a defroster on your project window, and you happen to catch one of the lines with a razor blade, you can always repair the line with a kit from your local auto parts store. Hope this helps!
IP: Logged
PFF
System Bot
Emc209i
Member
Posts: 3091
From: Charlotte, NC
Registered: Apr 2005


Feedback score:    (15)
Leave feedback


Total ratings: 225
User Banned

Report this Post02-10-2008 03:11 AM Click Here to See the Profile for Emc209iSend a Private Message to Emc209iDirect Link to This Post
It also helps to have a warm dinner waiting for you afterwards!!!


A finishing beer is also mandatory.


Company is encouraged.
IP: Logged
kyote
Member
Posts: 1232
From: Germantown, Wisconsin - Metro Milwaukee Area
Registered: Sep 2001


Feedback score: N/A
Leave feedback

Rate this member

Report this Post02-10-2008 07:57 AM Click Here to See the Profile for kyoteClick Here to visit kyote's HomePageSend a Private Message to kyoteDirect Link to This Post
Excellent post..!! I need to do that to mine...I don't have defrosters ...yeah!!

------------------

'86 Fastback SE 5 spd -'94 HD Electra Glide Cassic -'99 Chevy K-1500 Z-71

[This message has been edited by kyote (edited 02-10-2008).]

IP: Logged
Arns85GT
Member
Posts: 11159
From: London, Ontario, Canada
Registered: Jul 2003


Feedback score: (1)
Leave feedback


Total ratings: 202
Rate this member

Report this Post02-10-2008 08:00 AM Click Here to See the Profile for Arns85GTSend a Private Message to Arns85GTDirect Link to This Post
Great post! + for you

Arn
IP: Logged
Larryh86GT
Member
Posts: 1757
From: Near sunny Buffalo NY
Registered: Jan 2008


Feedback score: (1)
Leave feedback

Rate this member

Report this Post02-10-2008 08:12 AM Click Here to See the Profile for Larryh86GTSend a Private Message to Larryh86GTDirect Link to This Post
I've been wondering what to do with the mirror tint that came with my "new" GT. This really helps.
IP: Logged
BillS
Member
Posts: 647
From:
Registered: Apr 2000


Feedback score: N/A
Leave feedback

Rate this member

Report this Post02-10-2008 10:24 AM Click Here to See the Profile for BillSSend a Private Message to BillSDirect Link to This Post
Nice write-up and good photos. Looks like a nasty job.
IP: Logged
Jncomutt
Member
Posts: 8902
From: Charlotte, NC
Registered: Apr 2001


Feedback score: (3)
Leave feedback


Total ratings: 221
Rate this member

Report this Post02-10-2008 11:39 AM Click Here to See the Profile for JncomuttSend a Private Message to JncomuttDirect Link to This Post
Good stuff here man, nice post.
IP: Logged
Emc209i
Member
Posts: 3091
From: Charlotte, NC
Registered: Apr 2005


Feedback score:    (15)
Leave feedback


Total ratings: 225
User Banned

Report this Post02-10-2008 12:18 PM Click Here to See the Profile for Emc209iSend a Private Message to Emc209iDirect Link to This Post
 
quote
Originally posted by Jncomutt:

Good stuff here man, nice post.


We'll have to go back to the yard to get a full write up about removing the glass next. I hope you or I never have to do that again. Thanks for the help once more!
IP: Logged
pswayne
Member
Posts: 1282
From: Lawrenceville, GA USA
Registered: Sep 2006


Feedback score: (2)
Leave feedback

Rate this member

Report this Post02-10-2008 12:48 PM Click Here to See the Profile for pswayneSend a Private Message to pswayneDirect Link to This Post
I hope you had windows open. That amonia can be bad for both people and dogs.
IP: Logged
Firefighter
Member
Posts: 1407
From: Southold, New York, USA
Registered: Nov 2004


Feedback score: N/A
Leave feedback

Rate this member

Report this Post02-10-2008 01:35 PM Click Here to See the Profile for FirefighterSend a Private Message to FirefighterDirect Link to This Post
Well, not to burst your bubble. But you might have tried "Gila - Window Film Remover". Certainly easier with the window out, but with this stuff, no need to remove the window at all. Ed

------------------

IP: Logged
Emc209i
Member
Posts: 3091
From: Charlotte, NC
Registered: Apr 2005


Feedback score:    (15)
Leave feedback


Total ratings: 225
User Banned

Report this Post02-10-2008 02:20 PM Click Here to See the Profile for Emc209iSend a Private Message to Emc209iDirect Link to This Post
I have used Gila before. Ammonia works better in my opinion.

 
quote
Originally posted by Firefighter:

Certainly easier with the window out, but with this stuff, no need to remove the window at all. Ed


Ha! I didn't take it out to get the tint off , that would have been pretty crazy. I shattered my last window. This one was a replacement. Might as well take off the tint before installing.
IP: Logged
PFF
System Bot
Emc209i
Member
Posts: 3091
From: Charlotte, NC
Registered: Apr 2005


Feedback score:    (15)
Leave feedback


Total ratings: 225
User Banned

Report this Post02-10-2008 02:21 PM Click Here to See the Profile for Emc209iSend a Private Message to Emc209iDirect Link to This Post

Emc209i

3091 posts
Member since Apr 2005
 
quote
Originally posted by pswayne:

I hope you had windows open. That amonia can be bad for both people and dogs.


No we were both flying high. I'm kidding, the area was well ventilated.
IP: Logged
brandon87gt
Member
Posts: 1298
From: mesa, az
Registered: Nov 2006


Feedback score:    (7)
Leave feedback

Rate this member

Report this Post02-10-2008 02:27 PM Click Here to See the Profile for brandon87gtSend a Private Message to brandon87gtDirect Link to This Post
NIce write up. I use more or less the same procedure, except I just do it on a nice hot summer day here in AZ and it comes right off.

I have however always used steel wool to take off the leftover glue and have never had a problem with it being too harsh for the defroster lines. Maybe I was using finer steel wool though? I don't remember what the grades are with it.
IP: Logged
Emc209i
Member
Posts: 3091
From: Charlotte, NC
Registered: Apr 2005


Feedback score:    (15)
Leave feedback


Total ratings: 225
User Banned

Report this Post02-12-2008 04:12 PM Click Here to See the Profile for Emc209iSend a Private Message to Emc209iDirect Link to This Post
I'll bet a finer wool would have been fine! I was using triple O (000) because that's what the website said to use. I had some 00000 in the garage, I probably should have tested it to post results. : \
IP: Logged
Emc209i
Member
Posts: 3091
From: Charlotte, NC
Registered: Apr 2005


Feedback score:    (15)
Leave feedback


Total ratings: 225
User Banned

Report this Post02-12-2008 04:20 PM Click Here to See the Profile for Emc209iSend a Private Message to Emc209iDirect Link to This Post

Emc209i

3091 posts
Member since Apr 2005
 
quote

There is a thread on here that I just saw it was about taking tinting off the window. It also talks about taking the window out. It may help you out. Its probably on page 2 or 3.

Ryan


I just saw this on another thread. Let me add that procedure just in case someone is browsing for the information. Jncomutt and I stripped the rear clip off of an 86 SE. We removed the inside B-pillars and the third brake light. The trunk lid also had to be removed. From there we used cotter pins (they were in the scrapped van beside us) to dig a hole through the seal. The best place to do this is at one of the top corners. We also had to hammer on the back of it a bit to get it to penetrate, the seal is pretty tough. Once the cotter pin when all of the way through, we tied 100# wire (from home depot) to the tail of the pin and pulled it through. We tied a long bolt to either end and began sawing around the window. We originally started with 50# wire, and that broke about 6 times before we went to get 100# <---so use 100# or more.

It wasn't easy, but we worked hard and got the window out successfully. It took about three hours to do. I blame that mostly on the wire breaking and having to get more. It could prolly be done in less than an hour and a half with decent wire and speed.
IP: Logged
Jncomutt
Member
Posts: 8902
From: Charlotte, NC
Registered: Apr 2001


Feedback score: (3)
Leave feedback


Total ratings: 221
Rate this member

Report this Post02-12-2008 04:28 PM Click Here to See the Profile for JncomuttSend a Private Message to JncomuttDirect Link to This Post
^ in other words, it sucked.
IP: Logged


All times are ET (US)

T H I S   I S   A N   A R C H I V E D   T O P I C
  

Contact Us | Back To Main Page

Advertizing on PFF | Fiero Parts Vendors
PFF Merchandise | Fiero Gallery
Real-Time Chat | Fiero Related Auctions on eBay


Copyright (c) 1999, C. Pennock