I think you'll have to remove it. I tried to do it without removing it, and ended up pulling it. Not sure if it was just easier, or if it was in the way.
IP: Logged
12:54 PM
fierosound Member
Posts: 15185 From: Calgary, Canada Registered: Nov 1999
Thanks for the replies ! I'll remove it, will get someone to help remove hood, so I don't bugger up the paint.
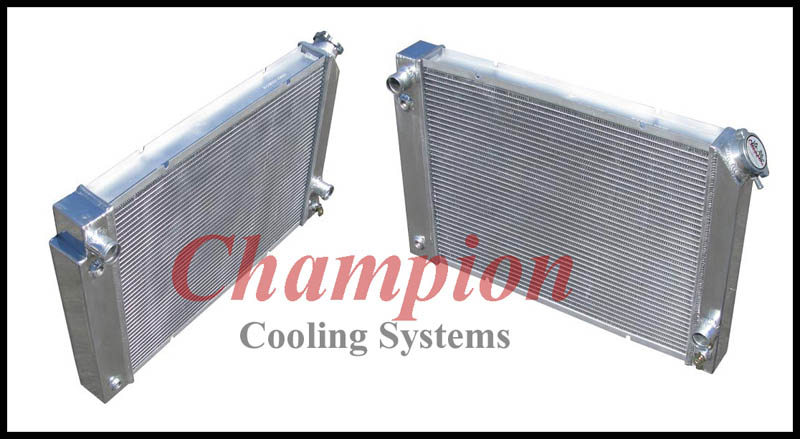
Reason for changing it out, the Hilborn Injection setup likes engine temperature to be in 170 to 185 range, I'm running a bit warmer than that with a custom copper radiator. Thinking of going with the 3 core Aluminum Custom. My electric radiator fan crapped out the first time I took the car out this year, so I figure if I'm going to pull it down to change fan motor, might as well do the radiator at the same time. Can't complain about the fan motor, it's 22 years old, and did have the heck worked out of it.
No.... Hood stays. I know... My Rad is bad. I'm teared it down now....
Right side headlight is out to make easer to get overflow tank and rad. Mark headlight bucket to make it easer to put back. Bucket... Top 2 nuts come out. Bottom 2 nuts are sloted. Loosen half way. Oil the stud for headlight and tank before you put back in.
------------------ Dr. Ian Malcolm: Yeah, but your scientists were so preoccupied with whether or not they could, they didn't stop to think if they should. (Jurassic Park)
Well now you have me thinking...............I'll start without pulling the hood, if it turns into a PITA, I can always have my son come over to help pull off the hood.
[This message has been edited by California Kid (edited 03-21-2010).]
IP: Logged
02:43 PM
Blacktree Member
Posts: 20770 From: Central Florida Registered: Dec 2001
There should be plenty of room to pull the radiator without removing the hood. Just remove the overflow tank and fan/shroud assembly first.
I was able to accomplish that (without much difficulty) in a campground at Yellowstone Park, using a socket wrench and a screwdriver. So doing it in the comfort of your own garage with plenty of tools at your disposal should be a piece of cake.
There is NO need to remove the hood simply to R&R a radiator.
1. open hood 2. remove overflow tank hose clamp @ radiator cap neck then remove hose. 3. remove (3) 10mm nuts from overflow tank and remove tank 4. unplug harness from radiator fan motor and unclip harness from fan shroud 5. remove (4) 10mm bolts from radiator fan shroud, (2 @ top, 2 @ bottom) 6. remove rediator fan shroud 7. remove (4) 13mm bolts to upper radiator support, (2 each side) just inboard and forward of headlights 8. disconnect upper and lower radiator hoses, (and trans cooler lines if it's an auto) 9 lift radiator out
Installation is reverse of removal
[This message has been edited by randye (edited 03-21-2010).]
NO NEED TO REMOVE THE HOOD. I did replace both Radiator and Condenser without removing the hood. You might manualy rise the lights in order to have better access but nothing else
Hope this helps
------------------ Bernard Fiero V6 GT 1987 (Manual)
IP: Logged
06:09 PM
California Kid Member
Posts: 9541 From: Metro Detroit Area, Michigan Registered: Jul 2001
Thanks again for all the responses !!! Always great to know a little ahead of time, I did read V8Archie's comments on modifications required to install the Champion Alum 3 core, in another thread. Also read some comments on re-finishing the fan blades (remove sharp corners, fine sand blades to remove roughness, wax/urethane coat blades) to improve performance, that was posted by another member here. I should be in good shape to cool this baby down just a little bit, while I've got plenty of horse power, you do feel a little difference between running at 180 v/s 200 F, it's real nasty in the 170 to 180 range !
There is NO need to remove the hood simply to R&R a radiator.
1. open hood 2. remove overflow tank hose clamp @ radiator cap neck then remove hose. 3. remove (3) 10mm nuts from overflow tank and remove tank 4. unplug harness from radiator fan motor and unclip harness from fan shroud 5. remove (4) 10mm bolts from radiator fan shroud, (2 @ top, 2 @ bottom) 6. remove rediator fan shroud 7. remove (4) 13mm bolts to upper radiator support, (2 each side) just inboard and forward of headlights 8. disconnect upper and lower radiator hoses, (and trans cooler lines if it's an auto) 9 lift radiator out
Installation is reverse of removal
Thanks, randye. I've got to replace my radiator in a week or two, once Spring sets in for good. I'm sure I would have figured it out myself, but it's nice to see the procedure beforehand...makes it that much easier, knowing what to expect.
.............in a week or two, once Spring sets in for good.
Man are you an optimist!!!
The hood? I've done it both ways. I found it easier with hood removed, if for nothing else, not having to reach around/thru the hood support, and not having to bend mybody to avoid the hood itself with my head.
The hood? I've done it both ways. I found it easier with hood removed, if for nothing else, not having to reach around/thru the hood support, and not having to bend mybody to avoid the hood itself with my head.
1. open hood 2. remove overflow tank hose clamp @ radiator cap neck then remove hose. 3. remove (3) 10mm nuts from overflow tank and remove tank 4. unplug harness from radiator fan motor and unclip harness from fan shroud 5. remove (4) 10mm bolts from radiator fan shroud, (2 @ top, 2 @ bottom) 6. remove rediator fan shroud 7. remove (4) 13mm bolts to upper radiator support, (2 each side) just inboard and forward of headlights 8. disconnect upper and lower radiator hoses, (and trans cooler lines if it's an auto) 9 lift radiator out
10. If you have a freakishly large head and hands, then remove the hood prior to step #2 like Don does...
To be fair, I've also done it both with and without the hood in place, and yes, it is marginally easier to do with the hood off but you don't *need* to remove it.
Thanks, randye. I've got to replace my radiator in a week or two, once Spring sets in for good. I'm sure I would have figured it out myself, but it's nice to see the procedure beforehand...makes it that much easier, knowing what to expect.
TIP: If you raise the front of the car and put jackstands under the front cross member, you'll find it a bit easier to get at all the bolts without bending way over the car, plus with the front end raised and the rear of the car down, you won't lose as much coolant from the long underbody lines and the engine when you remove the radiator hoses.
IP: Logged
01:23 AM
rogergarrison Member
Posts: 49601 From: A Western Caribbean Island/ Columbus, Ohio Registered: Apr 99
Id take the hood off just to make it easier. Its only 4 bolts. Mark the hinge position with masking tape so you put it back in the same spot. So much easier than trying to reach around and behind it. Trying to pull it out the side by going around the opened hood and you can very easily drop it and scratch up a fender. To me, just not worth the risks.
IP: Logged
08:33 AM
California Kid Member
Posts: 9541 From: Metro Detroit Area, Michigan Registered: Jul 2001
Id take the hood off just to make it easier. Its only 4 bolts. Mark the hinge position with masking tape so you put it back in the same spot. So much easier than trying to reach around and behind it. Trying to pull it out the side by going around the opened hood and you can very easily drop it and scratch up a fender. To me, just not worth the risks.
Ditto... The hood is so easy to remove I prefer to remove it. And I routinely remove the hood and decklid by myself as a one person job. The hood is not that heavy although there is a lot of grunting while I'm doing it.