Pennock's Fiero Forum
  Technical Discussion & Questions - Archive
  3800 V6 dogbone bracket?

T H I S   I S   A N   A R C H I V E D   T O P I C
  

Email This Page to Someone! | Printable Version


3800 V6 dogbone bracket? by FierociousGT
Started on: 07-21-2010 06:32 PM
Replies: 6
Last post by: James Bond 007 on 07-25-2010 11:41 AM
FierociousGT
Member
Posts: 2307
From:
Registered: Jan 2007


Feedback score: (1)
Leave feedback


Total ratings: 131
Rate this member

Report this Post07-21-2010 06:32 PM Click Here to See the Profile for FierociousGTSend a Private Message to FierociousGTDirect Link to This Post
- I know they are out of Biz but has anyone installed the Fiero Addiction 3800 V6 dogbone bracket? Feedback & pics plz.
- Is there anyone else that makes this?

> Thanks


http://www.fieroaddiction.c...h=1_6&products_id=61

------------------
'88 GT, 3800 SC II, IMSA/MC widebody combo, Choptop, Borla exhaust, GT-One NSX Headlights.
FGTO Build thread ~> Link

IP: Logged
PFF
System Bot
duckwalk39
Member
Posts: 355
From: Daly City, CA, USA
Registered: Apr 2004


Feedback score: (3)
Leave feedback

Rate this member

Report this Post07-23-2010 06:00 AM Click Here to See the Profile for duckwalk39Send a Private Message to duckwalk39Direct Link to This Post
WCF makes a similar one that attaches to the EGR bracket.
IP: Logged
James Bond 007
Member
Posts: 8872
From: California.U.S.A.
Registered: Dec 2002


Feedback score: (1)
Leave feedback


Total ratings: 263
Rate this member

Report this Post07-23-2010 10:20 AM Click Here to See the Profile for James Bond 007Send a Private Message to James Bond 007Direct Link to This Post
Make your own,I did, the Aluminimum bar that I used was a bit thick and was a pain to bend.I probubley could have used a thinner bar.You cant see,the aluminimum tubes welded on each end,with a rubber bushing inserted in each end.

[This message has been edited by James Bond 007 (edited 07-23-2010).]

IP: Logged
Dennis LaGrua
Member
Posts: 15593
From: Hillsborough, NJ U.S.A.
Registered: May 2000


Feedback score:    (13)
Leave feedback


Total ratings: 329
Rate this member

Report this Post07-23-2010 11:18 AM Click Here to See the Profile for Dennis LaGruaSend a Private Message to Dennis LaGruaDirect Link to This Post
 
quote
Originally posted by James Bond 007:

Make your own,I did, the Aluminimum bar that I used was a bit thick and was a pain to bend.I probubley could have used a thinner bar.You cant see,the aluminimum tubes welded on each end,with a rubber bushing inserted in each end.


Using bent aluminum stock is a very interesting approach.
------------------
" THE BLACK PARALYZER" -87GT 3800SC Series III engine, 3.4" Pulley, N* TB, LS1 MAF, Flotech Exhaust Autolite 104's Custom CAI 4T65eHD w. custom axles, HP Tuners VCM Suite.
"THE COLUSSUS"
87GT - ALL OUT 3.4L Turbocharged engine, Garrett Hybrid Turbo, MSD ign., modified TH125H
" ON THE LOOSE WITHOUT THE JUICE "

[This message has been edited by Dennis LaGrua (edited 07-23-2010).]

IP: Logged
jsketcham
Member
Posts: 434
From: Meadville, Pa, USA
Registered: Jan 2009


Feedback score: (1)
Leave feedback

Rate this member

Report this Post07-25-2010 08:17 AM Click Here to See the Profile for jsketchamSend a Private Message to jsketchamDirect Link to This Post
Need more pictures of how it connects to the engine and the body please, but i like the look so far.. would love to see more if you have the pictures.

James.
IP: Logged
James Bond 007
Member
Posts: 8872
From: California.U.S.A.
Registered: Dec 2002


Feedback score: (1)
Leave feedback


Total ratings: 263
Rate this member

Report this Post07-25-2010 11:10 AM Click Here to See the Profile for James Bond 007Send a Private Message to James Bond 007Direct Link to This Post
Heres a few current photos...
This pic is a good shot of how the end tubeing is welded on (not by me,I had a welder do that).This end,is the side that attaches to the trunk.

This end (below pic) is the side,that attaches where the coil pack was origionalley.

Heres a pic of where the coil pack is relocated to,but for anyone relocating their coil pack,when cutting the wireing harness remember that some wires are the same color,so it would be a good idea to mark those same colored wires with a few diffrent colored felt markers so you dont get lost later,when lengthing the harness.

Here is a good shot of the dog bone bracket (trunk side).I made this from sort of square fence post,that had a flange,so that I could bolt it up to the trunk compartment.

A shot of the curve,like I say this was a pain to bend.I even used a propain torch to heat it up real hot and I still had a hard time bending it.Its 1\2 inch thick,doesnt realley look like it.I probubley could have gone with 1\4 inch thick,but I would have to see how easy that might flex first.Bar is 2 inches wide,avalable at some scrap steel yards.

A close up (below) of how it attaches where the origional coil pack was.

[This message has been edited by James Bond 007 (edited 07-25-2010).]

IP: Logged
James Bond 007
Member
Posts: 8872
From: California.U.S.A.
Registered: Dec 2002


Feedback score: (1)
Leave feedback


Total ratings: 263
Rate this member

Report this Post07-25-2010 11:41 AM Click Here to See the Profile for James Bond 007Send a Private Message to James Bond 007Direct Link to This Post

James Bond 007

8872 posts
Member since Dec 2002
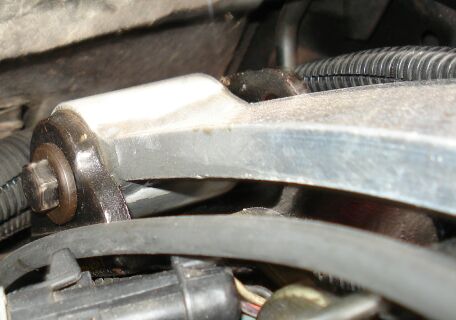
I baught the rubber bushings from CJPonyParts.com,sorey I dont have a part number for that,its form a late model mustang,its called a shackle (what is is I dont Know,I just needed the bushings).I used the bench grinder to shave a little off the ruber bushings so they would be flush and not stick out on each end.I found this part by Googleing rubber bushings.
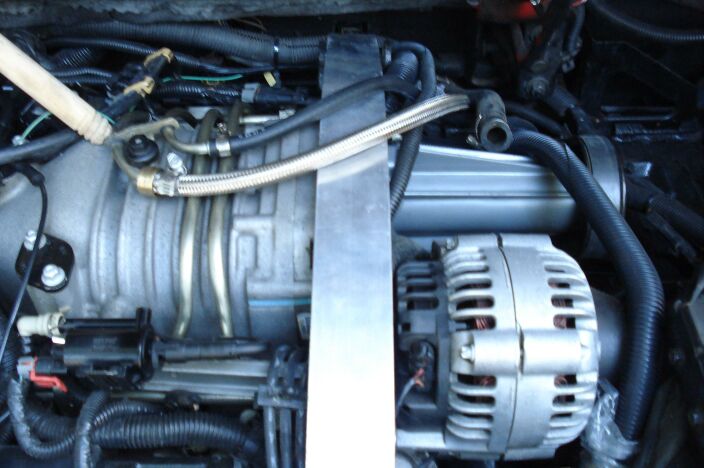
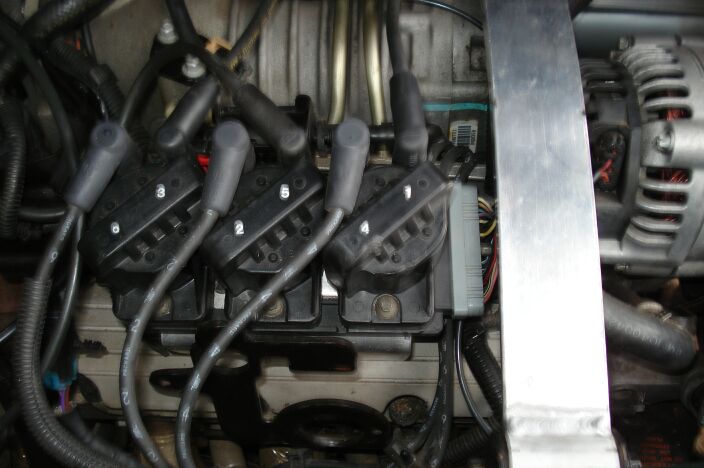
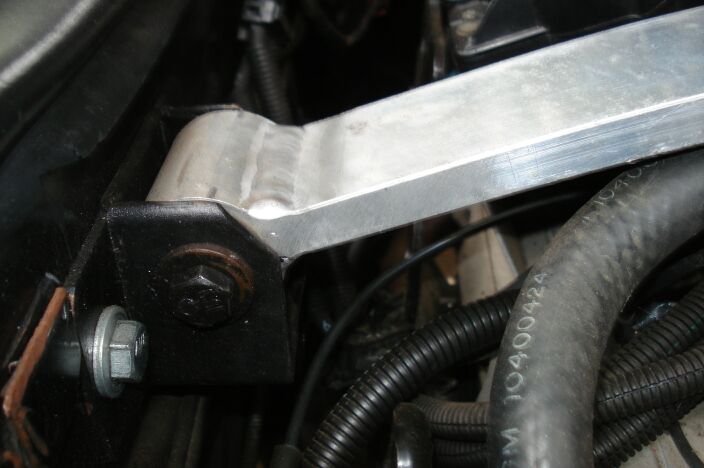
http://www.google.com/produ...um=3&ved=0CCgQrQQwAg
The dimensions for the dogbone are for refrence purposes only,because there might be some slight variations,when attaching this to your car.This custom dogbone was a close fit,its 1\4 Inches too long.Its fit,but I had to use a big screw driver to jentley pry it into its final resting spot.
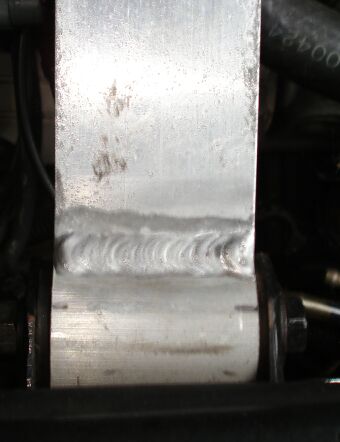
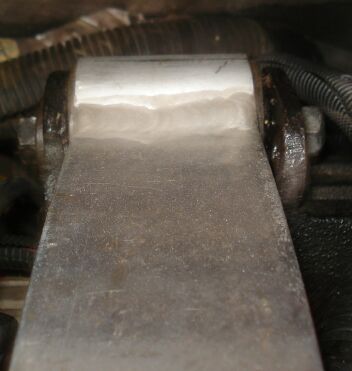
Bar (dog bone) dimensions are:
2 inches wide
1/2 Inch thick (use anything that is thinner,its dificult to bend).
22 Inches long,with out the circular ends attached.
25 Inches total,with the circular ends attached.
Like I say the 25 Inch length is a bit long, and would probubley should be 24-3/4Inches.But rememer that,these measurments could change,depending how thick the tubeing walls are,This may throw off these measurements slightley,for anyone planning on makeing their own.These measurements are for refrence,so be sure to measure how your going to set things up on your car.

[This message has been edited by James Bond 007 (edited 07-25-2010).]

IP: Logged


All times are ET (US)

T H I S   I S   A N   A R C H I V E D   T O P I C
  

Contact Us | Back To Main Page

Advertizing on PFF | Fiero Parts Vendors
PFF Merchandise | Fiero Gallery
Real-Time Chat | Fiero Related Auctions on eBay


Copyright (c) 1999, C. Pennock