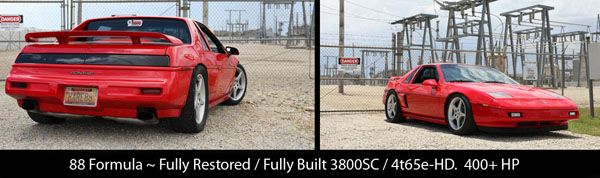
Figured I would post some info & pics of my 3800sc exhaust build... Fiero is an 88gt, motor is a 2000 GTP w/ matching 4t65hd trans Cat is a Magnaflow duel 2" in, single 3" out Muffler is a Flowtech single 3" in, duel 2.5" out Tips are Vett C6 (or are they C5), I forget wich Primaries are 1.75" mains are 2" Crossover is 2" Pipe is 3" after cat to muffler Flex joints are stock GTP x2 Slip joints are stock GTP x2 Head flanges are stock GTP drilled out to 1.75" i.d. All the pipe I used is 16ga steel Also used some of the stock GTP crossover pipe and heat-shields (duno if I am going to keep them)
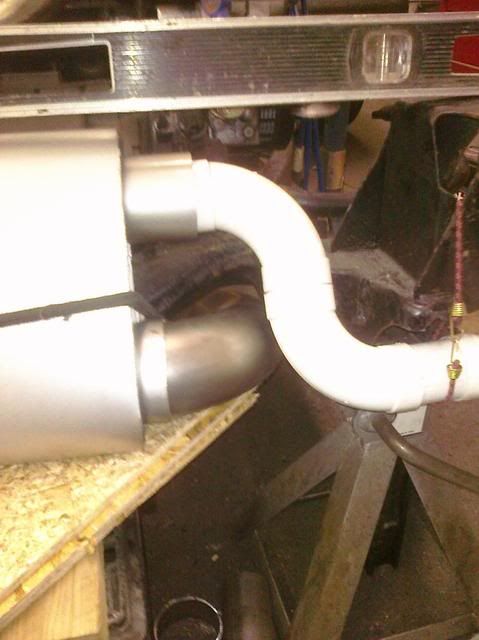
First set of pics shows some moch-up PVC pipe I used:
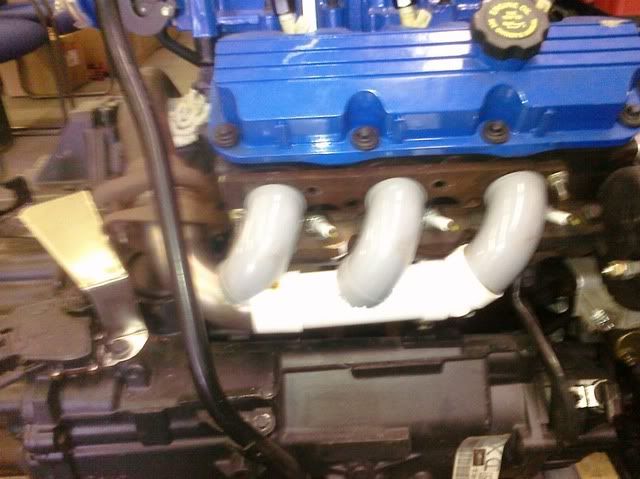
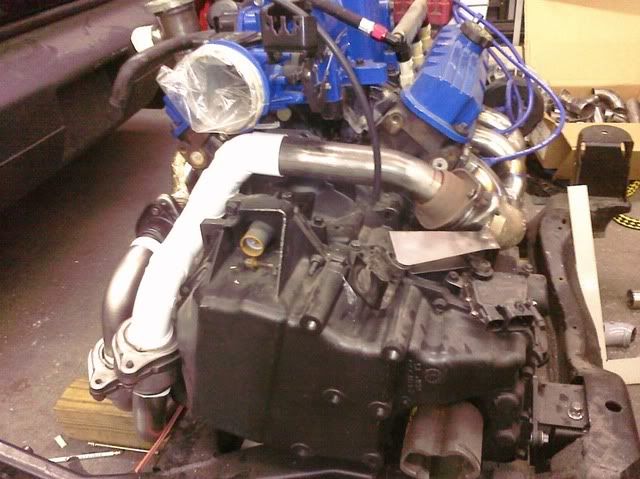
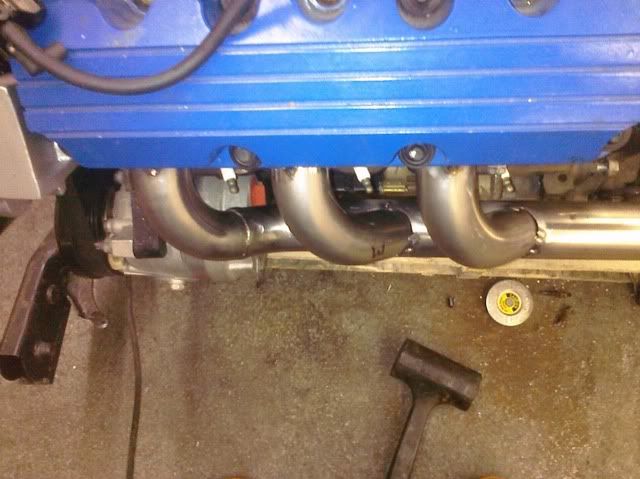
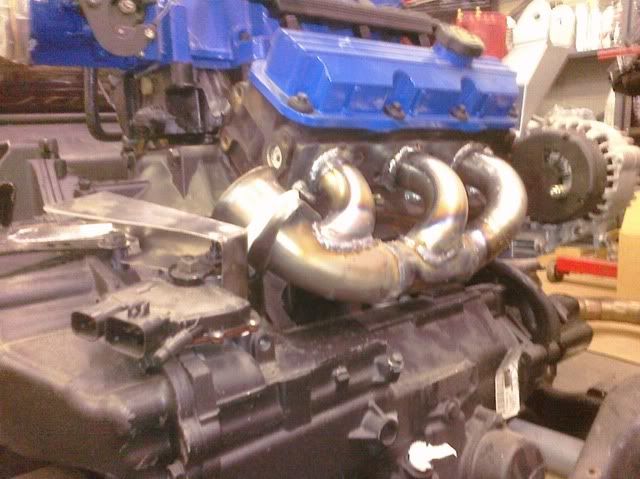
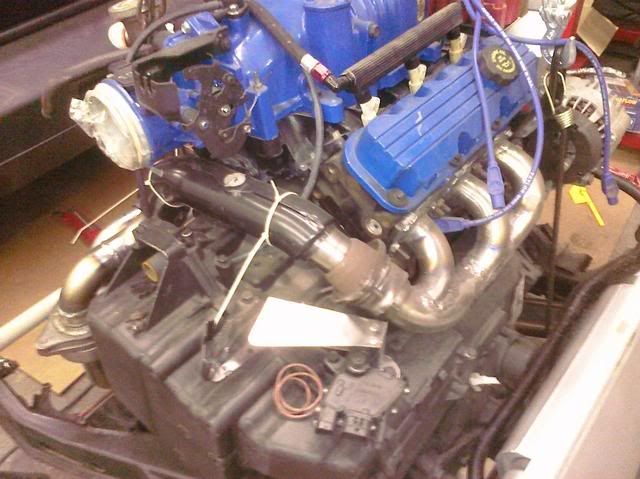
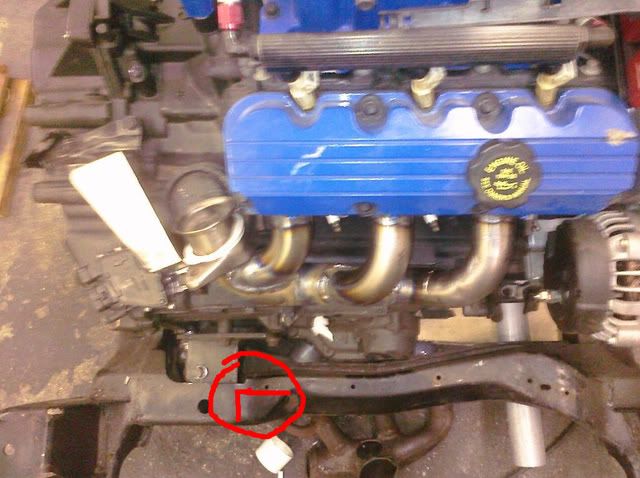
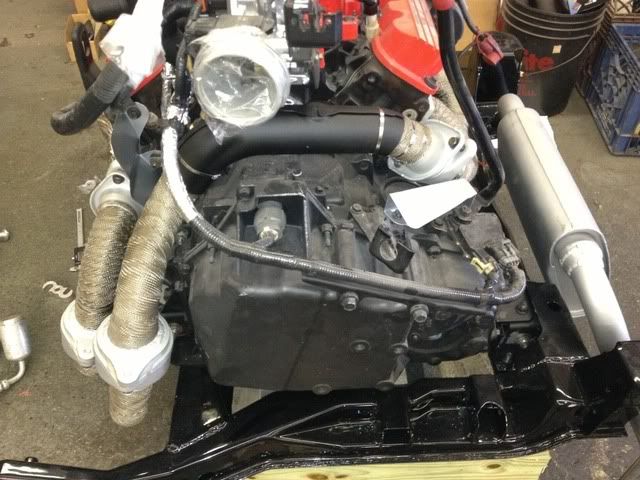
Some test fitting of the from manifold
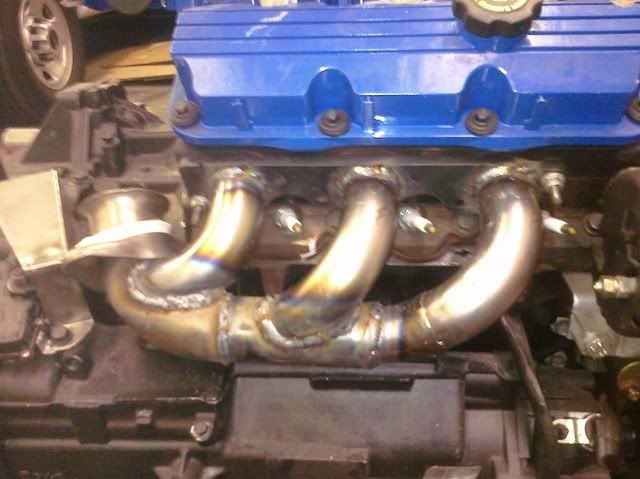
Welding up the rear manifold; please DO NOT comment on my welding ability, this was my very first weld seams
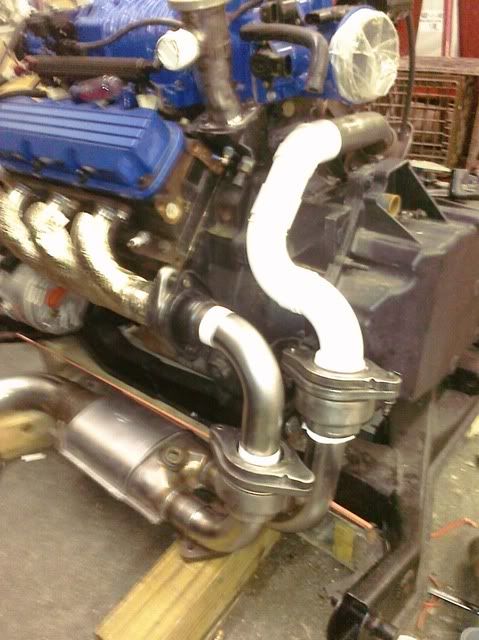
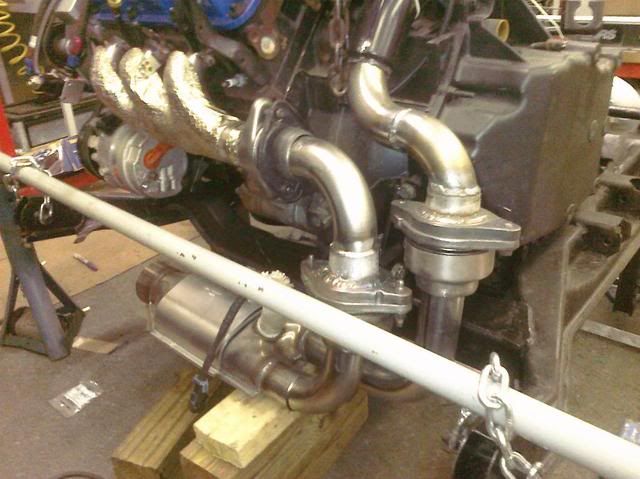
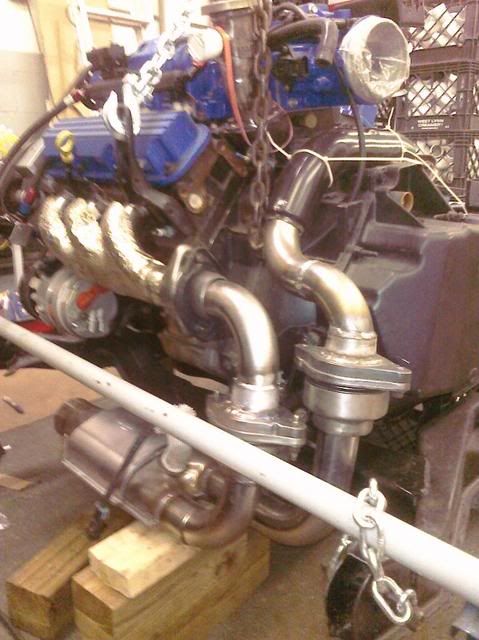
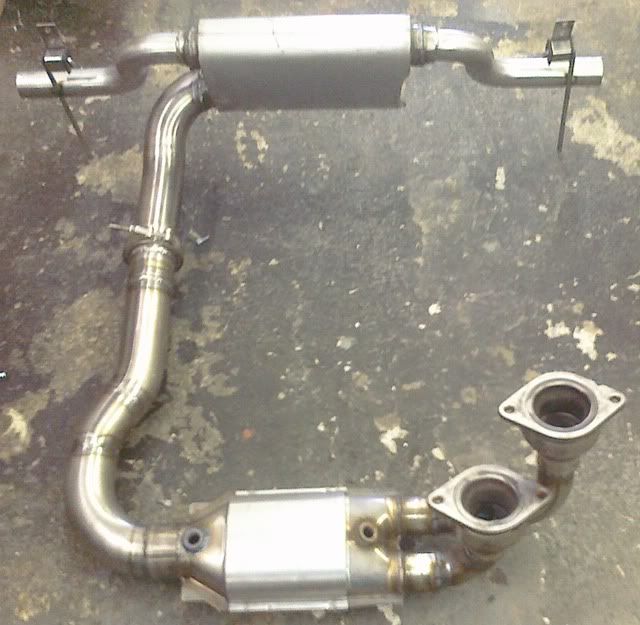
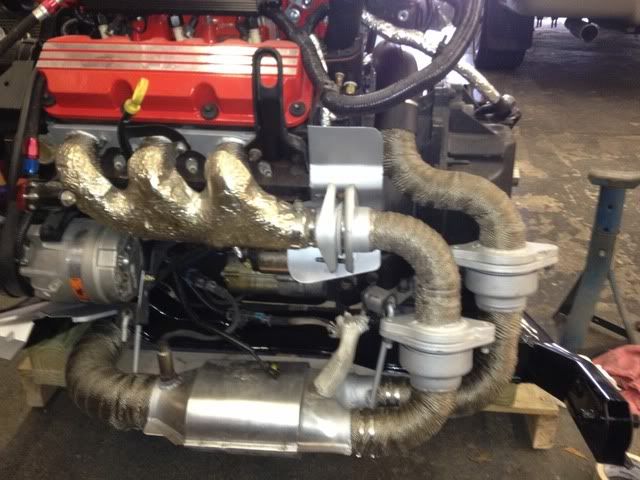
Some pics of the down pipes showing the use of the stock GTP flex-joints. I really wanted to use the stock GTP flex joint for two reasons; there built VERy well and it allows me a disconnection point; oh ya, a third reason, they were free. I maybe could have gotten away with just one and use a Y-pipe to connect both cyl banks, but the i.d. of the stock flex joint drops down to 2", not the best for a performance exhaust...
A pic of the engine cradle where I had to elongate the notch
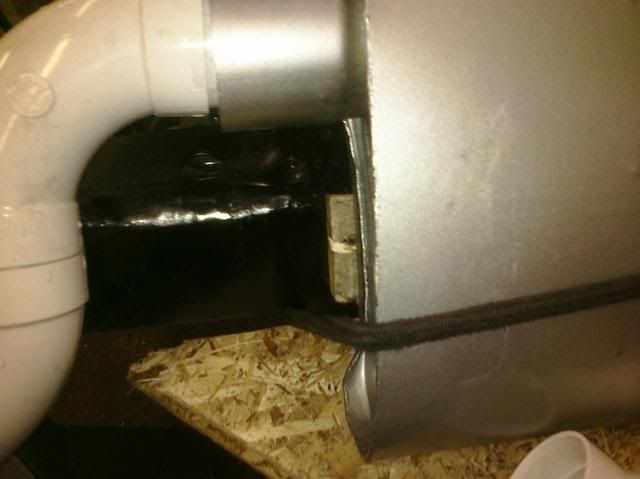
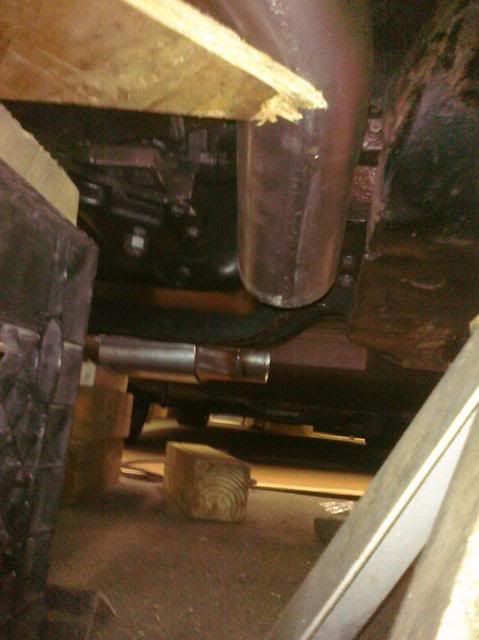
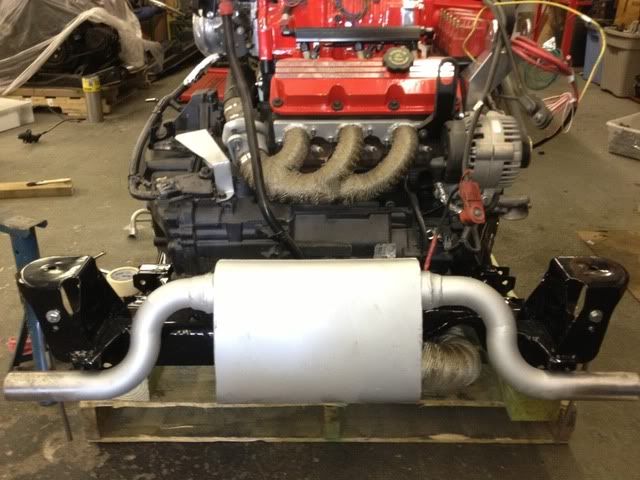
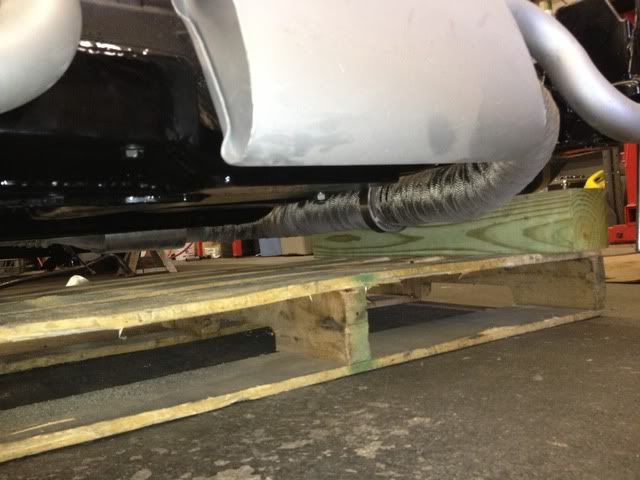
A pic of how tight the muffler fits, the notch gave me a couple more inches to work with. There is a piece of wood between the muffler and cradle, it is there to help me space it out while I am test-fitting. You can also see the edge of the muffler where I had to folt the lip over, this game me another 1/2" to work with (just dont want any vibrations or noise from things hitting...
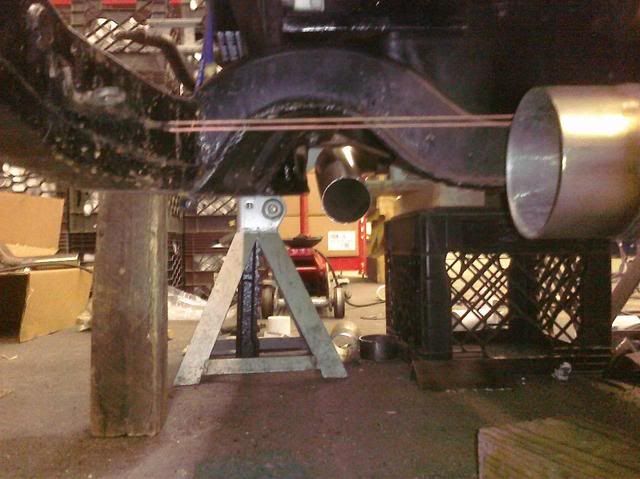
A pic of how close the 3" input is on the muffler and the 2" output
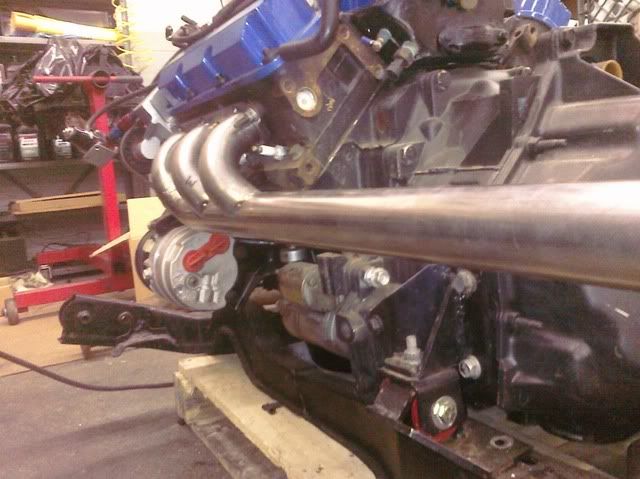
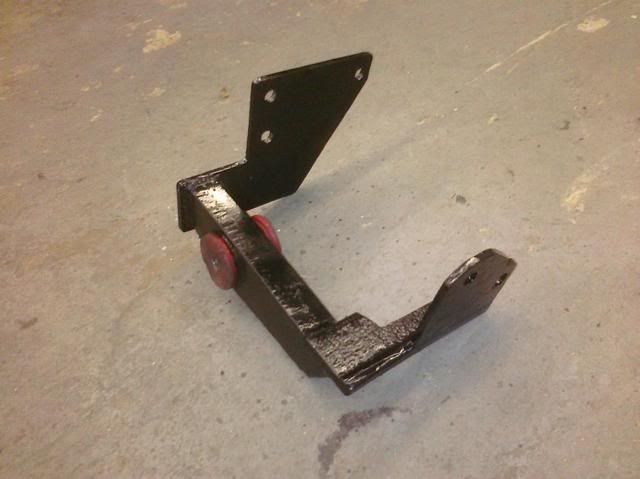
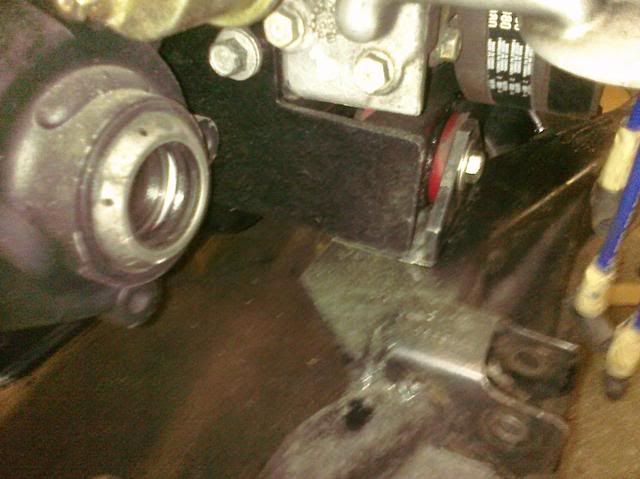
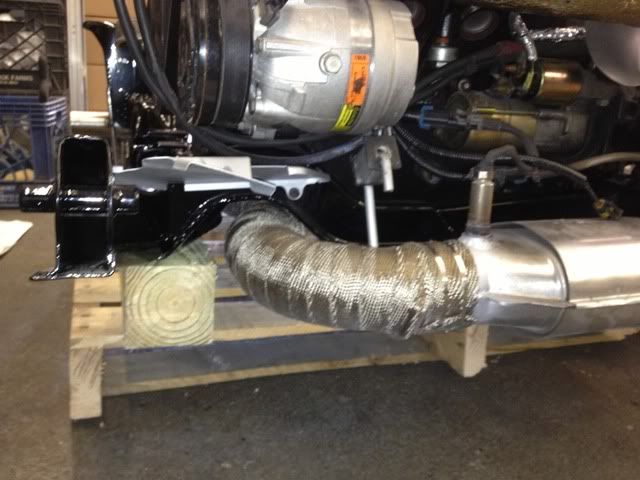
A pic of my modified lower engine mount. I needed to make this so I have a nice tunnel for the 3" tube between the oil pan and cradle. This motor mount sits RIGHT under the TC cover and JUST behind the dampner pully. It mounts to BOTH sides of the block
Motor mount installed
A pic of my tunnel for the 3" tube
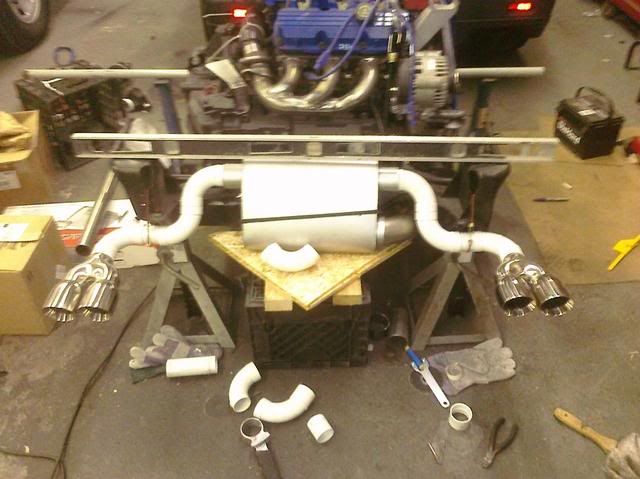
My last stage, moch-up of the muffler and tail pipe (work in progress)
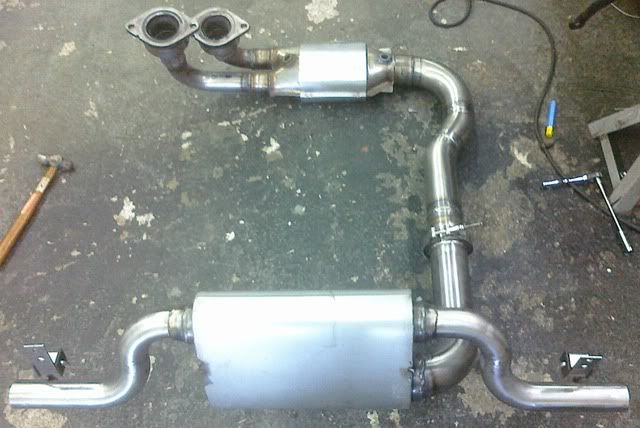
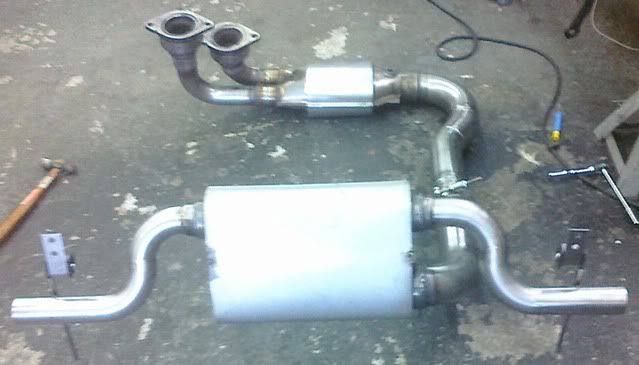
Some more progress pics of the near finished exhaust
Last things to do are install the rest of the hangers, have it coated and wrap the monifolds/crossovers
I also had the manifold to head surface machined to ensure a 100% flat surface & seal... The welding of the primaries distorts the falnge a bit...
The entire exhaust has been painted w/ several coats ceramic paint and baked-on... The exhaust has also been wraped w/ DEI exhaust wrap. I would not reccomend doing this on a DD, but this is my weekend toy that will most likely never see rain/water...
More to come
All bolted up and some heat shields I made installed. Im not going to do the tips till its in the car & I can position them properlly...
[This message has been edited by ALJR (edited 10-21-2012).]
You using a wire welder? If so, you can look up appropriate settings for the material and wire size/type that you're using for your particular welder. It's hard welding thin gauge stuff, especially for a beginner. My philosophy is get the welds strong first, then concentrate on appearance. I'd rather depend on an ugly strong weld than a weak pretty one.
I like the layout you're doing. If I do a 3800 swap I want to route all of the exhaust the same way as the factory, forward over the trans, across, then under the cradle and back. I like a completely unmodified and useful trunk space.
I am using a Lincold Pro Mig 140. The manifolds were welded using flux-core .025 (I believe), welder set to 4 for heat and 3 for speed. what those numbers actually corilate to, I have no idea. I did the rest of my welds with with .030 non-flux and they came out ALLOT better looking with 100 times less splatter. However, the flux-cored will weld thicker steel... For the thick flanges I set the welder to 5 (highest) for heat and 3-3.5 for speed. This gave me very good penitration and a nice looking bead that didn't build-up like it did on my first manifold (the rear one)...
The 16ga pipe is tricky, Had my welder set to 4 also and 3 for speed; but you need to move fairly quick or it WILL burn through...
I will see if I have an close-up pics of some of my more recent (AKA better) welds. My lincoln 140 is now my favorite tool...
[This message has been edited by ALJR (edited 03-29-2011).]
On your flux-core, see if it's gasless or requires a shield gas, that affects polarity. The wire should say DCEP or DCEN on the label or packaging somewhere. If you're set up for gas (C25 or straight A) the wire should be DCEP as the welder will be set up for that polarity most commonly. With DCEP the ground lead will be connected to the negative terminal in the welder.
On your flux-core, see if it's gasless or requires a shield gas, that affects polarity. The wire should say DCEP or DCEN on the label or packaging somewhere. If you're set up for gas (C25 or straight A) the wire should be DCEP as the welder will be set up for that polarity most commonly. With DCEP the ground lead will be connected to the negative terminal in the welder.
Yes, the flux-cre is gasless... When I use the regular wire, I have to use the argon and switch over the polarity...
I must say, I was a little concerned about getting a 110v welder; as all the ppl I know who weld (professionaly) said to go with a 220v. well, I really wanted the portability of 110 and did not want to have to install a 220 outlet in my garage; not to mention spending the extra $$. So I searched for the largest 110v welder I could fine and the Lincoln was my choice. Did I say how much I LOVE this welder It was the best $500 I have EVER spent...
I like the idea for the pipe routing. I would consider a brace for your crossover pipe, perhaps even a small bracket off the firewall side flange.
Have not gotten that far yet. I am not going to add the hangers, springs or any supports untill last. Too soon to tell what needs to be supported and where...
Routing the pipe under the motor was harder then I anticipated. There was absolutly no way I was gonna fit a 3" pipe between the oil pan and stock motor mount plate; I would have had to run the 3" pipe below the motor mount plate and that would have reduced my ground clearance by another 3"+/-. I also think I would not look that great from the rear...
[This message has been edited by ALJR (edited 03-29-2011).]
It's probably just the lighting or angle but it looks like a shark bit a chunk out of the muffler in pic full3
Thanks
While I was fitting up the muffler and tail pipes, I was having a heck of a time keeping the muffler in one cosistant location while I was fitting/removing sections of pipe for moch-up. seemed every time I removed the muffler, it was in a slightly different location and it was making it a pita to get the left and right side symetrical. So I had to make some temp brackets that I tack-welded to either side of the muffler and cradle. What you are seeing is the grinding marks from the angle grinder after I removed those brackets
IP: Logged
08:56 PM
Oct 25th, 2011
Riceburner98 Member
Posts: 2179 From: Natick, Ma, USA Registered: Apr 2002
Bump before the winter? I still need to stop by and check that thing out... Looks like I'm going for essentially the same exhaust next spring. Finally got my fuel in and ran the thing this past weekend with no exhaust, my buddy wanted to hear it so he blasted off a few full-throttle revs.. Man that motor is loud!
------------------ Bob Williams (still) working on the 3800 swap... It'll drive some day!
Bump before the winter? I still need to stop by and check that thing out... Looks like I'm going for essentially the same exhaust next spring. Finally got my fuel in and ran the thing this past weekend with no exhaust, my buddy wanted to hear it so he blasted off a few full-throttle revs.. Man that motor is loud!
Still have not gotten the motor in My OCD is getting the better of me and I have been detailing and powder coating misc. brackets and shtuff... Need to get the cradle sand blasted and painted next...
IP: Logged
09:05 PM
Riceburner98 Member
Posts: 2179 From: Natick, Ma, USA Registered: Apr 2002
Kudos on the great looking exhaust! The welds are great too, welding on thin stuff is not easy. Especially when you're novice at it. I don't have a lift or a bender, so I had a guy I've known for years do my exhaust. He's been doing it professionally for 23 years, and he had leaks.... on a (new)truck exhaust.... and it looks like **** . Needless to say i'm not supprised he doesnt get much work, but that's a story to lift your spirits even more about your natural skill.
Kudos on the great looking exhaust! The welds are great too, welding on thin stuff is not easy. Especially when you're novice at it. I don't have a lift or a bender, so I had a guy I've known for years do my exhaust. He's been doing it professionally for 23 years, and he had leaks.... on a (new)truck exhaust.... and it looks like **** . Needless to say i'm not supprised he doesnt get much work, but that's a story to lift your spirits even more about your natural skill.
Ya, this was my very first welding project. You can definatly tell which exhaust manifold I did first Even though I praticed quite a bit before and dialed-in my welder for the 16ga metal, its still a PITA... However, I am very pleased at how it turned out...
Only wish I could have fit a Magnaflow muffler instead; I really like the sound of them. Not to mention, ppl who have used Flowtech muffler said they were on the loud side. Then again, they didn't have a full exhaust either; so we'll see how it sounds this summer (hopefully)...
I would sell my soul for this exhaust. Unfortunately I already sold my soul years ago in order to date a pair of sisters in highschool....
Very inspiring! I would love to get an exhaust like this built one day. Unfortunately I am pretty sure the engine would need to come out making the cost prohibitive
Great job, well done!
Edit- TWIN sisters
[This message has been edited by cam-a-lot (edited 03-06-2012).]
IP: Logged
07:52 AM
KaijuSenso Member
Posts: 911 From: Westland, MI Registered: Jan 2007
Now this is my kind of exhaust. Can't wait to hear it run.
That makes the two of us...
I’m so behind schedule its not even funny... Between work, home improvements, a 2yro and another due in August, finding time to work on my Fiero is hard. I would rather it sit and be dun the way I envision than rush it just to finish...
IP: Logged
12:40 PM
Rare87GT Member
Posts: 5086 From: Wichita, KS USA Registered: Oct 2001
Would it be possible to get a couple video clips? Maybe one of the exhaust running at idle inside and outside of the car, then one of the exhaust on the road inside the car?
Would it be possible to get a couple video clips? Maybe one of the exhaust running at idle inside and outside of the car, then one of the exhaust on the road inside the car?
Thanks and yes, but I wouldn't hold my breath if I were you. Im trying not to rush it just for the sake of getting it in a driving it; im trying to make it look like the Fiero came w/ the 3800 in it from the factory.
Hey aljr its craig the one who bought the stock 2.8 gt exhaust setup of you the build is coming along really well cant wait to see it actually done if u ever do decide to sell that 3.1 or 3.4 you have sitting let me know i might be able to take it off ur hands in the future if u decide to sell it
Hey aljr its craig the one who bought the stock 2.8 gt exhaust setup of you the build is coming along really well cant wait to see it actually done if u ever do decide to sell that 3.1 or 3.4 you have sitting let me know i might be able to take it off ur hands in the future if u decide to sell it
I have WAY too much money in the 3.1 to sell it. Ill most likly keep it, just in case I come across another 88 w/ a blown motor...
Just a bump to keep it alive. I am going to copy the majority of your exhaust on my current swap.
A quick suggestion for ya...
When I purchased my tubing stock, I ordered six 90 deg. bends for the primary tubes, If I were to do it again, I would order three 180 deg. U-bends and cut them in half. That would have saved me a few $$..
IP: Logged
11:33 AM
PFF
System Bot
CC Rider Member
Posts: 2037 From: Cameron Park, Ca Registered: May 2001
I just ordered the 180's Funny you would mention that! Thanks order an extra to insure I get it right on all of them
Wish I thought of ordering the 180's when I did mine
Pratice, pratice, pratice on some straight lengths of pipe so you can get your welder dialed-in and to not waste the expensive elbows. Flux-core is a biotch to use on such thin metal. I started out using flux-core (because it came w/ my welder & I didn't have the argon bottle yet), but the gas welds came out soooo much better. Also, an auto-darkening helmet make a world of difference. HF has them on sale for $39 (the one I got & love)...


 It was the best $500 I have EVER spent...