
 
     |
| LS4/4T65EHD Fiero (Page 1/4) |

|
lsfiero
|
AUG 27, 02:33 PM
|
|
I first want to start off by saying thank you to everyone on this site. Pennock and everyone showing their builds. There is soo much good information here it's unreal. This 87 GT has been on my watchlist for a long time. I mean a loooong time. I first seen this car when i was about 12 (31 now) riding my bike around with my friends. It was a friend of mines uncle that owned it. I know for a fact it hadn't moved the entire time I've known of its existence. Well about 5 years ago I had the opportunity to buy it and I jumped on it. I probably should have talked him down a little bit but it was the one I've been wanting for a decade and a half so i had to get it. No title or keys. It took me 8 months to track down and speak to the original title holder (not the guy I bought it from) but he, thankfully, applied for a new title and signed it over to me. (I sent him $ for fees to re-apply and some gas money)
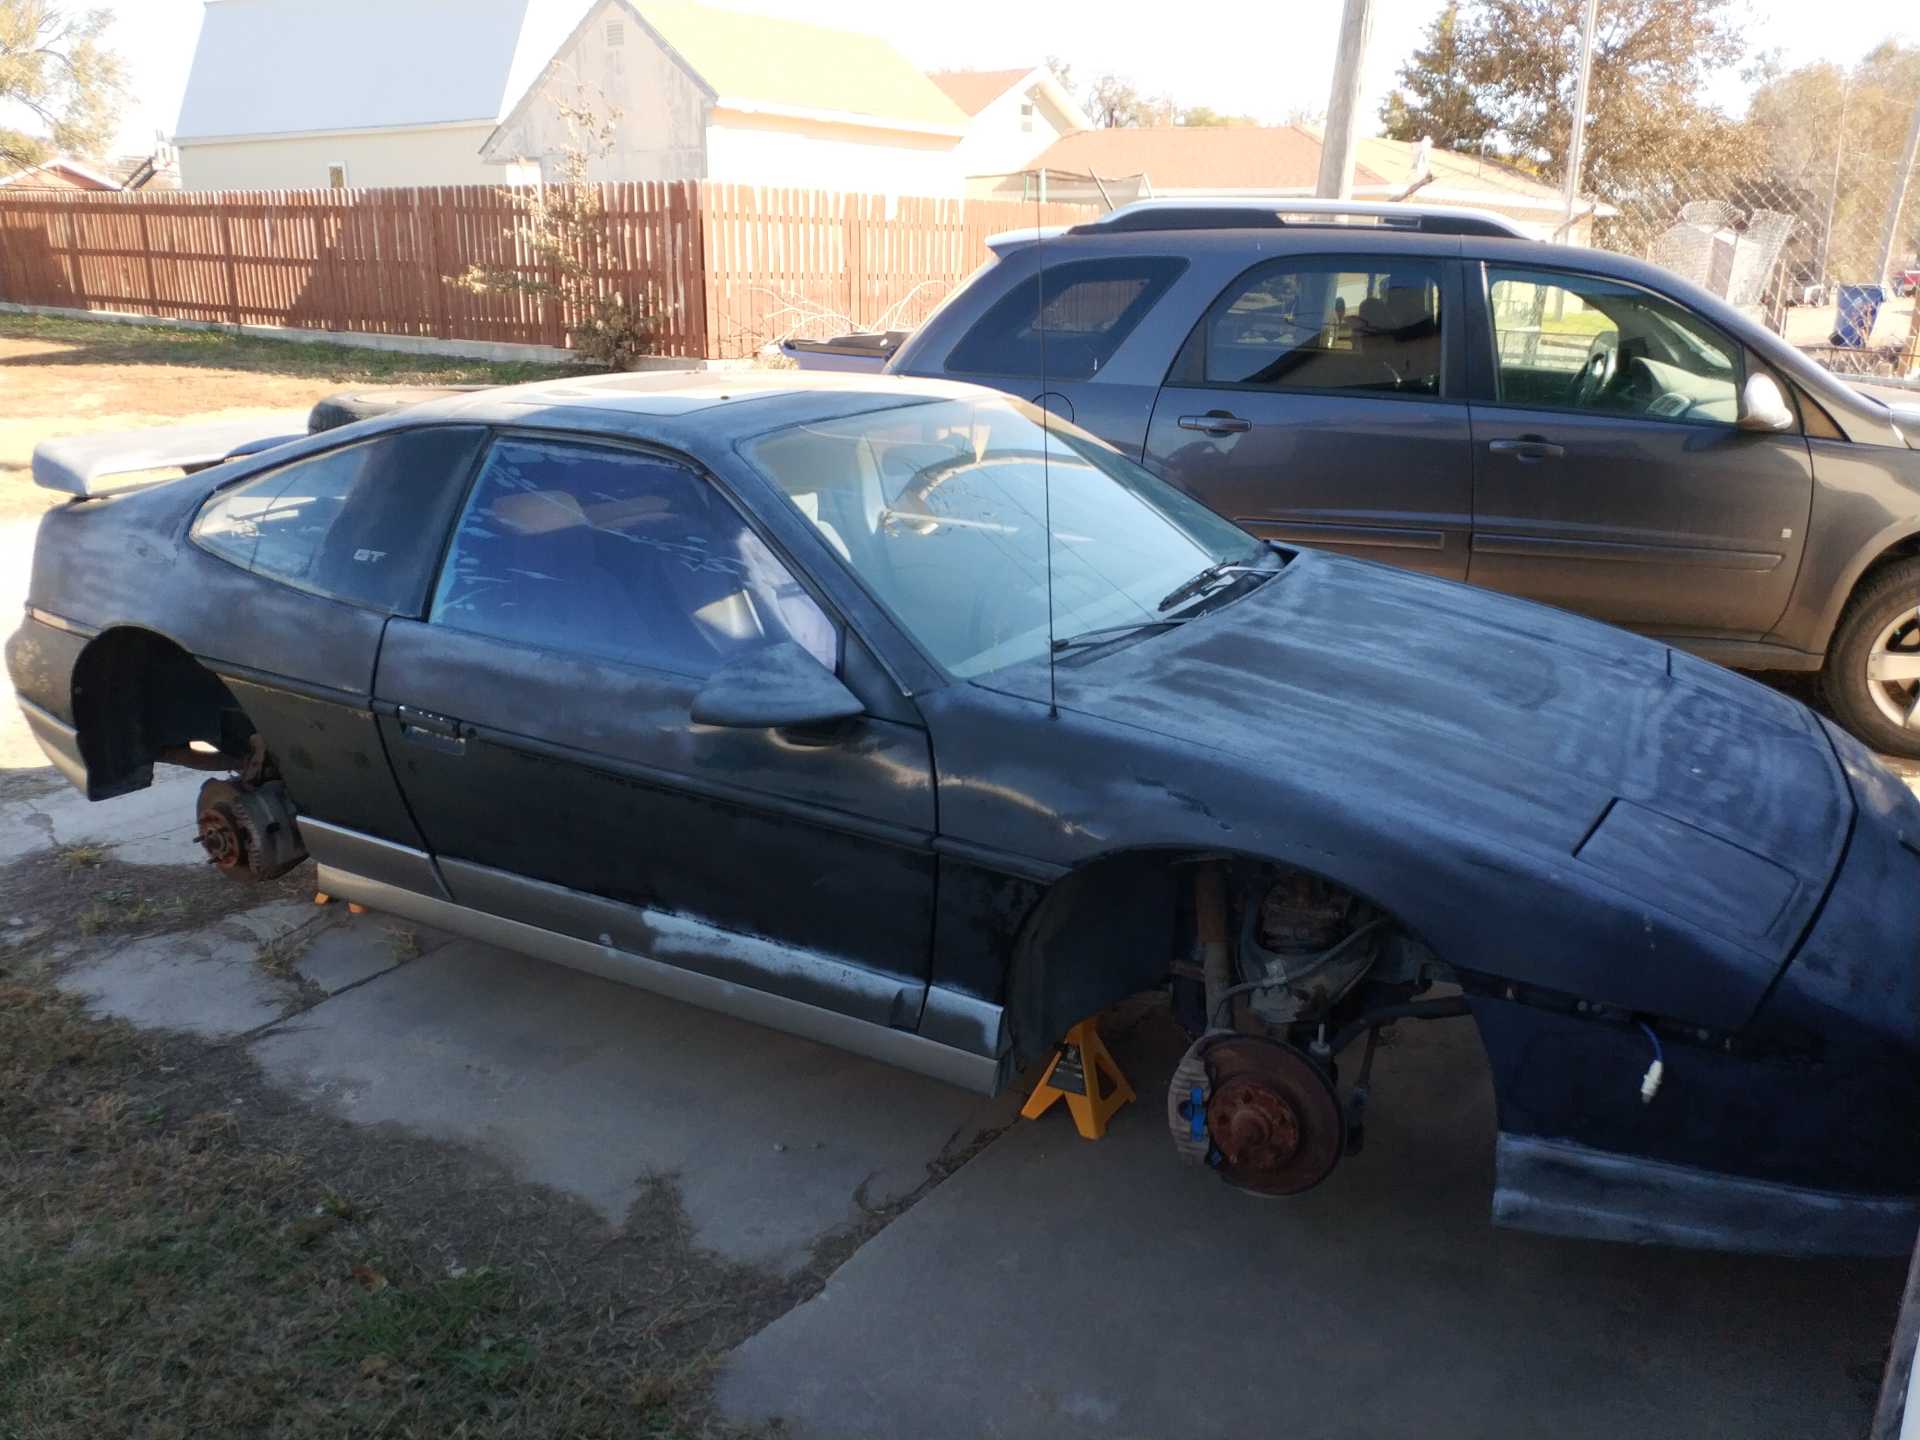
Yes it did come with wheels i just needed to use them at that point in time to move my parts car
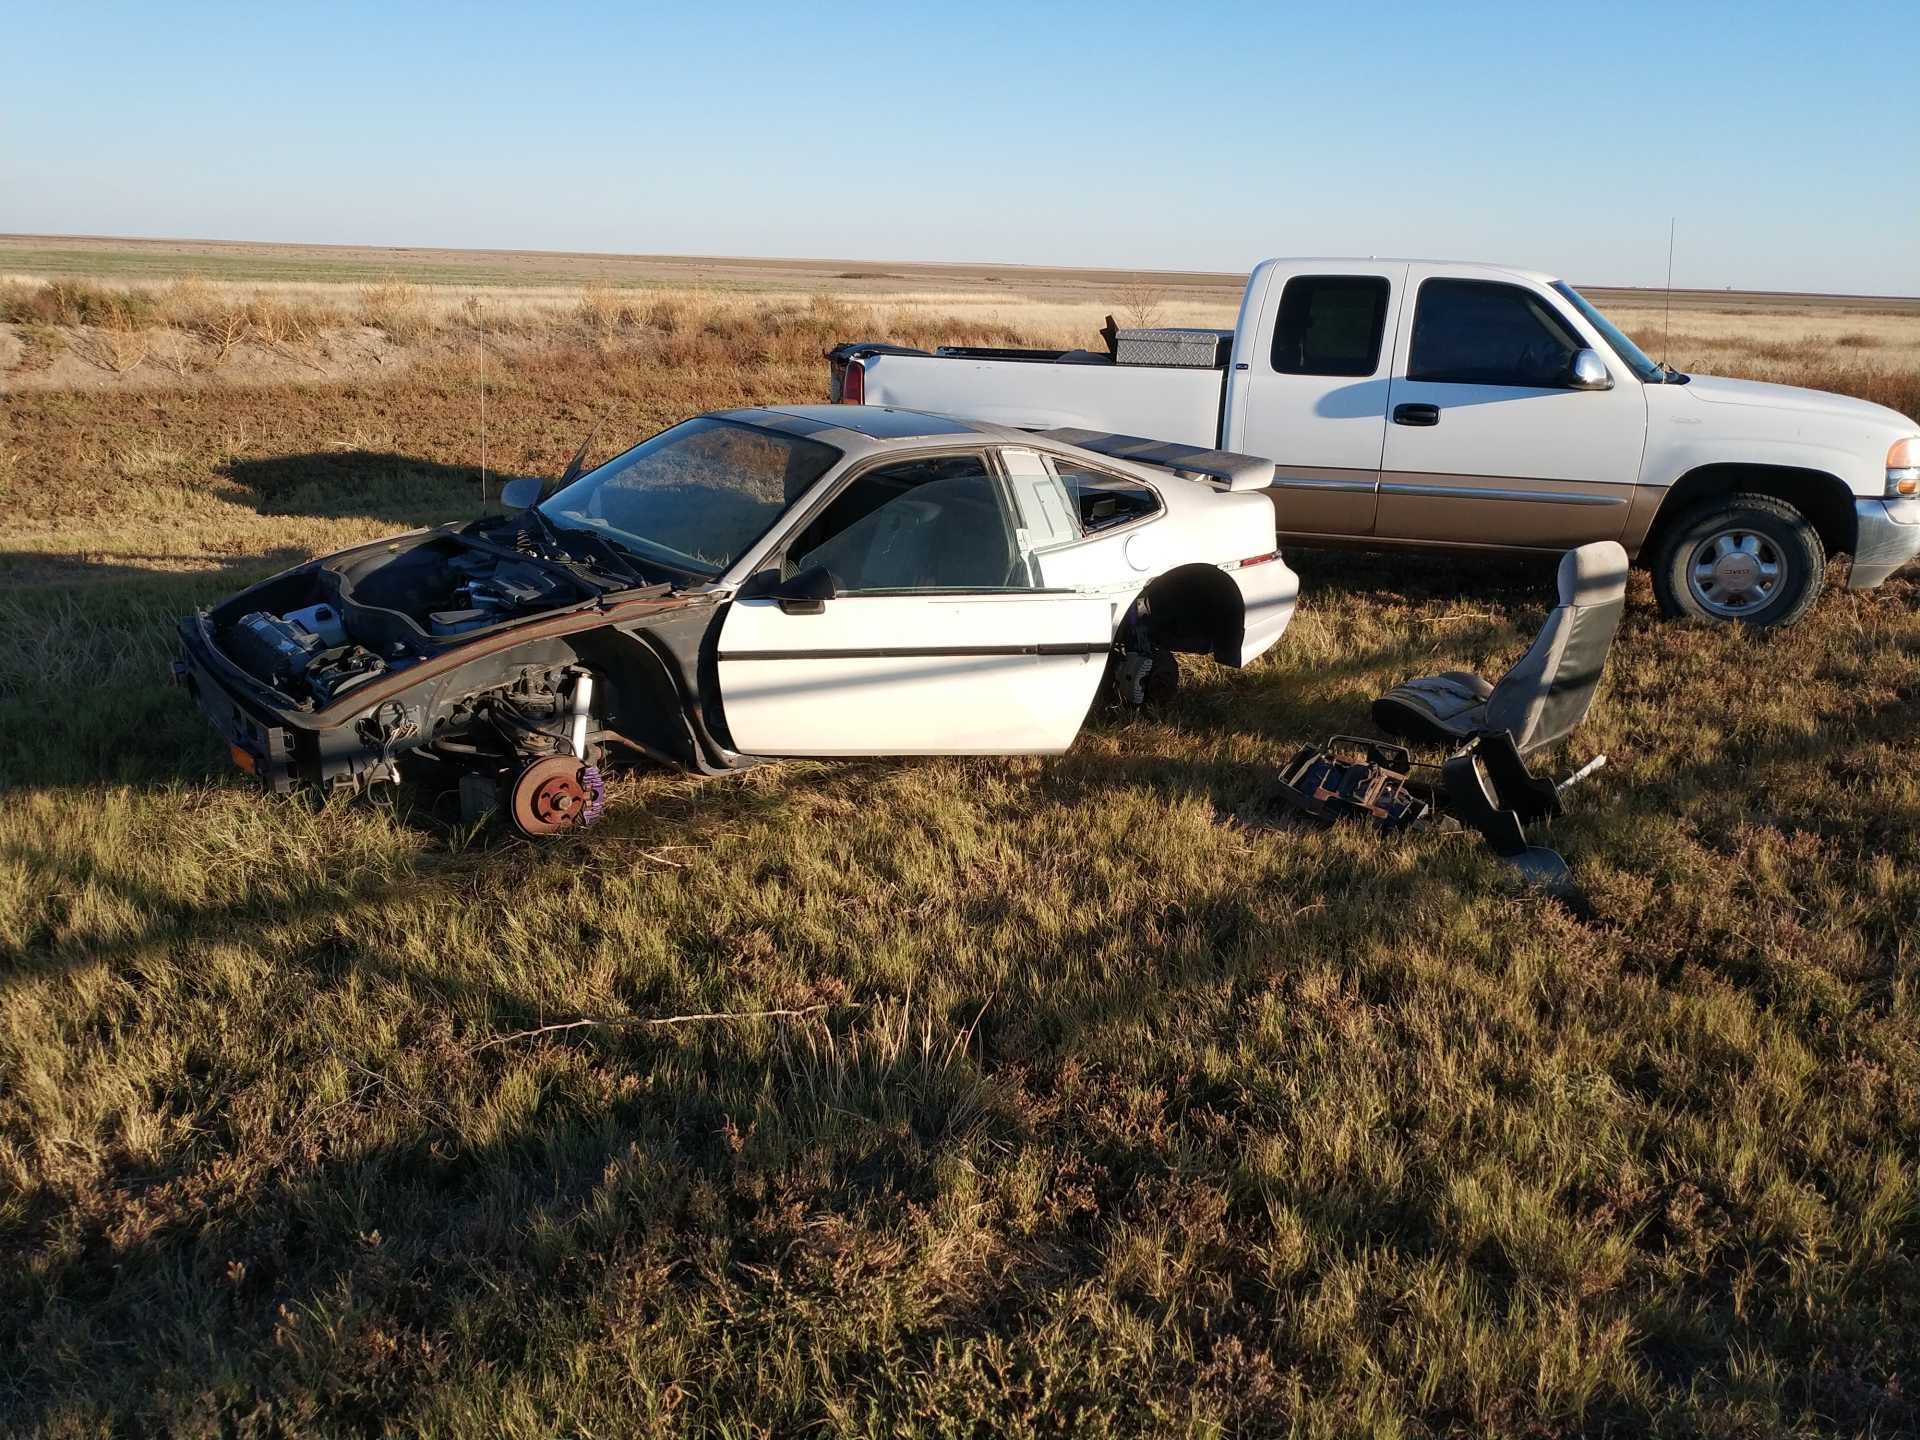
Parts car doesn't have a title either and its been hit in the drivers side (door had been replaced)
I had big hopes for the black one but when I dropped the oil, about 2 gallons of antifreeze came out with it so the car sat for about 4 years while I located a motor I wanted to put in it. I had a 3800SC lined up but the price wasn't right and couldn't talk them down. About a year ago, after not looking for a motor for months, I randomly got on Craigslist and looked again. There was a LS4 motor , tranny, & harness for the right price so again I had to have it haha.
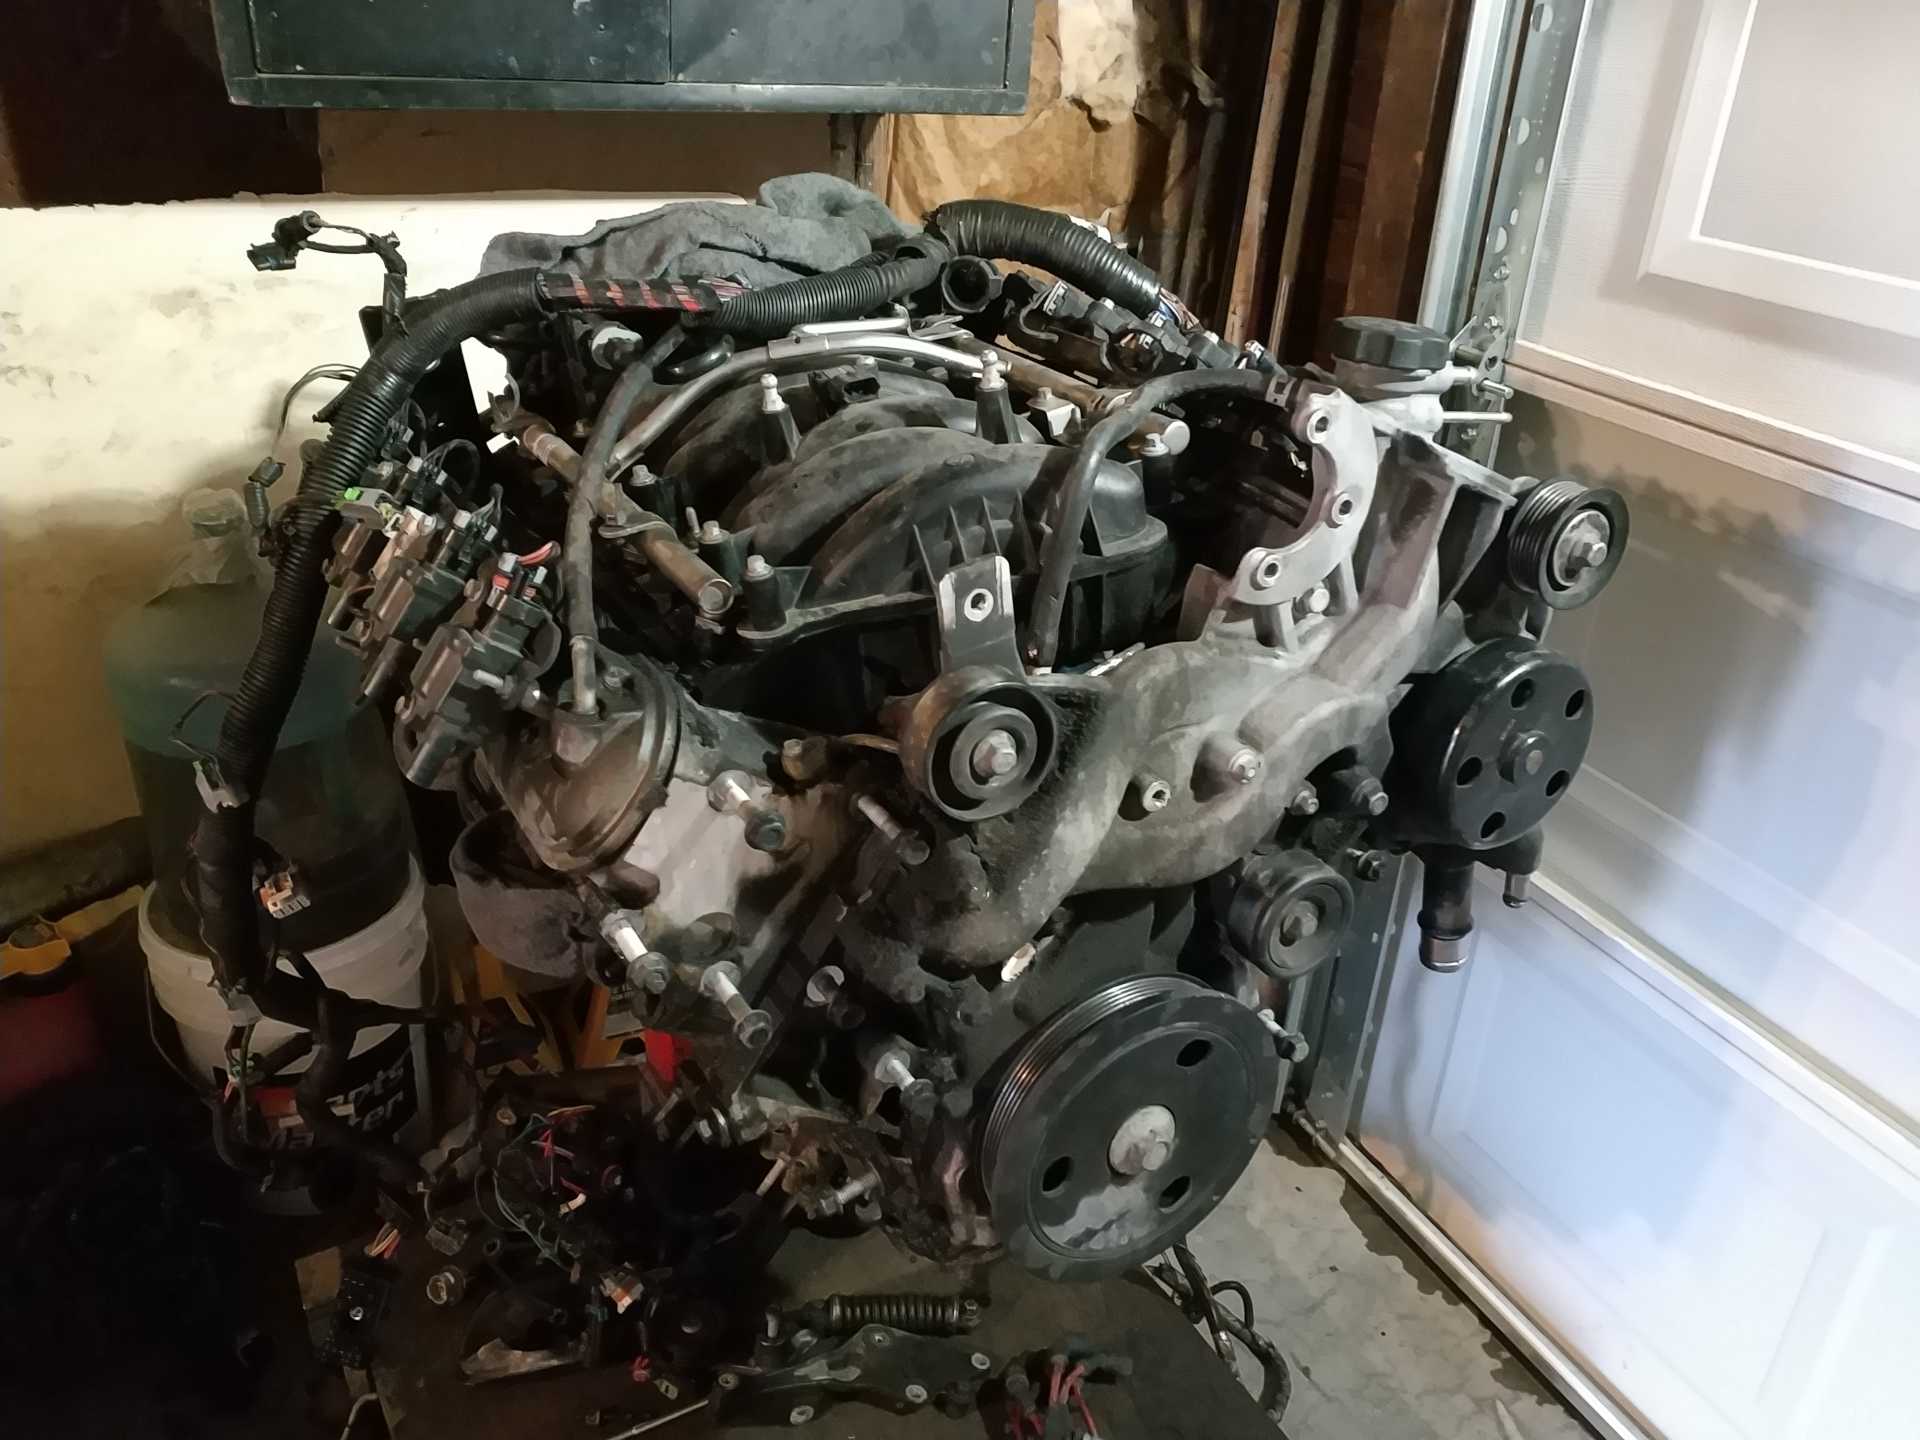
Yeeeaaa let's get this party started!
From then til now has been an awesome ride and I want to share it with everyone I've found inspiration from on this site. Now It's not quite up and running yet but it's getting there.
Also I'm slow working on it mainly because I'm preoccupied with work and being a parent so be patient with me lol and I hope you all enjoy my upcoming posts and the build as much as I love searching through the builds on here.
|
|

|
lsfiero
|
AUG 27, 06:00 PM
|
|
The drive train came out of a 2008 Chevy Impala and it was a MESS. I got it all cleaned up and started tearing into it to. It got all new gaskets from my work and a DOD delete kit from AMS Racing. I decided to go with a stock cam even though it would be nice to hear it lope a bit. I'll probably change that later on down the road when I can afford a less restrictive intake and maybe dual exhaust. First I want to make it a reliable 5.3l. It's not going to have A/C (for now) and I will be running an electric water pump.
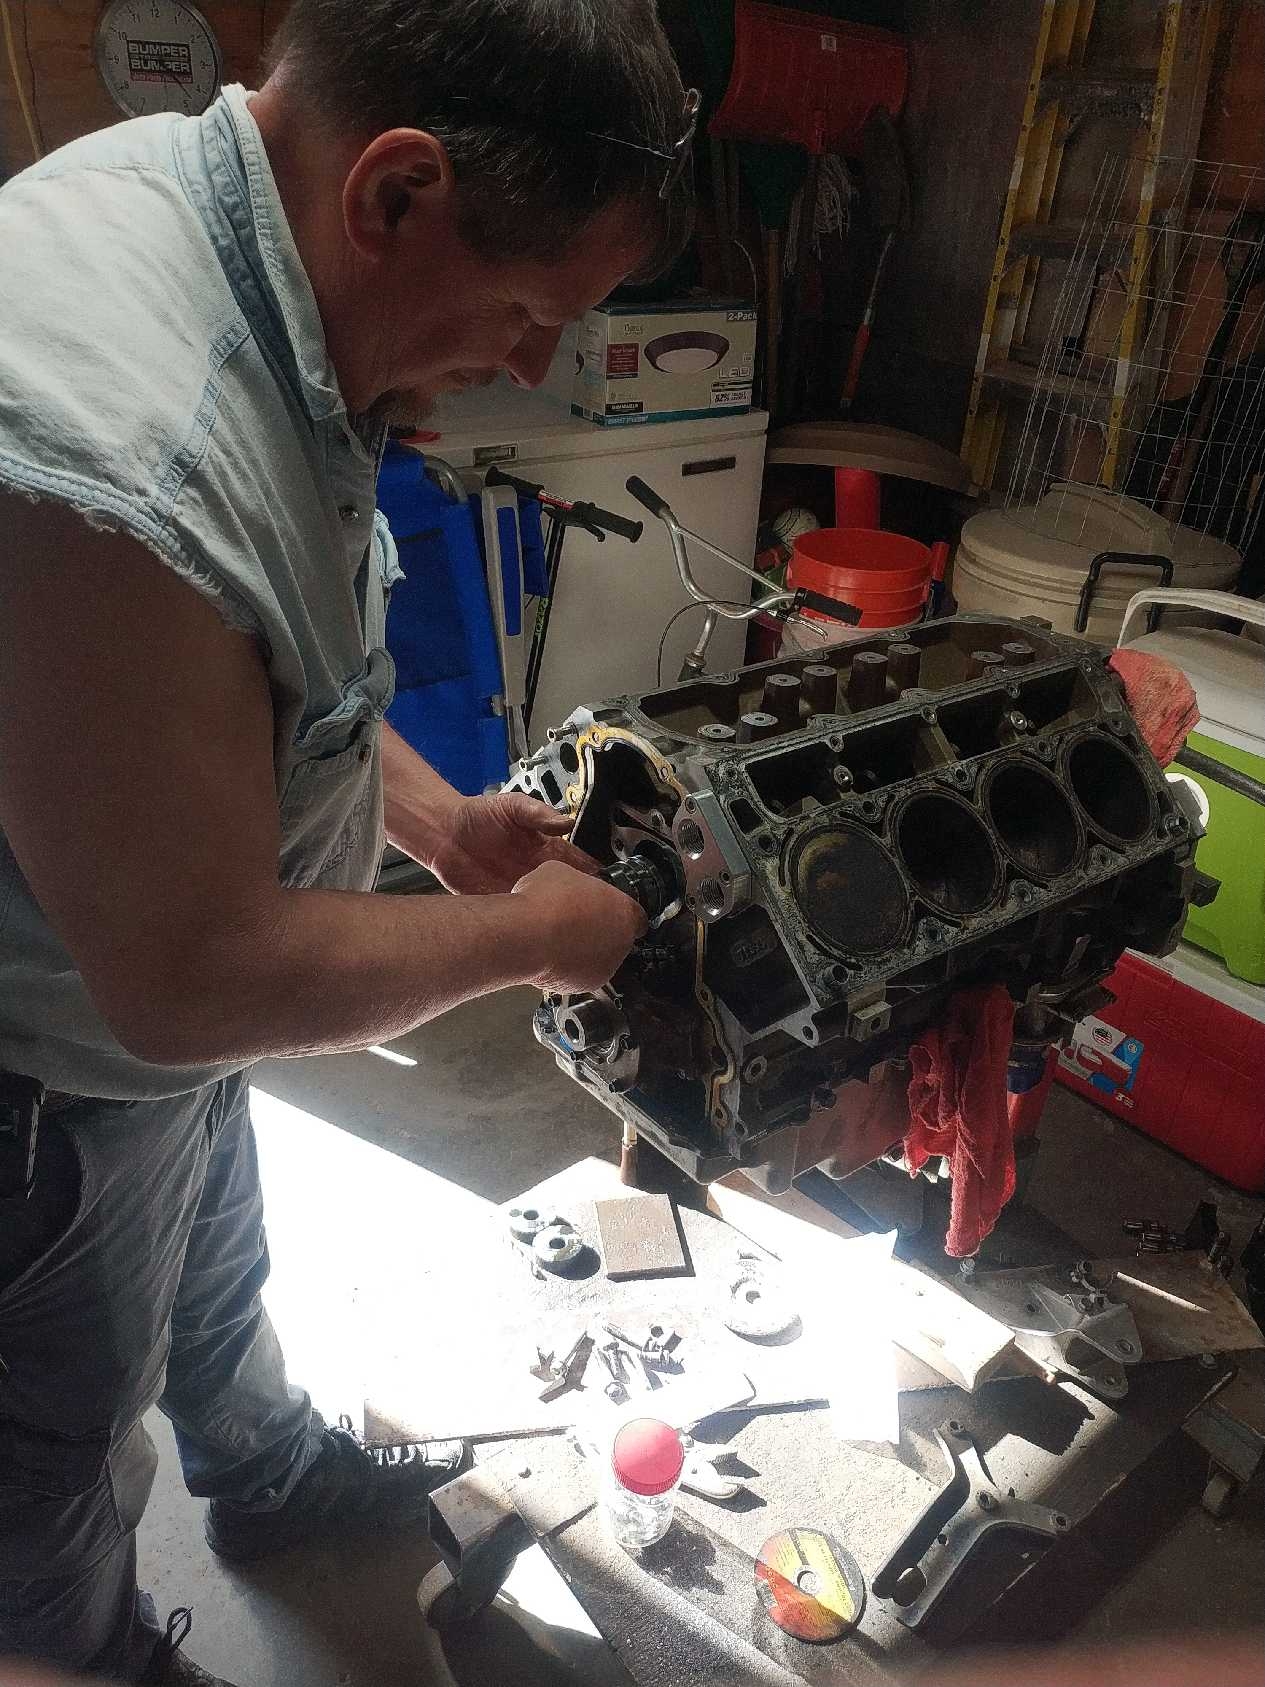
My dad was helping me this day 
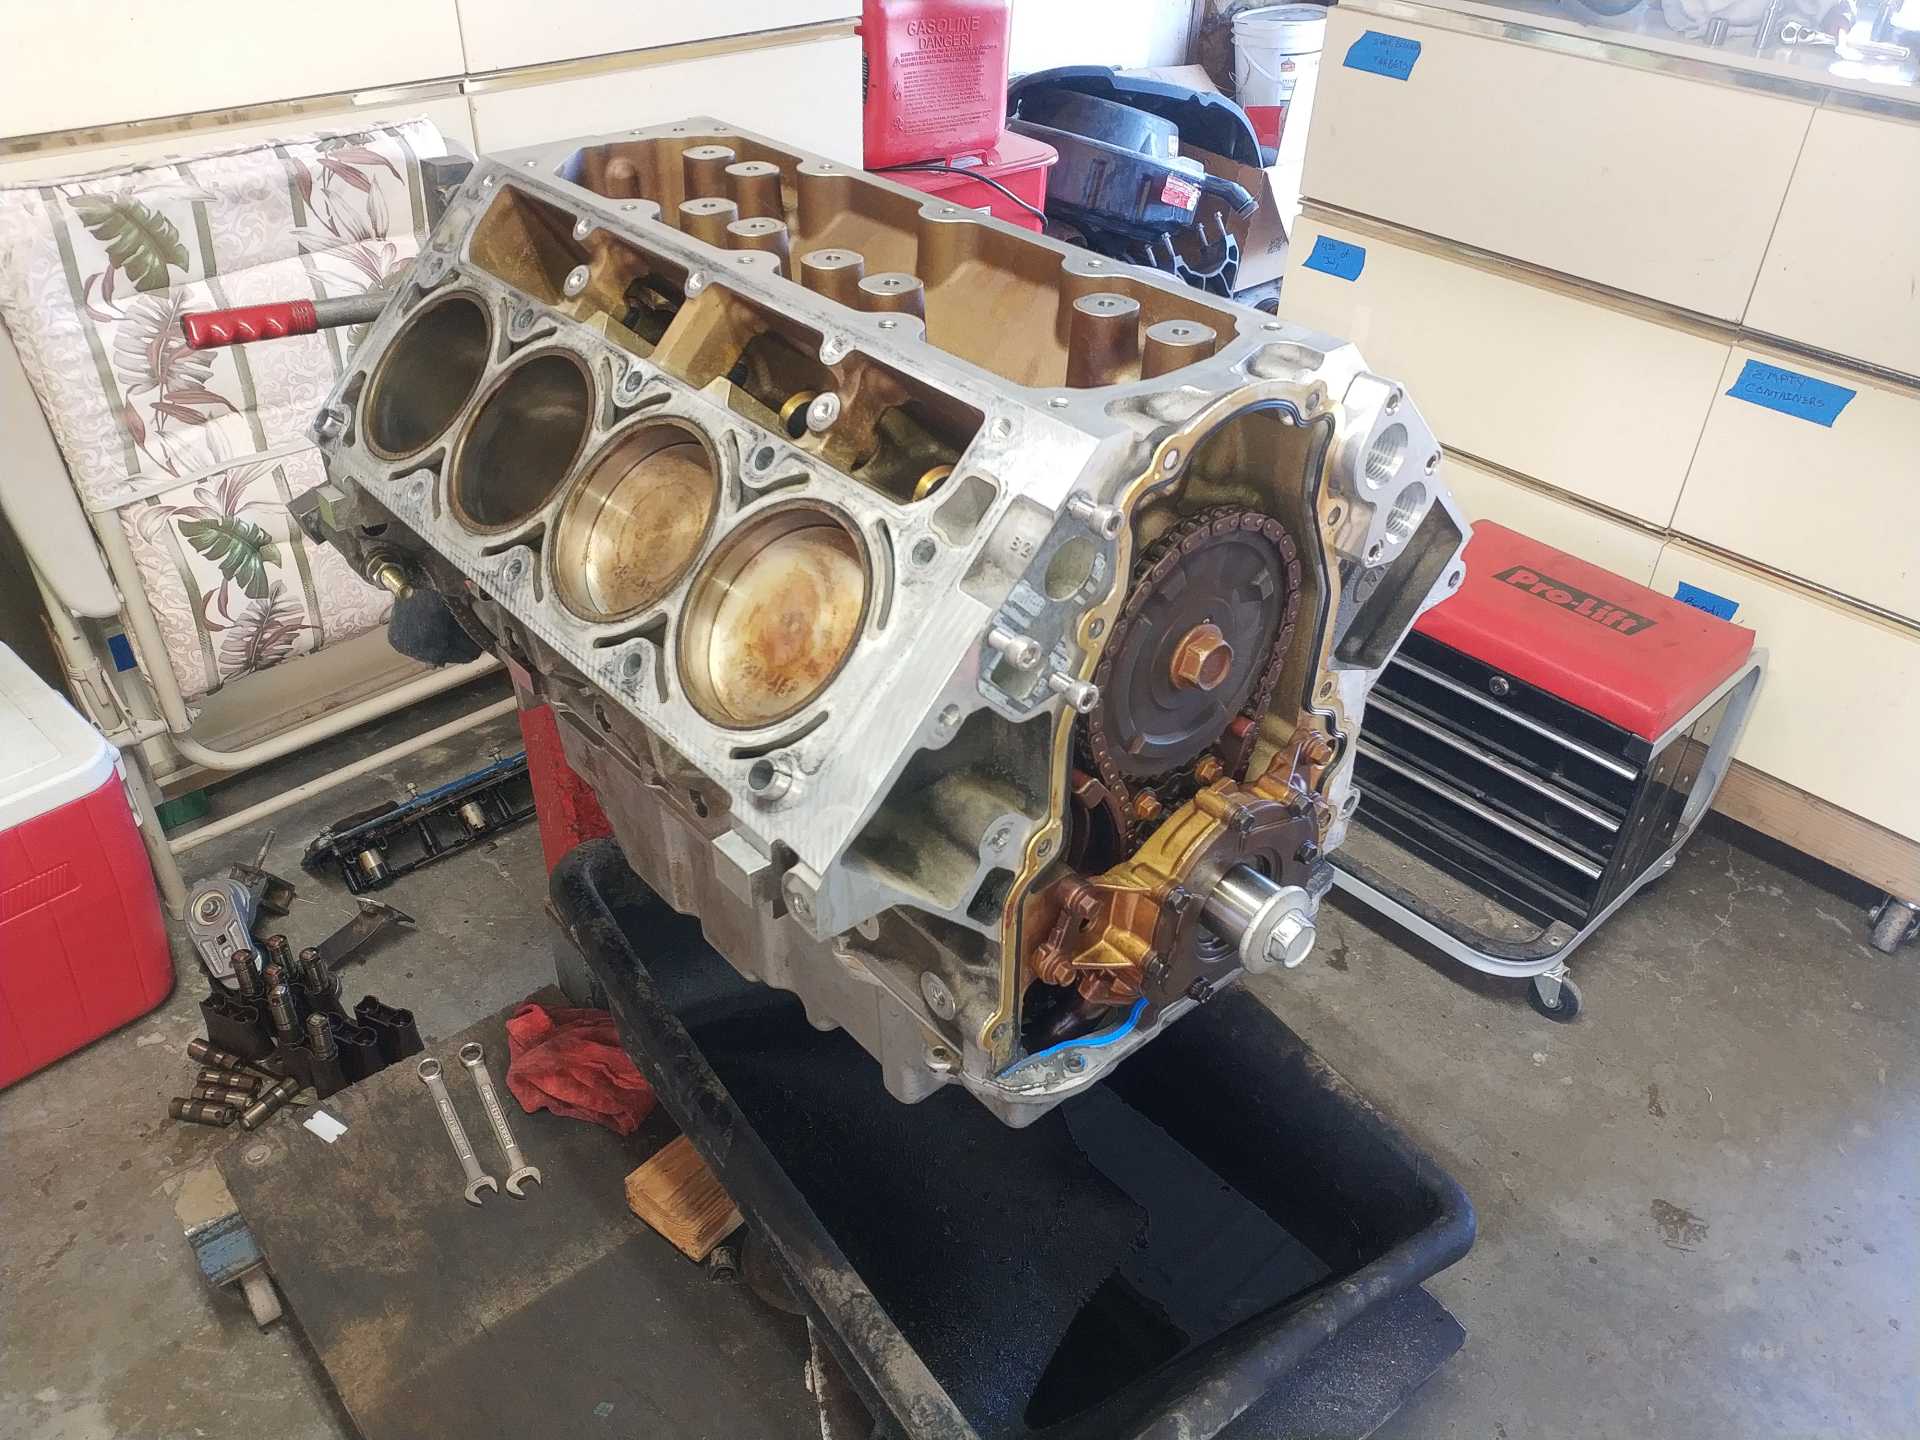
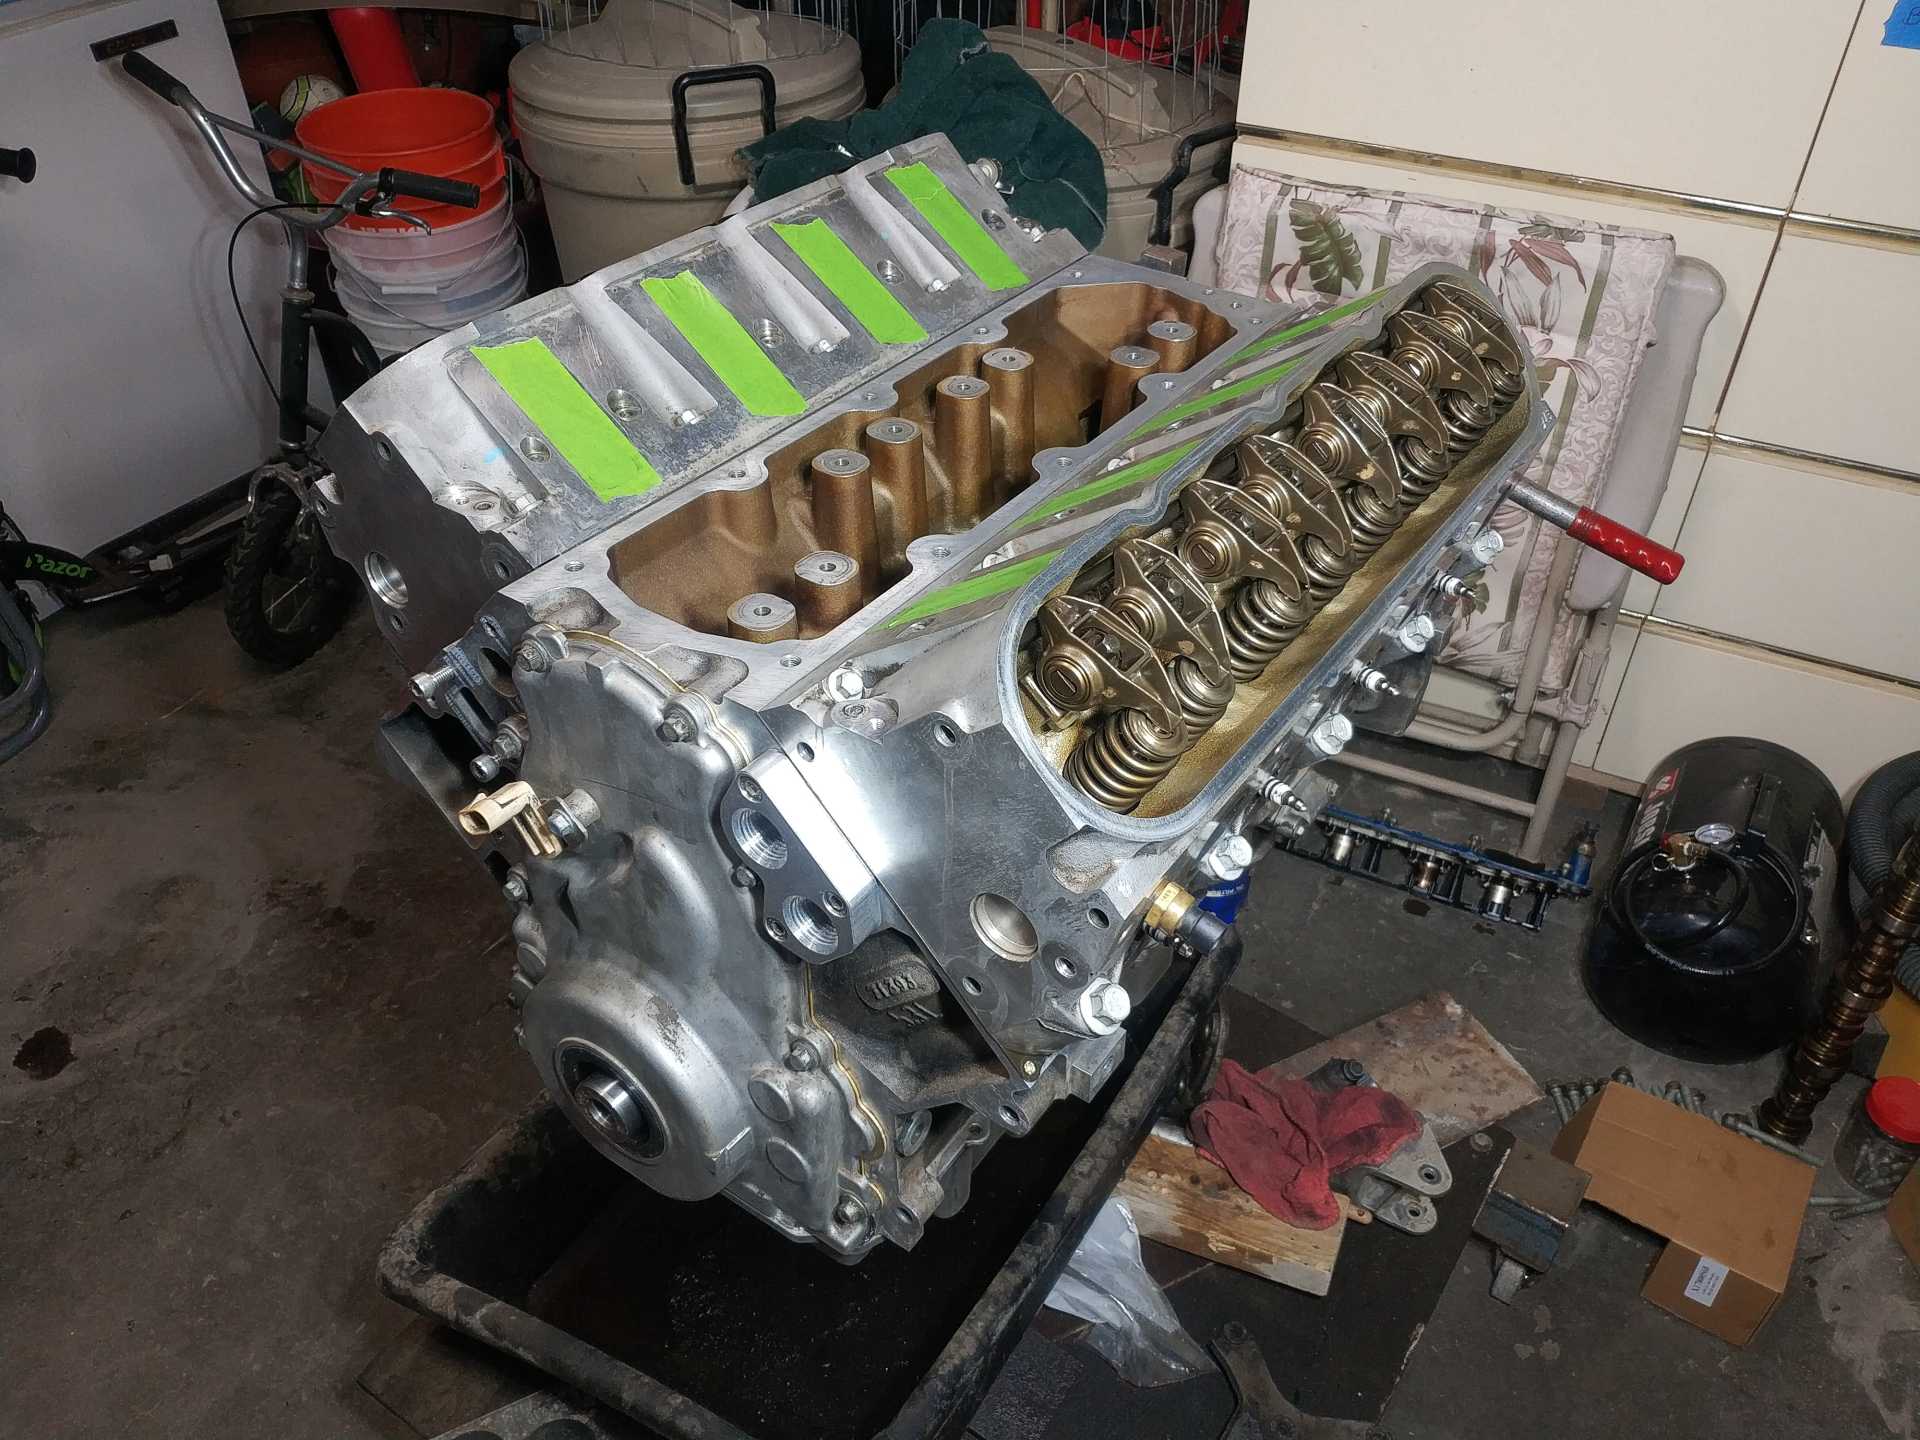
Despite it being a grease ball on the outside, it was pretty clean inside. Anyways I got it all put back together with the valve covers swapped and the hoses going to where they should
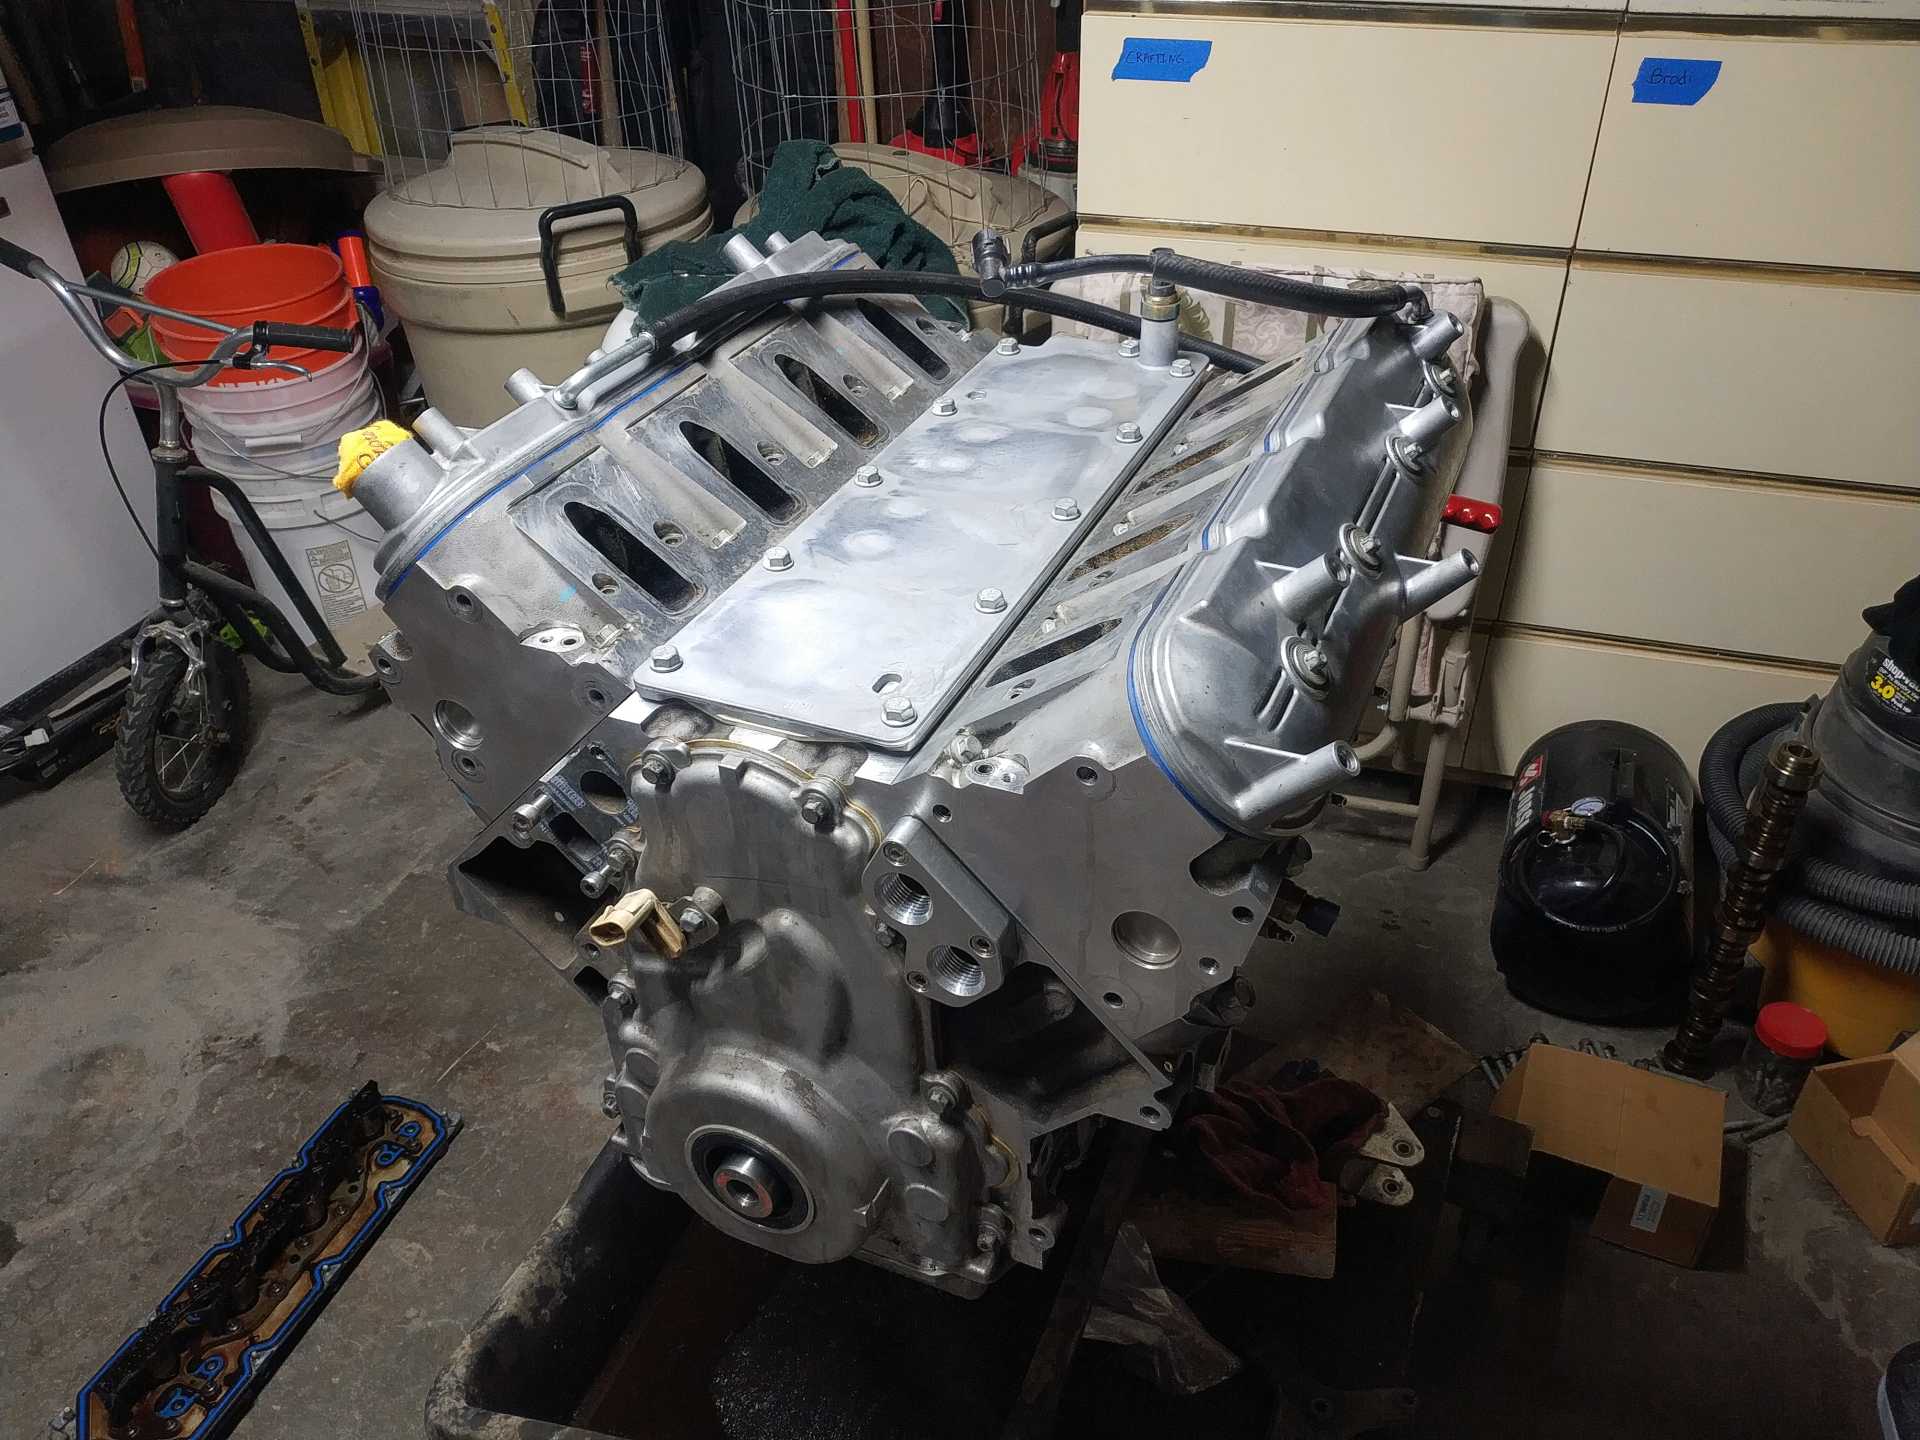
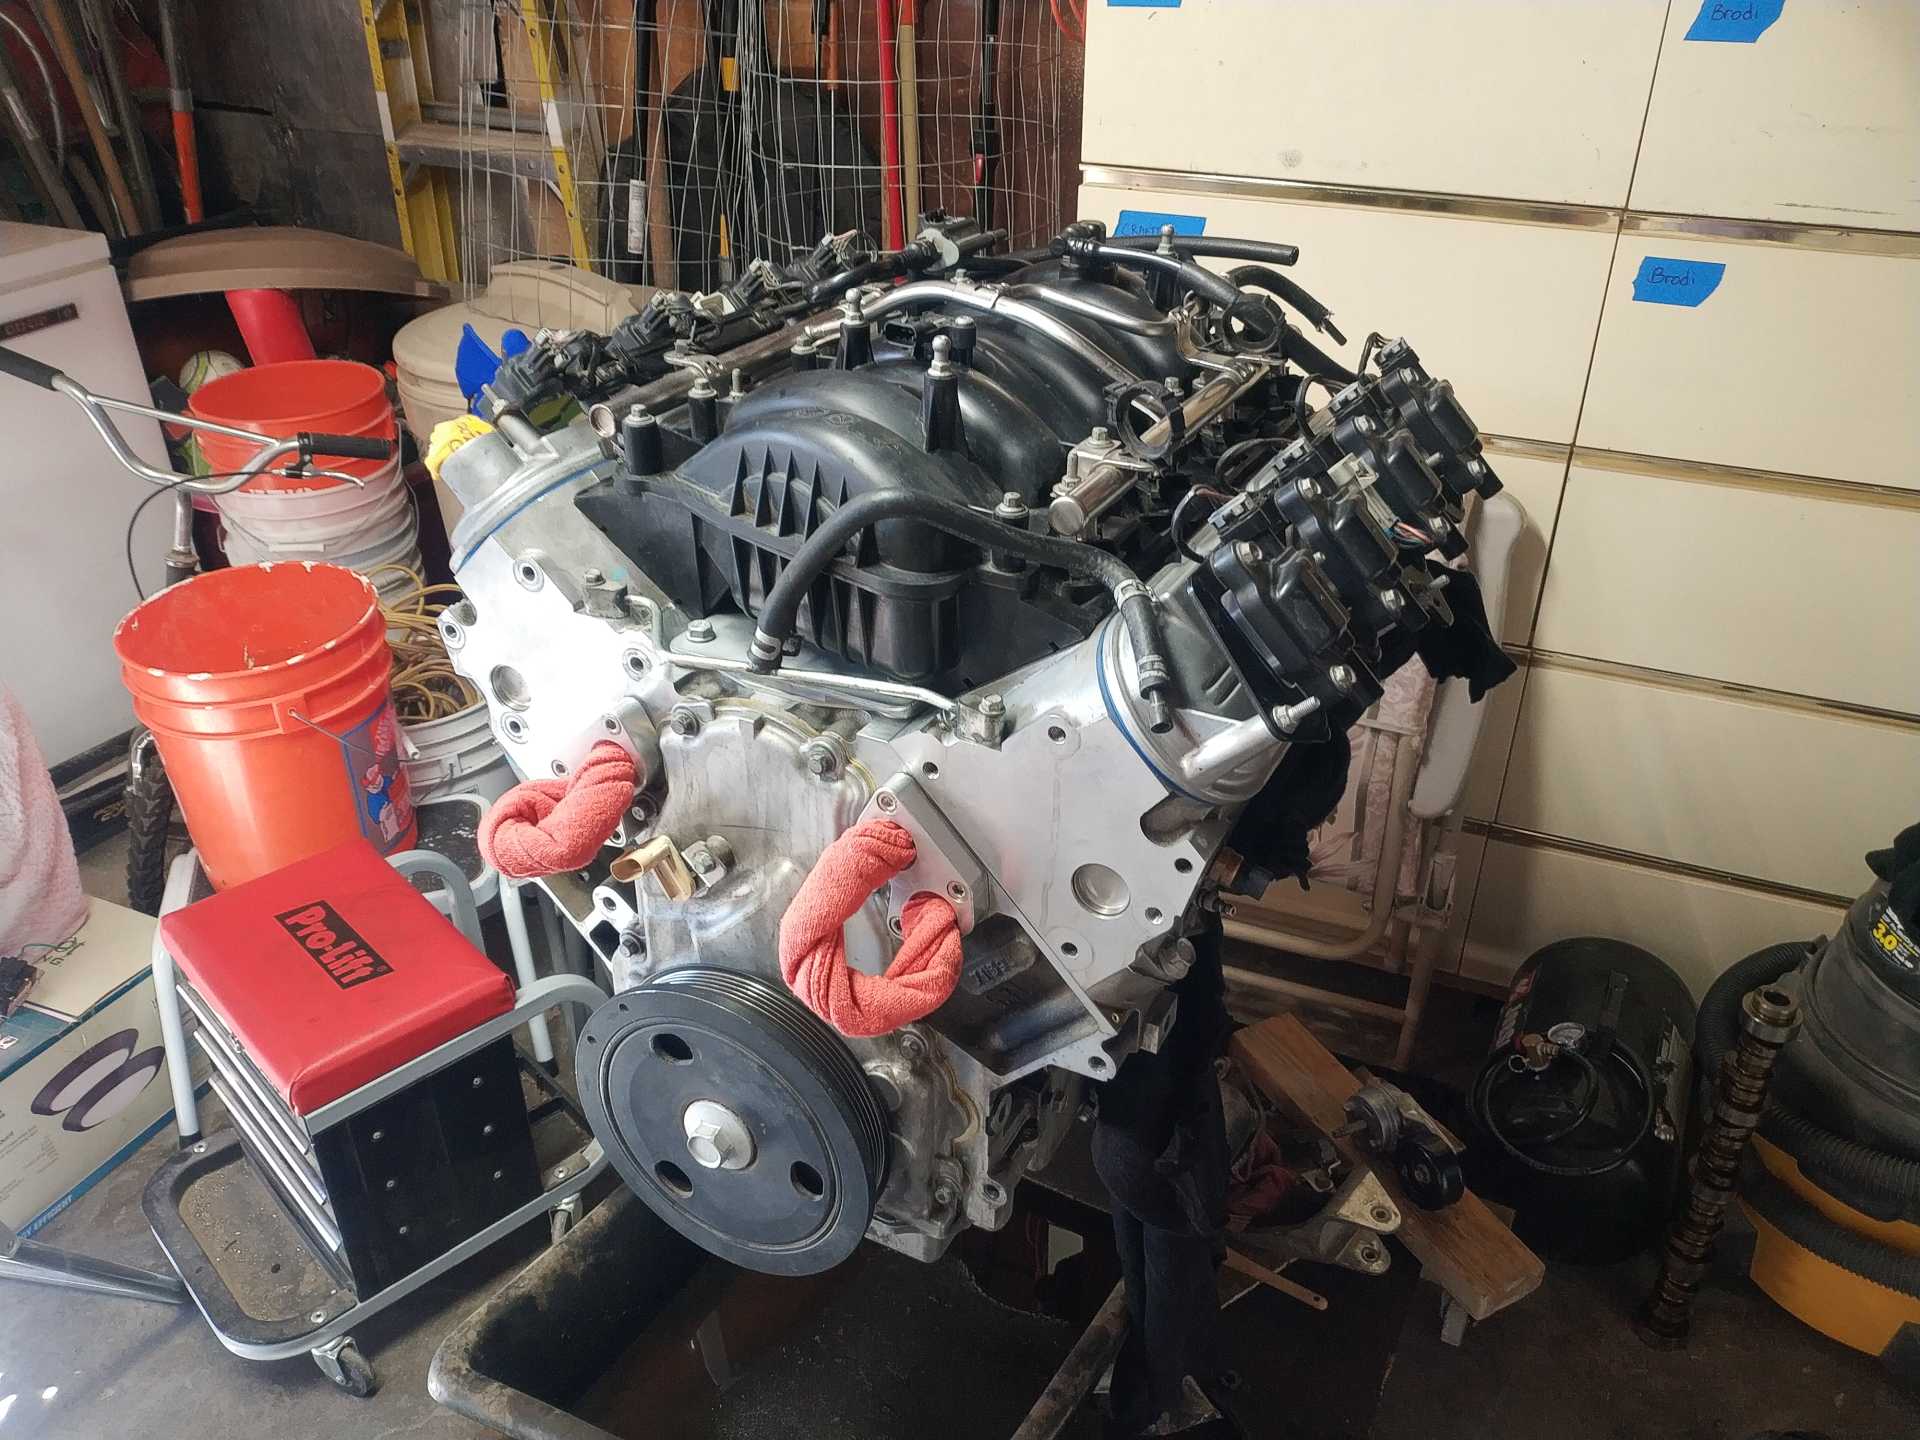
Please excuse my mess in the backgrounds lol small garage problems..
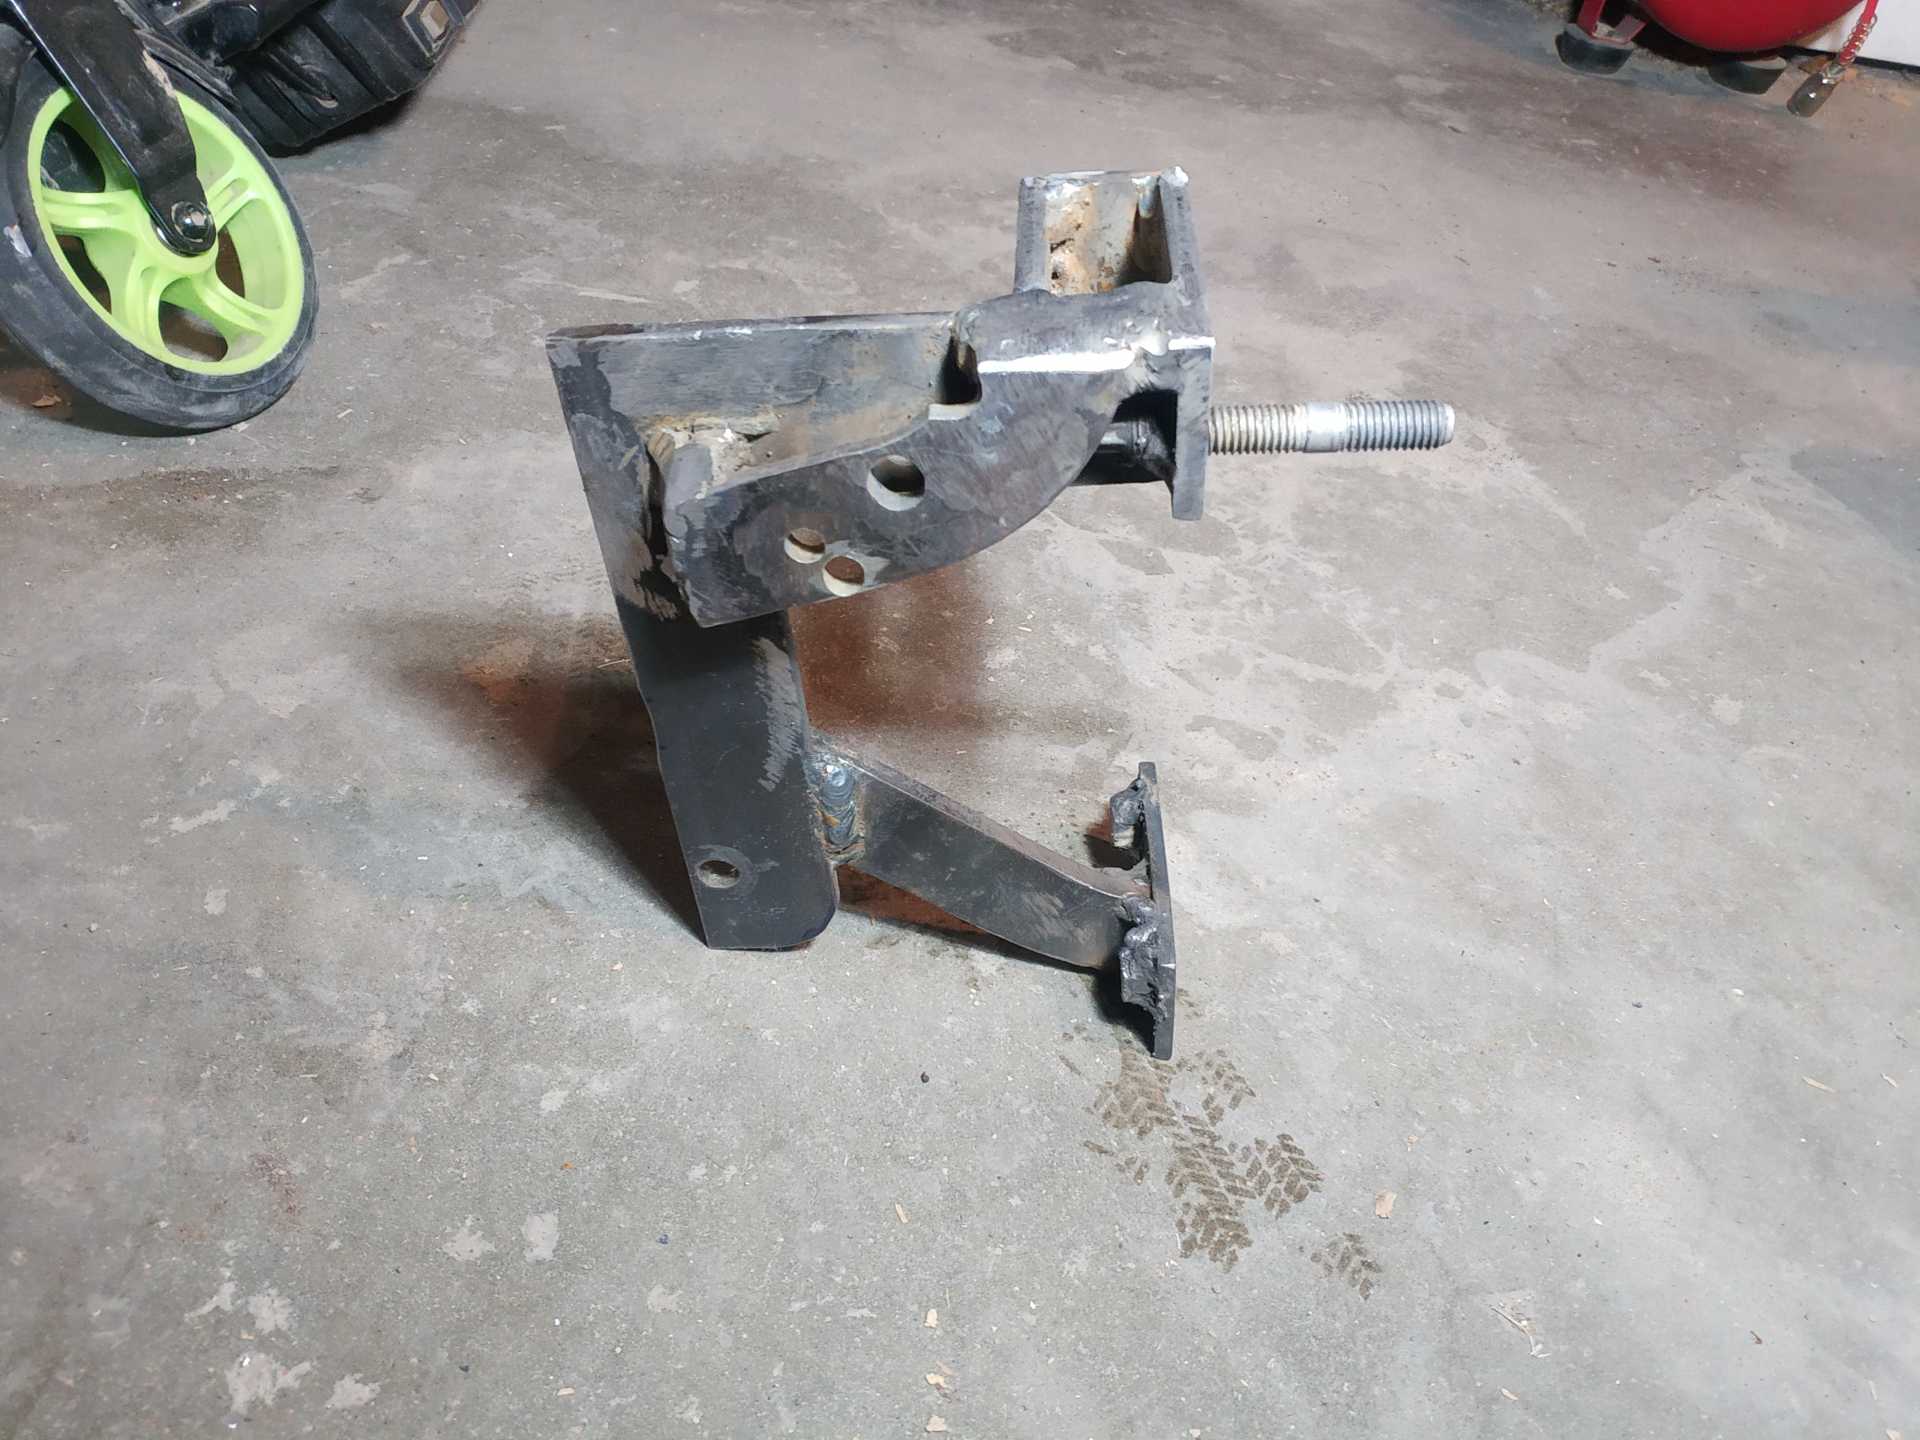
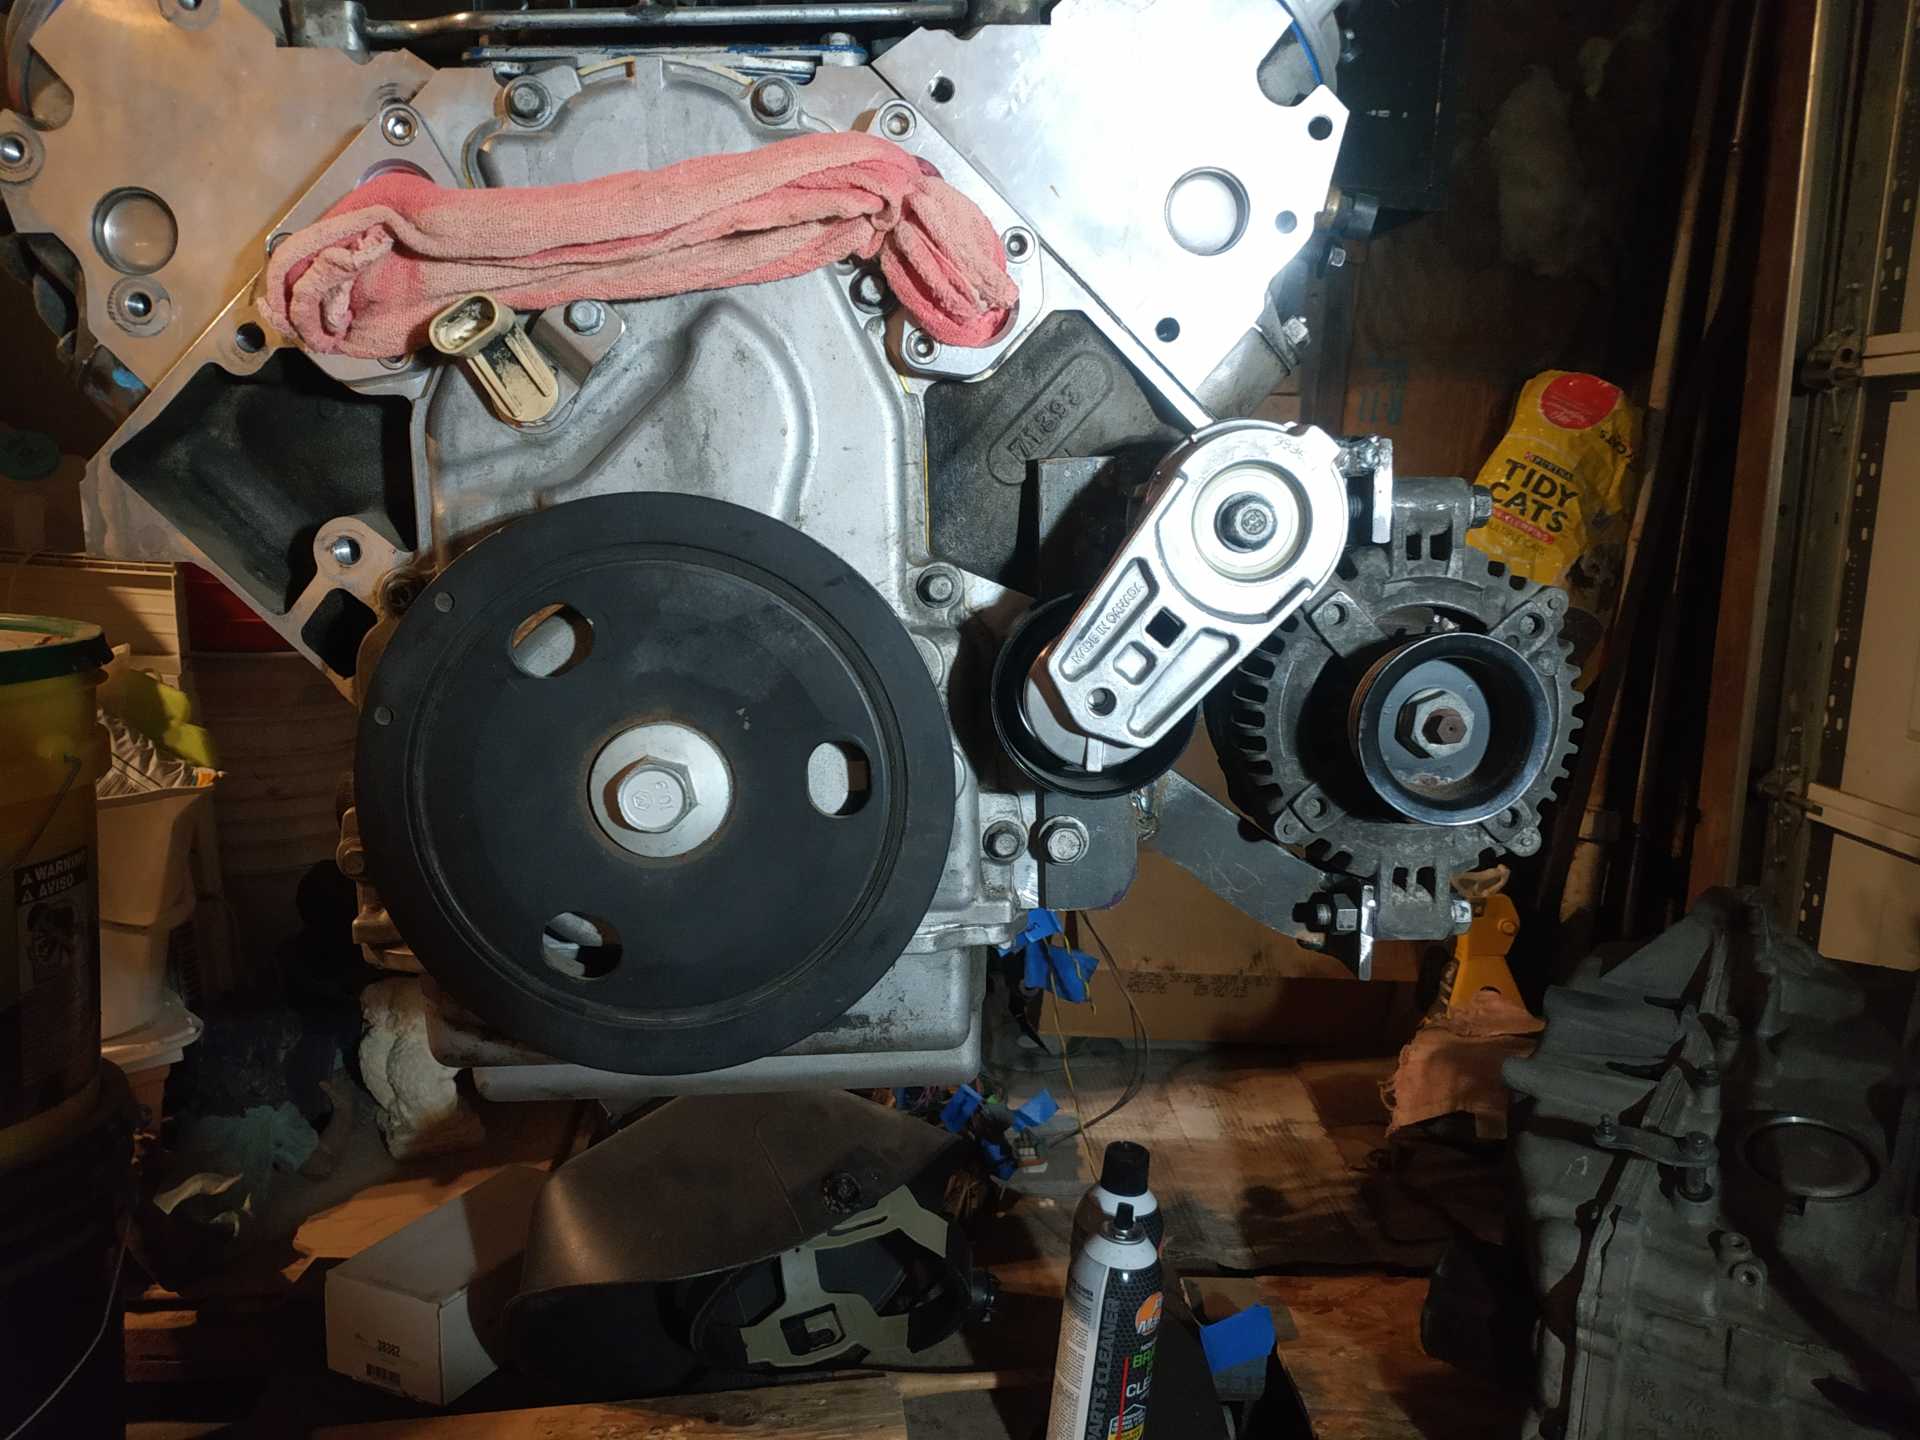
Next it was time to figure out the alternator. I'm on a pretty strict budget but I have some metal and a welder so I decided to make my own tensioner and alternator bracket. (Sorry Guru) I had to oval out one of the mounting holes on the alternator a little bit to make sure the pulley lined up well with the harmonic ballancer. One bolt mounting the alternator on is going to go through my bracket and into the block.
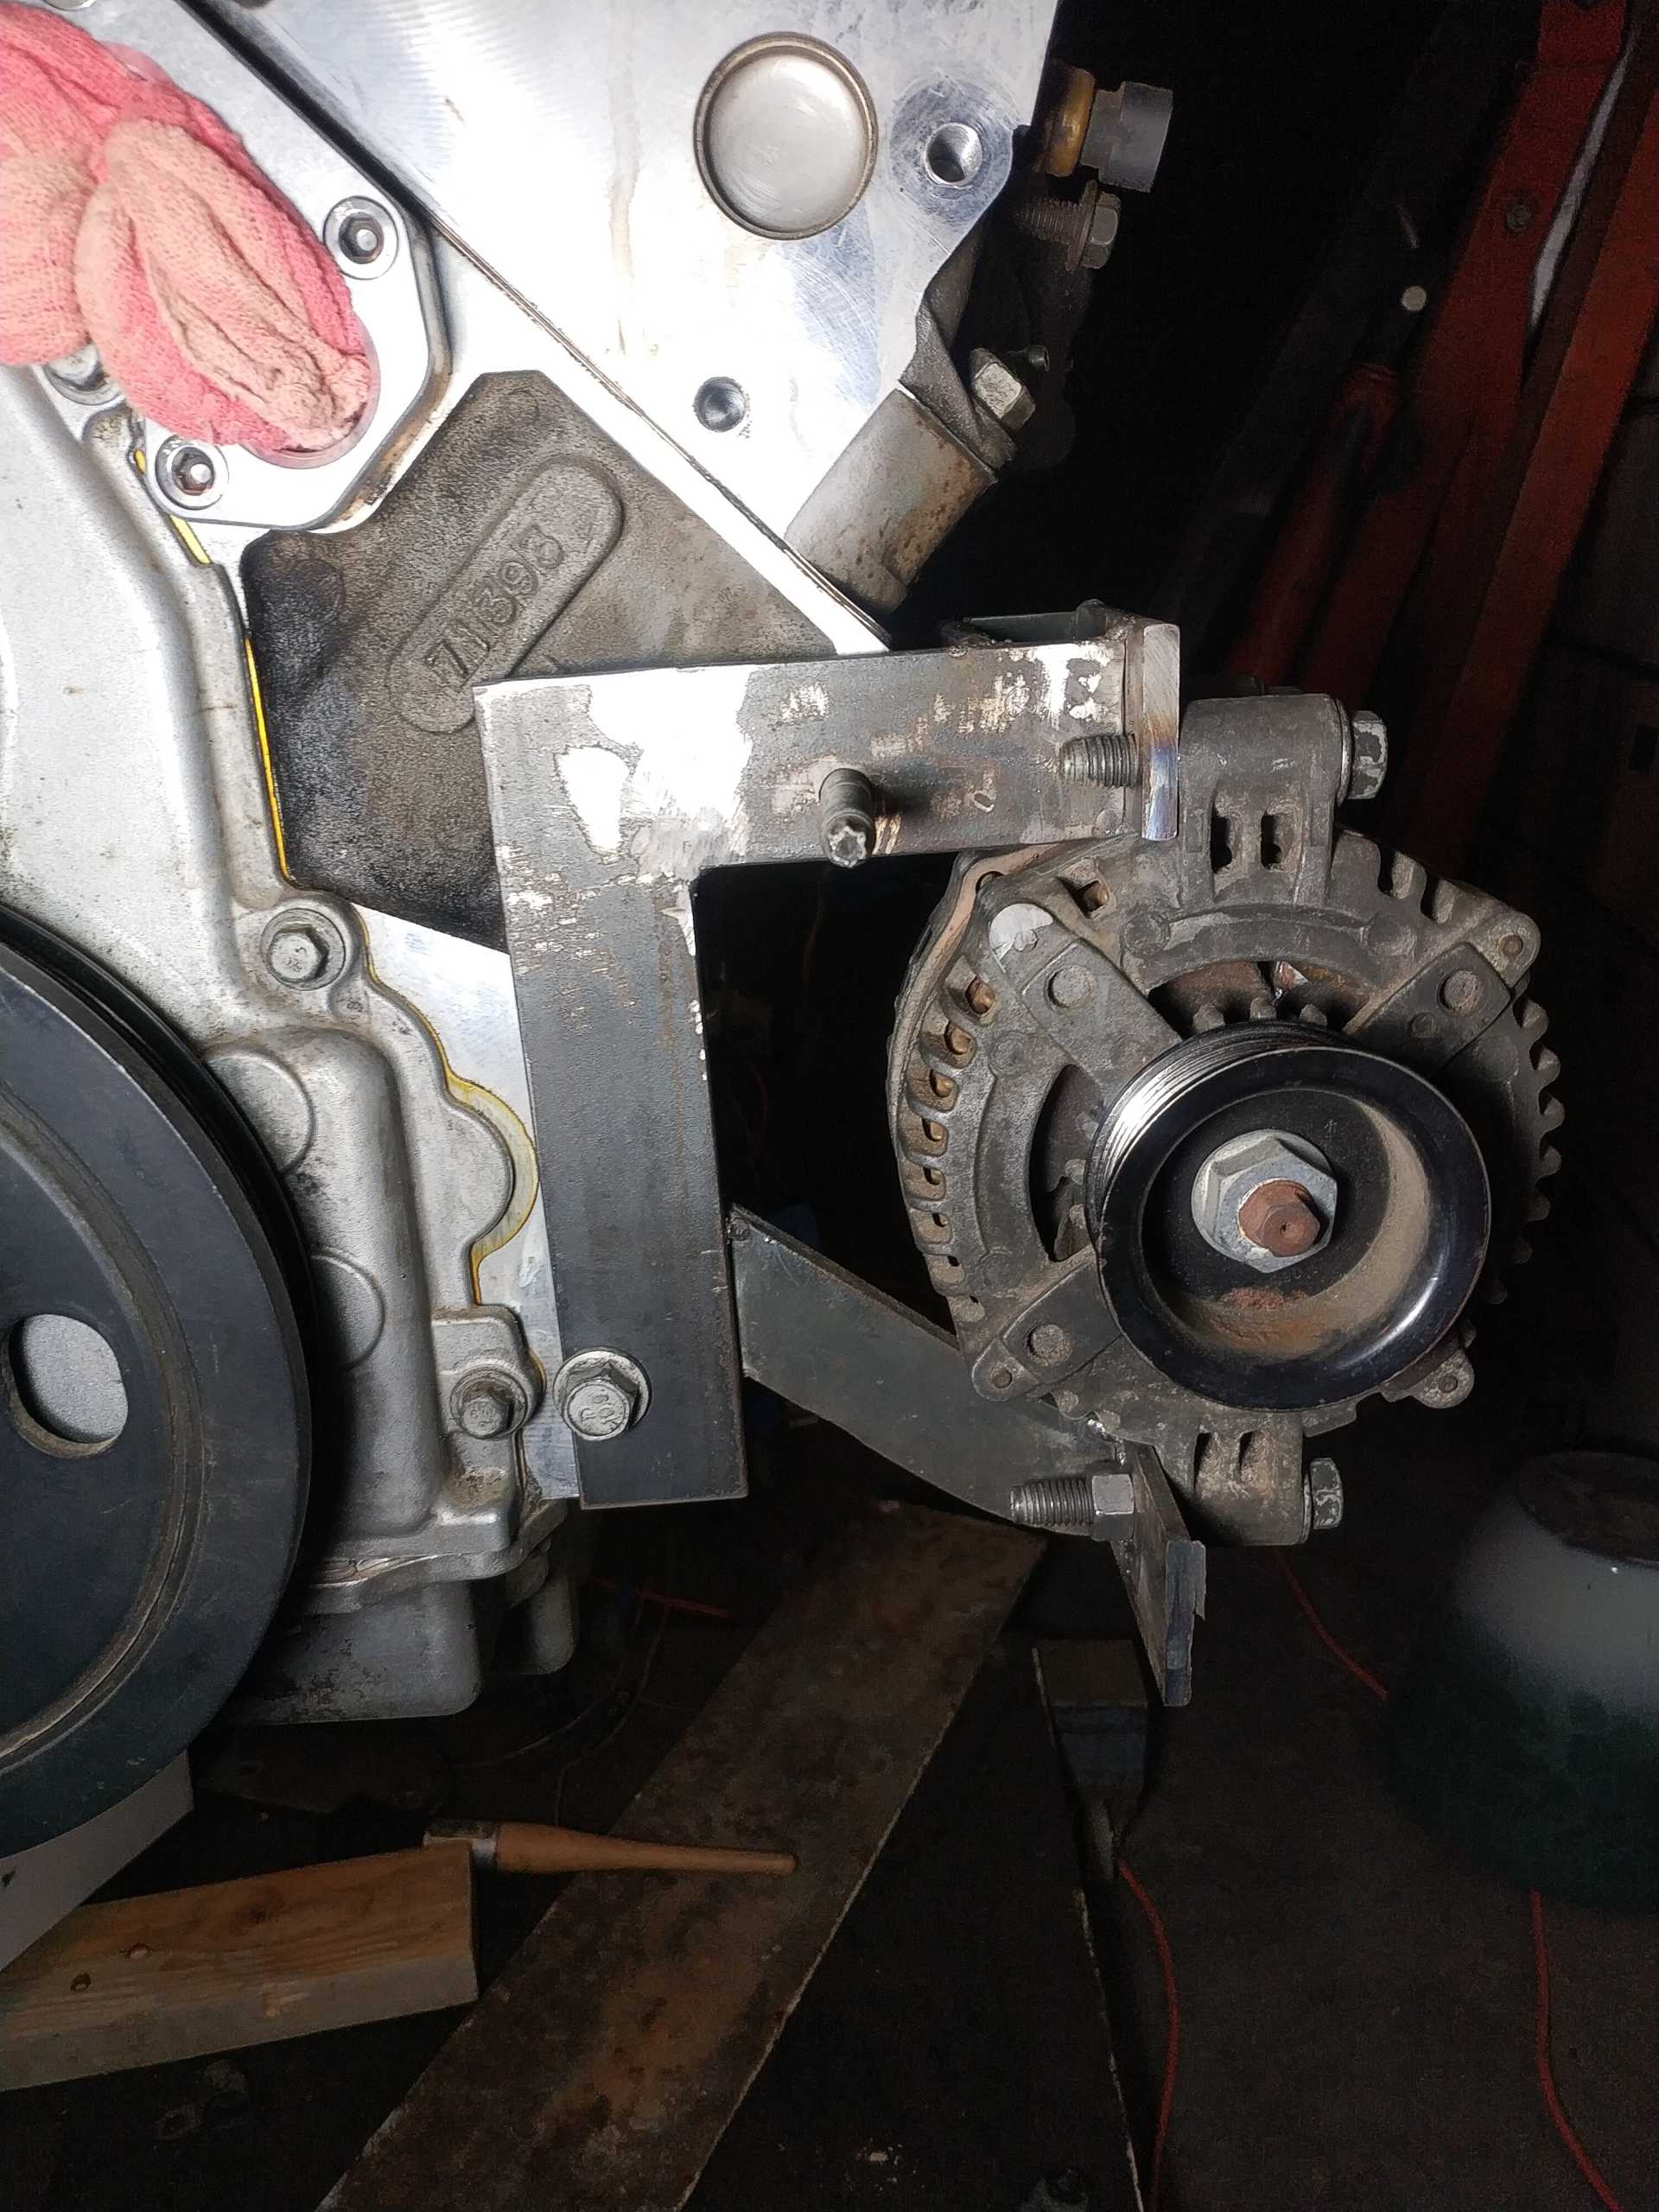
It was slightly off so i cut it apart and redid it lol I don't want to be constantly tearing up belts. The tensioner is a Gates 38382. It comes with a 7-rib grooved pulley so I used a Gates 38006 smooth pulley. I finally came up with this gem lol.

|
|

|
lsfiero
|
SEP 05, 03:46 PM
|
|
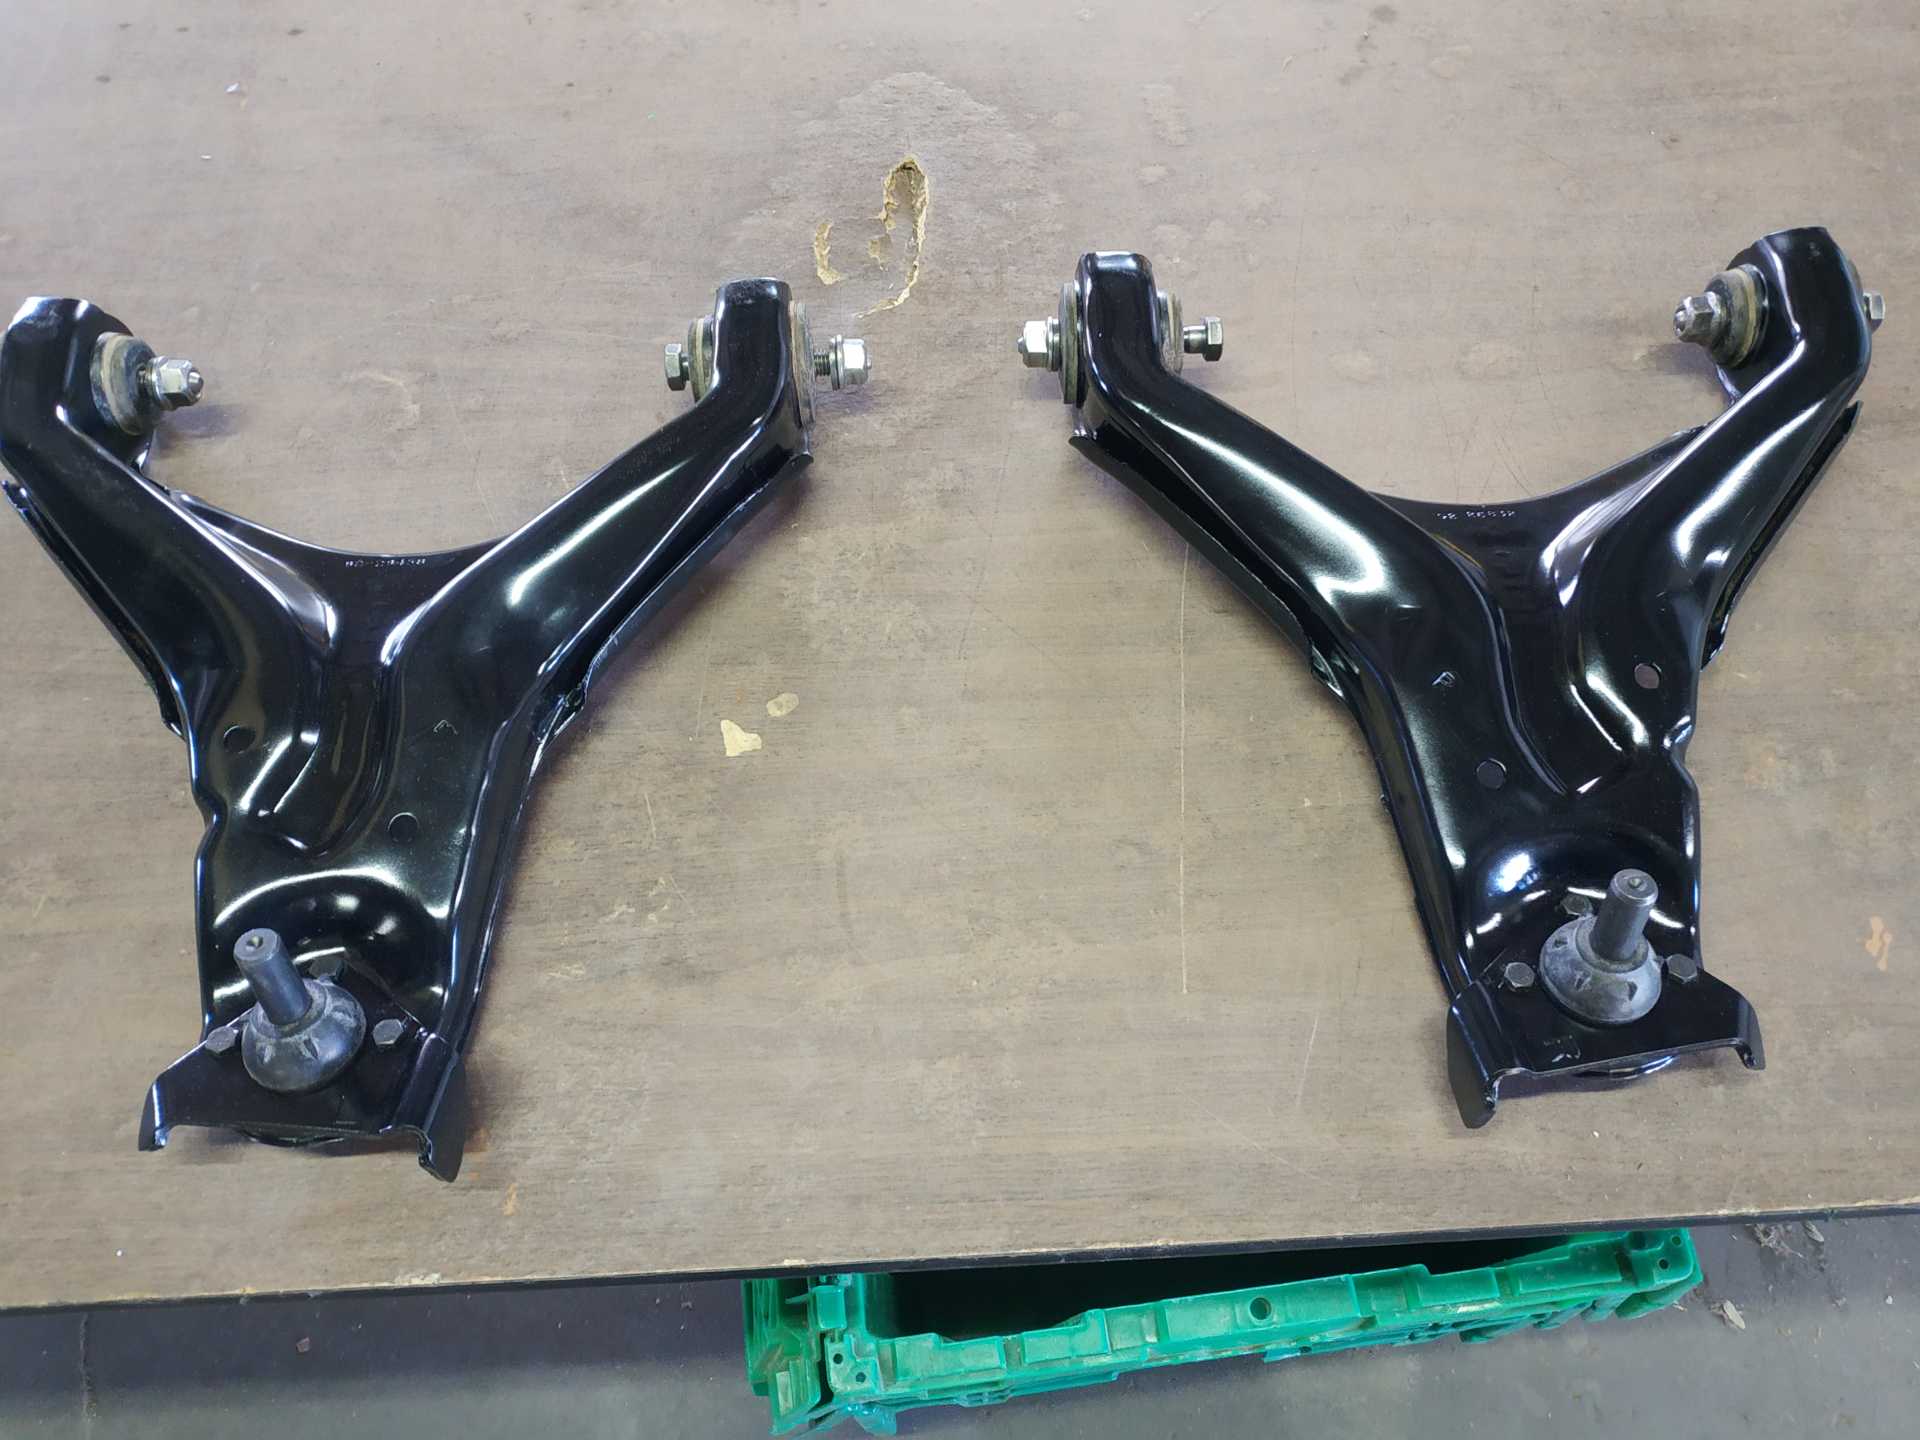
Over last winter the rear end of the car was taken apart and the pieces were restored/rebuilt. I took them with me to work and worked on them on my lunches and stayed after quite a few times to get this done.
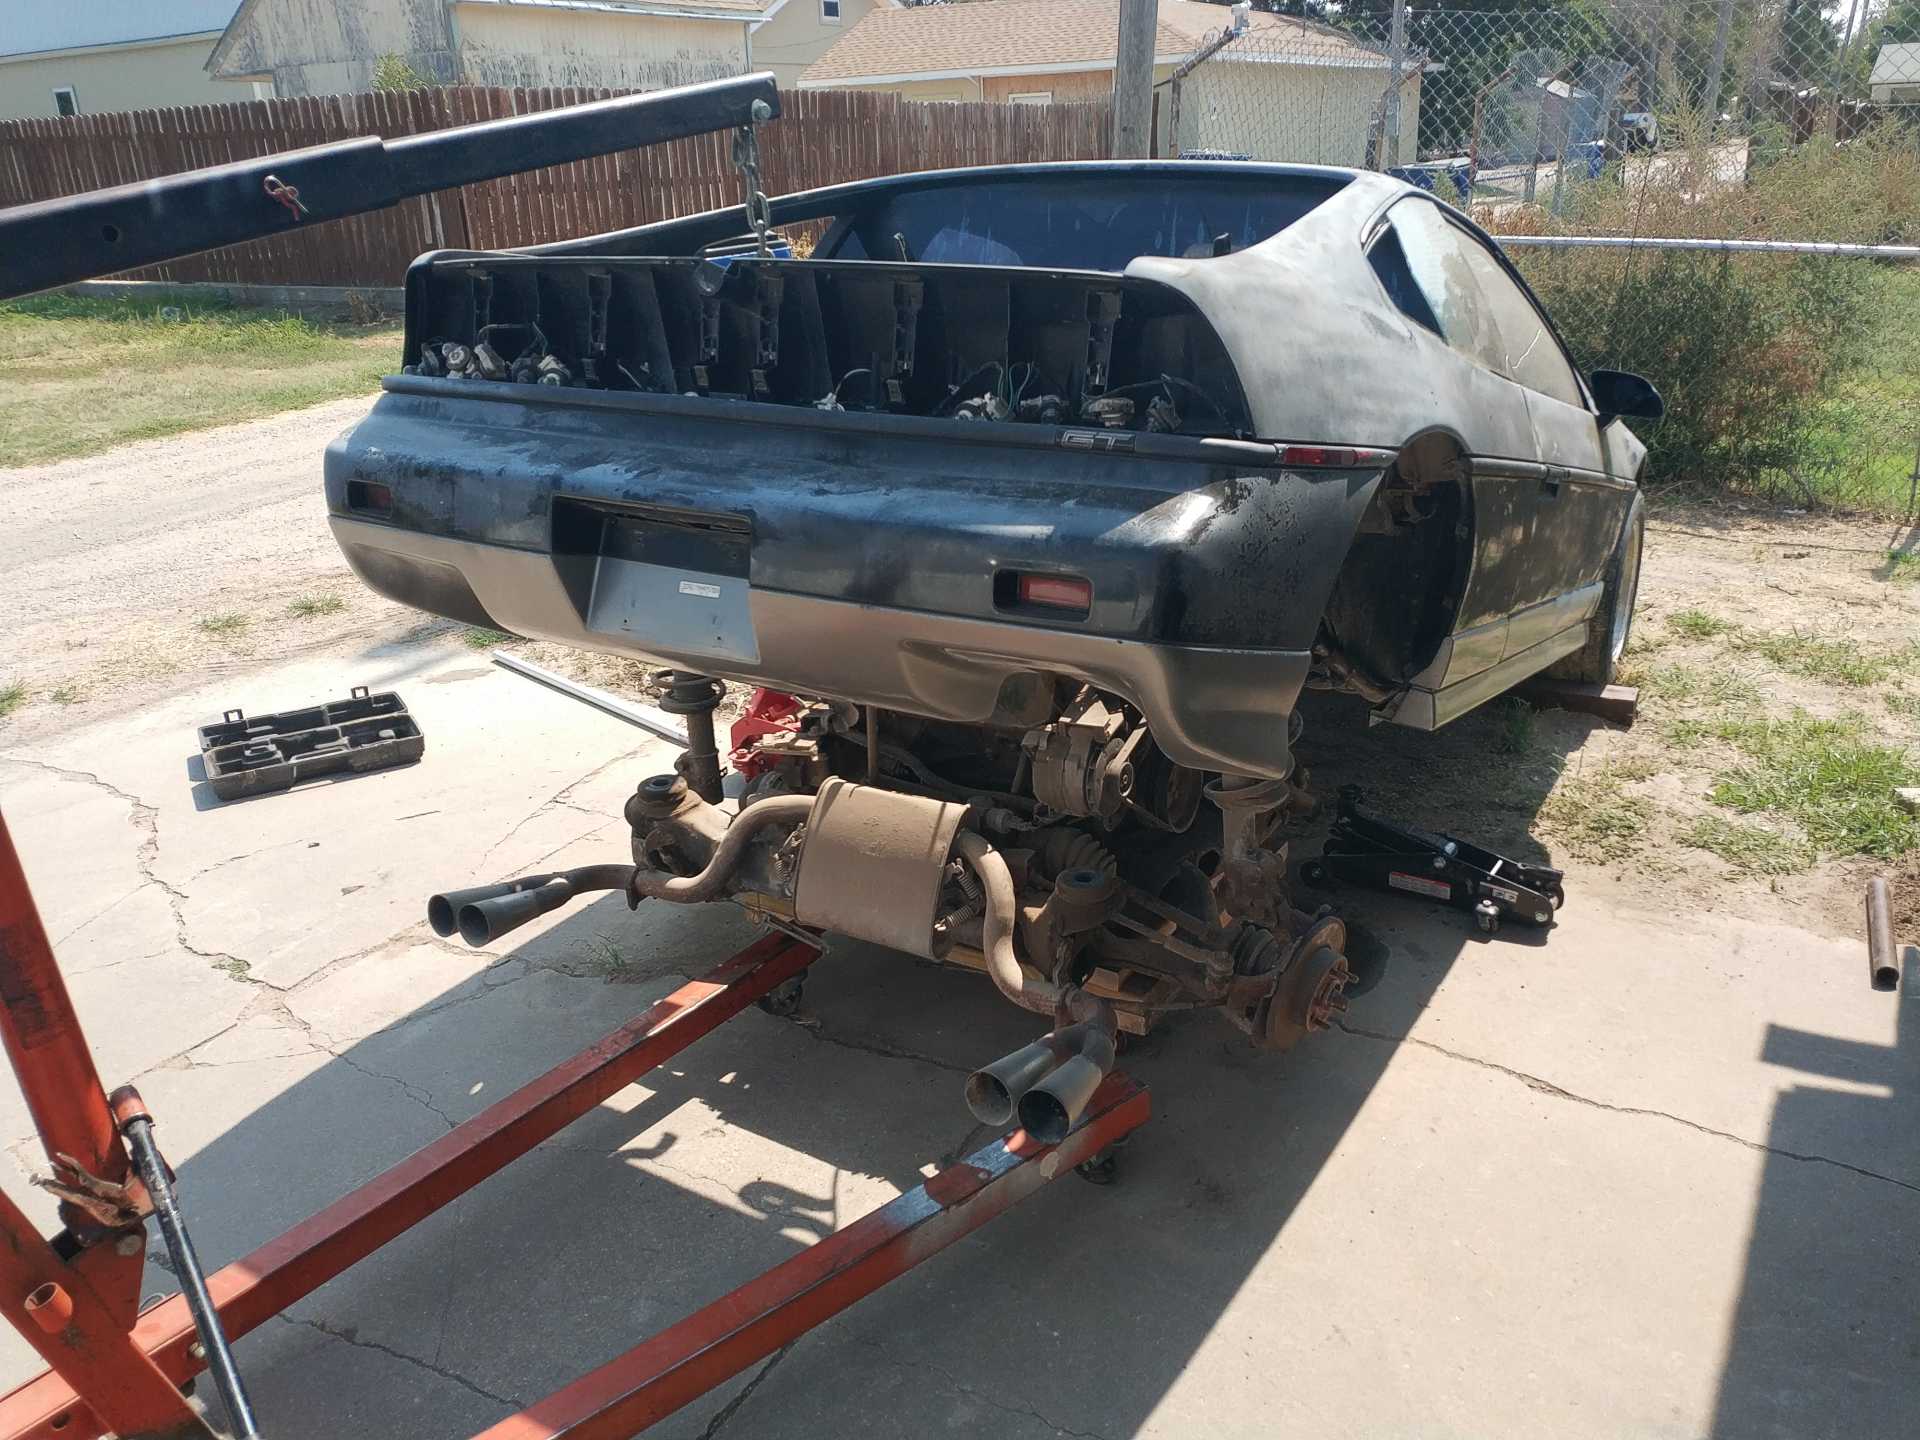
I used the trunk latch to lift the car even though it is sketchy. The legs of the cherry picker stuck out to far to get any closer to the engine cart i built.
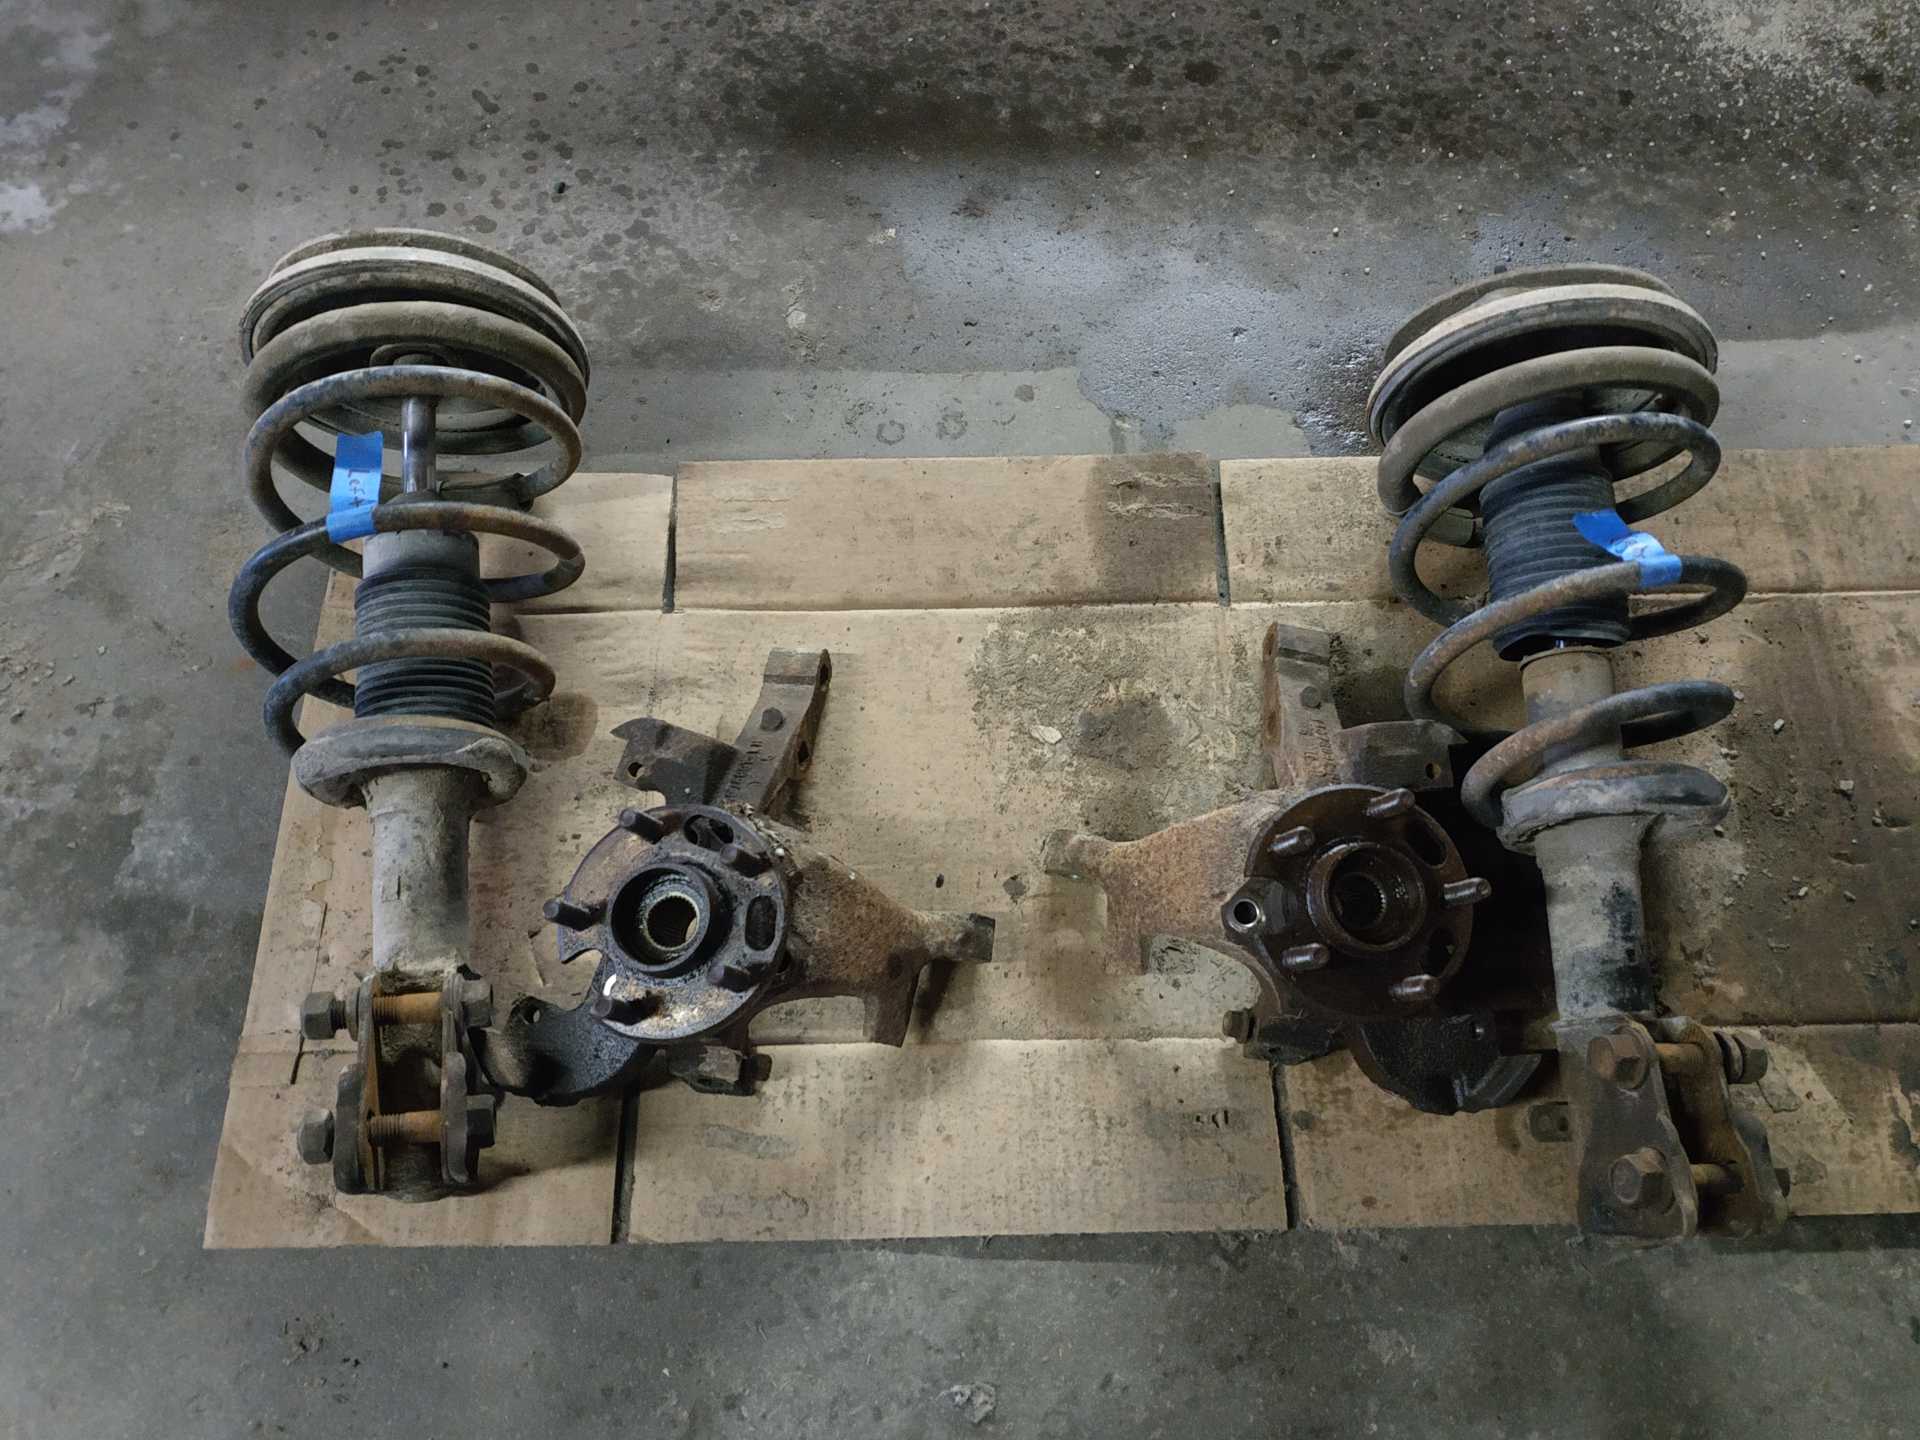
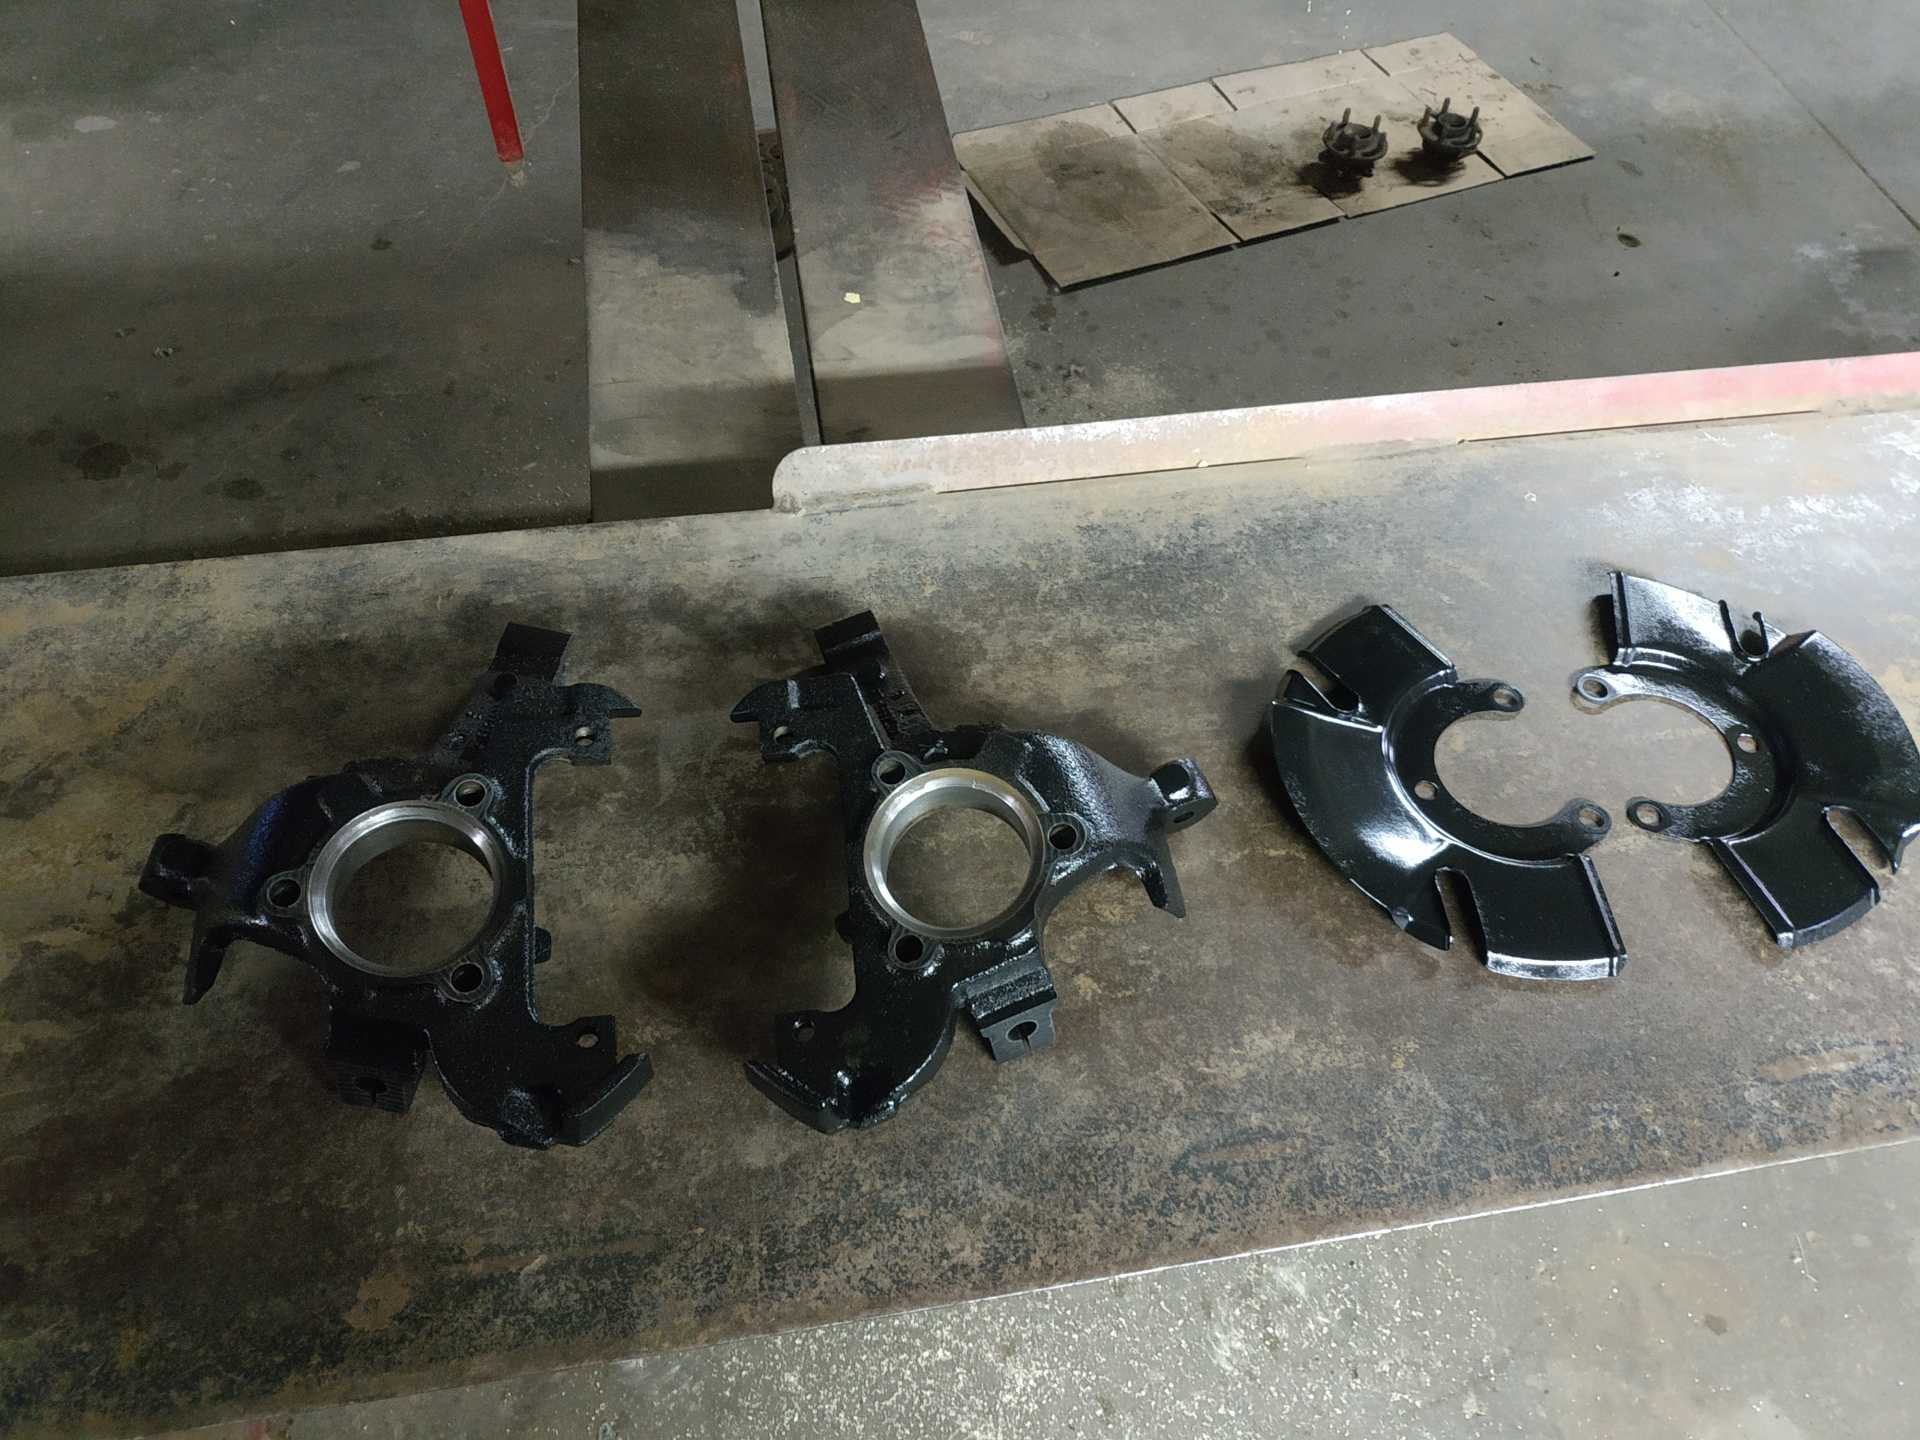
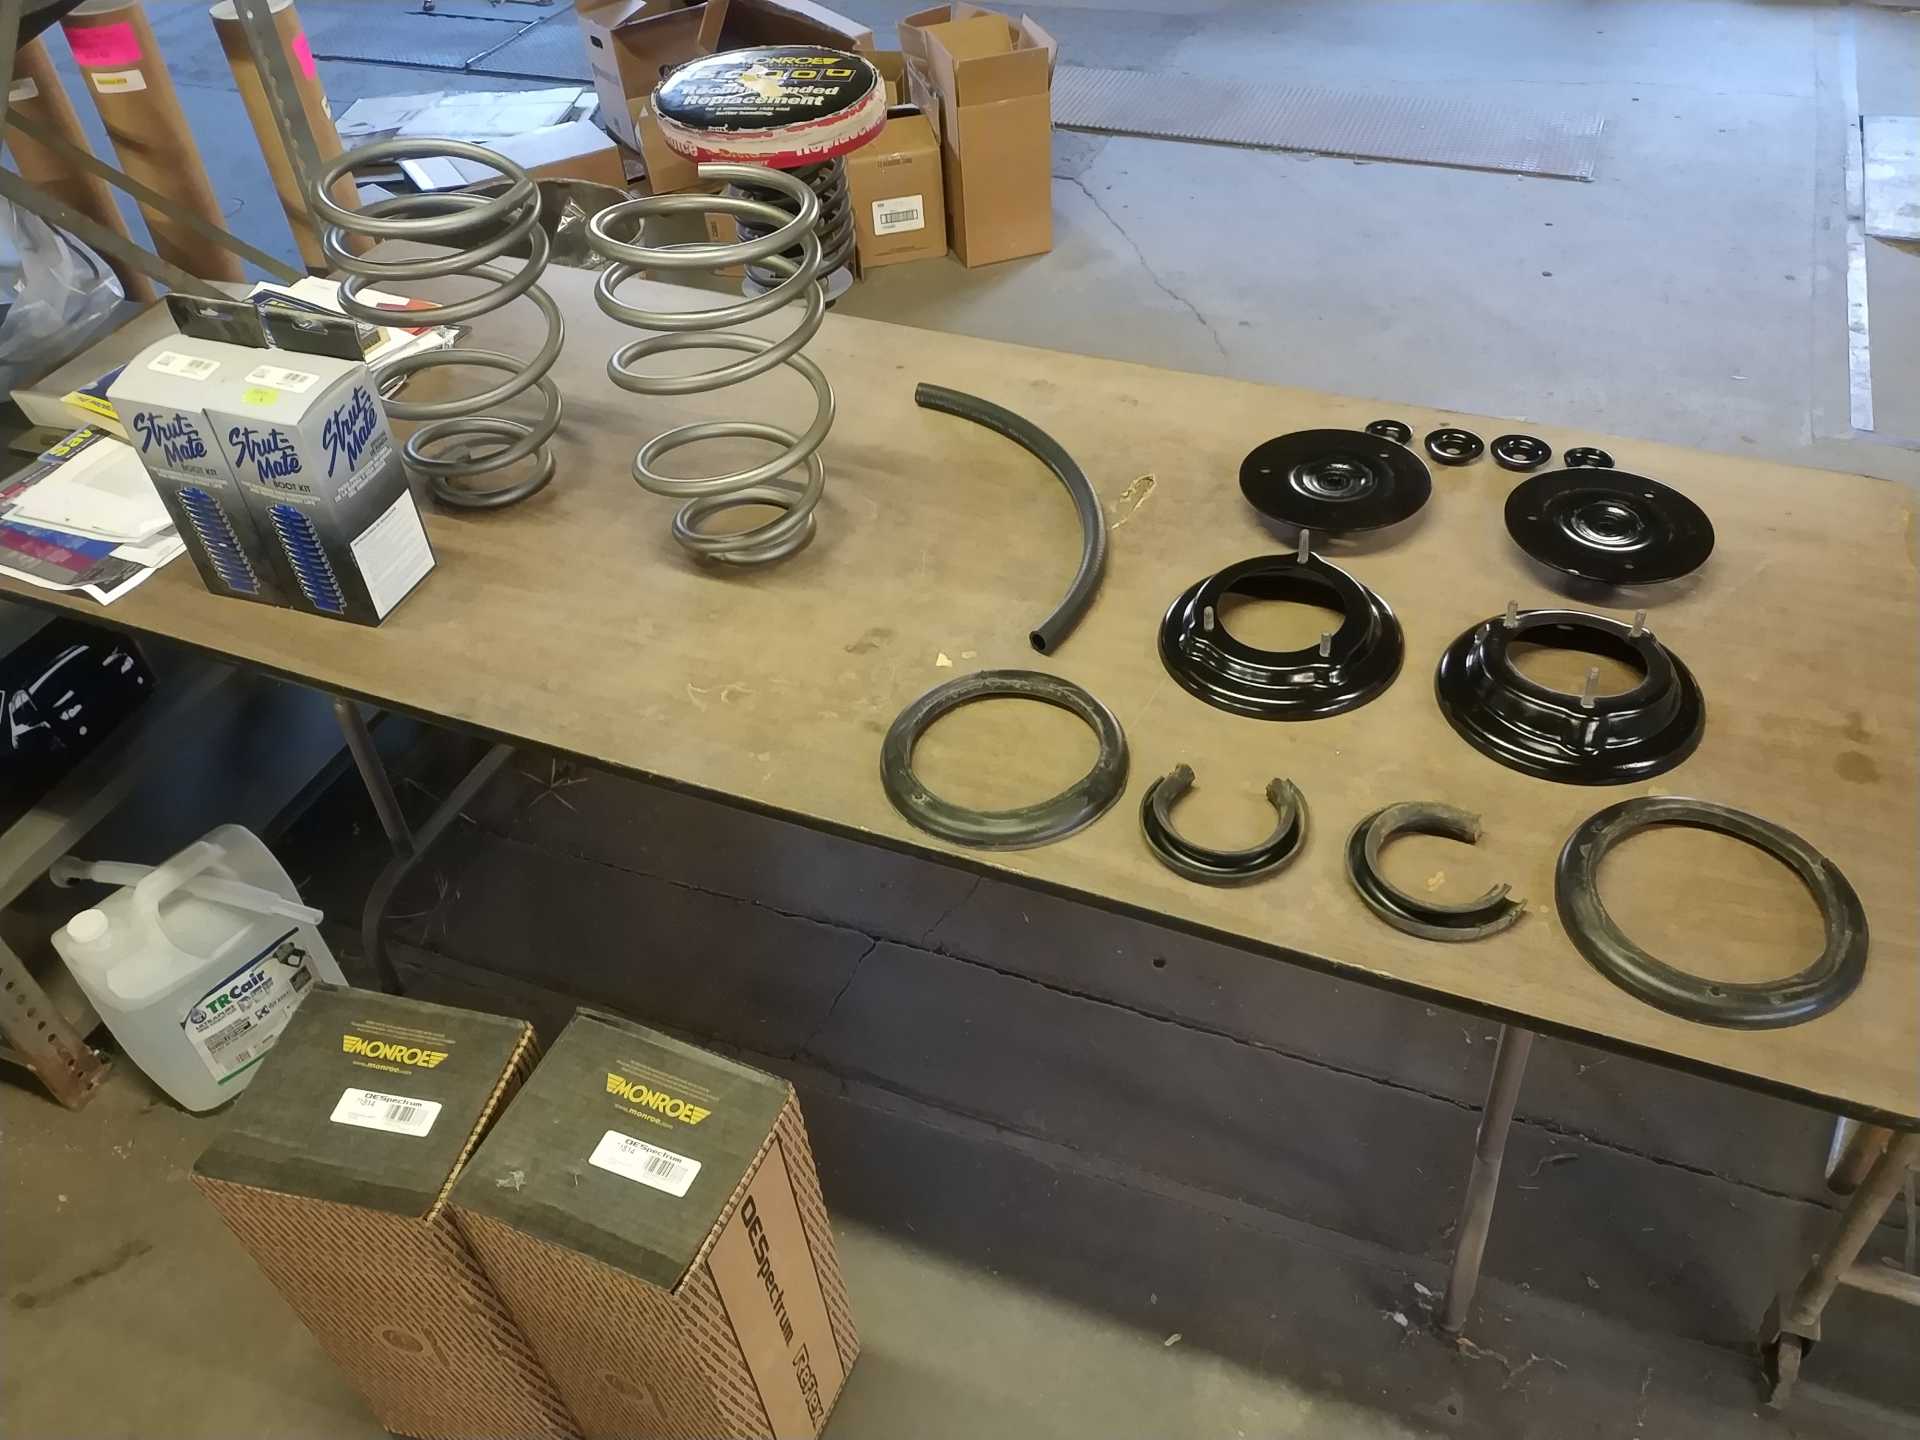
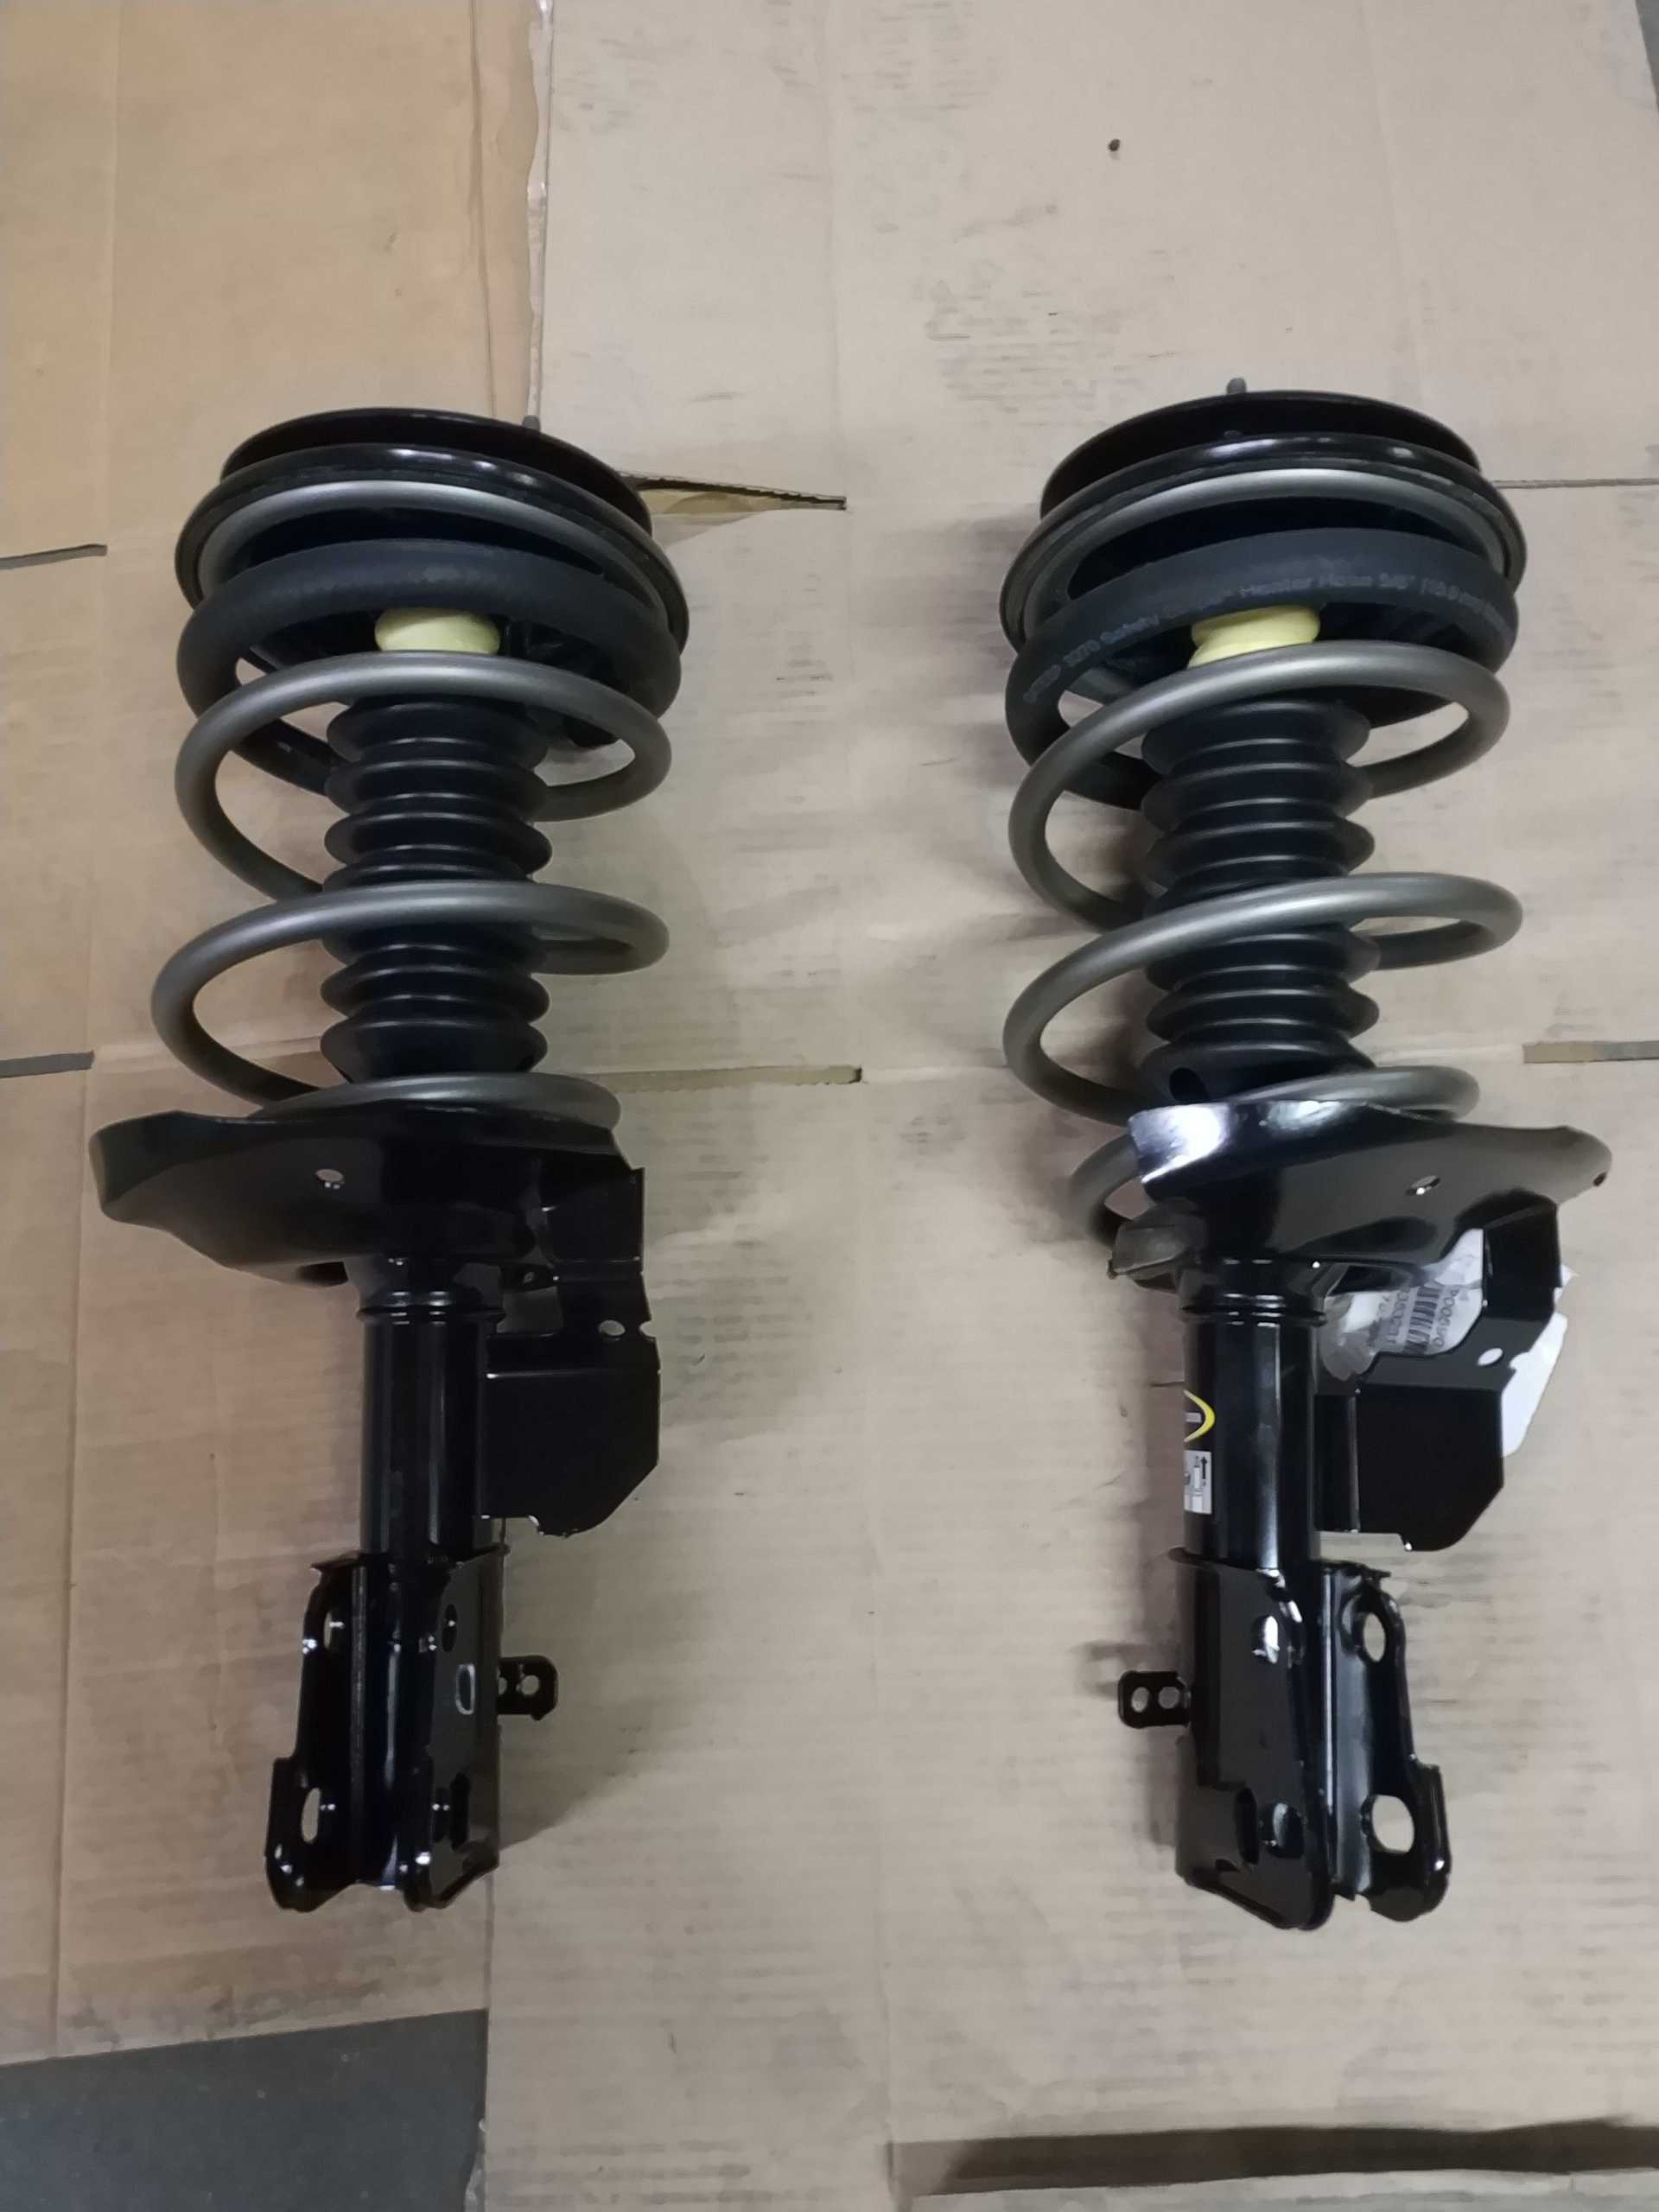
In my opinion, rebuilding the struts is more sketchy than lifting the car by the trunk latch. I had jacks to stop/slow the car from falling on me, if it would have, but there's no stopping a strut that wants to come apart if something fails. Thankfully nothing bad happened.
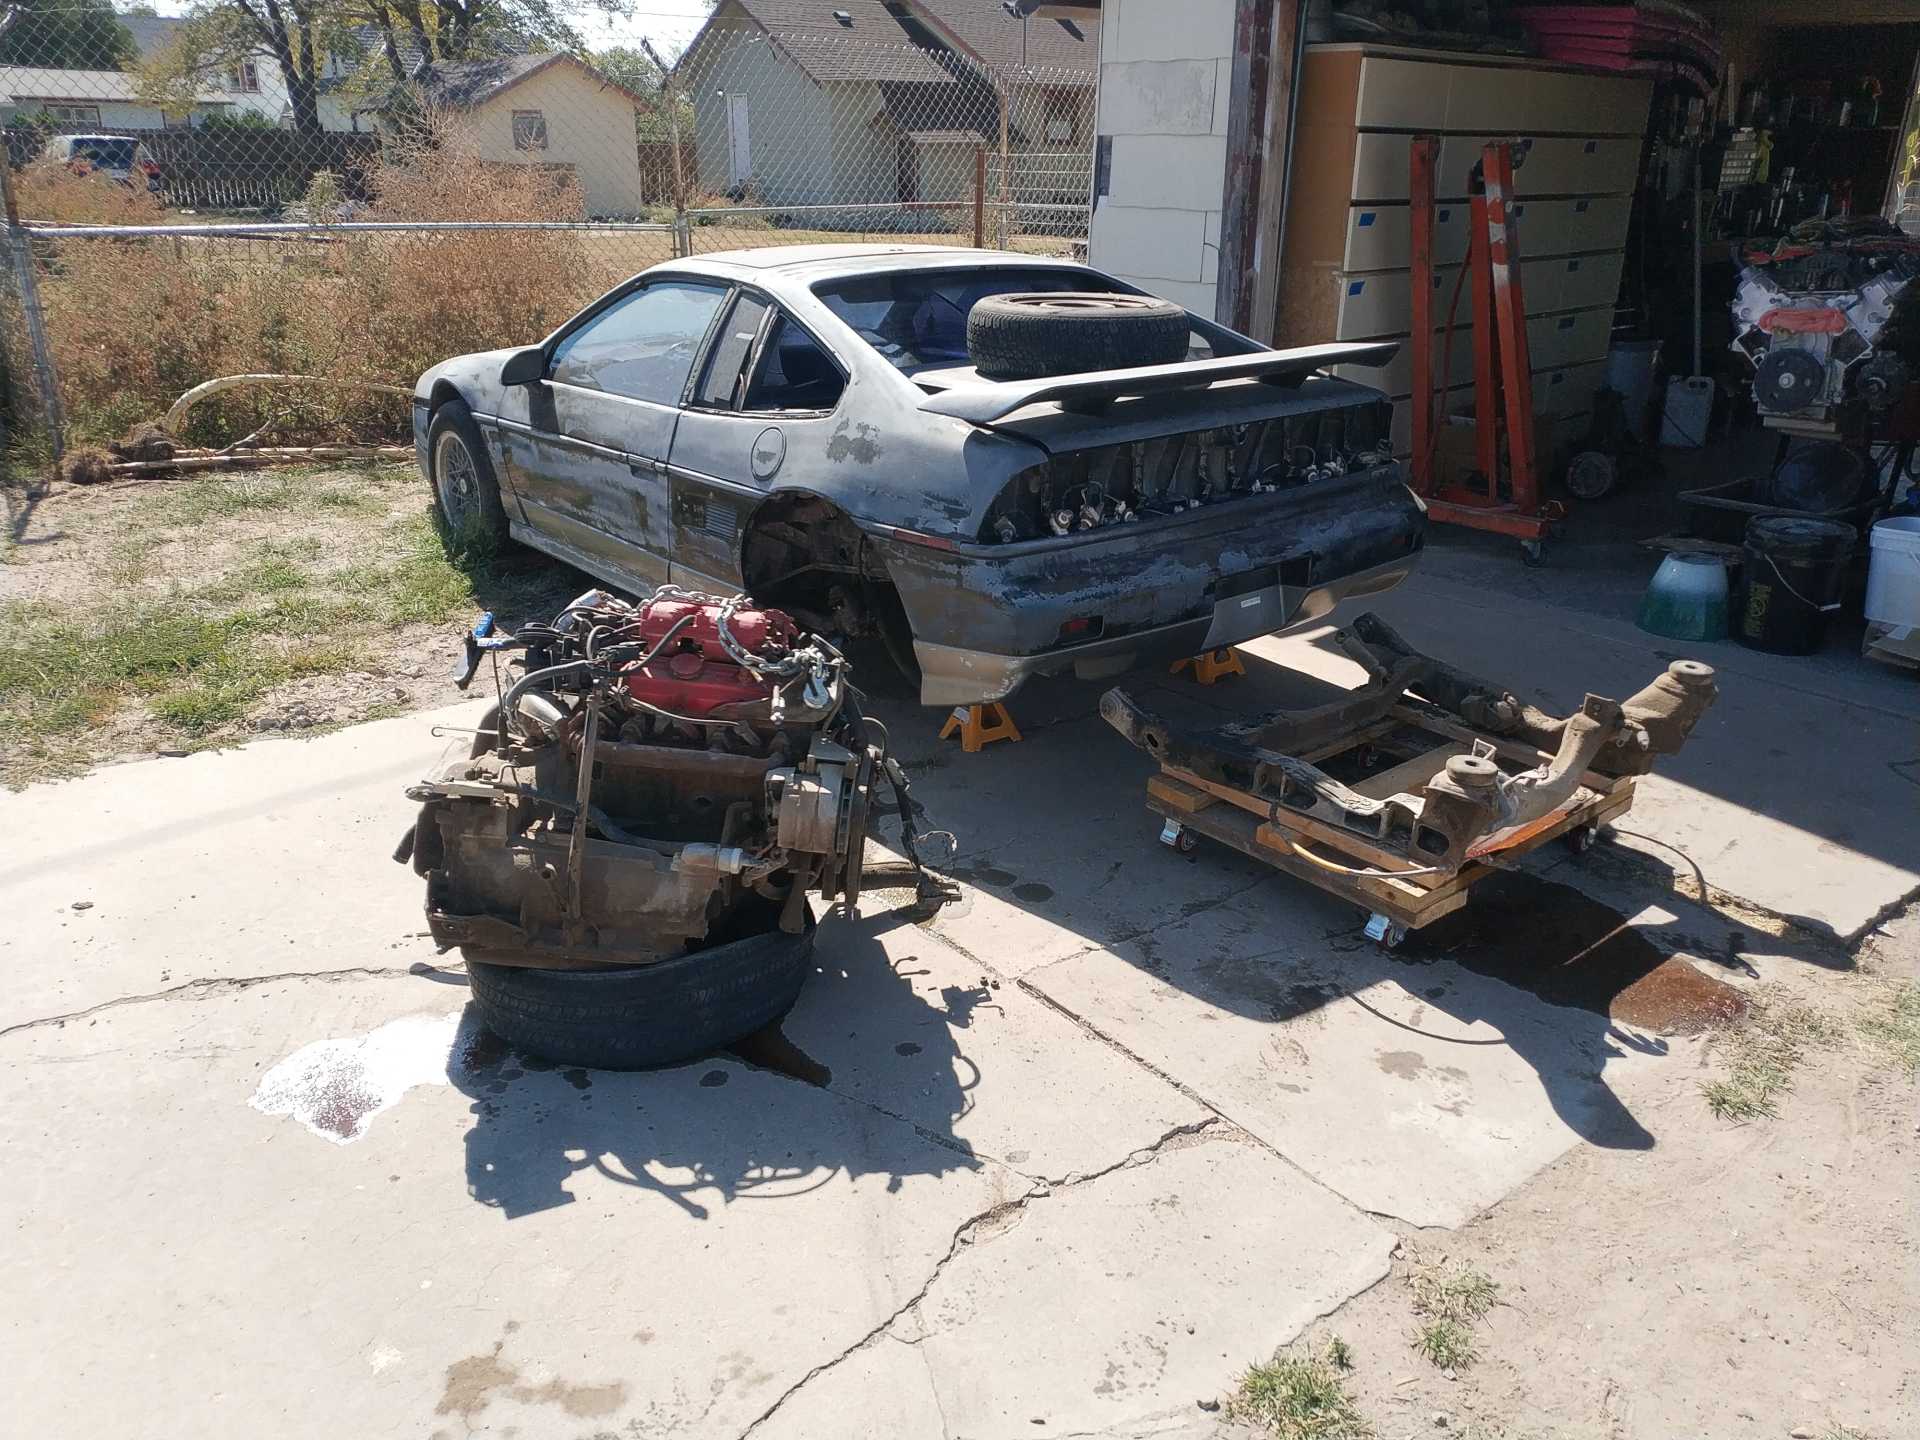
I wanted to make sure the new engine was going to sit on the cradle properly so I made the decision to buy a kit through West Coast Fiero. This made things soo much easier and sped the process up since I didn't have to build the mounts myself and worry about alignment. The battery tray and dogbone mount were removed. The passenger decklid mount was also modified. I welded the mount at the top and cut out a good sized square to make room for the coil pack. I made a water pump mount out of sheet metal and opened up enough of an area where the battery use to be. The water pump is a Meziere WP116S and will go behind the passenger quarter panel.
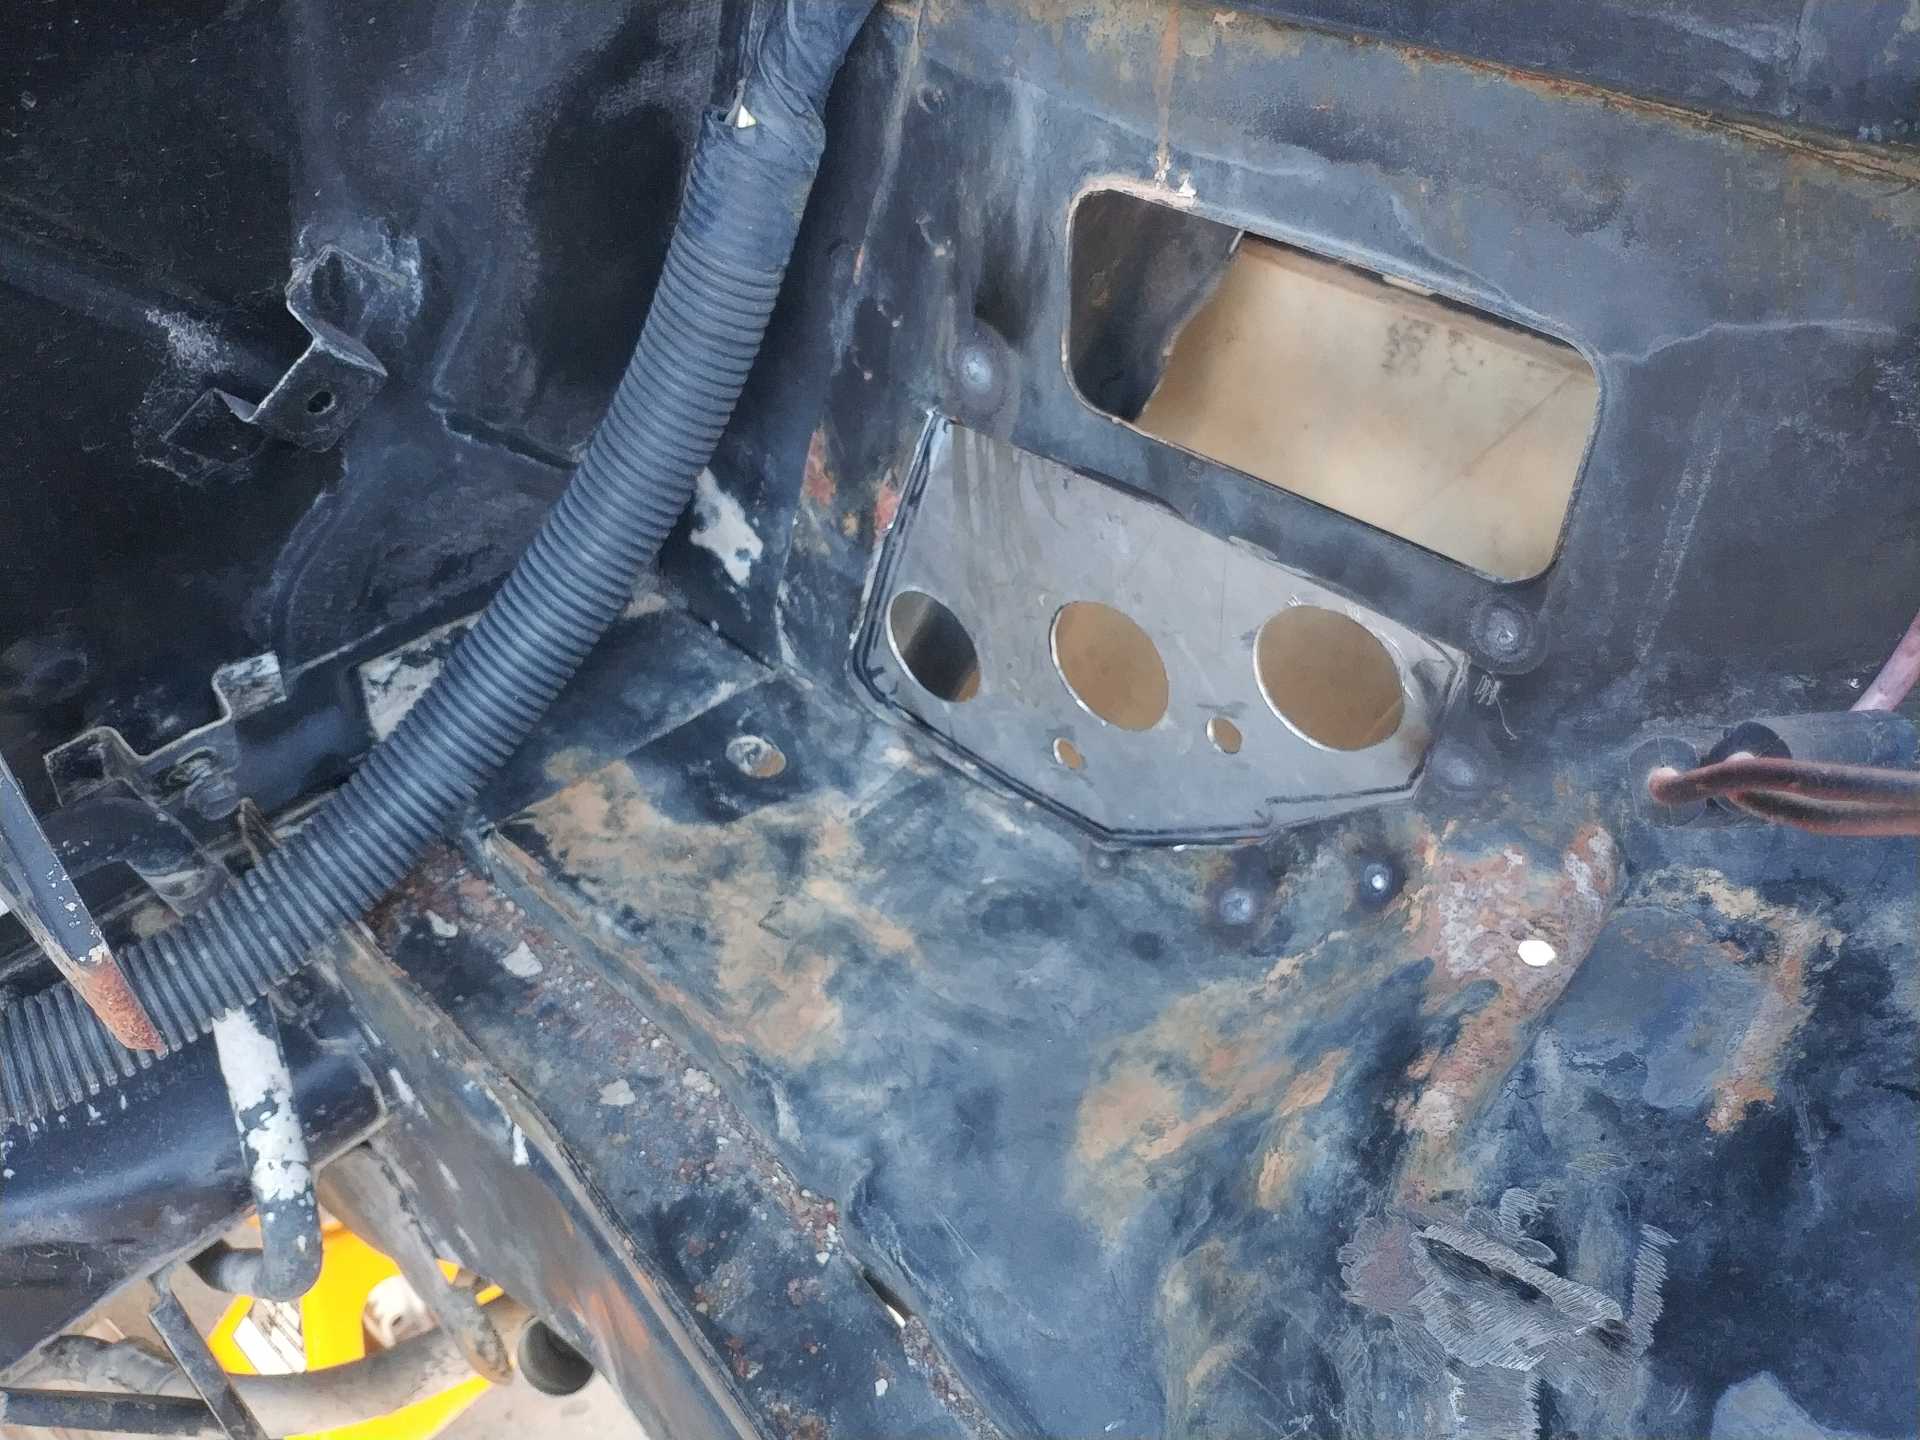
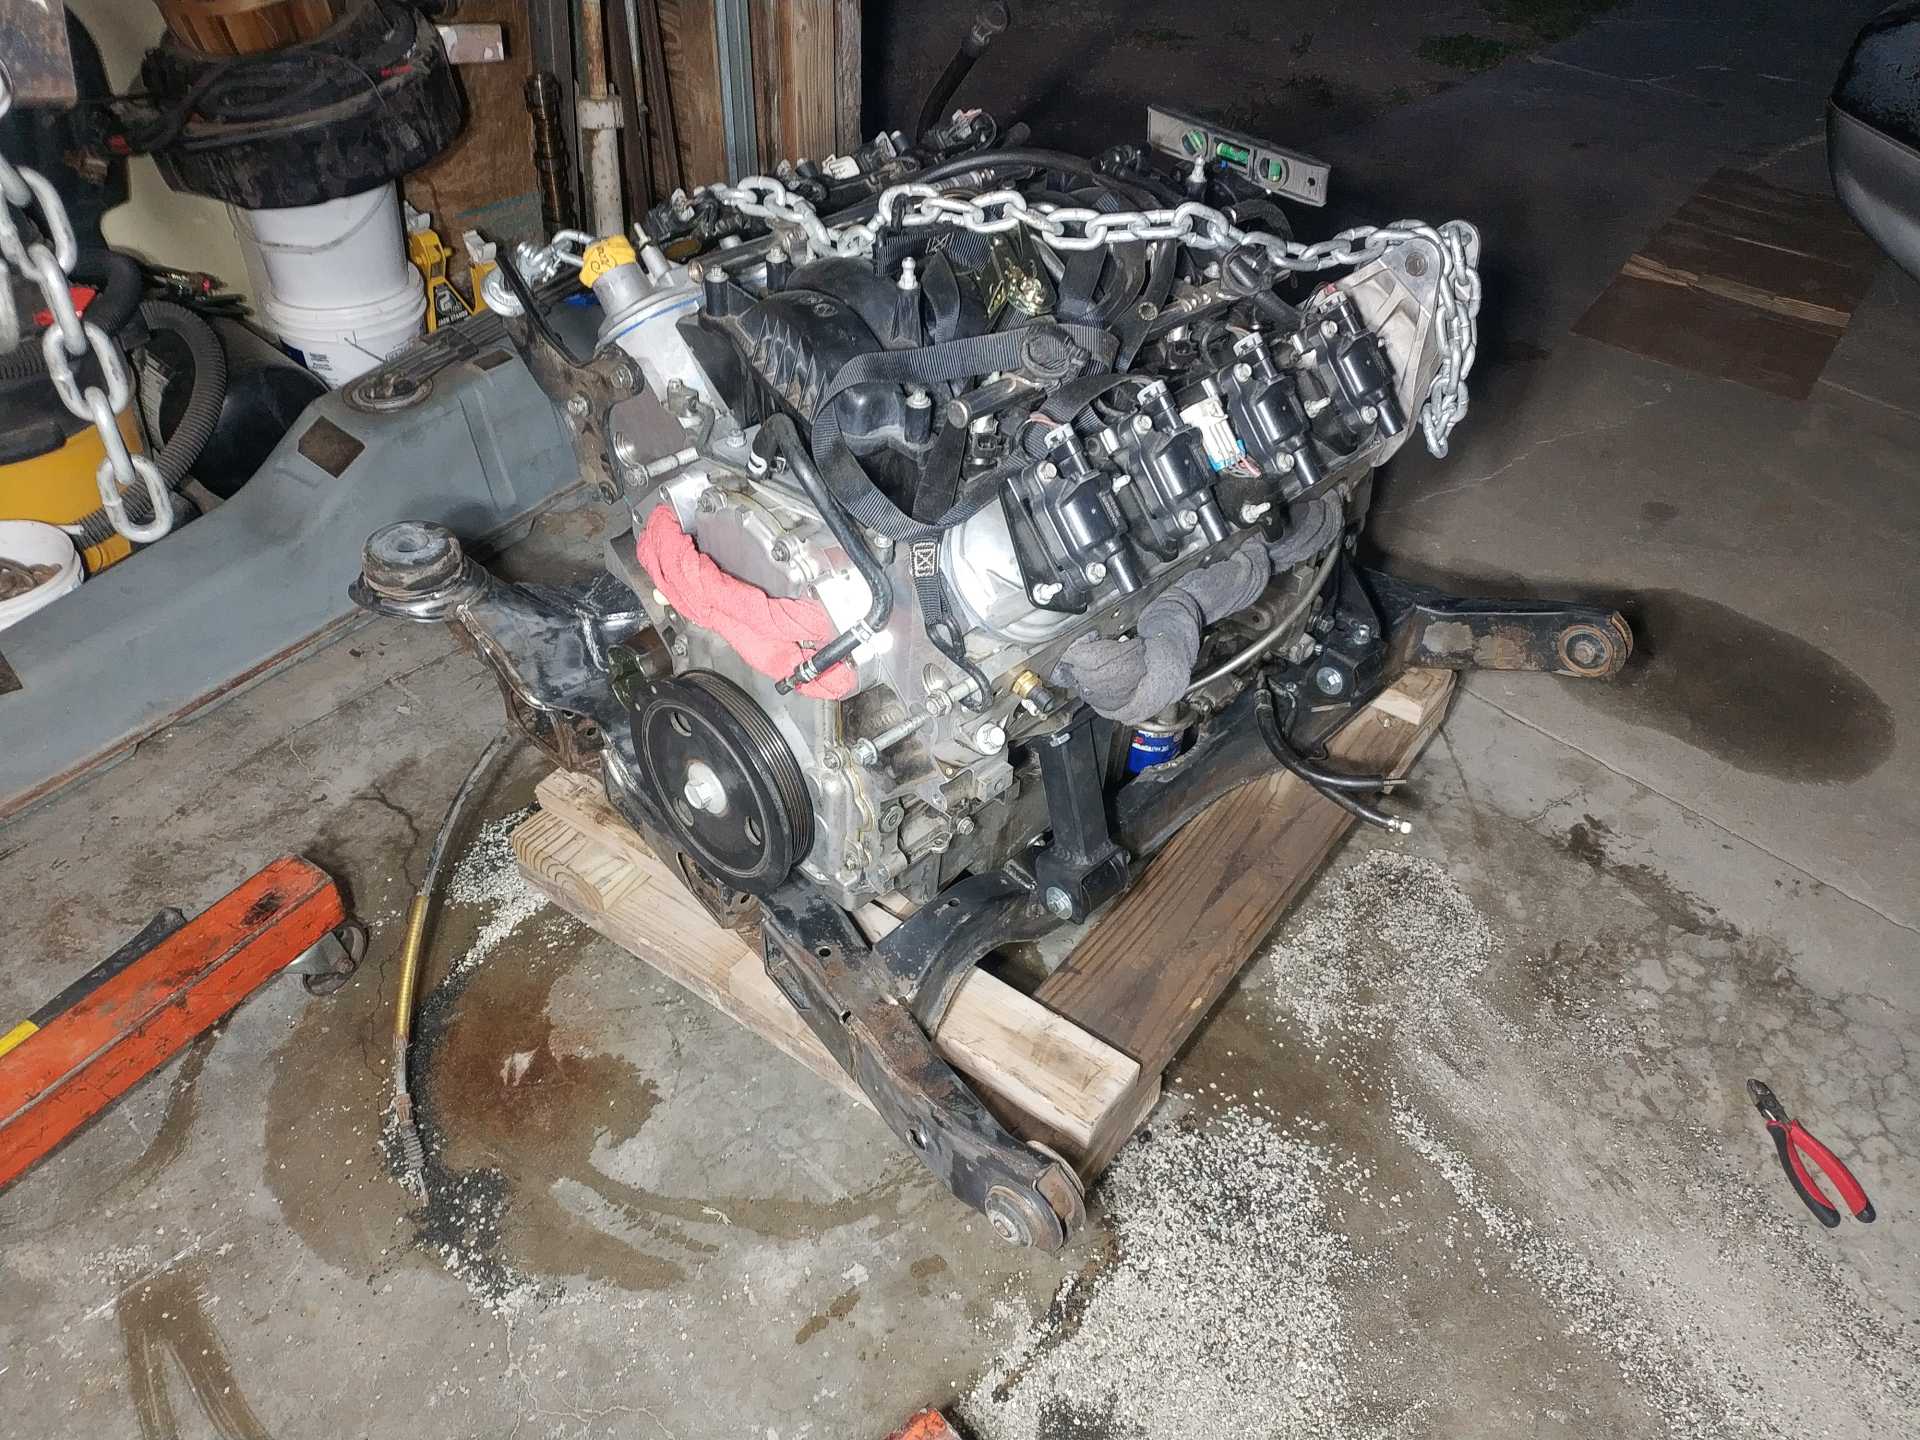
With the help of a friend we got the engine fitted to the cradle and the oil filter provision welded in and everything reinforced on the bottom. I had realized the oil drain plug needed to have a spot cut out on the cradle after fitting the engine on it. It was going to make a huge mess every time the oil was changed if this wasn't done. (not pictured) Next we test fit it in the car.
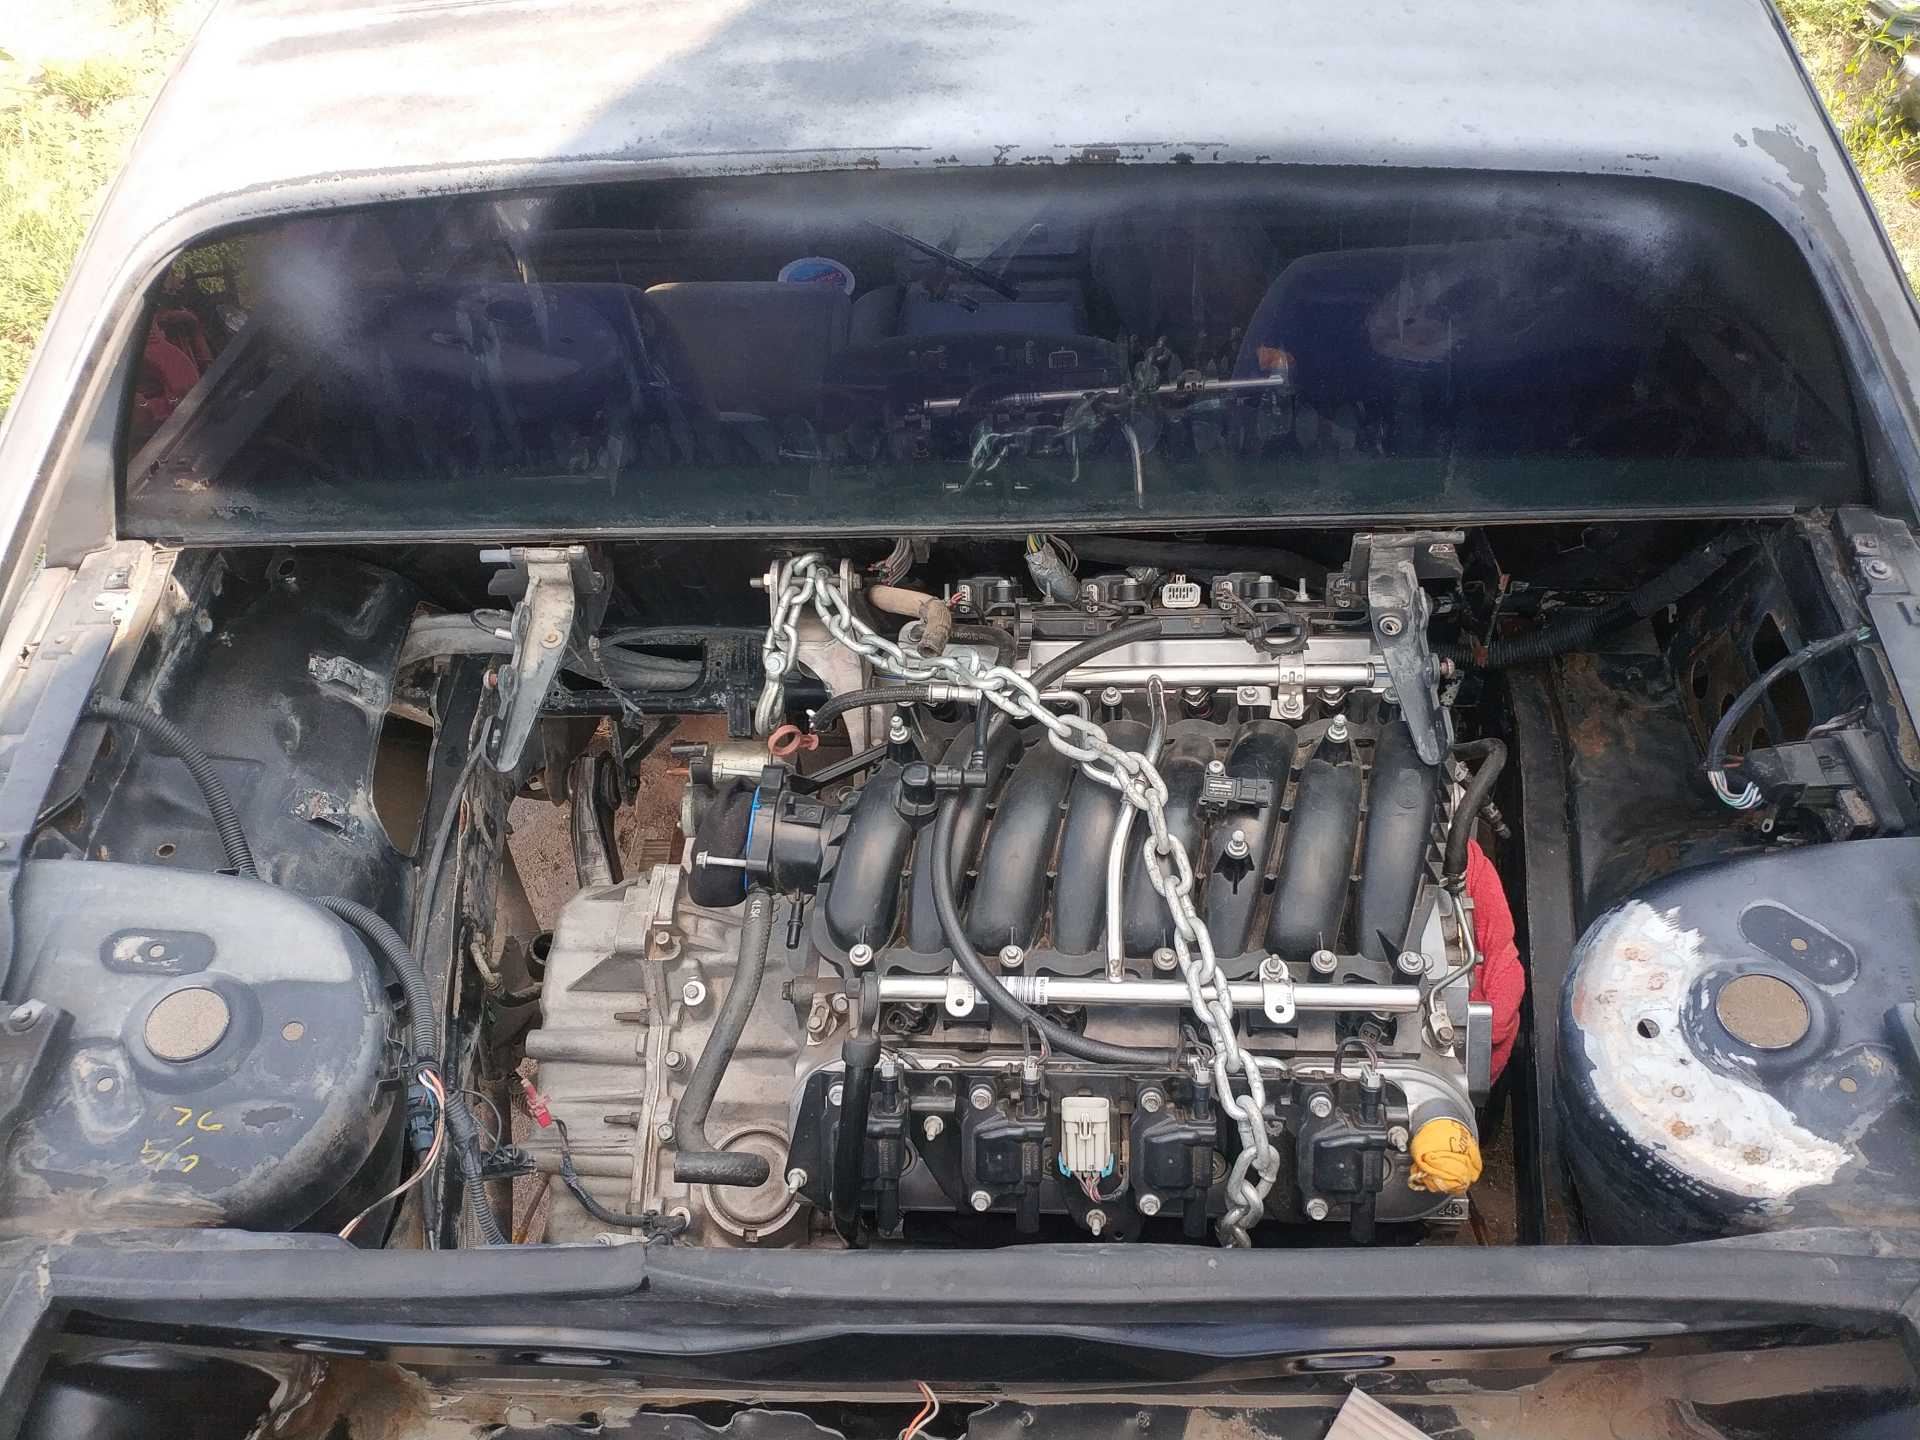
Looks pretty good to me. It was then removed and the cradle and engine bay prepped for paint.
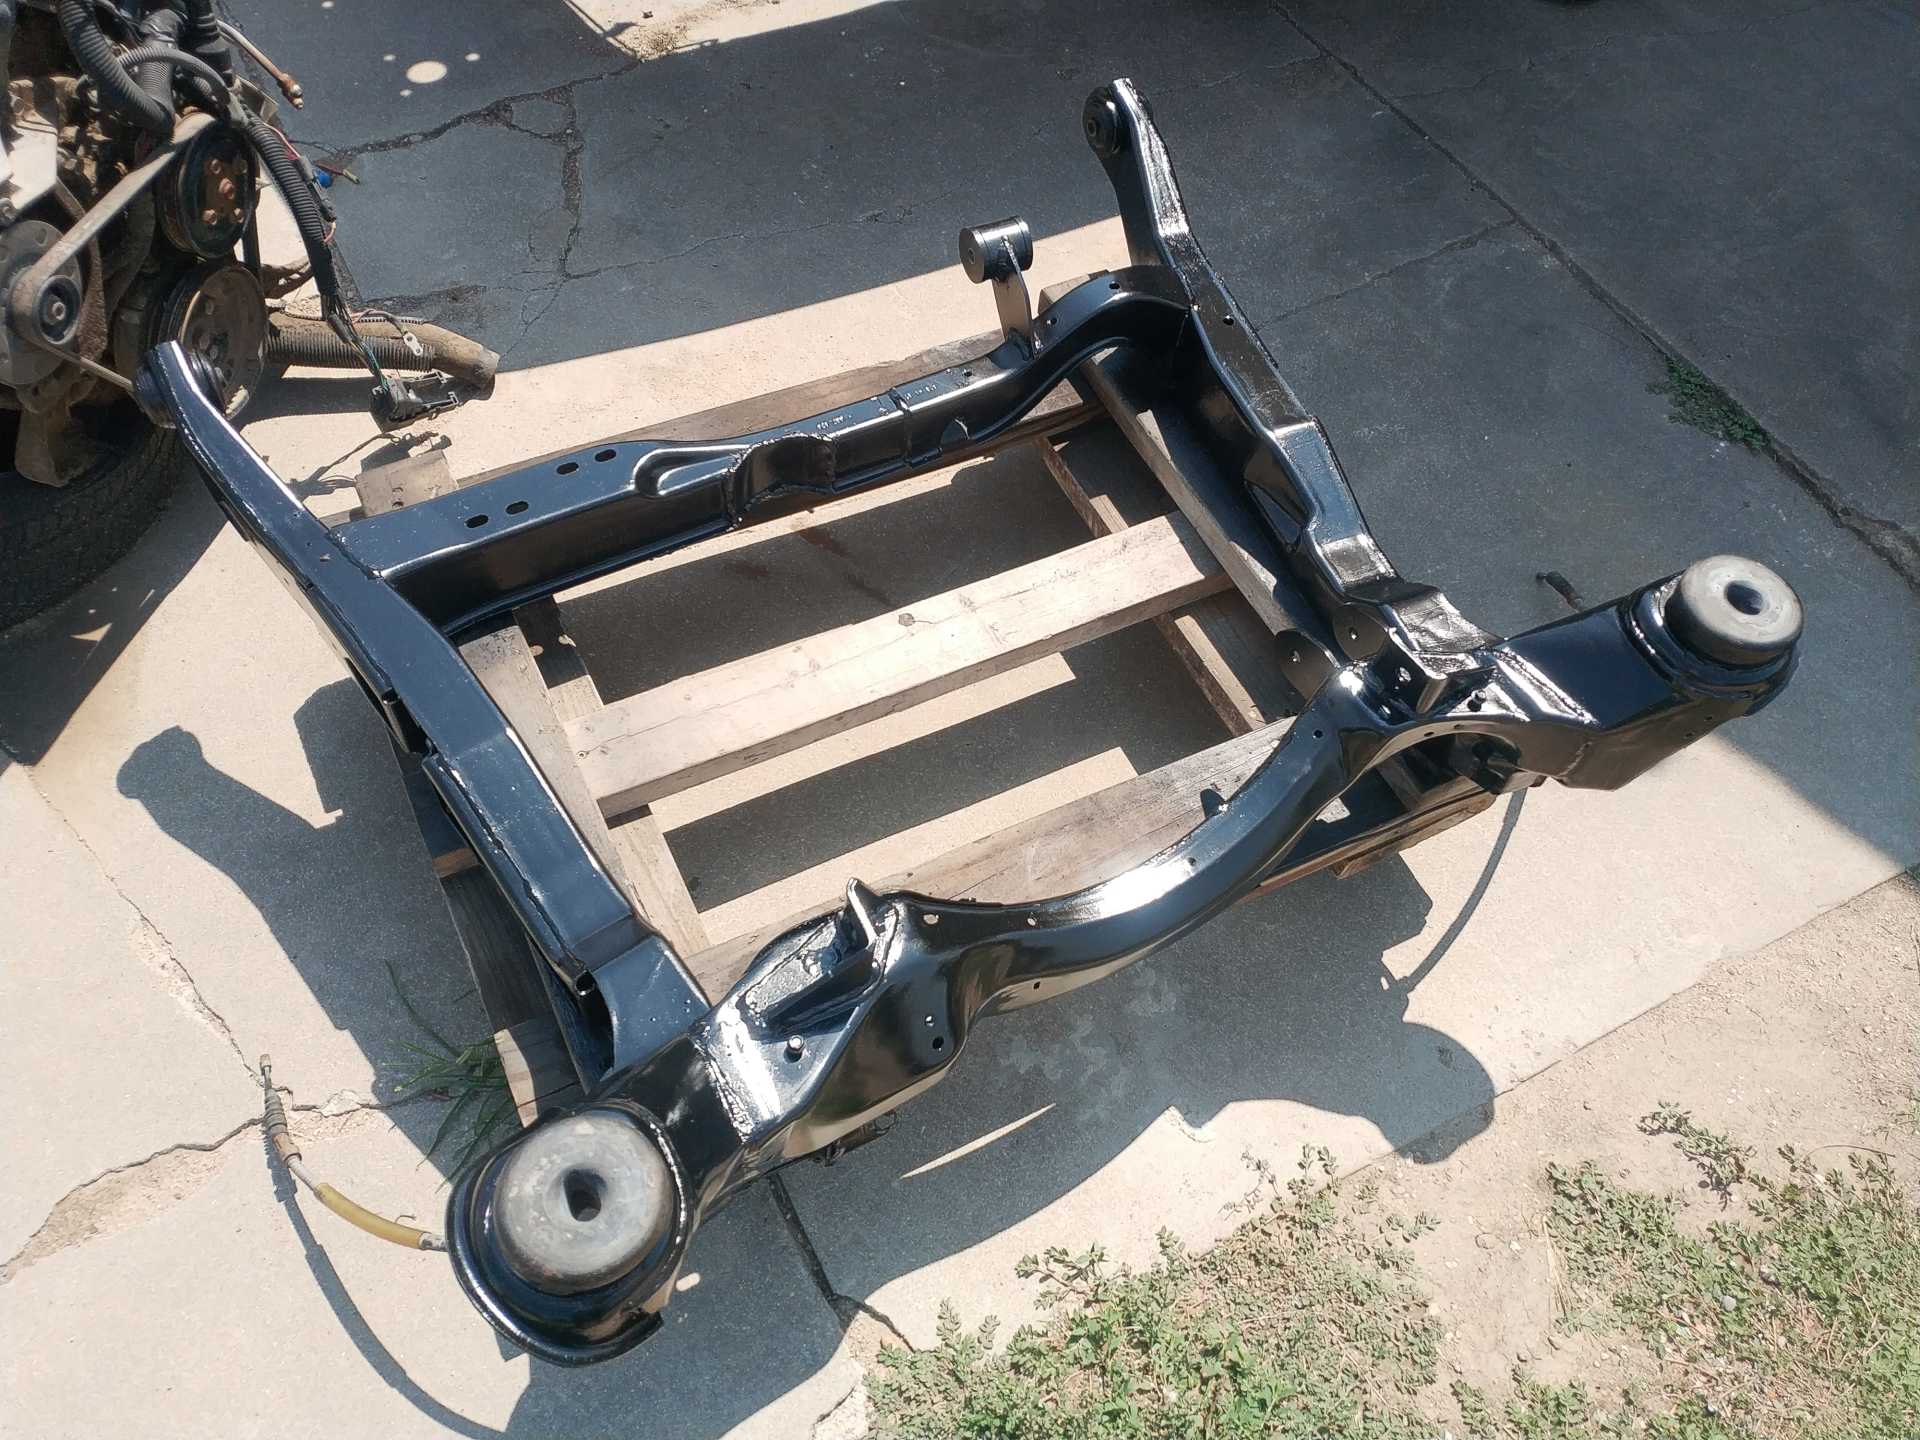

|
|

|
qwikgta
|
SEP 06, 12:09 AM
|
|
|
Looks great, love the alt bracket.
|
|

|
lsfiero
|
NOV 04, 01:46 PM
|
|
Thank you sir. It doesn't look too pretty but it's going to work great I believe.
I realized after I painted the engine bay that I'm going to have to do more work in it and have to respray again but for now it is clean and looking good.
The fuel tank is up next. I didn't think the tank in the car that had been sitting forever was going to be as bad as it was.. It was bad. Thankfully I had a parts car that had been on the road a lot more recently than this one.
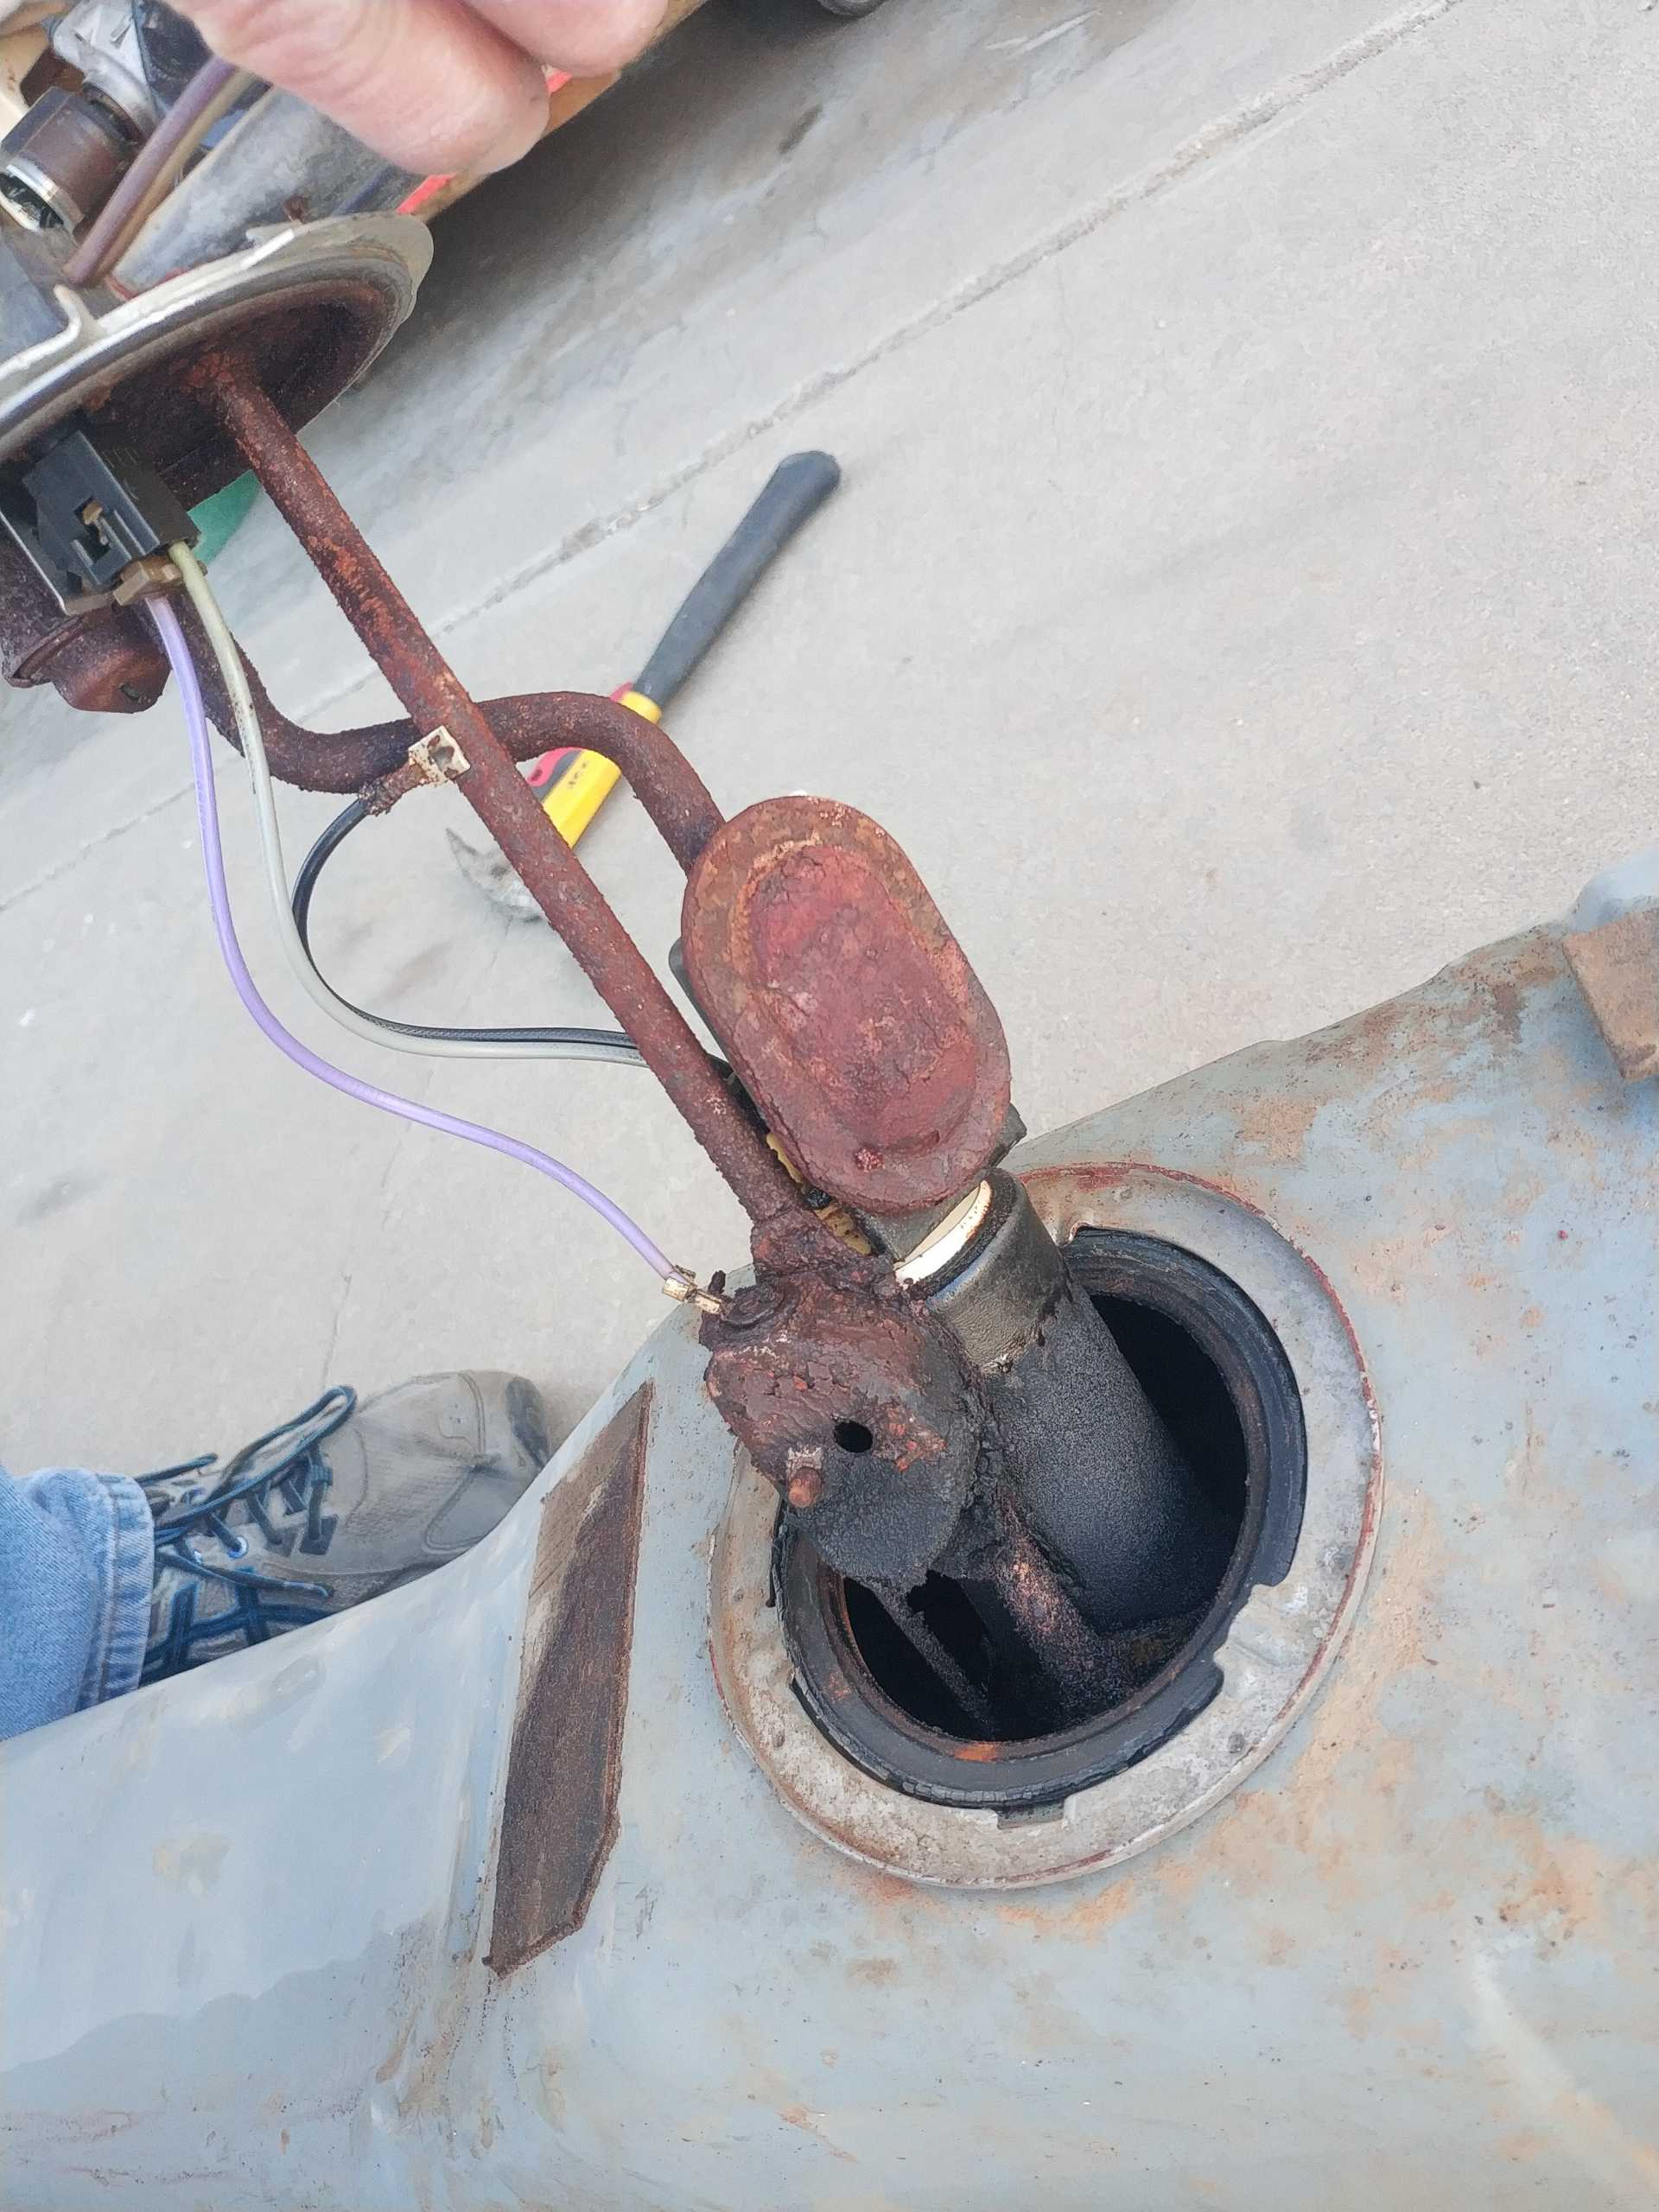
There was probably 2 gallons or more of crusted fuel and I couldn't get it all out with what i had available so I went to get the other tank.
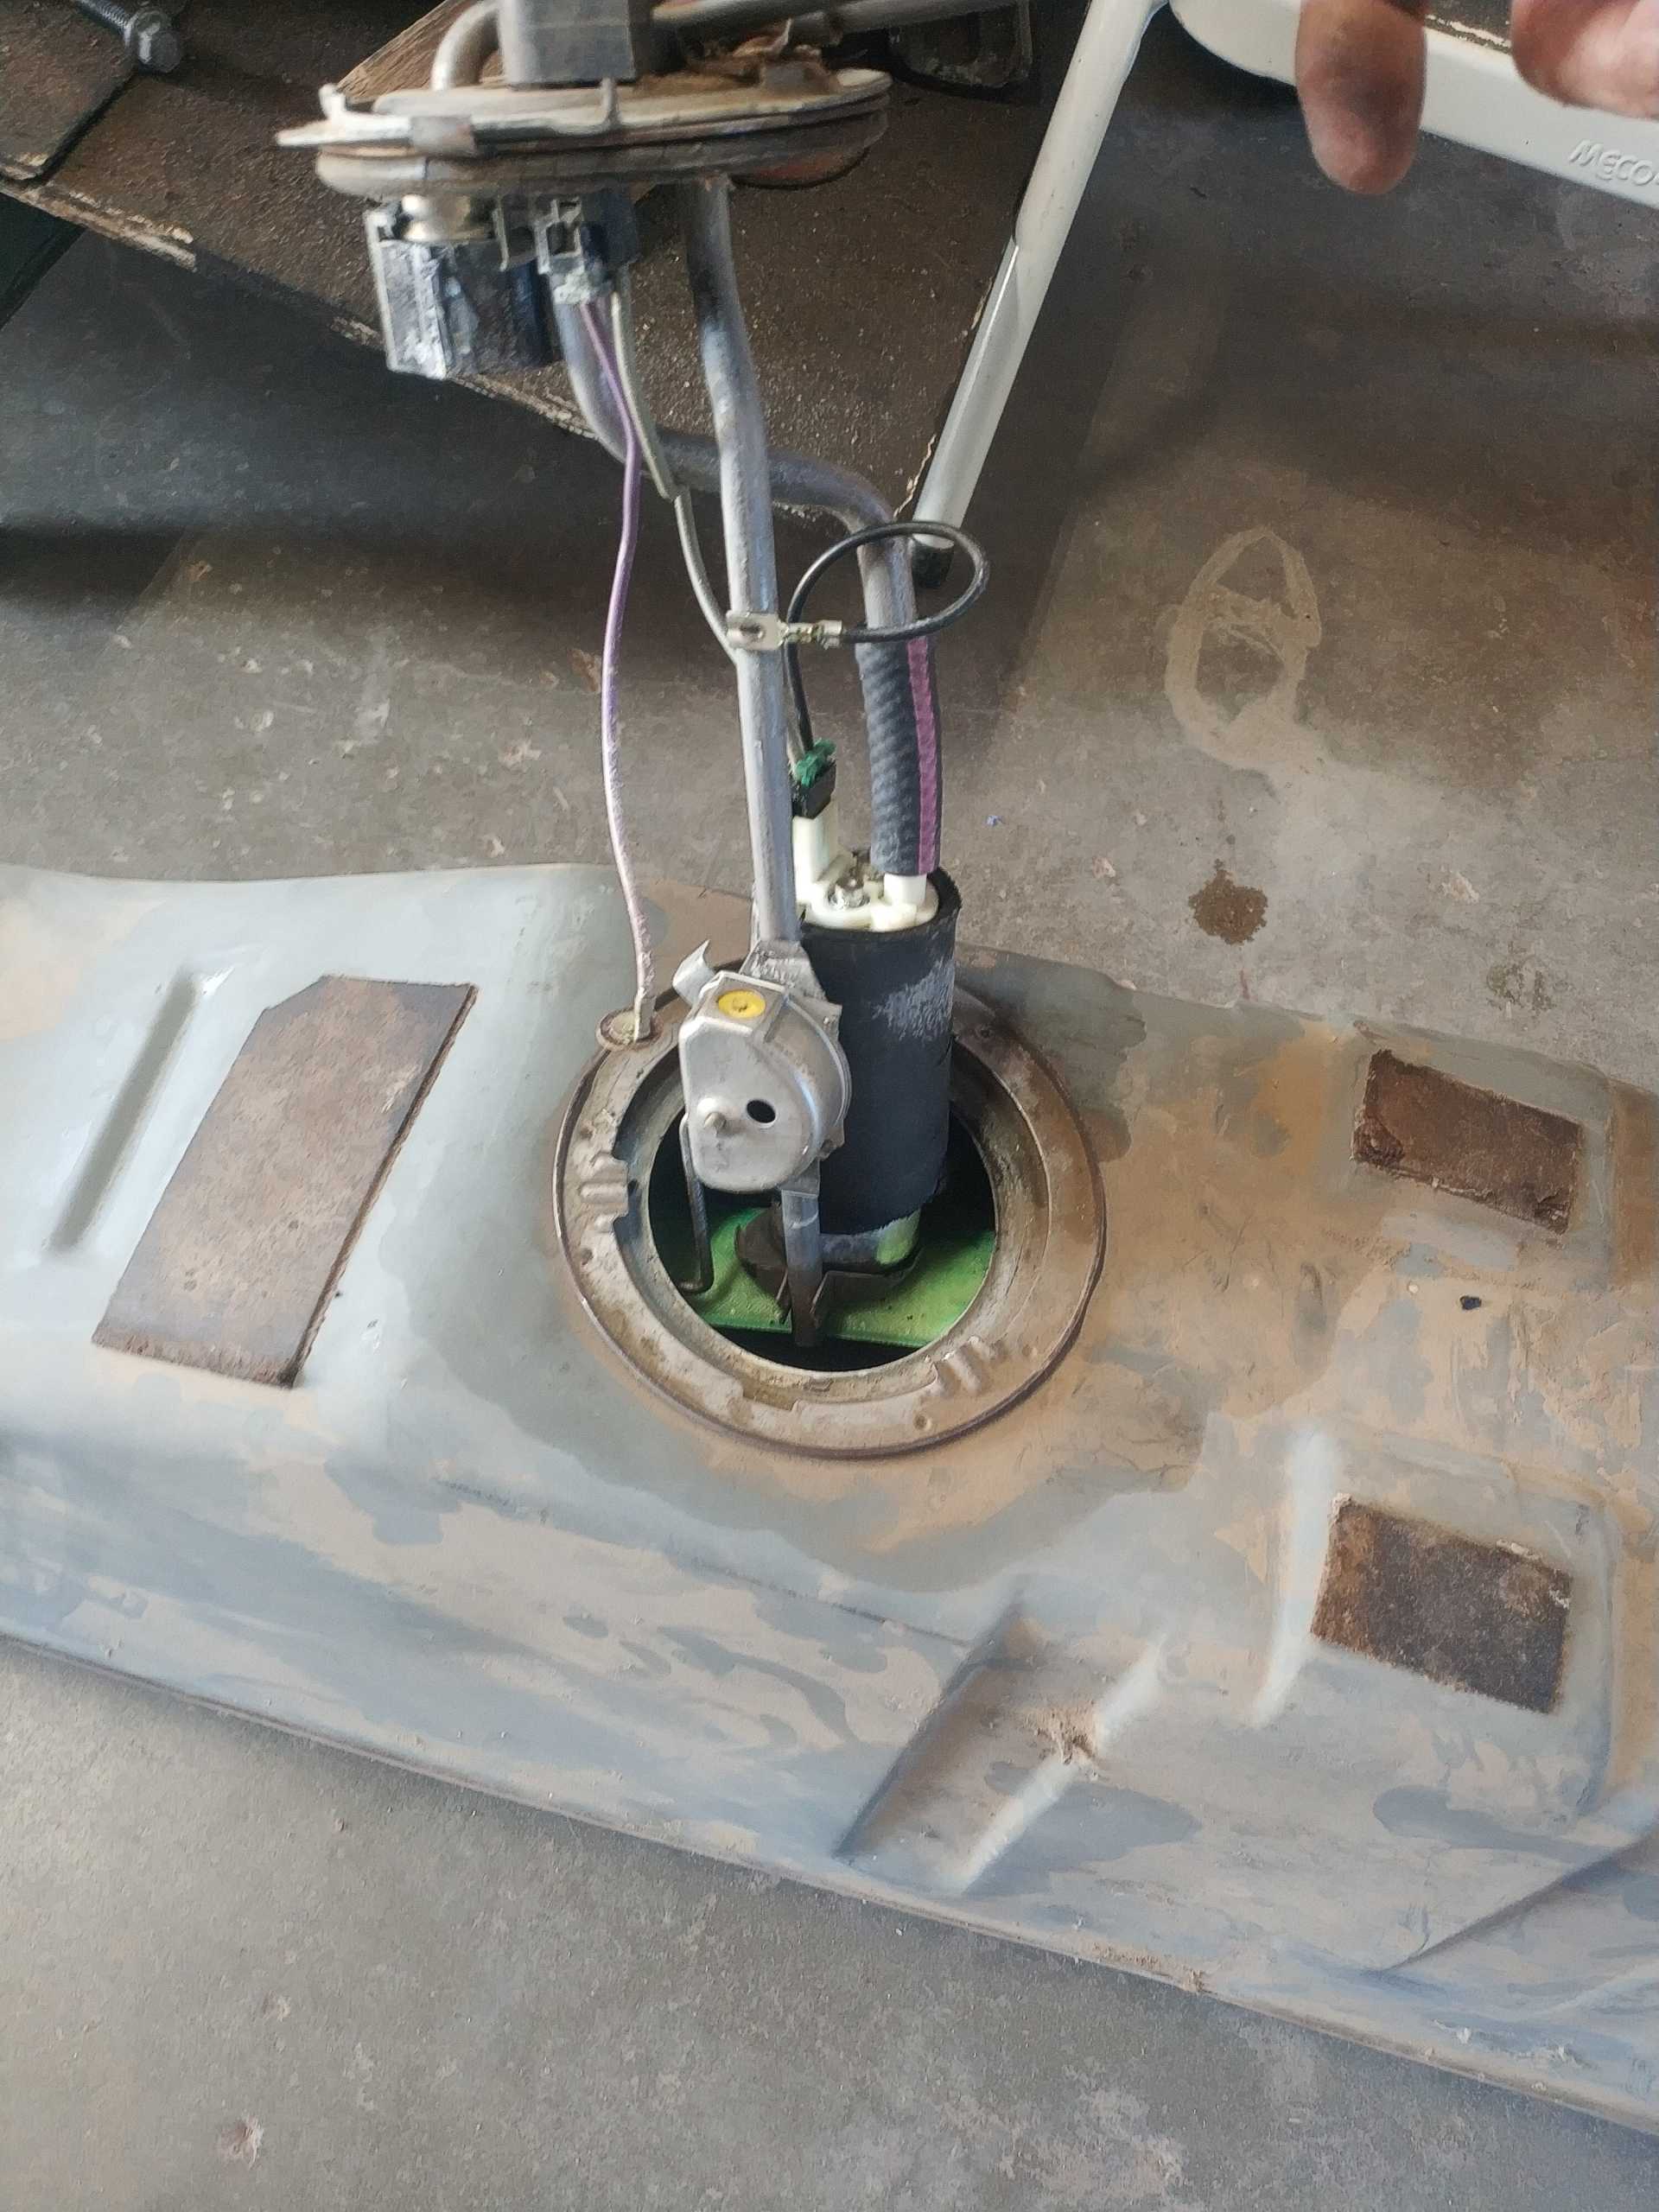
It was much better and clean on the inside. I had a lot of trouble getting the fuel level sender to read right. Ohms would jump all over the place when I tested it so that needs to be addressed while its out. The set of gauges that's going in the car is going to be Equus 7000 series black and chrome. I bought the Equus fuel level sender 9982, took it apart, and reattached it to my hanger assembly.
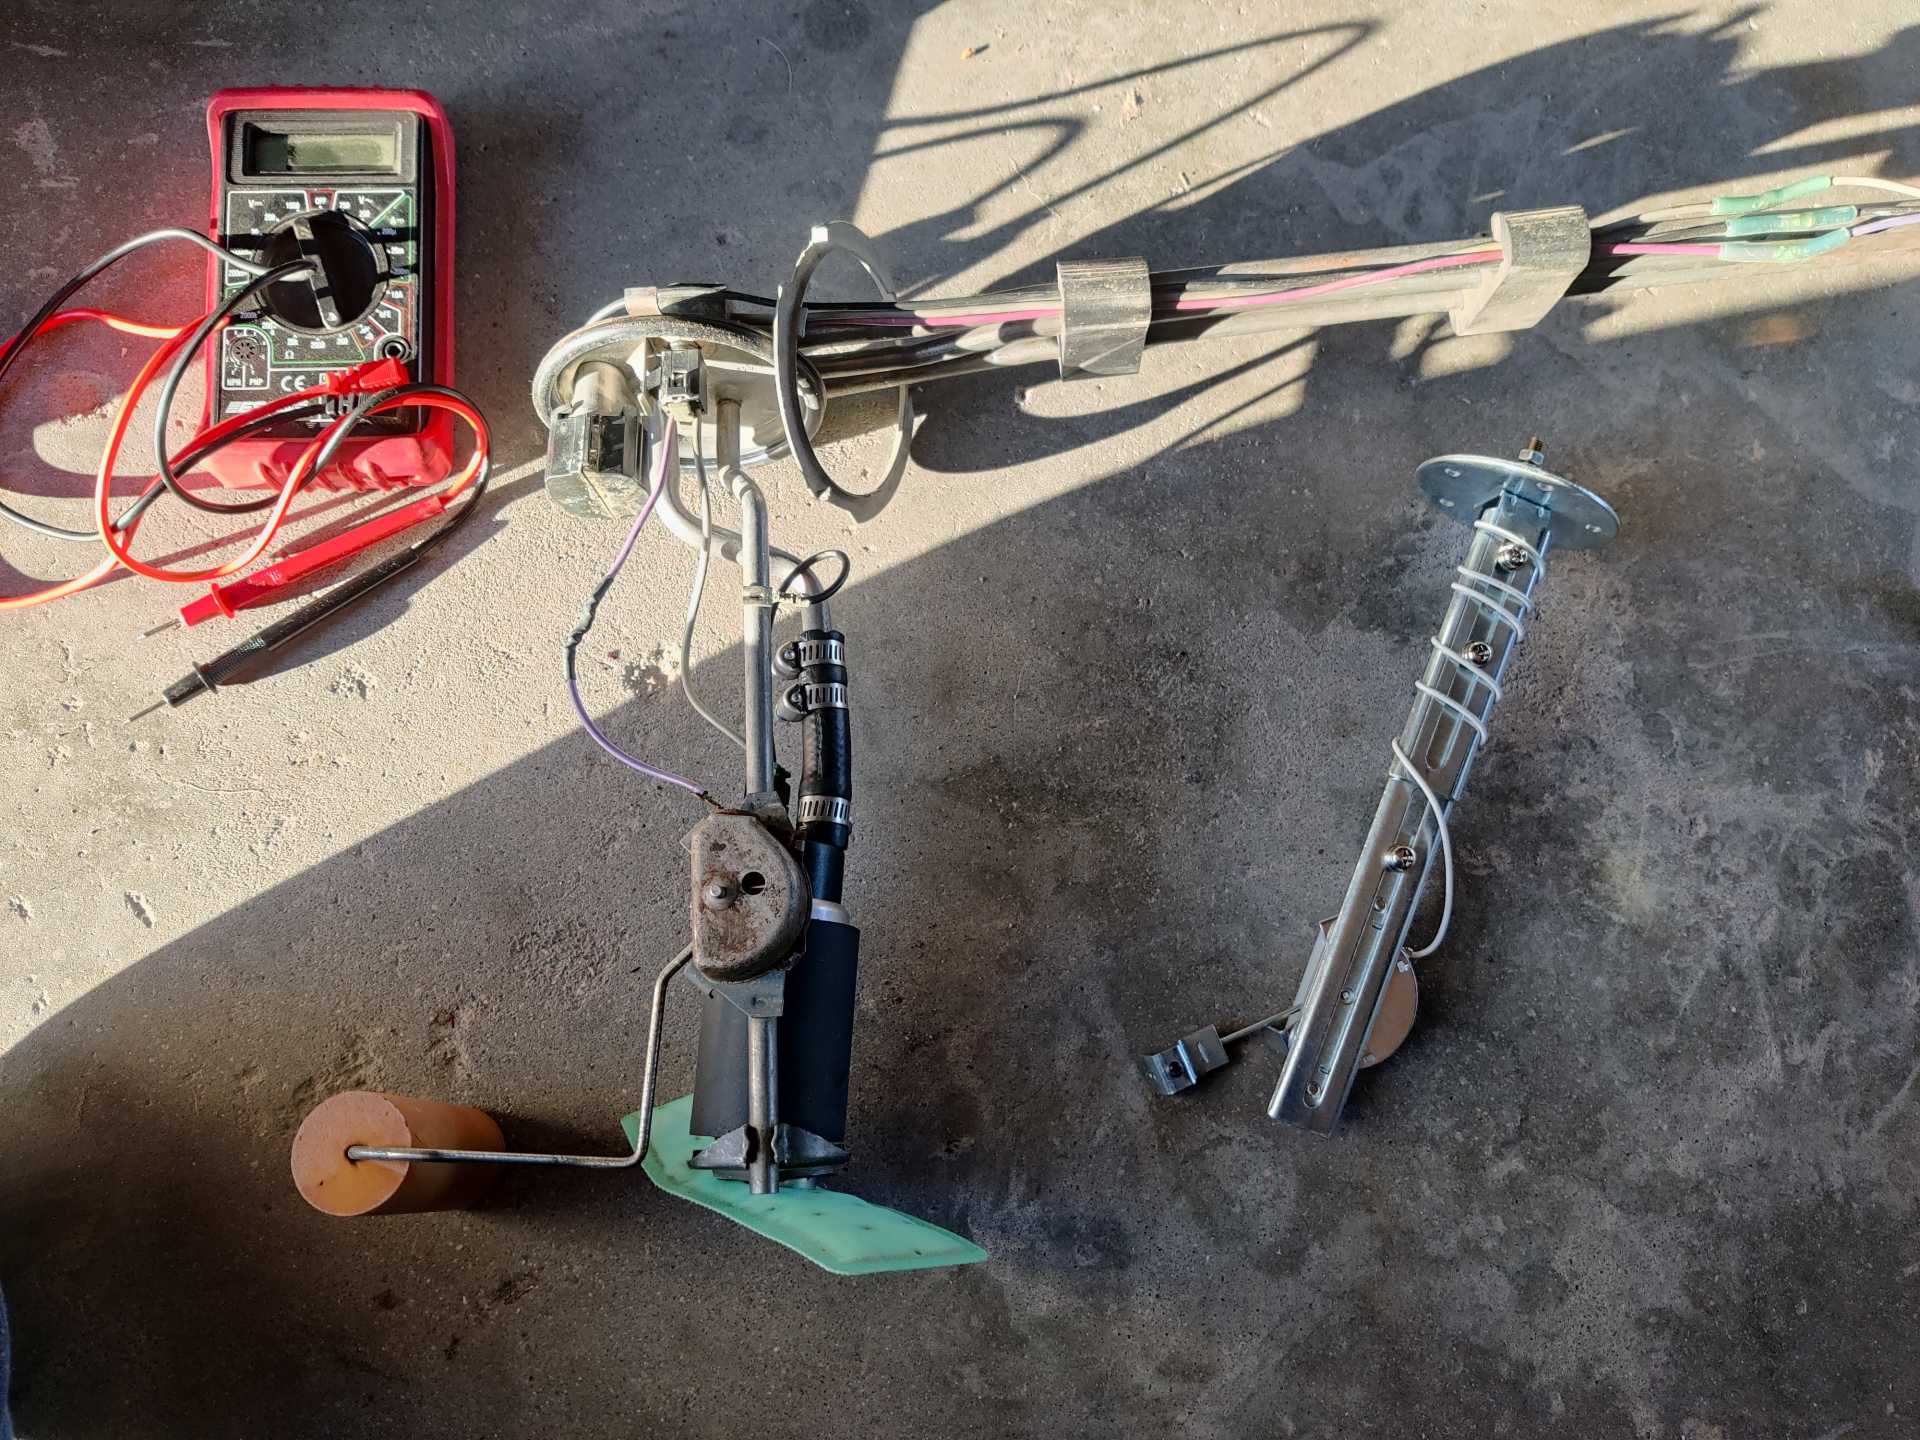
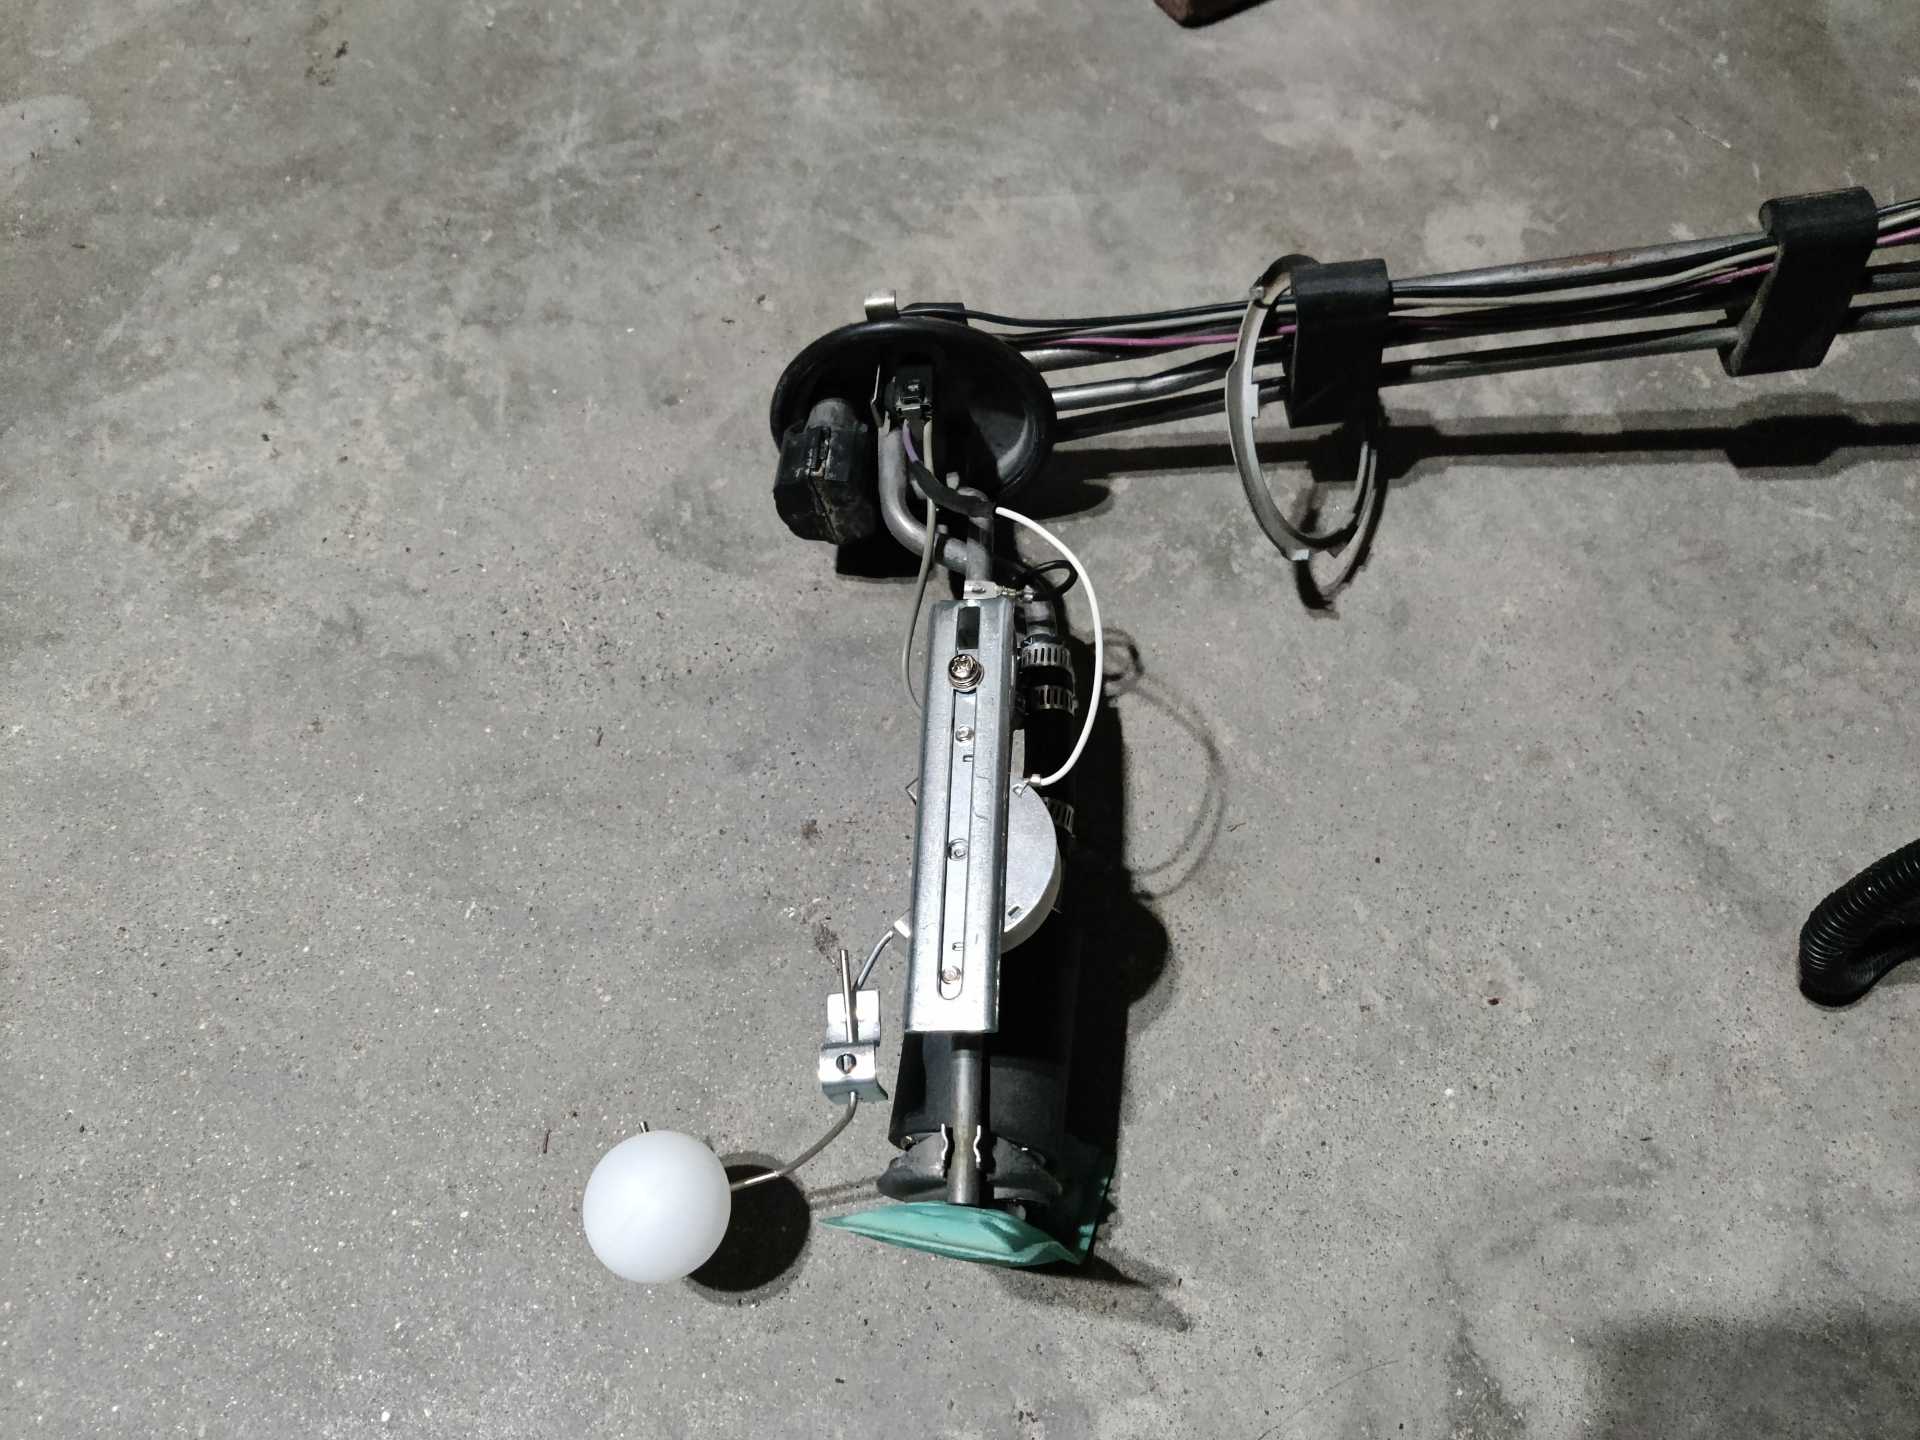
Now it reads correctly.
The fuel pump I used for this was a Carter P90005. It says it's a minimum of 58 psi so I paired that with a Wix 33737 filter and regulator. It should be sufficient for this swap. I used Dorman 800-035, 800-036, 800-057, & 800-058 to get the feed and return lines to the regulator. I'm not quite sure what to do with the third line on the hanger assembly yet so if someone could let me know what I should do with it I would greatly appreciate the knowledge. I used a tubing bender and a heat gun to get the bends in the nylon tubing.
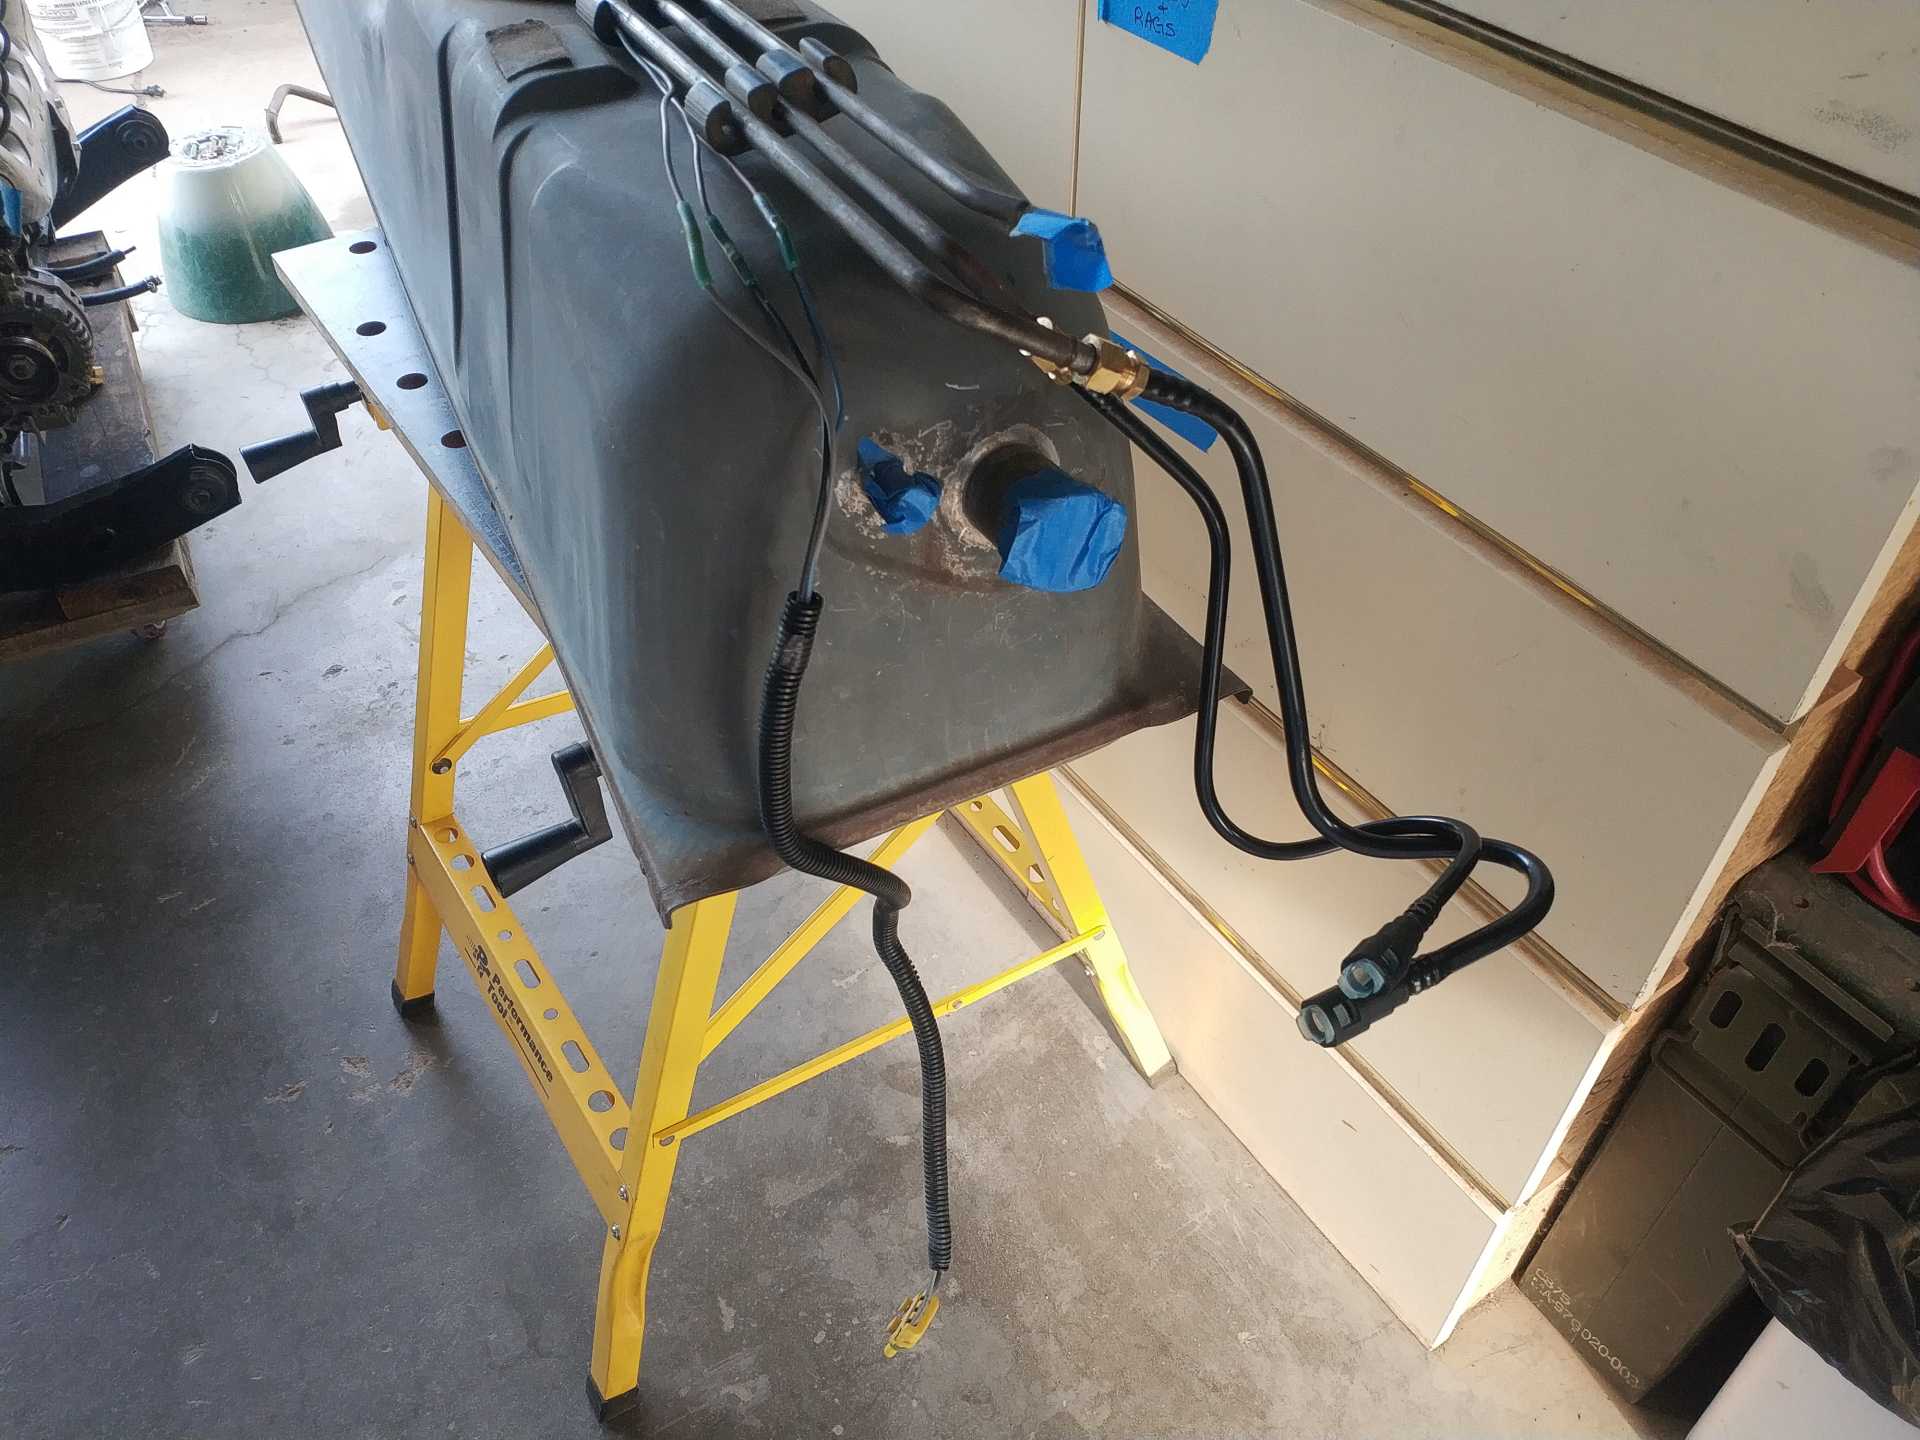
For after the regulator I have a Dorman 800-155 I'm going to attempt to bend slightly and finish off the rest up to the intake with nylon tubing.
|
|

|
fieroguru
|
NOV 05, 10:53 AM
|
|
| quote | Originally posted by lsfiero:
Next it was time to figure out the alternator. I'm on a pretty strict budget but I have some metal and a welder so I decided to make my own tensioner and alternator bracket. (Sorry Guru) I had to oval out one of the mounting holes on the alternator a little bit to make sure the pulley lined up well with the harmonic ballancer. One bolt mounting the alternator on is going to go through my bracket and into the block.
|
|
Just as helpful hint to the other DIYers... you can add a spacer behind the alternator pulley to line up the belt. This allows you to use the factory engine block boss for 1 of the 4 alternator mounting holes w/o any modifications to the alternator.
|
|

|
Hudini
|
NOV 05, 05:49 PM
|
|
|
Isn't the 3rd line for the fuel vapor canister? It's been a while since I tackled that area.
|
|

|
Rickady88GT
|
NOV 06, 01:50 PM
|
|
| quote | Originally posted by Hudini:
Isn't the 3rd line for the fuel vapor canister? It's been a while since I tackled that area. |
|
Yes
|
|

|
lsfiero
|
NOV 15, 10:04 PM
|
|
Thank you Guru. I honestly don't know why I didn't think of doing that.
| quote | Originally posted by Hudini:
Isn't the 3rd line for the fuel vapor canister? It's been a while since I tackled that area. |
|
I live in a state where this car will not be tested for emissions and was wanting to eliminate it. Is a vapor canister and purge valve necessary? Theoretically couldn't I just run it to atmosphere somewhere with maybe a little filter on it to keep junk out? And if so does it have to be higher than the tank or looped in some way or even blocked off completely? The cap is vented right? Let me know please and thank you.
When I had gotten to the wiring, I did not think it would be as bad as it has been. And then I decided to make it worse for myself to clean up the engine bay a bit. And since the battery can no longer stay in it's stock location. I decided to get rid of the c500 connector altogether and do what I've seen some others have done and go through the corner of the cab. The taillight harness passes through the passenger side and the A/C, power wires, an ignition turn on for the engine fuse box, and fuel level and ground pass through the drivers side. I will still be using one pass through located in the center of the engine bay for gauges, pedal, etc. I used the coil power wire to provide power for the electric water pump and I believe I used the original ECM turn on for the main relay for the engine.
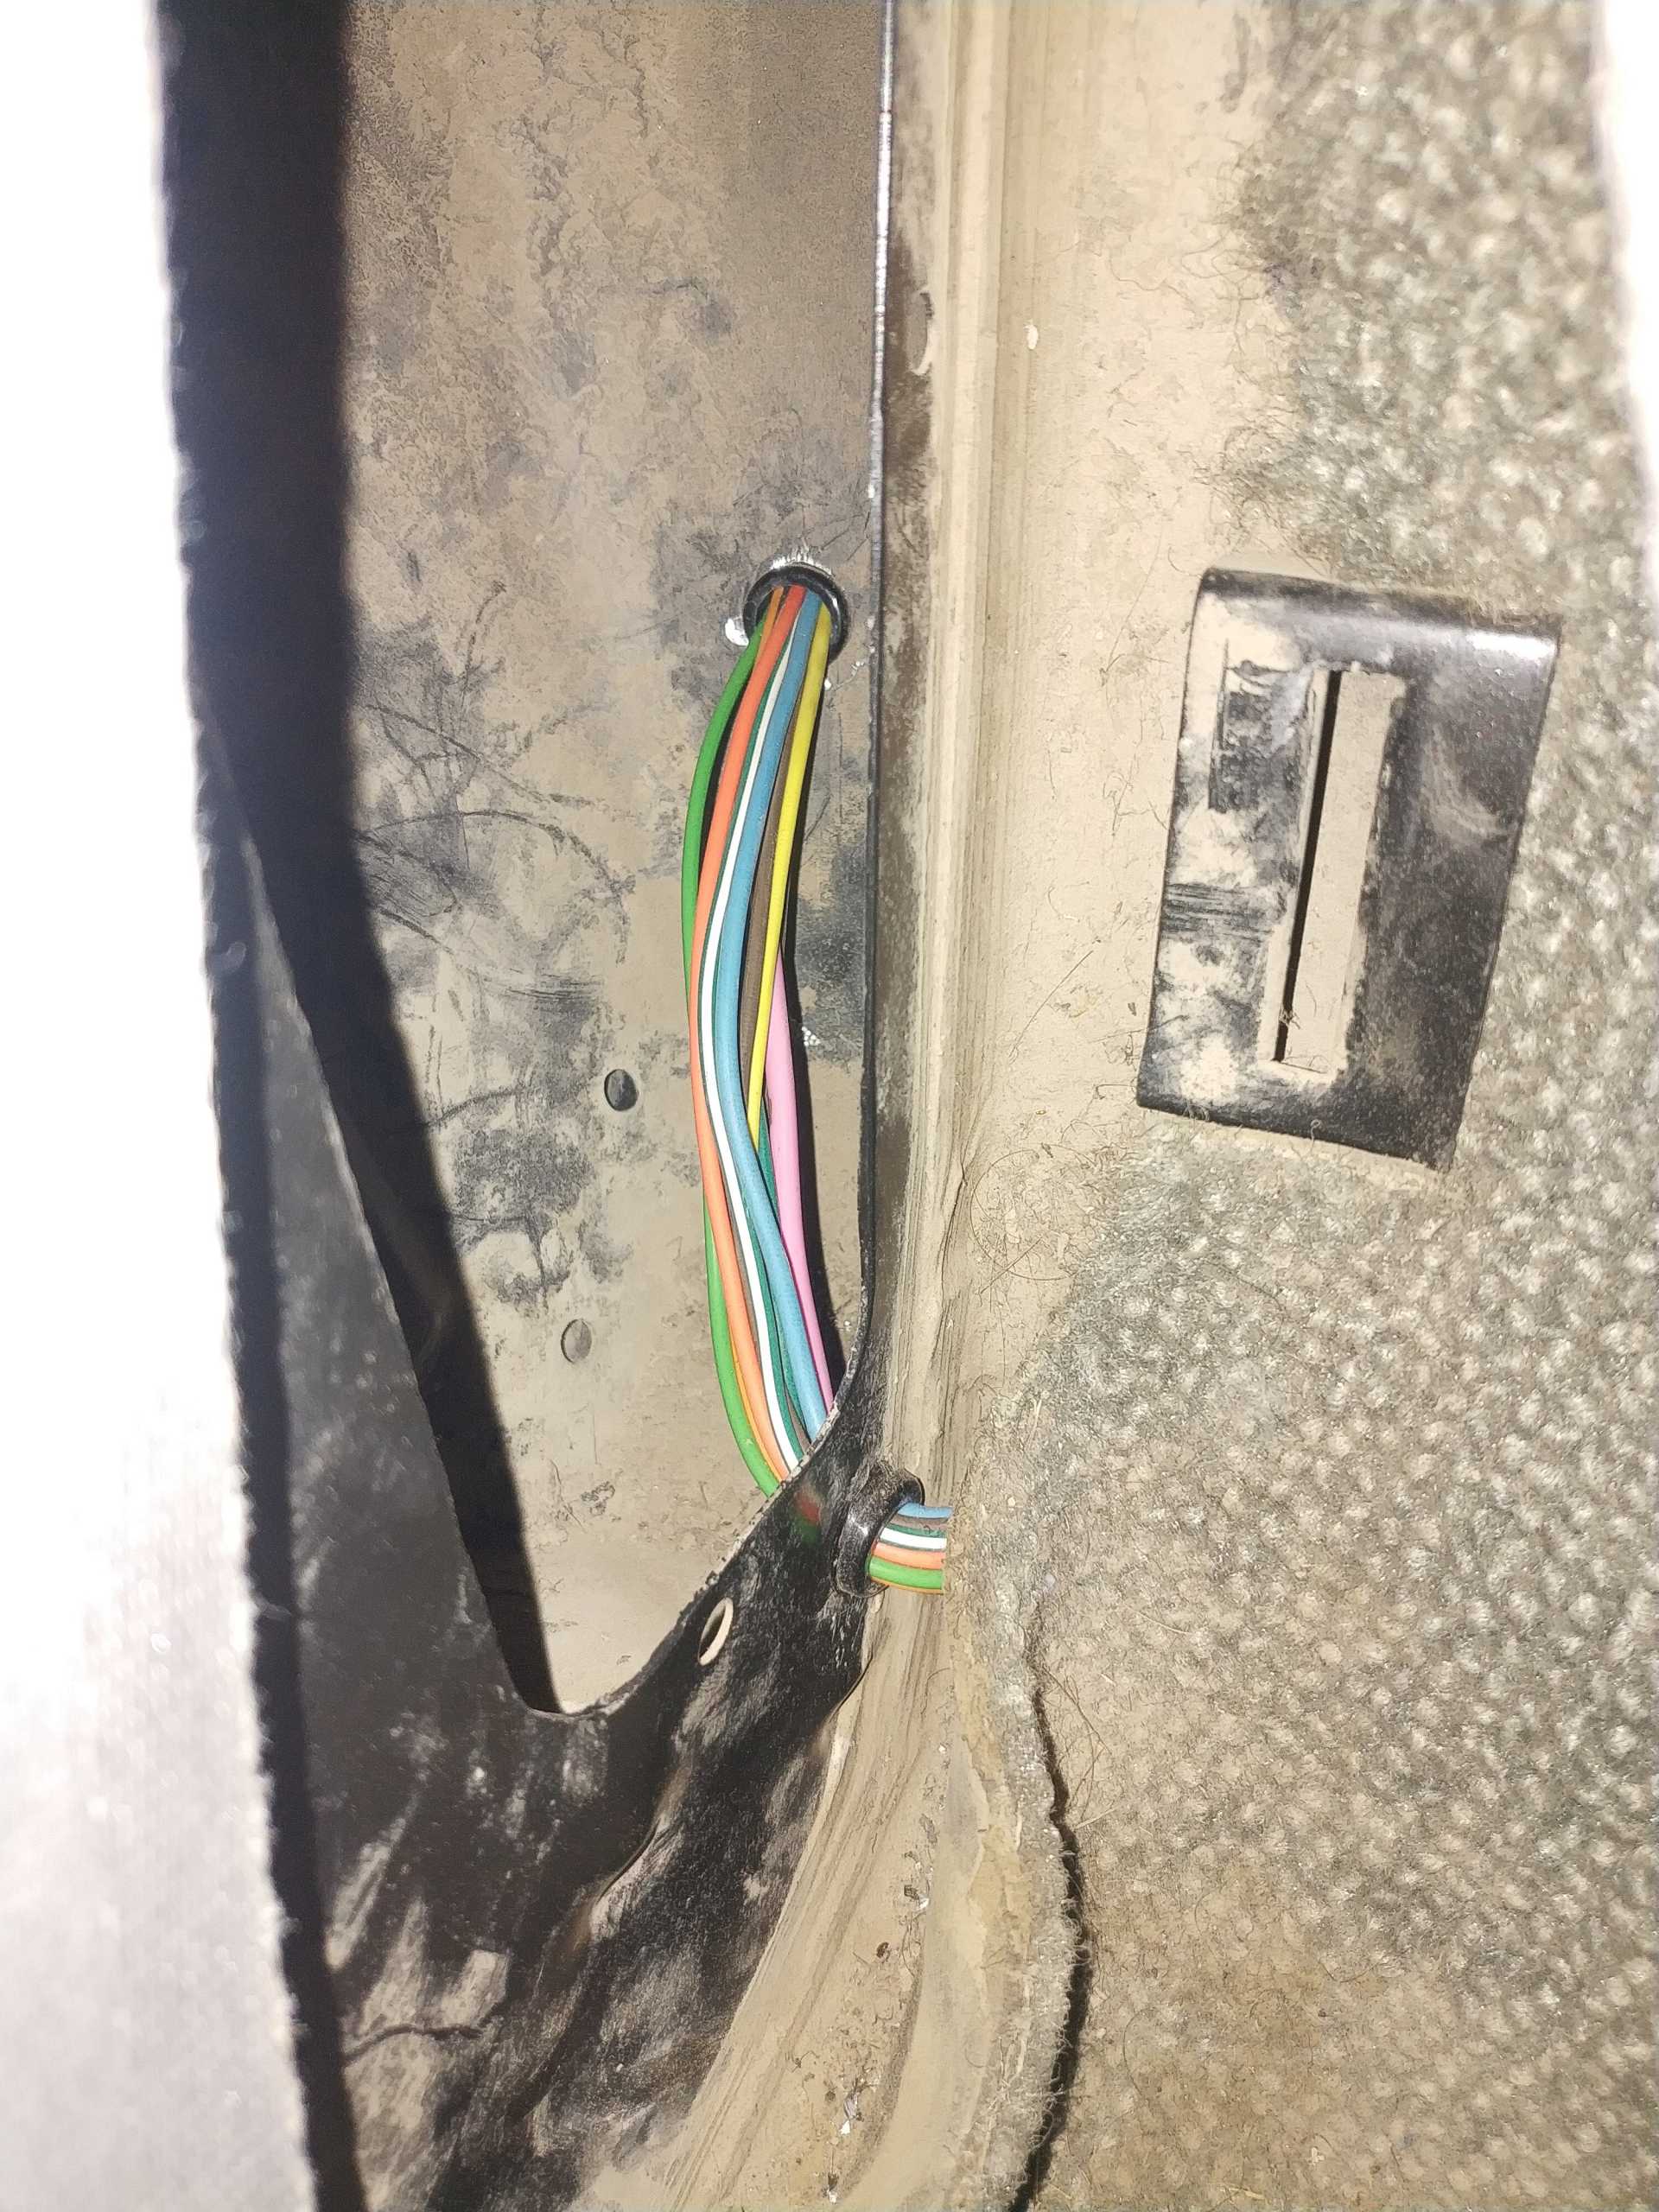
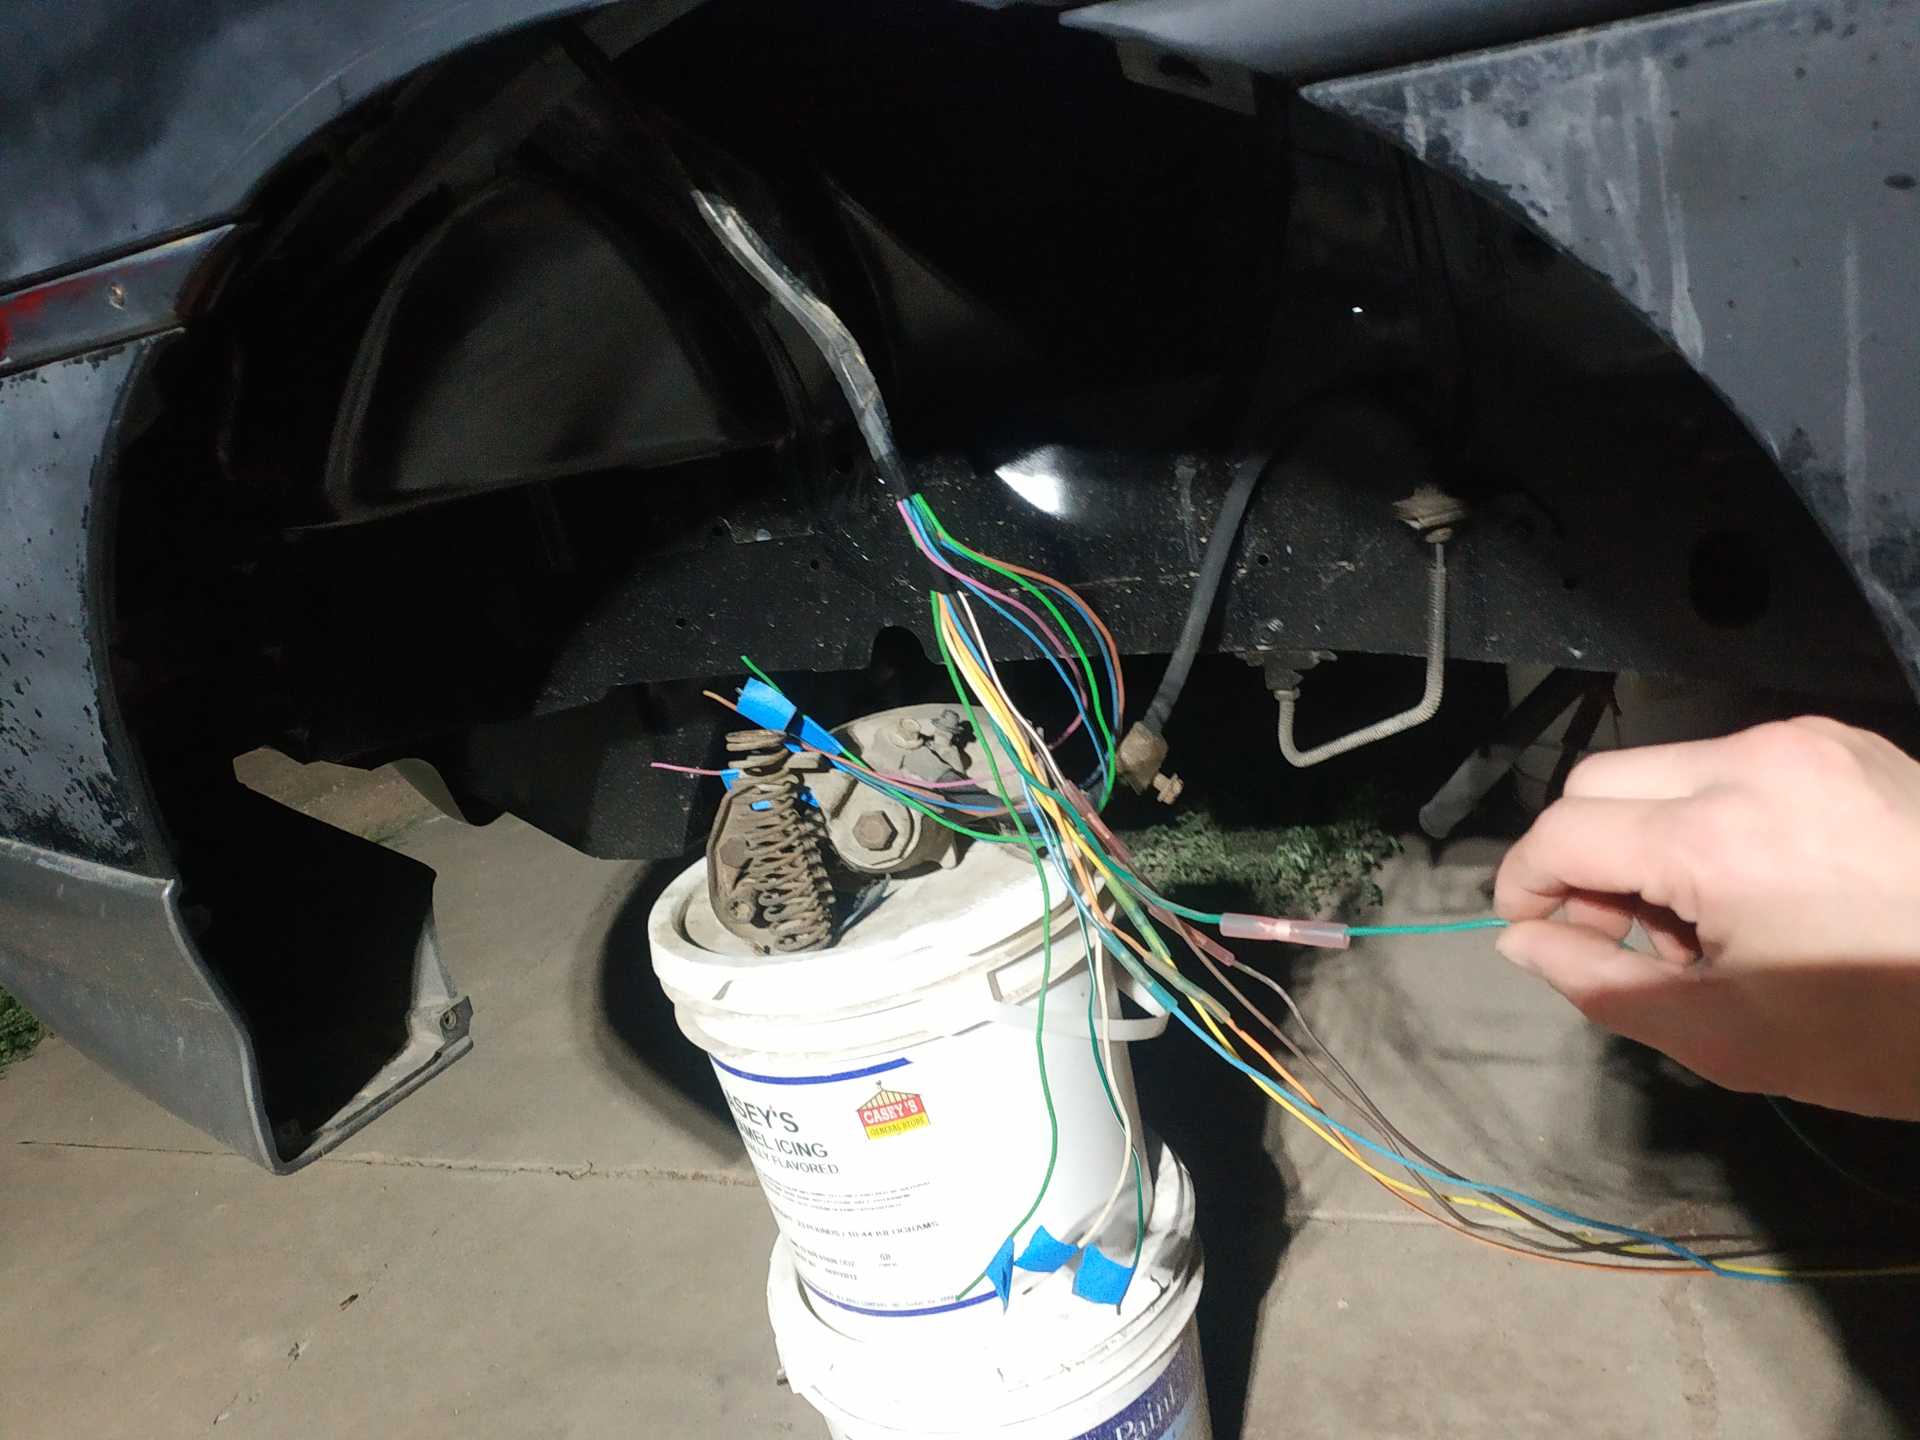
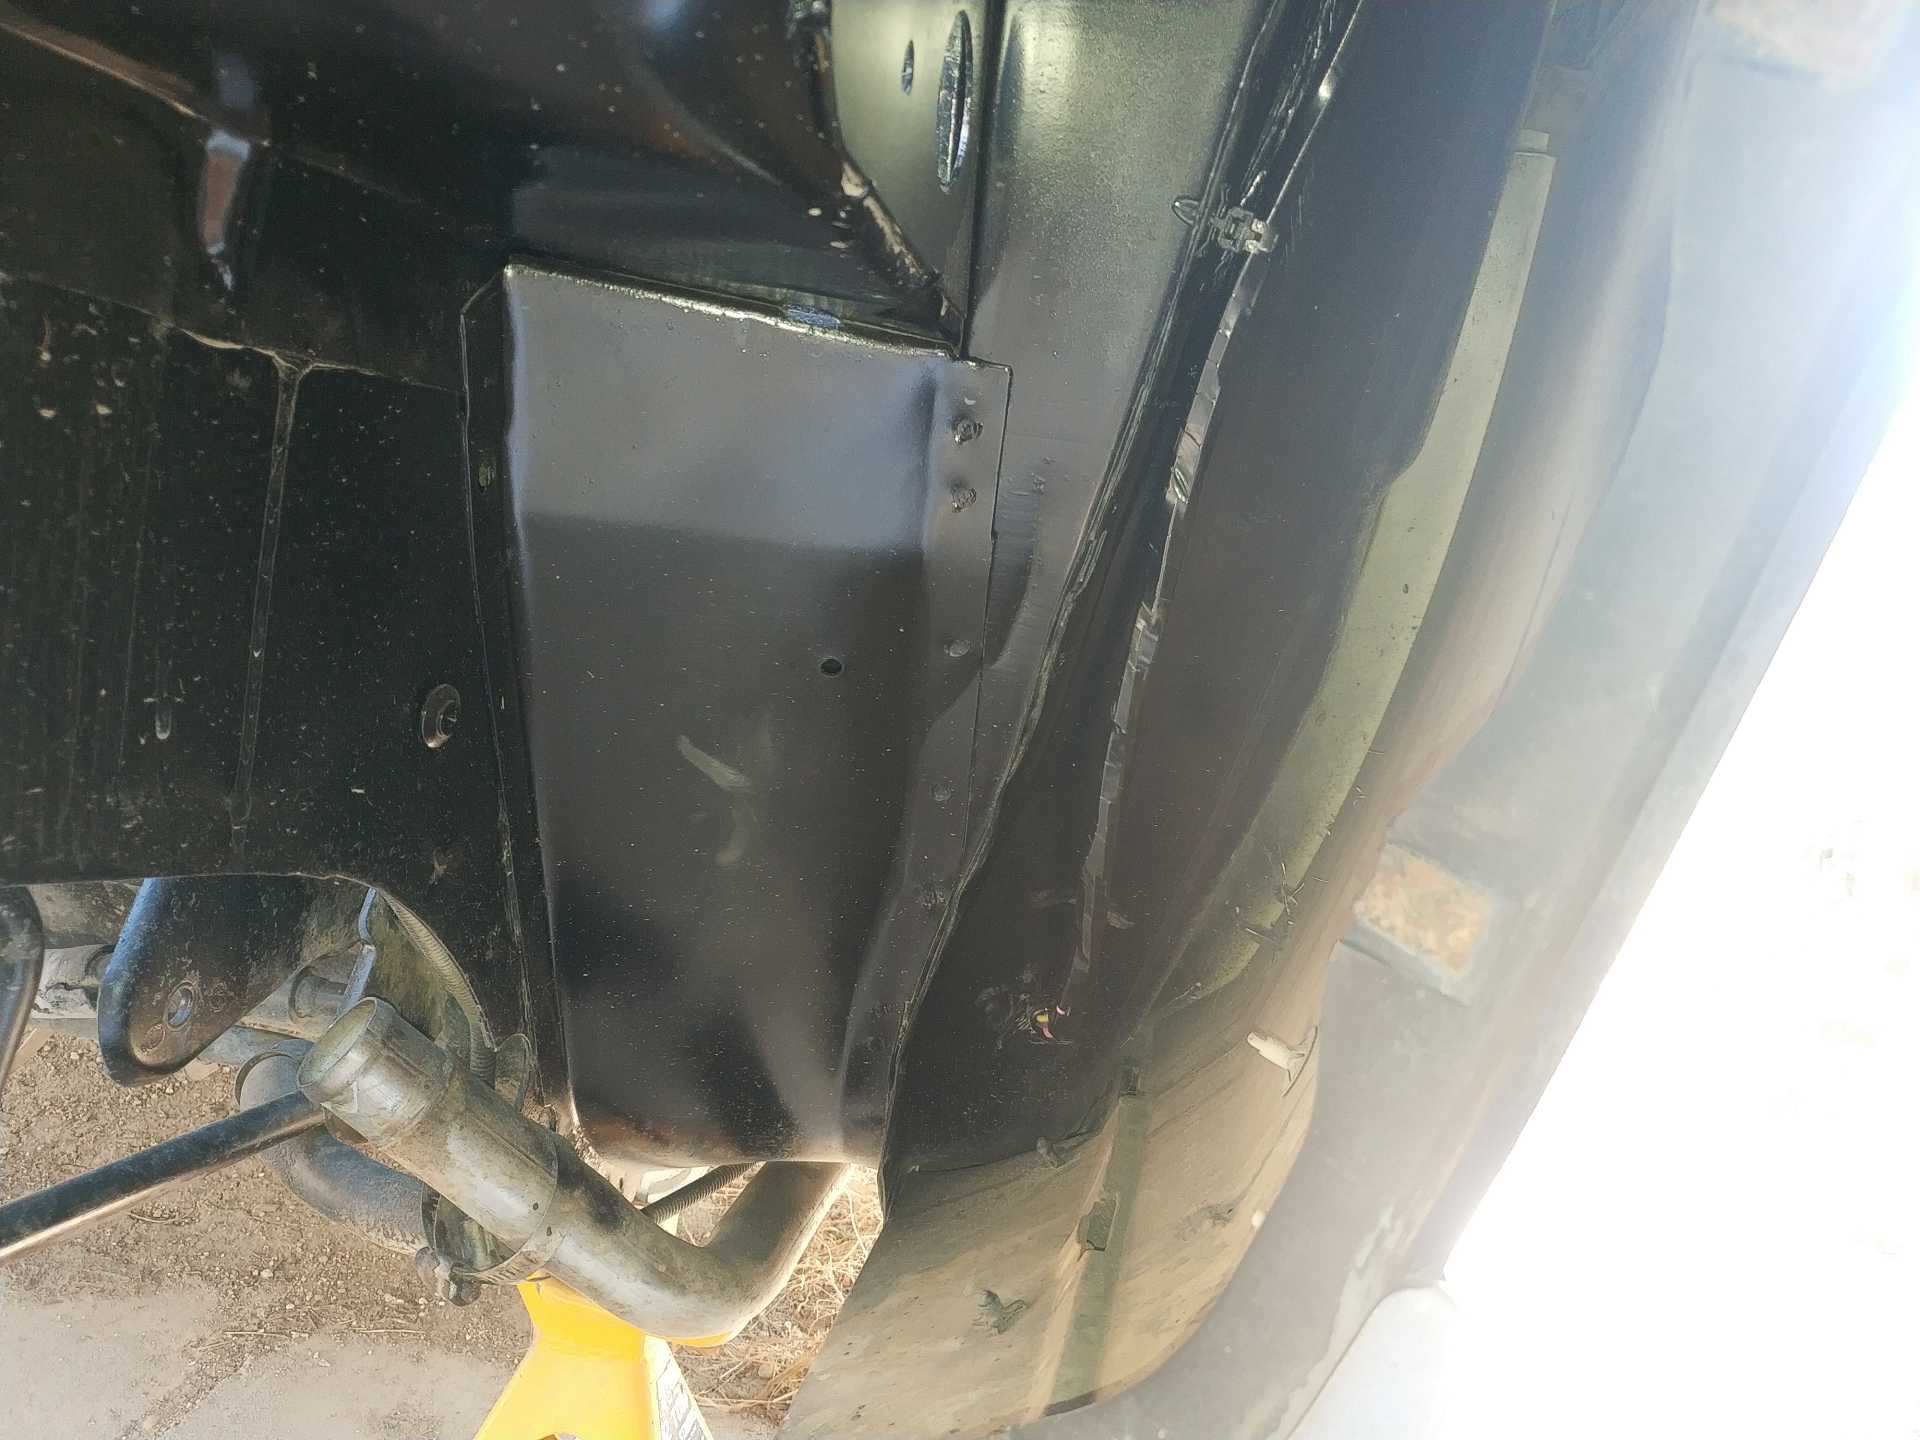
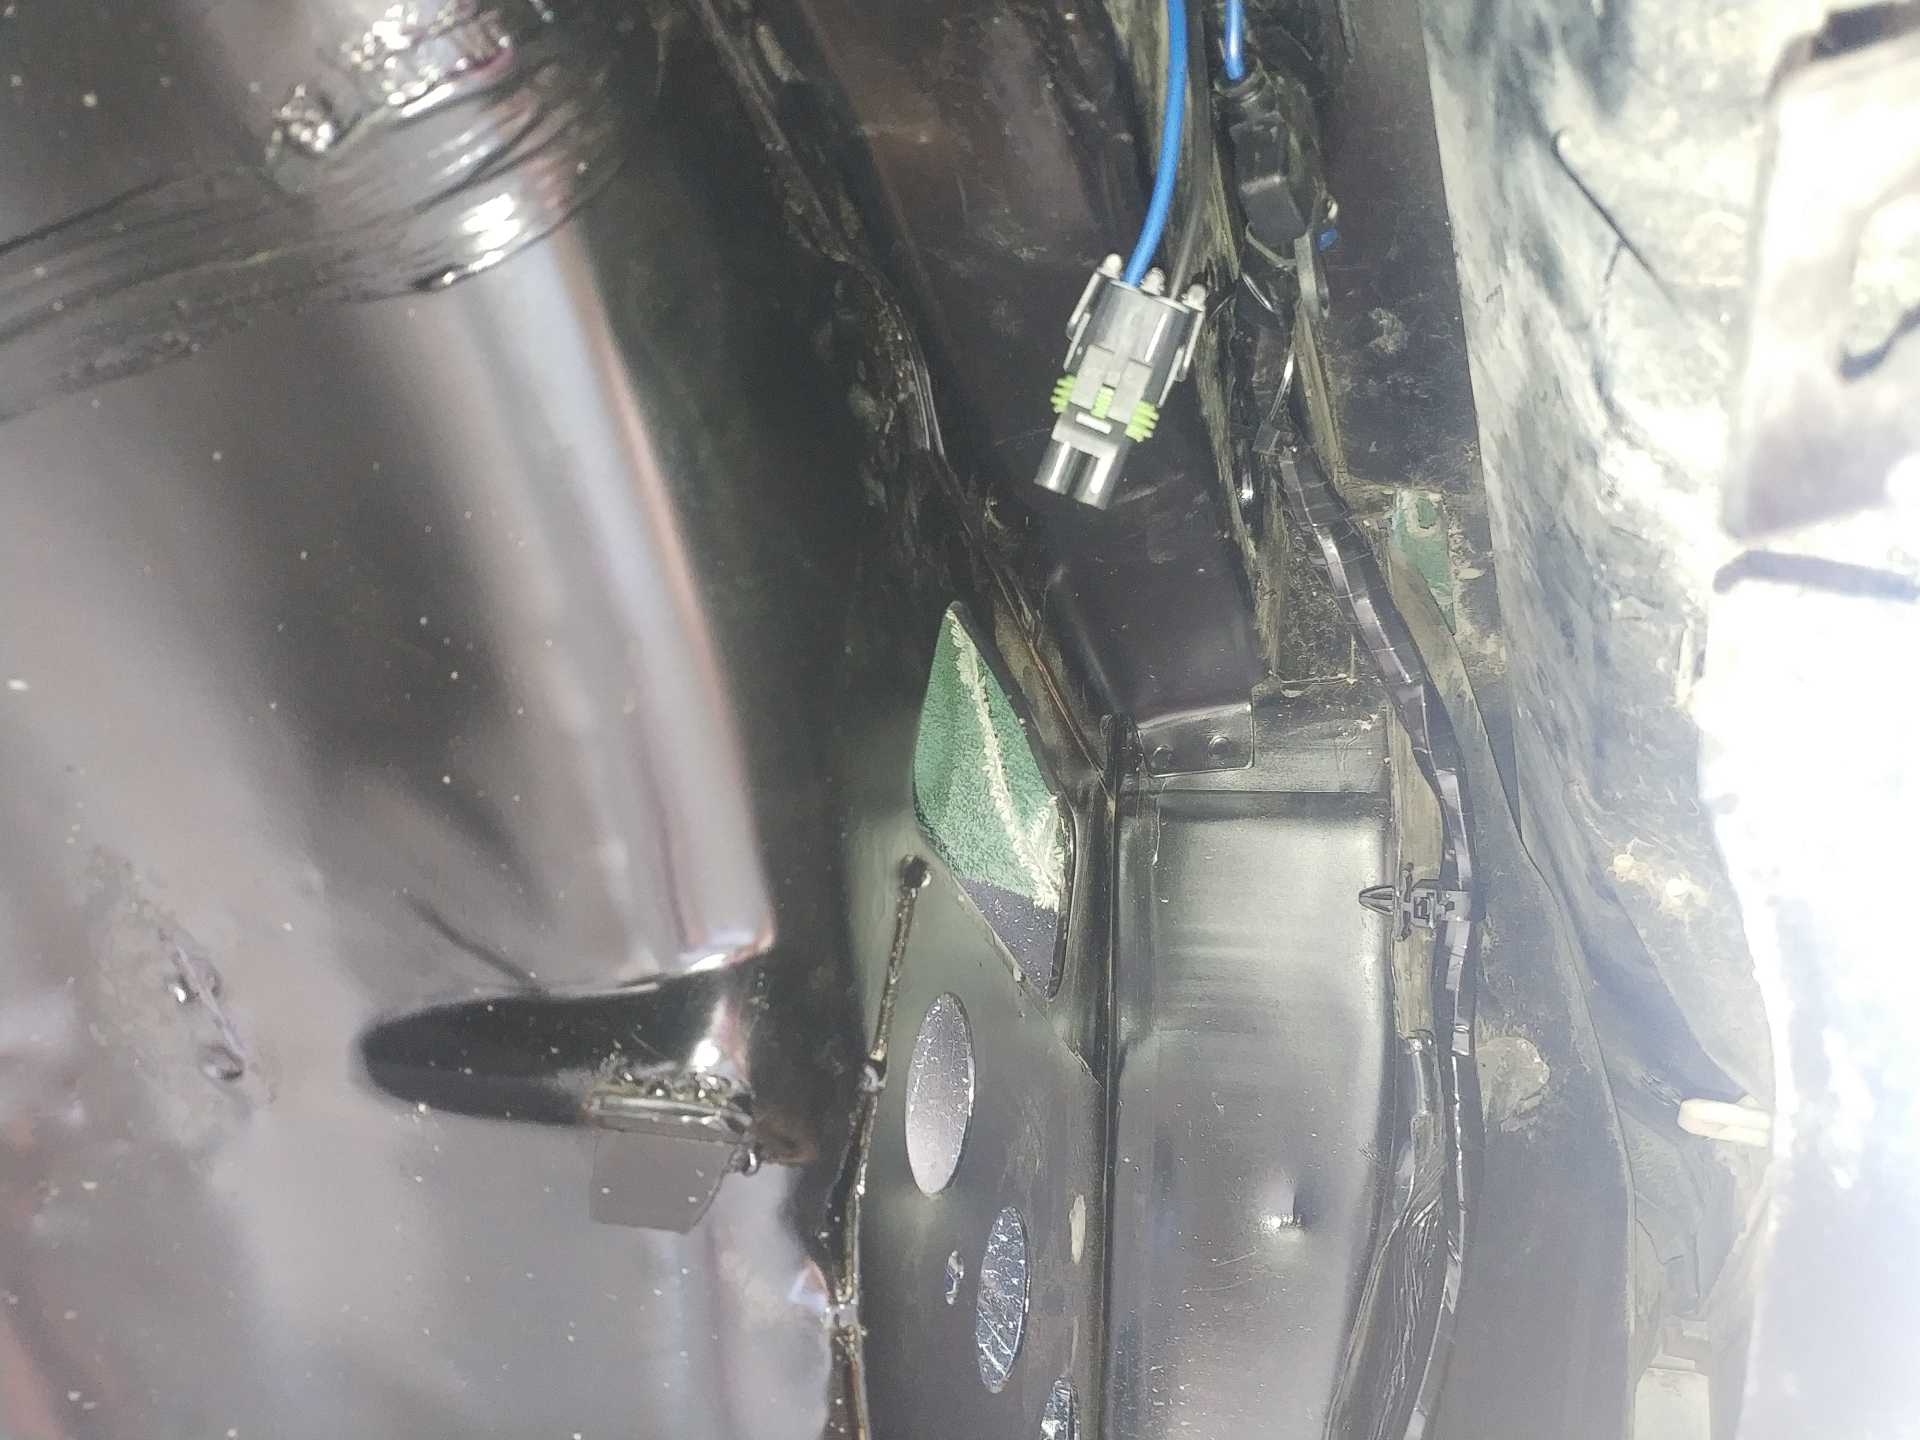
Yea I think the water pump is now fused twice but it'll be ok. It's grounded near in the wheel well at an existing ground.
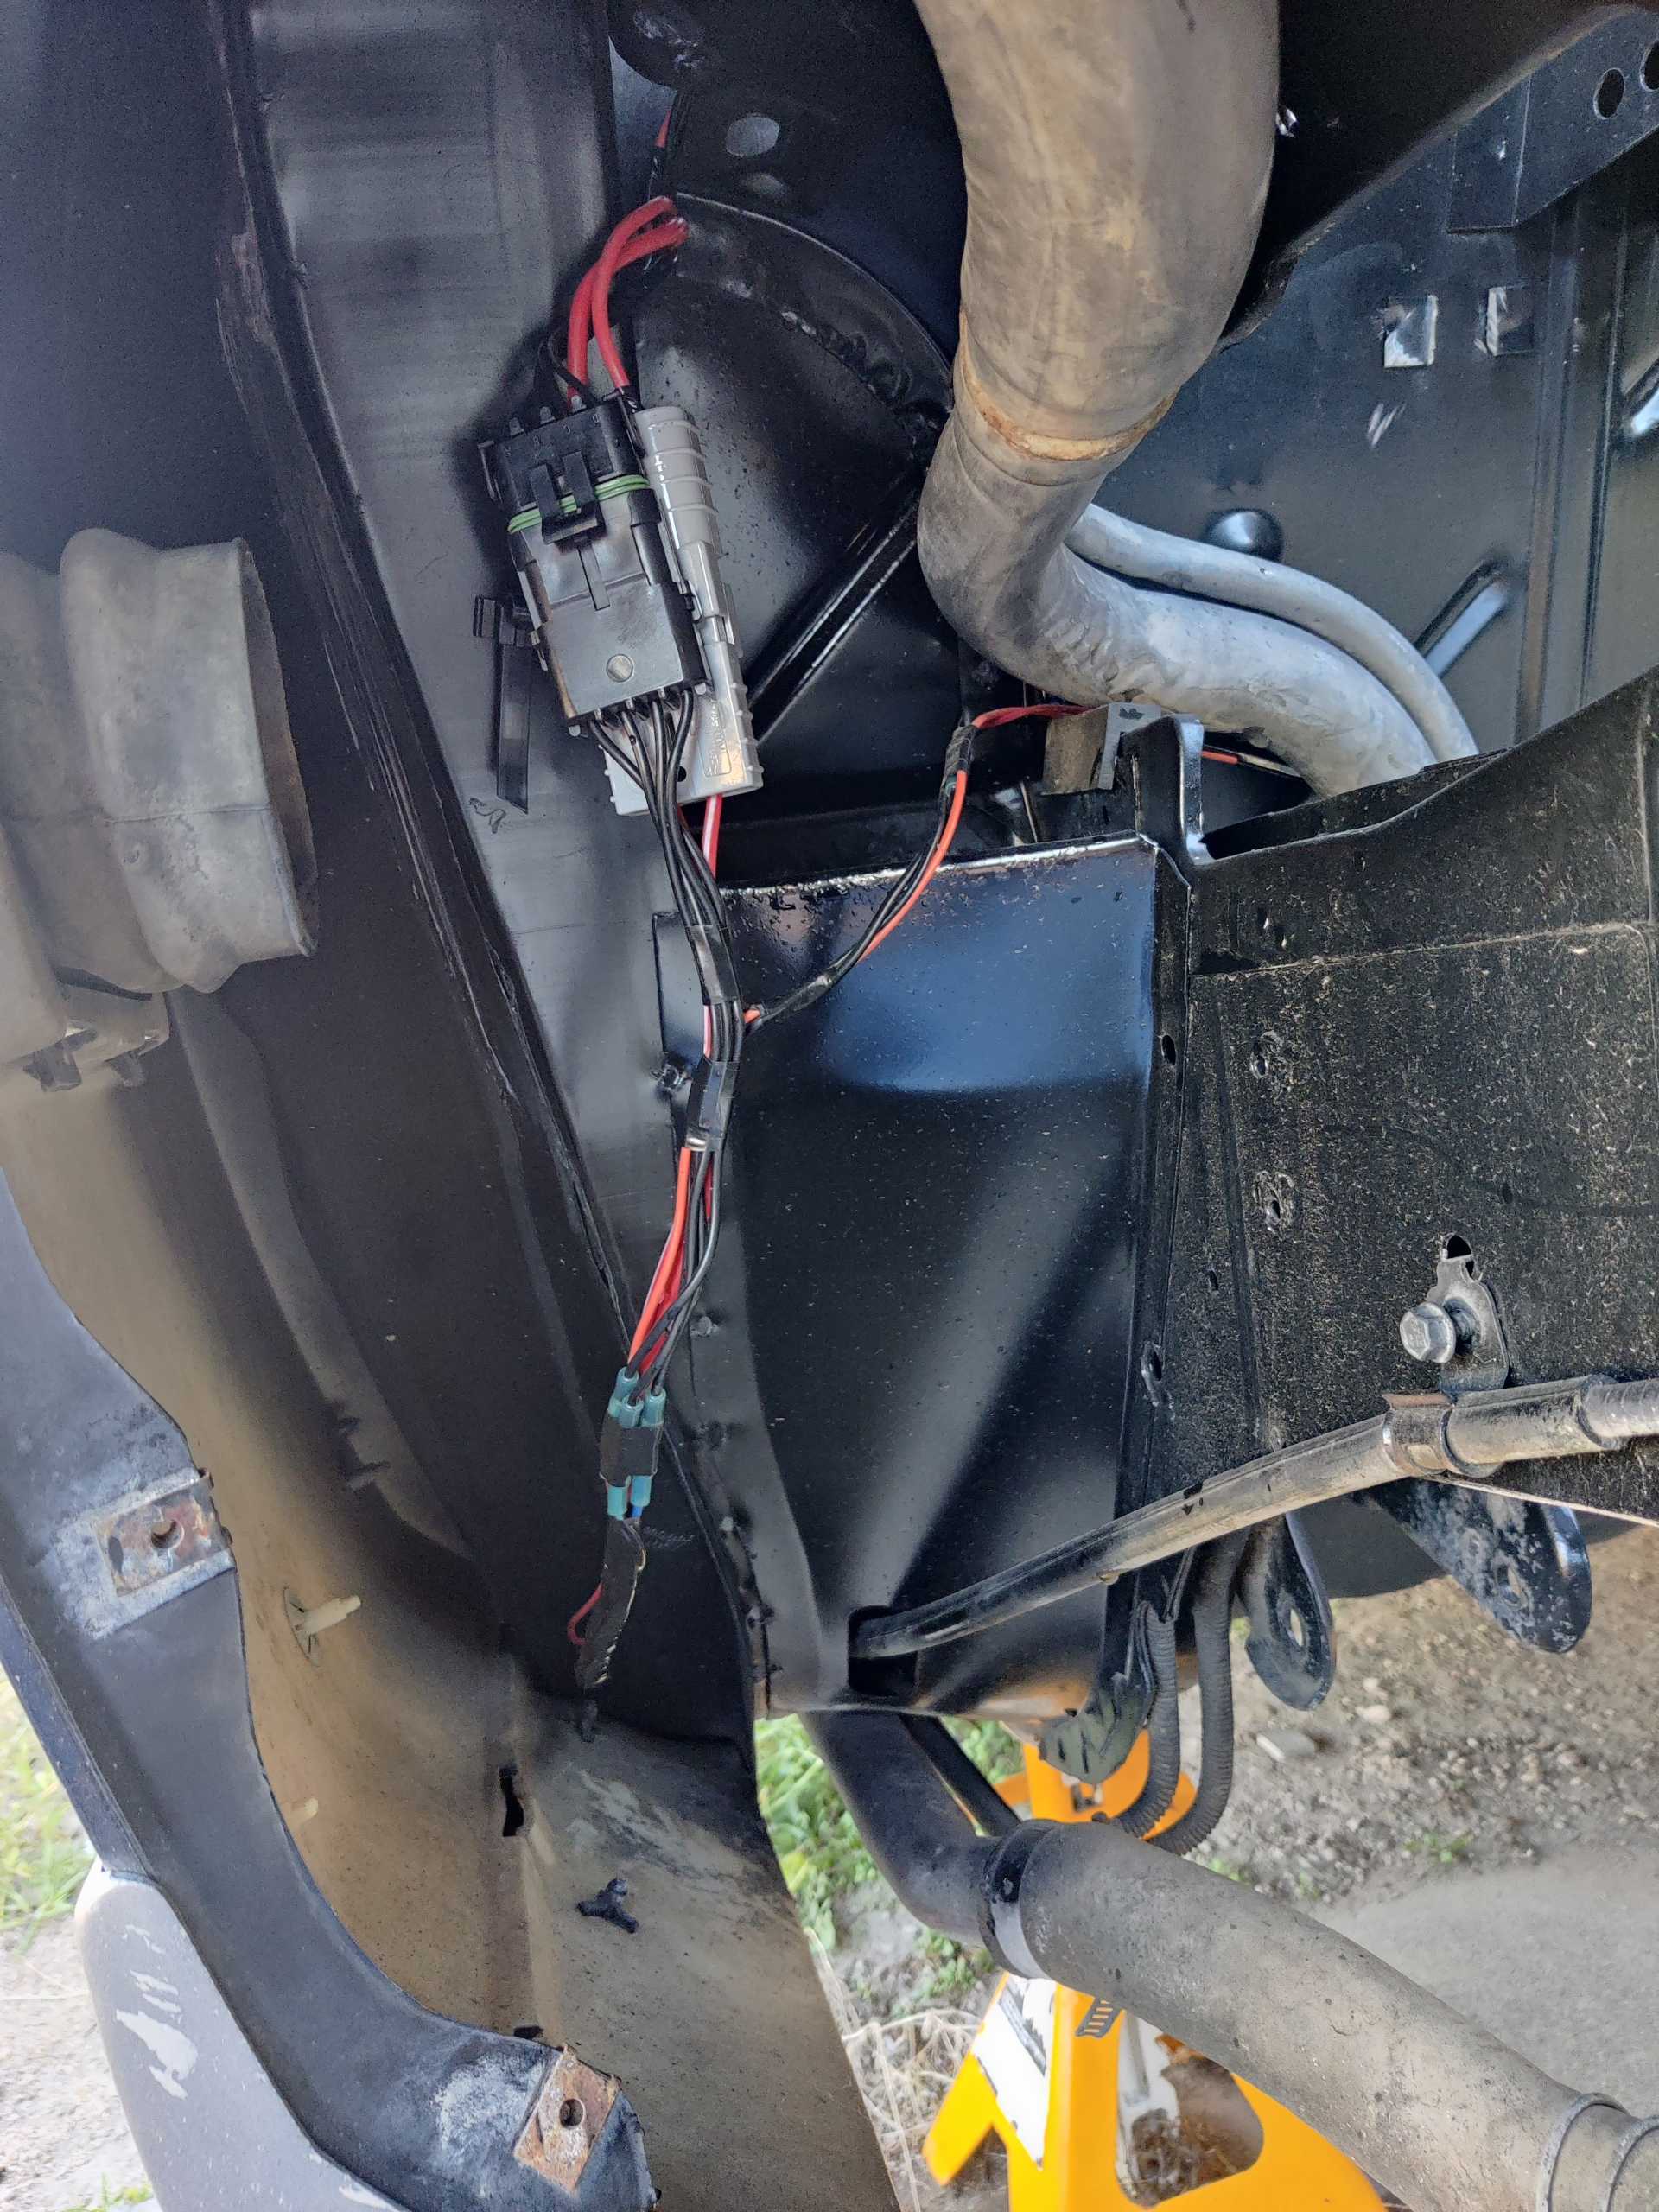
Fuel pump power comes from up top on the drivers side (where the new fuse box will be) and the 3 wires will sneak behind the fuel fill tube and will follow along the ledge to the tank. I wanted to make this build in such a way where I could keep the fuse box with the engine harness and be able to start the engine on the ground. I originally got the cheap relay and fuse holders for this and then my friend told me 'If you're guna do it, do it right'. That may have played a huge part in deciding to do all this with the wiring being cleaned up and my over-analyzing of everything over and over again. I got a somewhat cheap, but waterproof, distribution and fuse & relay boxes off Amazon and mocked up where I wanted them to be. I also welded bolts to the body where the ECM & TCM will be. They are mounted on non-conductive plastic and the plastic will be mounted to the body.
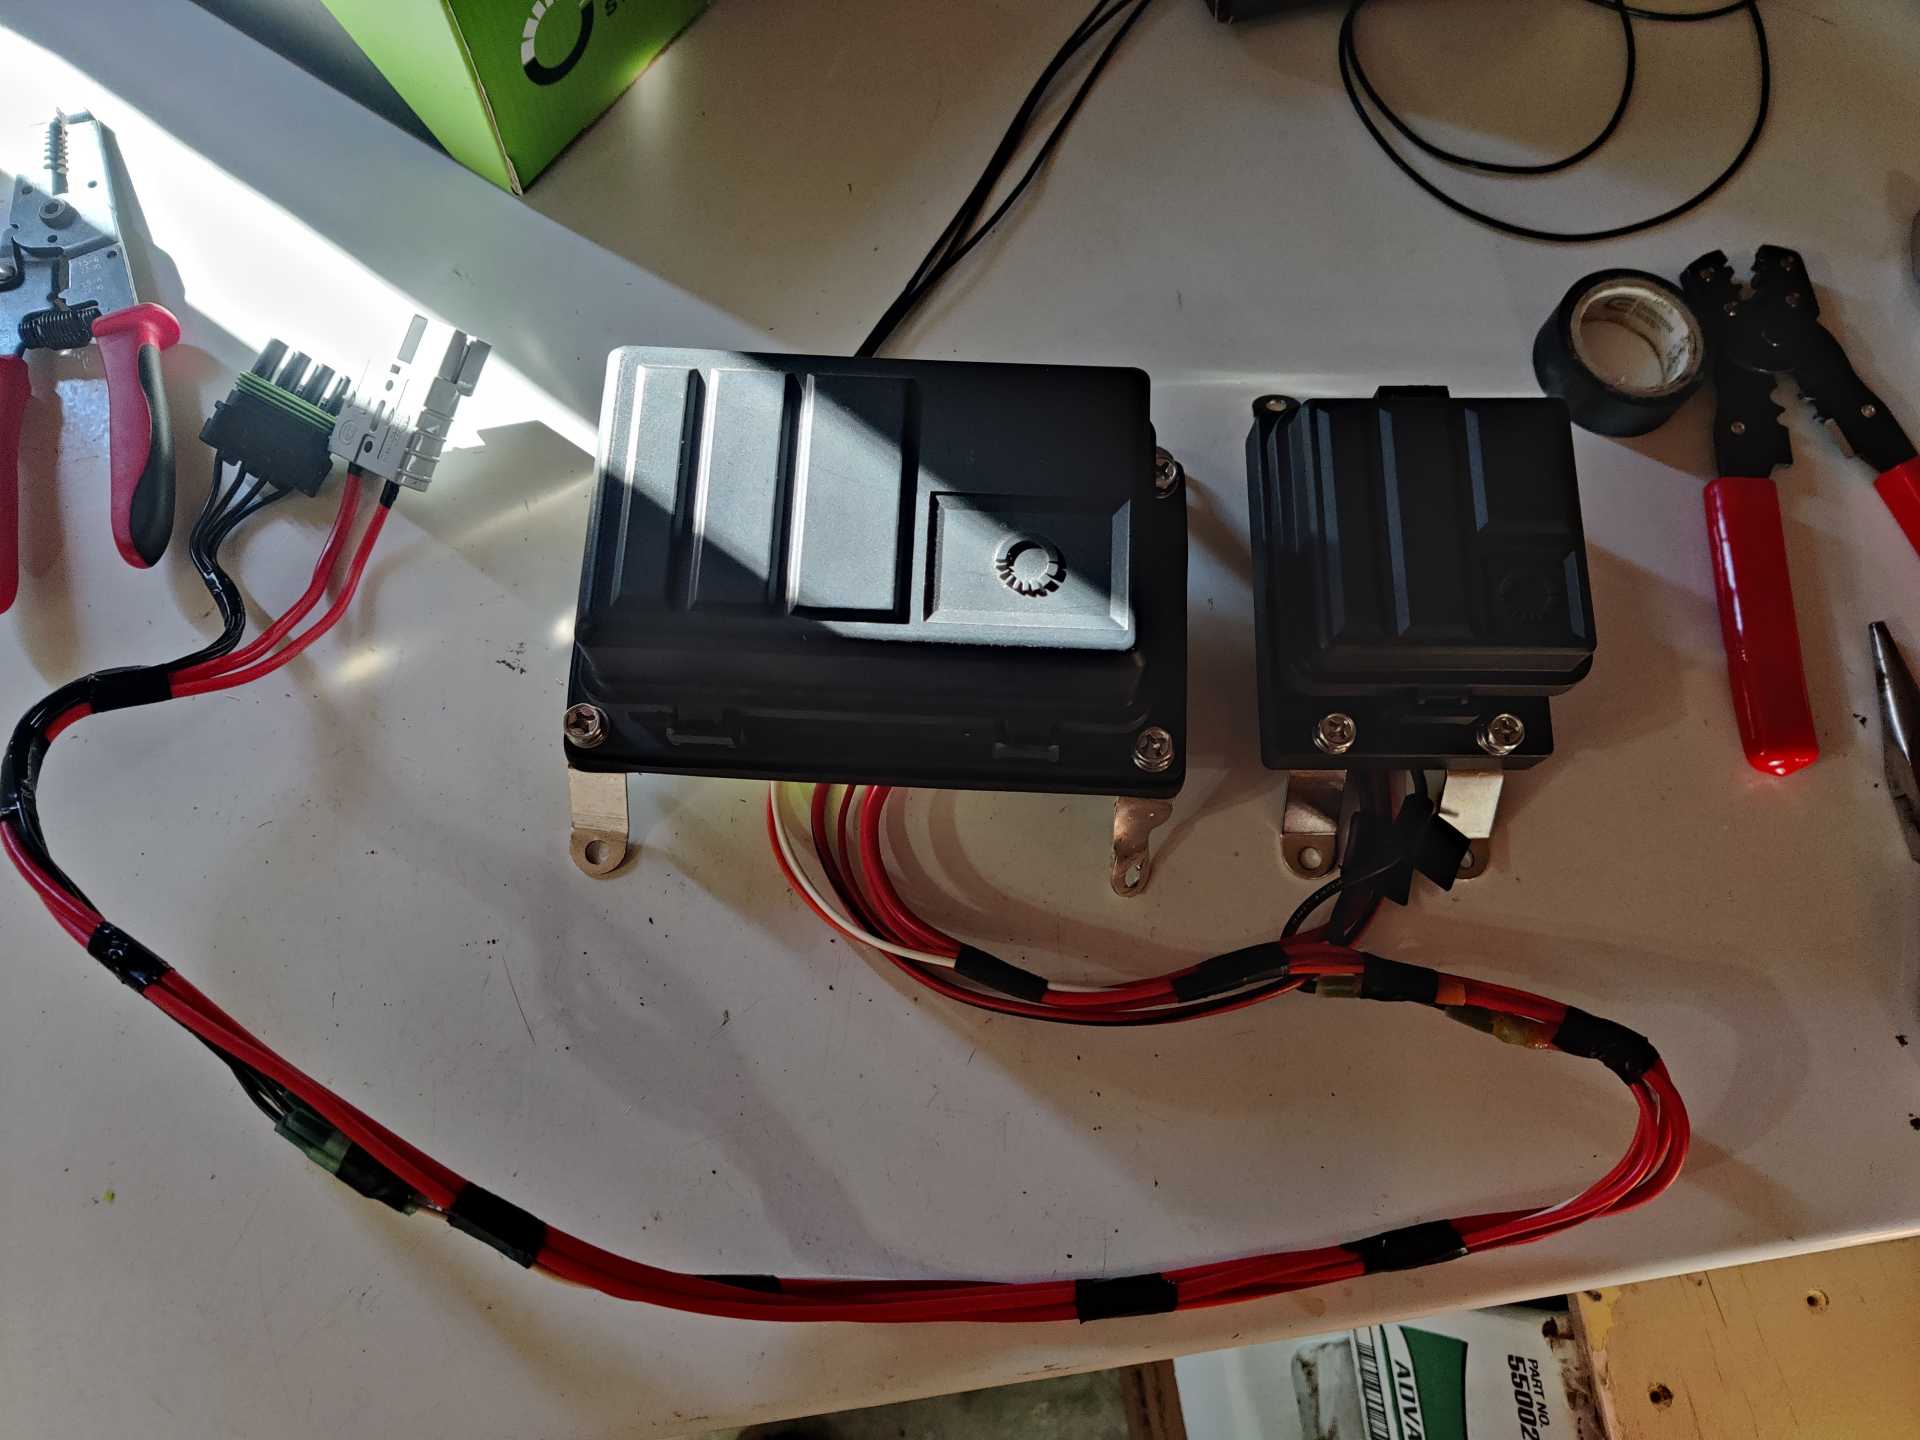
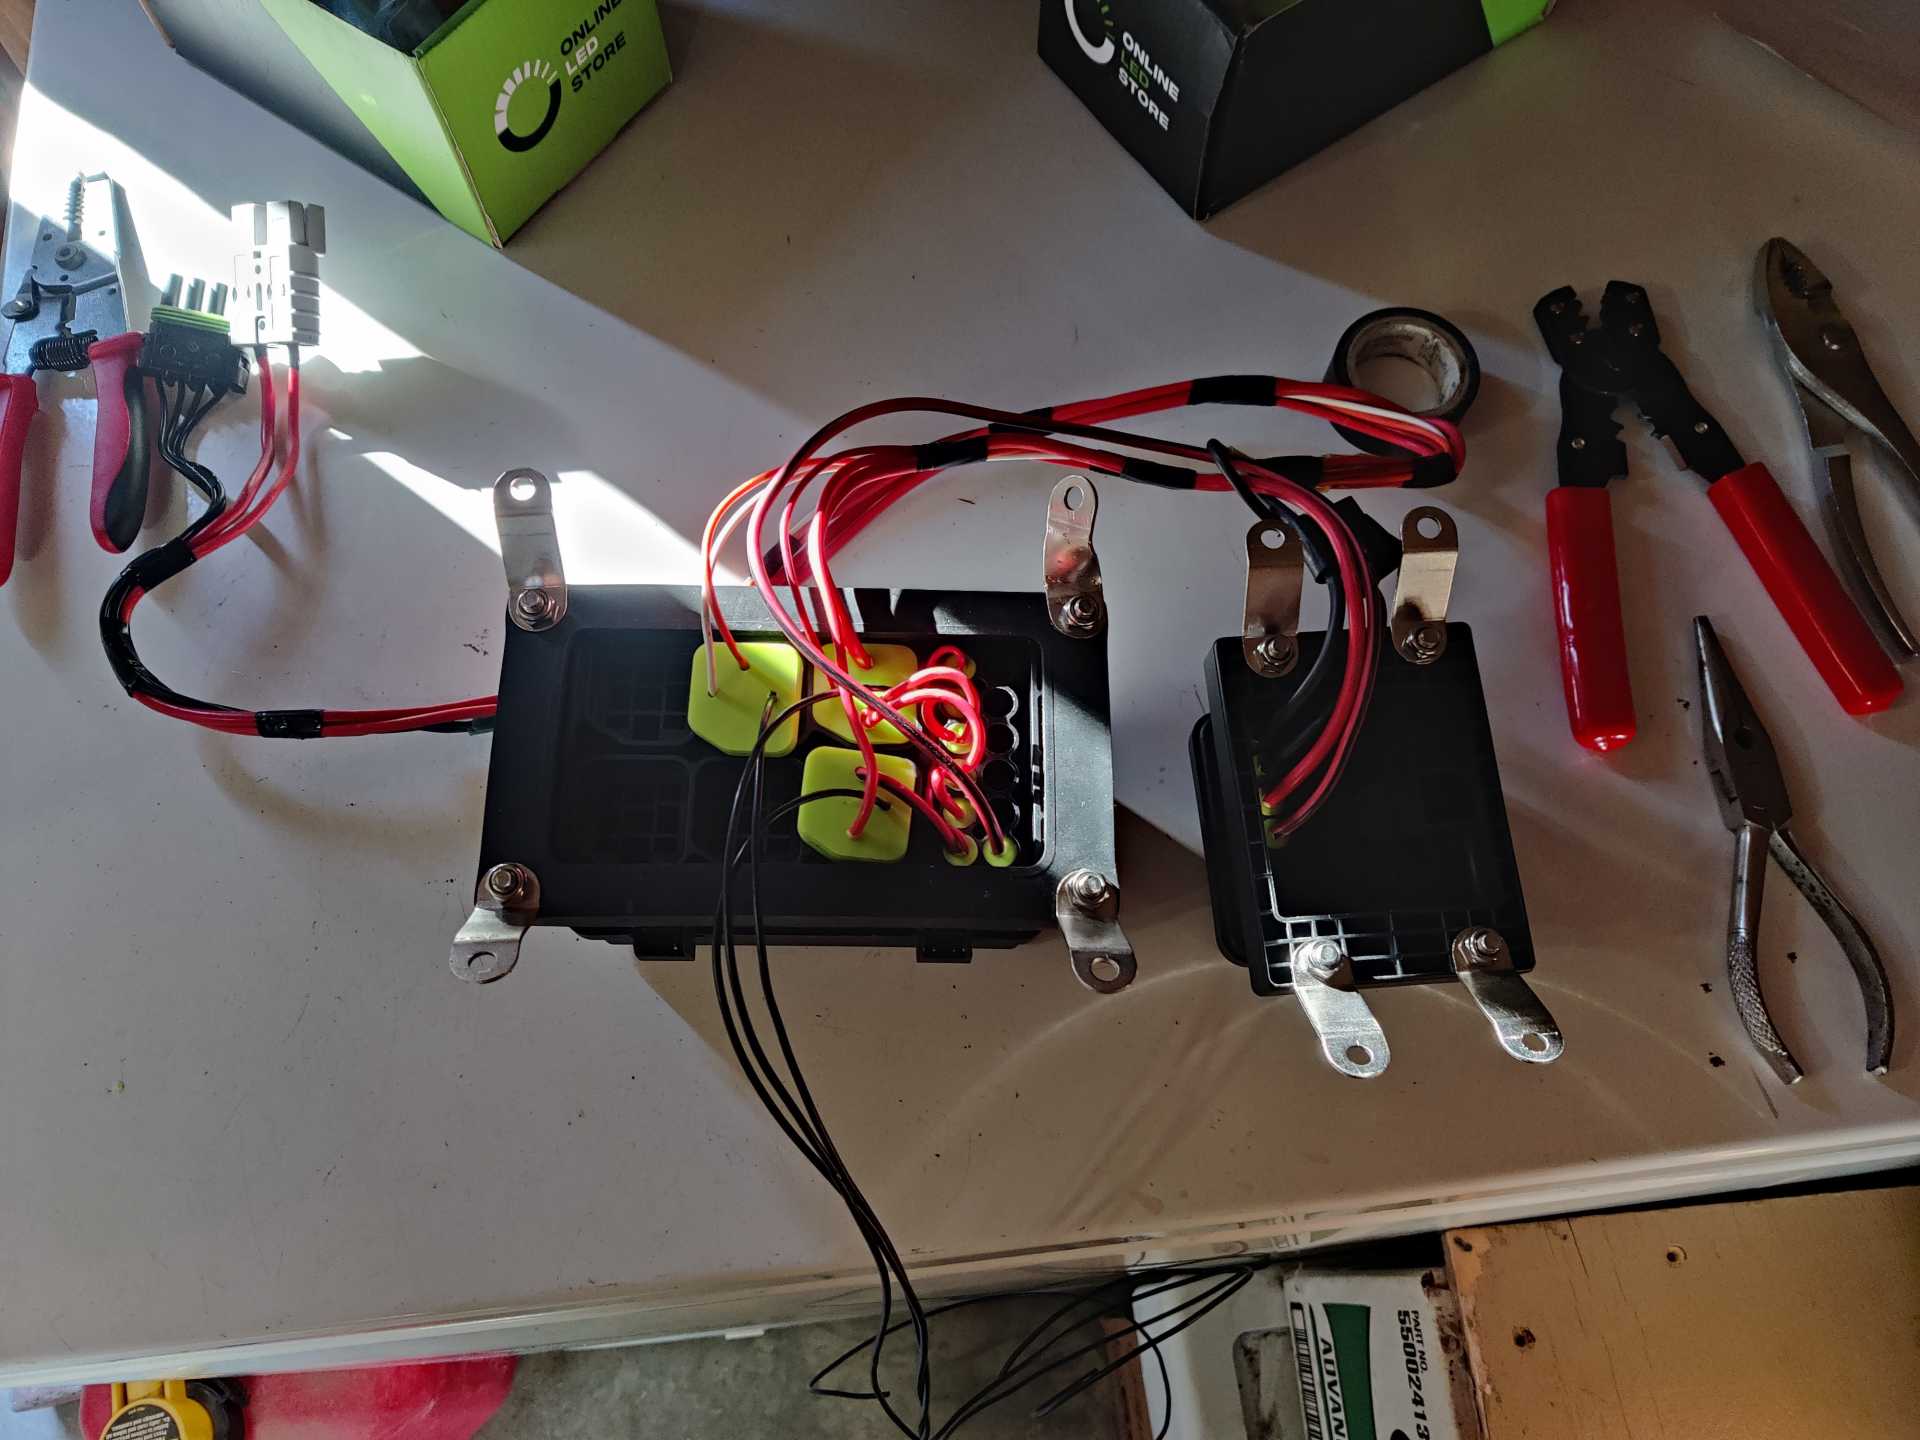
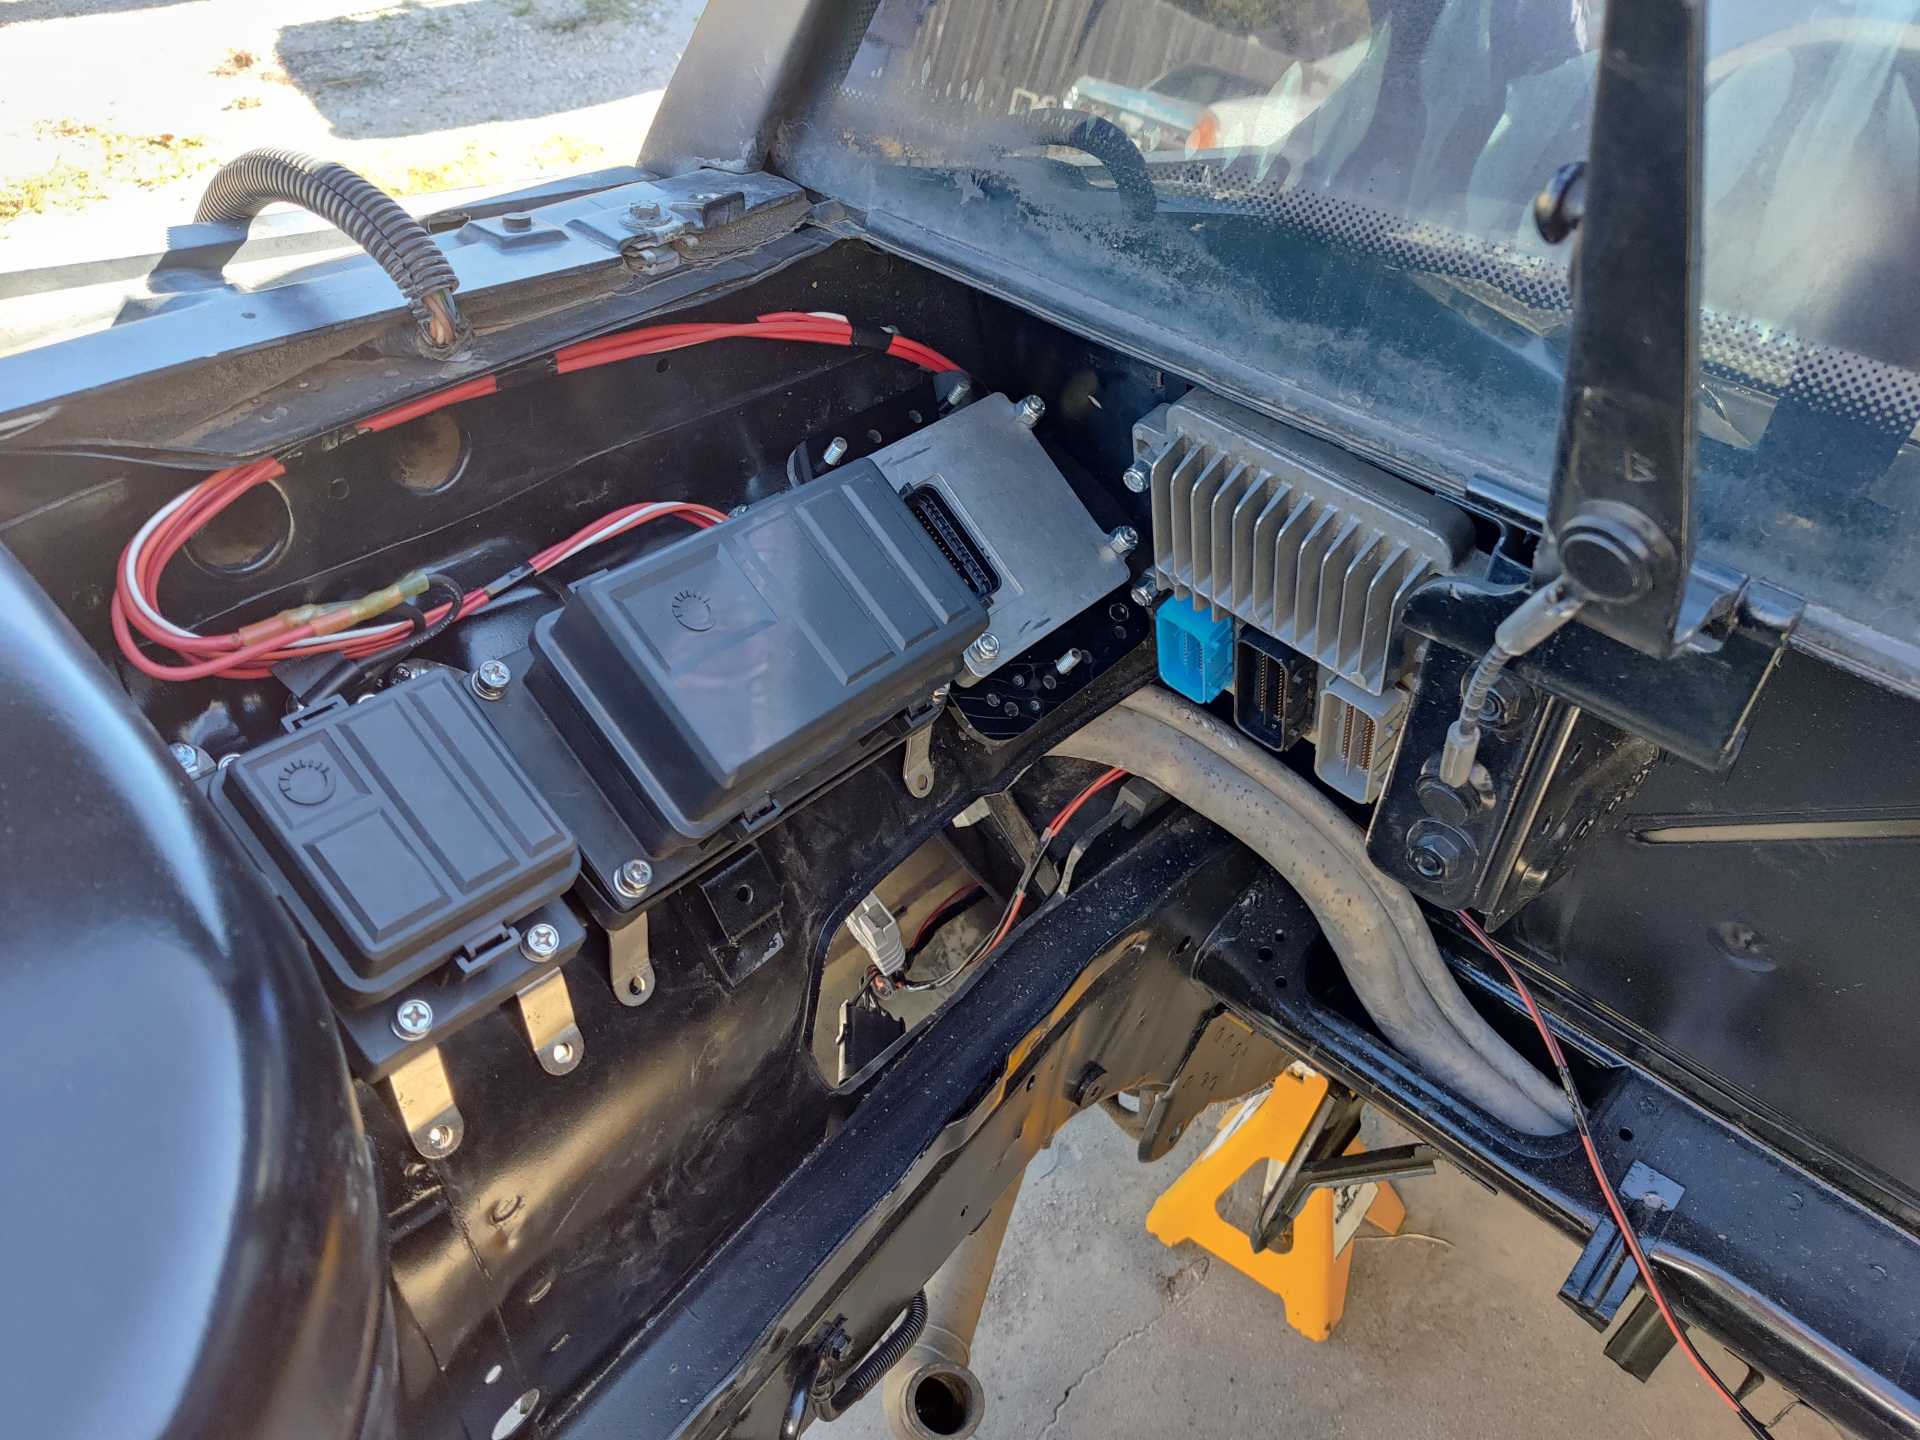
This is correct isn't is? Having the computers cases not grounded or touching the body. Could I get a little more help with this one too? I've heard to not let the computers be grounded from the cases and I've heard to ground the case. I thought they were grounded through the wires for ground but lately I've been told it wouldn't matter. I just don't want to fry my computers over something so little.
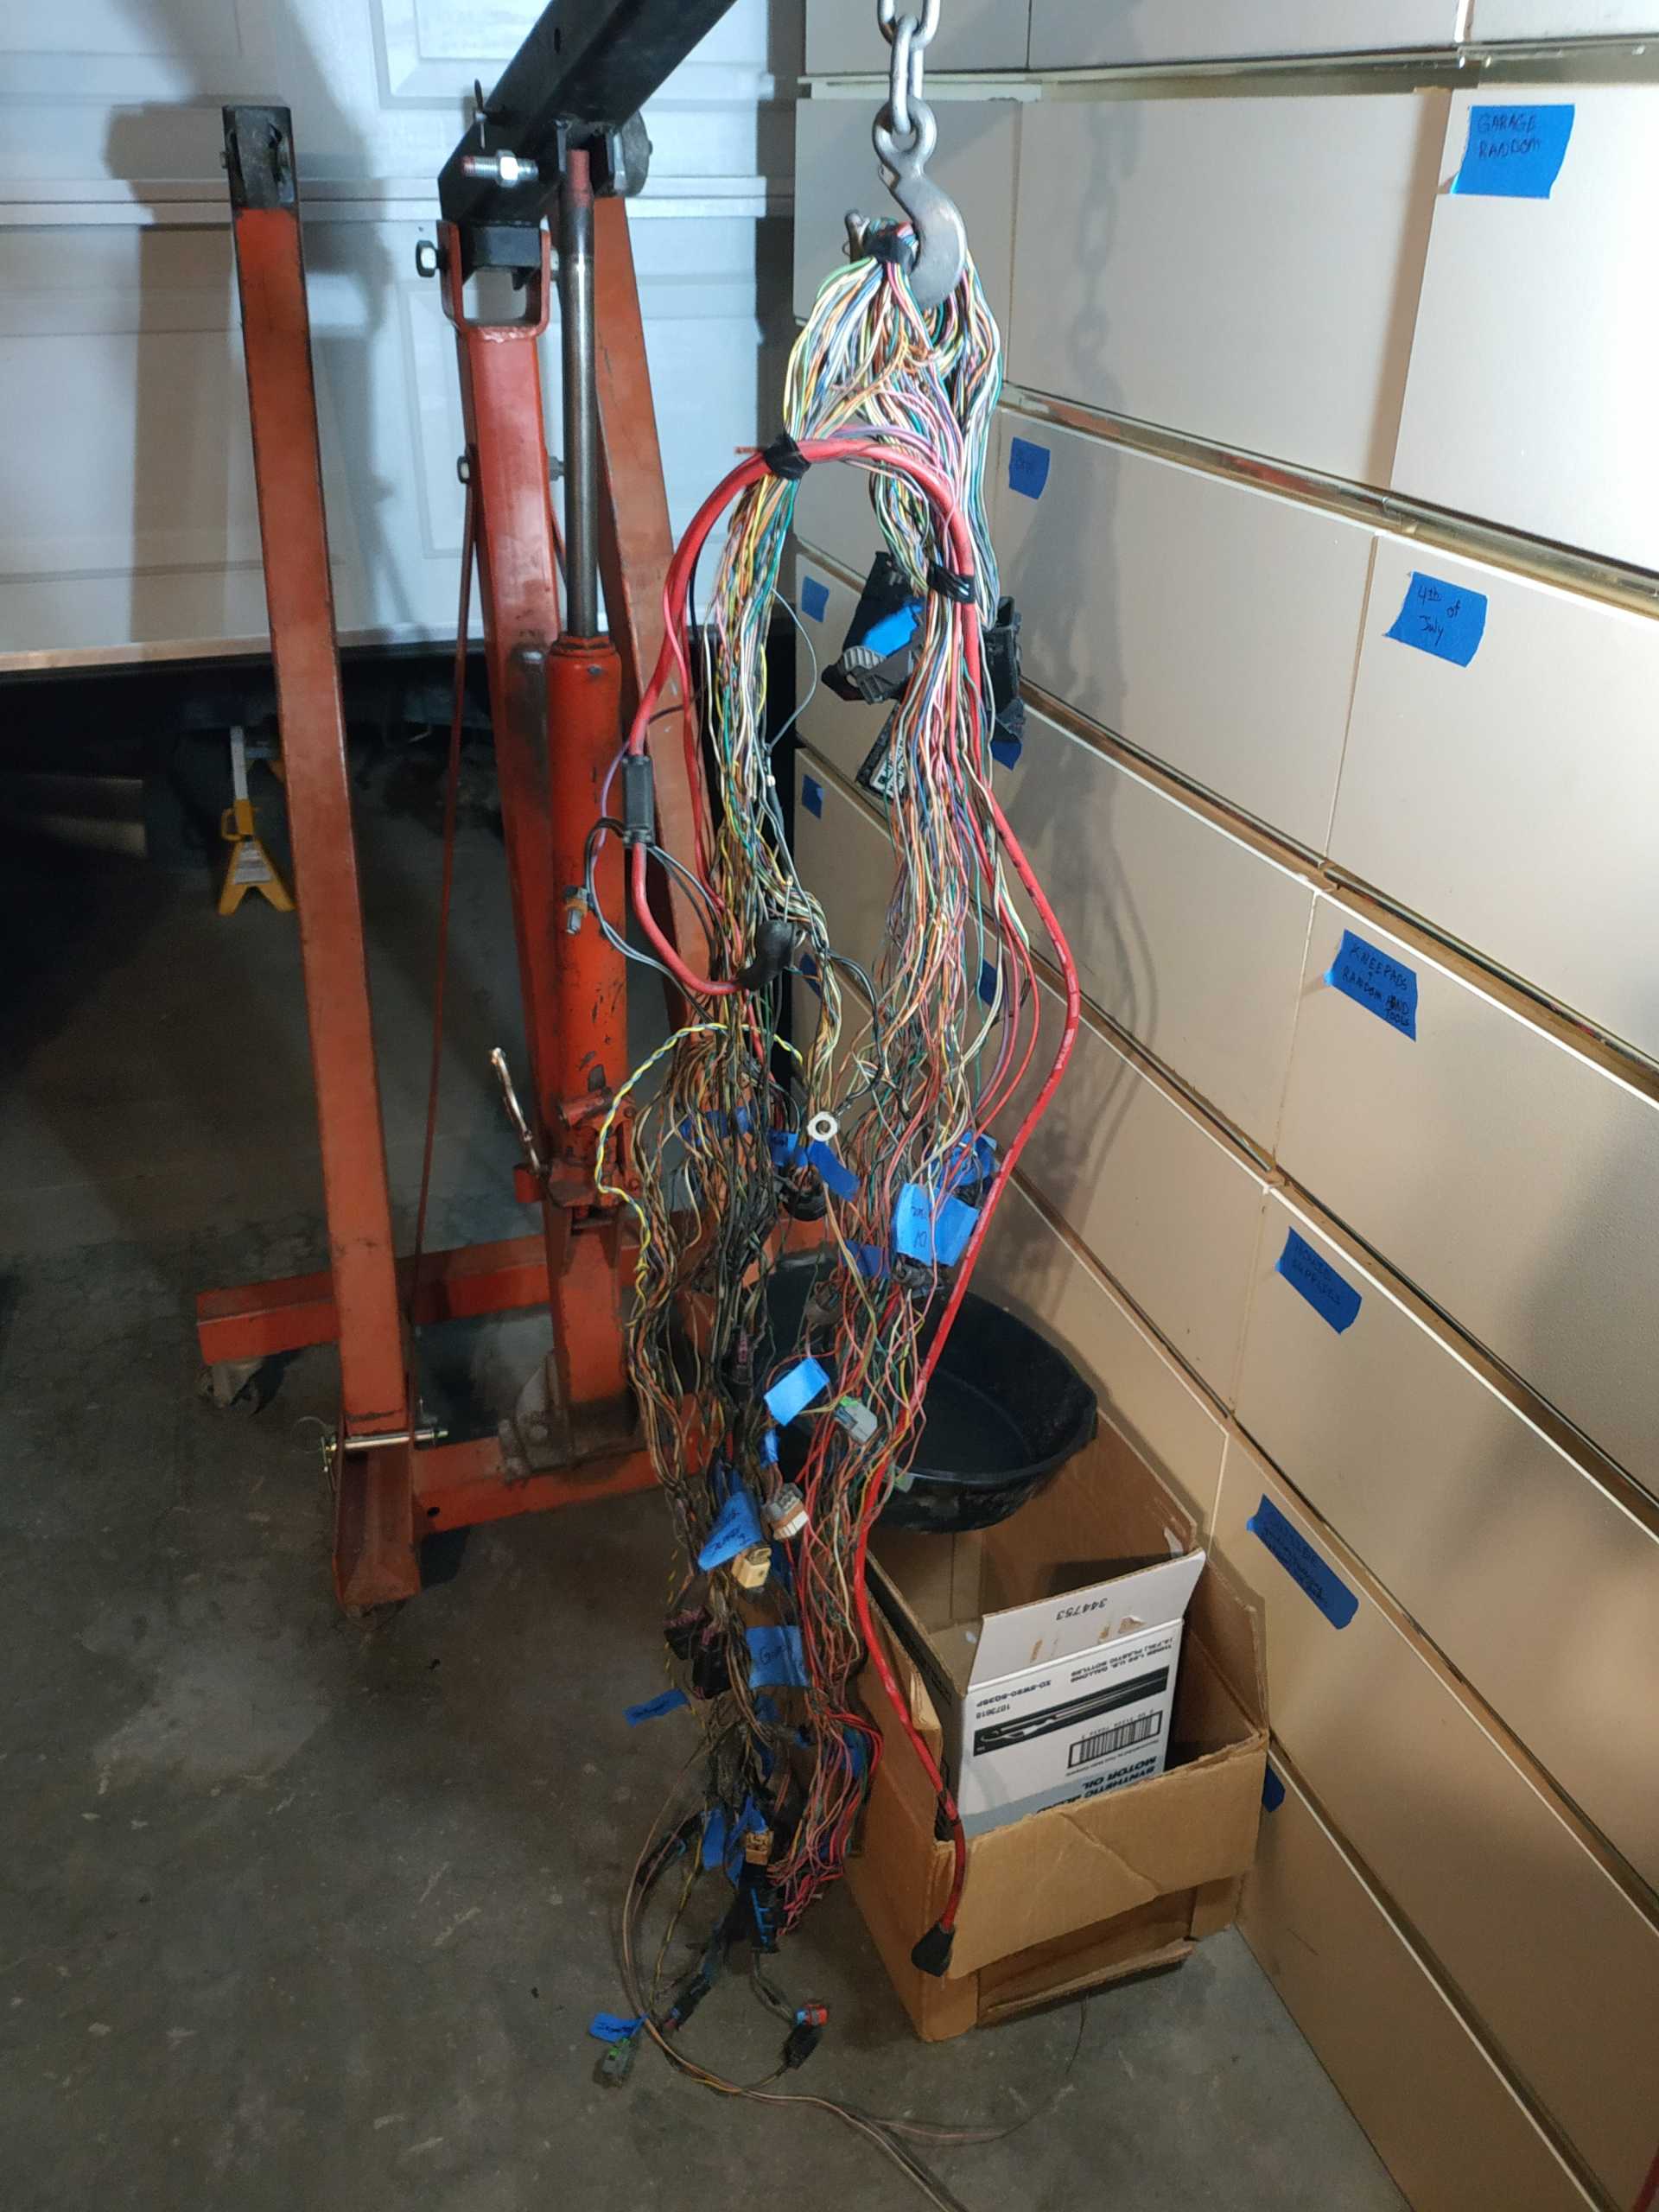
I got the engine harness all deloomed and removed the extra wires not needed for this build. I wanted to keep the wires from drooping over where the coolant lines were so I purchased some of the ECM pins and moved the O2 sensor and cam position sensor wires to the rear (left) underside of the engine. I have so many left over it isn't funny. I planned to mount the computers on the inside of the car but this was the route I took. I also added a coolant temp sender on the opposite side of the motor from stock for the gauge. Ive seen the 3 wire ones that run the ECM and gauge but the sender came with the gauge so I just ran the wire for it. The coolant temp and alternator wires were routed under the front (right) side of the engine along with the alternator power cable. A wire for the oil pressure gauge was also ran along here. I may still get ahold of you, Guru, for the adapter at the filter housing if I can't drill and tap the original one.
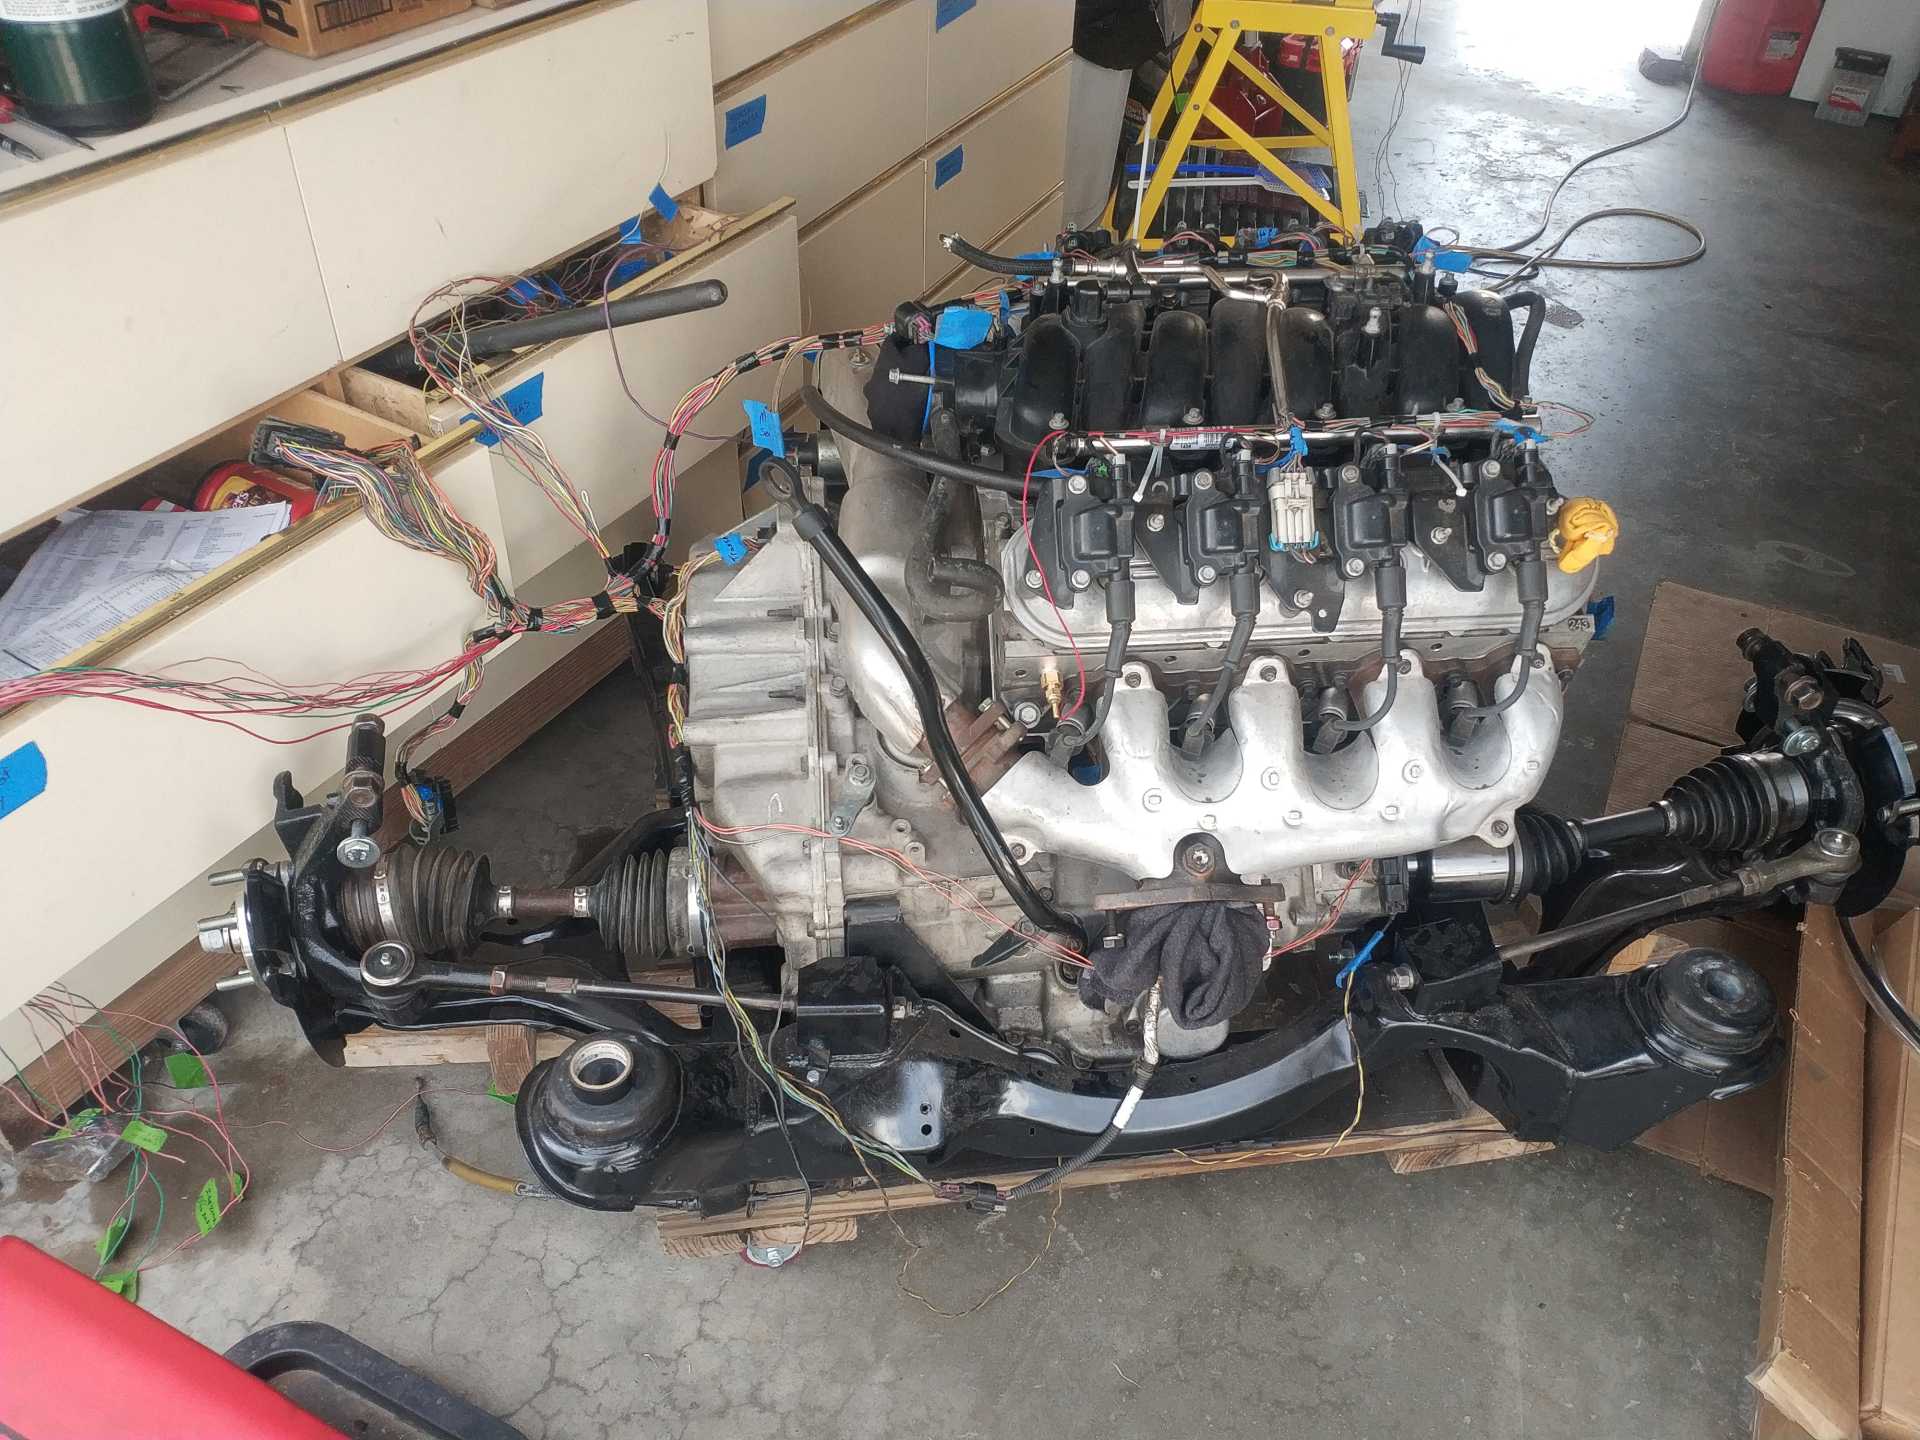
I haven't got the fuse box connected to the harness yet but soon.
|
|

|
Dennis LaGrua
|
NOV 16, 12:48 PM
|
|
|
Nice job but does the stock cam work with the AFM/DOD delete? Most LS4 swaps that I have come across replace all the lifters, lifter cradles, valve springs and camshaft but this could be as a performance mod. Have you figured out the changes needed to the PCM program to make this all work? ------------------
" THE BLACK PARALYZER" -87GT 3800SC Series III engine, custom ZZP /Frozen Boost Intercooler setup, 3.4" Pulley, Northstar TB, LS1 MAF, 3" Spintech/Hedman Exhaust, P-log Manifold, Autolite 104's, MSD wires, Custom CAI, 4T65eHD w. custom axles, Champion Radiator, S10 Brake Booster, HP Tuners VCM Suite.
"THE COLUSSUS"
87GT - ALL OUT 3.4L Turbocharged engine, Garrett Hybrid Turbo, MSD ign., modified TH125H
" ON THE LOOSE WITHOUT THE JUICE "
|
|
    
  |
|
