
 
     |
| How I Fixed Fuel Sender Binding Problem in 88 Tank (Page 1/4) |

|
V8Steve
|
JUN 02, 06:55 AM
|
|
Like others, I bought a new sending unit and spent a great deal of time putting it back in the car, only to discover the gauge didn't work. It always read EMPTY and did not respond to a full tank. Finally, I took out the tank and here's what I found and how I fixed it.
The unit came from the Fiero Store and they were all helpful. Their customer service to me has always been excellent but this sender problem was one that just couldn’t be solved easily.
Like others who pulled the tank out, I put a meter on the unit and it read around 0.7 ohms at the bottom of the stroke and 92-93 ohms at the top. It worked perfectly on the bench. I think I read every forum post on this about 1) stuck on empty, 2) finally went to full, wouldn't return to empty, 3) try it with a fishing line, etc. Apparently, there were instructions in the box about potential binding but I must have missed that. No one could tell me which way to bend the rod and by how much. I'd bend the rod a little this way and that way and put it back in tank with no results.
SEAL PROBLEM - Every time I turned the tank upside down the residual fuel leaked out. The round cross section seal that comes with the kit is difficult to keep in position without leaking. Don't use it. The correct part with the three alignment tabs is ACDELCO G10. If you have a repair shop replace the sender, make sure they test the installed unit in the tank by turning it upside down to check the ohms, and more importantly, checking for leaks.
PUSH WASHER PROBLEM - The little push washer was on too far and wouldn't allow the float to spin. At first, I thought that was the root cause of the binding problem.
FISHING LINE TRICK - Someone on the forum posted this as a way to check it. You simply tie some line on the float and assemble it without the seal. Right away I found some binding and bent the rod, reinstalled it, checked again. After several attempts and bending the rod little by little, the fishing line thing worked. So I put it all back together with seal, turned the tank upside down, and the ohm meter said it was still stuck on empty. That’s because the sender was not exactly in the same position with the seal compressed and the locking ring secured. The only way to know for certain is to drill a hole in the top plate and run the finishing line through, install with correct ACDELCO seal, and check it. I decided against that.
NO FLOAT - Next, I removed the float entirely and attached a small weight. Again still stuck on empty.
Finally, after all this bending of the rod with no results, I was concerned that I might damage the potentiometer and plastic clips so I removed the rod, tried more bends, and carefully reinserted it back into the clips every time.
I’d already spent too much time on this by searching the forum and trying everything I could think of, including just giving up. I’d run out of patience and ideas on this and kept looking at my angle grinder and spare 88 tank.
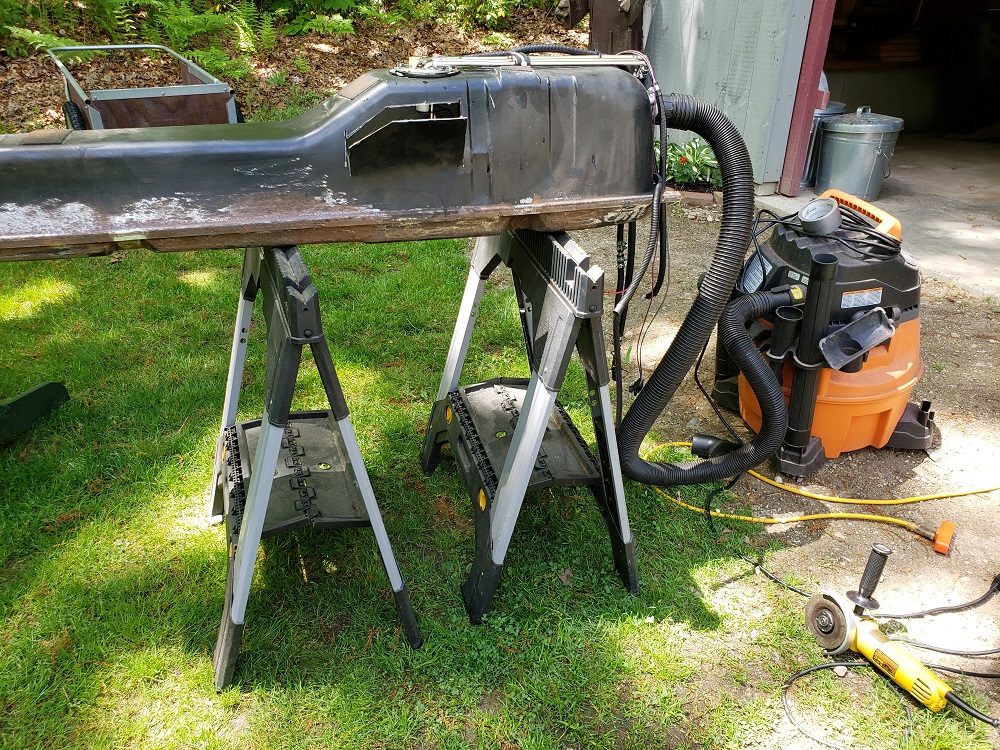
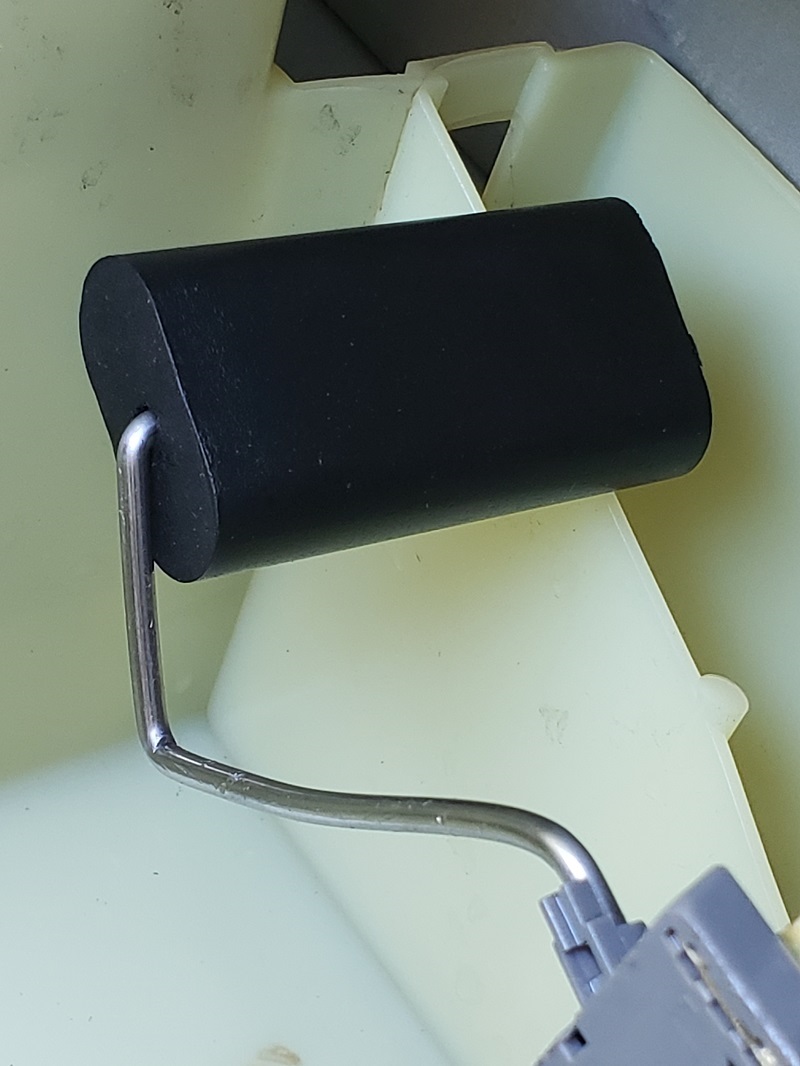
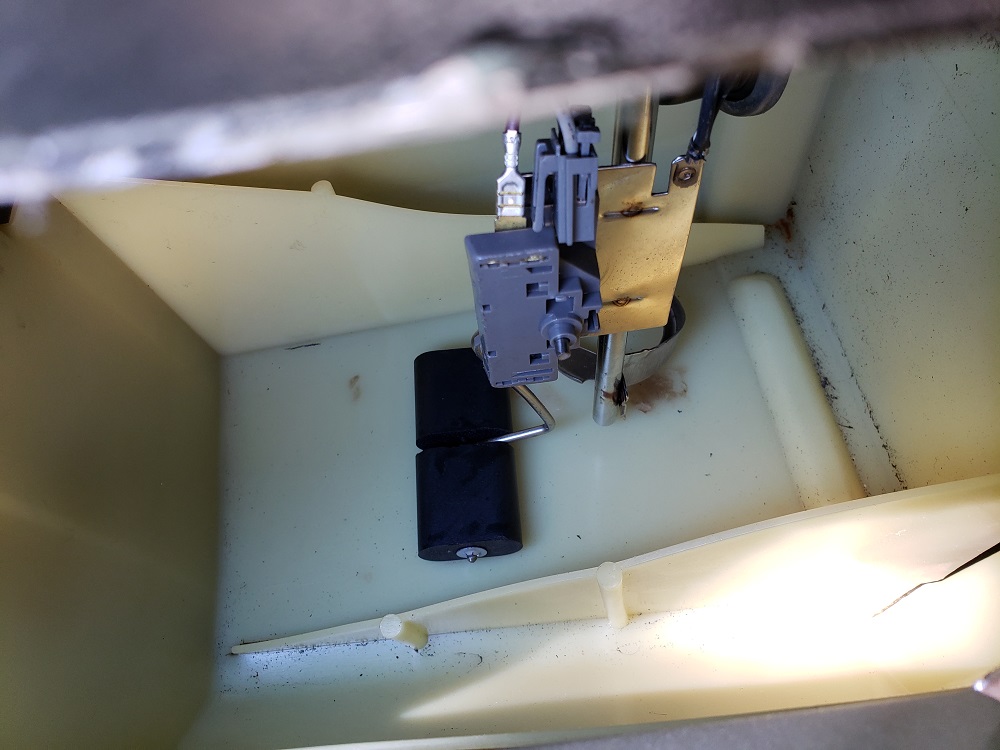
I cut a window in the side of the tank and here’s what I found. The tip of the rod where it exits the float was rubbing on the side baffle. In fact, the interference was so much that if the float moved upward enough toward full, it could never return all the way because it overhung the top of the baffle. In my case I would have had to move the entire float and rod away from that baffle by at least 3/8 - 1/2”. It was too far to bend the rod while still maintaining any form of alignment and being plumb.
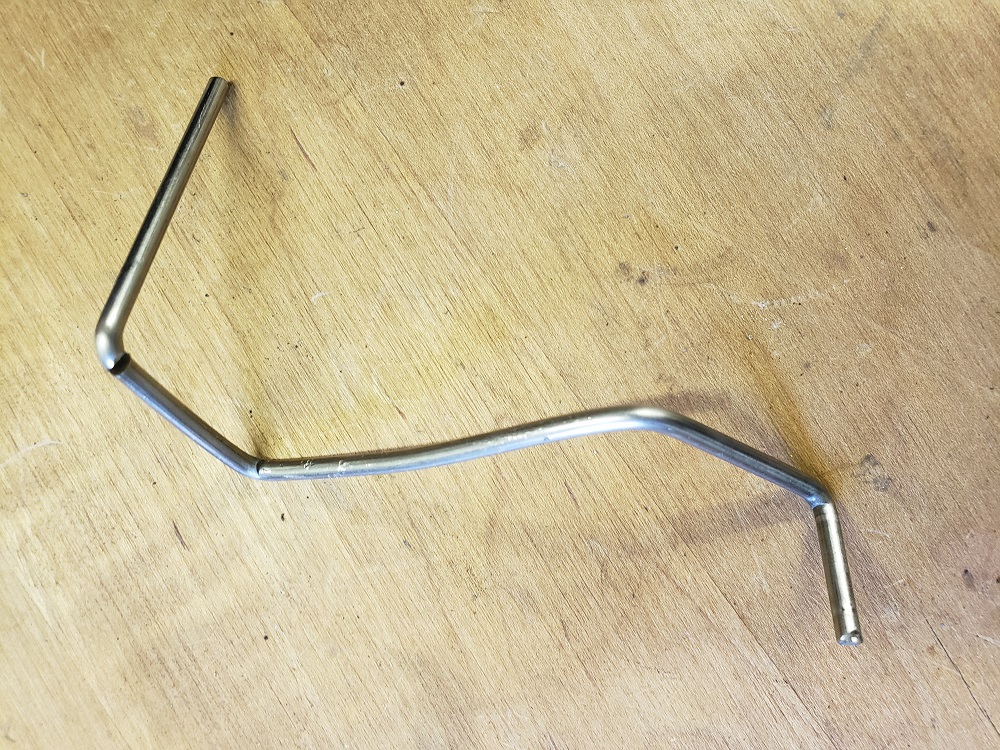
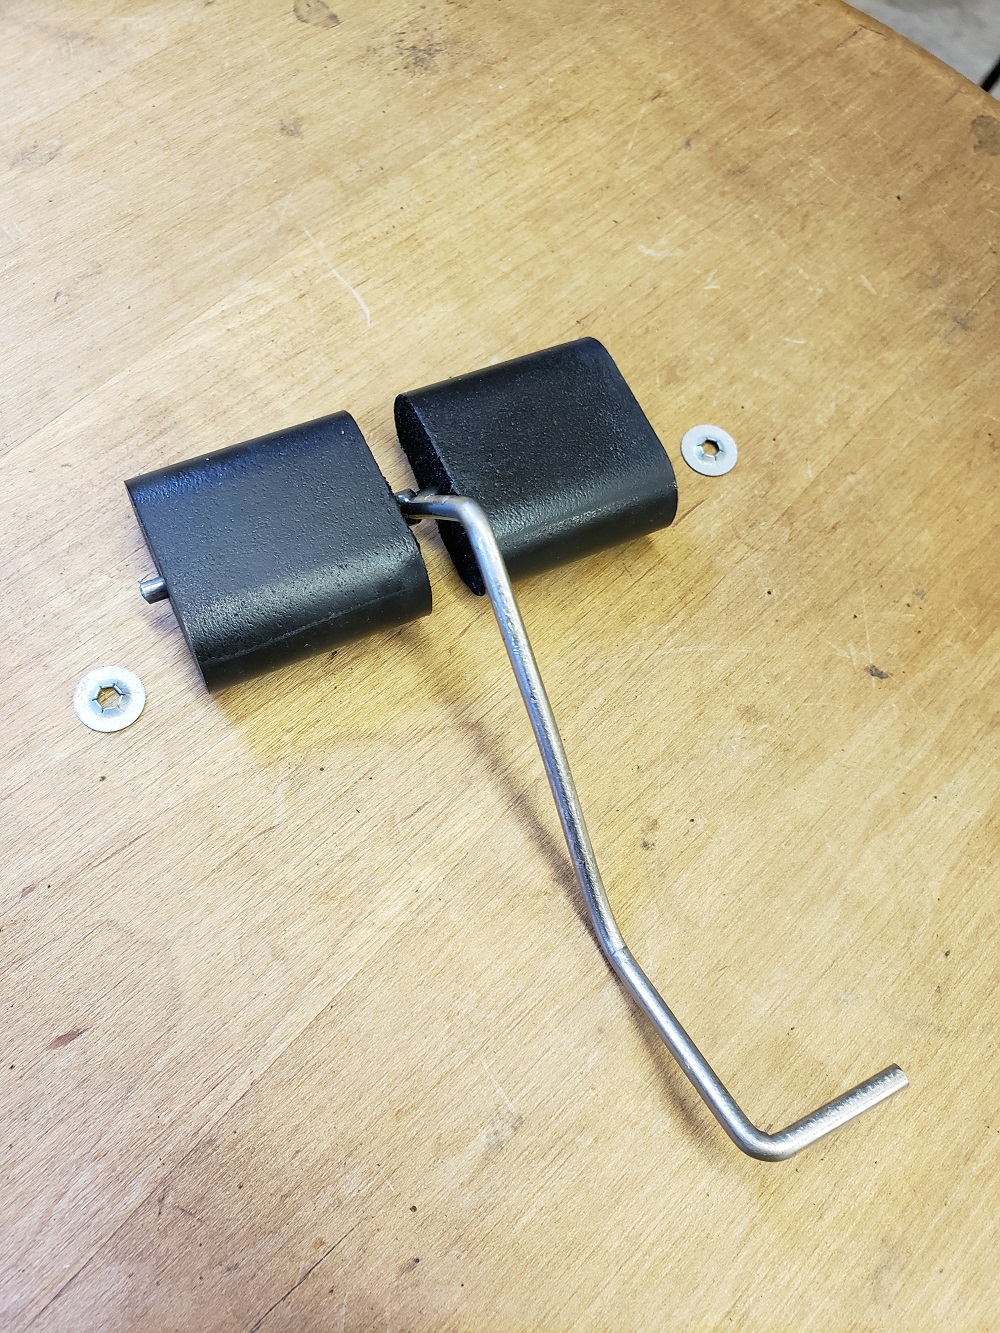
The next step was to remove the float and cut off the rod just at the bend that enters the float. I bought a piece of 1/8” steel rod and two push washers. Then I cut the float in half with a sharp box cutter blade and made two identical halves. Finally, I welded a piece of the rod on the end of the original rod to make a T and to accept both halves of the float.
Here's the original rod versus the modified one:
 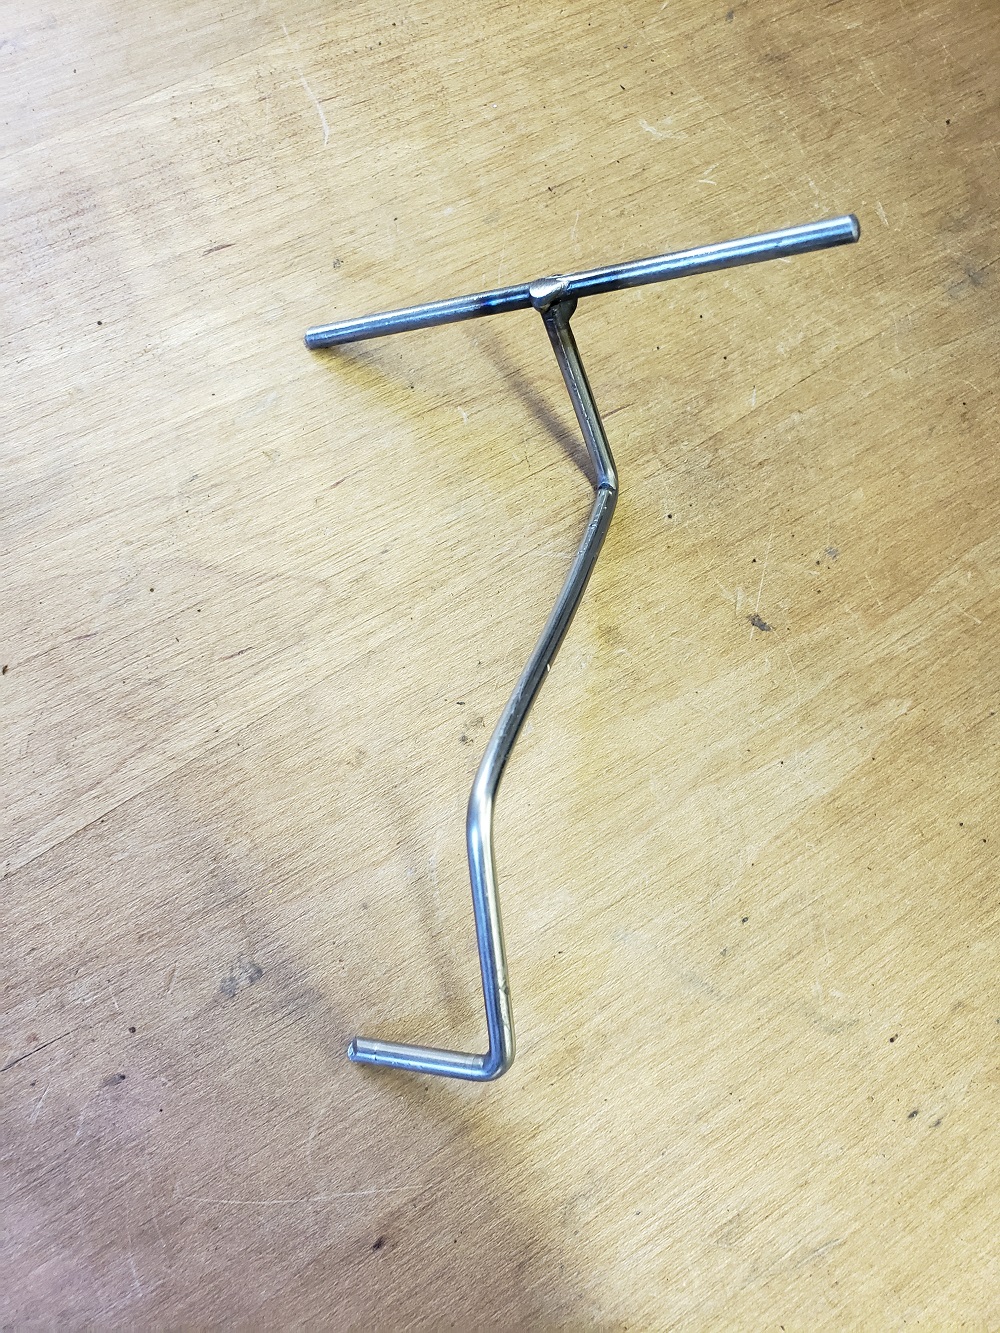
Fully Assembled New Rod:
Showing new rod in empty and nearly full position with plenty of clearance in all directions:
 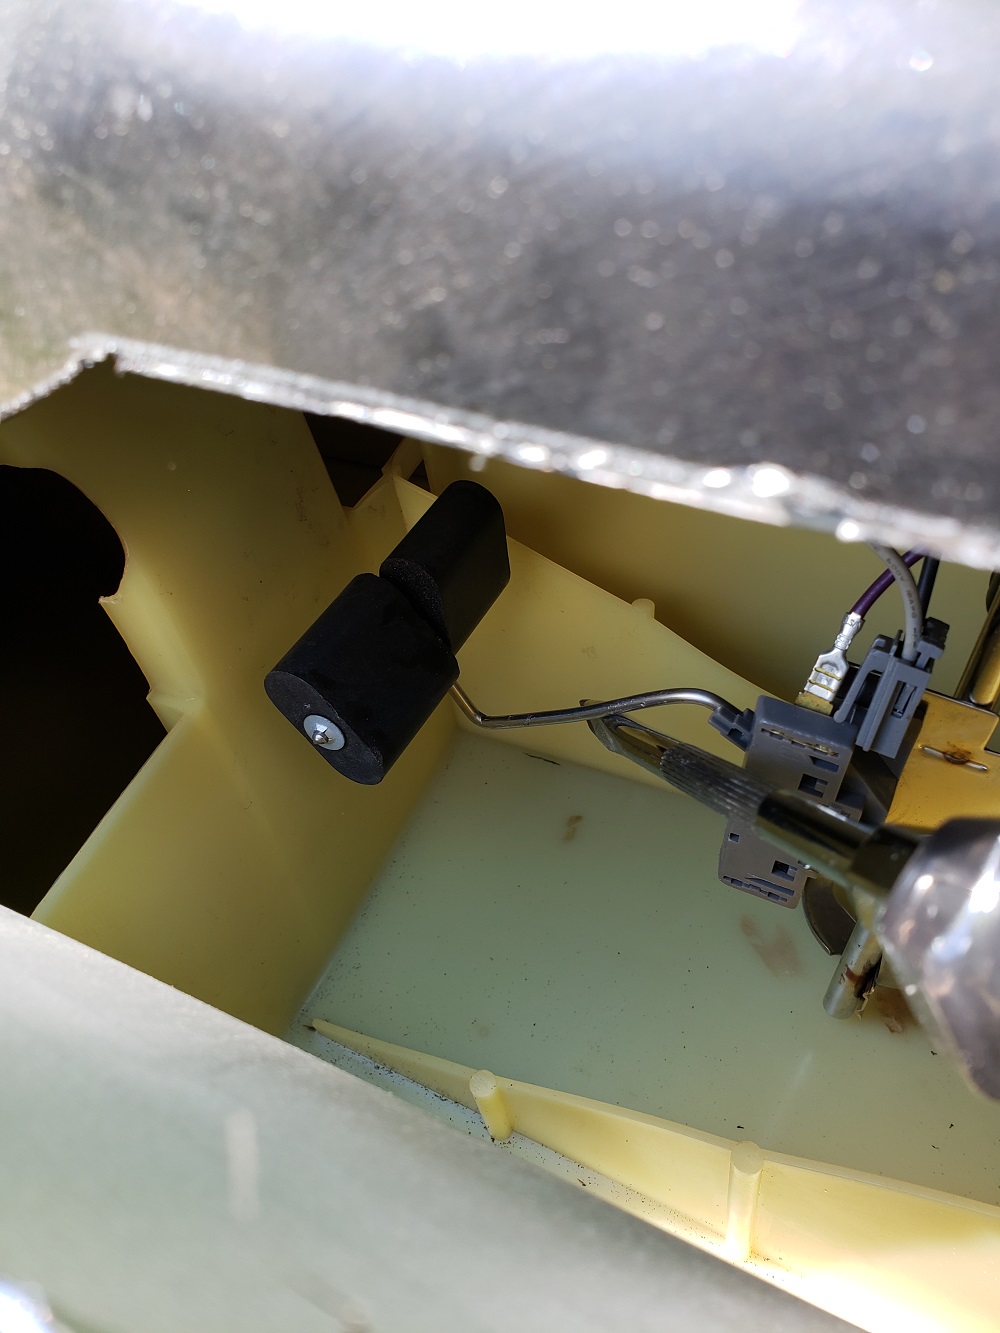
Finally, I put it all back together with the correct ACDELCO seal, flipped the tank over and watched the ohms go from .7 to around 92. No leaks.
Forgot to mention, I also checked out the sender alone under the car with no tank. The gauge responded the way it should.
Hope this thread helps others to save a lot of time by using this simple modification. The tank is now back in the car. The spare tank will be repaired and go back to being a spare.
------------------
88GT 355 CI Sequential Holley Multiport , AFR milled 180, Dyno'd at 427 HP, 320 WHP
anderson@gdsconsulting.com[This message has been edited by V8Steve (edited 06-02-2020).]
|
|
|
|
fierofool
|
JUN 02, 08:19 AM
|
|
|
Very good solution to a problem so may have had. You need to provide this service. TFS could dropship all orders to you for modification, then you could ship to the buyer. If that's not doable, maybe TFS could have that modification made by their vendor. Patent the design and collect royalties.
|
|
|
|
V8Steve
|
JUN 02, 09:01 AM
|
|
Thank you.
It's a real simple solution but I couldn't find any post or website where someone actually cut open a tank to find out what's really going on. The tackwelded position of the potentiometer on the mounting tube is critical. Any angular variation of that position relative to the alignment tangs on the upper plate can make the difference between binding and not binding. A small angle here makes a big difference in float position when the arm is extended outward. That may be the reason why some people have problems and others do not. The design is marginal at best.
There are epoxy compounds that are claimed to be suitable for full immersion in gasoline. A hacksaw, a piece of 1/8" rod, one or two large droplets of epoxy, and two new push washers would be all that's needed to fix this in ten minutes for less than $10, including the epoxy. I tried using scrap 1/8" wire and 6d nails with no luck. The DIY rod has to be straight in order for the float halves to spin freely. If it were me, I'd make a test piece with epoxy and soak it for at least a week. Otherwise, weld it.
The float is shiny on the exterior but the exposed razor cut surface is rough. Just be sure there was no potential for absorbing fuel, I weighed the two halves on a food scale at .2 oz. Then I immersed them in gas and put a weight on them for 24 hours and weighed them the next day. There was no change so I was satisfied the foam was non permeable.
|
|
|
|
Kevin87FieroGT
|
JUN 02, 09:43 AM
|
|
Nice fix !!!! Thank you for all your time spent! I don't need the fix yet, but I'll get there one day.
fierofool : "TFS could have that modification made by their vendor."
Sounds like the best solution. My guess though is the fuel sender the FS supplies is probably used in many other car models. Vender may be reluctant to the fix for us. Certainly worth the try!
|
|
|
|
shemdogg
|
JUN 02, 09:47 AM
|
|
Very cool write up, something I need to do on mine. This will help many folks good stuff!
shem
|
|
|
|
V8Steve
|
JUN 02, 09:49 AM
|
|
I have a manufacturing business and gave thought to producing kits consisting of a new stainless steel arm and instructions. The market is too small and it's simple to DIY.
If the market were larger, it would be a perfect Rodney Dickman offering. Everything I ever bought from Rodney was high quality with good instructions and worked perfectly.[This message has been edited by V8Steve (edited 06-02-2020).]
|
|
|
|
Dennis LaGrua
|
JUN 02, 11:22 AM
|
|
|
Interesting thread and helpful. If the new rod on the Fiero Store sending unit is made incorrectly so it binds, the simple solution might be to replace it with the rod on the unit that you took out. Its hard to imagine that the Fiero Store would reproduce a part that is exactly not like the original. ------------------
" THE BLACK PARALYZER" -87GT 3800SC Series III engine, custom ZZP /Frozen Boost Intercooler setup, 3.4" Pulley, Northstar TB, LS1 MAF, 3" Spintech/Hedman Exhaust, P-log Manifold, Autolite 104's, MSD wires, Custom CAI, 4T65eHD w. custom axles, Champion Radiator, S10 Brake Booster, HP Tuners VCM Suite.
"THE COLUSSUS"
87GT - ALL OUT 3.4L Turbocharged engine, Garrett Hybrid Turbo, MSD ign., modified TH125H
" ON THE LOOSE WITHOUT THE JUICE "
|
|
|
|
Spadesluck
|
JUN 02, 11:40 AM
|
|
|
Many have a problem with the sending units doing this. It is interesting this has not been addressed on the manufacturing side. Thank you for taking the time and showing us what you did to fix it.
|
|
|
|
V8Steve
|
JUN 02, 12:43 PM
|
|
|
It was not possible to replace the rod from the old unit because the units were swapped sometime in 2016. It took until late 2019 to get the rebuild back together again and actually start the car. By that time, the old unit was long gone. Since I've owned the car since around 1998 I'm pretty sure the old unit was original. ------------------
88GT 355 CI Sequential Holley Multiport , AFR milled 180, Dyno'd at 427 HP, 320 WHP
anderson@gdsconsulting.com
|
|
|
|
Notorio
|
JUN 02, 12:51 PM
|
|
Excellent write up and a study in the rewards of real patience and determination in the face obstacles. 
Perchance if you still had the Original unit you removed it would be interesting to see it.
|
|
|
|