
 
     |
| Fixed hood latch cable using bicycle cables and 3D printed part (Page 1/1) |

|
WalkerTexan
|
AUG 07, 01:51 AM
|
|
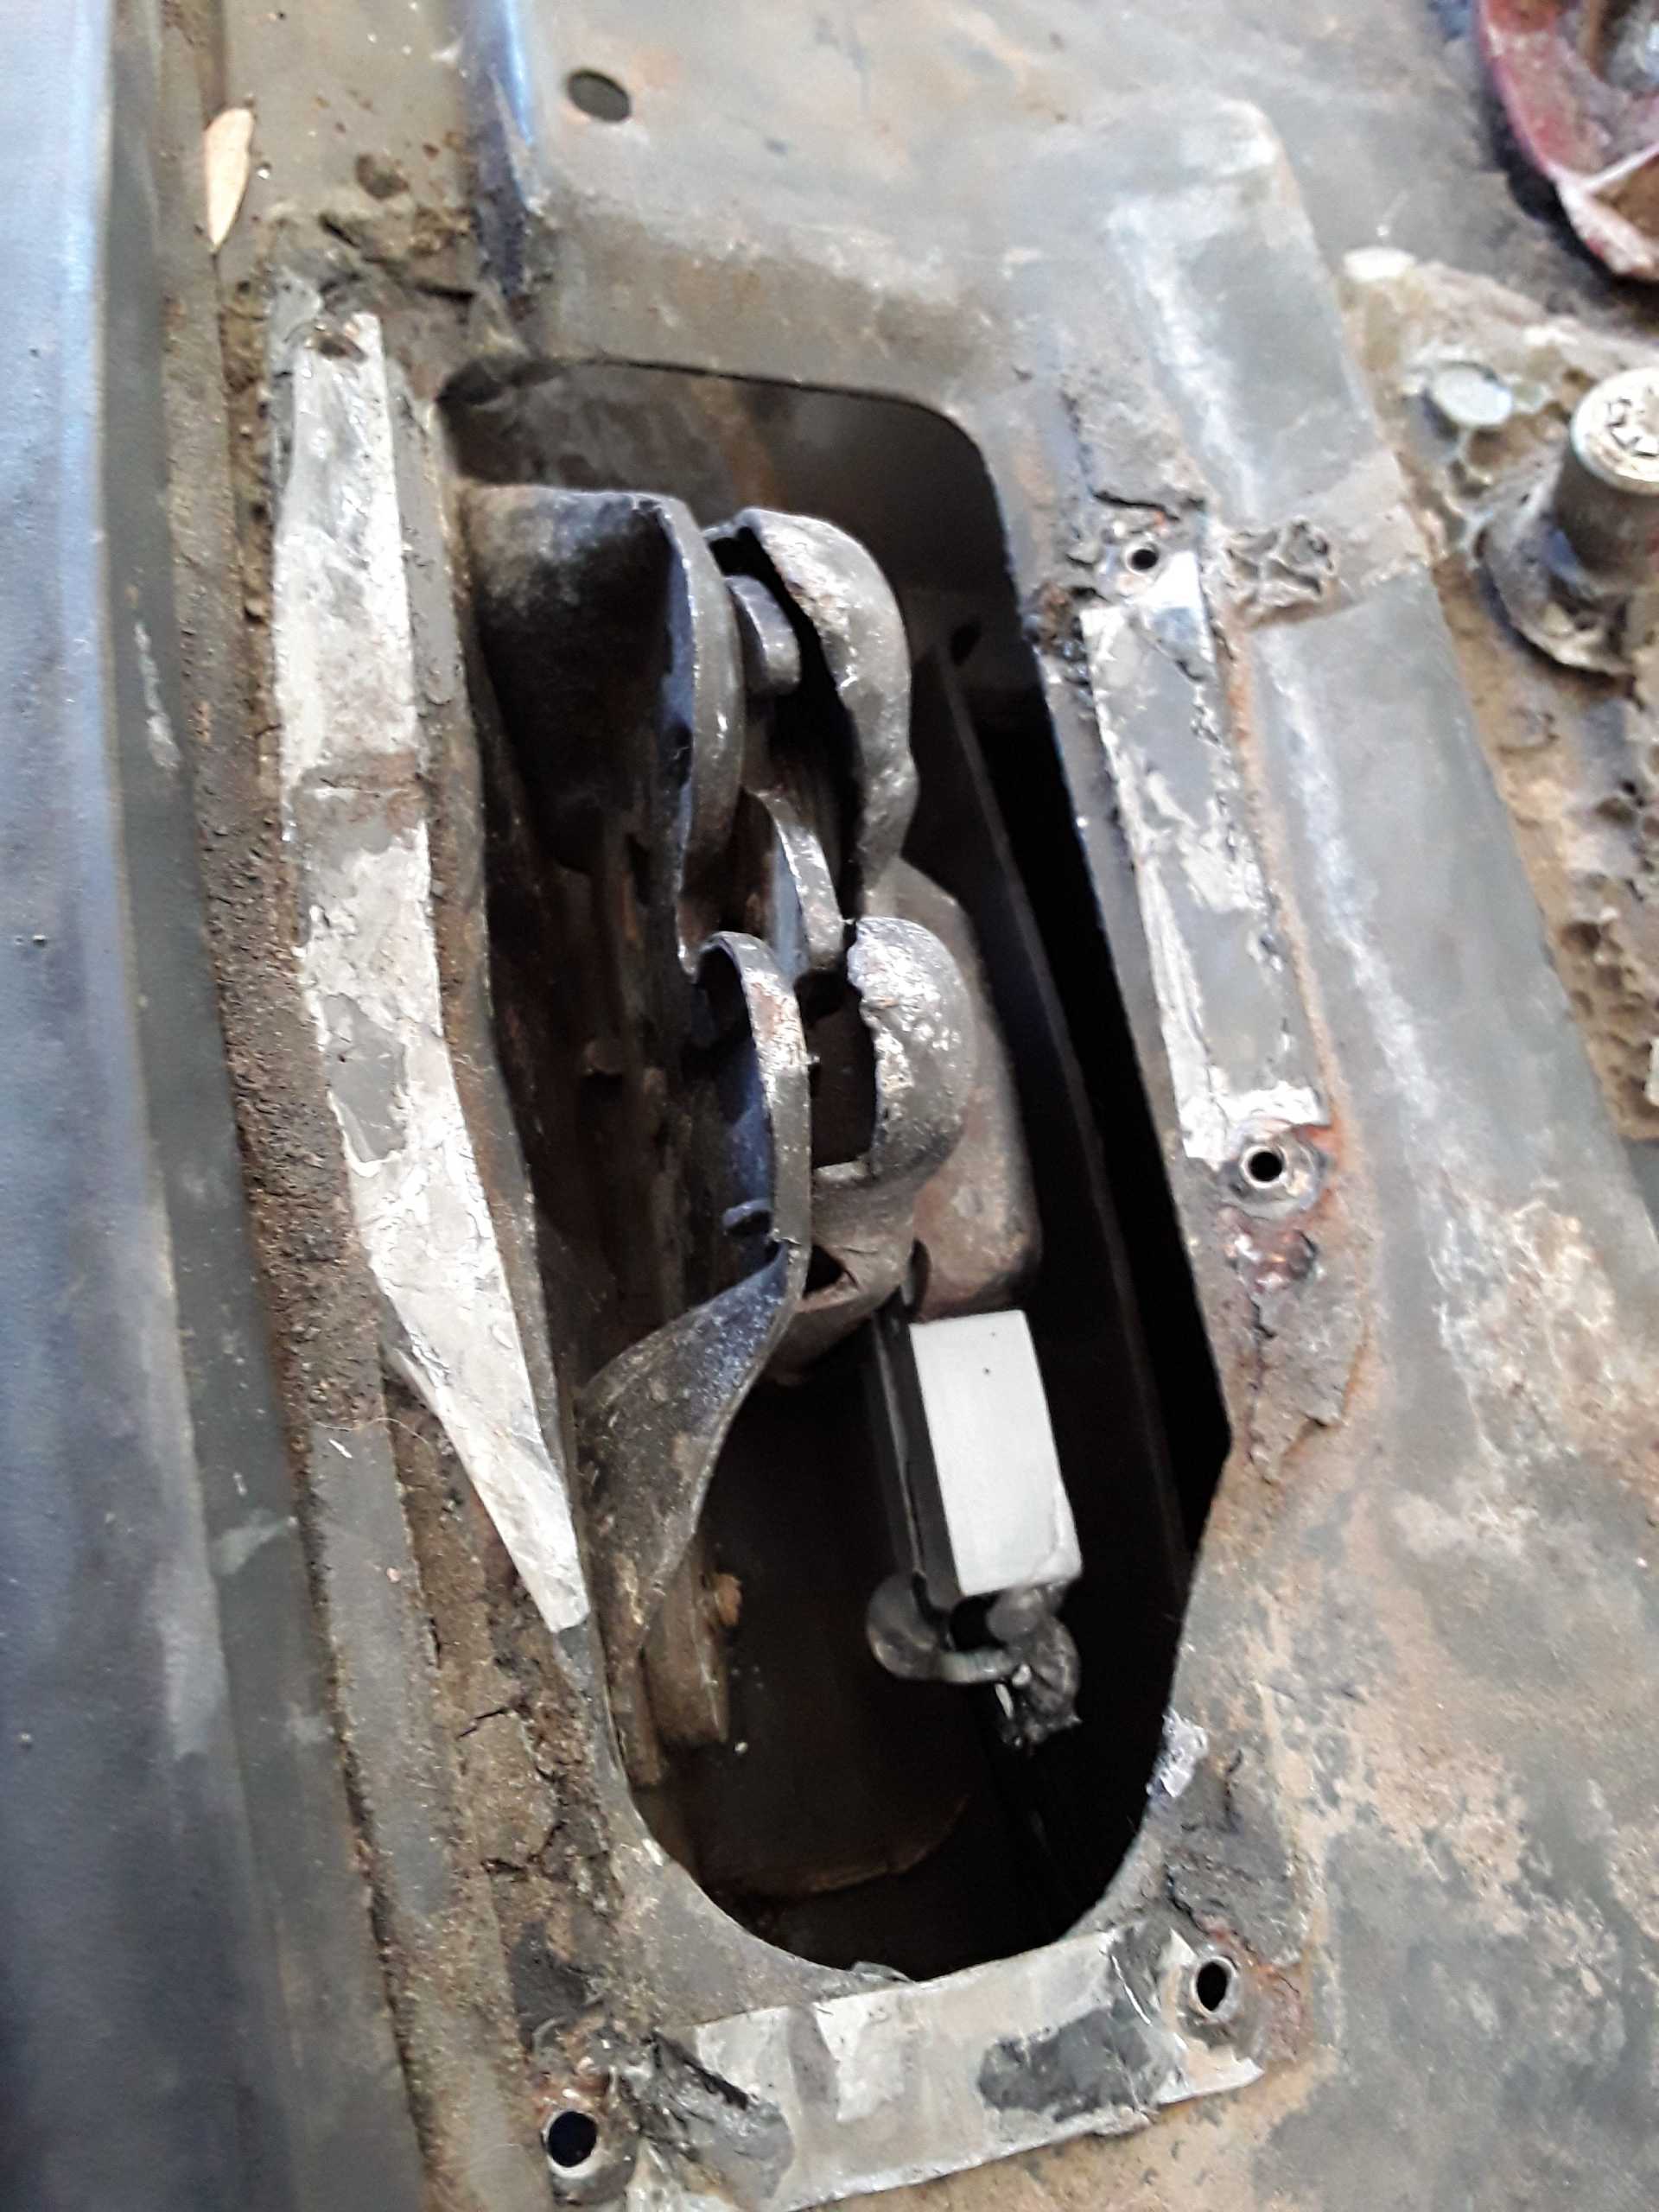  Don't know if anyone is interested in this but here goes. Both the latch cable and spare cable failed while my new "project" sat for 10 years. Thankfully the hood was unlatched and in a carport all that time so getting in wasn't a problem. The cable was broken at the latch because the plastic molded part holding the two cables had crumbled, and was broken at the handle in the "bent" tube. Double whammy on this one. Don't know if anyone is interested in this but here goes. Both the latch cable and spare cable failed while my new "project" sat for 10 years. Thankfully the hood was unlatched and in a carport all that time so getting in wasn't a problem. The cable was broken at the latch because the plastic molded part holding the two cables had crumbled, and was broken at the handle in the "bent" tube. Double whammy on this one.
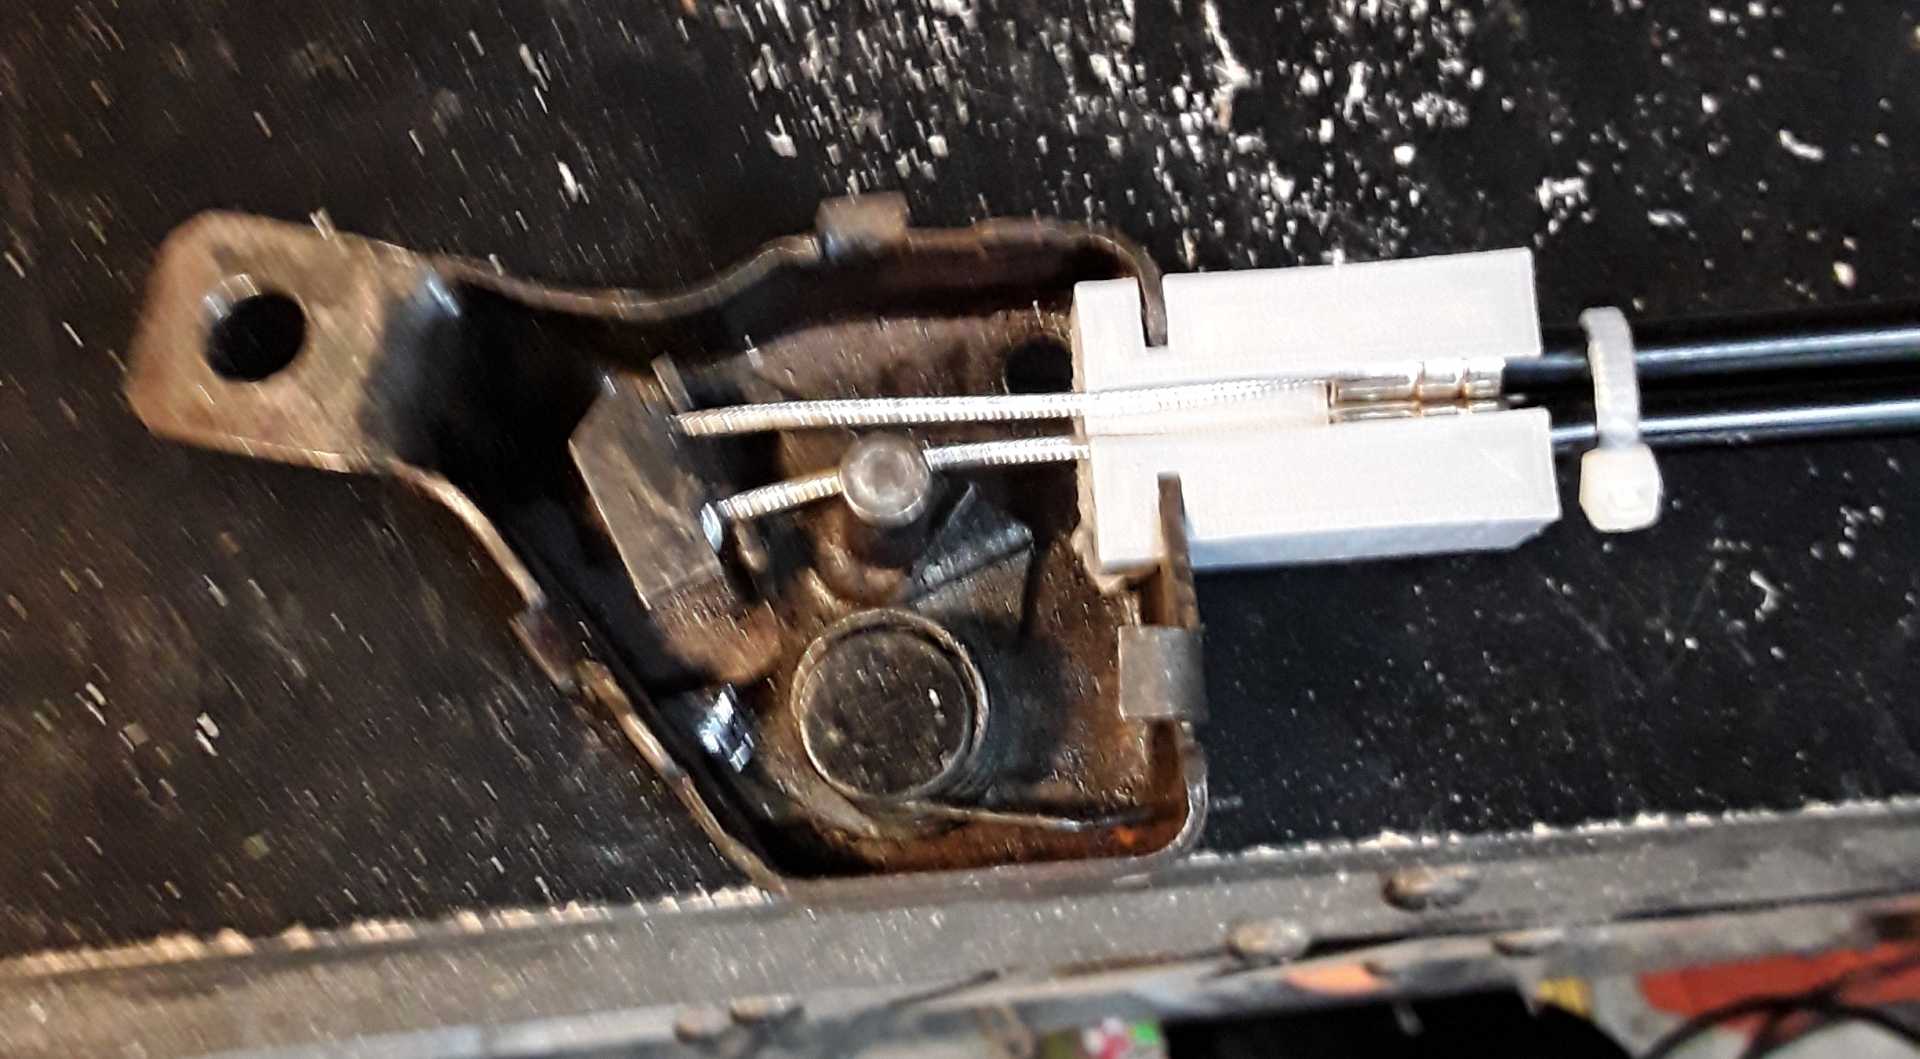
I had a set of bicycle cables (another hobby) on hand so I thought I might get a reasonable fix for low $$. My hood release handle is still in good condition. Another hobby came in handy; I designed a plastic block to hold the cables and then printed it on my 3D printer. I can provide the "stl" file for anyone that would like to print one for themselves. After installing the block and cables I used nylon cable ties to wrap around the slots to make sure the cables never fall out. Just for good measure I epoxied the cable ties to the block. Sorry, anal-retentive retired engineer and I always plan for the worst. I took the pictures before I added the wire ties/epoxy but it should be obvious where they need to go. I used three. never fall out. Just for good measure I epoxied the cable ties to the block. Sorry, anal-retentive retired engineer and I always plan for the worst. I took the pictures before I added the wire ties/epoxy but it should be obvious where they need to go. I used three.
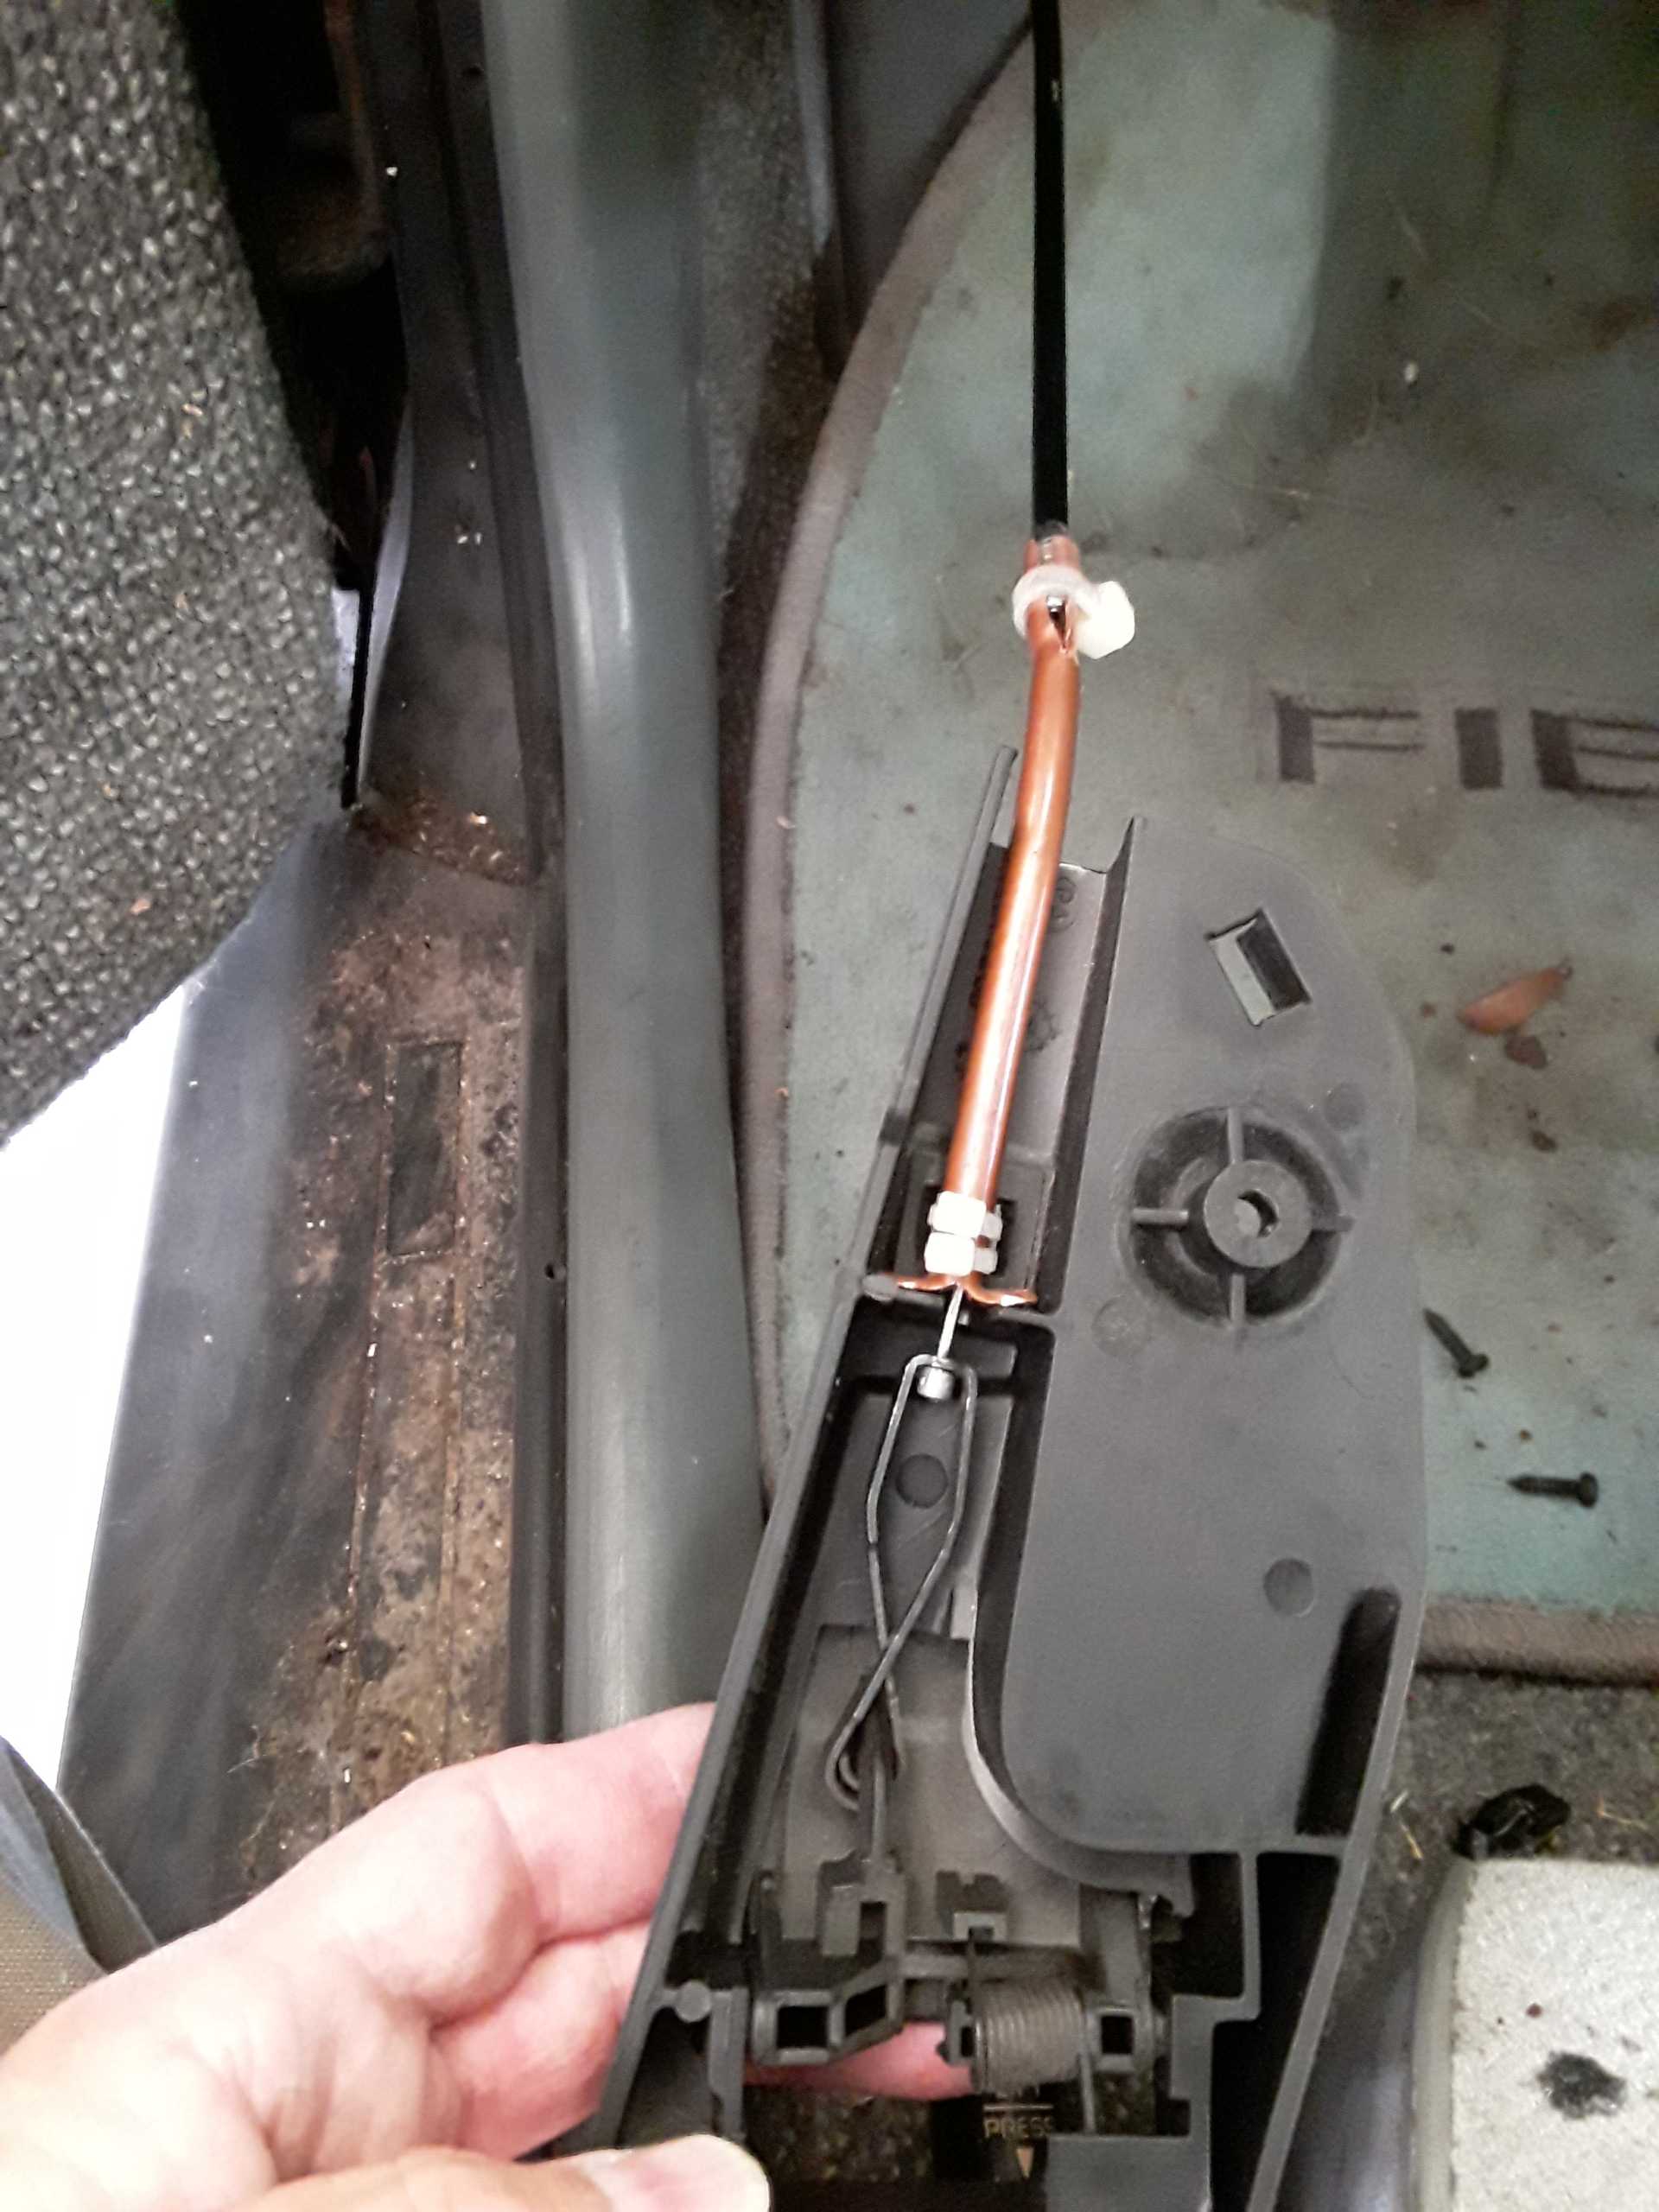
I then used a short piece of soft copper waterline available at Home Depot/Lowes/Hardware store to make a new tube at the handle. I measured the length between the cable sleeve and connection point so that the tube would take up the slack. I cut a small slot in one end and spread the sides into 90 degree angles to make a "rest" in the handle. I cut a slot in the other end and spread them slightly so that the cable sleeve would fit between them.
I then used a Dremel tool with a cutoff wheel to make a tiny slot in the metal clip of the handle so that I could snap the bicycle cable ball end into the clip. I made the slot so that the cable would have to snap into place rather than allowing a loose fit. I positioned the slot on the bottom because there isn't anywhere for it to fall out in that position but that probably wasn't necessary because it takes pliers to force it in. The hole is large enough that it doesn't chafe. I used nylon wire ties again to hold the tube in position on the handle.
Once it was all assembled in the car I pinched the copper tube closed around the cable sleeve so that it was tight enough that it wouldn't move. I then nylon tied and epoxied it in place just in case. Did I mention that I'm an anal-retentive retired engineer?
I used a brake cable for the main cable and a derailler cable for the spare because the derailler cable has a much longer exposed wire end. This allowed me to coil it into a circle to act as a crude pull handle should I ever need it and can just wrap a cloth around it instead of getting pliers out to yank the wire.
Oh, and FYI, I was an original purchaser of an 85 2m4. If anyone out there owns an 85 that was originally silver with a custom cruise control setup with switches in the console, a "test switch" in the black plate at the console that allowed you to get "blink codes" from the ECU and hood crests mounted to both sail panels (because it bugged me that Pontiac didn't identify the Fiero on the sides) then that was my car. It's probably been in a crusher by now but you never know...I once found someone driving a car I owned 15 years prior in a parking lot 
Glad to have a Fiero again...once I get it running. Had to get rid of my first one back in the early '90s because two seaters don't work so well when you have to cart around both a wife and newborn.
|
|
|
|
dremu
|
AUG 07, 03:23 PM
|
|
Dig it!
With older cars like this, you frequently find that some little mechanism or thing needs repair. Sure, sometimes you can get a repop, or you could go to the PickNPull and hope that the one Fiero they have has your part and it's not also busted ... or you can fab your own. Before 3D printers, those home fab parts were often pretty hack, but with the printer, you can make elegant solutions that are as good or better than the original. I can't count how many bits on my Fiero are printed, though I gotta admit sometimes it's just an excuse to use the printer and improve my CAD skills
If you haven't seen it, check out this thread too.
-- A
|
|
|
|
WalkerTexan
|
AUG 07, 06:31 PM
|
|
No, I hadn't seen that thread until now. VERY COOL! I've printed a lot of parts for other cars but I'm limited to an 8 inch cube so I have to get creative on larger parts. The console skeleton impresses me! I may have to bring those STL files in and look at cutting them into smaller pieces.
I typically use PLA or ABS. I have actually found that most parts, if printed solid, will work in PLA without issue. I was concerned about heat during a hot Texas day in direct sunlight but all of my experiments have been fine. It does require painting if there is any moisture issues, such as a A/C vent part, but that's not a biggie in most cases.
There are some glues that work well with PLA and ABS, fewer with PETG. I have tried HIP as well since any model kit glue works with it but boy, does it ever stink up the house! My wife forbade me using it unless I move the printer to the garage...
Thanks for pointing this thread out to me.
Michael
|
|
|
|
dremu
|
AUG 07, 08:32 PM
|
|
| quote | Originally posted by WalkerTexan:
No, I hadn't seen that thread until now. VERY COOL! I've printed a lot of parts for other cars but I'm limited to an 8 inch cube so I have to get creative on larger parts. The console skeleton impresses me! I may have to bring those STL files in and look at cutting them into smaller pieces.
I typically use PLA or ABS. I have actually found that most parts, if printed solid, will work in PLA without issue. I was concerned about heat during a hot Texas day in direct sunlight but all of my experiments have been fine. It does require painting if there is any moisture issues, such as a A/C vent part, but that's not a biggie in most cases.
There are some glues that work well with PLA and ABS, fewer with PETG. I have tried HIP as well since any model kit glue works with it but boy, does it ever stink up the house! My wife forbade me using it unless I move the printer to the garage...
Thanks for pointing this thread out to me.
Michael |
|
Yes, the WAF (Wife Acceptance Factor) is important for any hobby My printer lives in the garage for that very reason.
I find that size is a concern, but when you start breaking things down, you can print them so that the best face is on the print surface, or you print with the least support required, etc, to get the best orientation. Does sometimes require some head-spinning in the CAD though.
IMO a 3D printer should be standard issue for hobbyists like a Dremel ... but the learning curve is a bit steeper. (Less dangerous though, much harder to remove a finger or eye with a printer  ) )
-- A[This message has been edited by dremu (edited 08-07-2020).]
|
|
|
|