
 
     |
| HOWTO: Flipping the switch, or how I learned to love my trunk release (Page 1/2) |

|
dremu
|
AUG 12, 03:26 PM
|
|
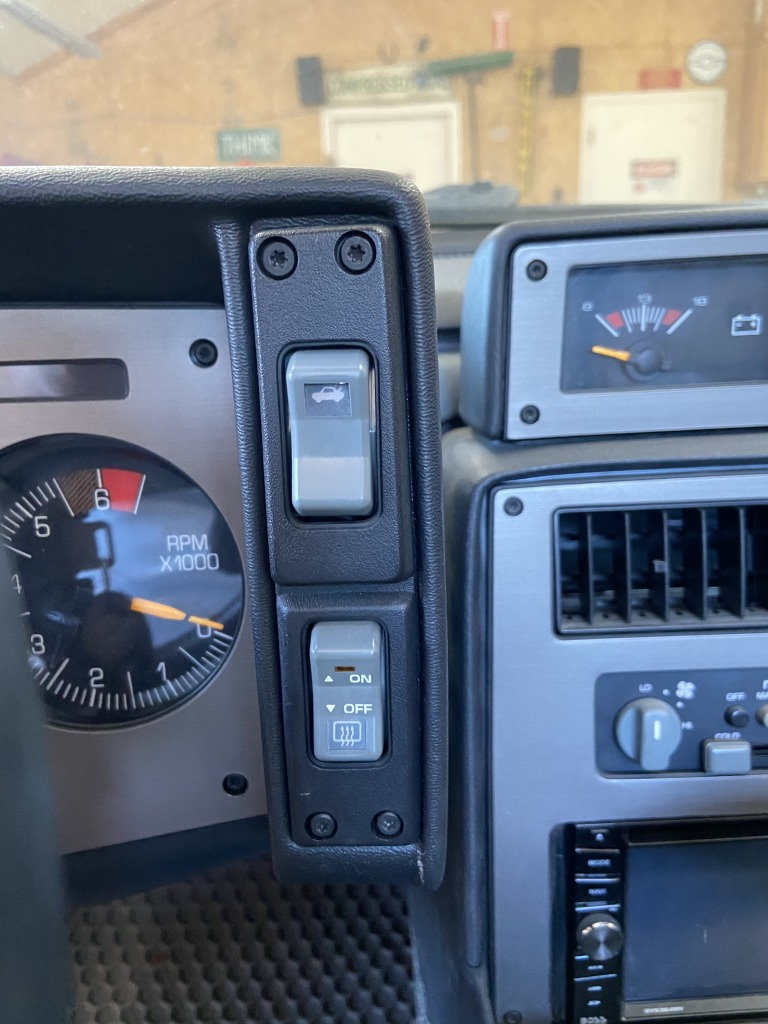
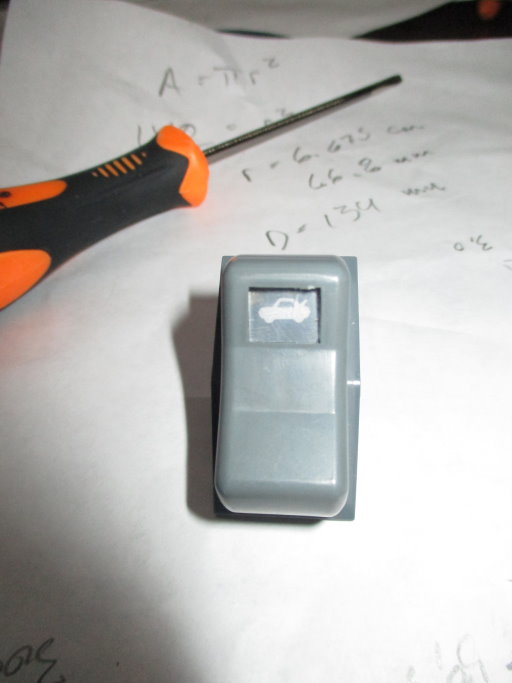
It's always bothered me that the trunk release switch on the dash has the icon on the bottom but you push the top to activate it. I know it's one of the (many) "quaint" and "unique" features of the Fiero, like the gas door release handle and the window switches in the center, but it still annoys me. Sets off my CDO (this is like OCD, but with the letters in the right order. ..whistle.. )
I was contemplating 3D printing a new piece to set it straight, but after discussion with another member here (thanks cvxjet!), I decided to take my switch apart and see if I could just reverse it with the existing parts. I mean, all I want is the car icon on the top where you push. How hard can it be?

Turns out that it's doable and doesn't cost anything, as long as you have the tools, patience -- and eyesight. If you do botch it completely, the Fiero Store sells a new one for twenty bucks as of this writing, so you're not completely screwed. I'll also share a coupla pain points along the way for potential oopses to avoid.
Also, if you're willing to accept a slightly less-than-factory look it can be even easier than when I did it. Let's dig in. I find a picture is worth a thousand words for projects like this, so forgive me for erring on the side of excessive pix 
First is to get the switch out. You'll need a T15 (remember when you reassemble that the longer ones go up top) for the panel and a 7mm nutdriver to undo the switch. One or two small flatheads and pry the electrical connector off. I didn't take any photos of this, and really, if you can't get that far, you shouldn't be inside the switch
Now you pry the grey cover off the switch body. This is easiest with two small flatheads, and possibly seven hands, prying on each side where the arrow points:
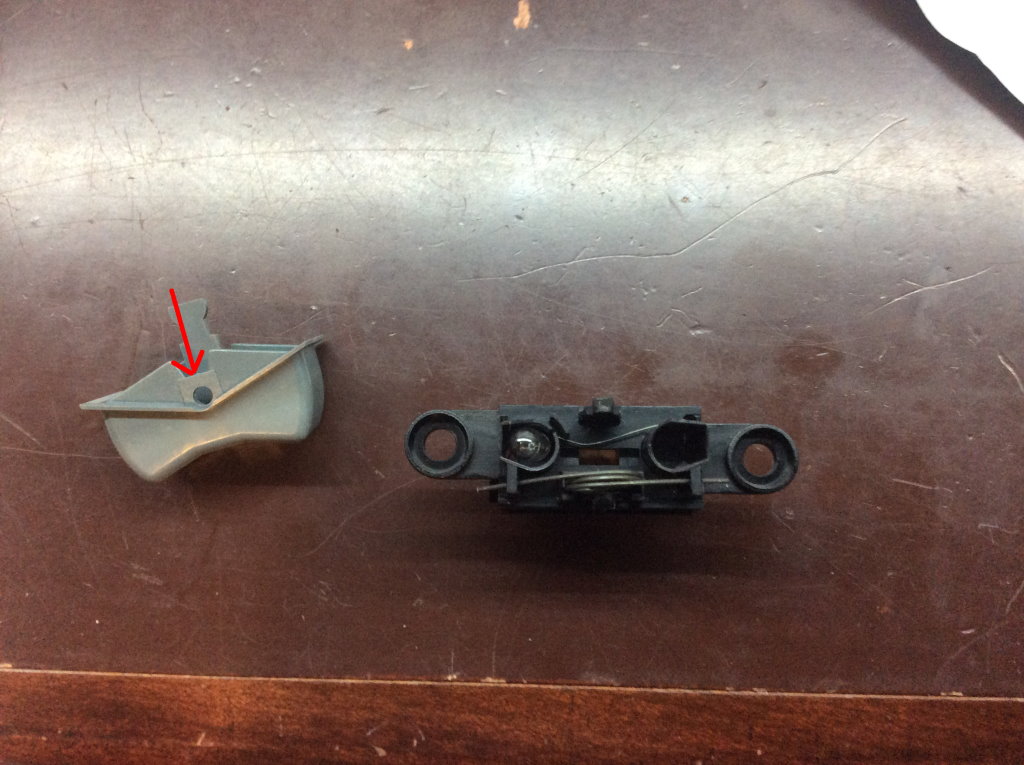
Cover on the left, and switch body on the right, obvi. You'll see the light bulb in there that illuminates the icon when the interior lights come on, your old-school 12 volt "grain of wheat" bulb. Here's one of the places you can take a shortcut if you're so inclined. If you don't care about illuminating the icon, you can leave the bulb where it is and save some intricate soldering and swearing. Also applies if the bulb is burned out.
To do this properly, you have to flip the icon inside the switch cover. Again, as a shortcut you could just leave it alone, but the the icon would be upside down, which seems silly. The icon is actually two pieces, a clear plastic and the decal itself. You have to be REALLY CAREFUL removing it or you'll scratch the decal as you see below. The decal is multi-layered to add the orange tint to the light but also has grey paint on it.
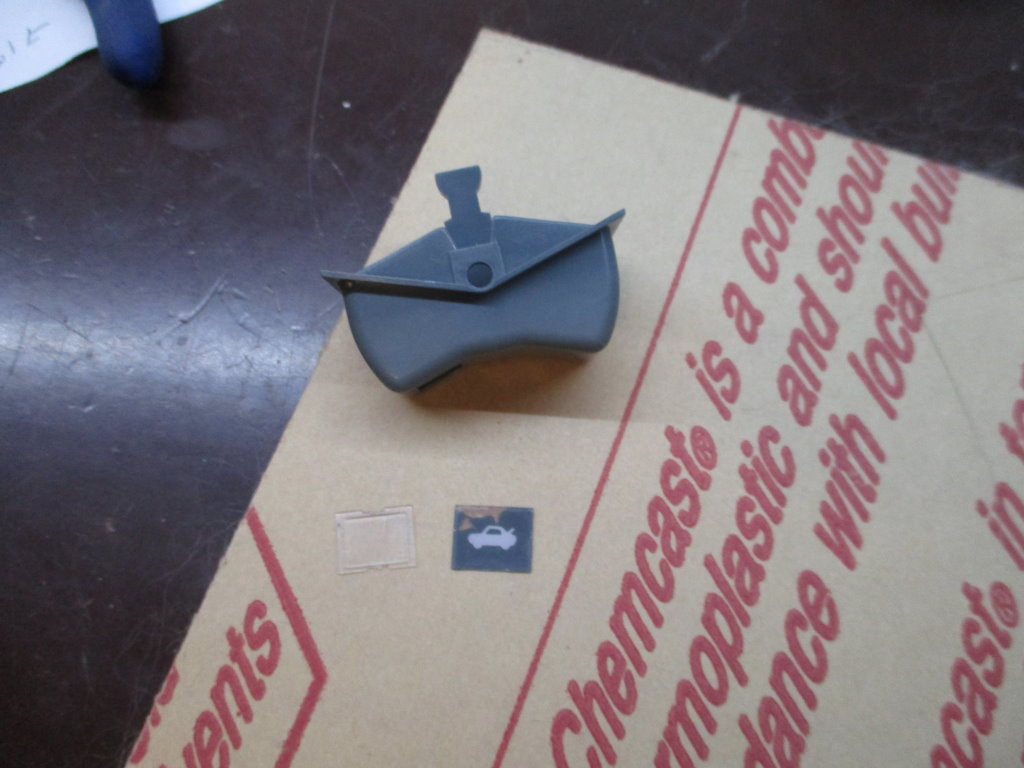
This pic is out of order, but just to warn ya. I was able to mostly patch it up with model paint and a tiny little brush, but if you don't have scale model supplies in your hobbyist kit, and a very steady hand, take tremendous care in this next step.
Put the switch cover into a vise to keep it steady. I used these rubber pads to keep from scratching it, though you could also wrap it in a rag or the like.
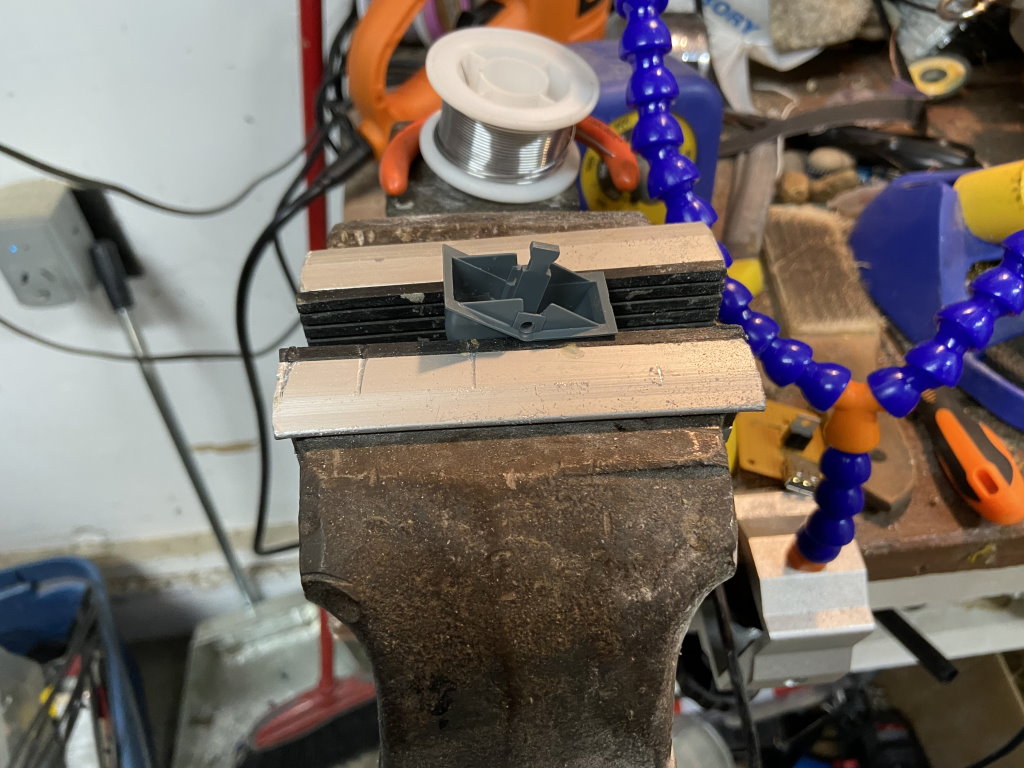
The icon inserts are held in by melted plastic around the perimeter:
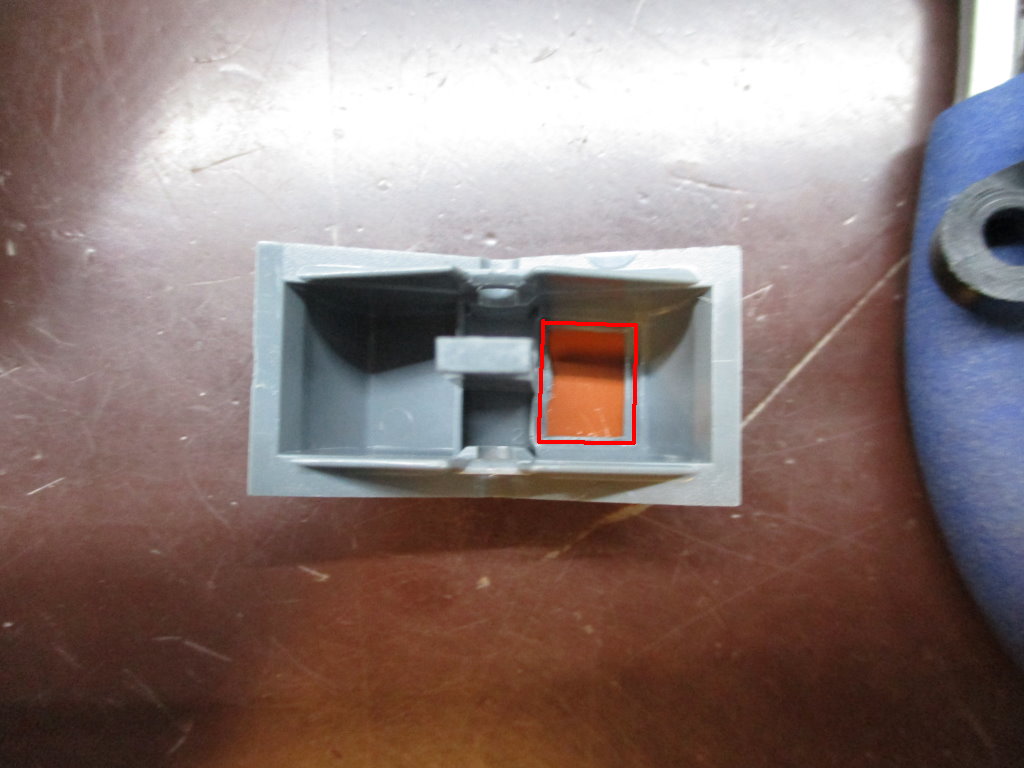
So you want to take a Dremel and grind JUST THAT MELTED PLASTIC off. You just want to shave off the red bit above, on the outside. Again, you don't want to touch the inserts themselves as they scratch easily, as seen.
In my case I used a diamond burr whose head was no larger than the shank, ie 1/8". You want one with grit on the *end*, as you'll be grinding with the end and not the edge:
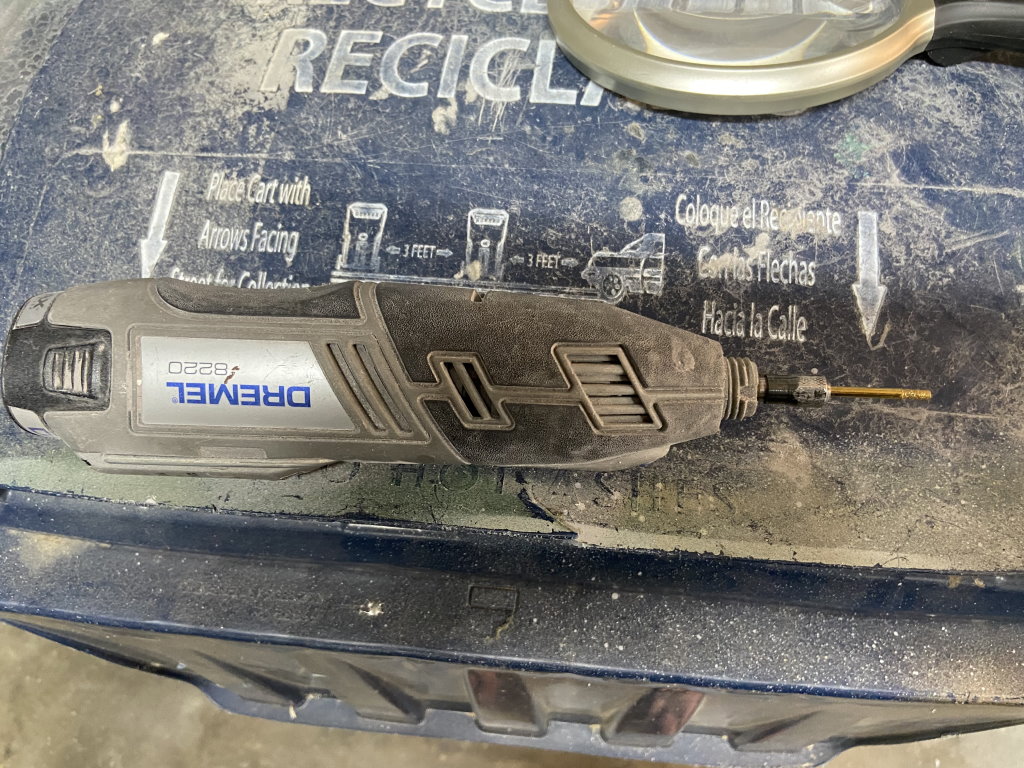
Also notice the burr is sticking out of the collet a bit farther than might usually be safe. In order to get the head down to the plastic straight, I had to pull it out that far. I just kept the speed low, which is okay for plastic anyway. So, with your hand steadied, carefully grind off the melted bit, and then the inserts should pop out of the cover with just a bit of motivation from the front.
Assuming you didn't scratch them up like I did, you can now just turn them around and pop them back in. Again, being very careful, a coupla drops of CA glue on the corners should hold them in. EDIT: [B}Don't use CA glue[/B] as it fogs up the clear plastic cover. I gotta redo mine, figure I'll try VERY small dabs of a plastic glue or maybe even Elmer's.
Now comes the truly painful part, moving the bulb to the "top." Here there's a few options, depending on if you can get a replacement bulb easily (now that Radio Shack is defunct, finding a $2 part can cost more to ship than it's worth.) You could just cut off the wires on the existing one and install a new one. I chose to desolder the existing one and reuse it as I couldn't think of a local stereo repair place that would have them.
The problem there, at least on mine, is that the tiny wiring for the stupid bulb was not only soldered but also wrapped around the posts, so getting a pair of needlenose around them AND the soldering iron was a challenge. Note that you will need a fine tip pencil iron; your giant Weller 200W soldering gun is NOT the right tool here.
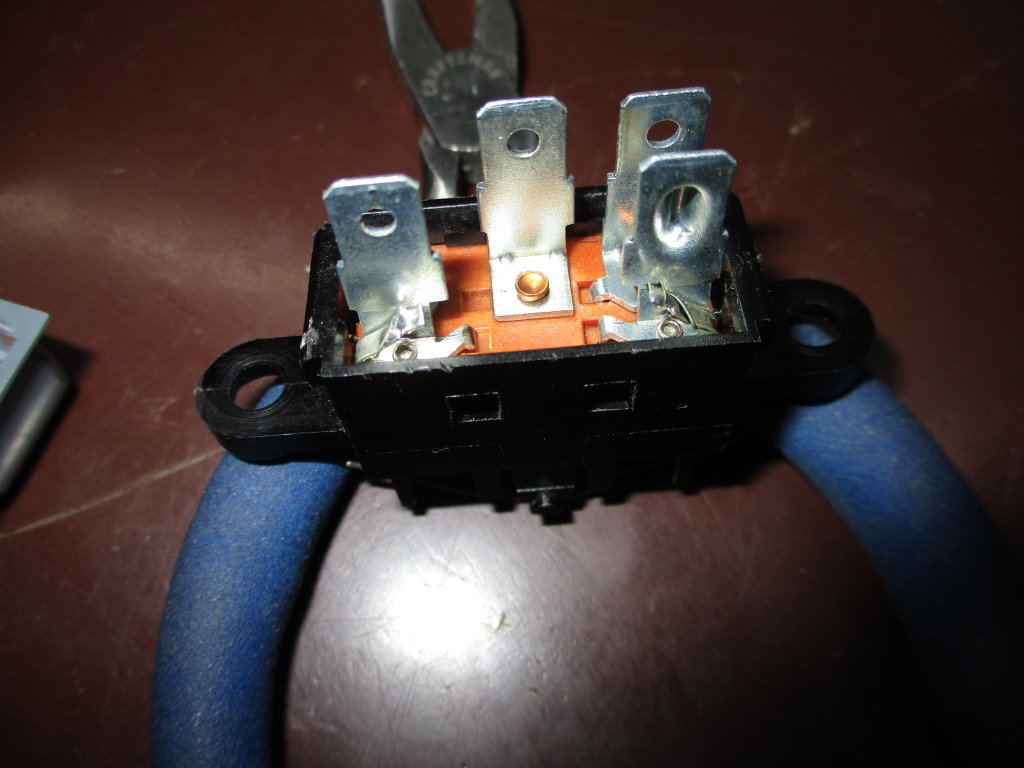
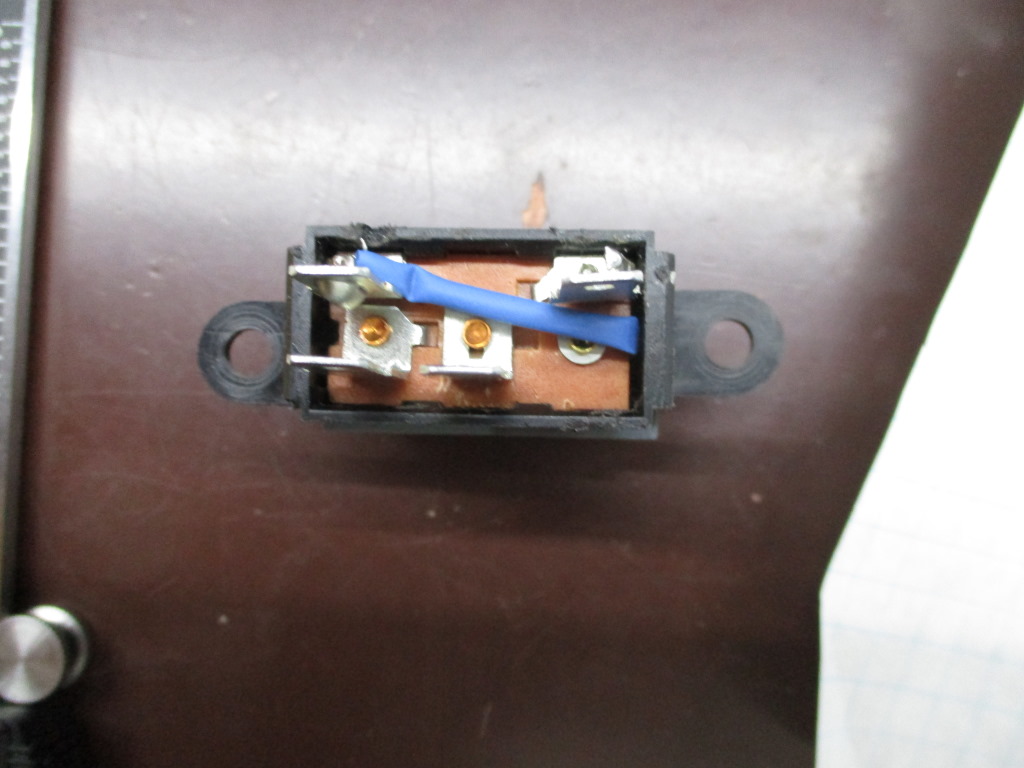
See the four main tabs for the plug, and then the two smaller posts on bottom left and right for the bulb. I found that to get the wiring unwrapped, I had to pry out the phenolic board for the switch slider. Let me warn you that the copper slider has a spring (or maybe springs) underneath, which are of the type that when you look at them funny will launch themselves into some hidden corner of the garage never to be seen again. If you choose to unsnap the slider, be VERY CAREFUL with the pieces inside.
Then you reinstall the bulb. You'll notice the switch body has a place on the far end and holes for the wires. Rather than trying to replicate the original routing, I just strung the wire closest to the post right to it, and then put the longer one in a little piece of heatshrink and ran it down the middle to the far end:
The wires on the bulb still reached and there was no concern of shorting. If I'd tried to run that tiny little wire around like it was originally, I was afraid it would touch something and then I'd have to rework the switch.
Finally, you can snap the cover back onto the body and test mechanical operation. If you took the phenolic board out, that center post should fit into the hole on the slider inside the switch. Assuming it pushes up and springs back to center, you're golden. If not, take it back apart and see where it went wrong. I categorically deny having to do this six or eight times
Then you put the switch back in the dash and test electrical operation. Might also be a good time to rewire the switch to use ignition power (like from the defrost switch below it) instead of being always on.
Anyway, now you press up, on the icon, to open the trunk, and sigh a sigh of either relief that it works the way it should, or a sigh that your Fiero is less Fiero-ish.
-- A[This message has been edited by dremu (edited 08-22-2020).]
|
|
|
|
Notorio
|
AUG 13, 12:25 AM
|
|
|
Well done, and good write up too. I have only one question: do your magnetic vise jaw guards constantly fall off like the ones I have? If not please let me know the brand so I can get some that actually work.
|
|

|
Patrick
|
AUG 13, 01:36 AM
|
|
Excellent write up!  I almost feel bad now that one of the first things I do when I acquire a Fiero is disconnect the electric trunk release. Yes, almost feel bad, sort of. I almost feel bad now that one of the first things I do when I acquire a Fiero is disconnect the electric trunk release. Yes, almost feel bad, sort of. 
|
|
|
|
dremu
|
AUG 13, 11:09 AM
|
|
| quote | Originally posted by Notorio:
Well done, and good write up too. I have only one question: do your magnetic vise jaw guards constantly fall off like the ones I have? If not please let me know the brand so I can get some that actually work. |
|
LOL. Yeah, these were cheap in every meaning of the word, "Yost". For the big vise I got a Bessey set, #BV-NVJ, which are better though not perfect. I think they have the stronger neodymium magnets.
| quote | Originally posted by Patrick:
Excellent write up! I almost feel bad now that one of the first things I do when I acquire a Fiero is disconnect the electric trunk release. Yes, almost feel bad, sort of. |
|
Philistine!
I know it seems antithetical for a decades-old car, especially a counter-ergonomic one like the Fiero, but there are some creature comforts I expect. Modern electrics/electronics are among them. Also in this case it makes it easier to fish the T-tops in and out without having to use the keys.
| quote | Originally posted by Notorio:
BTW, kudos on the homage to Dr. Strangelove.
|
|
Heh, glad somebody caught that. I work for an international company, so work documents have to be short and simple for best comprehension by folks for whom English isn't the first language. Here I mighta let loose a bit, but with Fieros, ya gotta laugh at least a bit.
Anyway, thanks guys. I don't know that many people will do it, but at least it's an option, give folks ideas.
-- A[This message has been edited by dremu (edited 08-13-2020).]
|
|
|
|
Notorio
|
AUG 13, 11:20 AM
|
|
Thanks, I shall order today. (BTW, kudos on the homage to Dr. Strangelove.)
Patrick, why do you disconnect this feature?
|
|

|
Patrick
|
AUG 13, 03:35 PM
|
|
| quote | Originally posted by Notorio:
Patrick, why do you disconnect this feature?
|
|
The electric trunk release is convenient for two reasons... a key isn't required, and being by the decklid isn't required. However, both conveniences can lead to issues.
1) The decklid can be opened by anyone with access to the trunk release button. Remember, that circuit is "hot" at all times. Parking the car with windows rolled down, even an inch, or the sunroof popped up, will allow scumbags (with just a stick) to open the decklid to check out the contents of your trunk
2) Even if the torsion bars are adjusted properly, and the decklid doesn't "launch" upon being released, there's a possibility that a gust of wind will catch the decklid while you're still sitting in the car. The cable-stops on the decklid hinges will only take so much abuse before they eventually let go.
Call me a control freak , but I want a key to be required to open my decklid, and I want to be in complete control of the decklid upon release.
|
|
|
|
DLCLK87GT
|
AUG 13, 04:01 PM
|
|
| quote | Originally posted by Patrick:
The electric trunk release is convenient for two reasons... a key isn't required, and being by the decklid isn't required. However, both conveniences can lead to issues.
Call me a control freak , but I want a key to be required to open my decklid, and I want to be in complete control of the decklid upon release. |
|
Couldn't you just rewire it so it's only HOT with the ignition key on instead of disabling a nice option??
|
|
|
|
Patrick
|
AUG 13, 04:22 PM
|
|
| quote | Originally posted by DLCLK87GT:
Couldn't you just rewire it so it's only HOT with the ignition key on instead of disabling a nice option??
|
|
Well sure, but part of what makes it a "nice option" in the first place is not having to use a key. Plus, rewiring the switch is not going to save the hinge cable-stops. [This message has been edited by Patrick (edited 08-13-2020).]
|
|
|
|
RWDPLZ
|
AUG 13, 05:40 PM
|
|
|
It is one of the stupidest design decisions on the entire car. Probably sold a lot of replacement switches for GM, though.
|
|
|
|
dremu
|
AUG 13, 06:11 PM
|
|
| quote | Originally posted by DLCLK87GT:
Couldn't you just rewire it so it's only HOT with the ignition key on instead of disabling a nice option?? |
|
Easy to do. There's an ignition-hot right below it for the defroster switch.
-- A
|
|
|
|