 
     |
| Headlight lift and bucket assembly installation (Page 1/1) |

|
ninedriver
|
JAN 03, 02:04 PM
|
|
|
So, I removed my headlight lift and bucket assembly to address issues with the motor. Fixed the motor and went to reinstall. Unfortunately, I didn’t mark the original location of the nuts on the assembly and there is quite a bit of play / adjustment, up and down / left and right. What am I looking for as far as adjustments and lineup is concerned?
|
|
|
|
fierofool
|
JAN 03, 04:23 PM
|
|
You might be able to see some scuff marks on the top mounting points where the washers scuffed the mechanism. To align it, notice the two Teflon rub strips on the headlight door. They should have scuff marks. The assembly rubs and pushes against these as the assembly moves up and down. These can be used as indicators. I like to center the assembly rub points as closely as possible on these strips.
Power to the motor should be disconnected once the headlights are raised. Leave the lower nuts slightly loose. Lower the hood to its halfway latch point. I think the headlight door will be in contact with the headlight assembly. Now, loosen the top nuts and center the rub points on these strips. Be sure both rub points are balanced each coming into contact with the door at the same time. You may have to raise and lower the hood to make this adjustment. Tighten the top nuts. Unplug the single motor wire on Gen 1 systems or the headlight motor harness on Gen 2 systems. Then underneath and tighten the lower nuts.
|
|
|
|
cvxjet
|
JAN 03, 04:52 PM
|
|
I don't know if this will help- I took pics of the linkage before disassembly so I could put it back together....
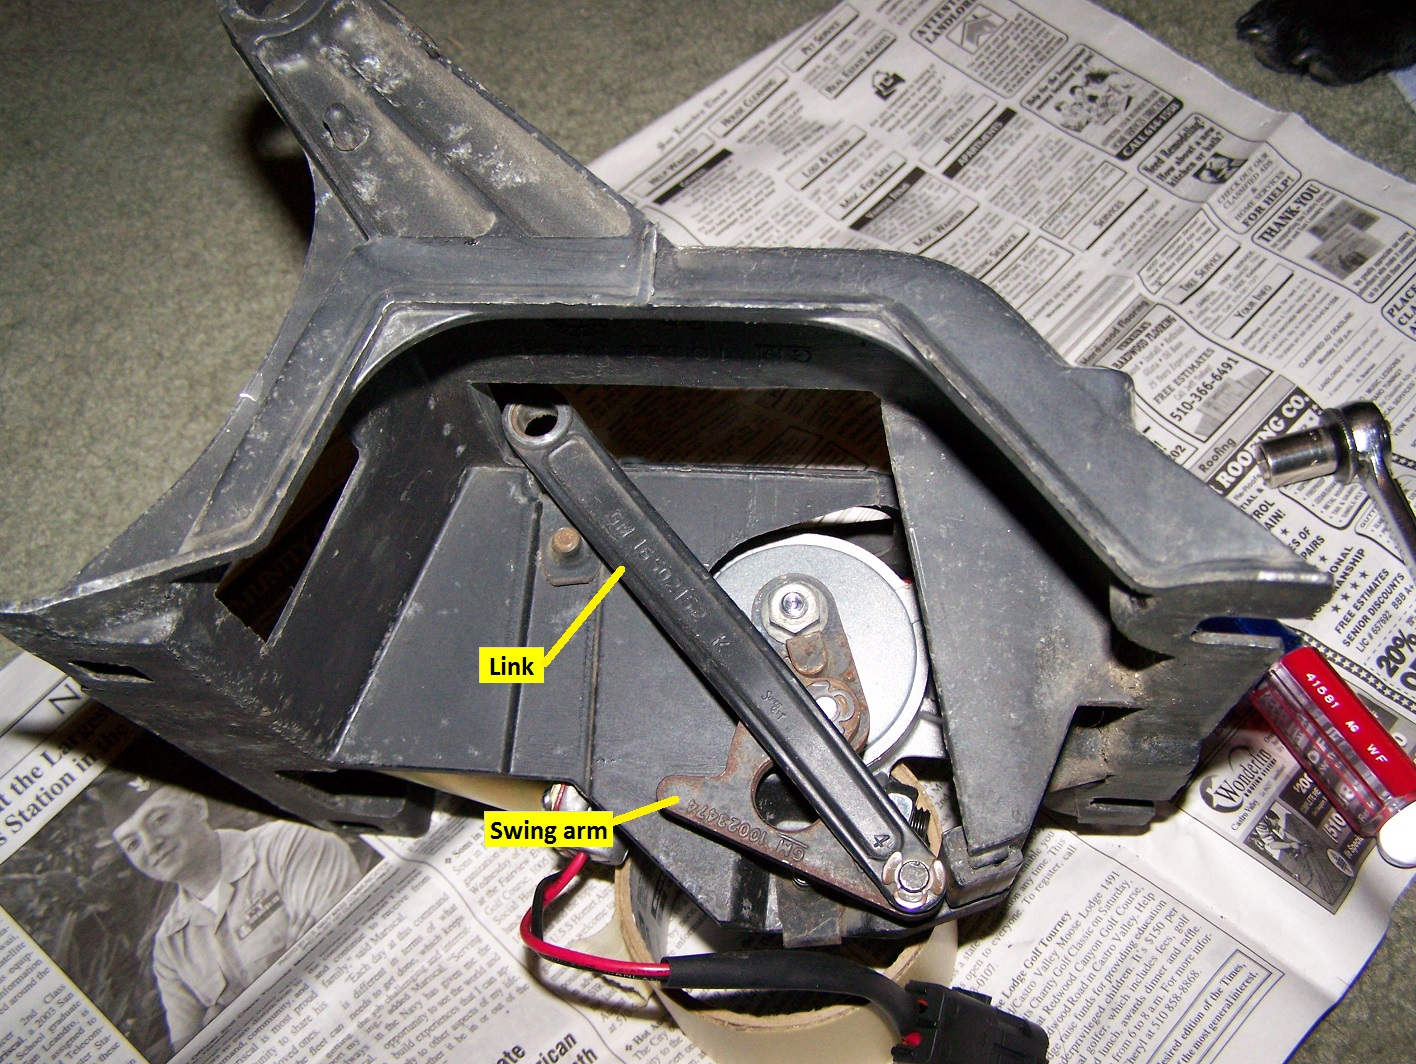
(This is with the headlights in the down position)[This message has been edited by cvxjet (edited 01-03-2021).]
|
|
|
|
ninedriver
|
JAN 03, 05:45 PM
|
|
Hey guys
Thanks for the pic, and awesome explanation using the scuff marks for alignment fierofool! That oughta get me heading in the right direction.
|
|
|
|
theogre
|
JAN 04, 01:16 PM
|
|
Lift mec have some play open/close the bucket. Only is tight at full open/close.
4 nuts holding lift on/in the car needs careful attention more then most think.
If you got lucky, you might see 1 set of "wear spots" where nuts were tighten at factory but many have been pulled 1 to many times and those wear spots mean nothing.
Buckets only hit the Door on 2 bearing strips...
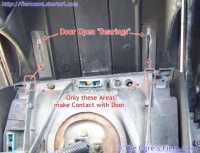 | | CLICK FOR FULL SIZE |
2 other spots in front is a backup and barely touches door.
Bucket Trim must not touch/rub the door anywhere else or extra load can bind or jam the system.
Many also let lift frame rest on top studs and HL bulb doesn't fully clear the hood at bottom of bulb.
See my Cave, Headlights etc.------------------
Dr. Ian Malcolm: Yeah, but your scientists were so preoccupied with whether or not they could, they didn't stop to think if they should.
(Jurassic Park)
The Ogre's Fiero Cave
|
|
|
