|
| EZ pull distributor tool, DIY (Page 1/2) |

|
hobbywrench
|
MAY 06, 02:25 PM
|
|
Got Popeye arms and wrists? Perhaps you have trouble removing your distributor? Here is a free (diy)puller which I made in about 20 minutes.
1. your scrap distributor cap 2. a 1/4-20 or similar bolt, eye bolt, plant hanger, etc about 4-6 inches long. 3. The old distributor cap is drilled thru the center (coil terminal) : Hold the cap sideways (no vise, you must not crack it). Keyhole saw or similar to score around the base of the coil terminal. Snap it off and drill thru to provide passage of your bolt. I just used a nut because the rotor was stuck on and I could not add a washer and still have the distributor seat fully . The distributor is fastened with the hold-down screws into the base plate. (DON'T PANIC , read on)
Yes, the little ?6-32 screws may seem risky , especially if you are rebuilding.... Here is how the puller is used. The top of your fastener must provide for a lever arm . My fastener came with a hook on it, but yours may be an eye , etc. Your delicate wrist is on one end of the lever and the other end is either on the plenum intake area or 90 degrees away on the plenum itself. With VERY LITTLE upward force you will note a spring effect as the distributor cap flexes, pulling the pesky O ring free. VOILA! No damage here to distributor Tried to upload image
|
|

|
Patrick
|
MAY 06, 02:55 PM
|
|
| quote | Originally posted by hobbywrench:
Tried to upload image...
|
|
And?
Cliff's Upload Image link that he implemented a while back actually works very well.
This is definitely a situation where a picture is worth a thousand words![This message has been edited by Patrick (edited 05-06-2021).]
|
|
|
|
Spoon
|
MAY 06, 09:12 PM
|
|
Next time just remove the Hold_Down plate and bolt and then crank the engine. Should push right out. Disconnect coil wire 1st.
Spoon
------------------
"Kilgore Trout once wrote a short story which was a dialogue between two pieces of yeast. They were discussing the possible purposes of life as they ate sugar and suffocated in their own excrement. Because of their limited intelligence, they never came close to guessing that they were making champagne." - Kurt Vonnegut
|
|
|
|
hobbywrench
|
MAY 07, 11:12 AM
|
|
|
|
|
hobbywrench
|
MAY 07, 02:37 PM
|
|
Sorry for redundancy. Here is a exploded view of distributor before rebuild. 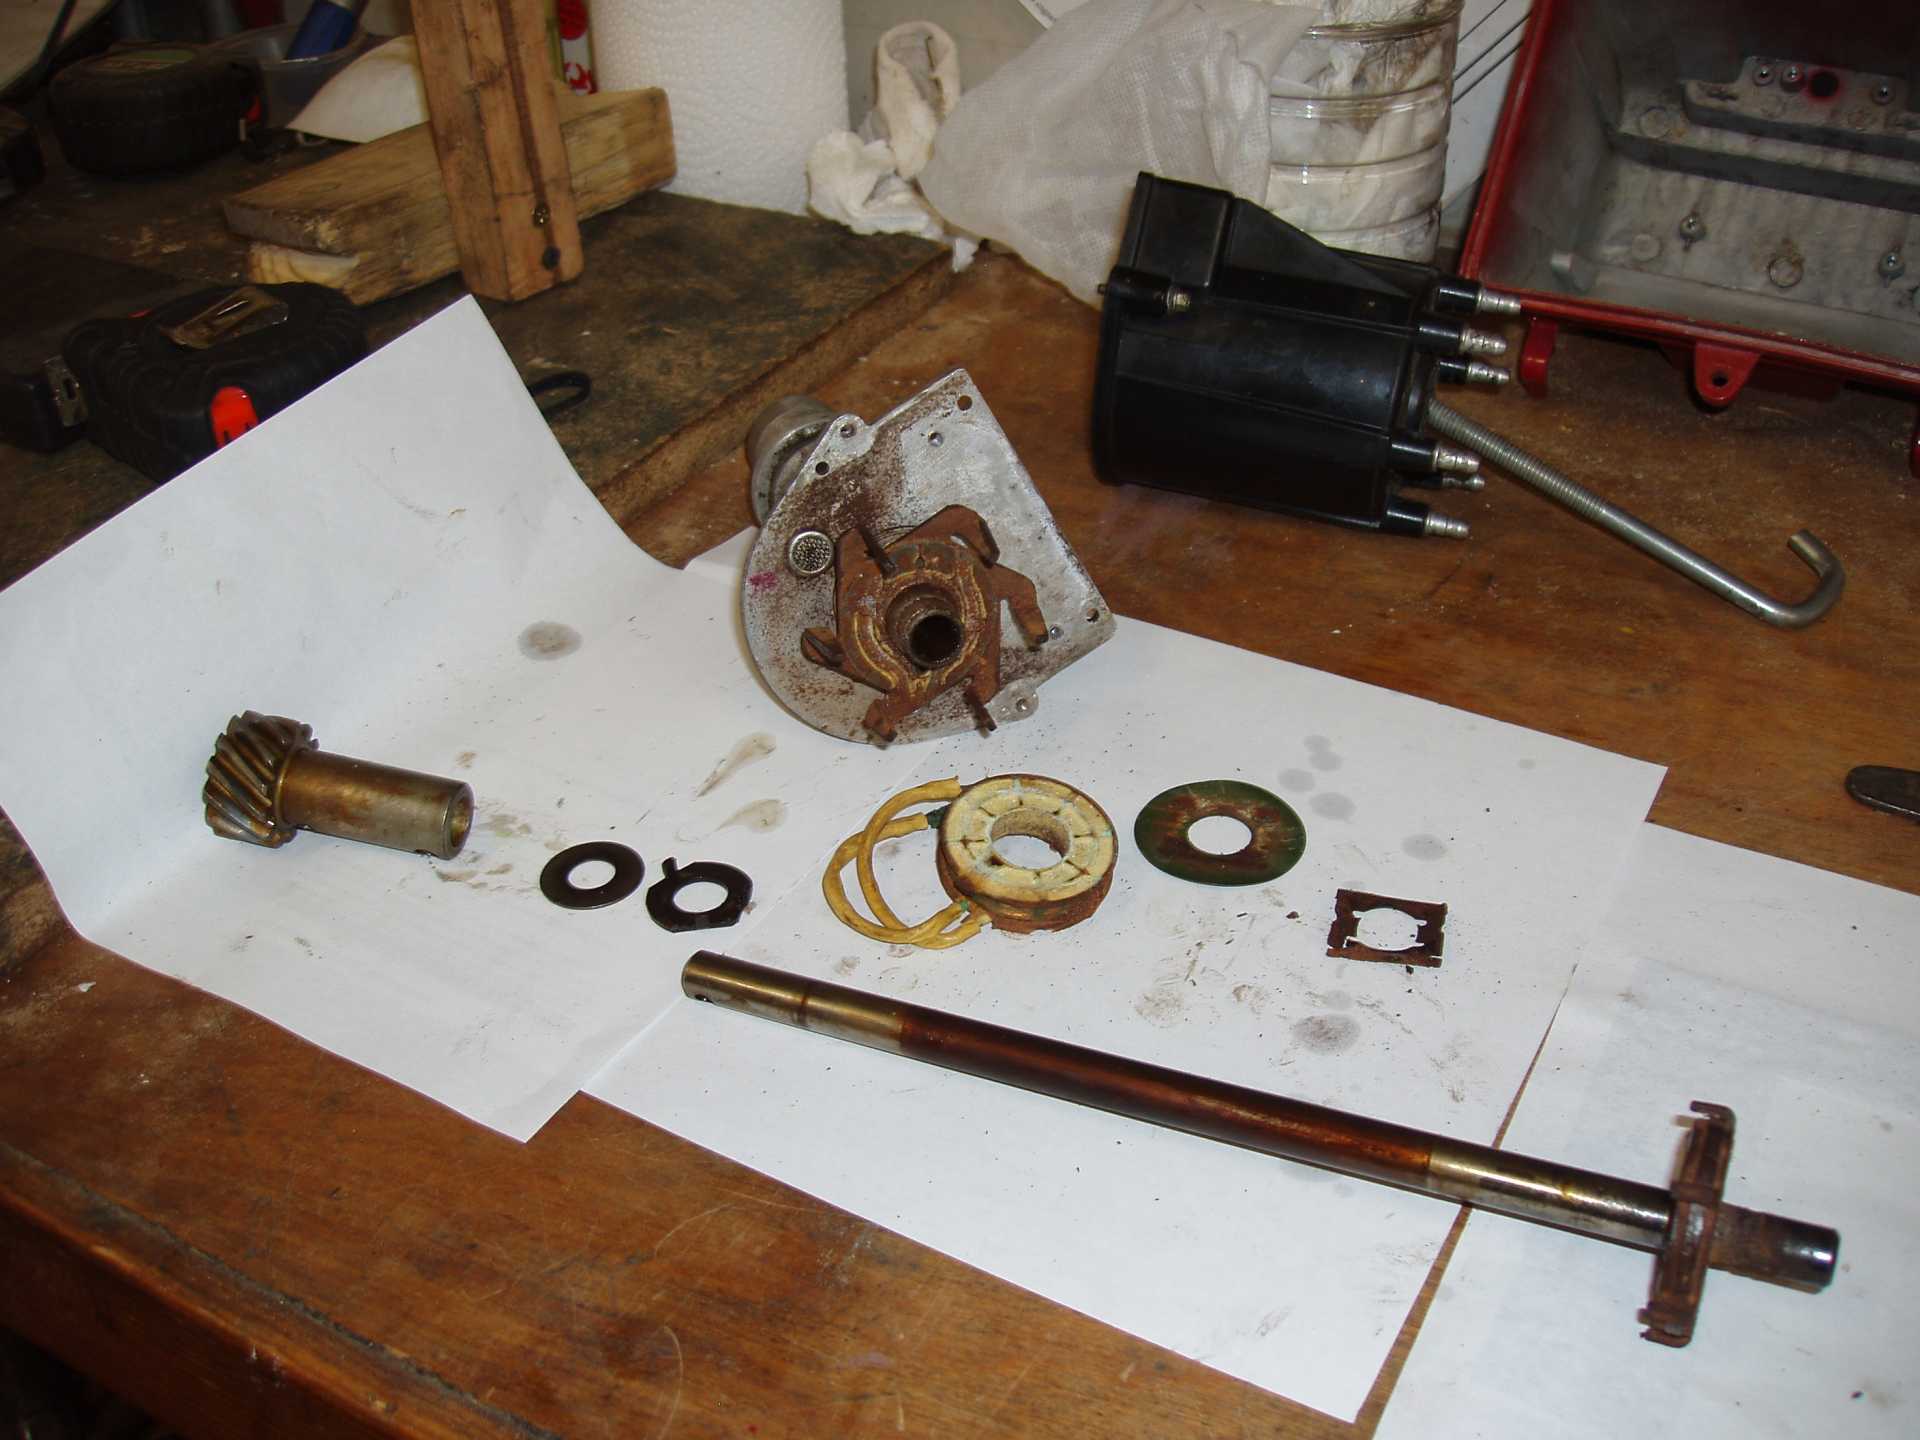
|
|
|
|
fierosound
|
MAY 07, 03:41 PM
|
|
|
|
|
Dennis LaGrua
|
MAY 08, 08:27 AM
|
|
|
Tip: The distributor gear must be put back on the shaft exactly how it was removed in the same position. This will make re-installation more precise and the re-timing will be easier. If the gear is put on 180* out you may not be able to get enough clearance around the distributor to adjust for the timing but you could also shift the gear teeth to compensate.. ------------------
" THE BLACK PARALYZER" -87GT 3800SC Series III engine, custom ZZP /Frozen Boost Intercooler setup, 3.4" Pulley, Northstar TB, LS1 MAF, 3" Spintech/Hedman Exhaust, P-log Manifold, Autolite 104's, MSD wires, Custom CAI, 4T65eHD w. custom axles, Champion Radiator, S10 Brake Booster, HP Tuners VCM Suite.
"THE COLUSSUS"
87GT - ALL OUT 3.4L Turbocharged engine, Garrett Hybrid Turbo, MSD ign., modified TH125H
" ON THE LOOSE WITHOUT THE JUICE "
|
|
|
|
hobbywrench
|
MAY 08, 10:51 AM
|
|
|
I found that a little heat from a "hair dryer" type heat gun focused only on the gear made positioning for roll pin alignment easy. The gnarly rust cleaned up well, but I can understand the appeal of the "short block " version of the reman for $125. Hope interested parties can see the hook on the fastener and visualize the simple lever action of a hammer handle, dowel, or even a metal rod to lift out the distributor.
|
|
|
|
reinhart
|
MAY 08, 07:51 PM
|
|
| quote | Originally posted by Spoon:
Next time just remove the Hold_Down plate and bolt and then crank the engine. Should push right out. Disconnect coil wire 1st.
Spoon
|
|
Doesn't this mess up the alignment of the distributor and make one have to guess on the gear position when reinserting? I have always marked the gear where it start to go in and where it should be when fully inserted, but cranking the engine means you have no idea where the ditributor gear should be relative to the engine.
Or am I missing something?
|
|
|
|
hobbywrench
|
MAY 09, 11:04 AM
|
|
The tool allows a somewhat controlled withdrawal. I marked the rotor position from vertical on the ignition module (black, 6 pin) with a straight edge before and just as the distributor was free to show the sweep movement of the gear. The distributor is inserted with rotor position on the second mark. Once home it should align with the first mark.
Another shout out to this great forum. My 30 year old timing light provides candle power so I tried a tip from the archive of clipping the inductive
pickup connector to the coil wire. EUREKA! A sparkly starburst which hovers over the desired 10 degree mark (baseline) , and about 4 times brighter. Just what these weak eyes needed.
|
|
|
|