
 
     |
| 88 GT 3800 L67 Swap and Restoration (Page 1/5) |

|
MichiganReefer
|
MAY 26, 11:20 PM
|
|
Hey everyone, I've posted a few questions on here as I'm a relatively new Fiero owner and now made enough progress on my car to warrant a build thread (and maybe having one will keep me progressing). I was inspired to get a Fiero from seeing a few youtube videos on it. The background on my car is quite vague, but I purchased it in April 2021 from the previous owner in Ohio with 62k miles on the odometer. He owned it for 10 years, and after seeing the title, realized he only had driven ~250 miles in the ten years he owned it. The interior was very clean other than the typical glue oozing out of the steering wheel.

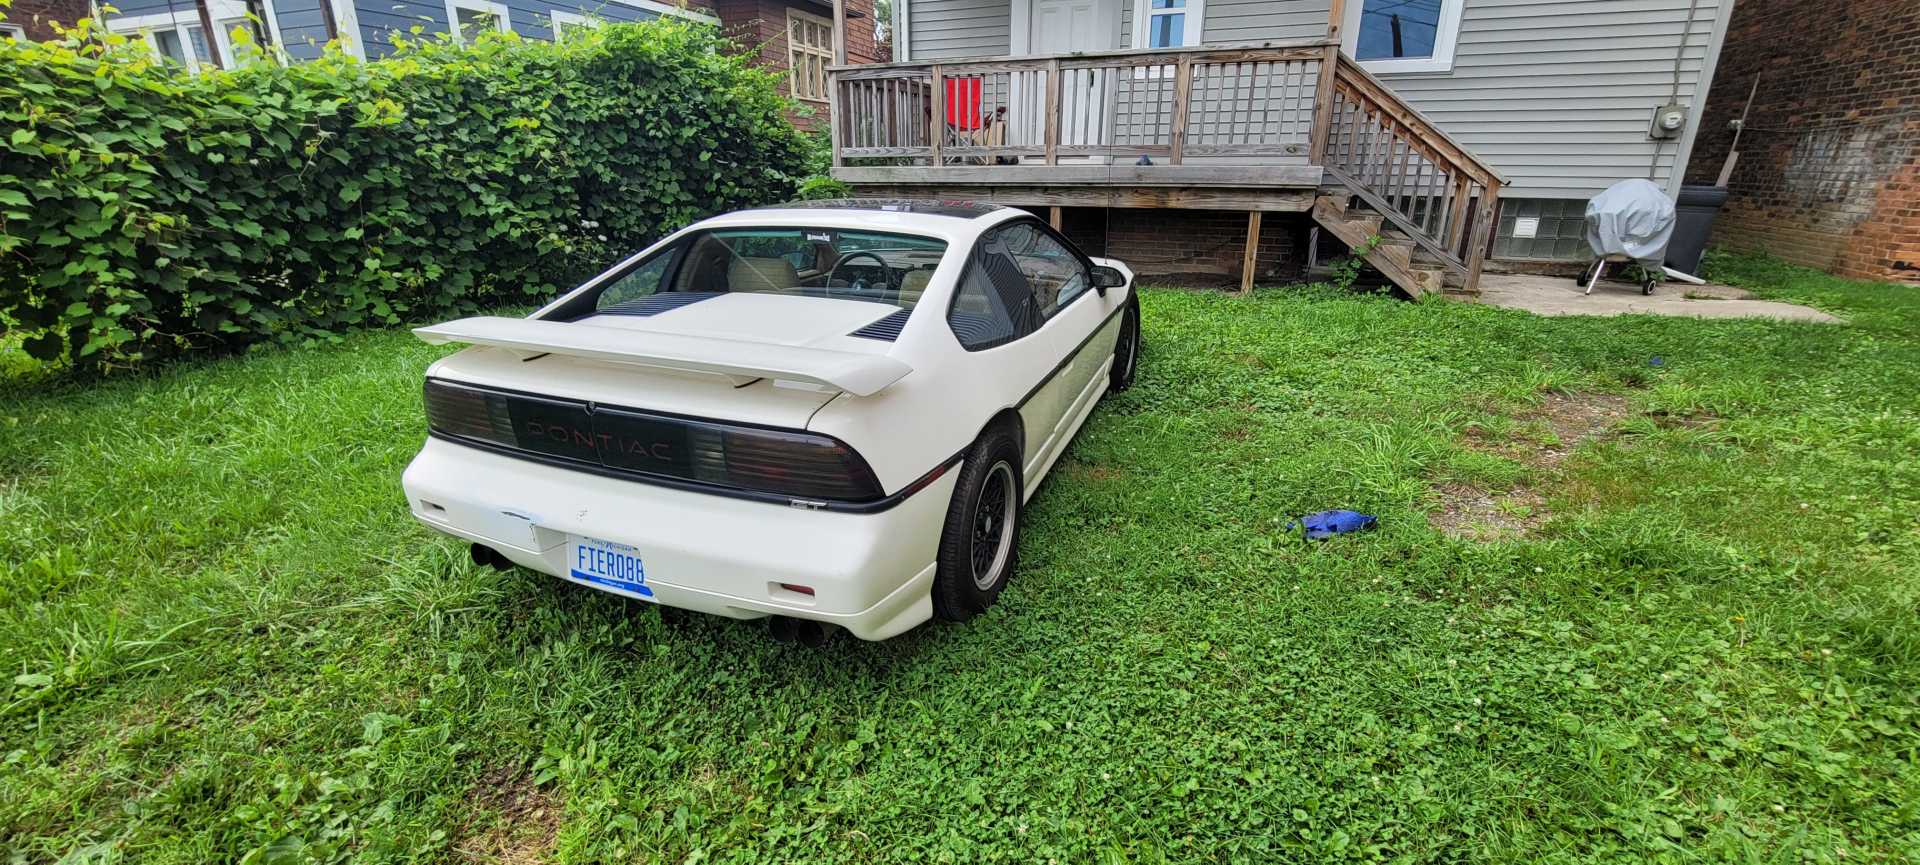
I towed it 6 hours home and began to do the typical maintenance items: oil change, brake fluid flush, new tires, fuel filter change, spark plugs, transmission fluid change, and a few other things. I got worried when it hesitated to start longer than I expected, but it eventually did but immediately would die. After some investigation and reading this forum I ordered The Fiero Store (TFS) stainless vacuum lines as that was a possible culprit. Got those installed and seemed to have the same issue where it would stall out, looked at the IACV and throttle body and cleaned those out as best as possible despite both looking clean. I decided to try giving a small amount of throttle input after starting to attempt at keeping it alive, to my surprise it did keep it from stalling. After keeping it alive for 15 minutes it was able to idle with a large swing in the RPMs. Long story short, it ended up having a swinging idle and would sometimes backfire which I struggled to diagnose but I was able to put a couple hundred miles on it trying to enjoy the car as it was. I also noticed a lot more yaw under throttle and braking events than feels intended.
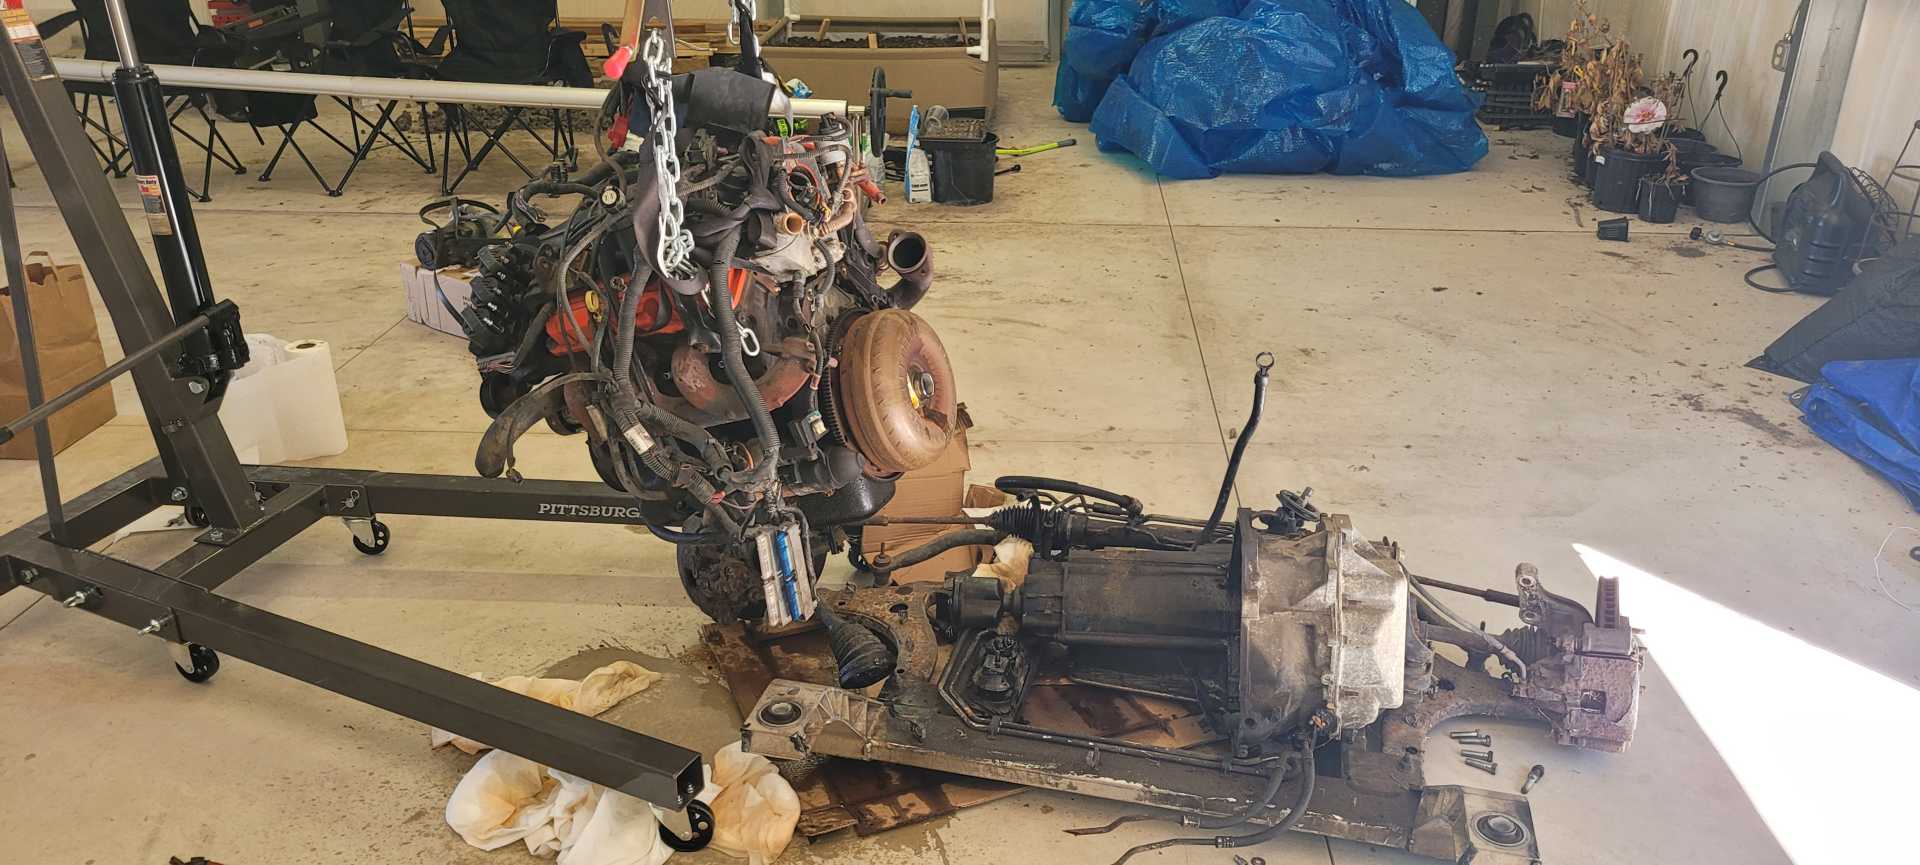
The solution I came up with to the engine troubles was to look into a 3800 swap. Lots of builds on here documenting it and great videos from LostNotForgotton and FieroAustin. At the same time, I decided to also do a steering/suspension restoration with a lot of items from TFS after being inspired by Ronald (Ronnie) Finger's series where he restores his 1985 2m4. I was able to find a full front subframe out of a 05 Monte Carlo SS with the harness and ECU, unknown mileage and condition for 500 bucks. The weekend after purchasing I was finally able to start dissembly on the donor engine because I decided to do it right and do a full bottom-end rebuild. This is the first time I've been doing any work on a car other than the oil, so I've been cautious with things I haven't been able to find forum posts or videos about.

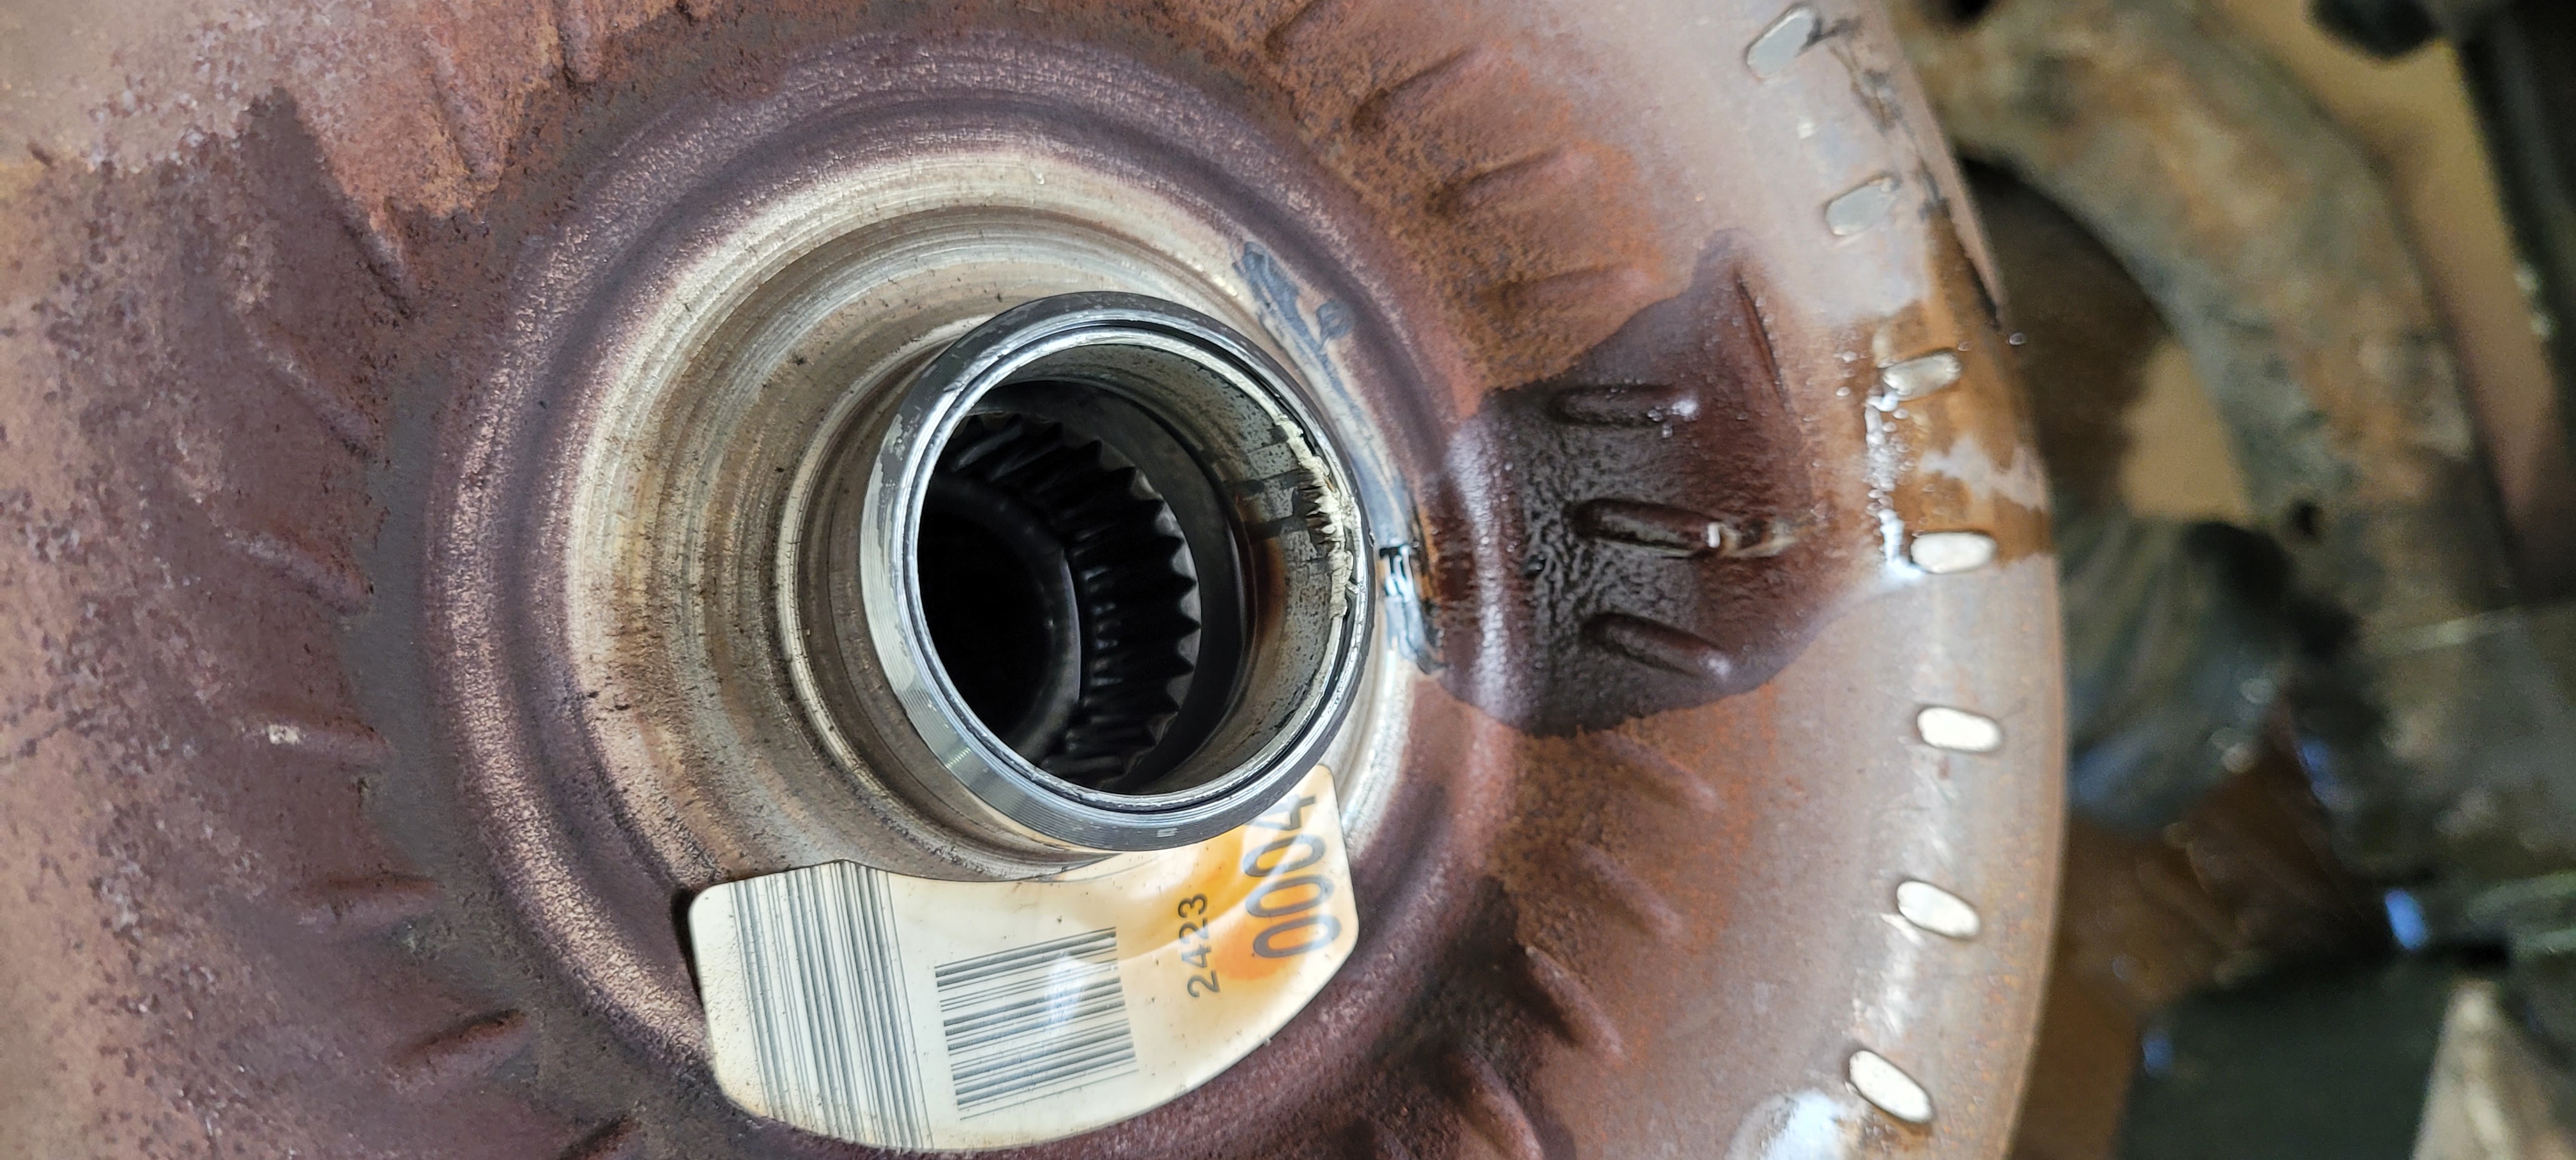
Goof up #1 (Didn't clear the torque converter from the spline and messed up the journal surface):
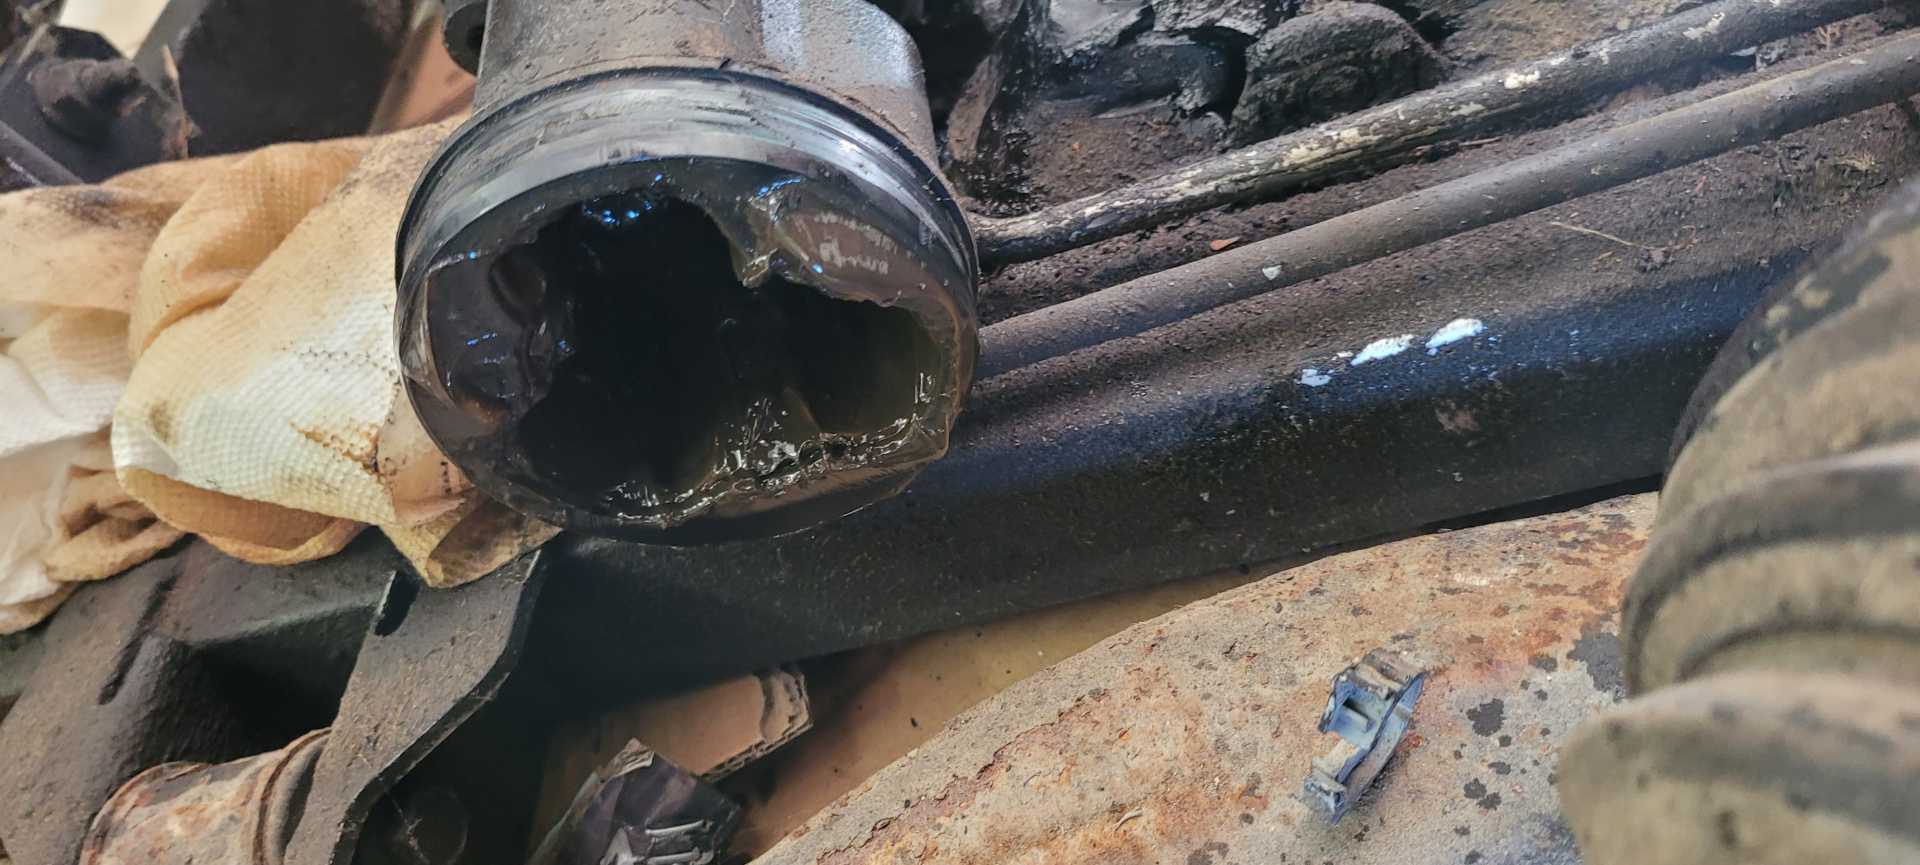
Goof up #2 (Couldn't undo the halfshaft spline from the spindle and pulled the inner halfshaft joint apart on accident) :

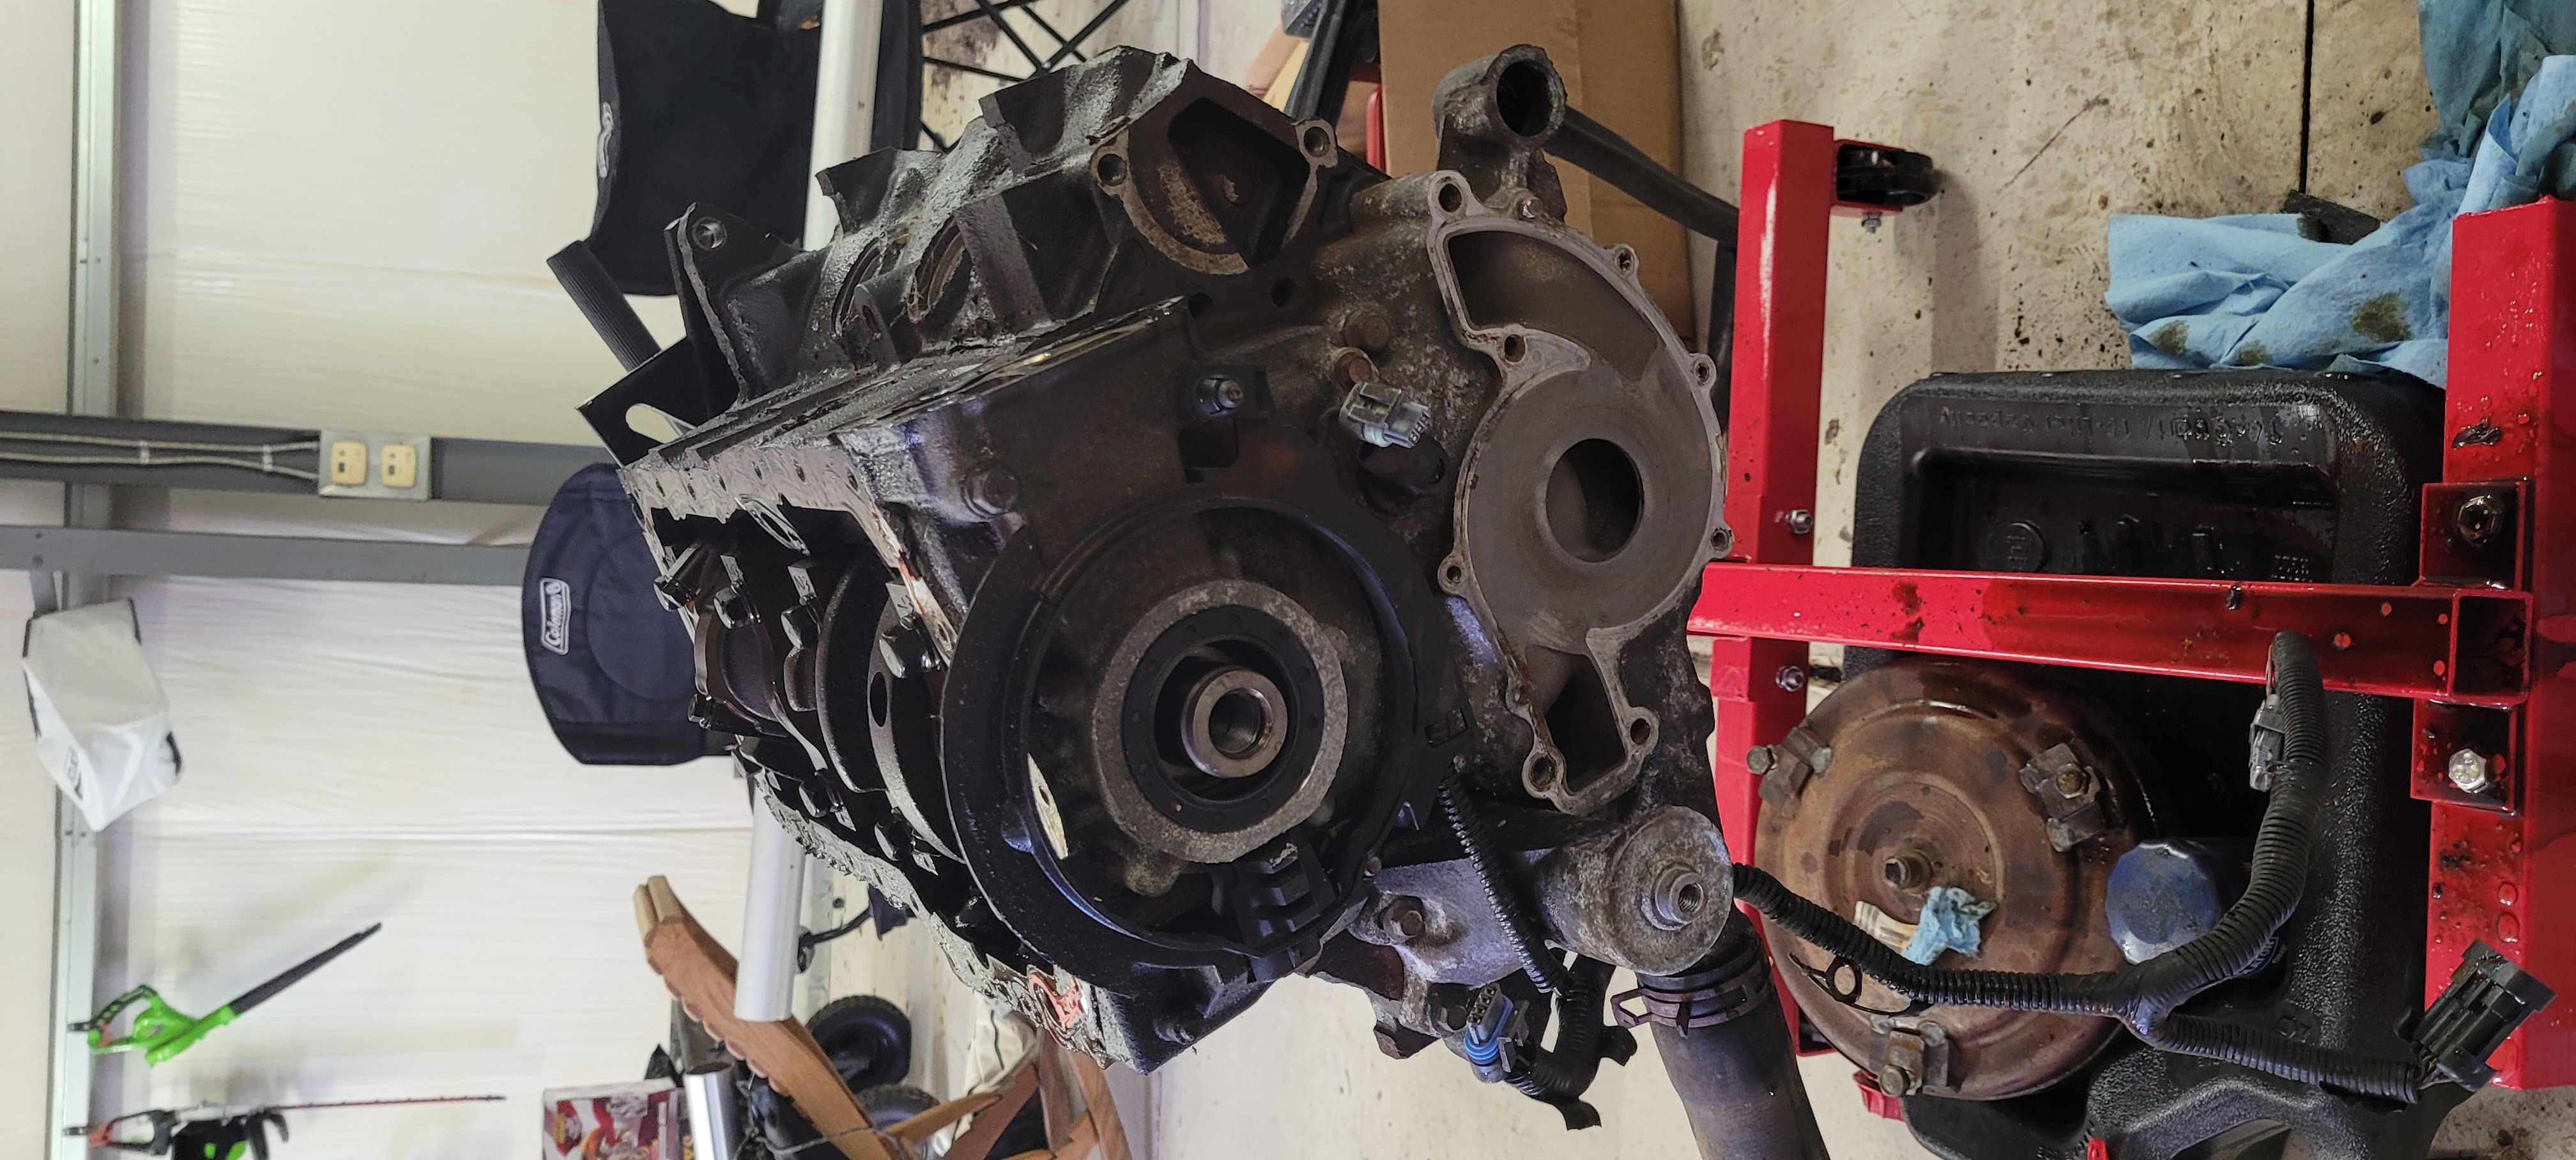
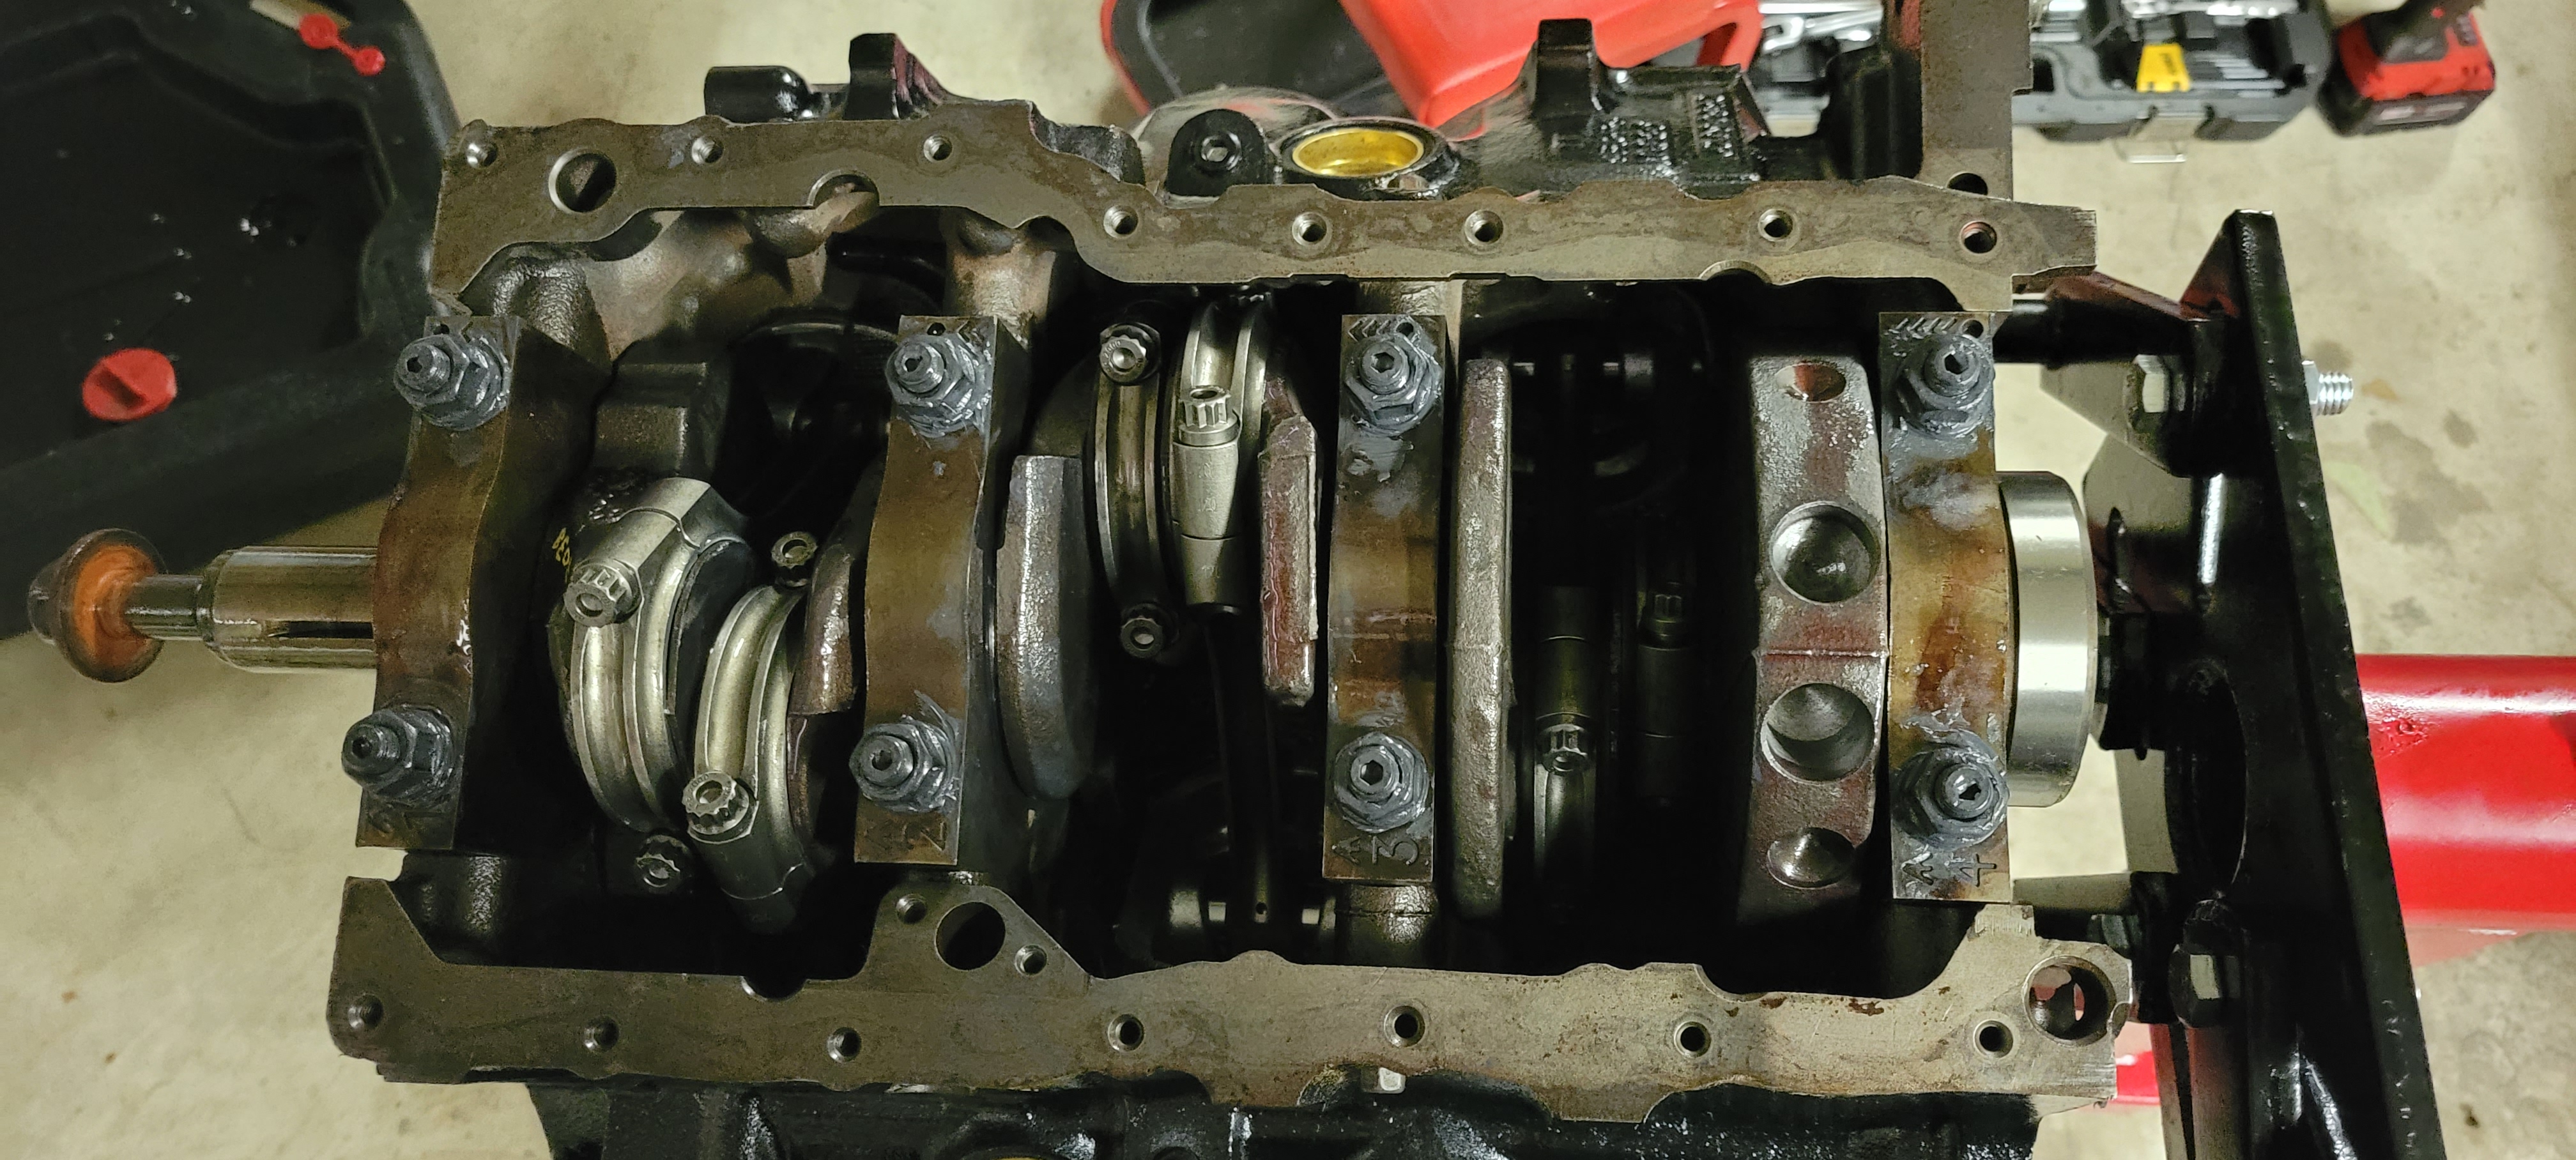
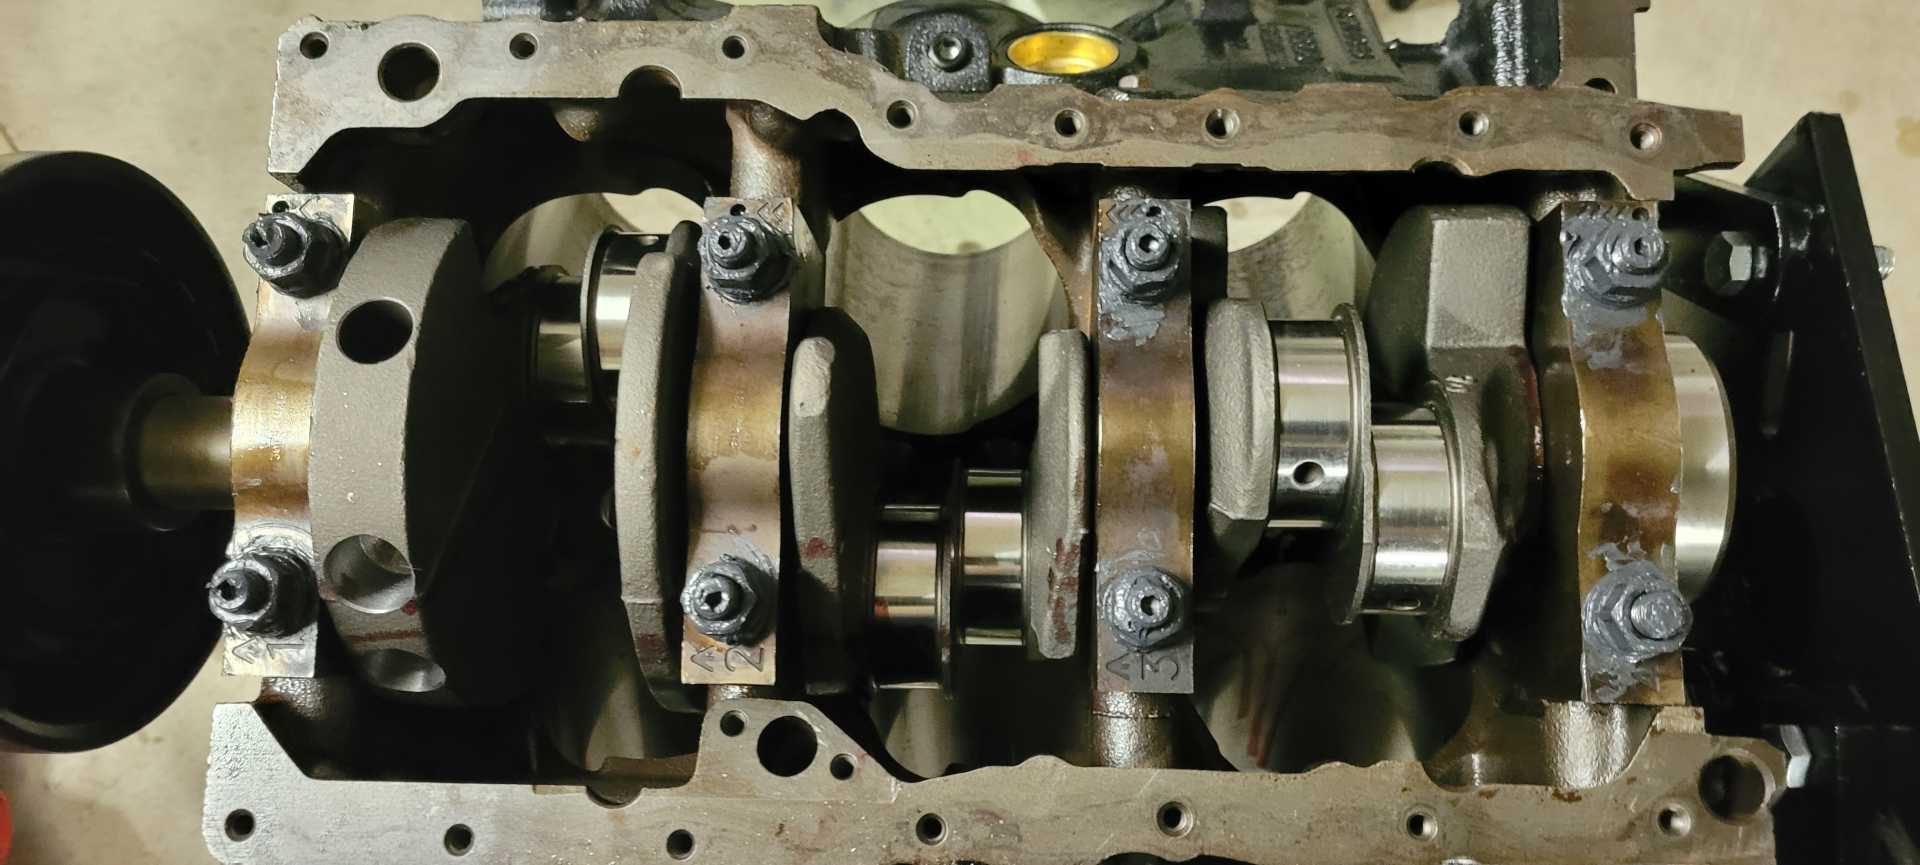
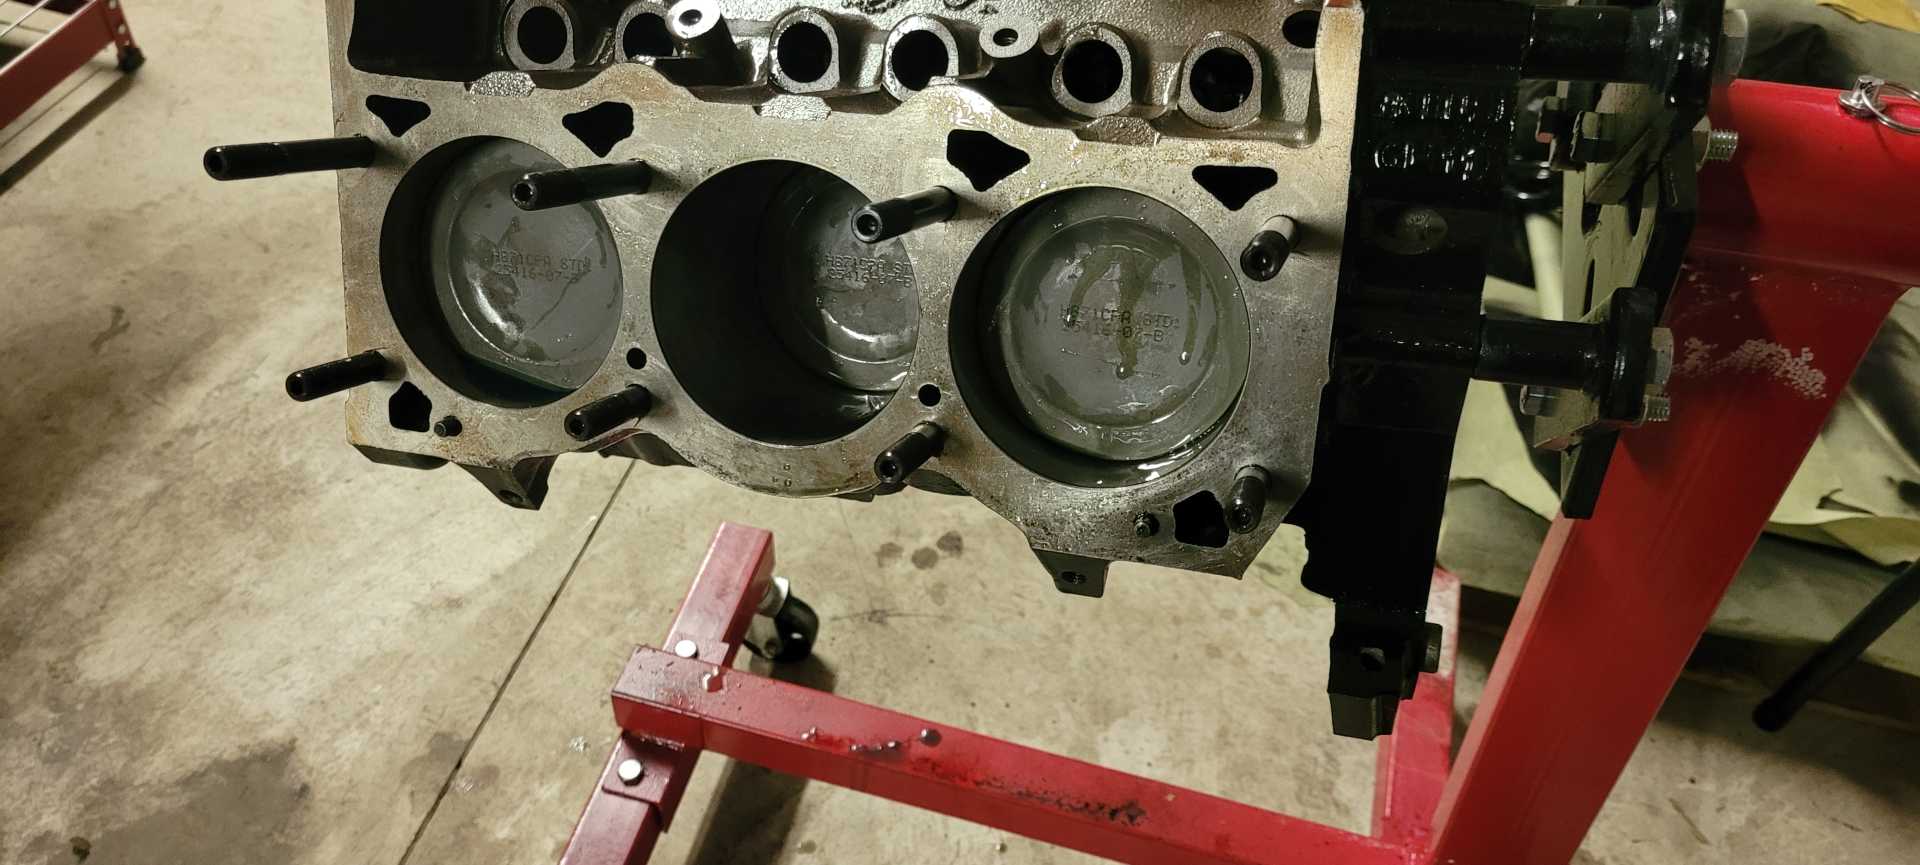
So I finally got the engine on the engine stand and took some reference pictures so I remember on assembly:

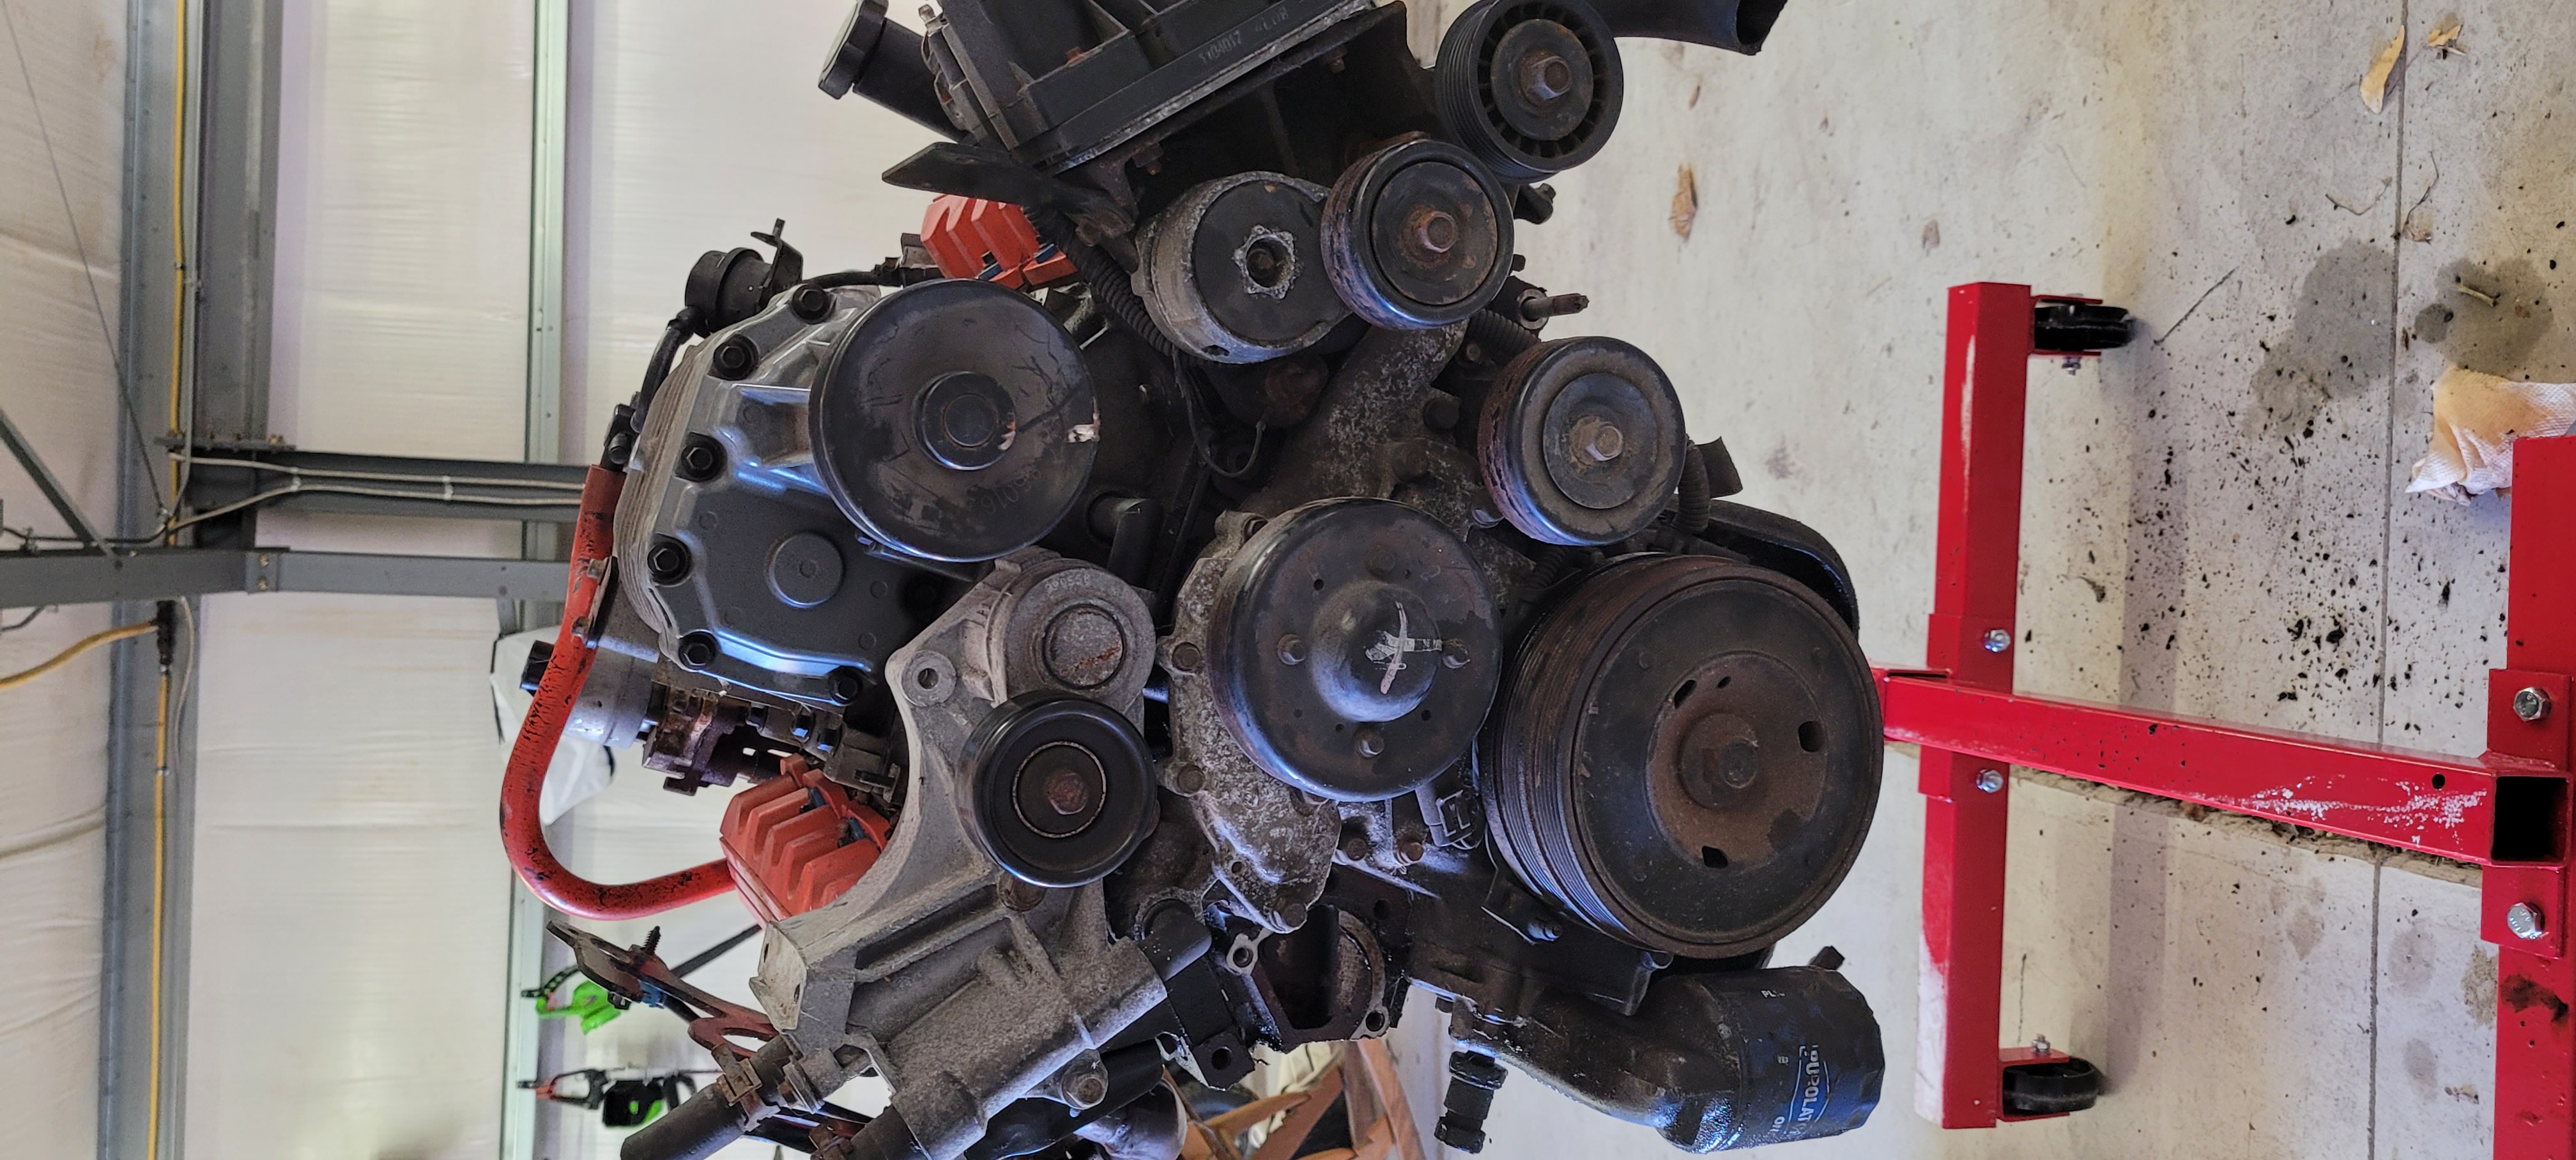
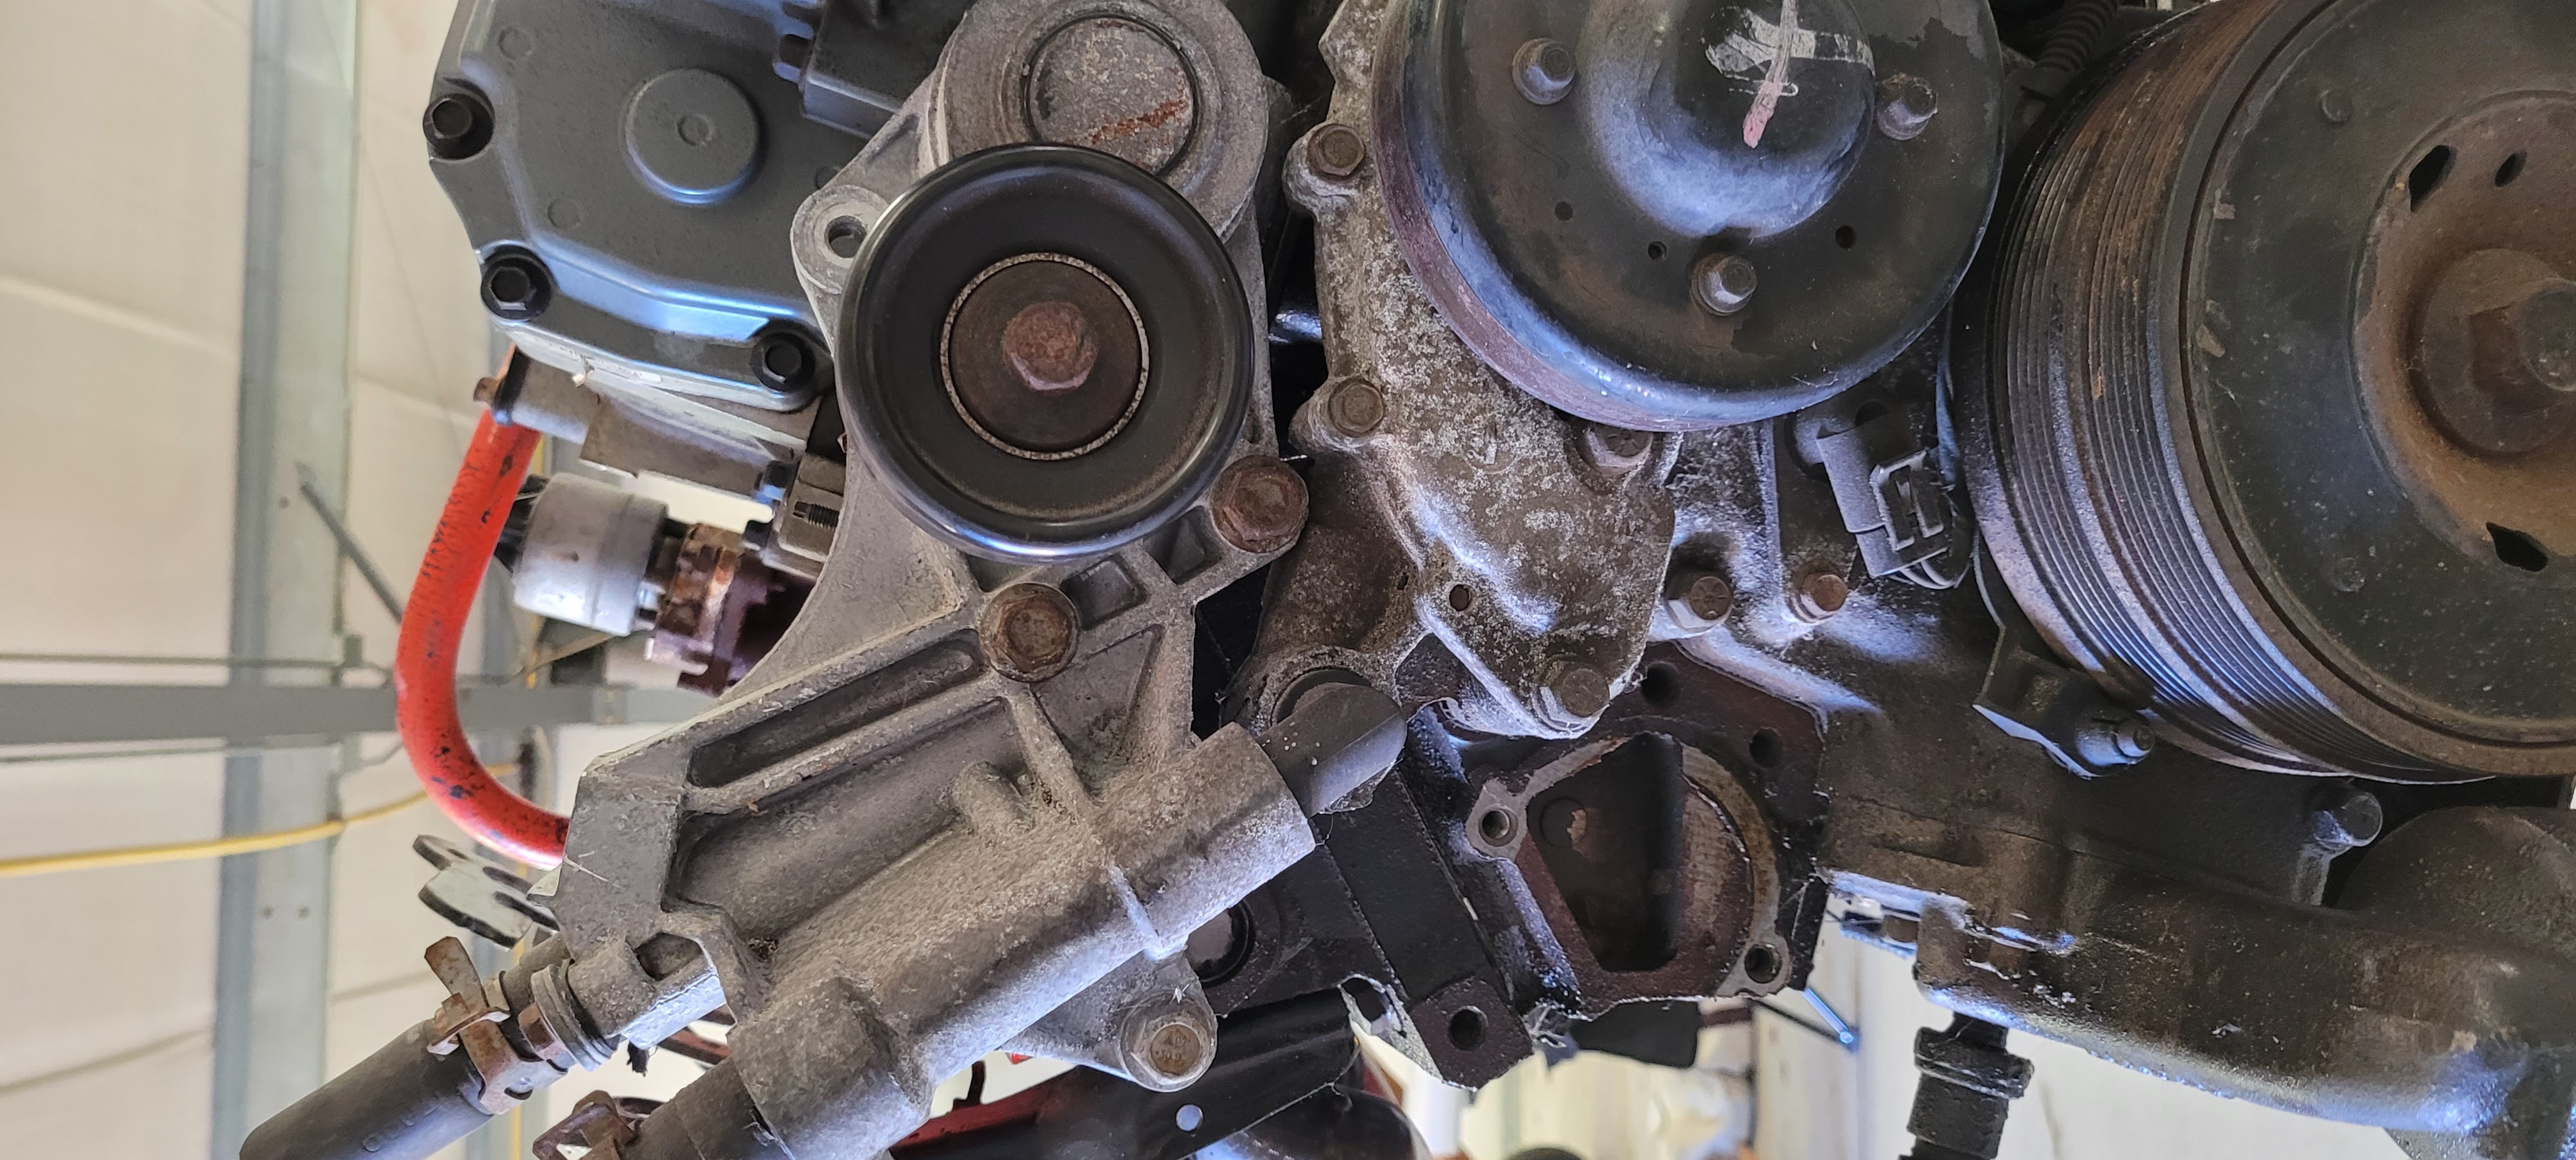
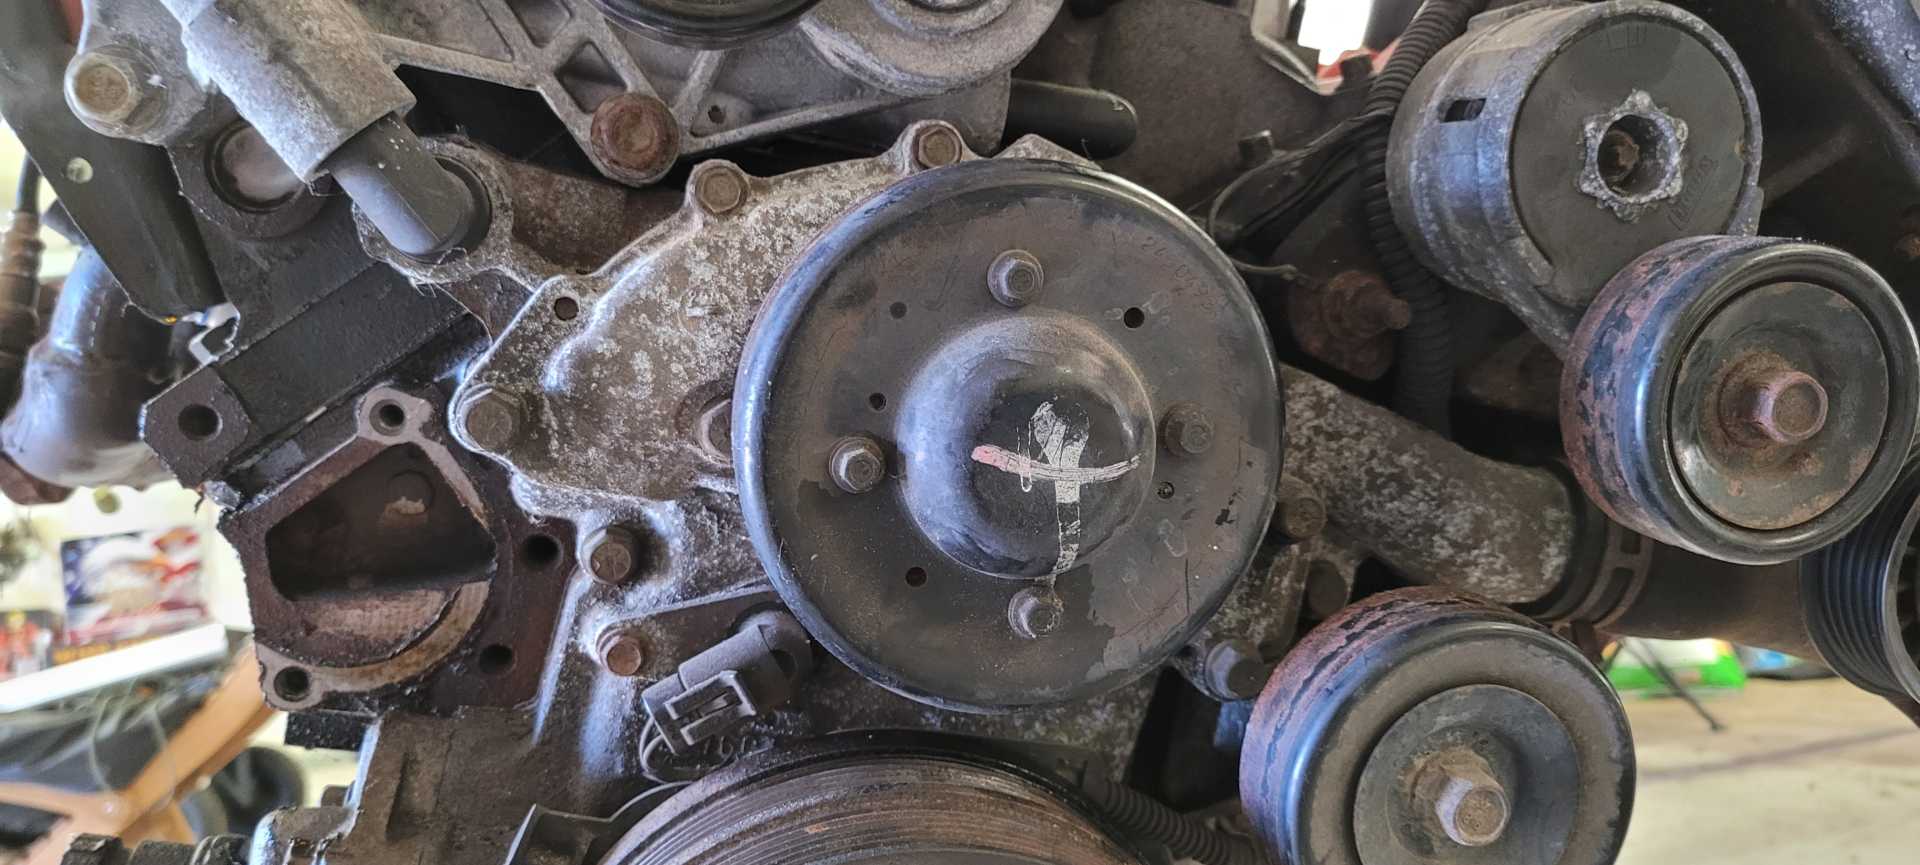


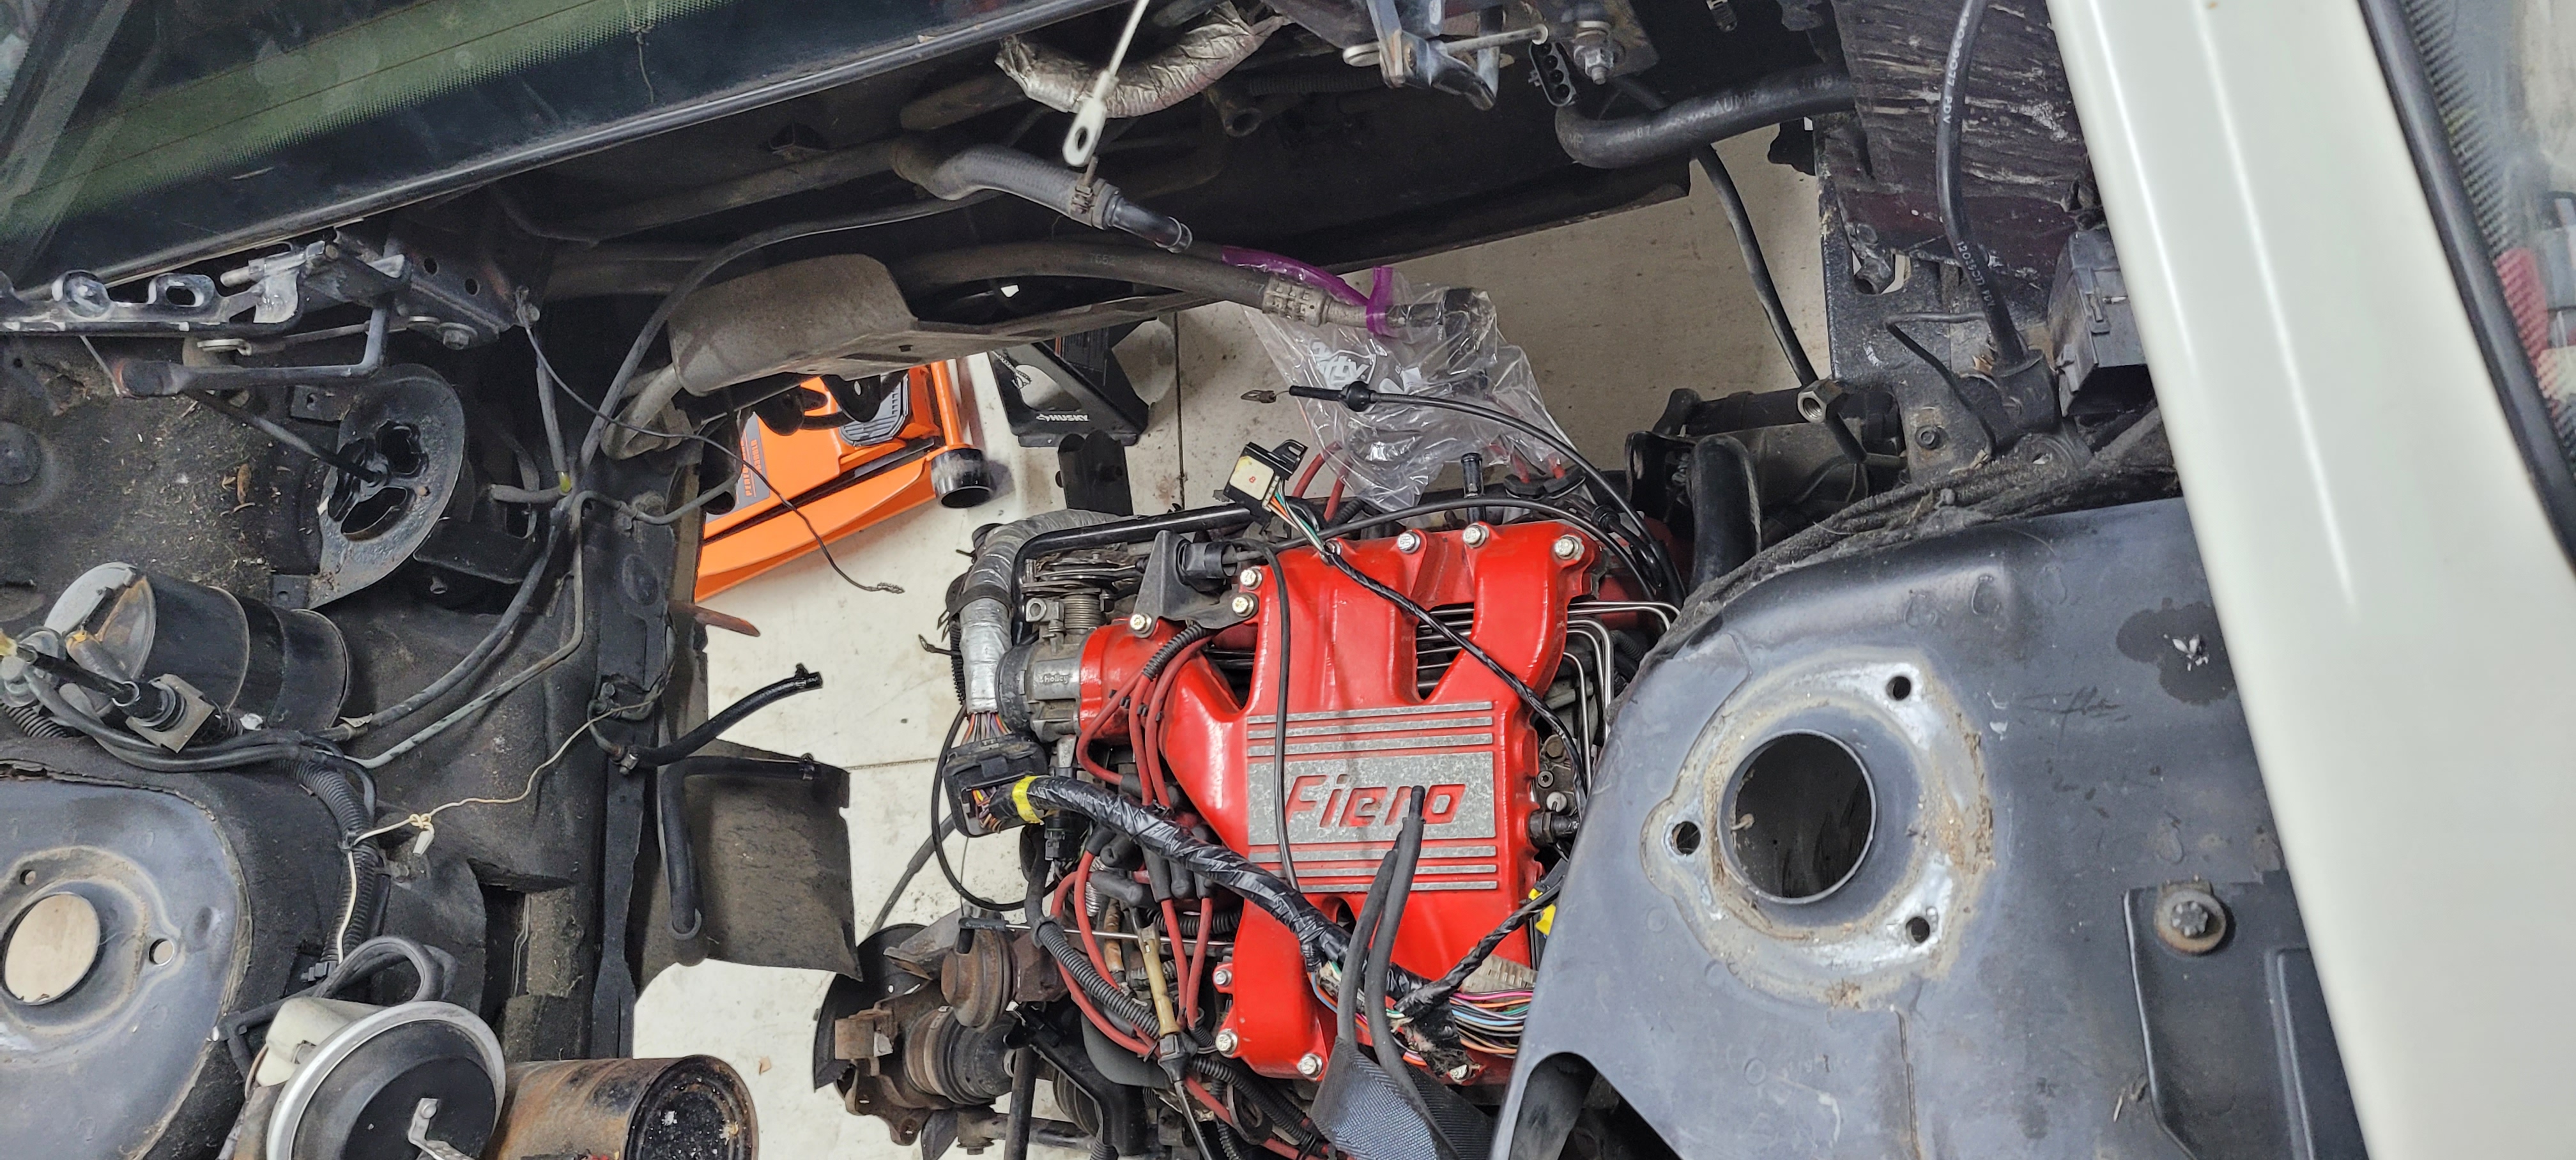
In my opinion the valves and bottom end looked pretty good:

And overall everything else looked good in the 3800:


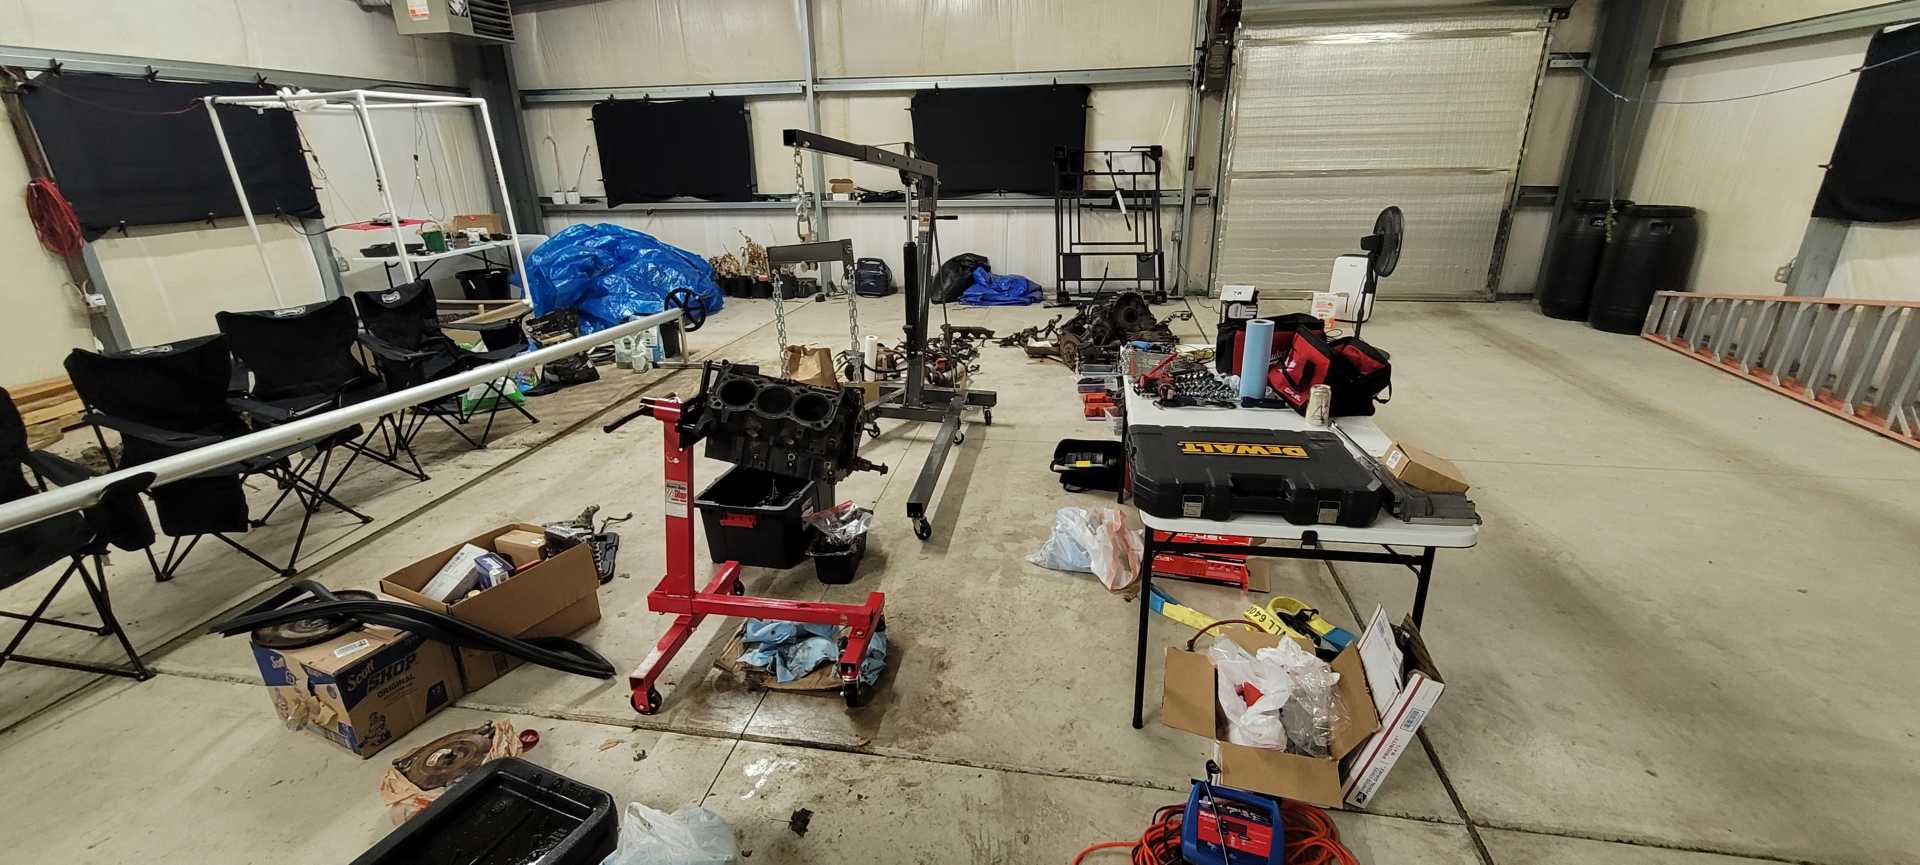
I've been working out of a pole barn that I am renting a section out of from the owner. Big cudos to him for letting my car live there for a few years while I do this.
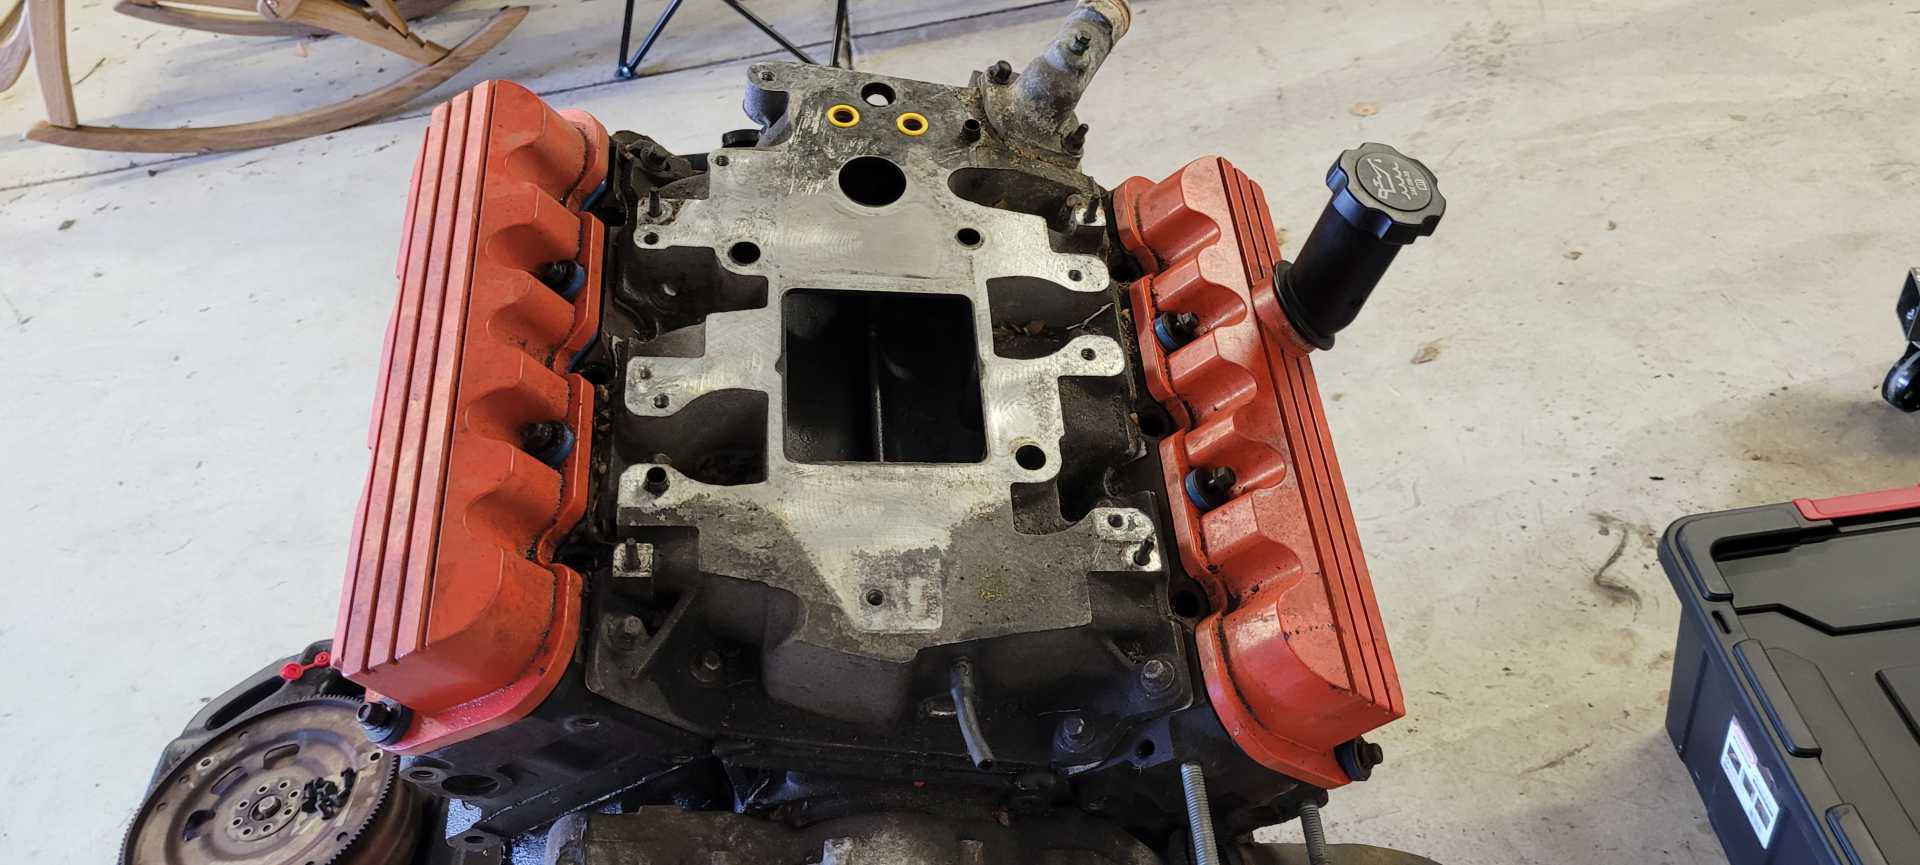
I took the engine completely apart to see what I was working with.
Main Bearings looked very good:
Crankshaft also looked excellent:
[In hindsight I would have left the bottom end untouched based on the conditions of the parts, but obviously am glad I opened everything up]
This post will be updated in the coming days, I have made significantly more progress than this first post is showing.
|
|
|
|
Frenchrafe
|
MAY 27, 01:54 AM
|
|
|
|
|
MichiganReefer
|
MAY 27, 10:06 AM
|
|
|
Thank you! I don't rent out the entire garage but a strip down the middle. So it's not as big as you think, but plenty for a vehicle this size.
|
|
|
|
Dennis LaGrua
|
MAY 27, 10:44 AM
|
|
|
From what I read, it seems that total successful rebuilds of 3800SC engines are difficult. I would just pay close attention to tolerances and torque specs especially on the main bearings. It looks like you have a nice project underway. Good luck with the build . You will love the performance. ------------------
" THE BLACK PARALYZER" -87GT 3800SC Series III engine, custom ZZP /Frozen Boost Intercooler setup, 3.4" Pulley, Northstar TB, LS1 MAF, 3" Spintech/Hedman Exhaust, P-log Manifold, Autolite 104's, MSD wires, Custom CAI, 4T65eHD w. custom axles, Champion Radiator, S10 Brake Booster, HP Tuners VCM Suite.
"THE COLUSSUS"
87GT - ALL OUT 3.4L Turbocharged engine, Garrett Hybrid Turbo, MSD ign., modified TH125H
" ON THE LOOSE WITHOUT THE JUICE "
|
|
|
|
MichiganReefer
|
MAY 27, 02:29 PM
|
|
|
Dennis, you'll see when I get more time to get the post created, but I've gone with all new bottom-end components from ZZP. New bearings, crank, cam, pistons, connecting rods. Went fairly all out as a learning experience for me and so I was more confident with diametral clearances and wear through the bearing's PTFE layer. But to those who are reading this in the future, I agree with Dennis that you've got to be careful with just slapping new bearings with an old crank or vice versa.
|
|
|
|
BadNewsBrendan
|
MAY 27, 08:42 PM
|
|
|
Hey if you're the guy that messaged me on reddit check your messages. Also I didn't get my mains align honed when I rebuilt my L67 and spun a bearing in about 3k miles. Afterward found people that rebuild them say to always get the mains align honed. ------------------
Tetanus
1984 3800 II SC Build
|
|
|
|
MichiganReefer
|
MAY 27, 11:29 PM
|
|
|
I am in-fact that guy, I'll message you about it.
|
|
|
|
MichiganReefer
|
MAY 31, 06:32 PM
|
|
UPDATE #2
Very shortly after getting the engine apart I had saved enough to buy some engine hardware and get things to my local machine shop. I elected to go with all new bottom end components as a learning opportunity for myself and the lack of confidence in the unknown mileage parts I pulled out.
I bought:
ZZP's Remanufactured Crank and Bearing Assembly
ZZP's 4340 H-Beam 3800 Connecting Rods
ZZP's Federal Mogul Hypereutectic Pistons w/ rings
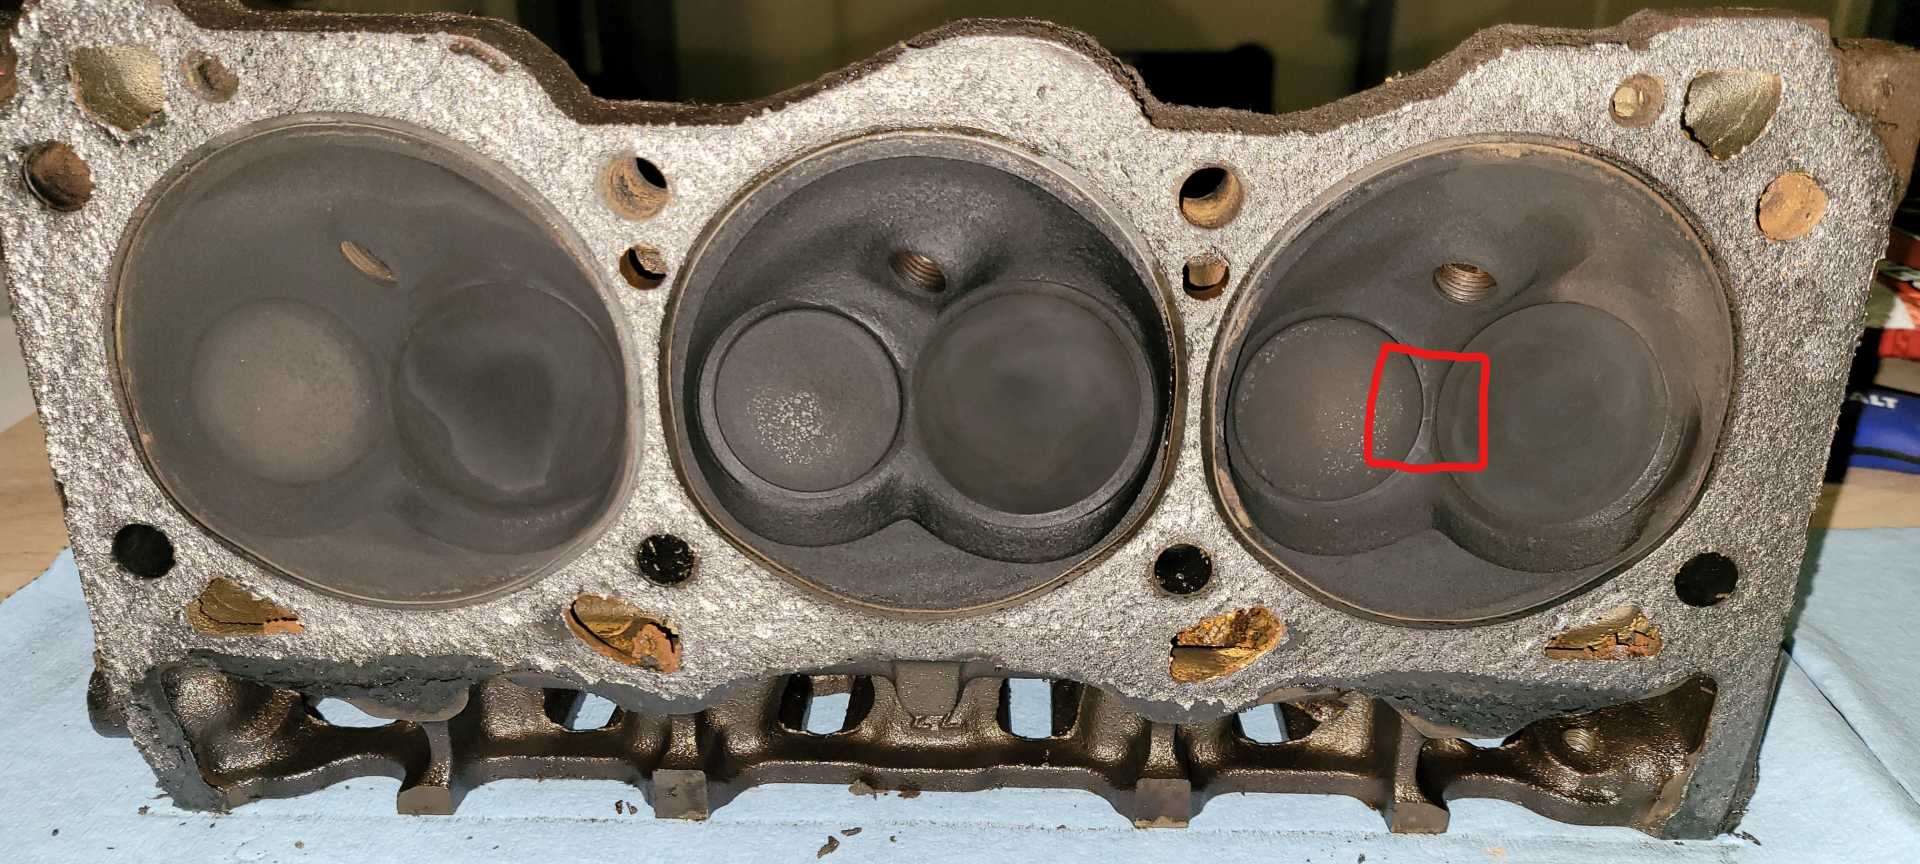
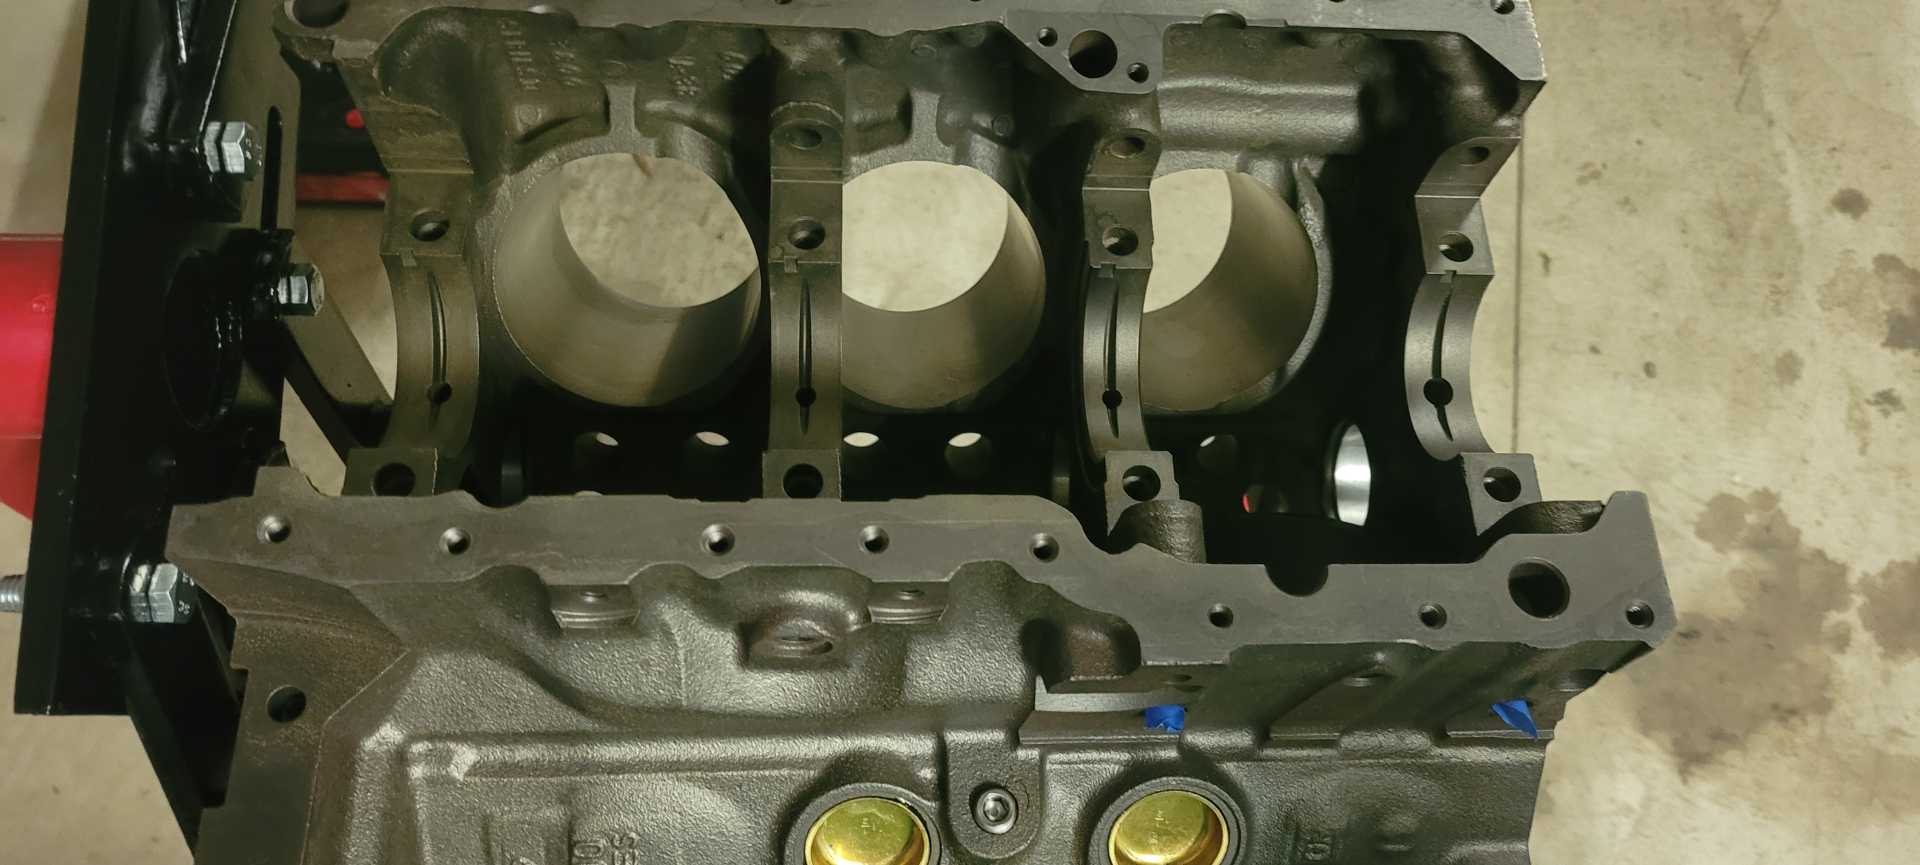
I took my block, heads, rotating assembly, and supercharger to the machine shop for them to work on. On the block: the cylinder bores were in good enough condition to just warrant a hone and did not need to be oversized, head surfaces decked, new cam bearings were installed, it was hot media blasted, and new freeze/galley plugs were installed. Heads were inspected with magnaflux and the machinist noticed cracks in 3 separate combustion chambers between the valves. I actually got a picture of the heads right after teardown and was able to see one of the cracks around all of the carbon buildup:
That threw a wrench into things and I gave ZZP even more of my money by buying a set of remanufactured heads that had 90# valve springs and fresh valves. My rotating assembly got balanced and I had given the machine shop my supercharger snout to put in new bearings and the front seal. I shortly messed up the supercharger snout on the install of my modular pulley hub. I had purchased ZZP's pulley puller/install tool that I had a poor experience with, and I'm not sure if it's the same experience others have had. The tool when assembled has a stud with a sacrificial bronze washer to protect the snout shaft when pressing on it. The stud had poor orthogonal alignment with the pulley and would walk around rather than press squarely on the shaft.
 
I spent 50+ minutes tightening and untighening the stud, until the threads gouged the side of the pulley and required so much force that the pulley was crushed under the force of the puller.
 
I was okay with the pulley being crushed, but it damaged the threads of the stud that I couldn't repair since I don't own a die for that size. That lead me to try tapping the modular pulley hub onto the shaft with a deadblow hammer, which did put the hub on but also pushed out the new bearings from their pressfit. So I had to take that snout back to the machine shop where they fixed it up for me. My total bill at the machine shop came out to about $1200.
In the time my parts were at the machine shop I figured out the rest of my parts I wanted for this engine:
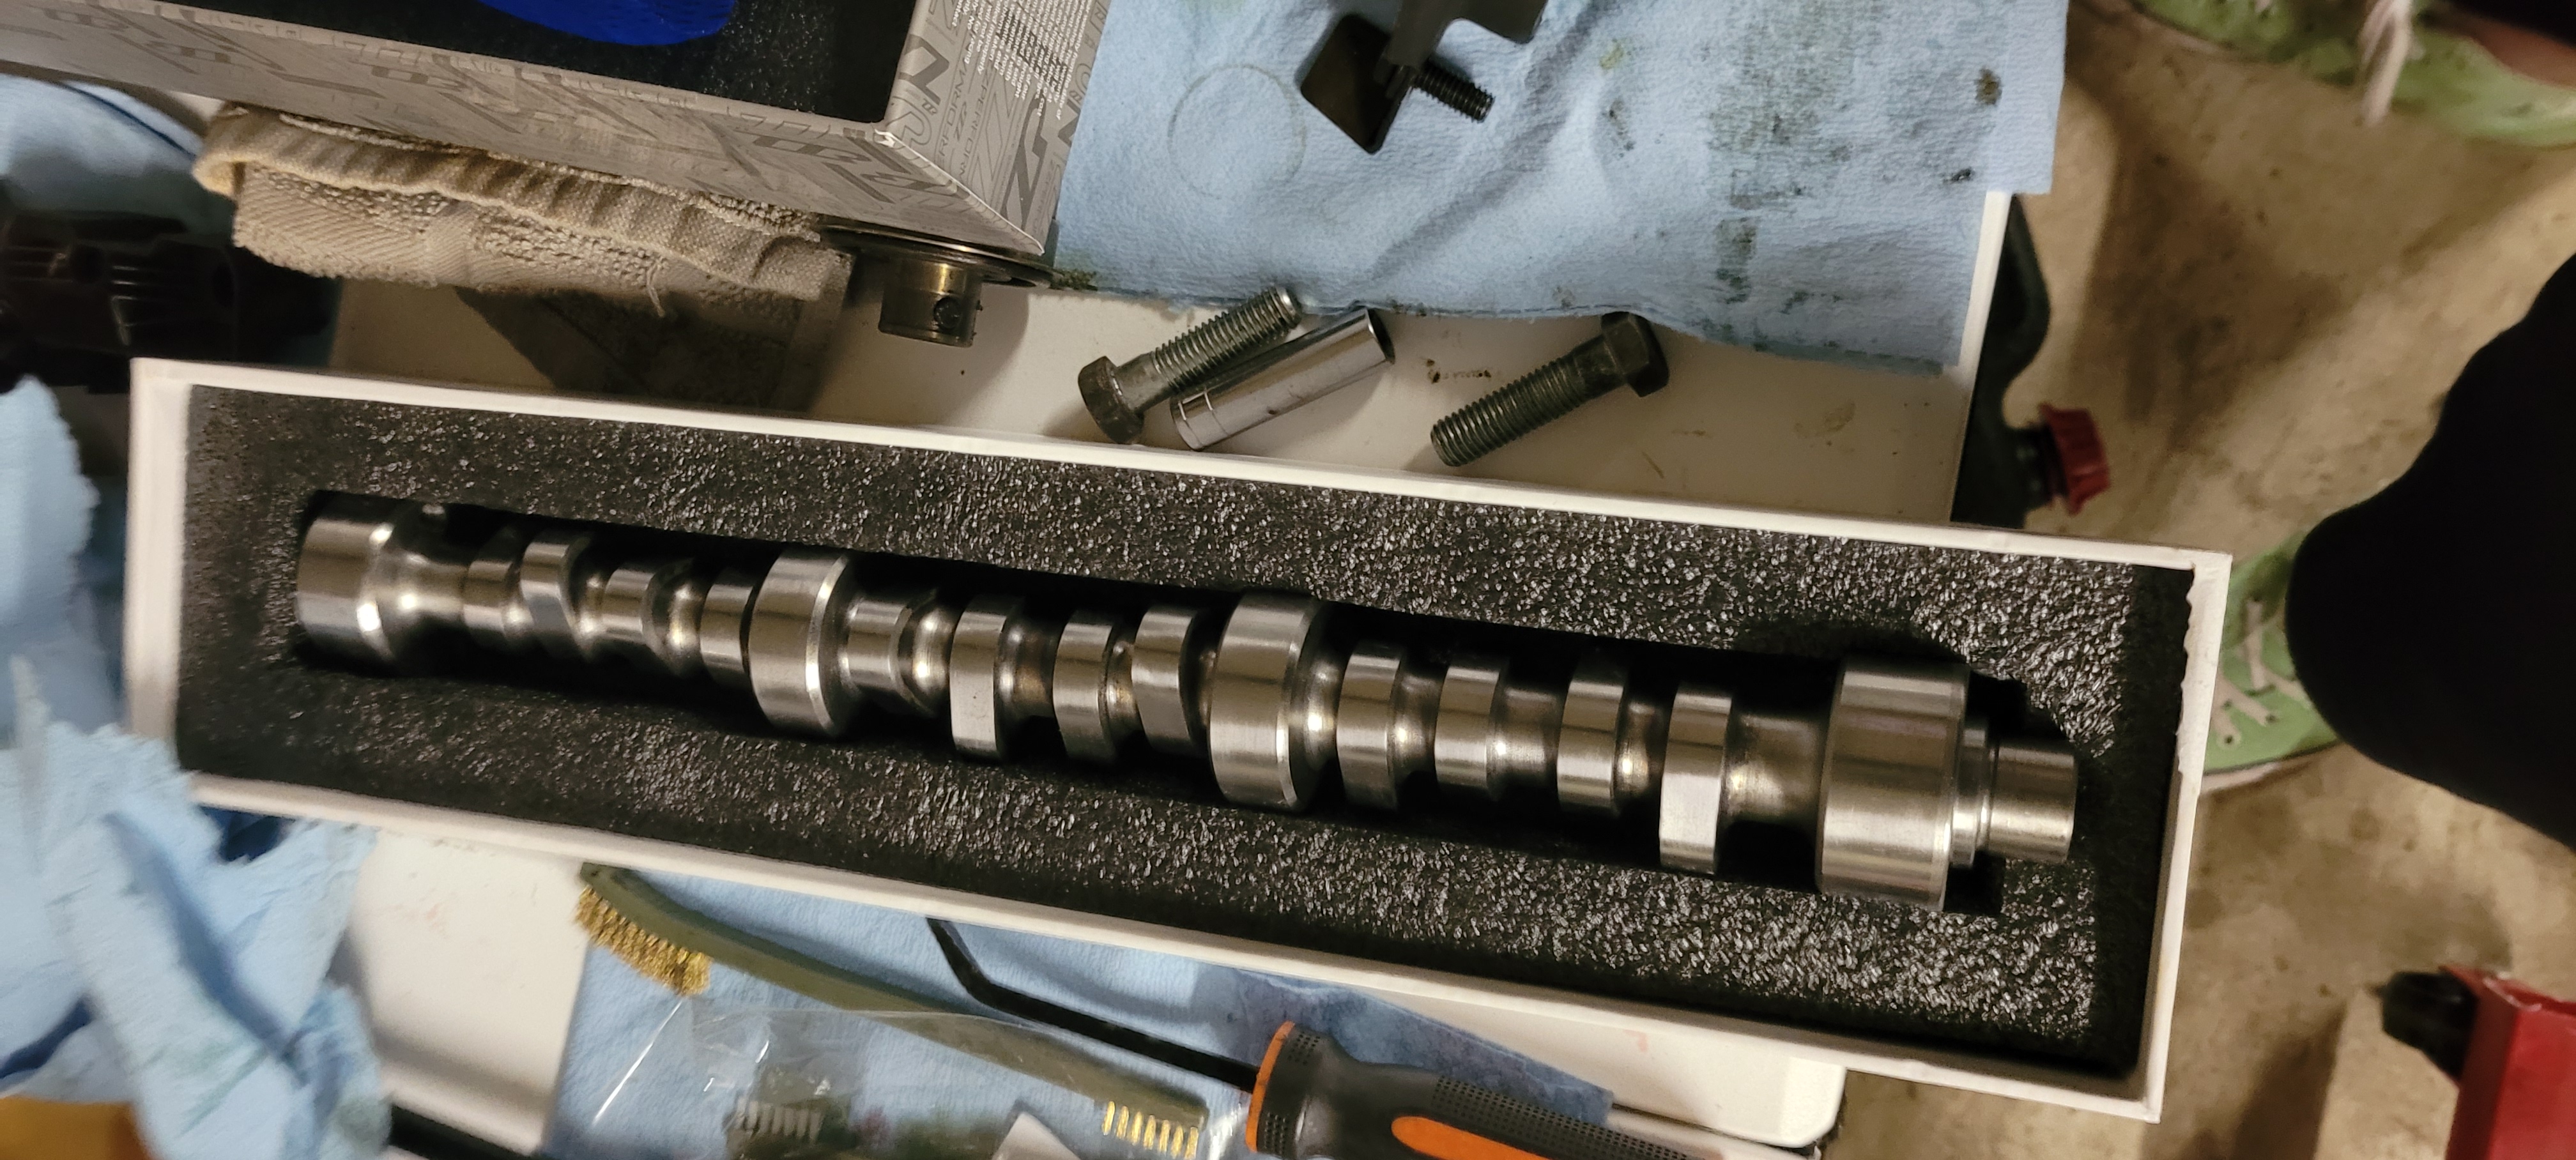
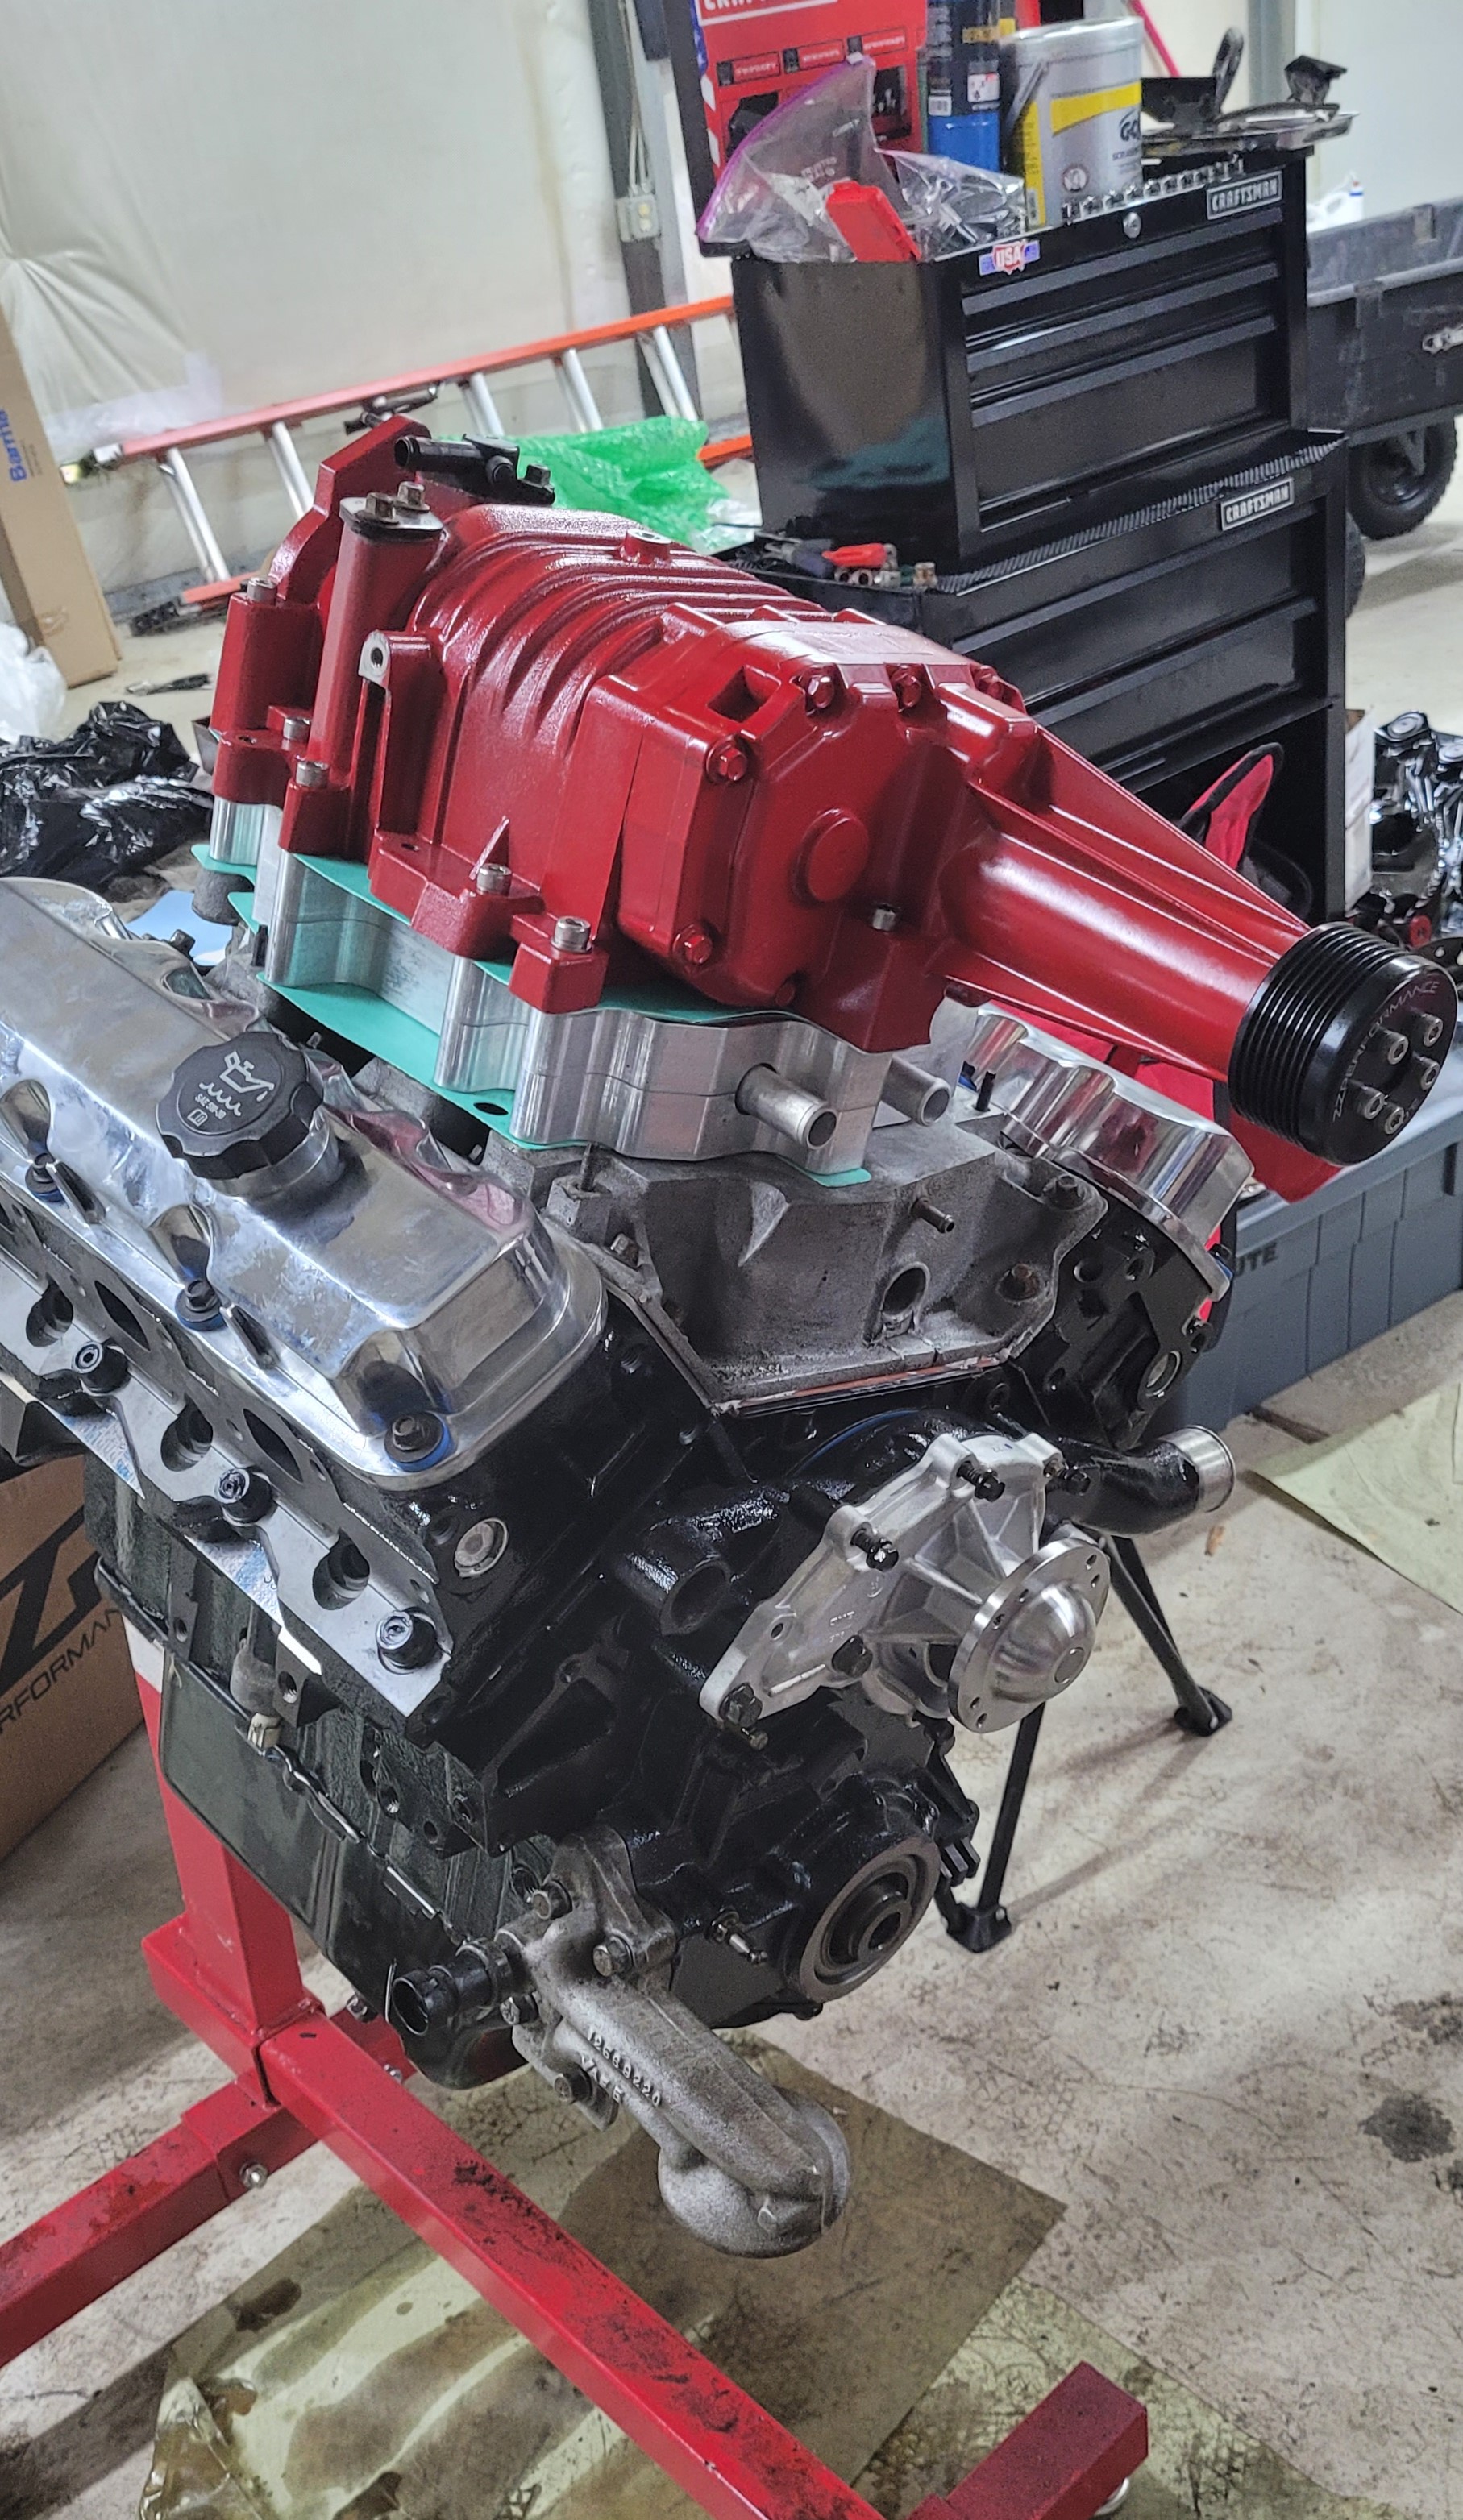
ZZP VS-RPM CAM
ZZP Full stack intercooler
TBD Heat Exchanger
3.0" Pulley Size
I decided to keep basically stock heads and based off of other builds, I'm guessing I may make around the 320 whp. Because of that I have my transmission with Dave from Triple Edge Performance being rebuilt with his 4T65E-HPS1.5 option. I should expect it back around the middle of August.
Component Painting
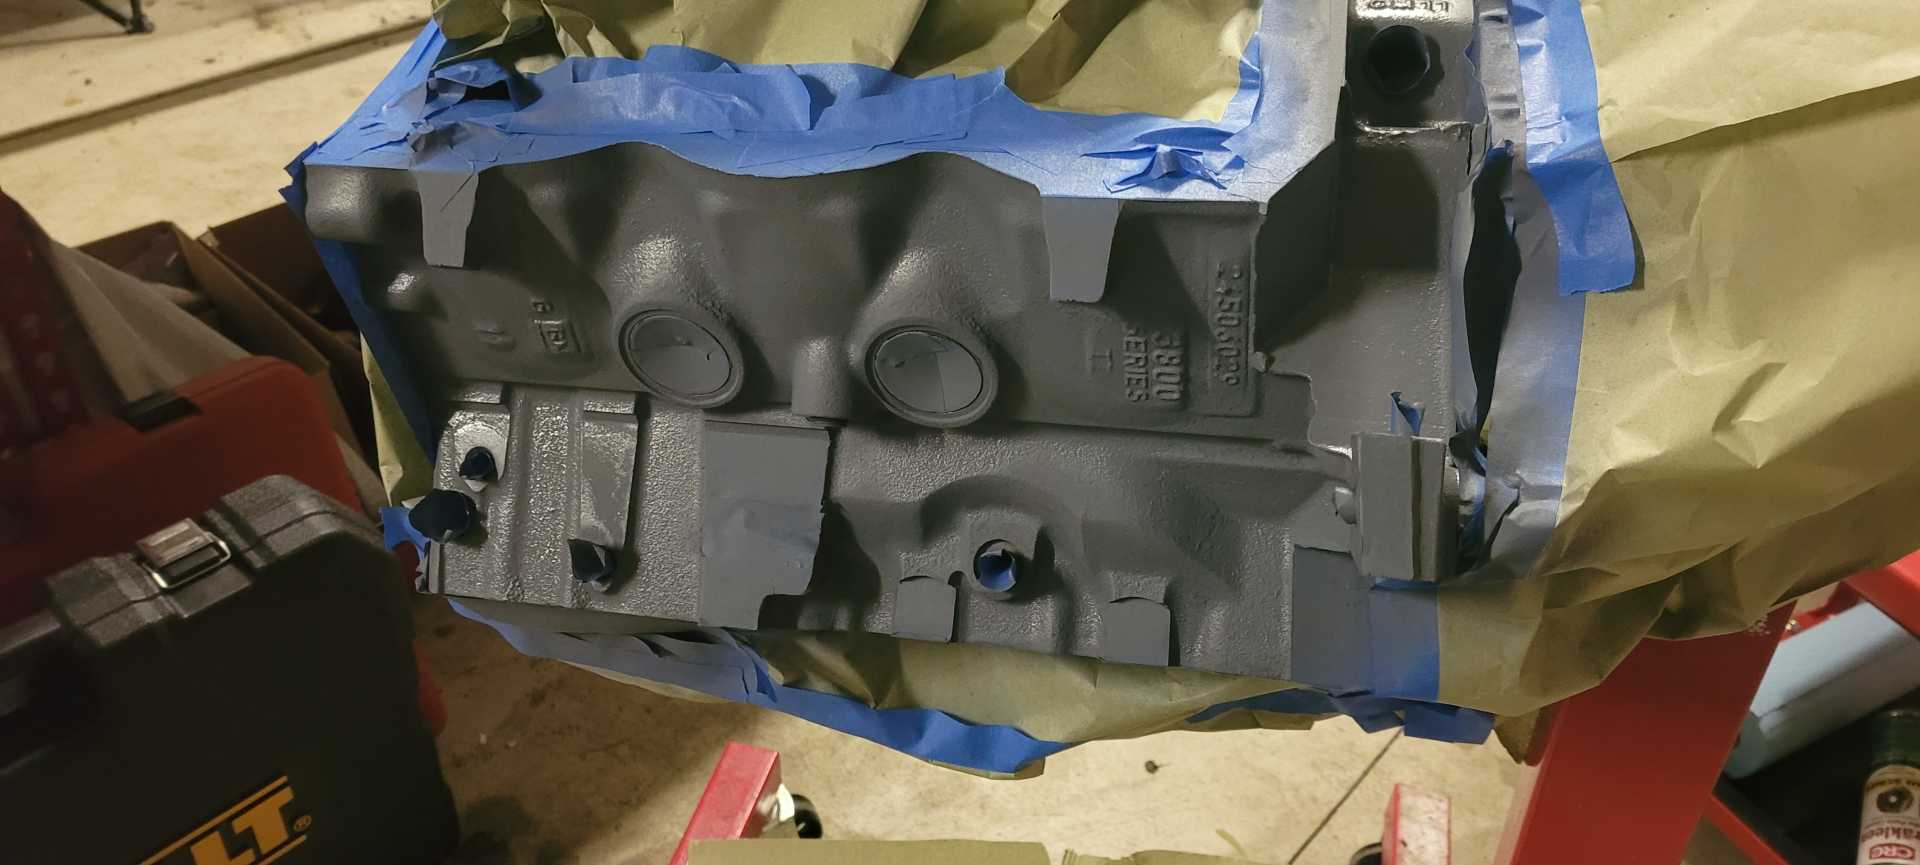
I got all my parts back from the machine shop and hurried up to get the engine block painted to protect it from rust.
 
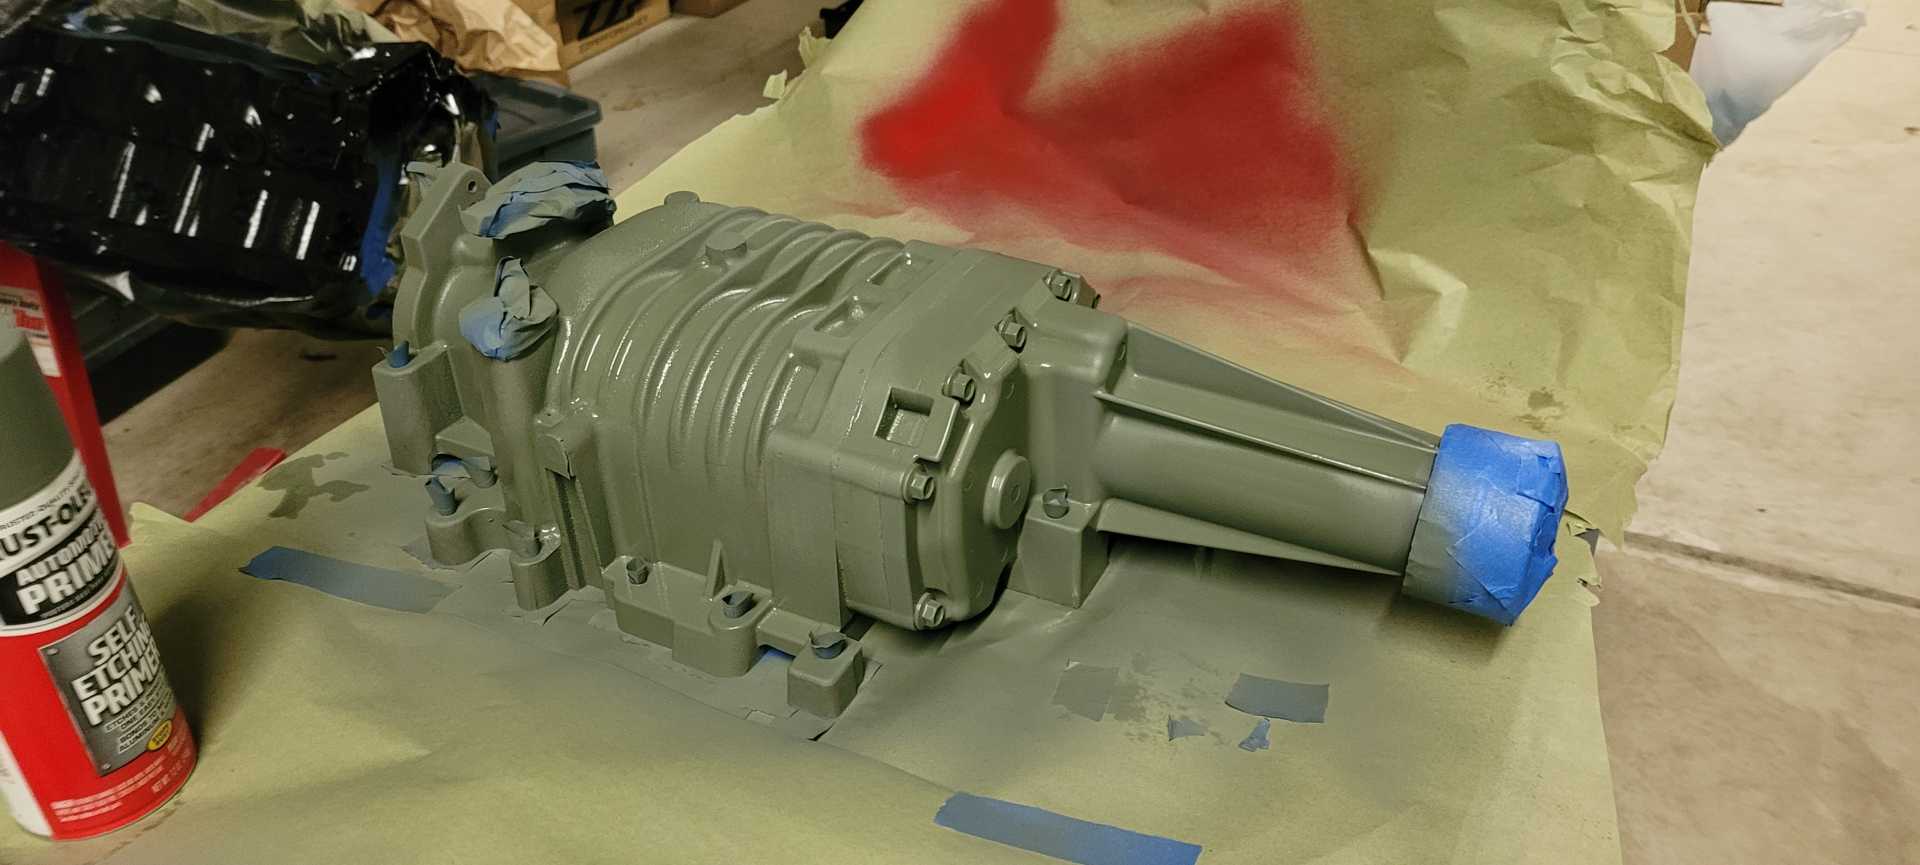
I also got the supercharger painted after I cleaned it up.
   [img]https://ima ges.fiero.nl/userimages/MichiganReefer/20220409_200443.jpg[/img] [img]https://ima ges.fiero.nl/userimages/MichiganReefer/20220409_200443.jpg[/img]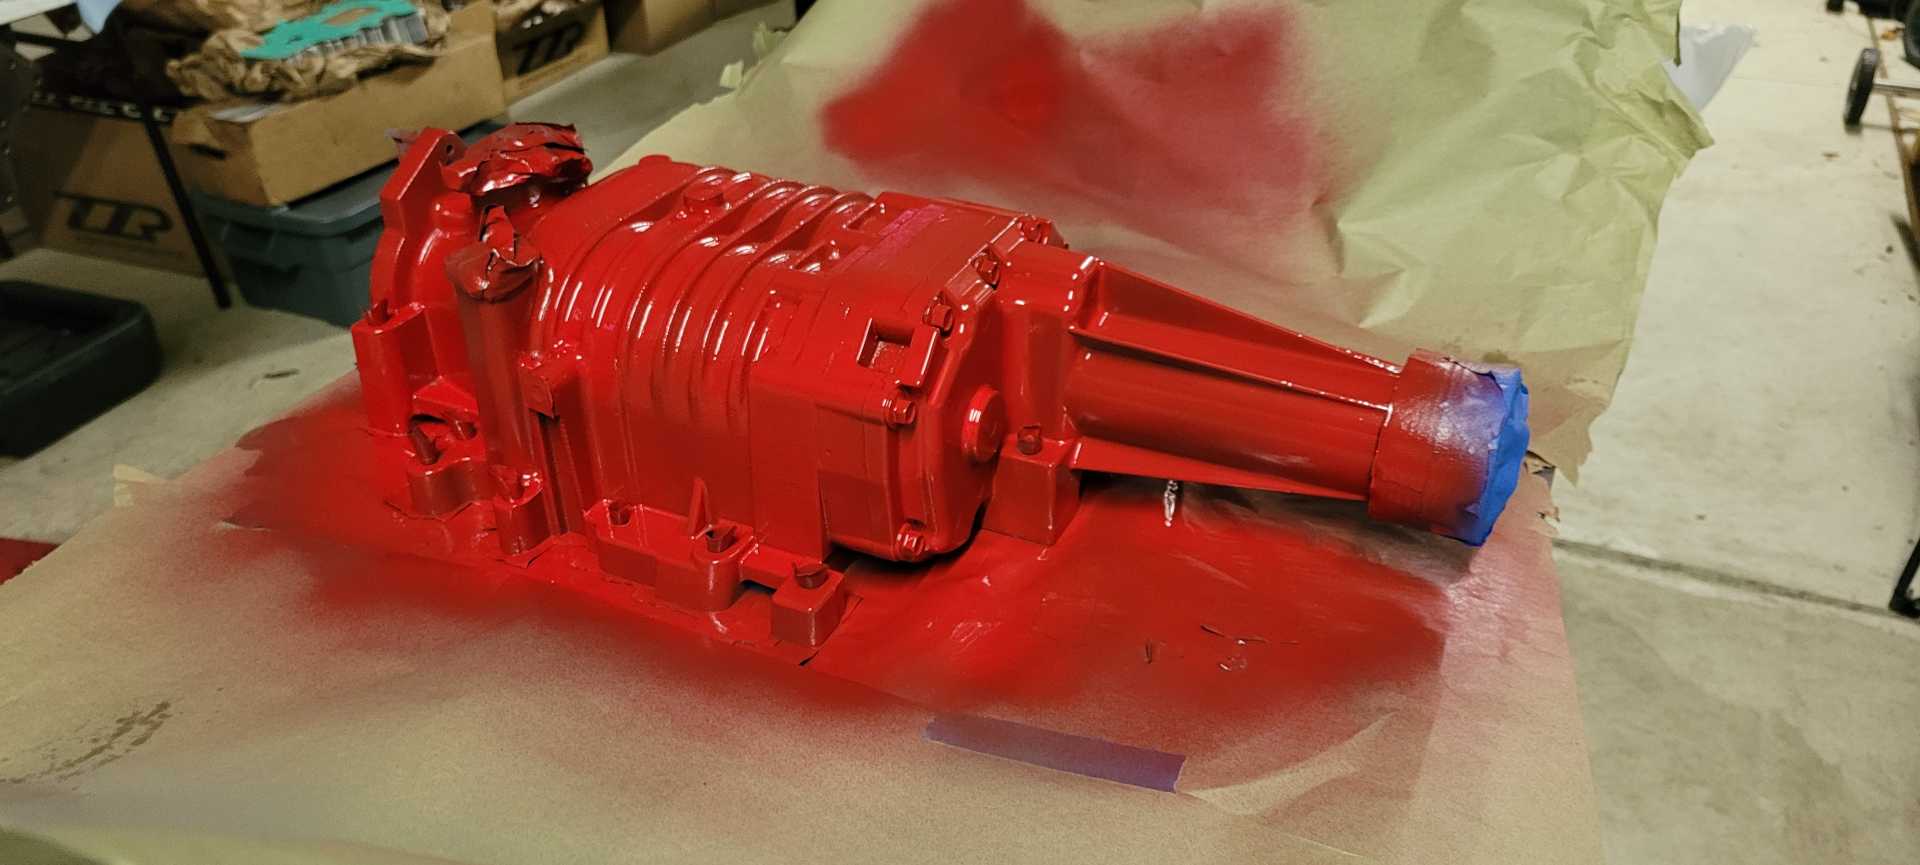 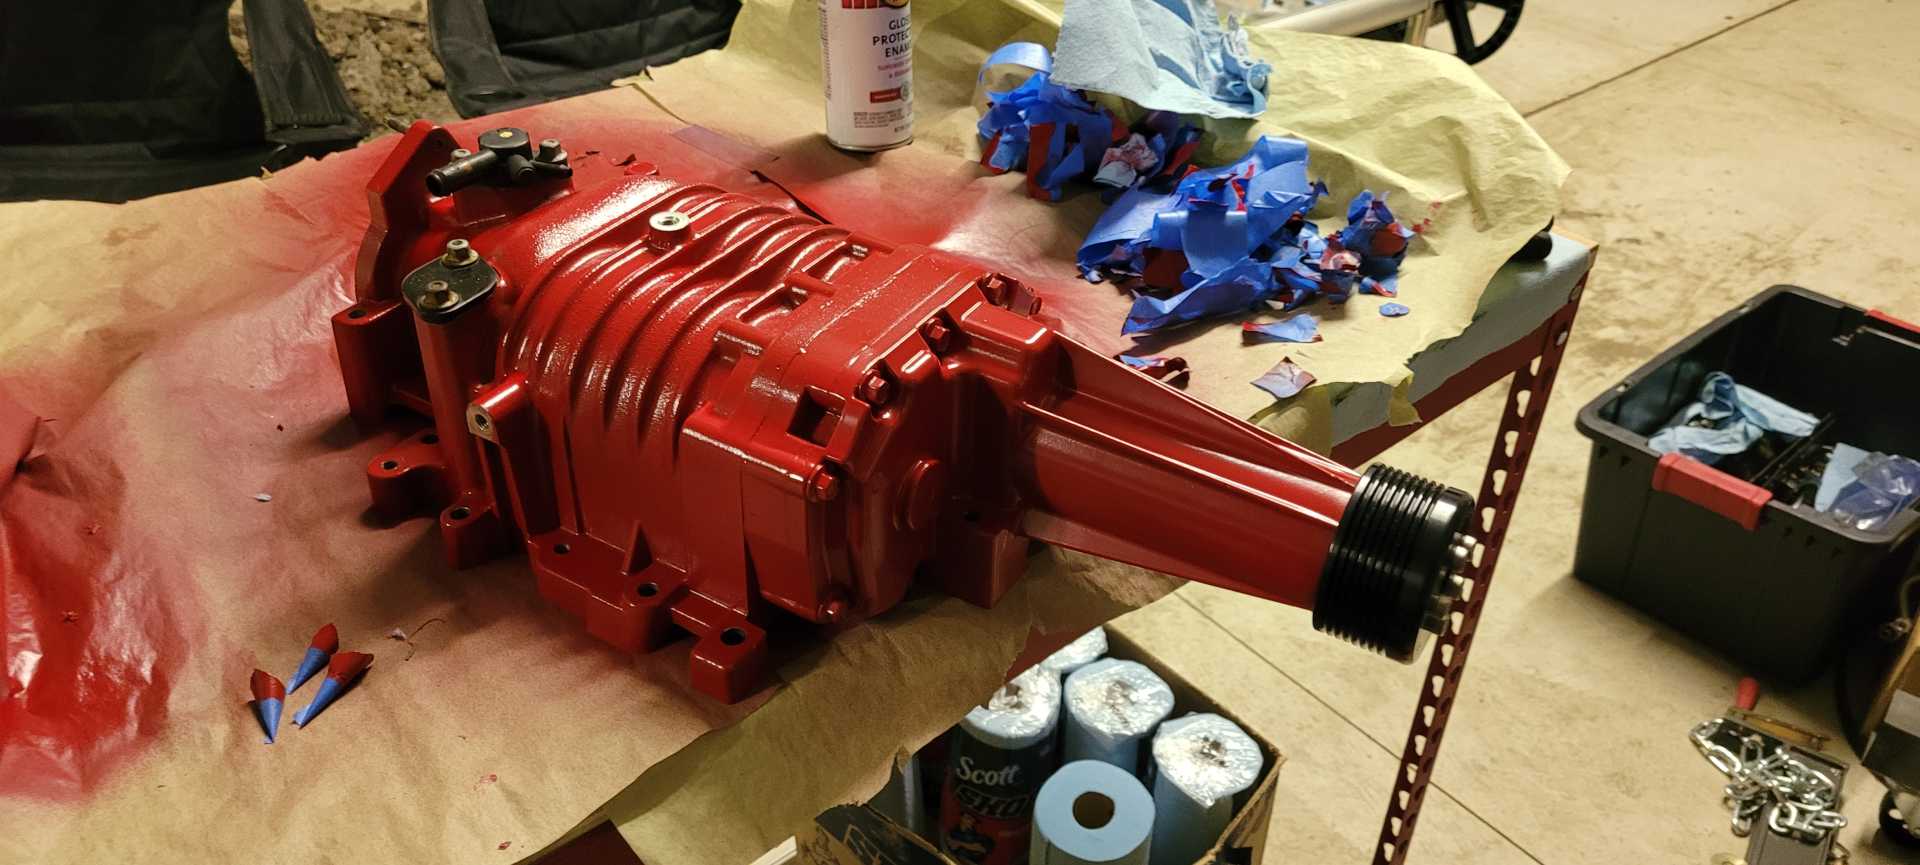
Rotating Assembly Rebuild
I've also been multitasking by tearing apart the front suspension, sandblasting, repainting, and installing poly bushings that I will be showing in another update.[This message has been edited by MichiganReefer (edited 03-23-2023).]
|
|
|
|
MichiganReefer
|
JUL 31, 08:33 PM
|
|
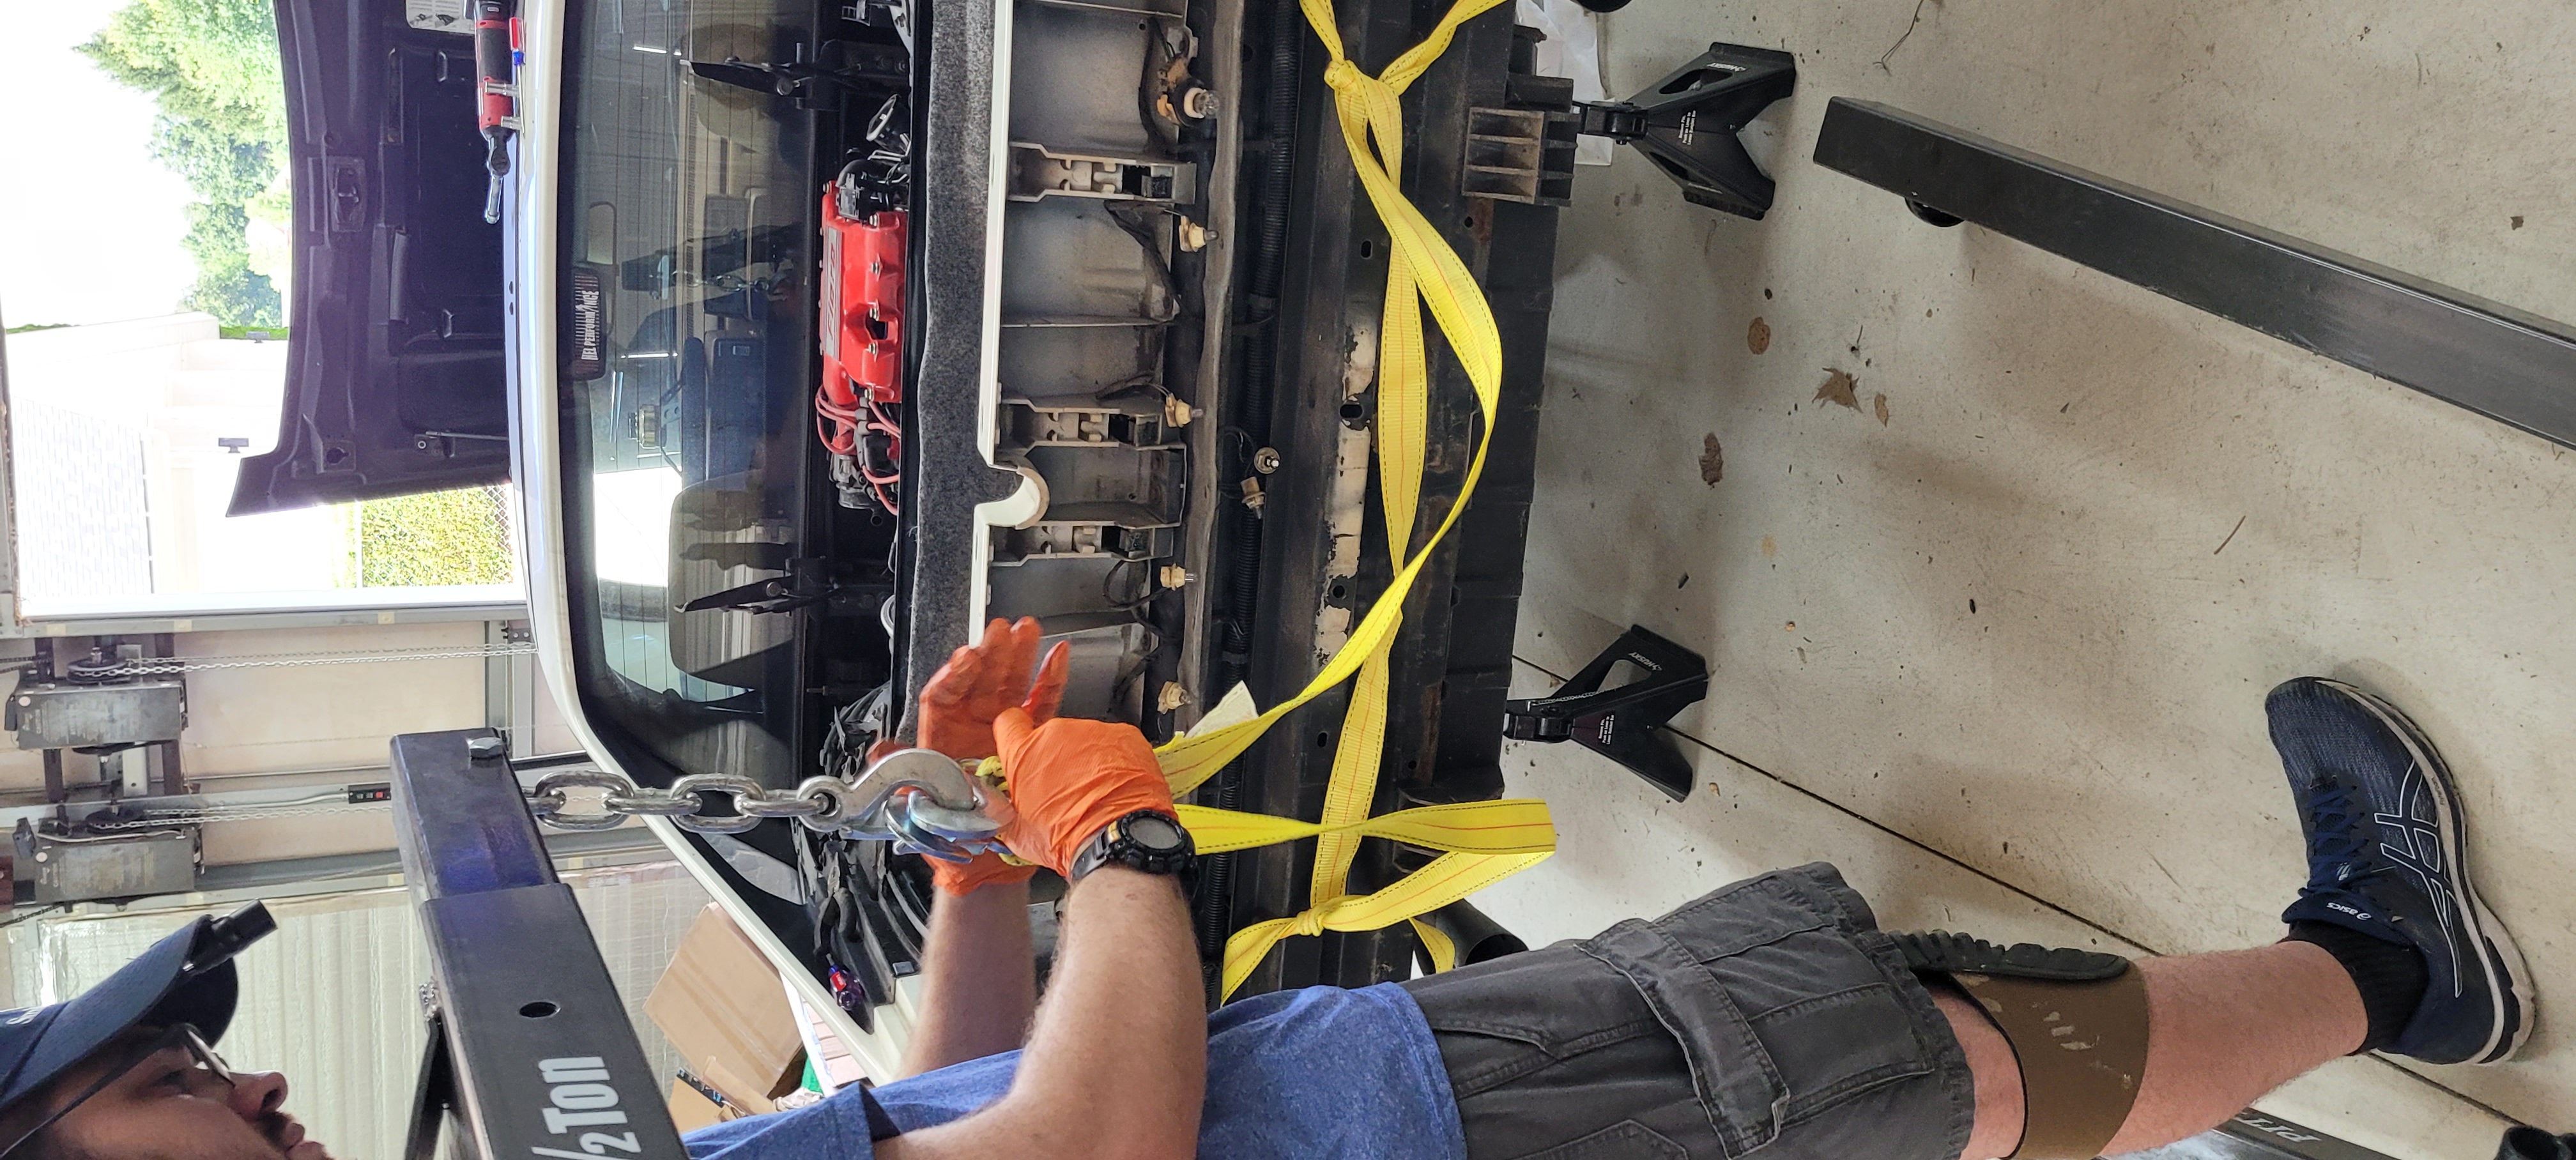
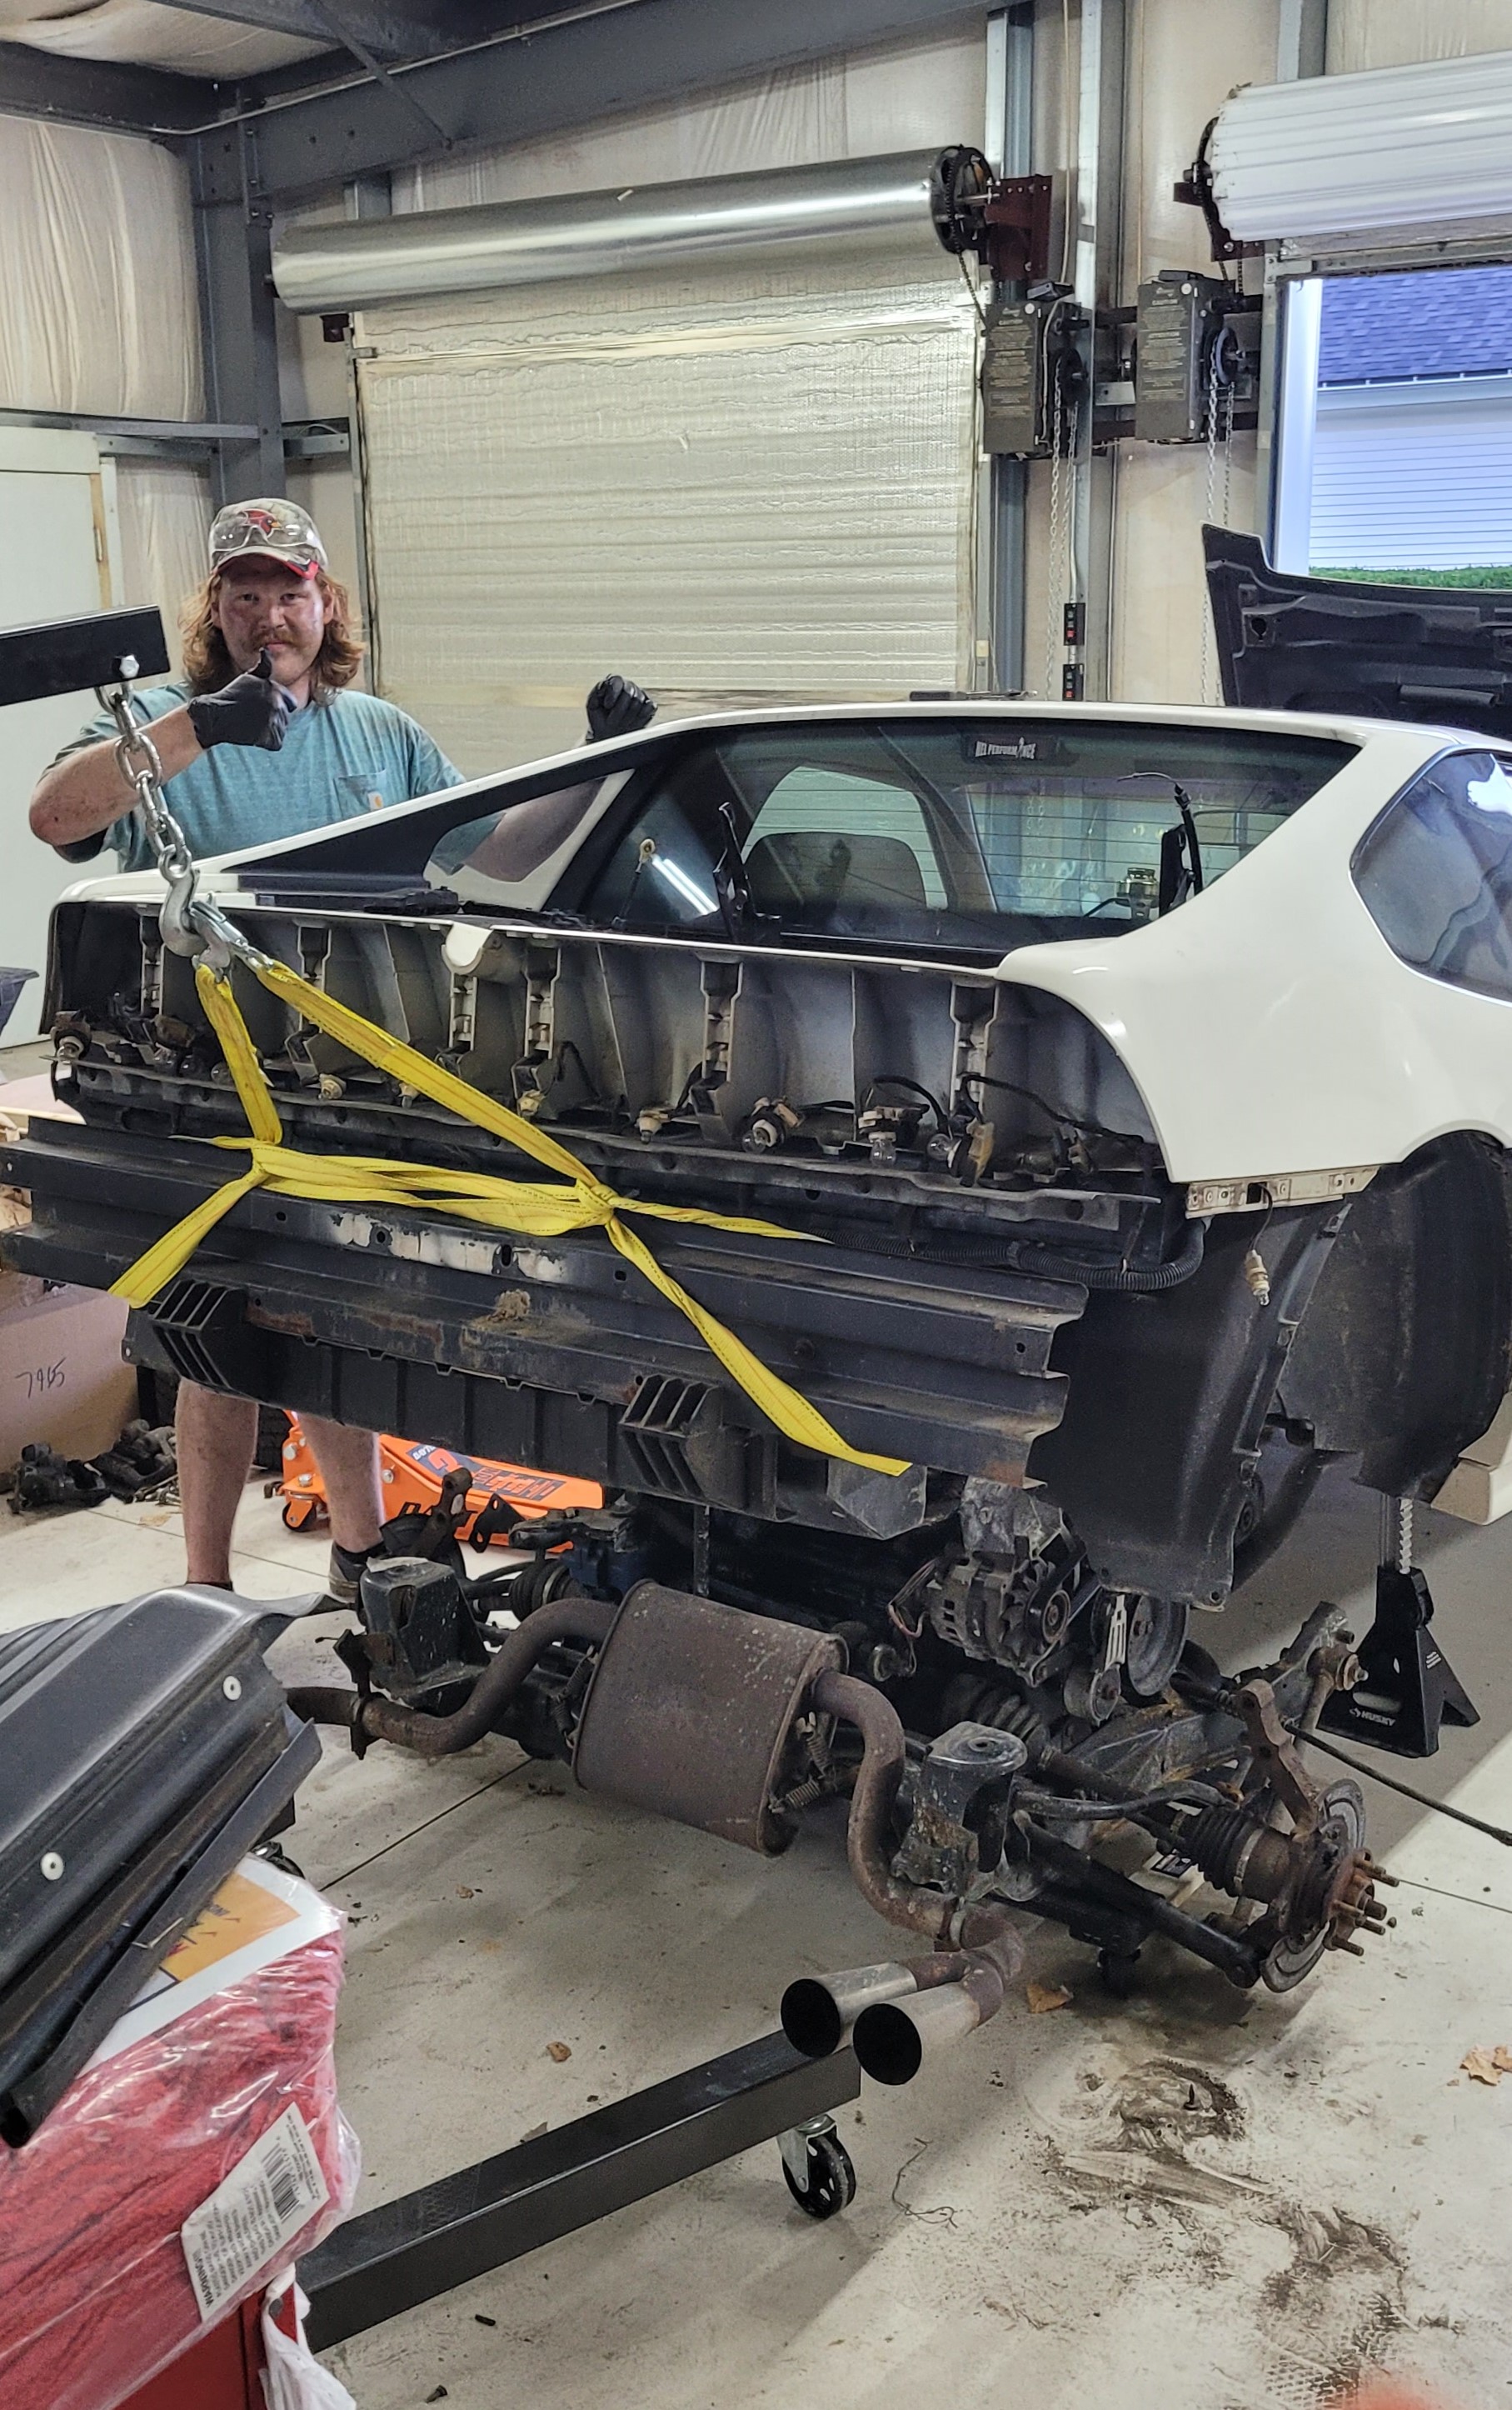
I made huge leaps on my project this weekend- finally got the stock powertrain and the rear cradle removed. A buddy and I (mainly I) made the decision to not install the front suspension yet to make use of the time we had yesterday and use some thinking with jack stands to help us drop down the cradle. We found that the cutout for the front cradle bolts is just wide enough to fit my jackstands in, so we gave it ago. We were cautious because of pivoting the whole car via that area and added two more jackstands in the front spring seat area that were one position lower.

We followed LostNotForgotton's video and disconnected everything, where we differed is how we lowered. We used two 3ton jacks in conjunction with two 1000lb furniture dollies and lowered the rear cradle to the ground that way. We lifted the body upward with my cherry picker lifting the rear crash bar (Note. We had to use the arm at the 500lb setting otherwise the feet of the cherry picker would've been too far under the car) We felt comfortable enough with this because we test lifted the car together and were able to raise it.

Once we rolled the stock powertrain to the back of the shop area, I worked on buttoning up the 3800 I've been building. I still need to locate all of the bolts for the front cover and torque them correctly, install the water pump and other accessories, get my harness built, and get my rebuilt transmission back from TripleEdge's shop. Hoping to get it running before mid-September.
|
|
|
|
MichiganReefer
|
SEP 05, 09:06 PM
|
|
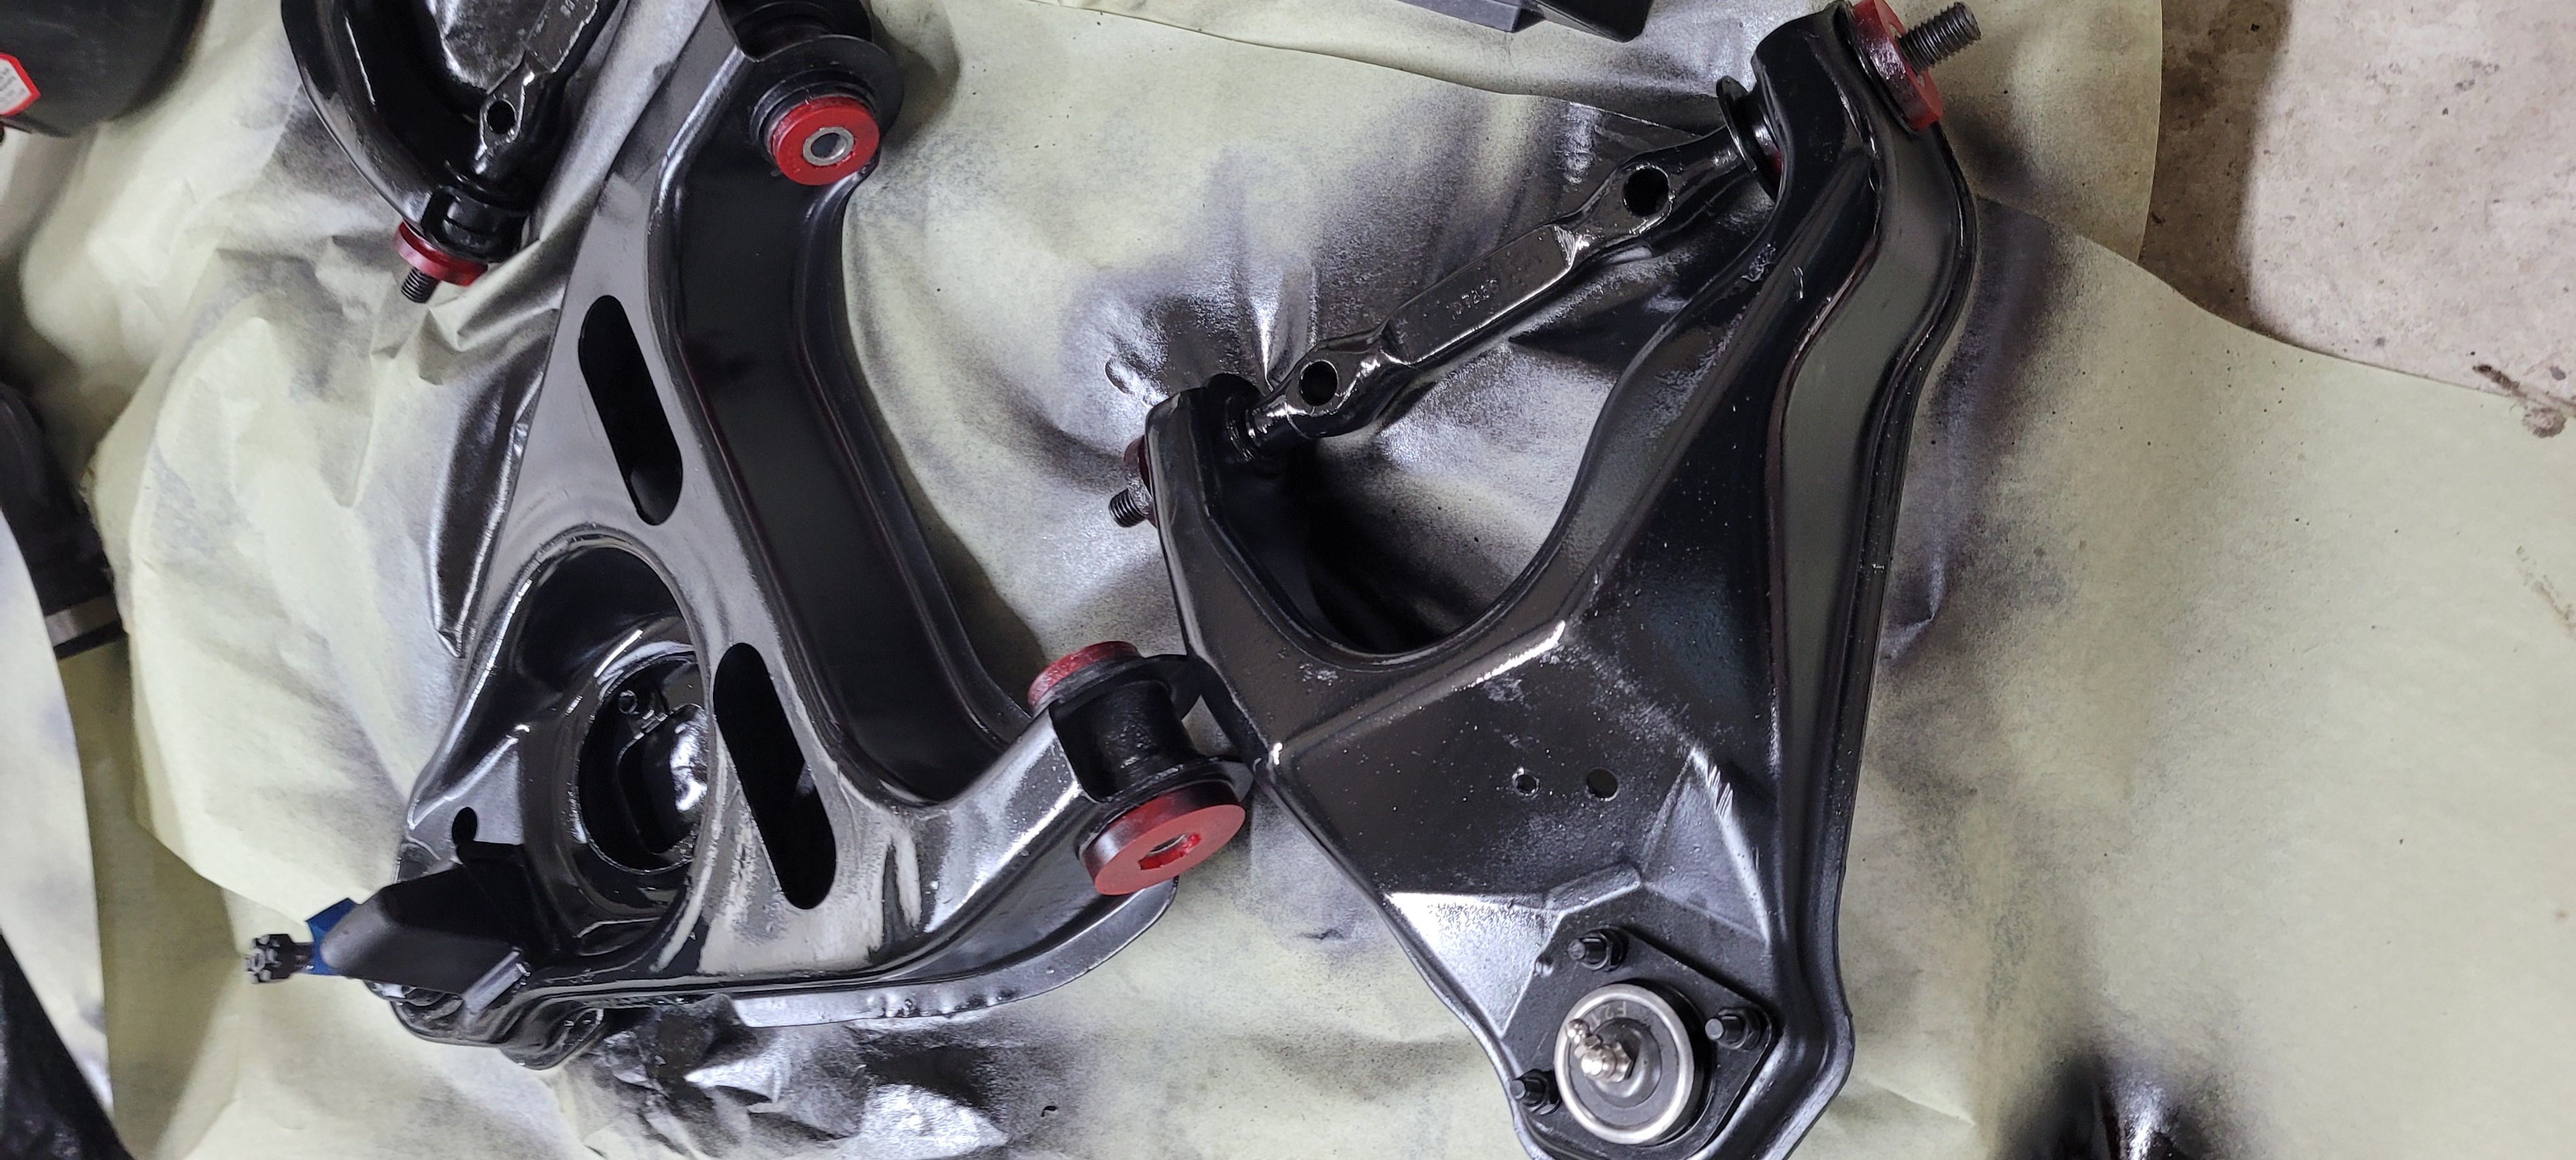
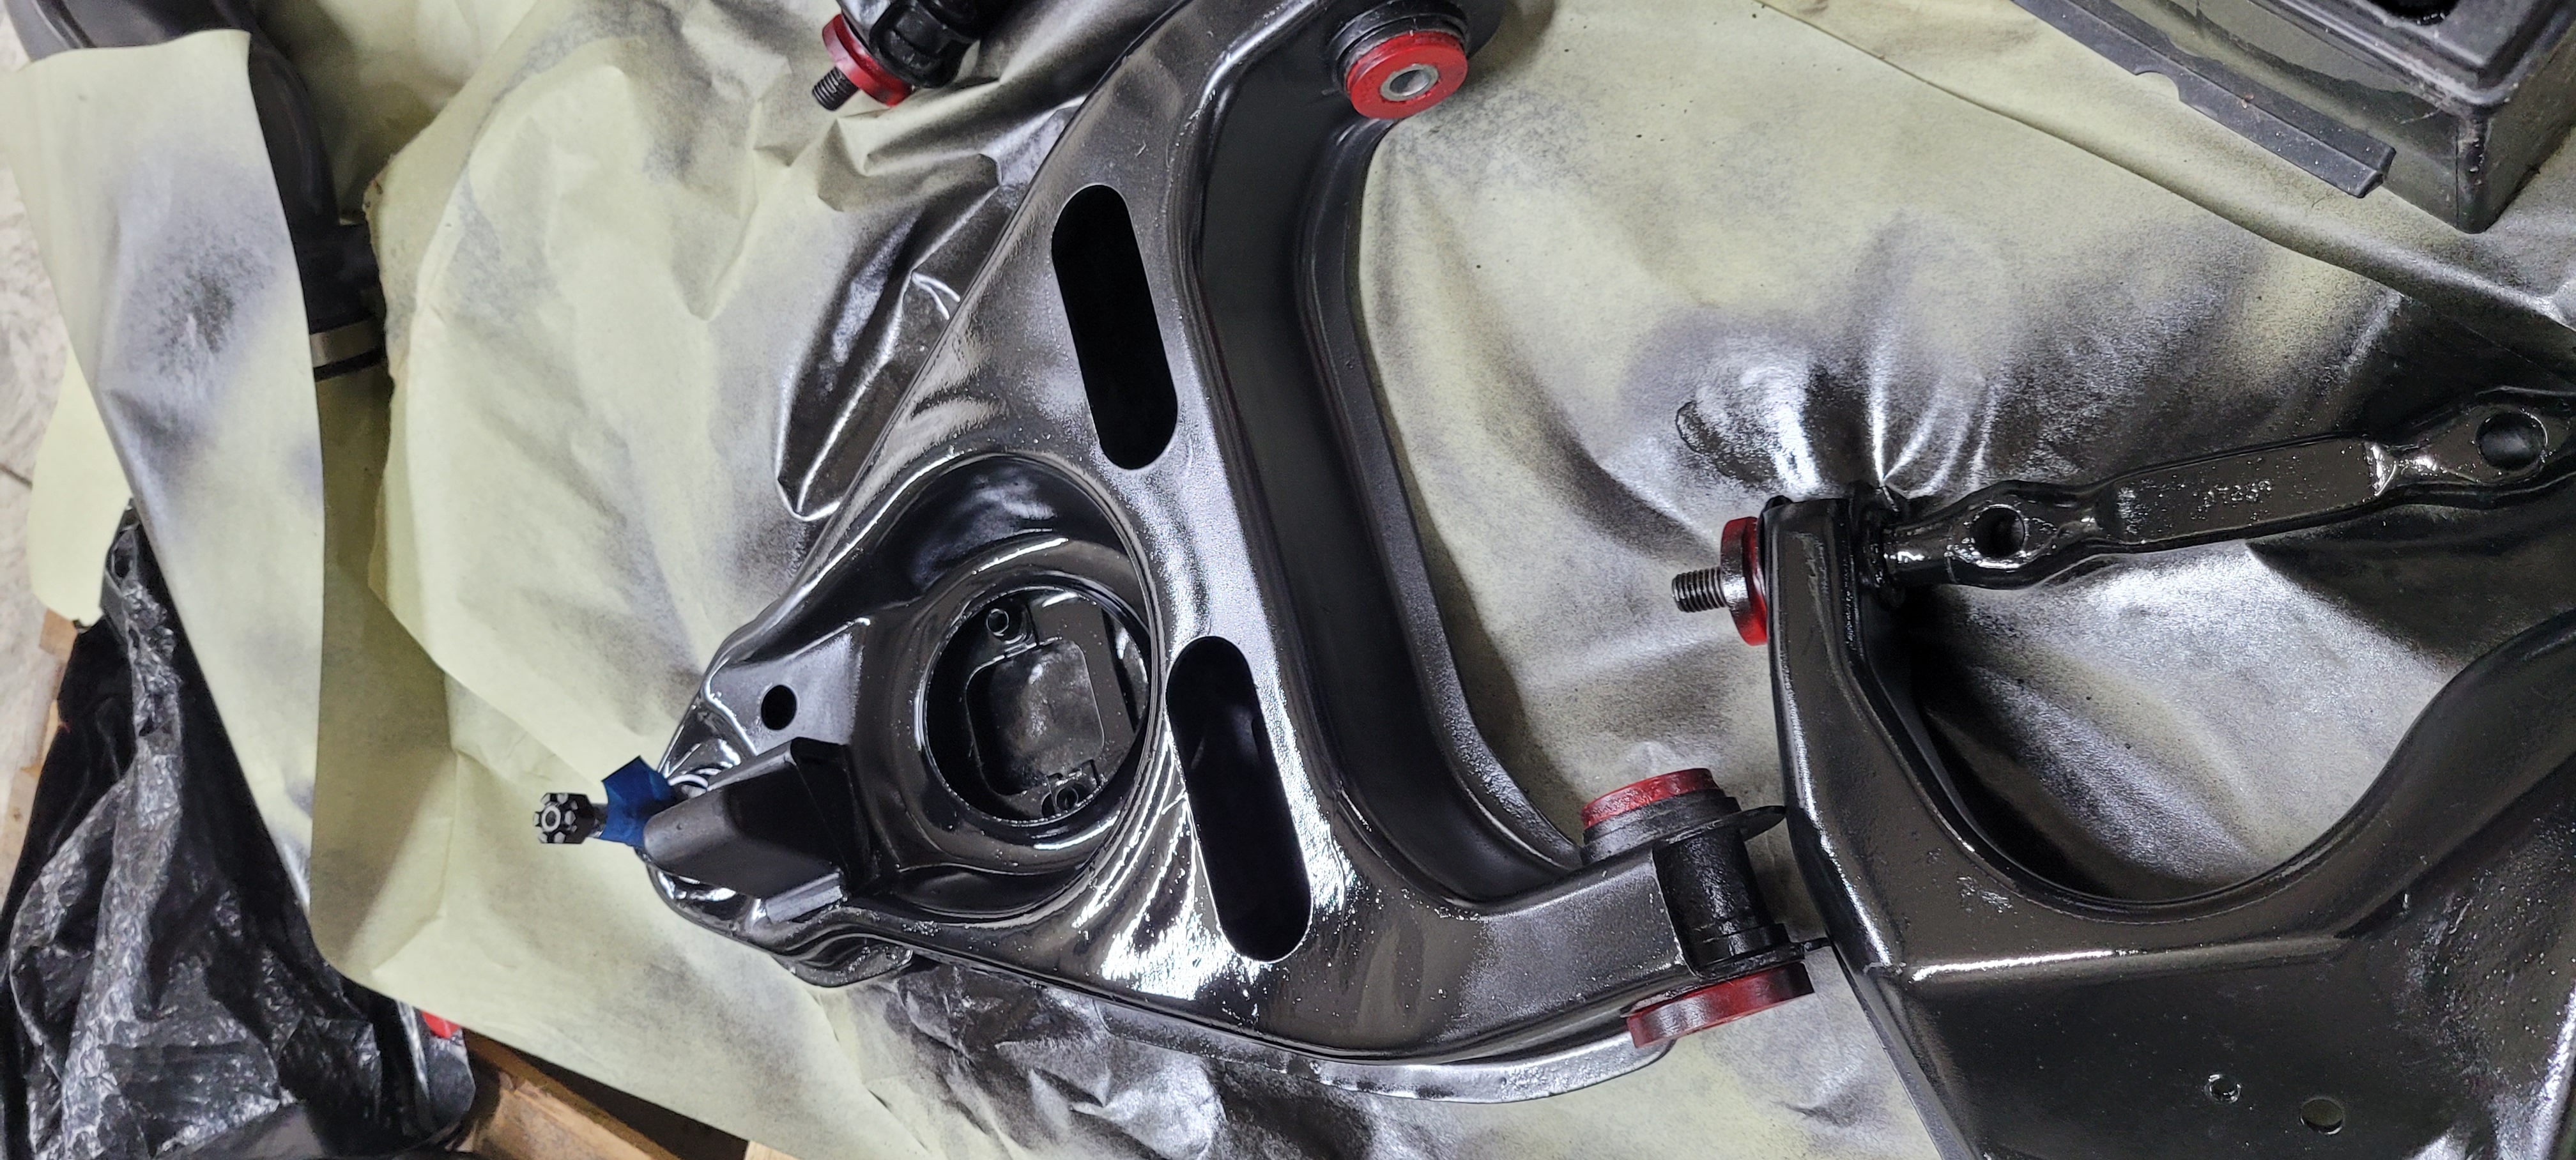
Should be picking up my transmission from Dave with Tripe Edge next weekend, looking forward to that. I spent this Labor day weekend rebuilding my front suspension. I've got all of the poly bushings from the Fiero store, the rebuildable front hubs from Rodney Dickman, and used my buddy's sandblaster to clean everything up.
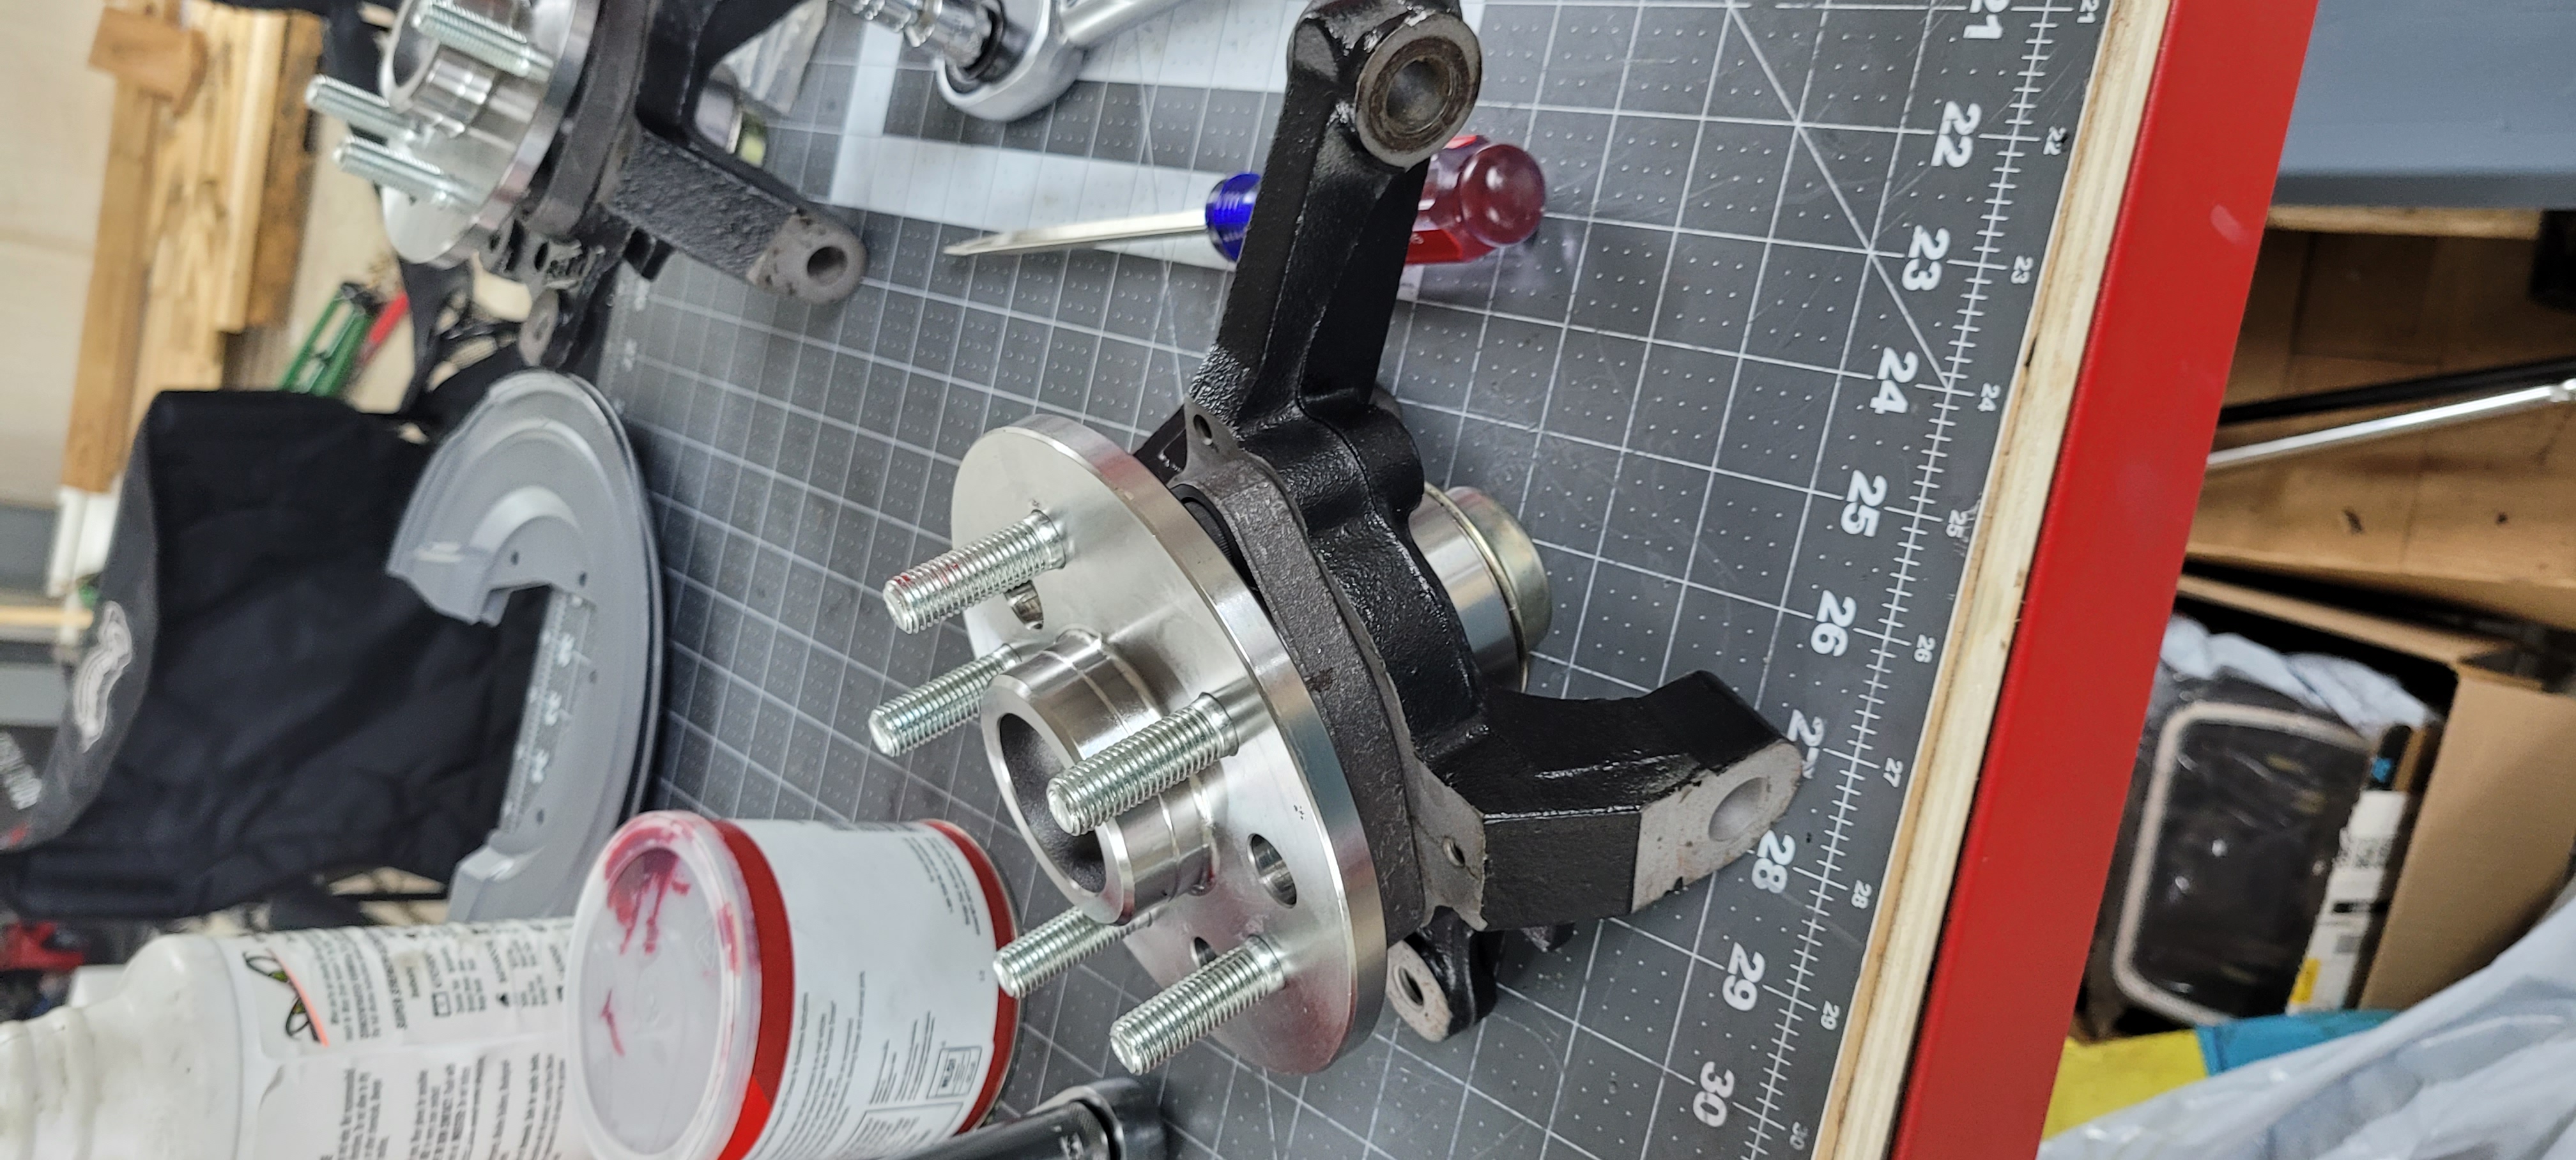

The inner tie rods caused me all sorts of issues and had to buy an inner tie rod removal tool from AutoZone, it saved my butt. I think everything is looking great.

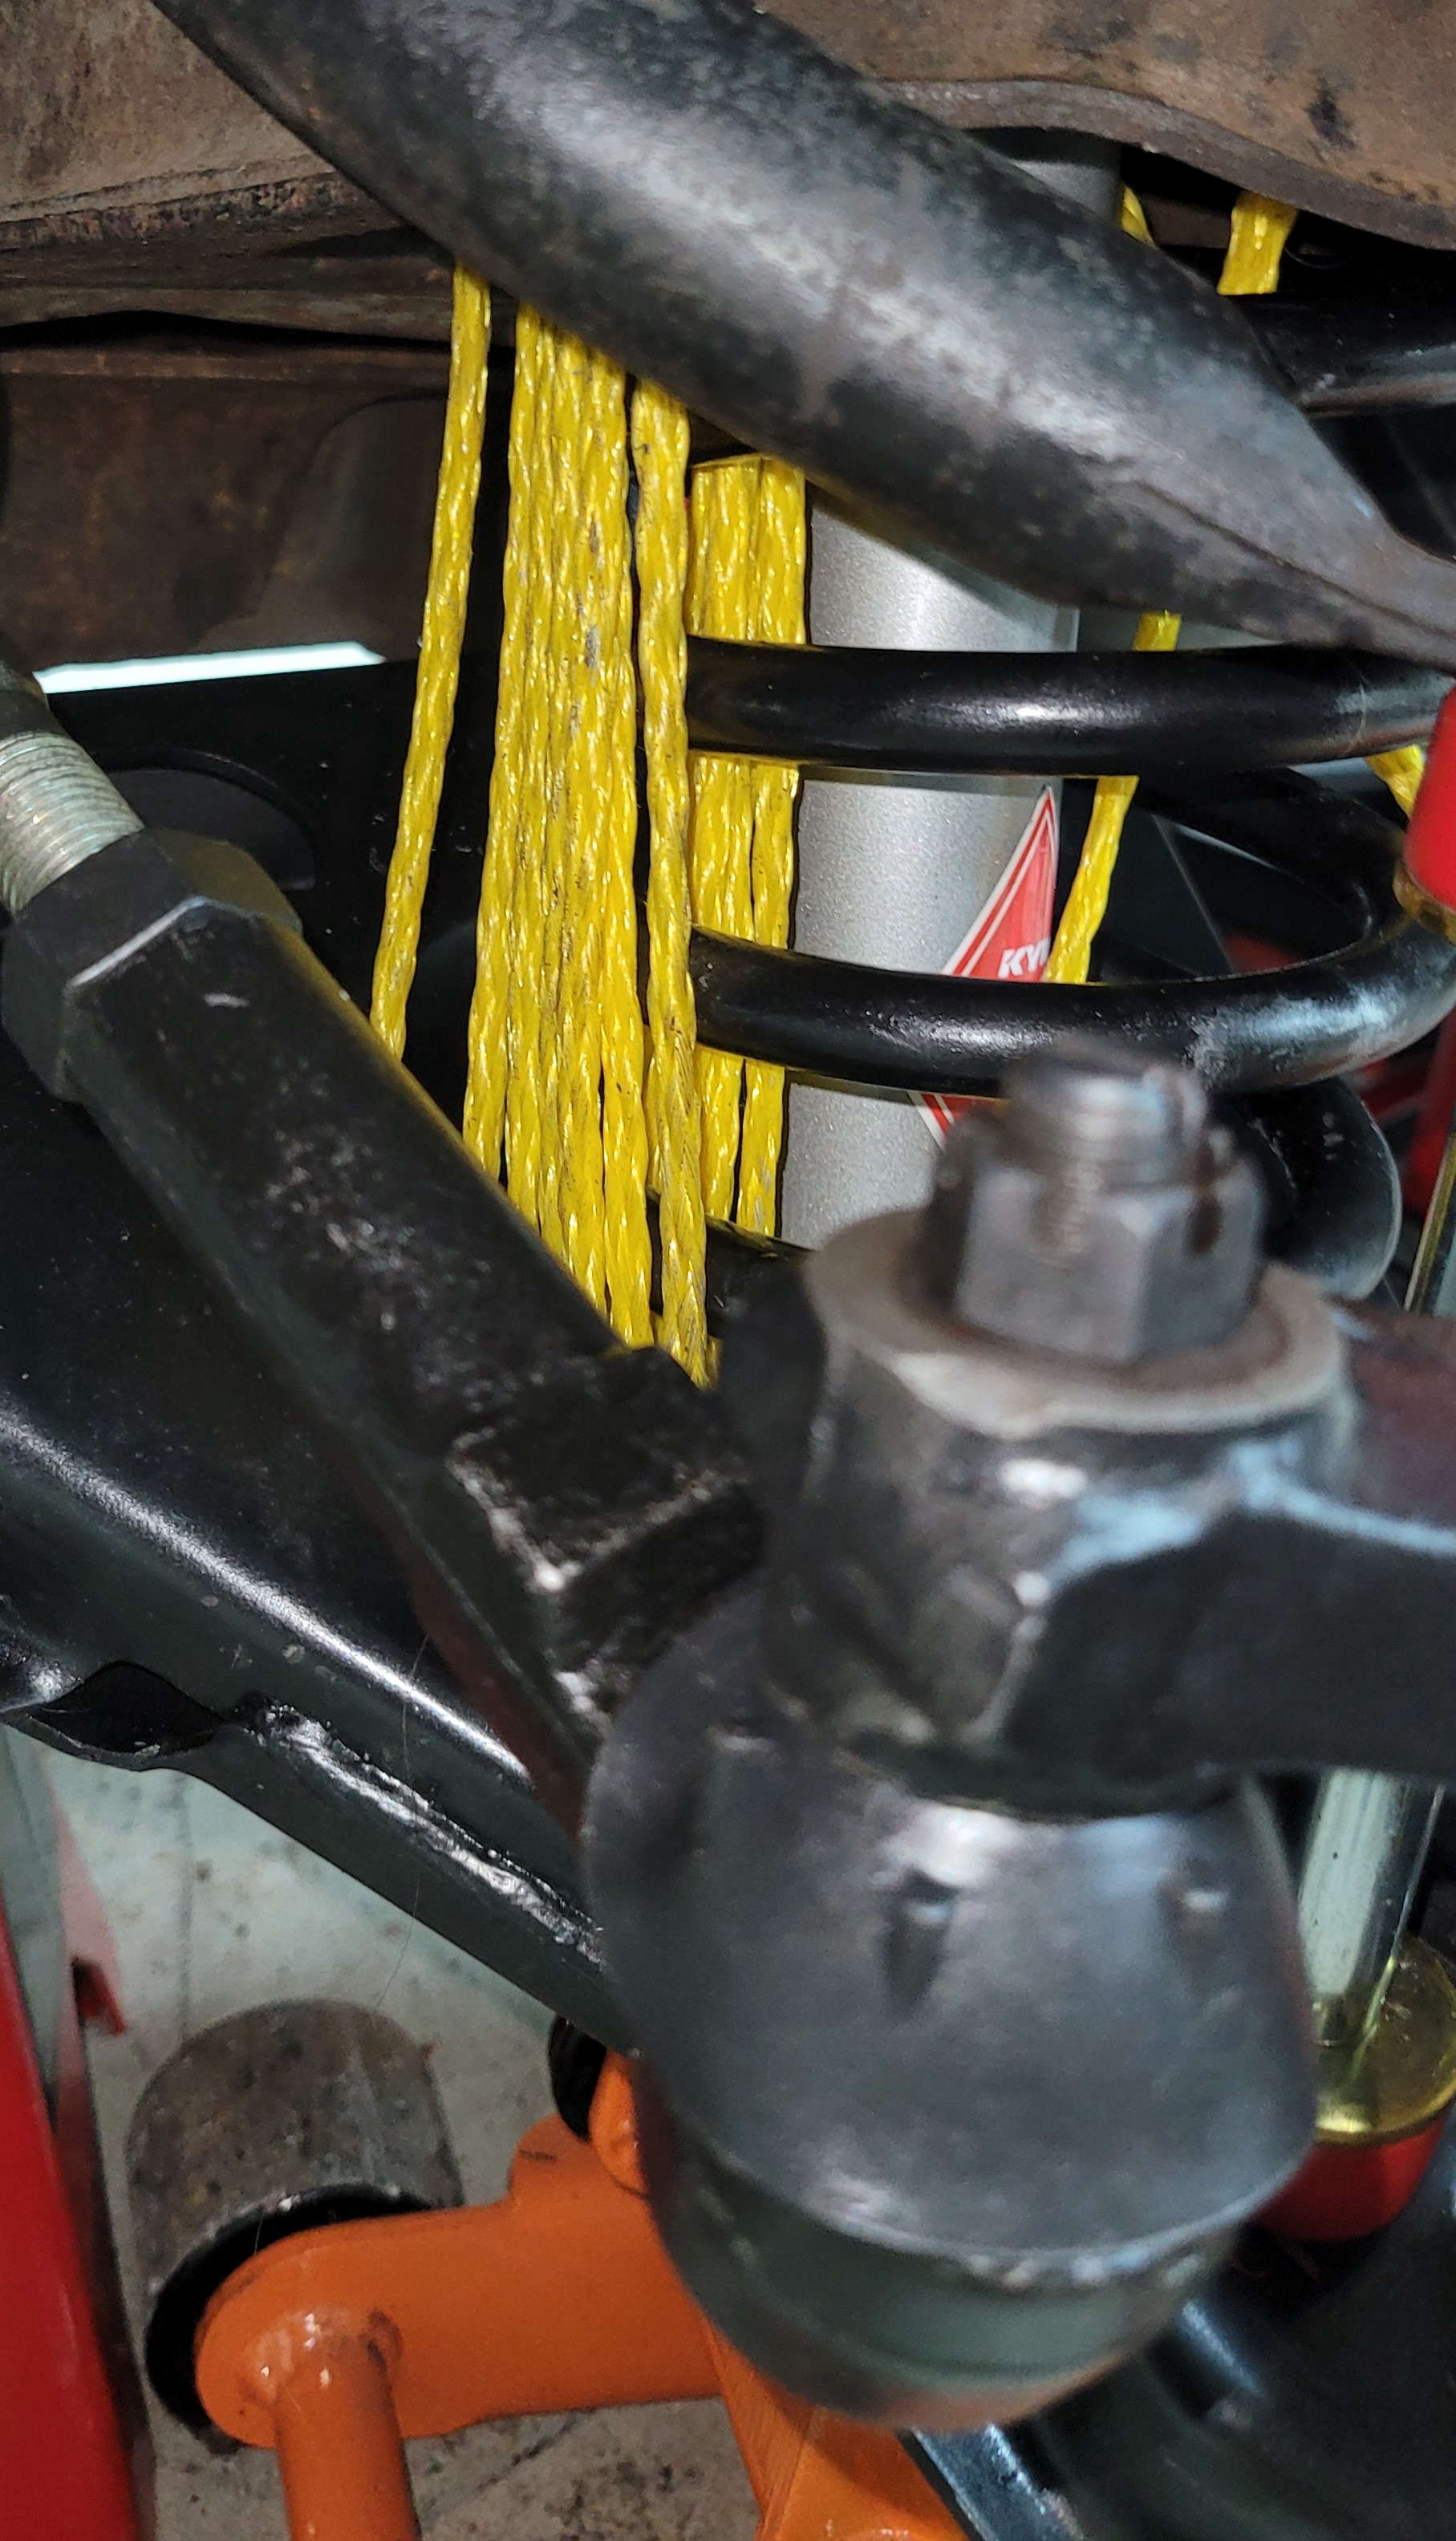
I tried something a little different to get the springs in there. I compressed them with my spring compressor tool but then held them in place with twine because it was low profile to get around all of the other components.


|
|
|
|
