
 
     |
| GT Trunk (Page 1/1) |

|
Trinten
|
MAY 30, 11:10 PM
|
|
So we went to put on the new trunk weatherstrip. I already knew one of the "d plates" was cracked. (see this post for what I'm talking about -- I don't know what else to call it. https://www.fiero.nl/forum/...15-2-070234.html#p30 )
Turns out they are both cracked. So I'm trying to source some undamaged ones.
First question is -- how do you replace these? In JScott's post, it looks like he took off the fascia from the back of the GT clip. Does that give access? If so, how is that done?
Second question is, does anyone reproduce these with 3D printers (either media feed or SLA), or stamped aluminum or even (Dare I said) CNC?
Tangentially, any GT owners out that have their trunk weatherstrip off that can post a top-down picture of the corners? Last year Mike discovered my current Fiero had been rear-ended (replacement and metal bumper), and from eyeballing things today, it looks like the trunk might be out of alignment with the body. He has some crazy tool to 'shove' it back into place, but I'd like to see some pics of others first for comparison.
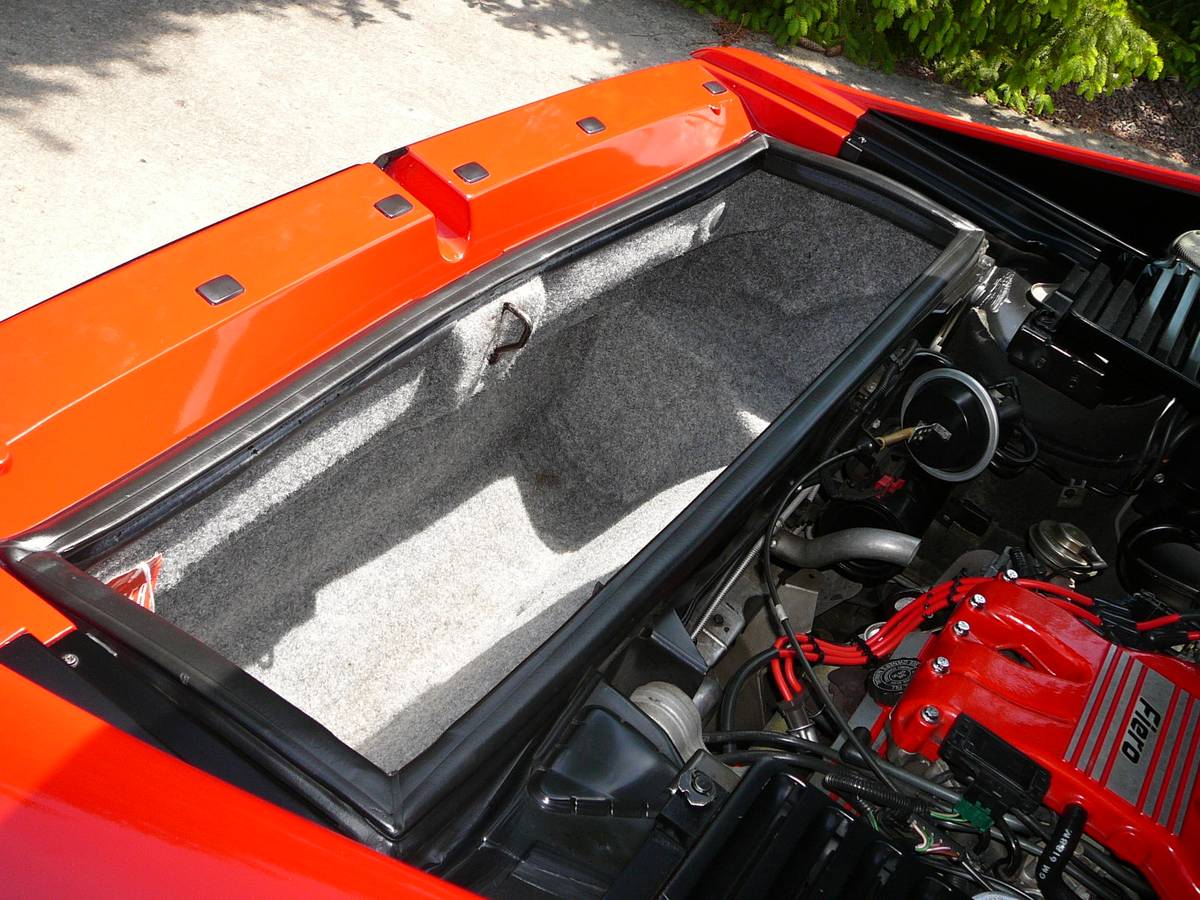
You can see how nicely the trunk seal sits in the body panel corners in this picture I found on the web. On mine there is a gap at the back driverside corner. So pretty sure we need to adjust the trunk-to-body-panel position, would just like some visual confirmations from others with the weatherstrip off.
 [This message has been edited by Trinten (edited 05-30-2022).]
|
|

|
shemdogg
|
MAY 30, 11:31 PM
|
|
Sorry cant help but wow that engine and bay look mint! Rest of the car looks the same from the pic, very nice man!
shem
|
|

|
Patrick
|
MAY 31, 02:12 AM
|
|
| quote | Originally posted by shemdogg:
...wow that engine and bay look mint! Rest of the car looks the same from the pic, very nice man!
|
|
You didn't read his whole post, did you? 
|
|
|
|
Trinten
|
MAY 31, 01:17 PM
|
|
Hi Shemdogg,
I wish I could say that was my car in the picture. If it was... I'd be thrilled. 
I hope I can get mine to look that good someday!
|
|
|
|
cyrus88
|
MAY 31, 05:02 PM
|
|
Answer to first question:
Remove the "Back Window to Quarter Filler Panel" and you will be able to remove and replace those "D" plates.
|
|
|
|
Trinten
|
MAY 31, 07:07 PM
|
|
Thanks Cyrus!
I recall seeing two screws back there near the quarter window (heads of screws facing skyward), I imagine that's the part I need to unscrew and remove.
|
|
|
|