
 
     |
| V6 ECM Terminal Repair (Page 1/1) |

|
SeaJay
|
MAY 28, 10:42 PM
|
|
I recently went through my V6 ECM wiring and thought I write up something for everyone since I have not seen an ECM terminal repair guide around.
My TPS values shown through my ScanTool were erratic and the TPS code was setting. I replaced the TPS with no success so I went to the ECM connectors and started pushing wires around and I got the engine to stumble. So I thought 'corroded terminals'. I went through the TPS, 5V, and grounds wires in the connectors and use contact cleaner and a very small cleaning brush. I put everything back together and it really didn't change much at all while moving the wires around again. So I waited a day and thought what to do next and I settled on trying to re-bend/re-crimp the barrel of the terminals. In the end of all of the re-crimping and putting things back together the ECM wires were no longer sensitive to pushing and prodding them around.
Here's what I did...
I tried to narrow down the wires which were causing me issues. First, get access to your ECM behind the center console and loosen the 4 mounting nuts so the ECM connectors can accessed. While the ECM was unmounted and laying down on the center console I had the engine running in idle and I went through with a tweezers wiggling individual wires to see if I got a response out of the engine.
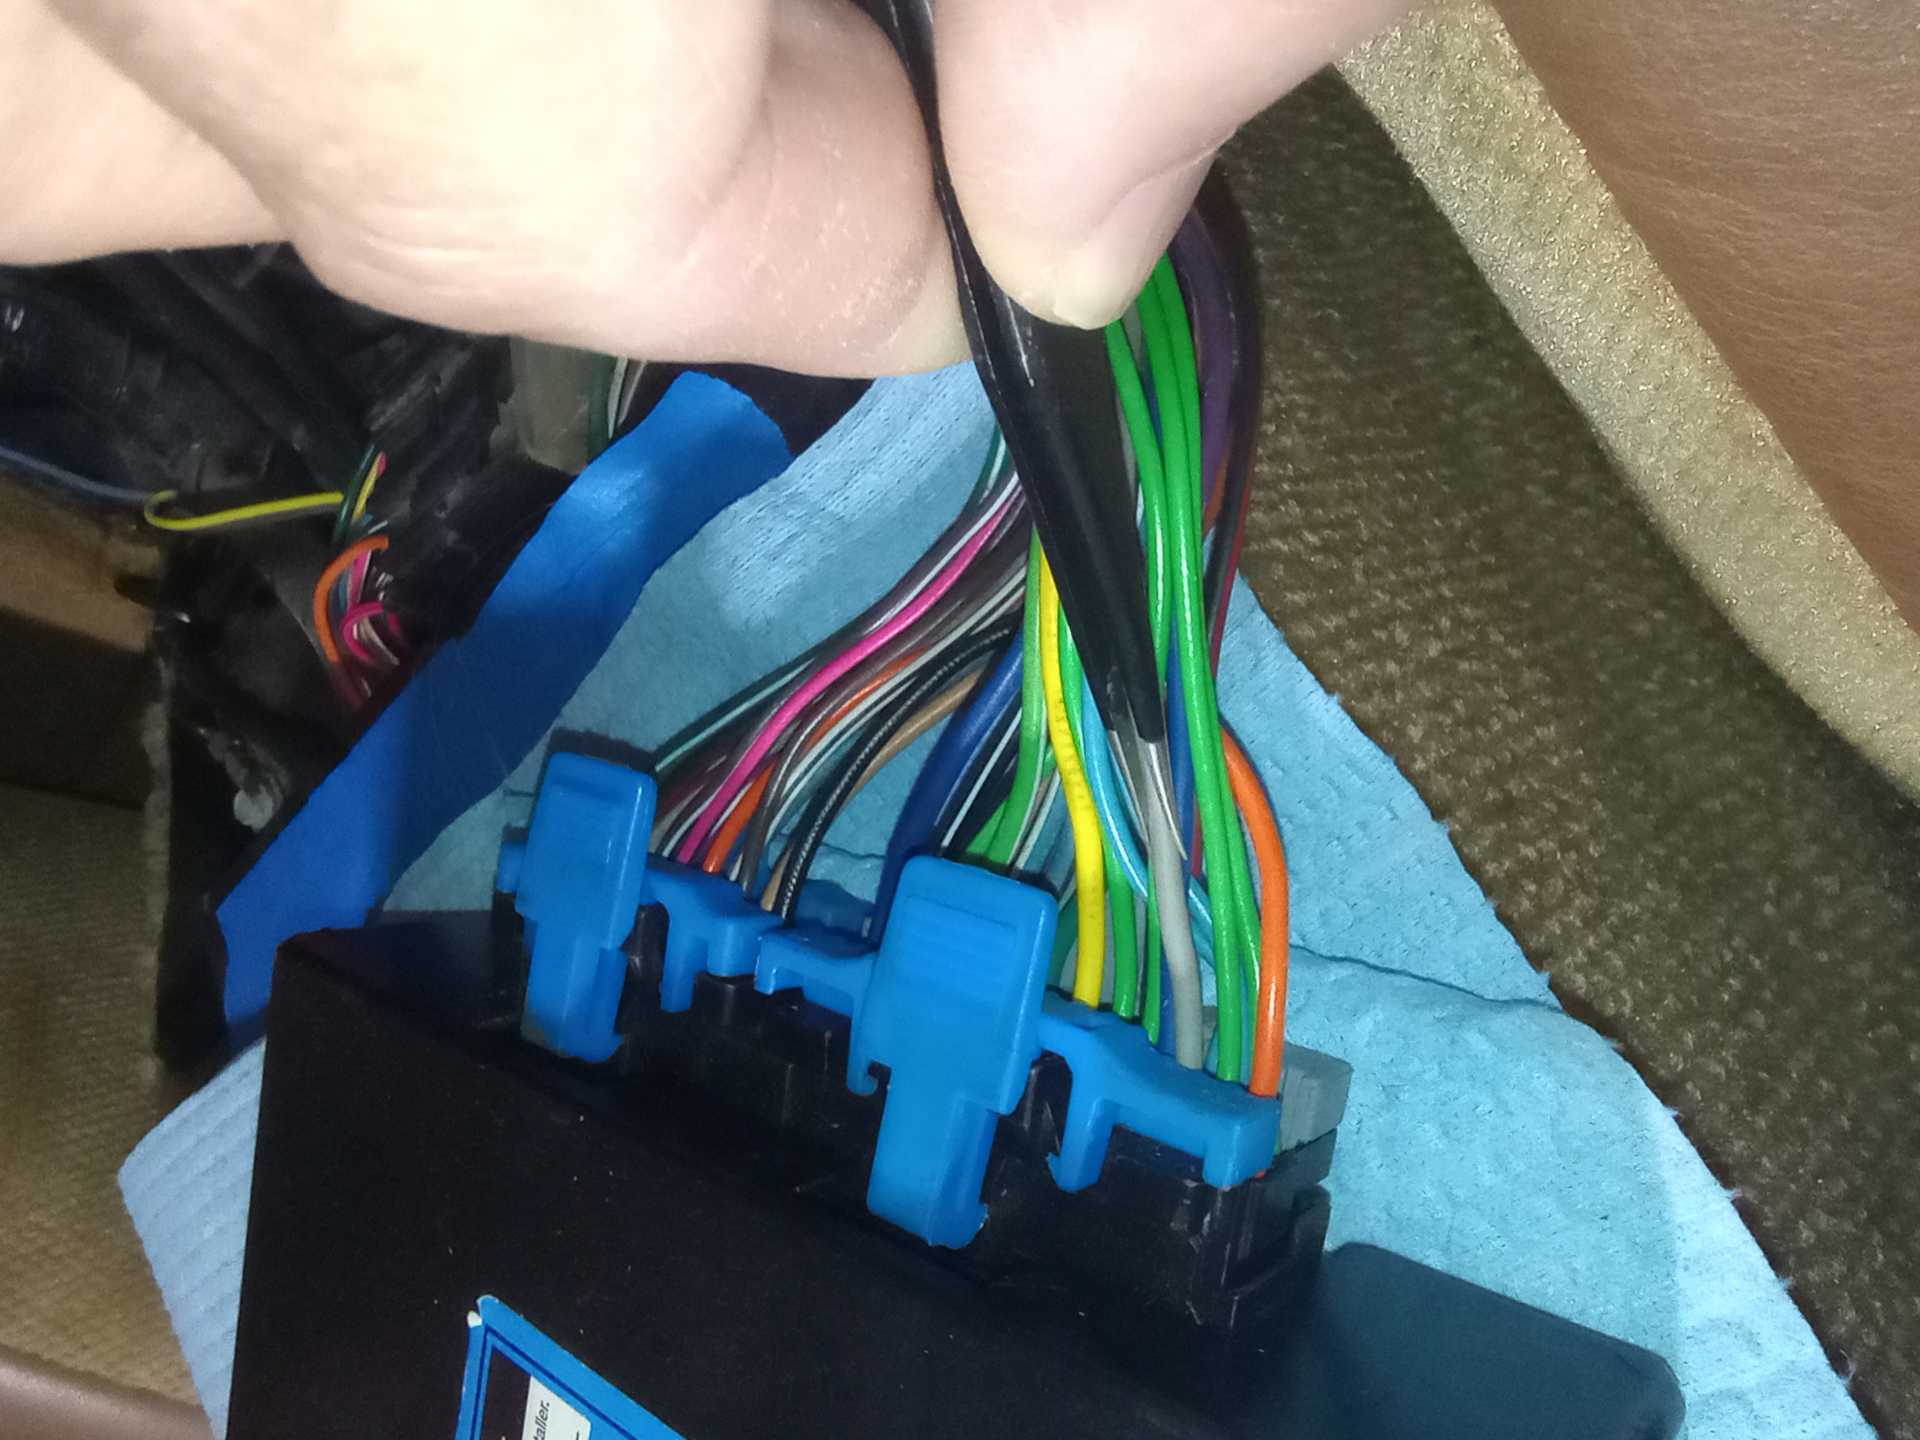
I used a small tweezers so not to disturb any other wire. I did this and it did show me that my TPS signal wire was sensitive, but it also showed that the MAP signal wire was sensitive. In the end I 'repaired' all of the ECM terminals since I figured there was no special reason my the TPS and MAP wires would only be loose.
To start the repair process first remove the battery negative cable from your battery.
To get access to the terminals you need to first remove the blue and grey plastic pieces which hold the terminals in. I believe these are called terminal protection assurance (TPA).
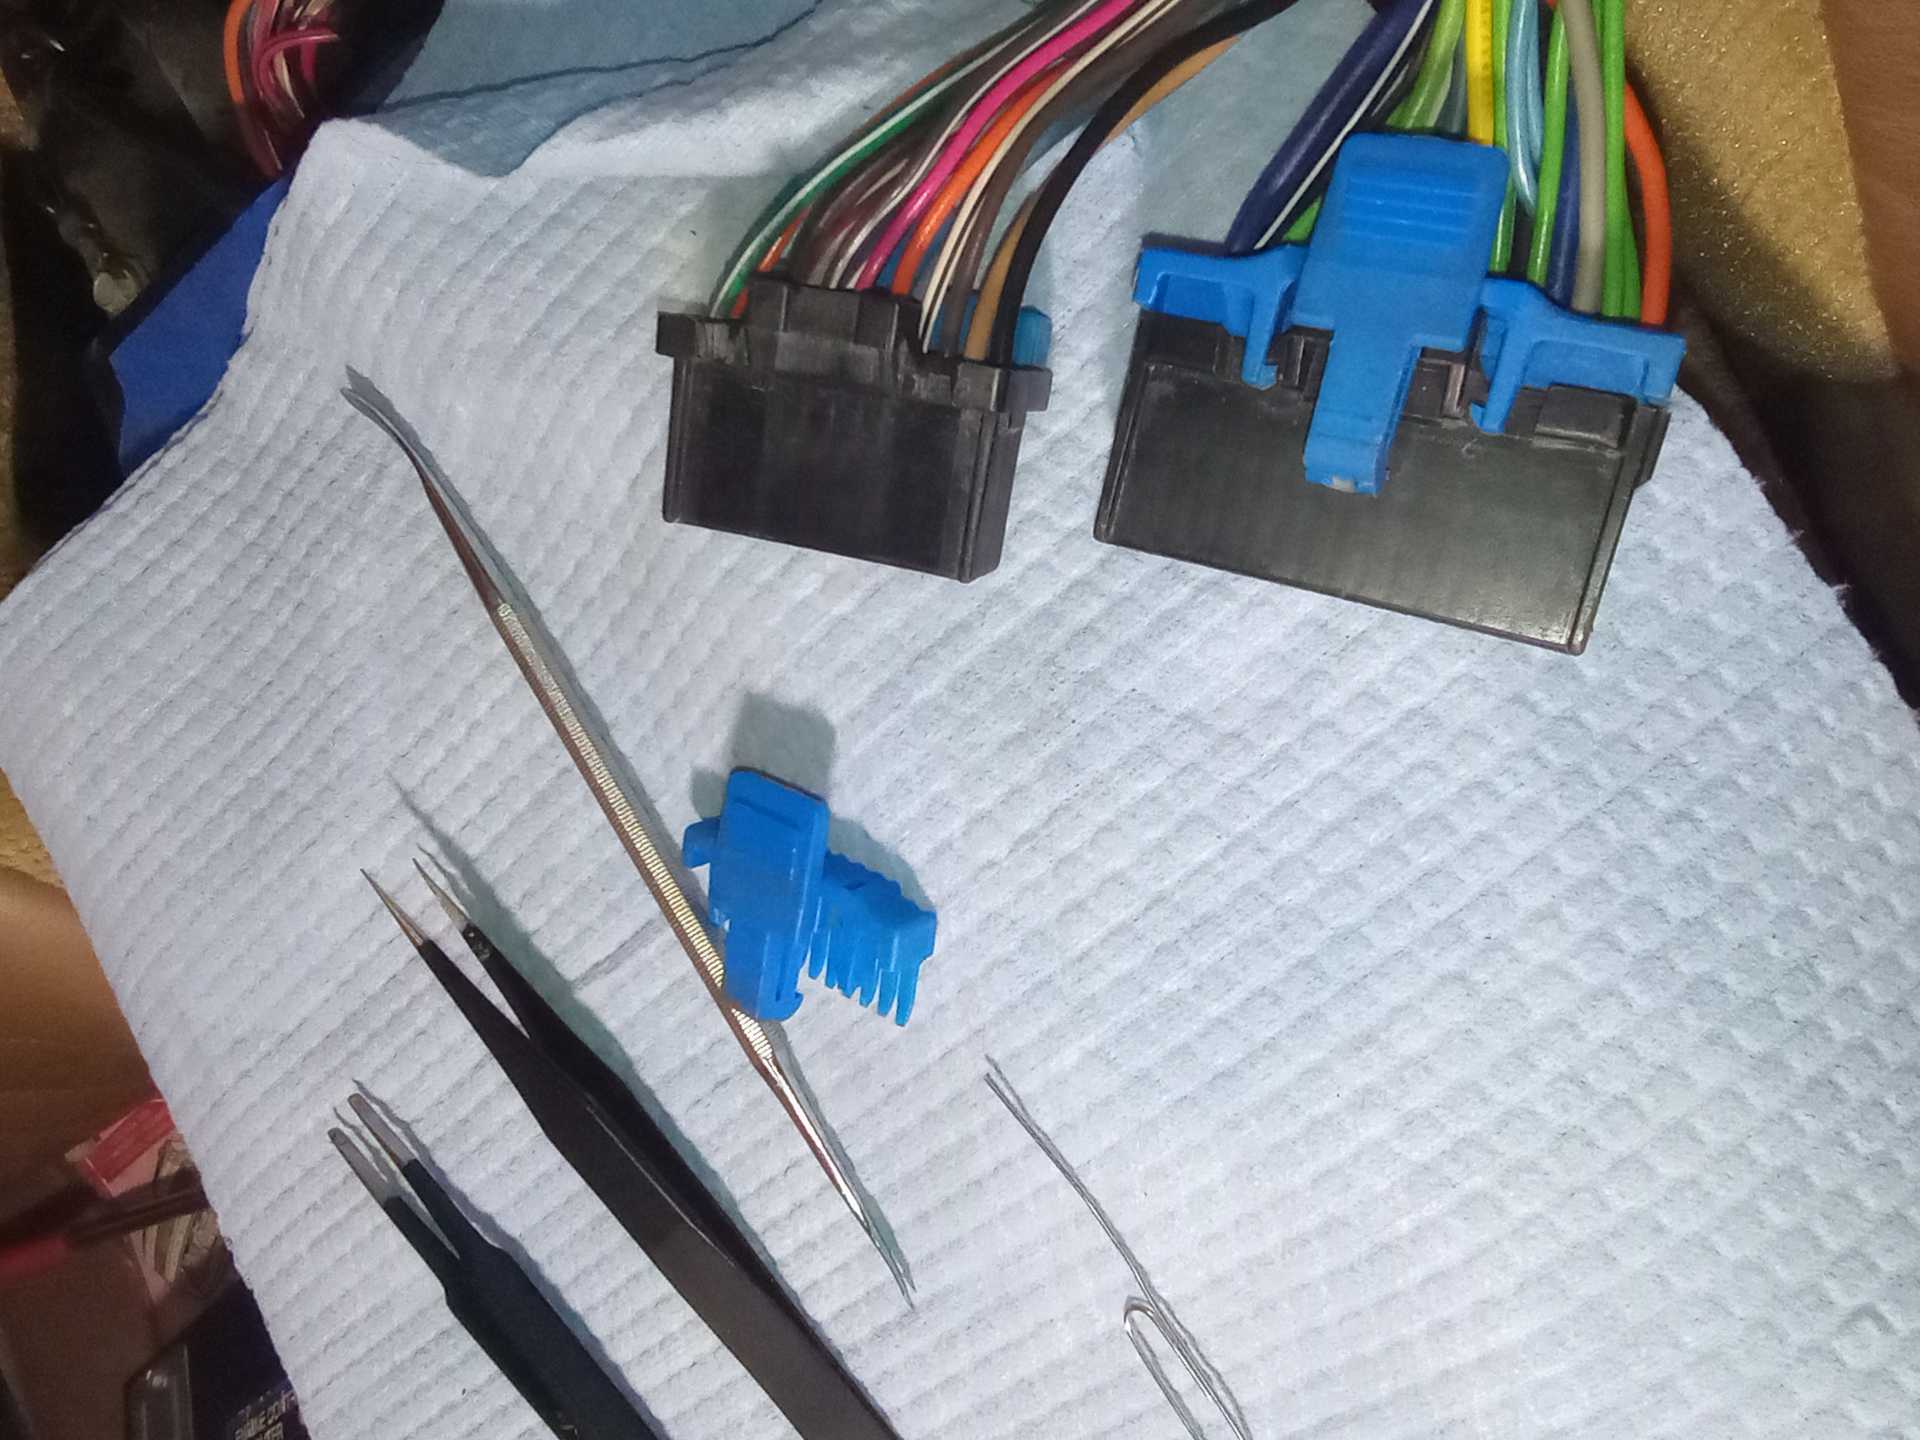
You can take all 4 TPAs out from the 2 connectors at once if you want. Next you will be taking the terminals out one by one since you do not want to mix up the order of terminals. I was even scared of getting mixed up from the unused cavities of the connectors. Just take it slow. It is tedious work, but you can always take a break from it. Photos beforehand of the connectors and wire colors is always a good safe guard. There are terminal tools out there, but I just ended up using an unbent bigger paper clip. You will need to insert the paperclip into the connector hole closer to the edge of the connector, not the hole where the ECM pins go. You insert it about 1 cm and push it over to the top/right (you see what I mean in the pictures below). I think it helps to gently push the wire that you are working on into the connector so that the terminal locking tab does not get hung up on the plastic retention feature inside of the connector. When you think you have the paperclip in place try to give the wire a gentle tug out. It probably won't happen the first time. Don't get mad and really pull on the wire it will just break the terminal. Try again and eventually you will get a feel for it.
Here's the paperclip in the connector while I try to push the terminal lock tab in.
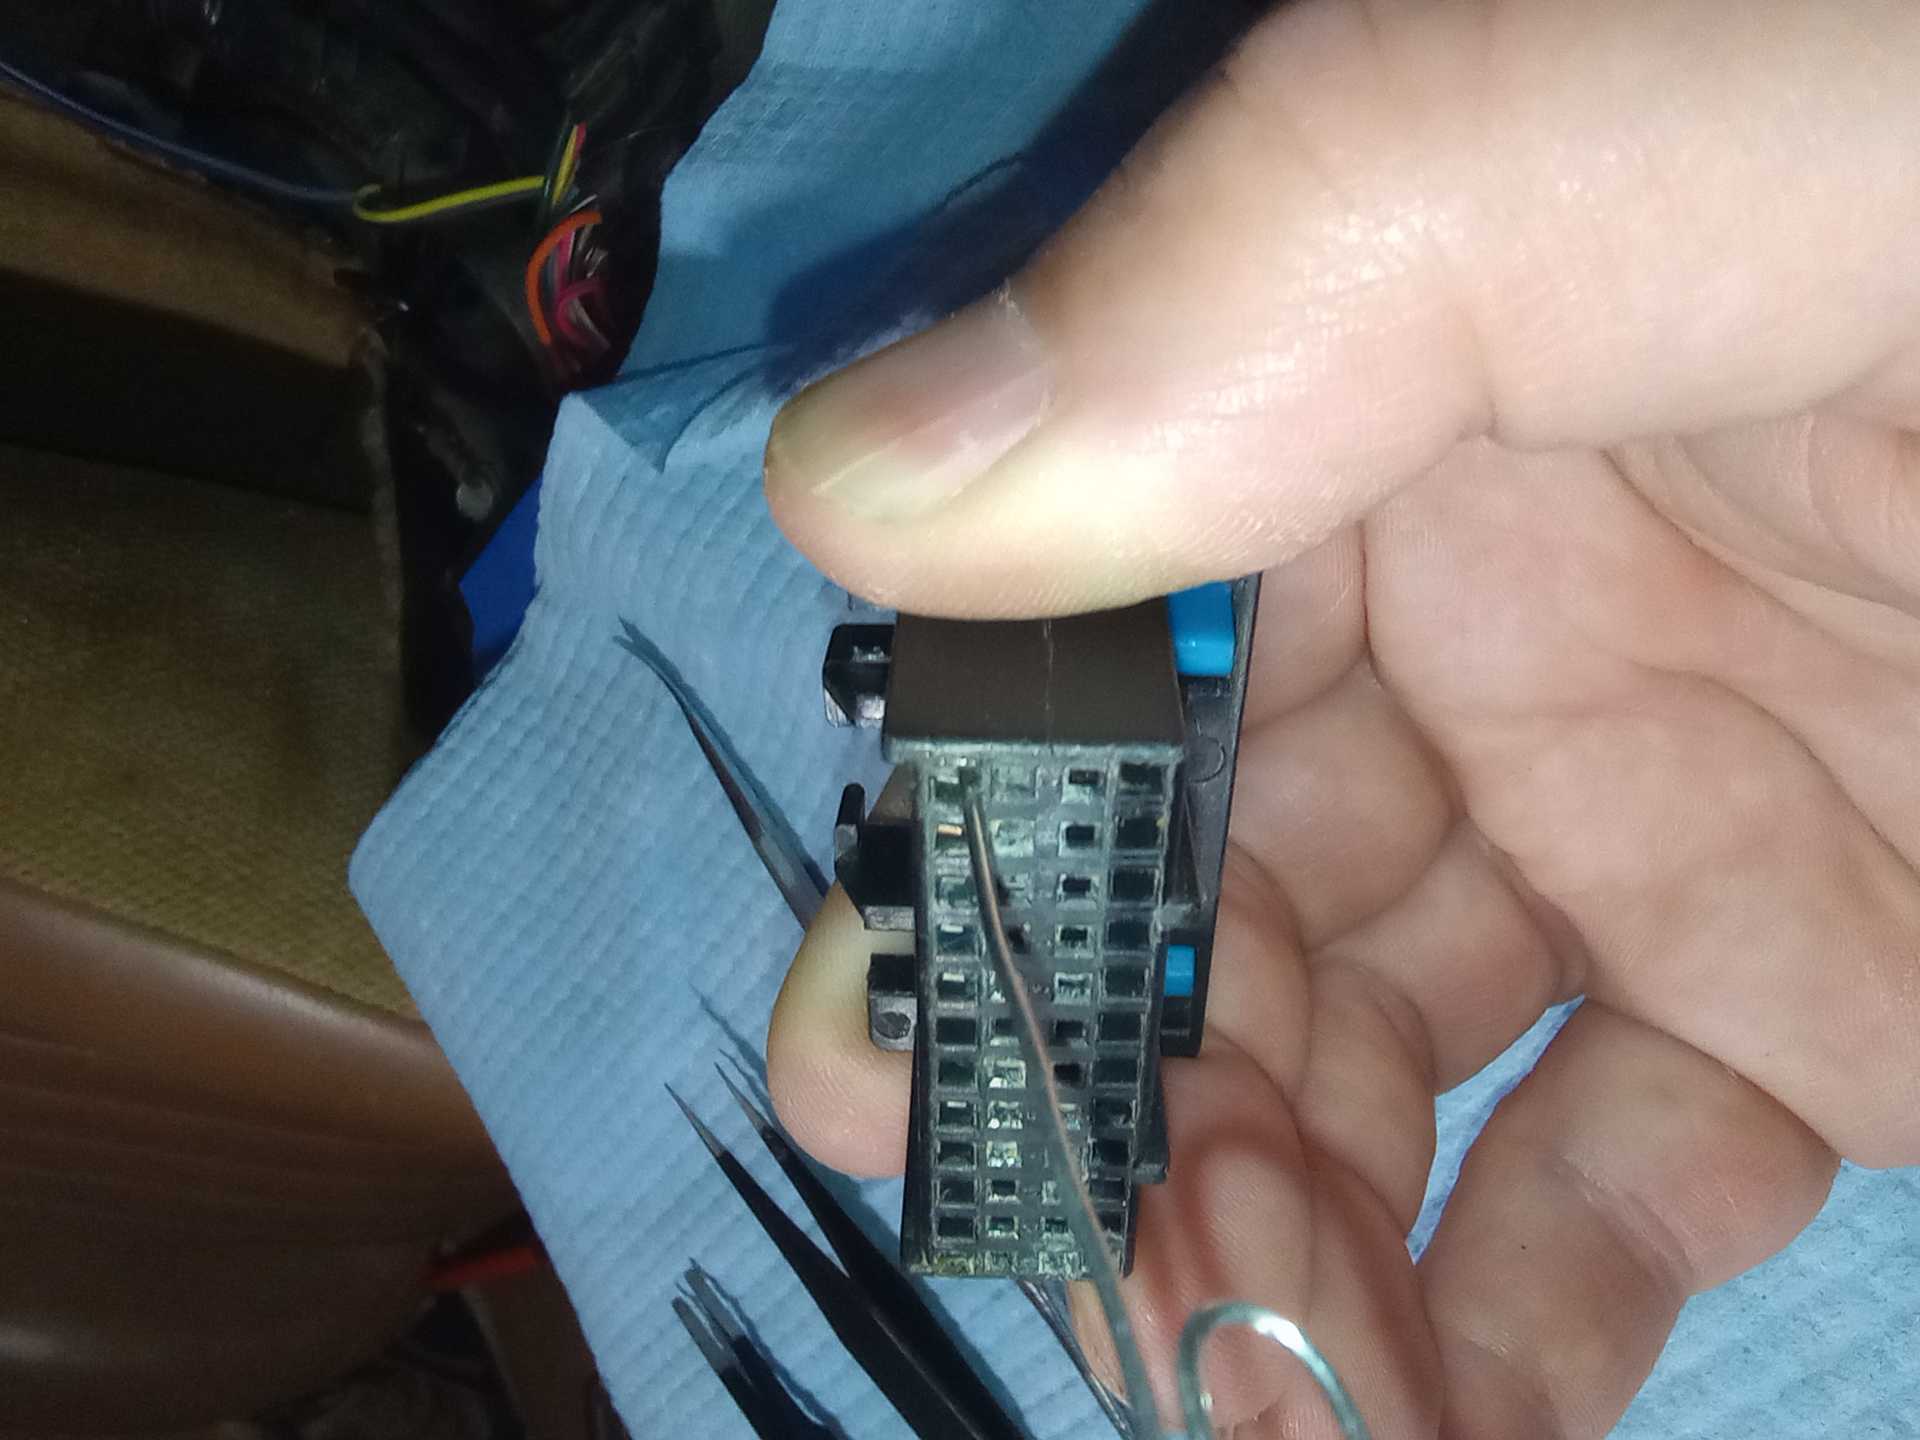
From this view I'm trying to lean the paperclip up to push back the terminal locking tab.
So once you get the terminal out it looks like this
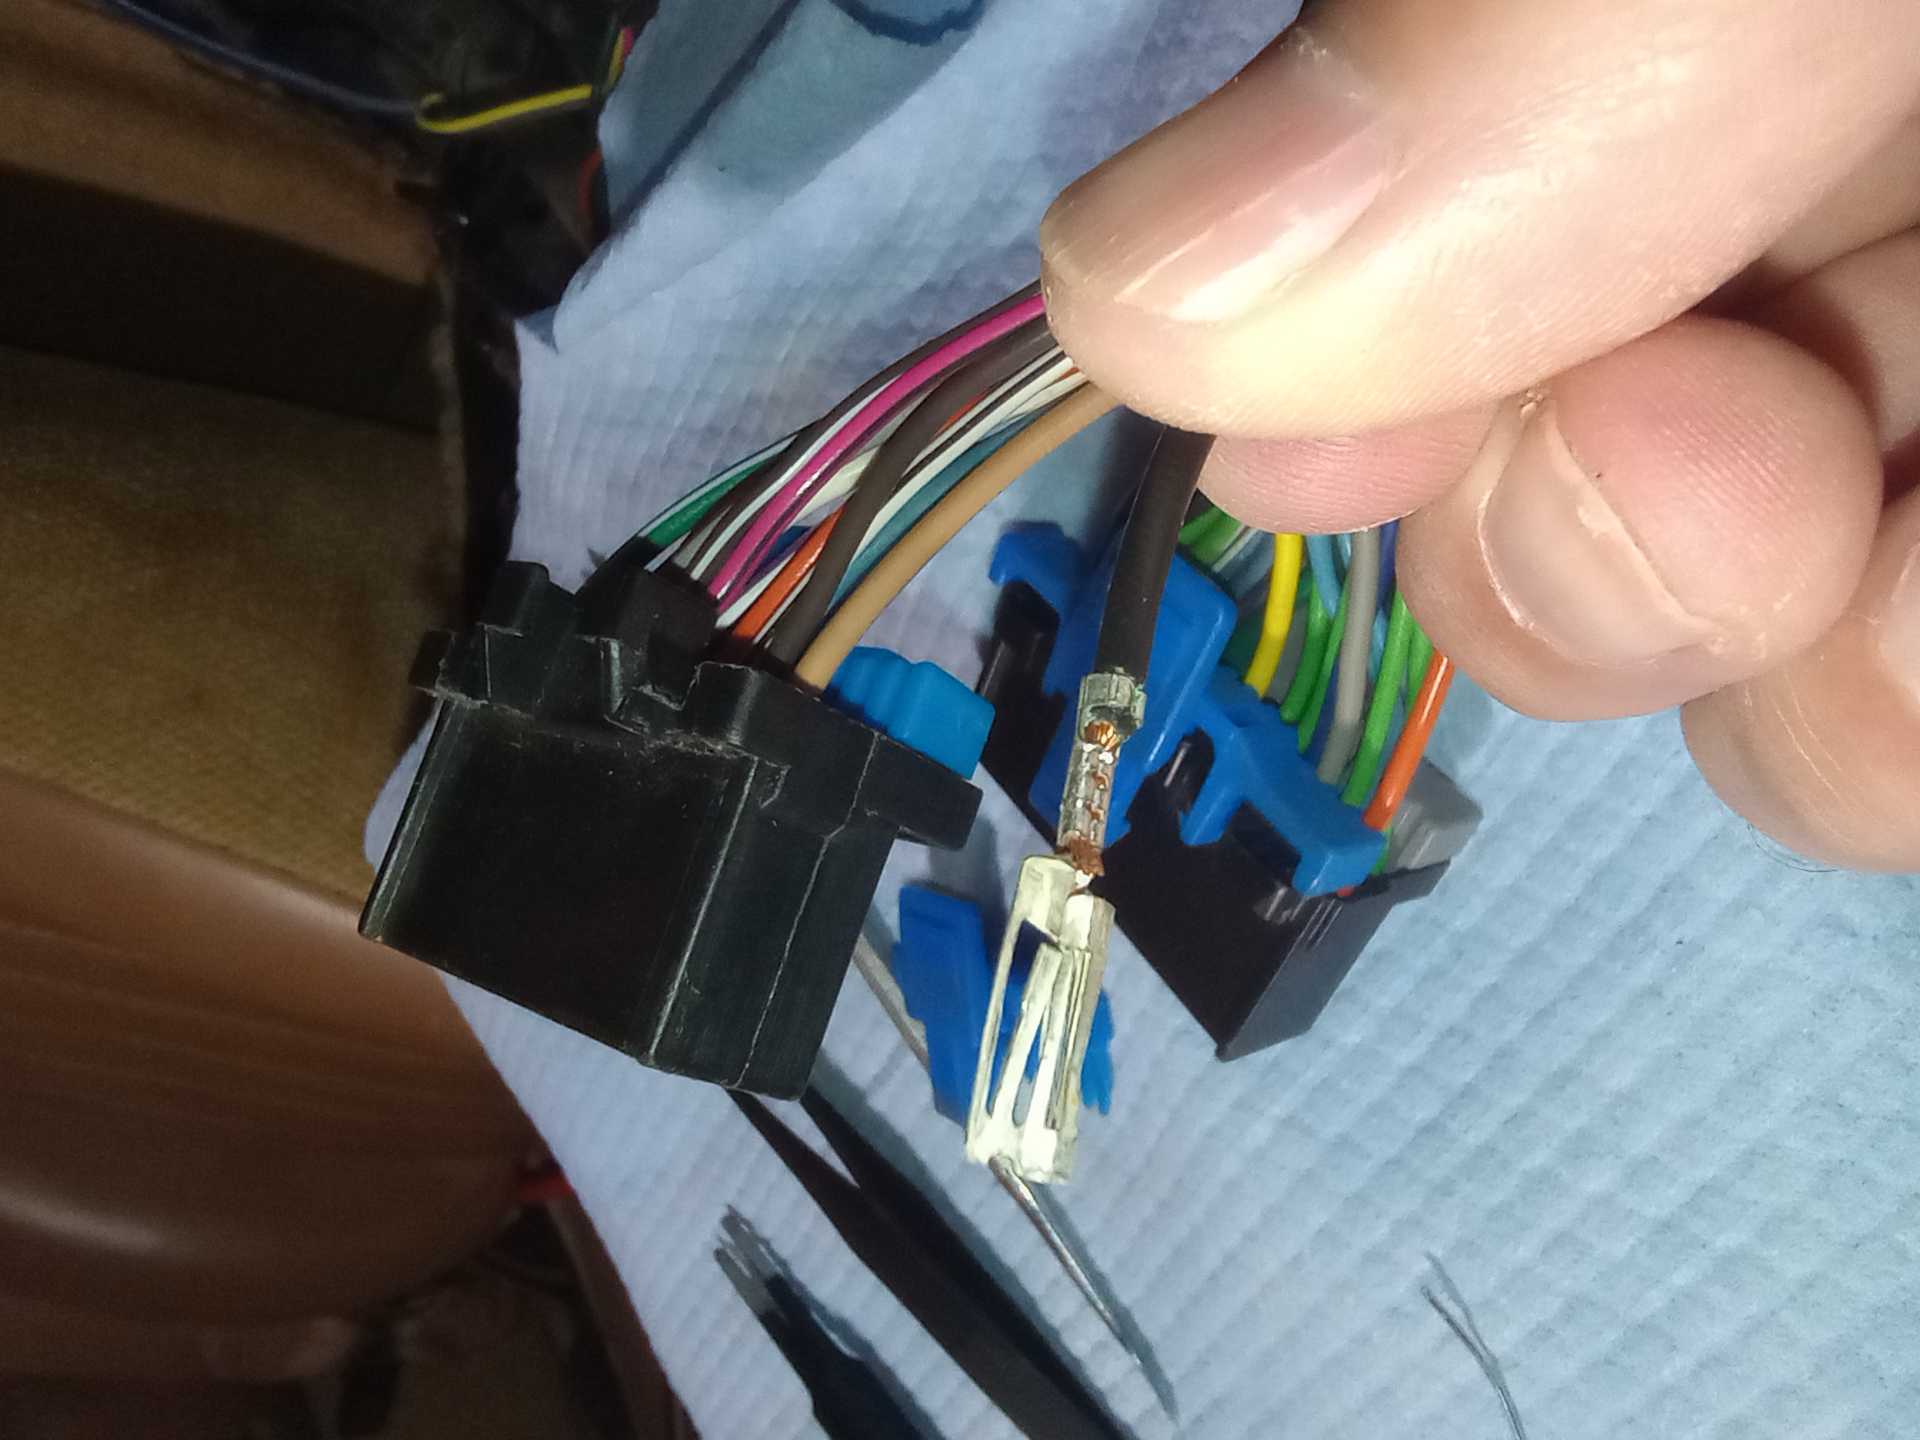
That little diving board (terminal locking tab) is what you are trying to push flat so it can move past a plastic feature in the connect body. Once you get the terminal out, you can try it out on one of the ECM pins to see if it feels loose to you. After that you will need to try to re-bend the metal pieces which contact the ECM pin. I did this by taking a little bit bigger tweezers (my fine point small tweezers would not do it) and clamping down on the center of the terminal barrel.
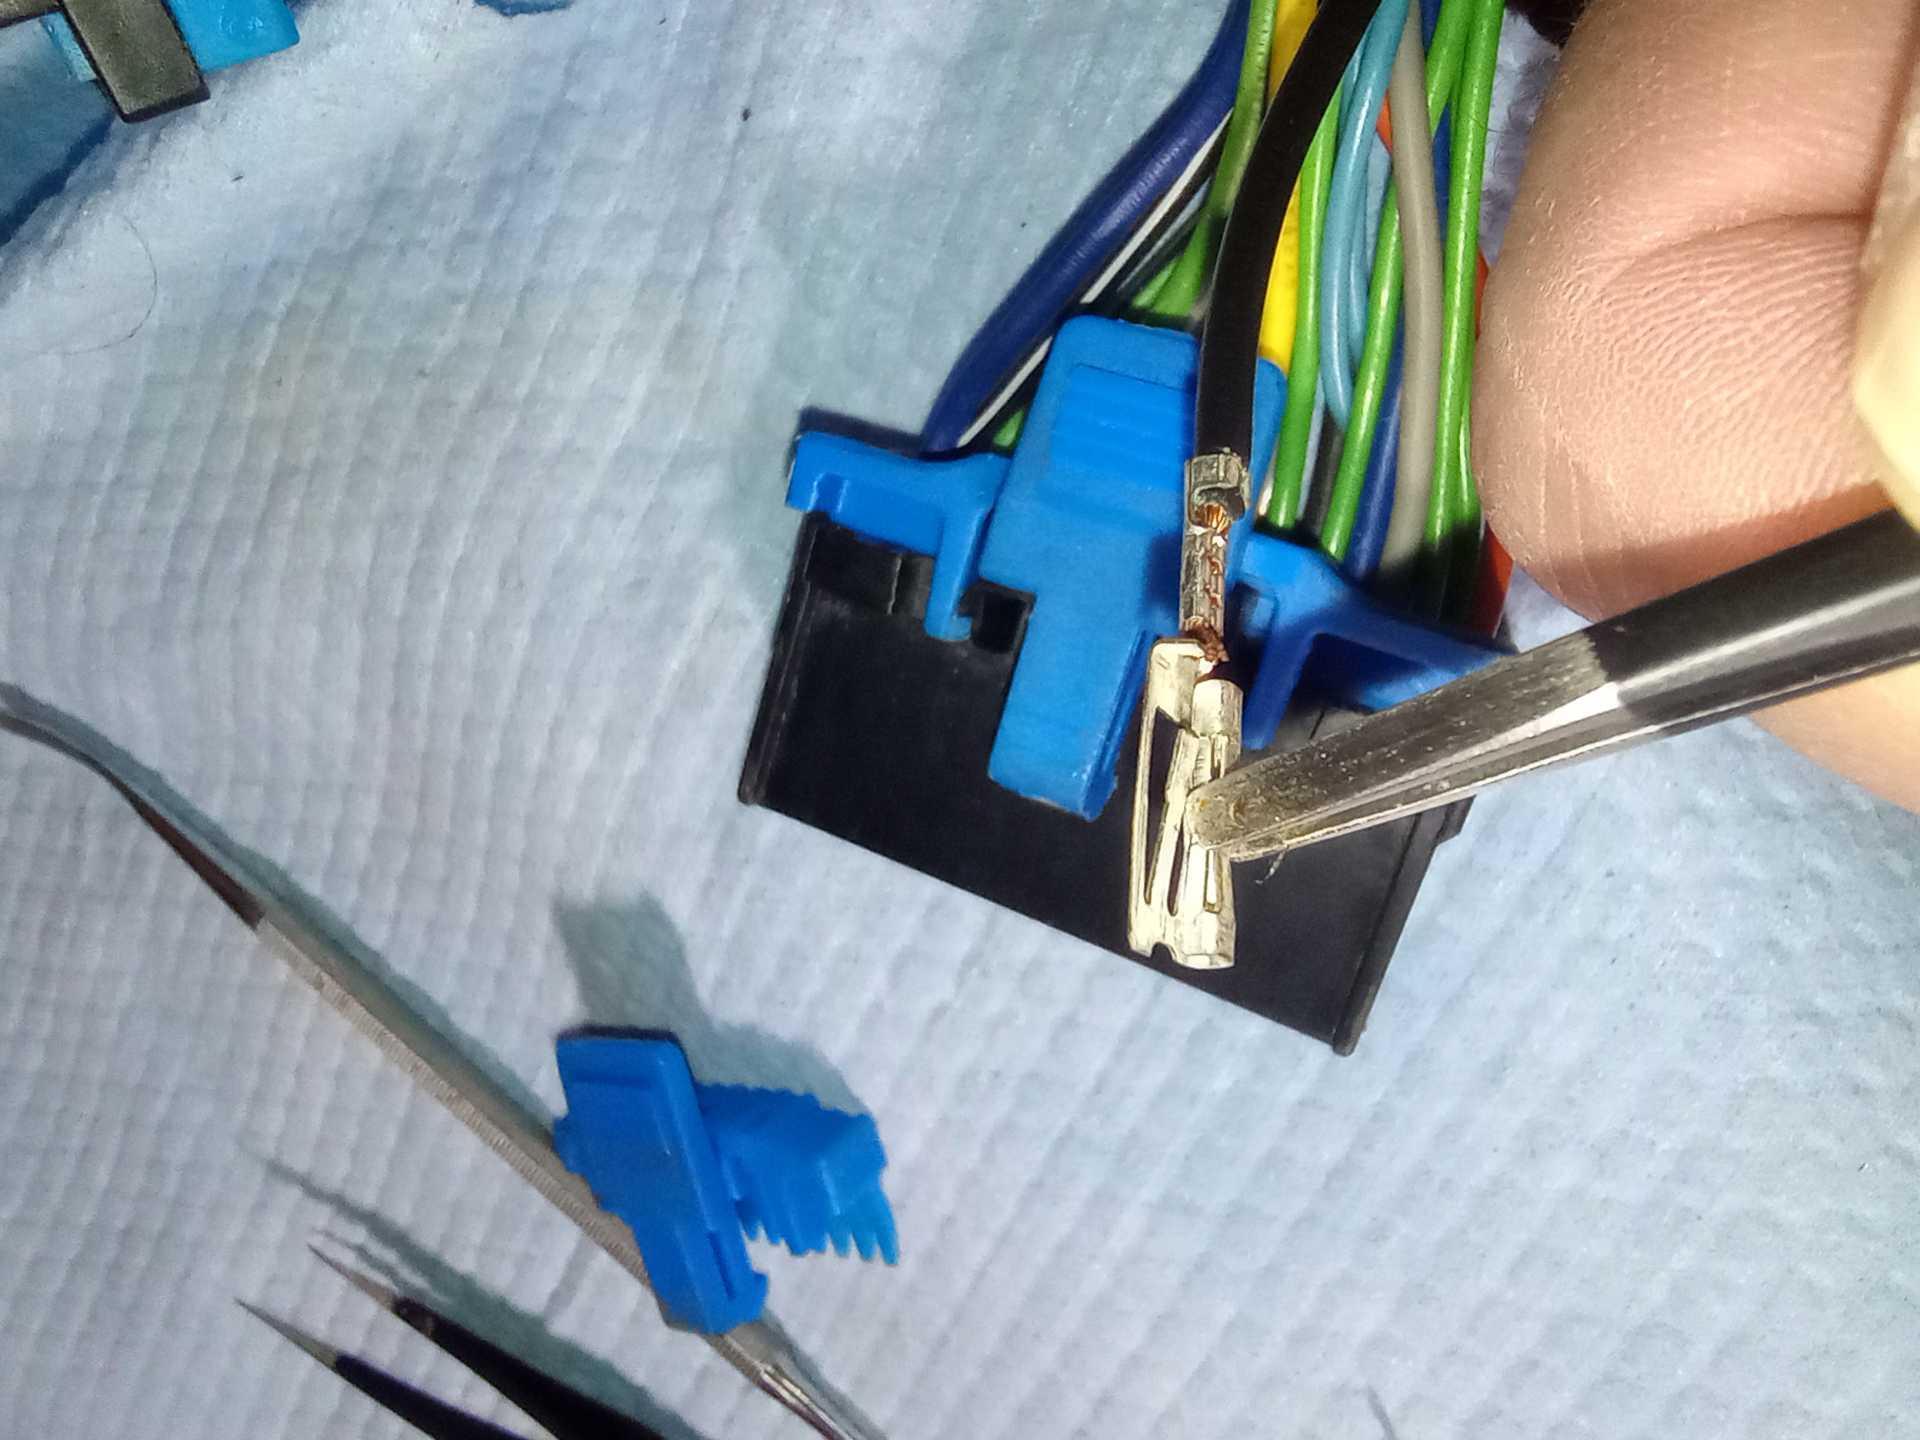
I would then rotate the terminal and try to clamp down on the other two sides.
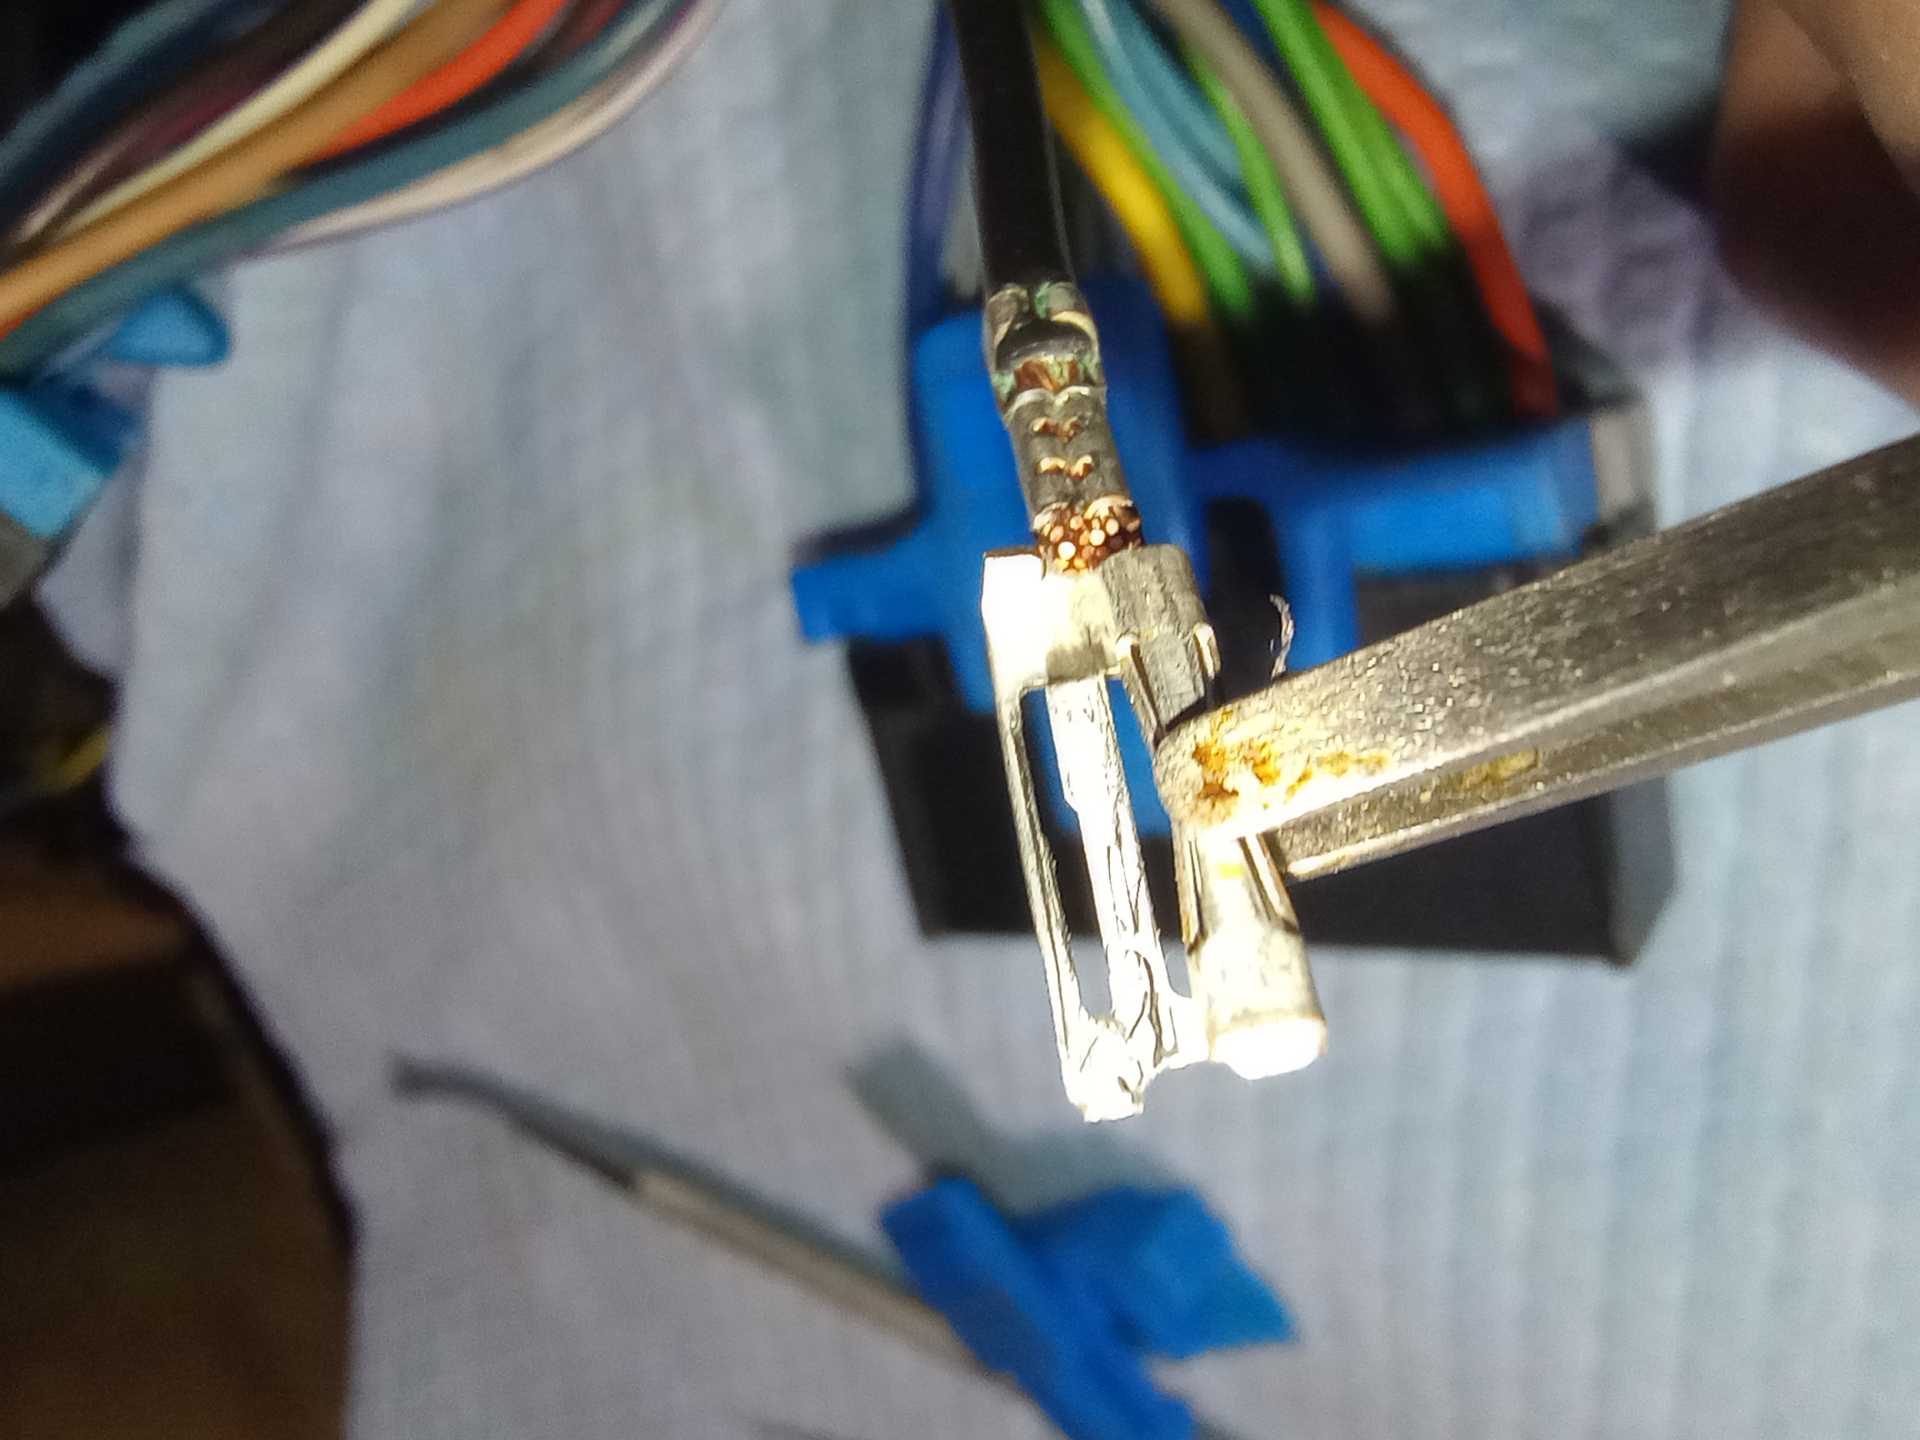
I wouldn't use any tool much larger than a tweezers to do this. Maybe you could get away with using a small electronics needle nose pliers and not a lot of force. Once you clamp both sides of the terminal you can try sliding it on to a ECM pin again and hopefully it feels a bit tighter. After you try it on a pin and you can see how much clamp force you should use. I would do the clamping again on the tested terminal since if you inserted the pin at an angle you might be re-bending it back loose. Once you are satisfied with the one terminal, slide it back into the correct pin cavity and then give it a slight tug back to make sure the locking tab caught again. Proceed on with the other sensitive wires/terminals or the whole two connectors. It is tedious but not really hard work. When I was done with all the terminals, I inserted the TPAs, and I re-connected the connectors to the ECM. I could feel from the force as the connectors were inserted that the terminal were contacting much better. You can always start the car up again and redo the wire wiggle test to make sure things are better.
Good Luck!
|
|

|
Vintage-Nut
|
MAY 30, 10:29 AM
|
|
Nice Write-Up!
My first thought is your title: V6 ECM Terminal Repair Cleaning
In my experience, aged electric connections in vehicles get 'dirty' mainly from oxidation or corrosion.
*Oxidation is the process of material deterioration due to the loss of electrons.
*Corrosion is the process of material deterioration due to a chemical reaction with its environment.
We're talking about the former more than the latter.........
Oxidation is commonly associated with this process where metals react with oxygen to form metal oxides which 'block' the mating connection surfaces.
Often, 'cleaning' both the 'plug' and the 'socket' with an electric contact cleaner to remove the oxidation will restore the connection.
IMHO: the 'squeezing' socket method in this write-up is the second step to restore the connections IF an electric contact cleaner didn't work..... 
------------------
Original Owner of a Silver '88 GT
Under 'Production Refurbishment' @ 136k Miles
|
|

|
Jason88Notchie
|
MAY 30, 11:08 AM
|
|
Just to add just the process of "reseating" the terminals off the ECM can restore connectivity as well for a quick fix. But hell while you're in there.....
Good write up.
|
|

|
Patrick
|
MAY 30, 04:00 PM
|
|
Great write up, very good photos, and all laid out so well. It's such a pleasure to see a well presented post... as opposed to one uploaded from a phone where the images are often in the middle of a sentence. 
One of the very best first-time posts by a new member here ever! 
|
|

|
jdv
|
MAY 31, 07:11 PM
|
|
|

|
SeaJay
|
MAY 31, 10:20 PM
|
|
Thanks for the link to the connectors and terminals. When looking in the past for them, I found terminals, but never found the connectors.
Thanks for the comments as well and I agree try contact cleaner first....always the easier thing first. I thought I did a pretty good job at cleaning, but the intermittent connections still persisted.
Hopefully it will last for a while and I won't have to touch the ECM for a while.
|
|

|
RWDPLZ
|
MAY 31, 10:59 PM
|
|
TPA actually stands for 'Terminal Position Assurance', it ensures the terminals are properly crimped, oriented, and seated into the connectors properly. If any one terminal is off, the TPA won't close or attach, alerting the operator or technician to an issue.
https://www.te.com/commerce...ocType=DS&DocLang=EN
The little diving board (terminal locking tab) is a terminal lance type. Ideally the lance is built into the connector itself, as this allows far more insertion and removal cycles than a metal one would provide, with less potential for failure and deformation. Fragile metal terminal lances can break quickly or be difficult to rework or service. They have been largely phased out except in legacy and service applications.
It's natural for oxidation to build up over time, even in perfect conditions, especially with how old these cars are now. If you're lucky just re-seating the connector will clean it off and re-establish a good connection.
|
|

|
slicknick
|
JUN 03, 08:52 AM
|
|
The pins are like 30-40 cents on mouser, really any GM pin is still around except for like the early 80s radio connector ones.
The crimpers on that site are what you want, though. Don't crimp with anything less.
|
|

|
fierofool
|
JUN 03, 03:12 PM
|
|
|
    
  |
|


