
 
     |
| LS4 / F40 swap - fieroguru (Page 200/216) |

|
Spadesluck
|
JUL 21, 07:21 PM
|
|
|
You going to cut any of the metal away for better airflow to the intercooler in that location?
|
|
|
|
fieroguru
|
JUL 21, 10:23 PM
|
|
Got the car back together with the turbo blanket on Friday and spent the weekend just driving and doing some tuning tweaks.
Messed with the EOIT and it helped off idle torque and should improve fuel economy. I spent a couple of hours rowing through the gears for no reason other than it being fun. I really like the sound of the turbo spooling but not building boost.
I wanted to verify my manual boost pressure gauge matched the boost in the ecm. On prior tuning runs the ECM logged about 9 psi, but I never looked at the gauge to know for sure. I decided to test it while watching the gauge. I was in 4th gear around 2600 rpm and I rolled into the throttle to build boost. Started building boost at 50% throttle and reached about 15 psi on the manual gauge in about 2.25 seconds at 96% throttle (it does go 100% throttle, but wasn't really planning to get on it, just make some boost).
As I saw the boost gauge pass 9 psi, I remembered that I didn't reconnect the boost reference line (oops!), so I got out of it. Now I know the wastegate spring will hold about 15 psi boost at a minimum. The log showed 190 kPa = 27.55 psi, or 12.85 psi, which is close enough. Luckily I have been keeping the boost timing low (single digits) and fueling around 10.8:1, so no harm was done.
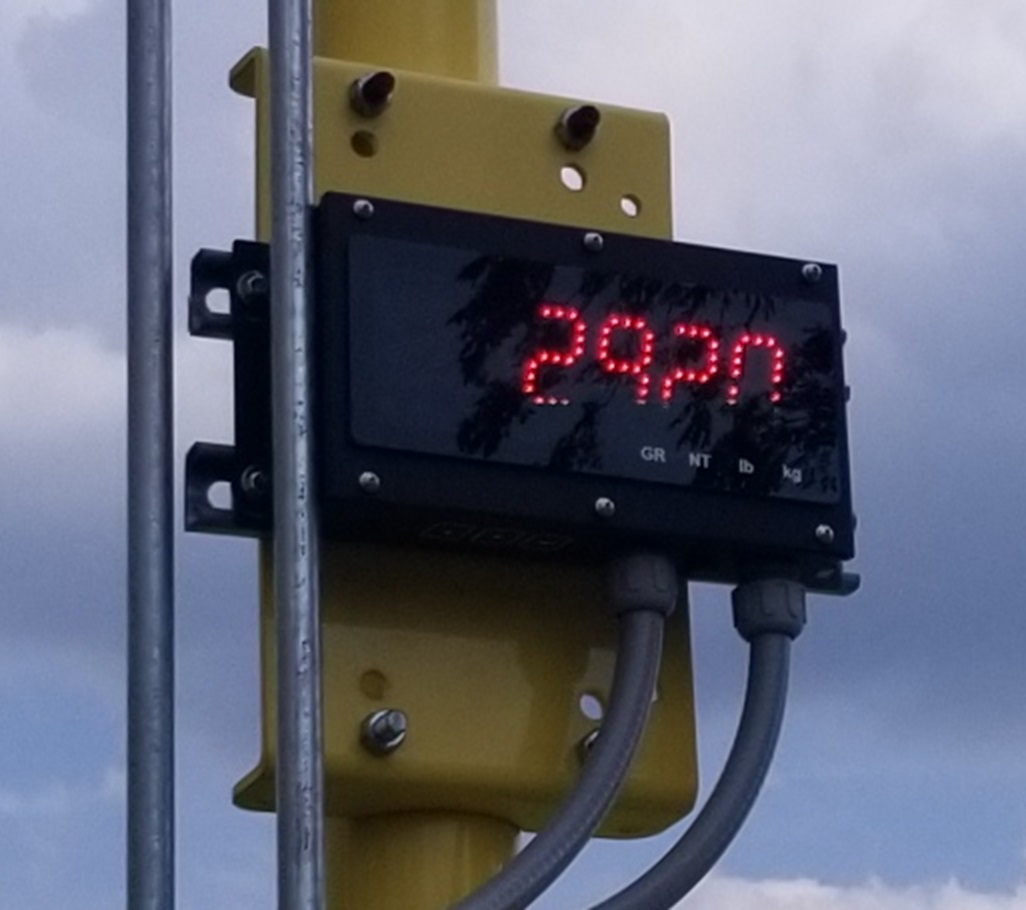
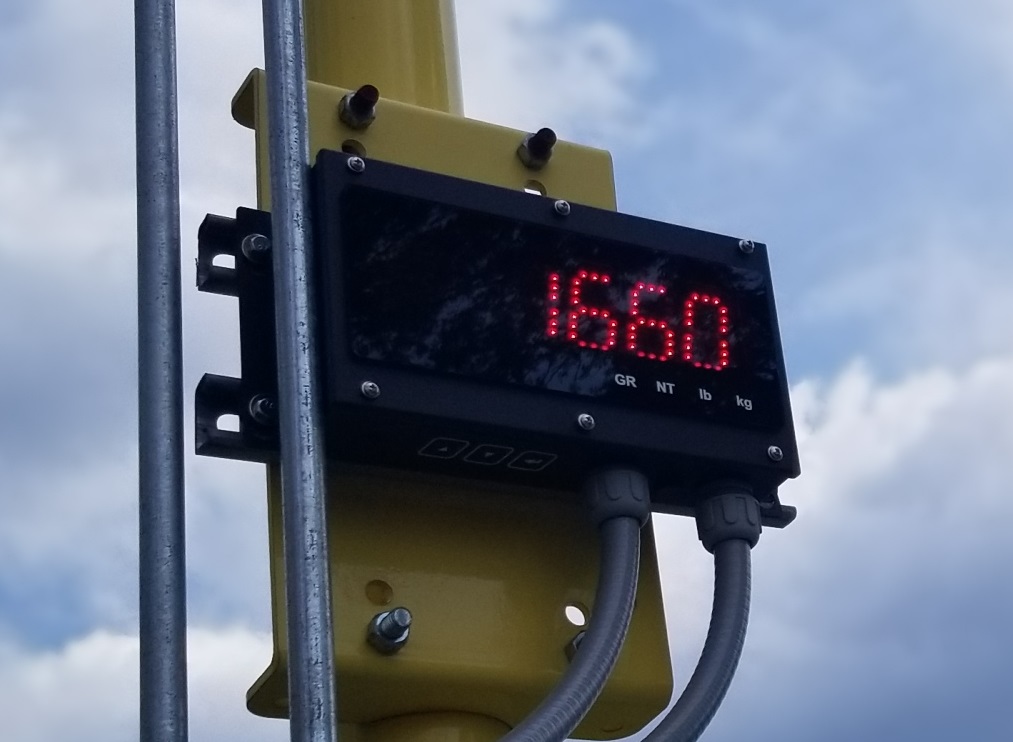
While driving just to enjoy, I stopped by one of the local grain elevators. Without me, the car tipped the scales at 2920 lbs, 1660 lbs on the rear, and 1260 lbs on the front. 43.2% front / 56.8% rear.

Let's go back in time and compare the specs of my previous swaps.
code:
SBC/Getrag:        2960 lbs, 283 rwhp, and 21 mpg.
LS4/F40:           2807 lbs, 382 rwhp, and 29 mpg.
LS4/F40/Turbo:     2920 lbs. ??? rwhp, and 27 mpg so far.
This includes a jack, spare front wheel bearing, and caliper up front (haven't taken them out from the HRPT). It also includes the heavier 17/18 wheel combo I have been running since 2016, the rear wing (2017), the twin disc clutch (2023), the 20 lbs for amp/sub/speaker setup (2024).
This likely means that I have met my goal of the turbo swap adding less than 100 lbs, but I want to do a few more things to reduce the weight.
I really would love to have this car in the 28XX lb range with full interior and A/C.[This message has been edited by fieroguru (edited 07-21-2024).]
|
|
|
|
fieroguru
|
JUL 28, 05:10 PM
|
|
The Fiero continued in daily driver status last week and will continue to do so this coming week.
I previously mentioned some junk in the spare tire area. This is everything that was in the front: Overall they weigh 22.5 lbs.
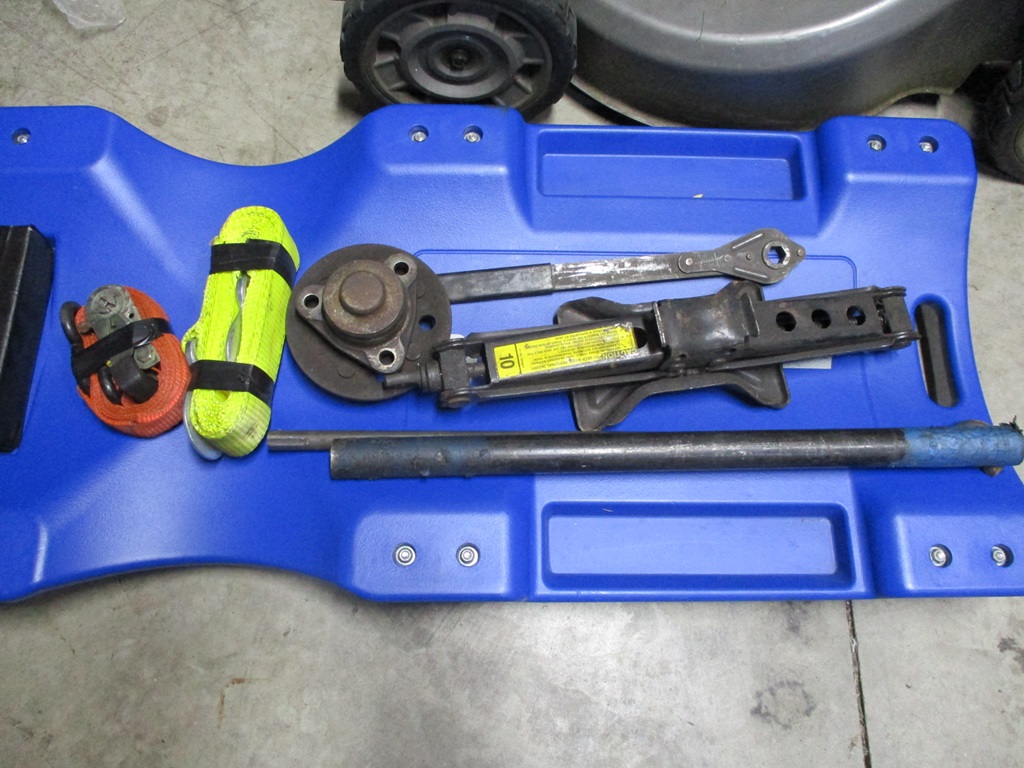
I want to do a couple more things before I put it on the scales again to help get it below 2900 lbs.
This weekend within 12 hours both of our Nissans had different issues in the same town about 10 miles away. Did enough troubleshooting to know what the two issues are, but I didn't want to dedicate the time to mess with them, so both were towed to the dealer... Same tow truck driver for both tows. For the 2nd one I was driving the Fiero, which he was really impressed with. He asked to follow me to the dealer so he could listen to the exhaust.
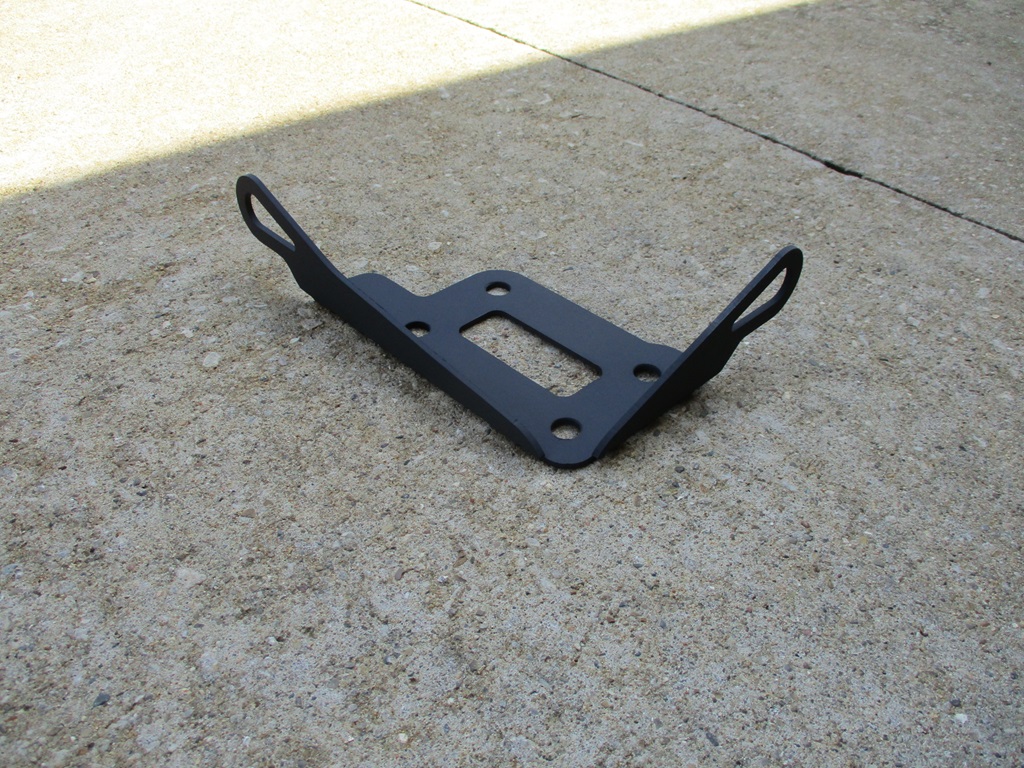
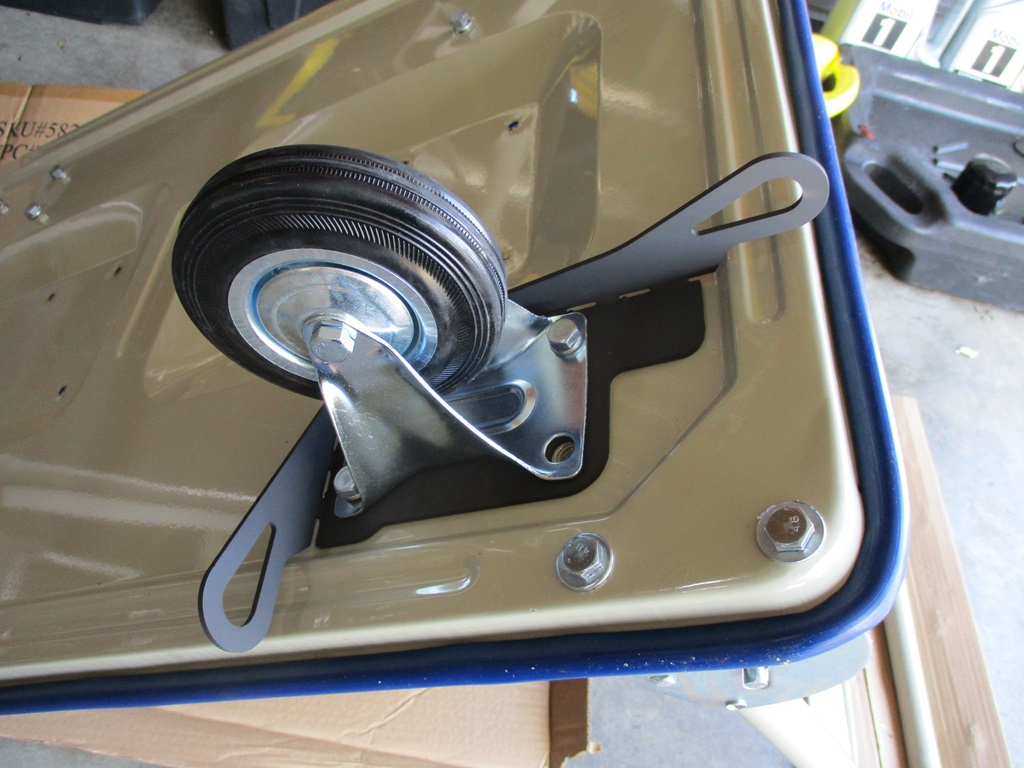
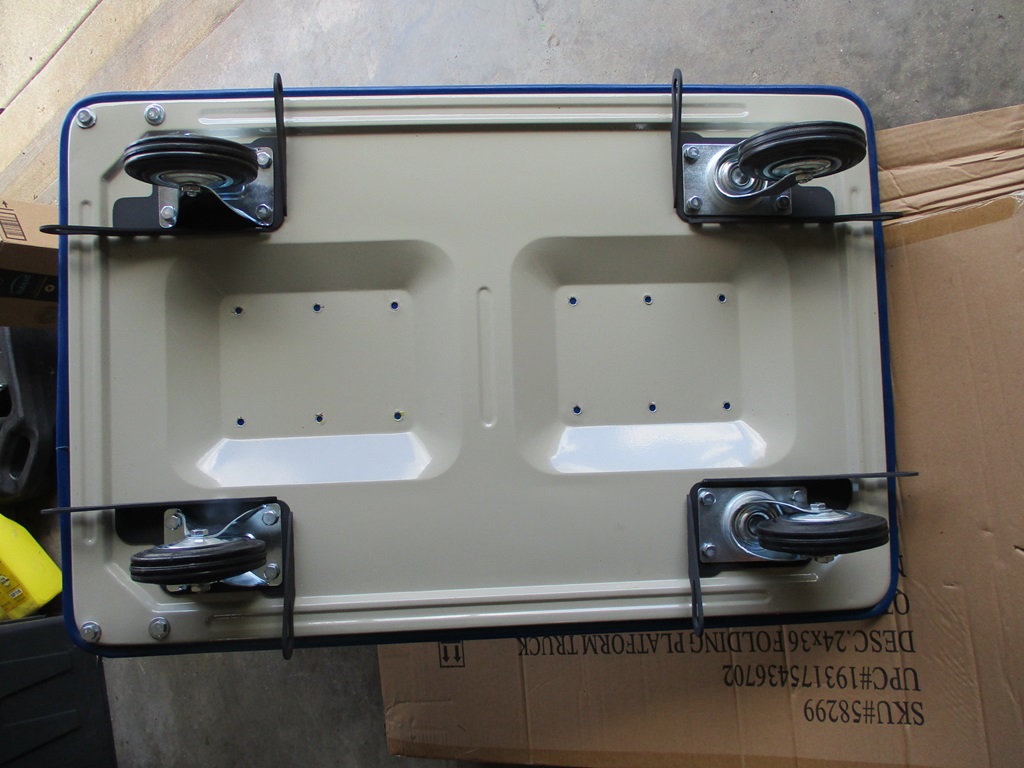
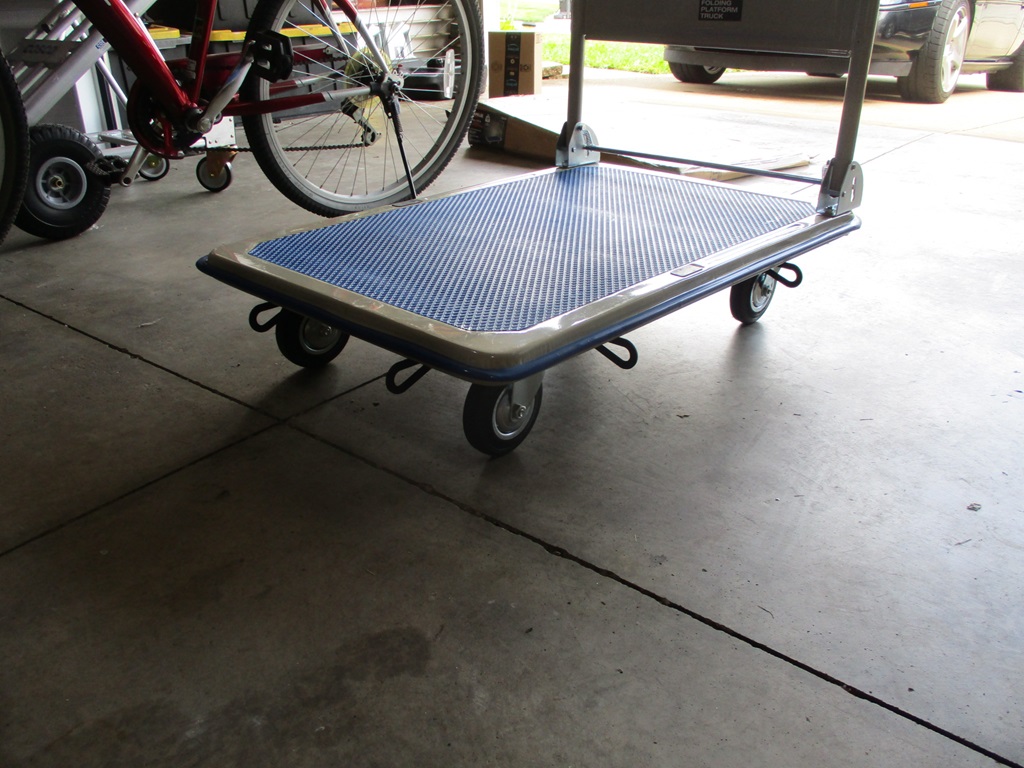
Carson, my oldest, is heading off to college in a few weeks. He is on the 7th floor of the dorm, so we have purchased a dolly as well as a 24x36 rolling cart to help with the move in. The 24x36 cart has a flat bottom and didn't have any good place for straps to attach stuff to it. I know Sara/Carson will likely stack this thing with 6+ feet of stuff to save trips, so it needed tie down locations. I didn't want them to hang out past the side or be mounted on the top and limit the width of stuff that could be put on it. So using the caster mounting locations, designed a plate with 2 tie off points per caster.
|
|
|
|
fieroguru
|
AUG 04, 06:16 PM
|
|
Another week of daily driving the Fiero.
Best tank for mixed driving on my commute (17 miles each way) was right at 20 mpg. Also did another 140 mile trip for mileage and it was 27.0 mpg as well.
One of the headlights was lazy and only coming up about 3/4 of the way. Since leave the house at 6 AM and the days are getting shorter, and it was raining most of the this week, I needed to fix the lazy eye. Already had a new switch, and it would raise up 100% with the hood up. Went ahead and picked up a set of new motors and installed them. Now both headlights work as they should!
https://www.amazon.com/gp/p...o00_s00?ie=UTF8&th=1
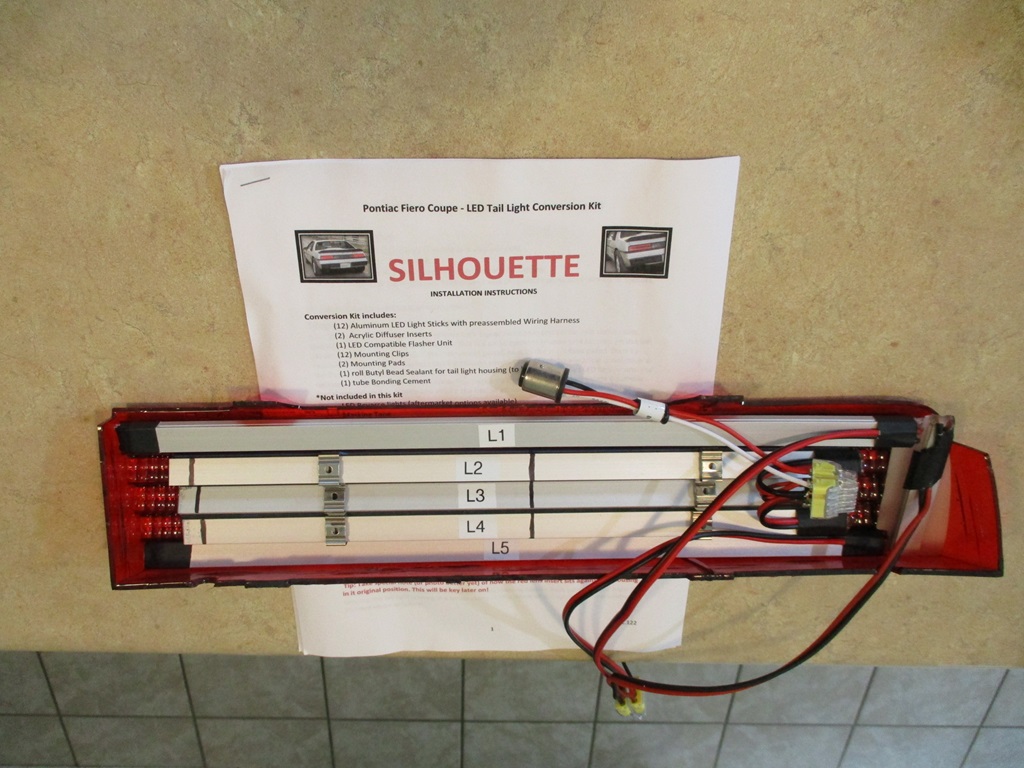
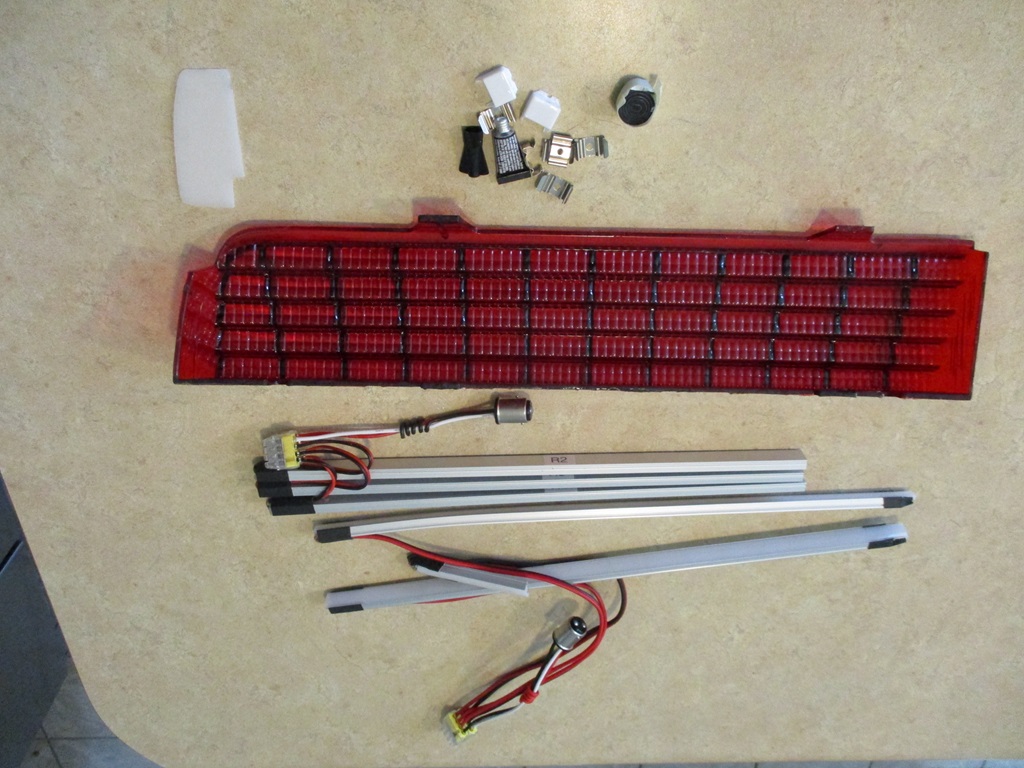
There are lots of upgrade parts in the basement for this car, so decided to bring up the rear taillight LED kit from NSL-Performance that was purchased in Feb 2022. This kit has since been discontinued, but wanted to see how they look. I read the instructions and then did a mock up just to see how things go together. Everything held in place with double sides tape on a single 1/4" surface, which I am not fond of. I will likely use it to get everything placed and positioned. Then measure and cut a couple of metal step rails I can silicone or hot glue in place to lock all the light bars together on both ends and to the red housing. Before I get to that point, I want to pull out some taillight connectors and rig up power so I can check the light pattern while it is being assembled. Here is one side mocked up and the parts for the other side.
|
|
|
|
Bob2112
|
AUG 05, 12:11 AM
|
|
I put the NSL kit on a little over a year ago. If memory serves, the plastic parts are held in with some type of glue which was used sparingly. I wasn't too concerns with things moving around because after it was all put together, there wasn't much room for the lights to shift around even if they were loose. My lights still look great. I got the set that continues the surround pattern across the center as well. For whatever reason, one of the strips I had was DOA so good idea to test them ahead of times like you said. The NSL guy sent me a new strip freeof charge, and it worked fine. I like the way they look, but I will likely replace them with a set of the programmable led array that BraveTECH is selling on my next round of upgrades. Which will be when I put in my new Amida dash kit - it's here in storage now - can't want to put that in!
Anyway - I like the NSL lights, and they have kept working for me no problem.
|
|
|
|
fieroguru
|
AUG 18, 07:54 PM
|
|
| quote | Originally posted by Bob2112:
Anyway - I like the NSL lights, and they have kept working for me no problem. |
|
Bob, thanks for the feedback on the NSL lights.
I am still looking for a decent set of notchie tail lights to modify so I can get them completed without needing to modify the ones on my car.
|
|
|
|
fieroguru
|
AUG 18, 08:24 PM
|
|
Another couple of weeks of daily driving the Fiero. Up to 4,100 miles on the swap now.
This weekend I went to my brother's house to work on my nephews S10 mud truck. I should have taken some pictures.... It is a mid 90s S10 with a 4.8, 5 speed, gear driven transfer case, 3/4" axles with some large tires. It was running rough and I went down to help figure out its issues and do some preliminary tuning. We were able to track down a bad connection to the MAP and the fueling (MAP and MAF) was off between 22 and 15% in the idle and part throttle ranges. Got the truck running much better, but he is going to invest in HP tuners, a wide band, and some street tires do we can do some more part throttle and WOT tuning.
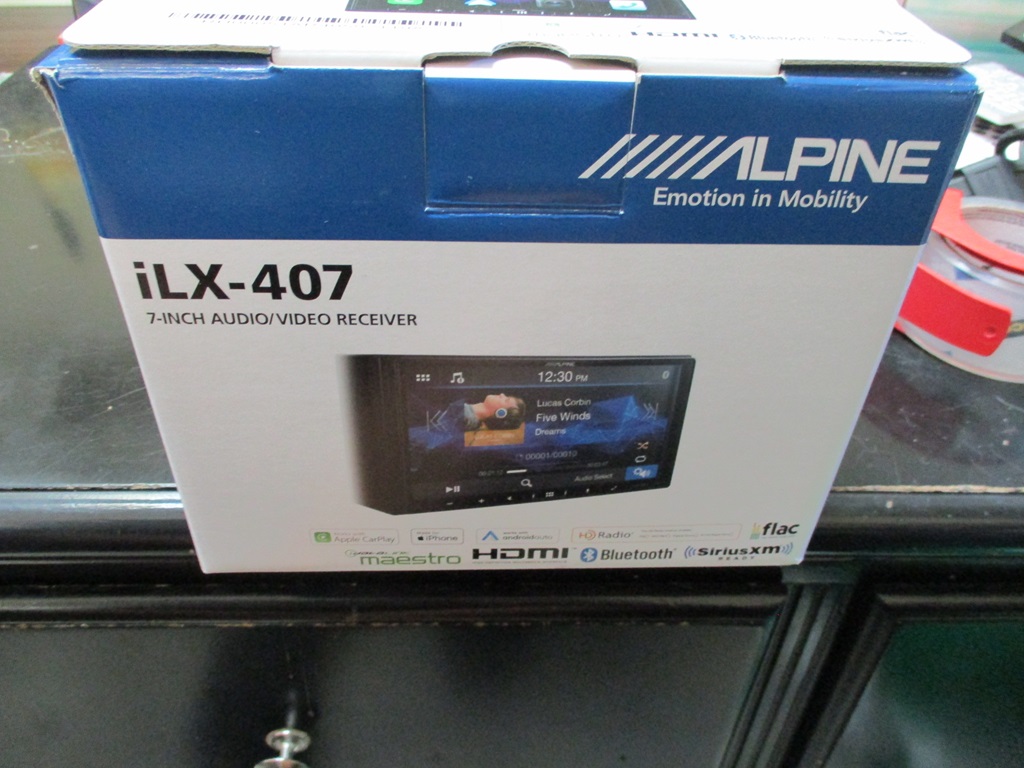
Picked up a new head unit for the Fiero, but haven't started the install.
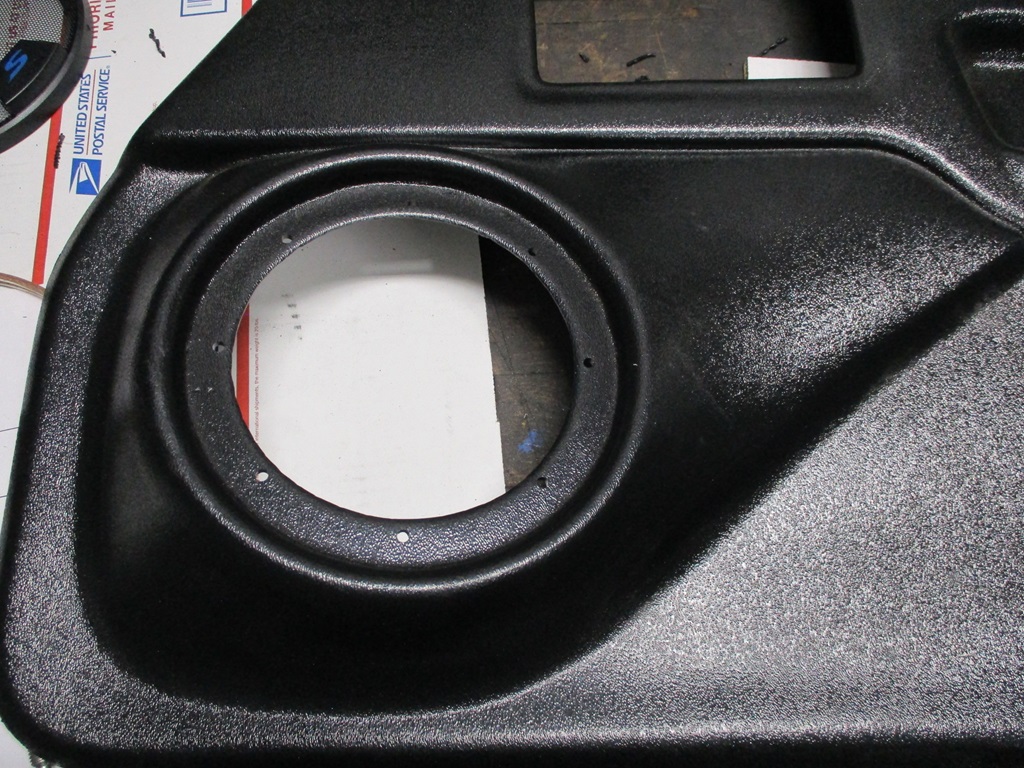
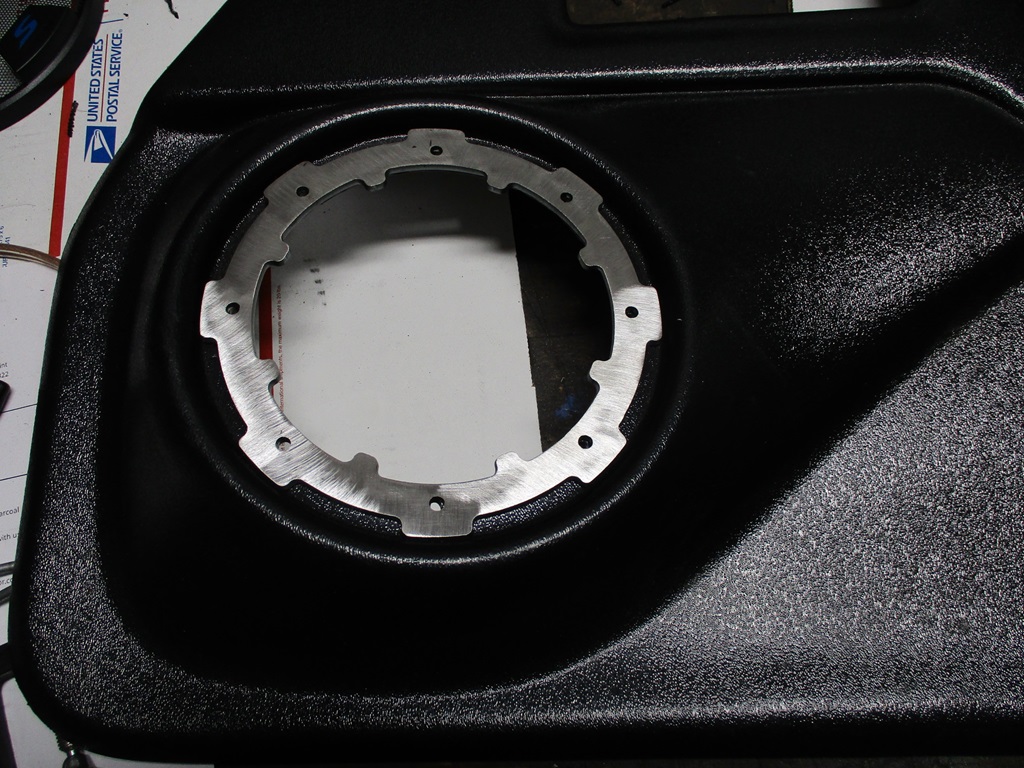
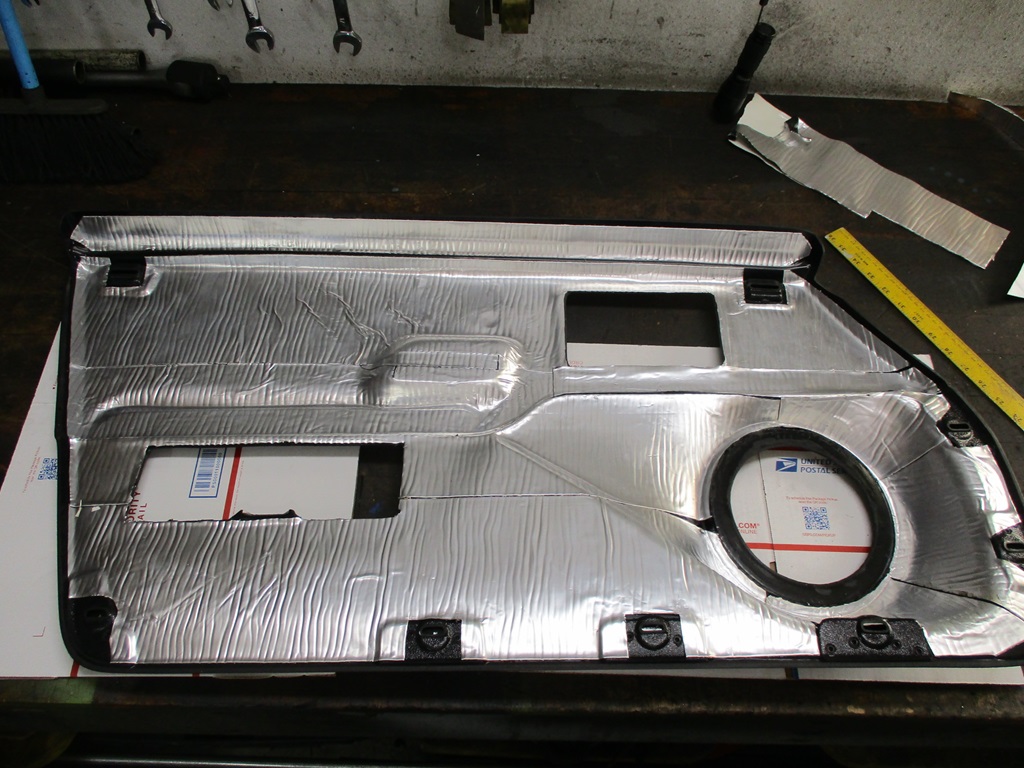
Also started working on the Fiero Store ABS door panels. Overall they should work, but the speaker openings are about 1/2" oversized for the 6.5" speakers. Here you can see the speaker shifted all the way to one side:
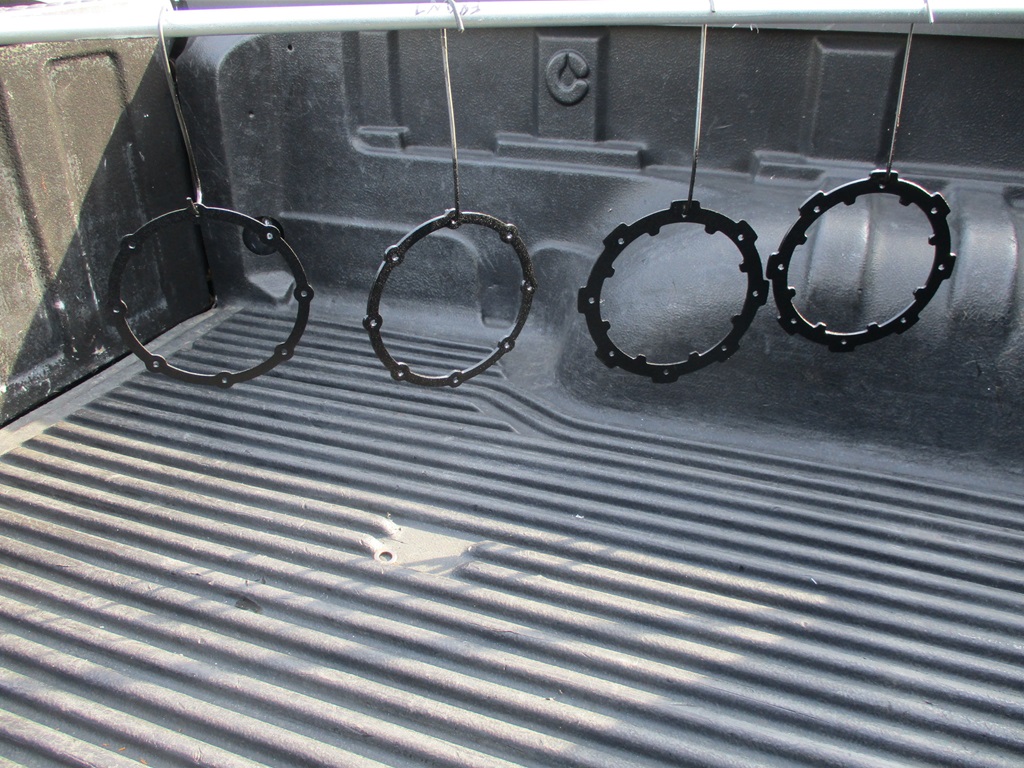
So to make sure the speakers are centered as well as reinforcing the plastic mounting flange, I make a centering ring for the front and a backup ring for the rear. Use the centering ring to locate and drill all 8 mounting holes. Here are the speaker holes in the flange. Notice they are closer to the edge than ideal:
Top centering ring:
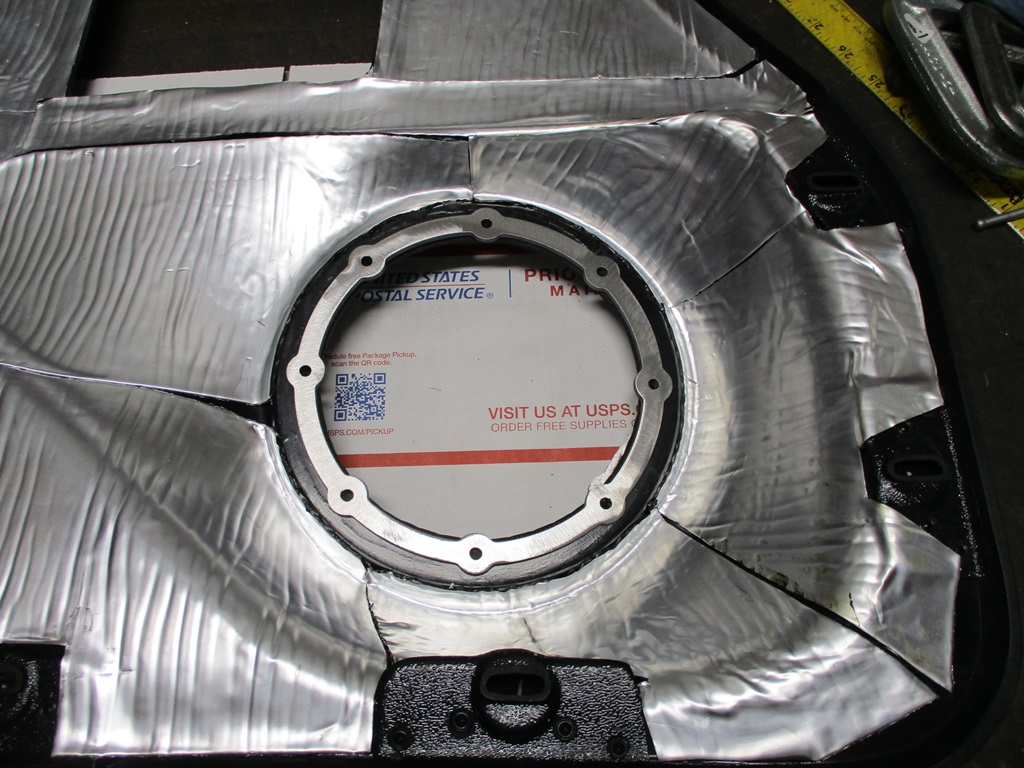
Rear centering ring:
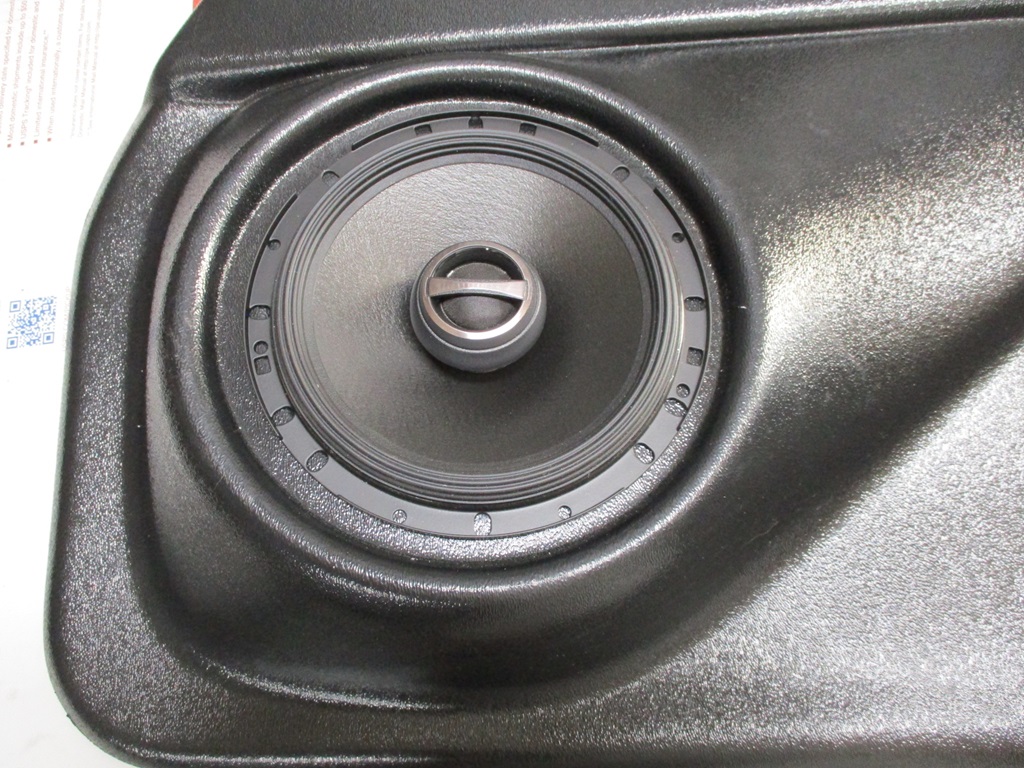
Here is the speaker set in place:
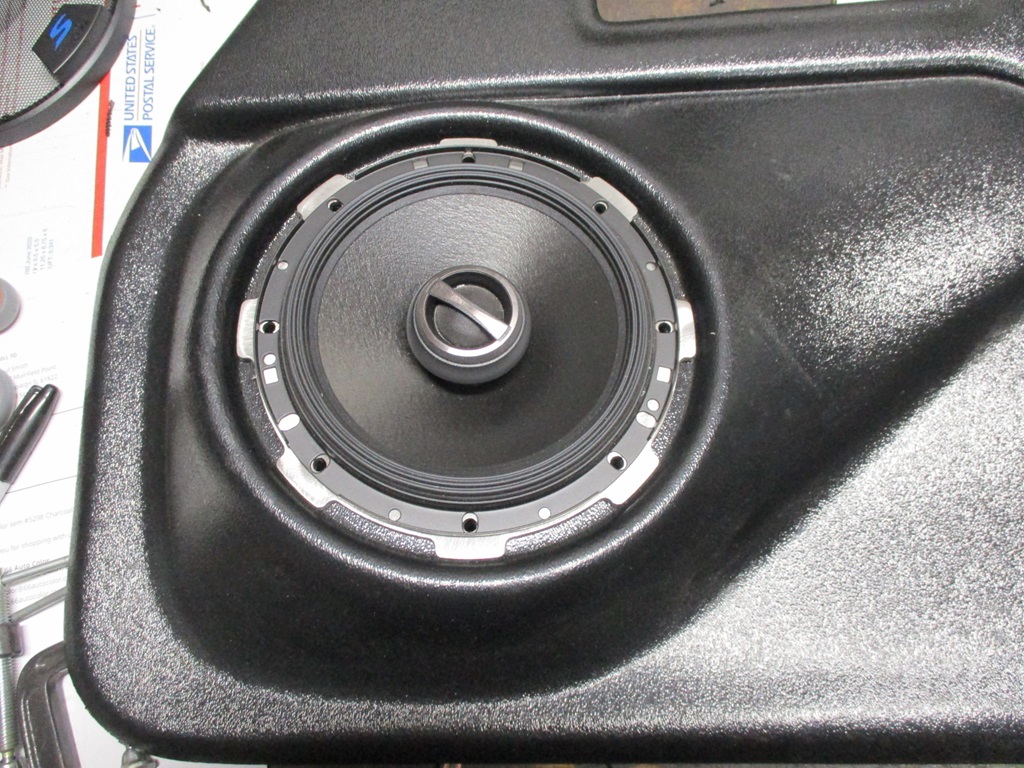
Here is the speaker and grill installed for mockup:

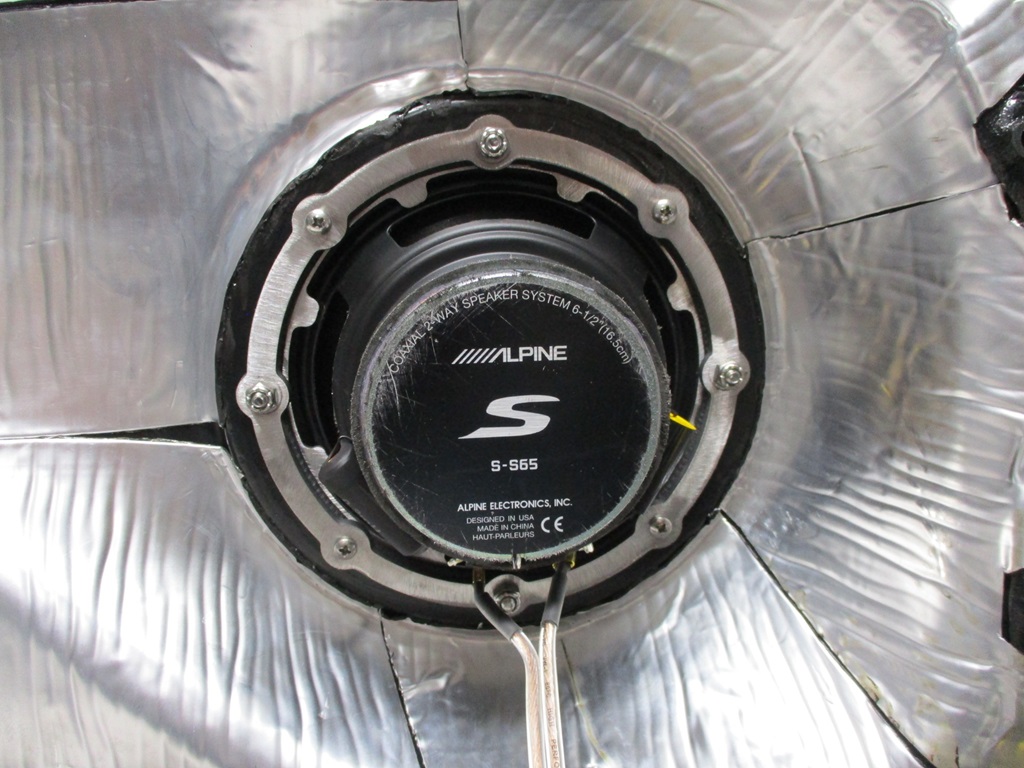
The backside also has sound deadening material:
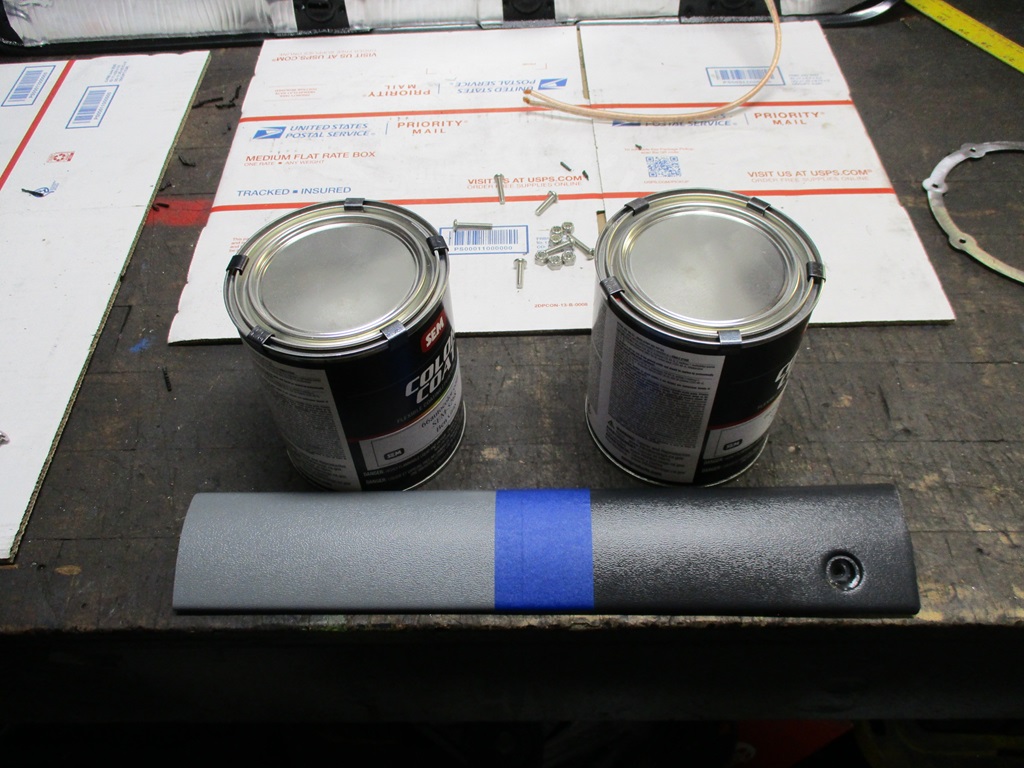
My custom SEM paint for the interior panels has also arrived. I sent them the sample in front of the cans and they found the closest match and tinted them to match. In the coming weeks I will be prepping the door panels, A and B pillars and Fiero Store ABS headliner for painting.
 [This message has been edited by fieroguru (edited 08-18-2024).]
|
|
|
|
fieroguru
|
AUG 24, 07:10 PM
|
|
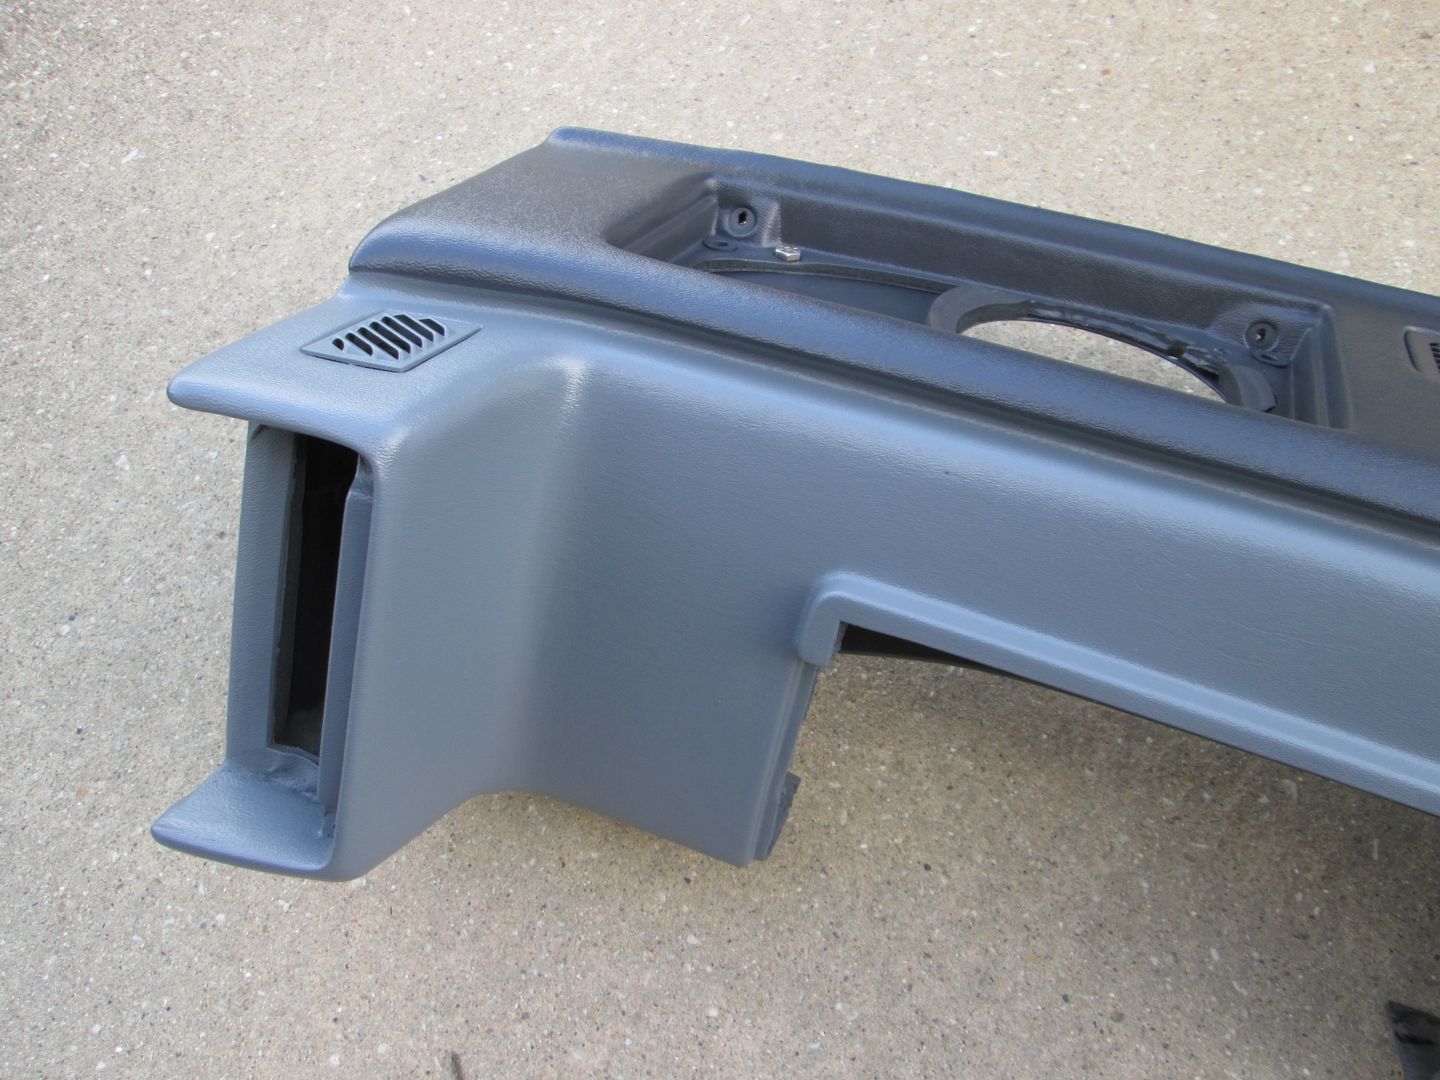
Back in 2006, I refinished the dash, cluster surround HVAC/Radio trim, shifter surround, center console, and the top of the door panels. I also installed new aftermarket sun visors.
| quote | Originally posted by fieroguru:
Painted the top side of the dash this evening and I think it came out pretty decent!
Then I painted several other parts... this car started out as a $500 purchase and will never be a show car, but I would like it to be less of a disaster from and interior (and eventual exterior) perspective.
|
|
Everything came out looking very good and has held up quite well except for a couple of areas.
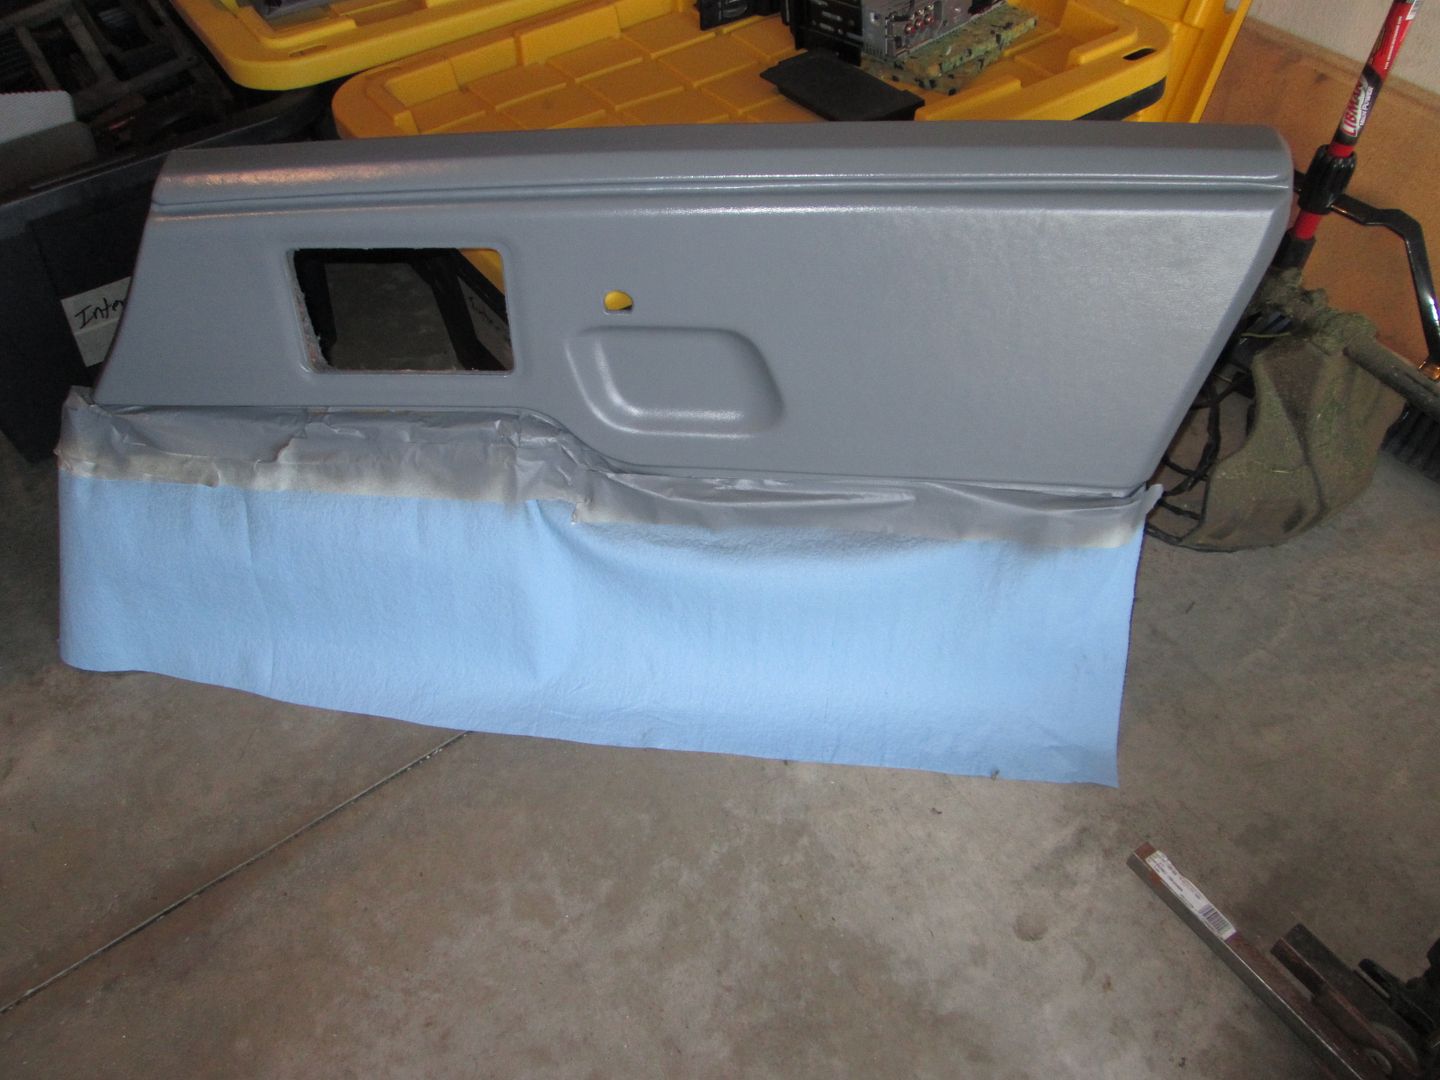
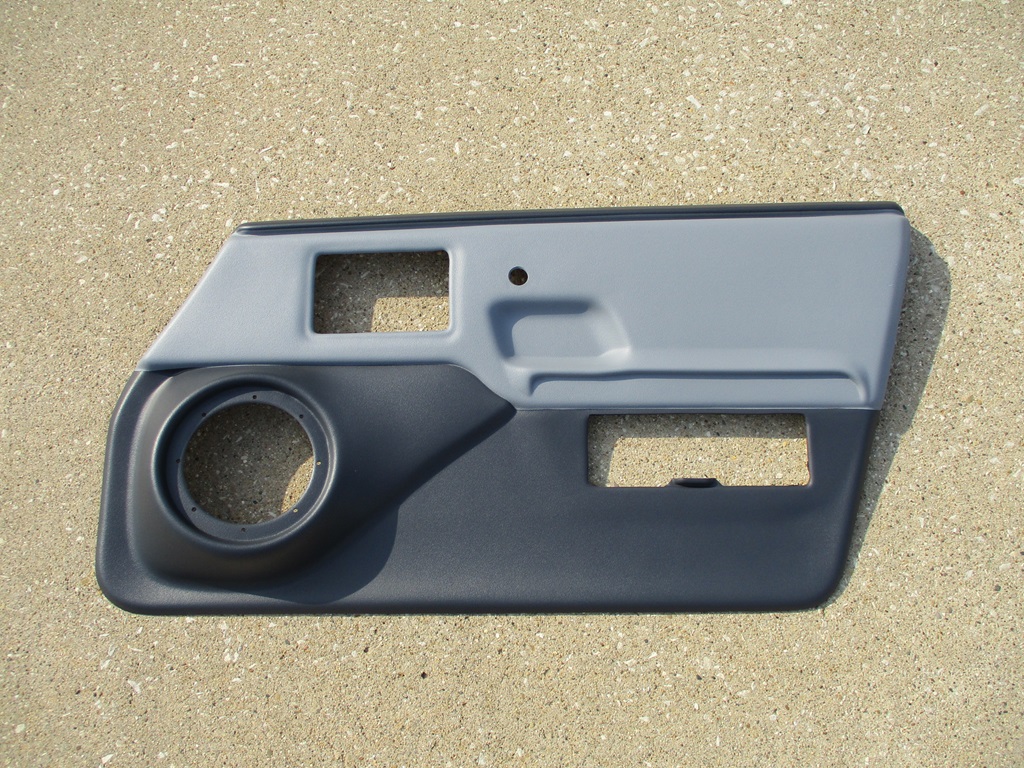
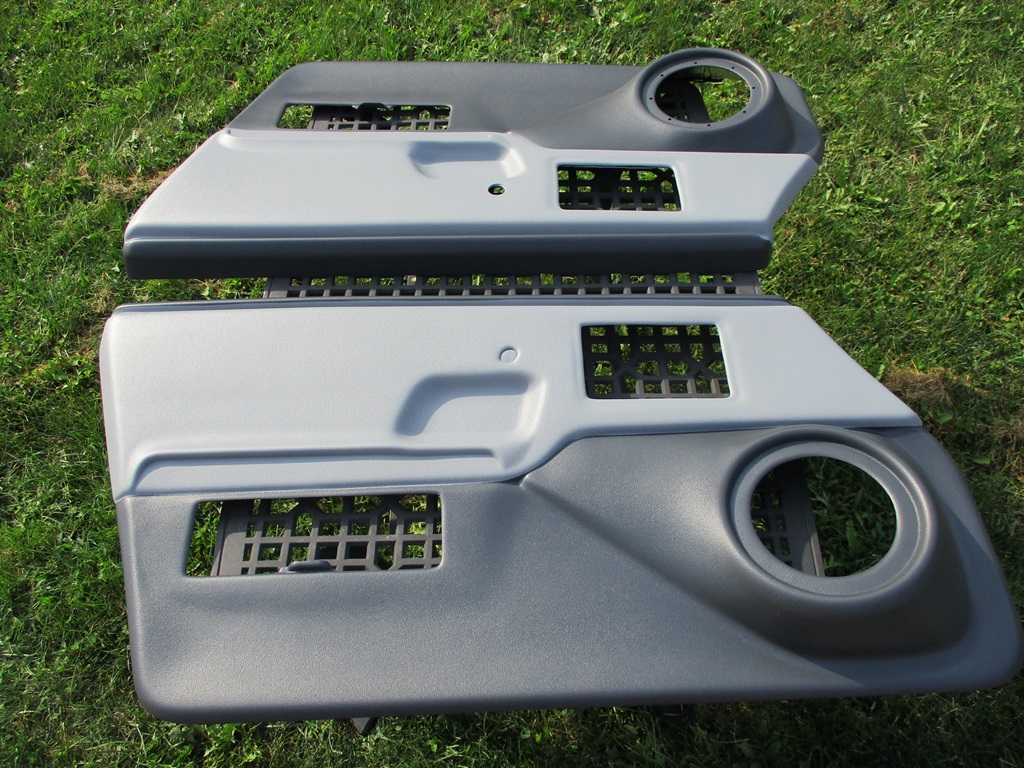
With the Fiero Store Door Panels, I am going a non-stock color pattern. I am carrying the charcoal color from the top of the dash to the top of the door panels. Reason being is when I rest my sweaty arm on the top of the door panel, the light grey can become a little discolored to the point I notice it. So the darker color will help with this. I am also painting the lower section charcoal as well as there is a very good chance that my size 13s will make contact with them at some point, so the darker color should hide normal wear and tear better:
I will let these bake in the sun for the rest of the day today and likely all day on Sunday
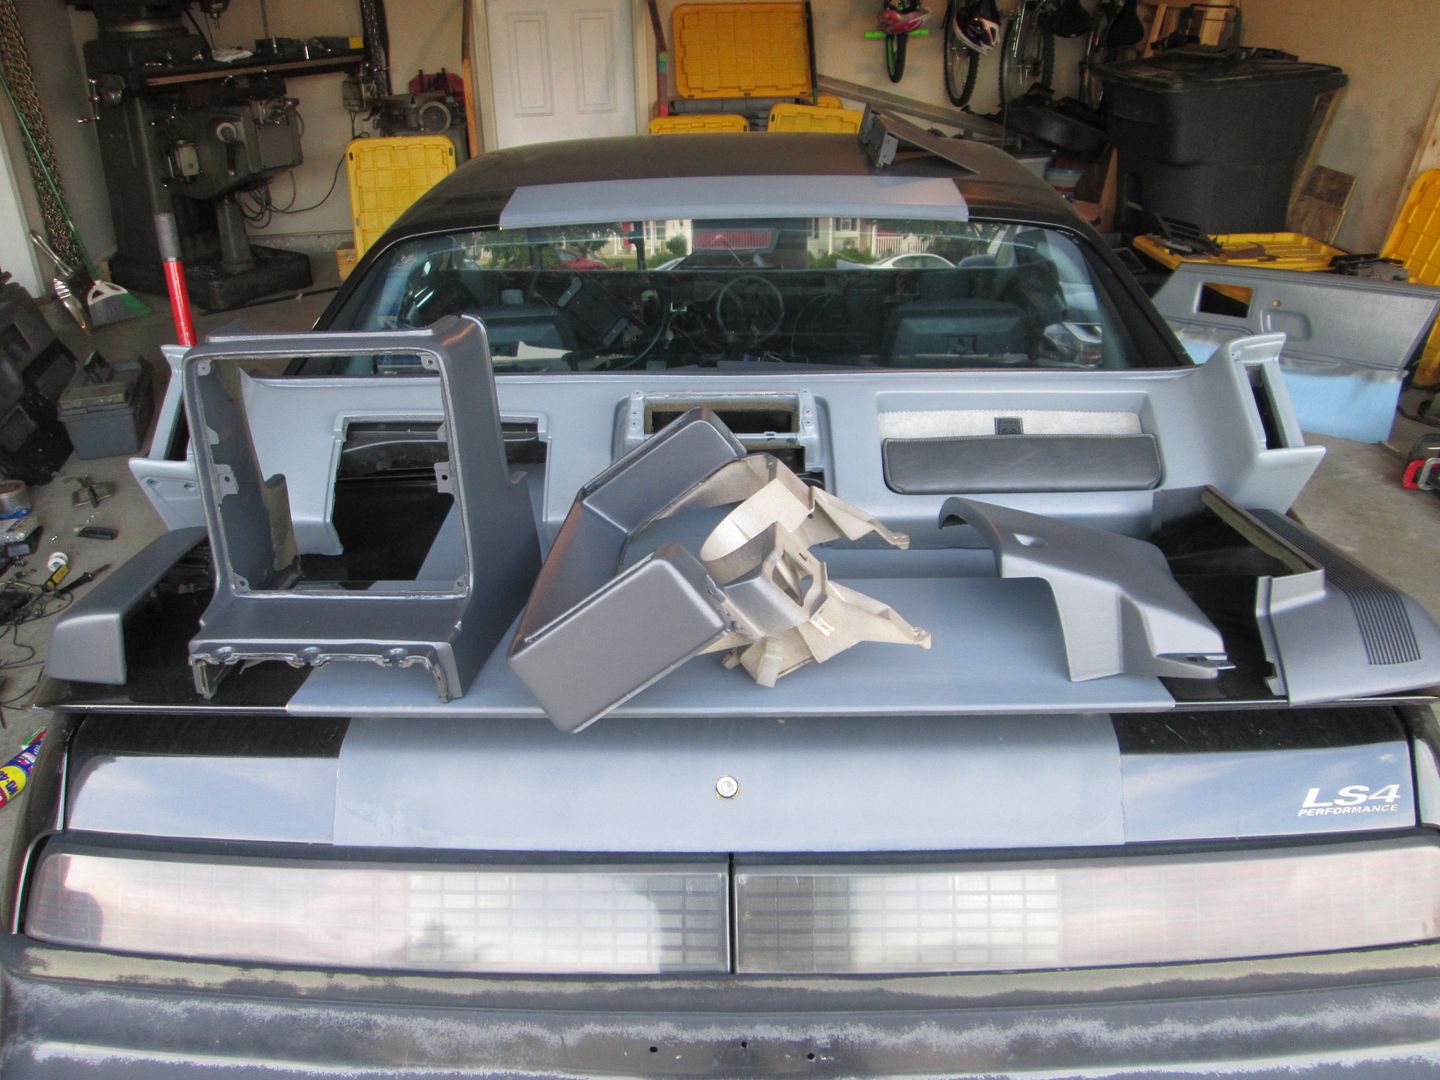
Here is my make shift painting area.
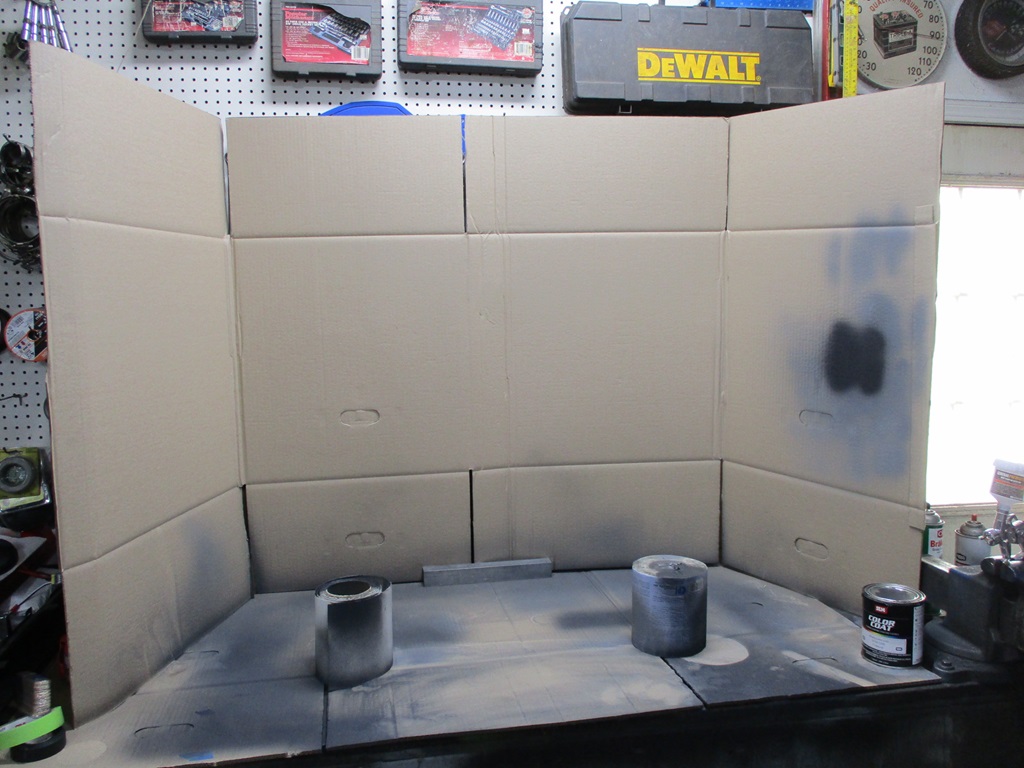
The speaker centering rings and backing plates were treated to a coating of truck bed liner so they have a similar textured surface as the rest of the custom interior parts.
On Sunday I am planning to pull most of the plastic interior from the car. I plan to clean and refinish the A and B pillar trim pieces, the lower door/carpet trim, the Fiero Store ABS headliner, the roof lights, the 3rd break light housing, and the center console.
The current plan is for the A & B pillars, floor trim and headliner to be medium grey (stock), the roof light, 3rd brake light, center console to be charcoal. The console is currently light grey and has the same issue with my sweaty arms.[This message has been edited by fieroguru (edited 08-26-2024).]
|
|
|
|
fieroguru
|
AUG 25, 03:02 PM
|
|
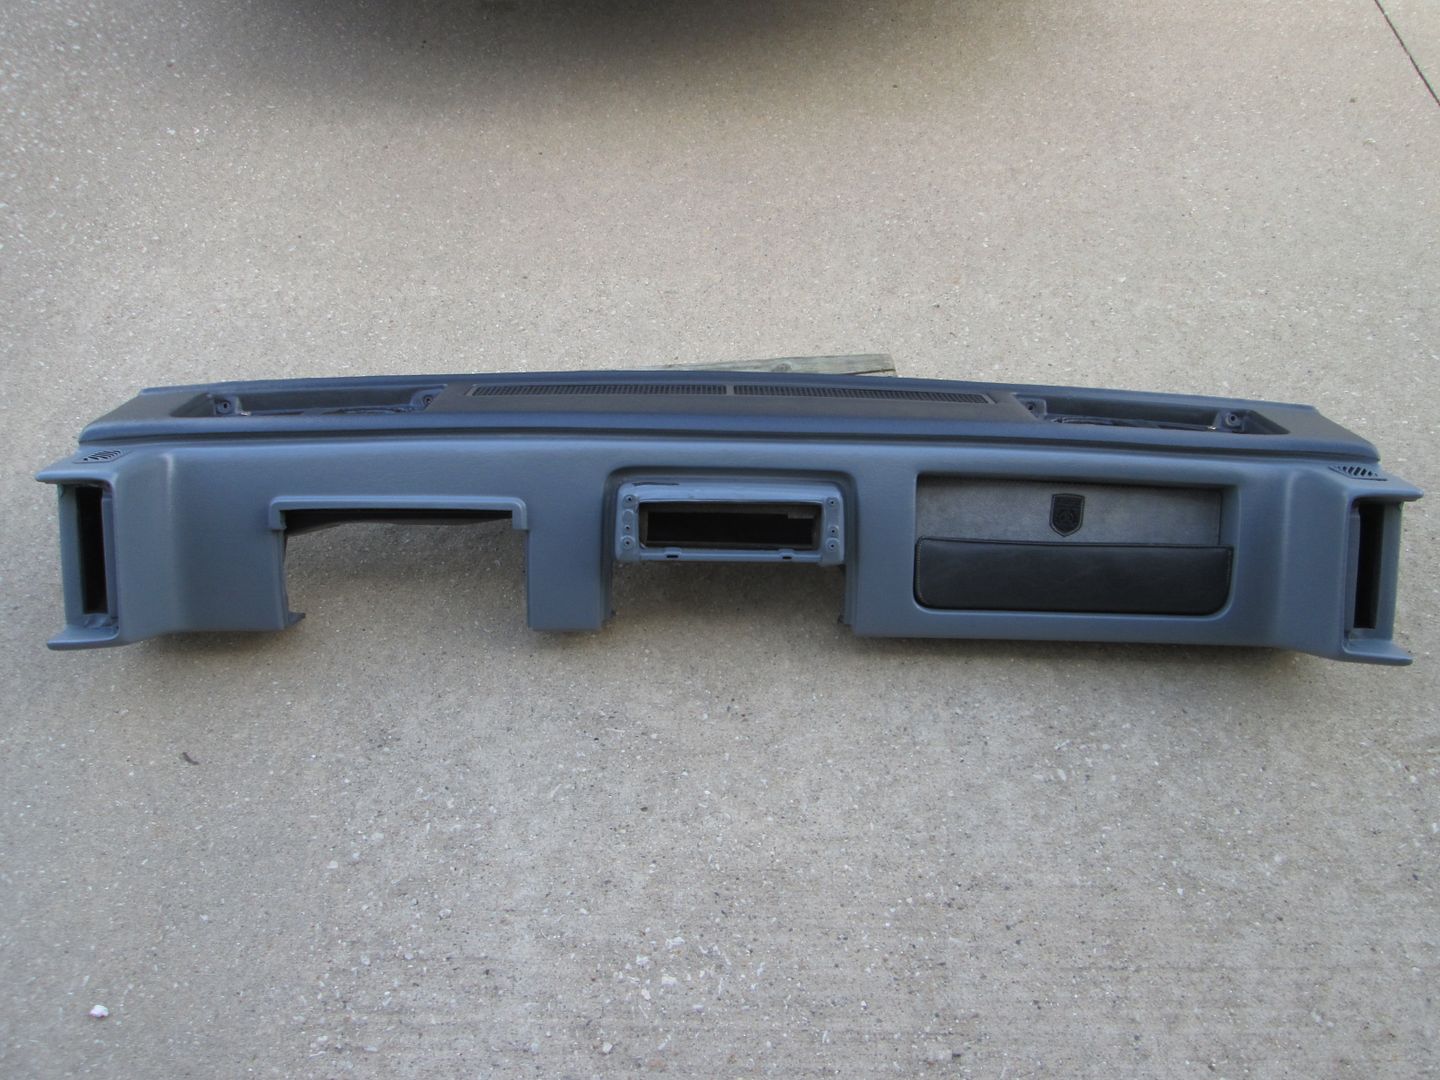
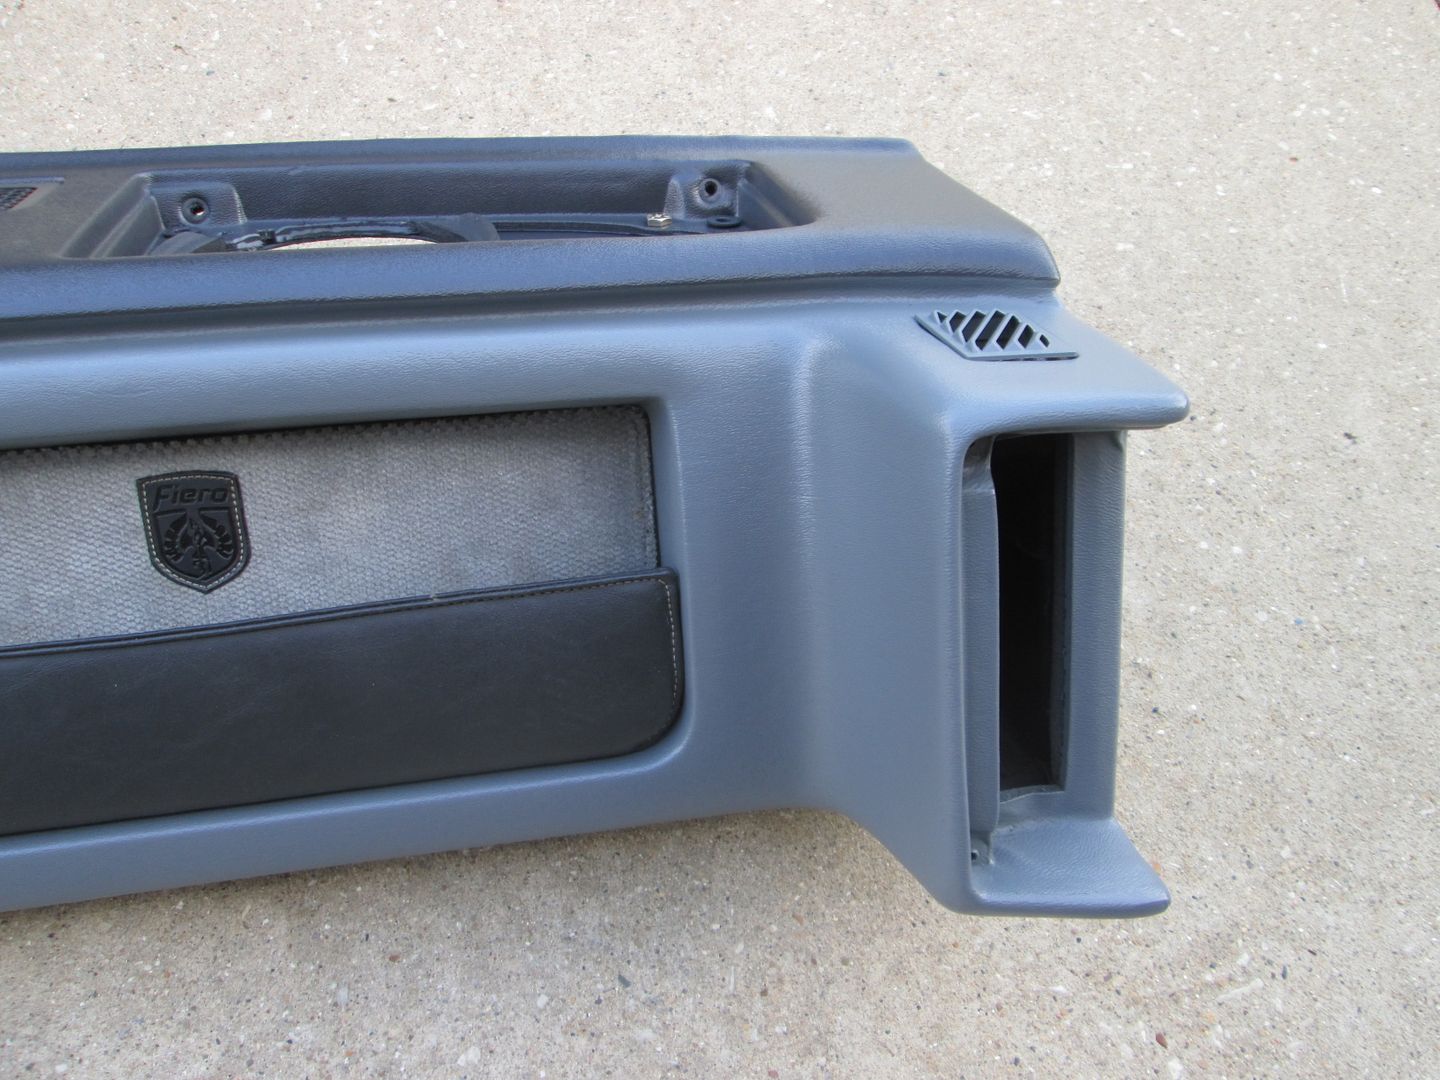
Here are a couple of before pics:

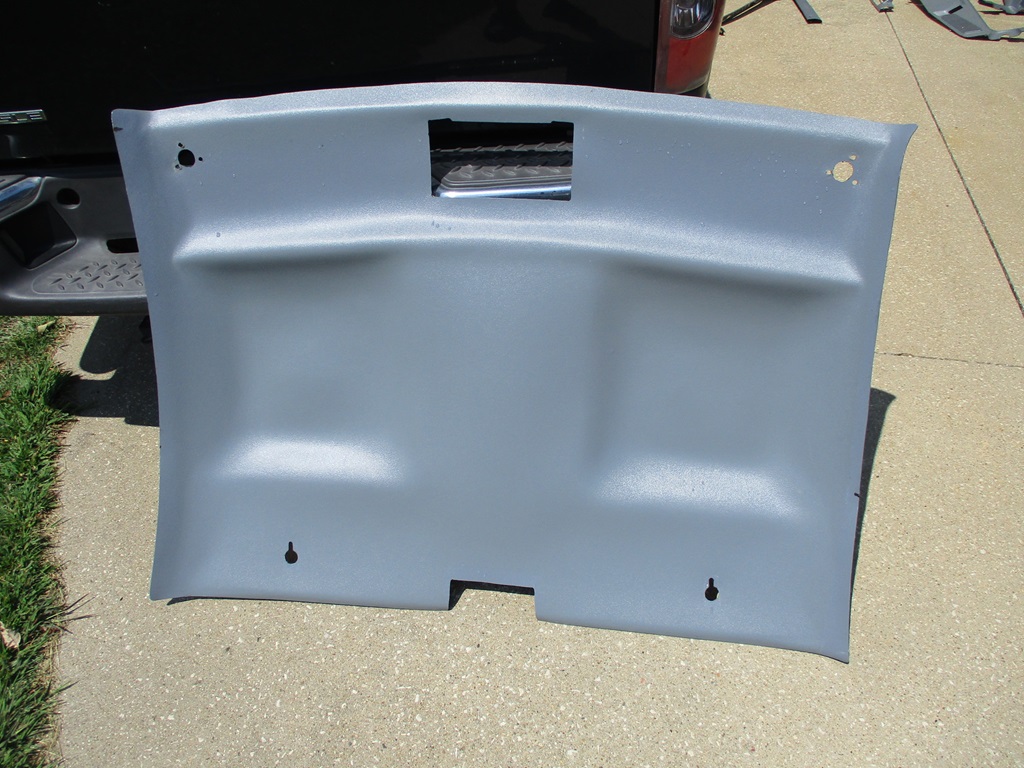
And the after:
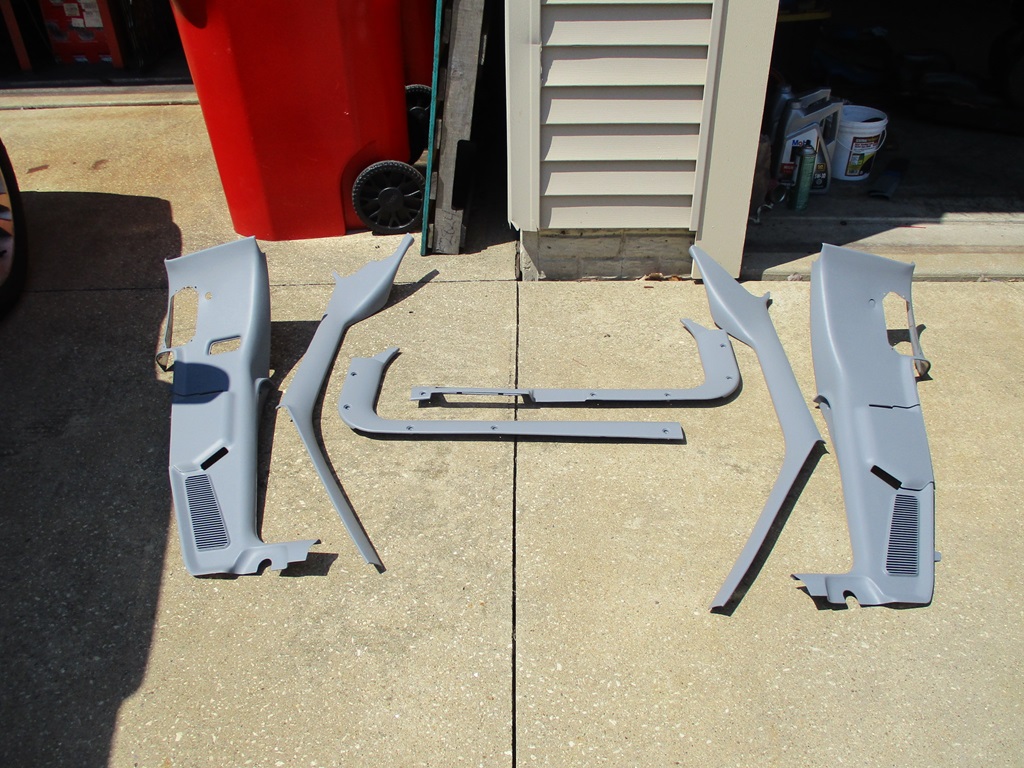
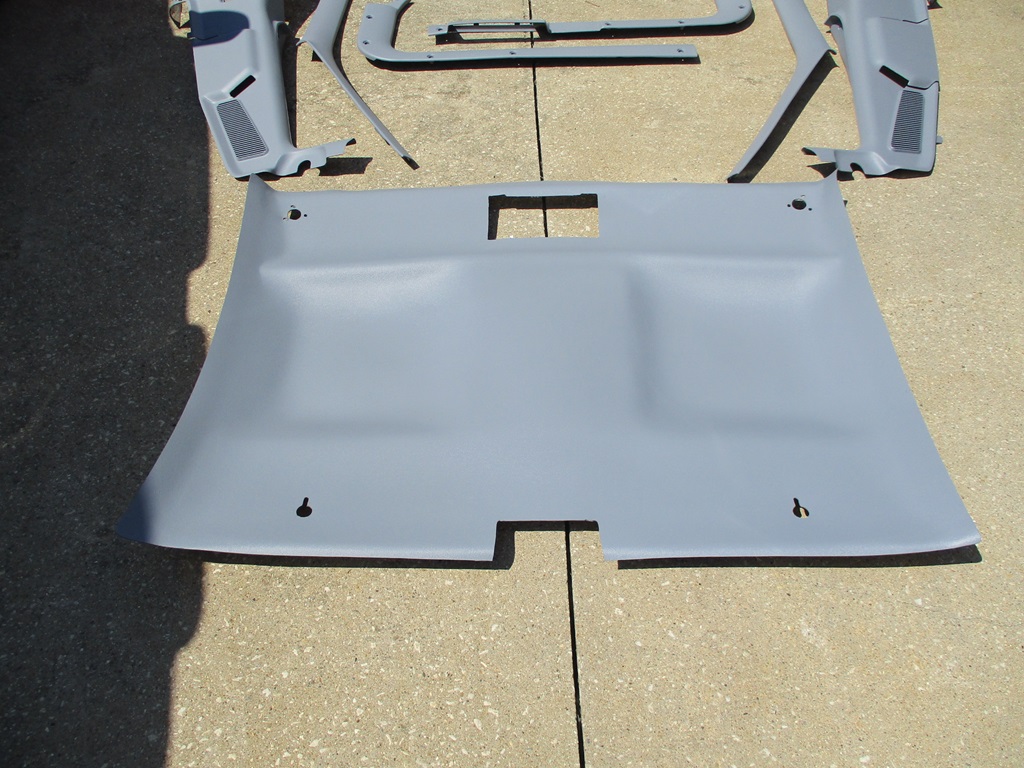
I am going to let them bake in the summer sun for a few days before putting them back in.
|
|
|
|
longjonsilver
|
AUG 26, 05:01 PM
|
|
|
The interior panels look GREAT! you are inspiring me to do some of mine. ------------------
Astronomy says we will find a coded signal from outer space. Then we'll KNOW that life exists there, for coded signals aren't by chance.
Biology says there are coded genetic signals in every cell, but we KNOW that no intelligence created life.
I'm the original owner of a white ' 84 2M4 purchased Dec 10, 1983 from Pontiac. Always garaged, no rust, 3800SC, 4-wheel drifts are fun!
|
|
|
|