
 
     |
| IMSA Racecar resoration:The rebirth of the Seyfert/Buist Fiero (Page 4/10) |

|
R Runner
|
JAN 05, 09:17 PM
|
|
I never saw the pictures of the fenders you made! When do I get a set? 

|
|
|
|
Dave Deerson
|
JAN 05, 10:54 PM
|
|
Paul,I thought I sent pics of that experiment.They weren't pretty but I think I could pull some parts from them.I never made moulds before so I thought I'd try my hand at it.Wow,I totally underestimated the attention to detail needed to make a mould! I guess practice makes perfect,so maybe this summer I will have some time to try again. I have one spare fender and quarter to use as plugs. I think in the end I will just try to pull the trigger and by those moulds in CA.
Dave
|
|
|
|
ccfiero350
|
JAN 06, 12:48 AM
|
|
Hi Dave,
The car looks great! I'm glad the doors and hood worked out so well, I was worried about that one curled up corner but it looks like new now.
Who made the hub carriers?
Thanks,
Chuck------------------
yellow 88 GT, not stock
white 88 notchie, 4 banger
|
|
|
|
Dave Deerson
|
JAN 06, 07:51 AM
|
|
The front and rear suspension uprights were made by Bell Axle Co. as designed by Pontiac. Terry Satchell wanted to keep costs in check. Where a "real " upright for a mid-engined sports racer (Lola,Spice,etc...) were very expensive per corner, he designed these uprights to use the less expensive hub/bearing units from the fill size front wheel drive sedans and S-10 truck(front of 4x4) with the larger bolt circle. These uprights even carry a GM part number! The bearings could be used off the shelf,but Huffaker would disassemble them and "blueprint" them to get the freeplay where he deemed acceptable.The best hubs to use are off the very early "E" body(V8 powered front wheel drive Toronado/Eldorado) as these units did not use ball bearings,but tapered rollers. The tradeoff in more drag was a bearing that handled the increased loads encountered on the track.
P.S. Ok,so I can build a car,but I never claimed to be a great typist or speller!!! I just realized that I misspelled the title to this thread!! It should be "restoration" not resoration"!!!!
Thanks for checking out my project,
Dave D.
|
|
|
|
Dave Deerson
|
JAN 06, 06:26 PM
|
|
After all the sanding,prepping,and more sanding on went the white sanding sealer. Then I laid on small base of blue for the stripe,waited for it to flash off then masked it with 3/8 vinyl striping masking tape.

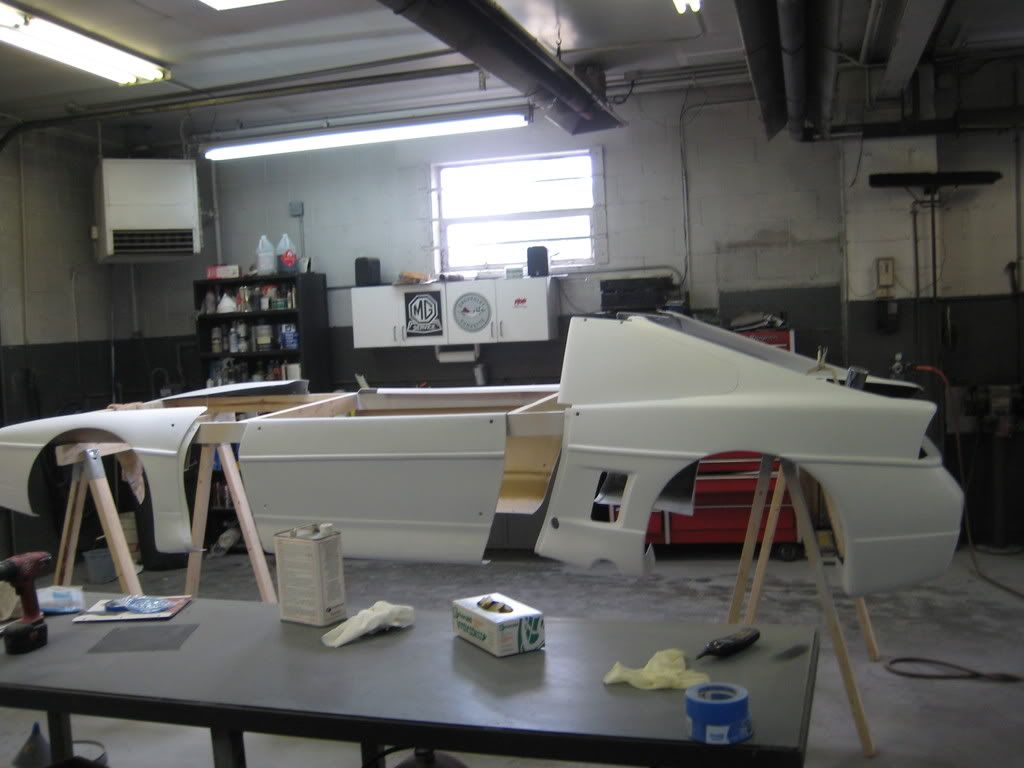
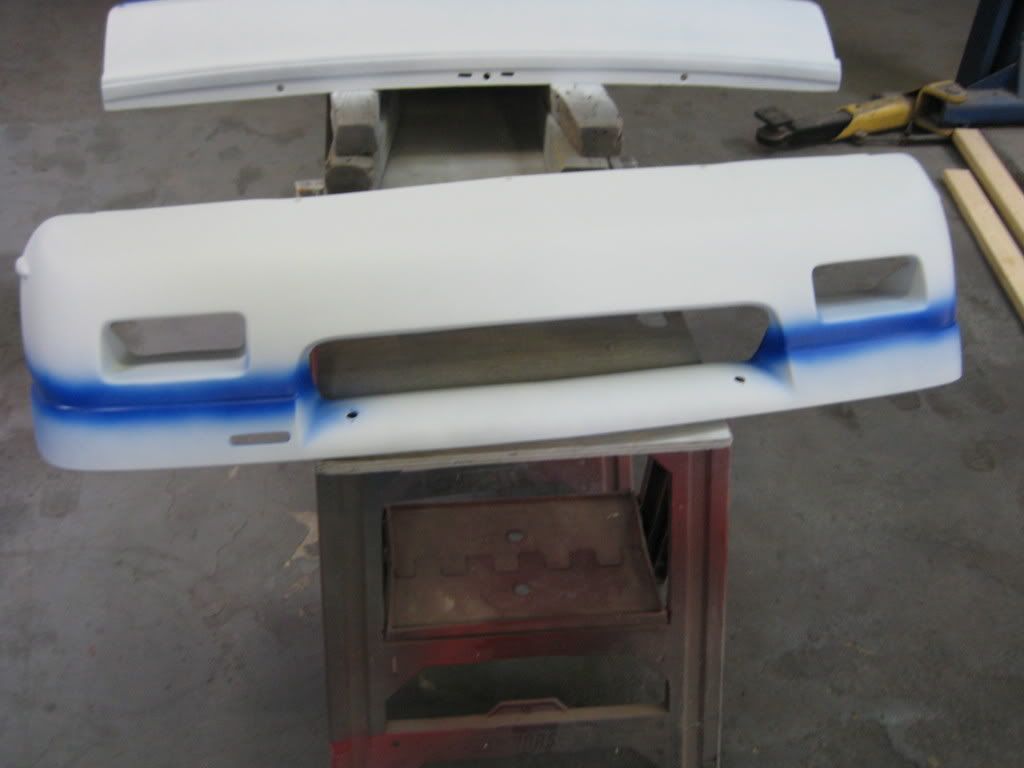
I then masked of the top and sprayed on the silver,let it flash off so the bottom can then be masked off for the red.
The silver is just GM code 13 silver and the red is GM code 9075 Torch red.Let me tell you,this red is bright in the sun! It makes Viper red look pink next to it.After all of these steps,the masking comes off and the clear goes on.Yes the haze in the pictures is from painting,and yes I do have a full respirator.Since I paint in the shop with out a booh,I just wet the floor down and put a few extra coats of clear on so I can wet sand and buf any dust on the clear.I have seen cars come out of high dollar spraybooths with dust and bugs still getting in the clear!
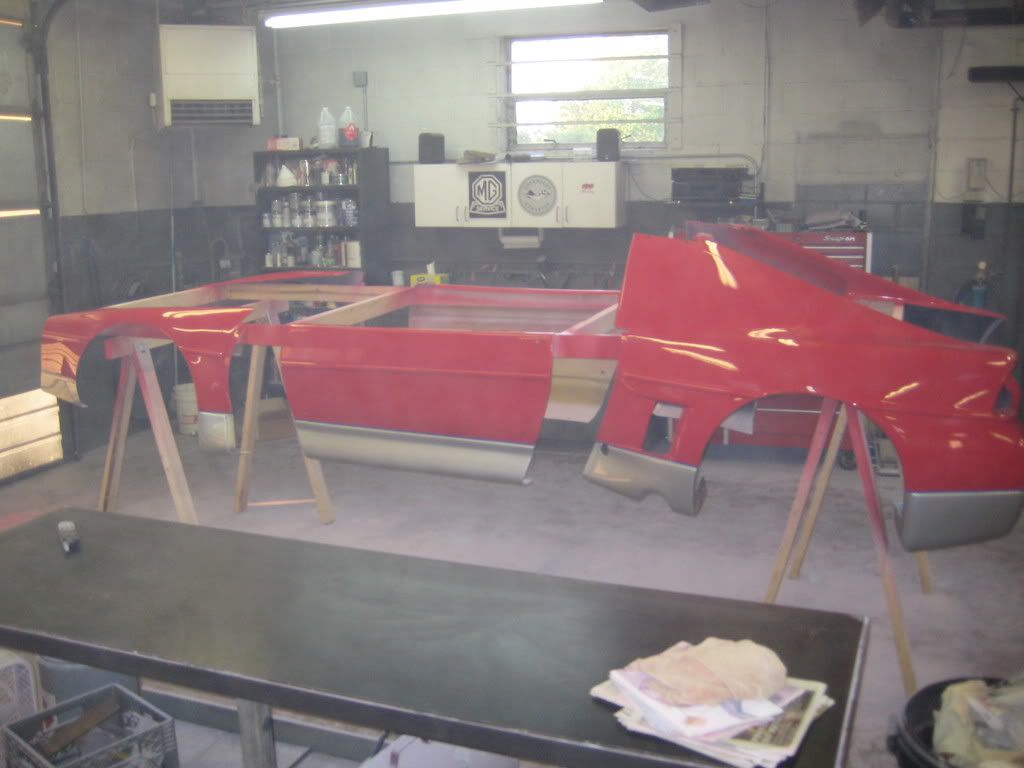
Also around this time I painted a set of wheels gold from the black they came with.The outer rim shell were then polished. I could not make up my mind which I liked better, gold or black centers. The gold look great,but the black is easier to maintain with the large amounts of brake dust from the racing brake pads. In the end I left one set in black and one set in gold.The wheel are Jongbloeds(pronounced Youngblood) and were used on many GT and GTP cars in the 80's.They are magnesium,so they must be crack checked every couple seasons or especially if involved in a shunt on track.They measure 16x10 in front and 16x12 in back with the tires being 23/11-16 and the rear 25.5/12/5-16(height/width & rim dia).
Then there is the cu$tom fuel cell.........Wow I had no idea the price increase for them. Ever since the war started,all ballistic fibers went up over 300%,so a cell that cost $1500 2 years ago now cost over $3000!!
After the extra fees for custom design on CAD from ATL,all the options(fuel level sender,in tank pump with integral surge tank,etc..) I think the final cost was near $3200.But at least they put my name on it!!
Next time I will get to the plumbing and assembly
Dave
|
|

|
exoticse
|
JAN 07, 12:14 AM
|
|
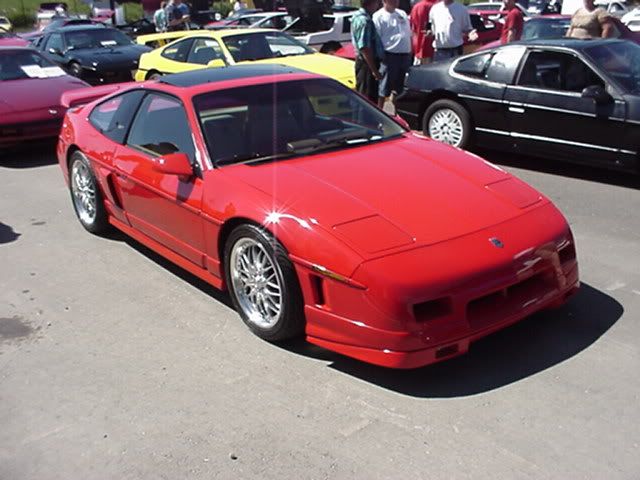
Gorgeous project !
GM Torch red is the color i have been planning to paint my choptop fiero for a long time.
I agree with you that particular red is simply amazing and really puts all other reds to shame.
A fellow central florida fiero club member has his painted that color and i drool over it every time i see it !
|
|
|
|
FieroGTRwideboby
|
JAN 07, 02:01 AM
|
|
I HATE you my friend.....such a nice car. If you ever wanna get rid of it, let me know. hahaha Seriously tho good job, your work speaks for its self.
-Alex
|
|
|
|
SuperchargedV6
|
JAN 07, 06:24 PM
|
|
|
Bump for a excellent thread. Rick B
|
|
|
|
Dave Deerson
|
JAN 07, 08:46 PM
|
|
Onto the build up.It was getting more enjoyable at this point as I started to bolt things together for the final time with the parts nice and clean and freshly painted.The engine as I said before is a balenced and blueprinted Z06-LS6 take-out engine from Phoenix racing with 20 hours since the freshening. It makes 405 to the wheels which moves the car pretty well with the weight at 2250lbs with me in it.I have a head and cam set that should push output to 475-485 to the wheels,but I want to just spend a full season just concentrating on chassis set up and getting comfortable in the car.I chose MSDs stand alone ECM kit as it comes complete with wire harness and is user programmable.I had to extensively modify the harness as it is really set up for a front engine car with the ECM to be mounted under the dash. I have a mid engined car with the intake manifold turned around. All told,I love the system! It's easy to work with and is so small,it was easy to find space for. Actually, this unit from MSD really started life as a GM Performance Parts stand alone ECM for crate engines!GM sold the production rights to MSD when the crate engines chaned over to the new style relucter wheel with the different ignition reference pulses.
The headers have been coated,the shift linkage that slides alongside the engine was hard-chromed for less friction and wear and the suspension has been hung. I converted the clutch actuation from cable to a push-type release cylinder.The suspension took a week on it's own to install and set up as everything is adjustable. After a rough static alignment, the bump steer must be graphed and adjusted on all 4 corners,getting both front and rear wheel pairs at equal settings(it takes alot of patience!!) The brakes are installed and bled. if you notice, I am not using the smaller brakes that came with the car.Instead I am using Alcon B-type calipers with 13x1.1 floating rotors all around with a 3/4 bore master cylinder in front and 13/16 in rear.This setup hauls the car down from 160 very well.
The mufflers are from Coast Fabrication and are the same ones as used on Daytona Prototypes.They work so well in fact that i was almost dissappointed when I started it for the first time as they are too quiet!.The radiator is a Ron Davis double pass unit and I have since come to the conclusion that I may have oversized it a little,but that's not a bad thing! Also mounted up is the engine oil cooler plumbed that takes in cool air from the
side duct in the quarter panel.The air filter gets it's air from the duct on the opposite side.
In the driver's compartment I finished the wiring,gauges,fuel lines, installed the Accusump,the ECM and the brake and clutch reservoirs, Completing the gearshift linkage is a shifter I fabbed up that is modeled after sports racers and GTP cars,only had to be designed for the Porsche's shift travel,not like a shorter throw Hewland race trans. This will change this winter as I convert the 930 box to dog-engagement.
Next...........The unveiling roll-out and first couple track days!!!
Enjoy,
Dave D.
|
|
|
|
doublec4
|
JAN 07, 09:01 PM
|
|
|
This is so friggin awesome! I love watching this come together!!
|
|
|
|