
 
     |
| Started my fiberglass dash build. (pics) (Page 1/6) |

|
Taijiguy
|
AUG 23, 10:02 PM
|
|
I recently decided to postpone working on my 4.9 engine swap in order to work on my custom dash. Mainly because I can work on the engine and swap in the winter, but I don't want to try and do fiberglassing in the winter. Doing it inside is out of the question (for obvious reasons) and it'll be too cold to do it outside. So I figured work on the dash while the weather is nice and I can take the whole thing outside when I'm ready to do the major glass work.
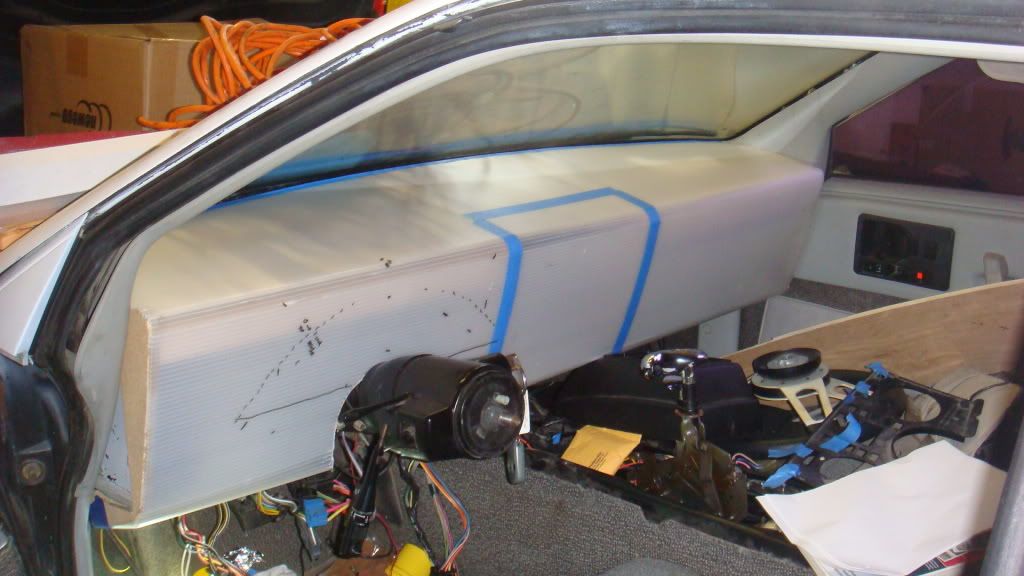
I had a very rough idea of what I wanted when I started this project. I knew I wanted something simple and clean. I decided to use the stock dash as a base and apply wood forms to the stock dash and lay cor-plast (corrugated plastic) over the wood for the general shape. I wanted to use the stock dash for a base for two reasons, first, so I can retain all the stock mounts, and two, so I can keep the stock HVAC ductwork and will still have lots of flexibility in how I apply the actual vents.
This is the cor-plast shell in for a test fit;
I ordered a set of 7 Glow Shift Elite gauges, which are black when off, and have selectable back lights. They also have peak recall, and high and low warning signals via audible tone, and flashing gauge needle. I built a pod to house these gauges. It actually underwent a couple of incarnations. I had originally designed and built it to have individual recesses for each gauge within a common cluster, but it ended up as a single common unit. This is the rough housing during fiberglassing:
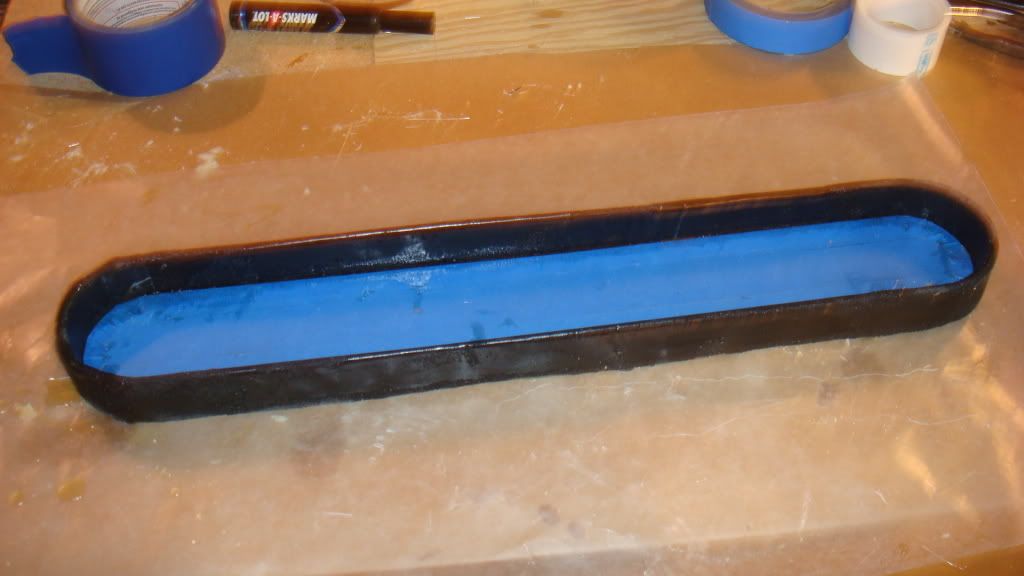
The blue tape is covering an aluminum plate that will serve as the actual gauge mounting. The housing will be molded into the dash, and the plate will be held in with screws to facilitate gauge installation and removal.
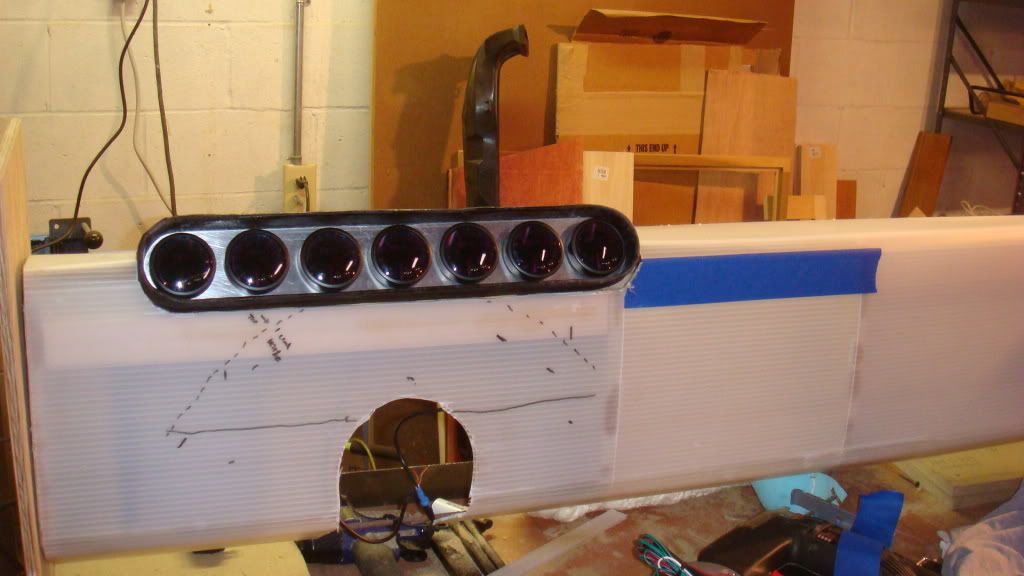
This is a test fit of the cluster with the gauges just set in place. (I know they don't look even, but they are- they are just sitting in there loose, so they're sitting at different angles which makes them look crooked. Once mounted, they will be dead-nut on.
The dash is mounted to a fixture I built that holds it on either end. It's sitting on a rolling service cart so I can move it around as I need to. When I'm ready to fiberglass the dash I can just unfasten the end pieces from the cart leaving them attached to the dash, and carry the whole thing outside. Set it on some newspaper and glass away.
The tach and speedo will be mounted below the gauge cluster on an angle in a housing similar to the cluster, also using an aluminum plate. The plan is that the major area of the face of the dash will be covered in aluminum plate also. The balance of the dash will be covered in black All Sport vinyl. For the center section where the radio and heater controls typically go will receive a 12" touchscreen from a tablet PC. The PC itself will be mounted behind the dash. I'm using an Arduino based controller to handle HVAC as well as other various functions. Which of course will then make all of those functions managed by the tablet PC. I'm also looking to move to a pushbutton starter system, and relocate the ignition key from the column. Don't ask me why, it was just a wild-ass idea I got that seemed relatively minor compared to all the other stuff I'm doing.
Updates as they occur. I have a few more pics of the dash after it was cut, but before applying the cor-plast. They're just on the camera's internal memory and I have to find the cable to get to them. I'll throw 'em up once I can get to them.
|
|
|
|
Ang84Indy
|
AUG 23, 11:16 PM
|
|
|
Hey, looks great so far. So this will end up being mounted on top of the original dash?
|
|
|
|
IMSA GT
|
AUG 23, 11:51 PM
|
|
|
This is actually the first time I have seen you post outside of the O/T. I didn't know that you actually owned a Fiero. It looks like it is going to turn out really nice in the end. Do you have a rough sketch of the final product?
|
|
|
|
Taijiguy
|
AUG 24, 07:09 AM
|
|
| quote | Originally posted by Ang84Indy:
Hey, looks great so far. So this will end up being mounted on top of the original dash? |
|
That's a good question. The plan is to use the stock dash during the construction and build of the new shell. Once the shell is done, the stock dash will be partly integrated with the shell, mainly along the leading edge that runs along the windshield, the side edges, and a few points along the bottom. Then I can go in afterwords and cut much of the stock dash away leaving a skeleton inside the shell. The skeleton will provide the stock mounting points for the dash assembly, as well as the HVAC ductwork. This will give me a lot of extra room behind the new dash for the tablet PC and other additions.
Thanks IMSA, No drawing really. I have the concept in my head, and wasn't really able to translate it to paper very well. It's not that I can't draw, I'm actually pretty good with construction drawings, but for some reason I had a hard time translating it to paper. It's a very fluid design right now. A lot of standing there looking at at it and letting ideas form as I go. I have a lot of pictures of the shell in the car with a measuring tape running in various directions so I have some sense of what kind of room I have, like, between the top of the dash and the windshield, the dash to the steering wheel, etc. That's how I can build it out of the car without having detailed drawings.
I'm surprised you've missed all my posts about the 4.9 swap, and the big discussion about the stock 4.9 vs Delta cam profiles.
|
|
|
|
Taijiguy
|
AUG 24, 08:30 AM
|
|
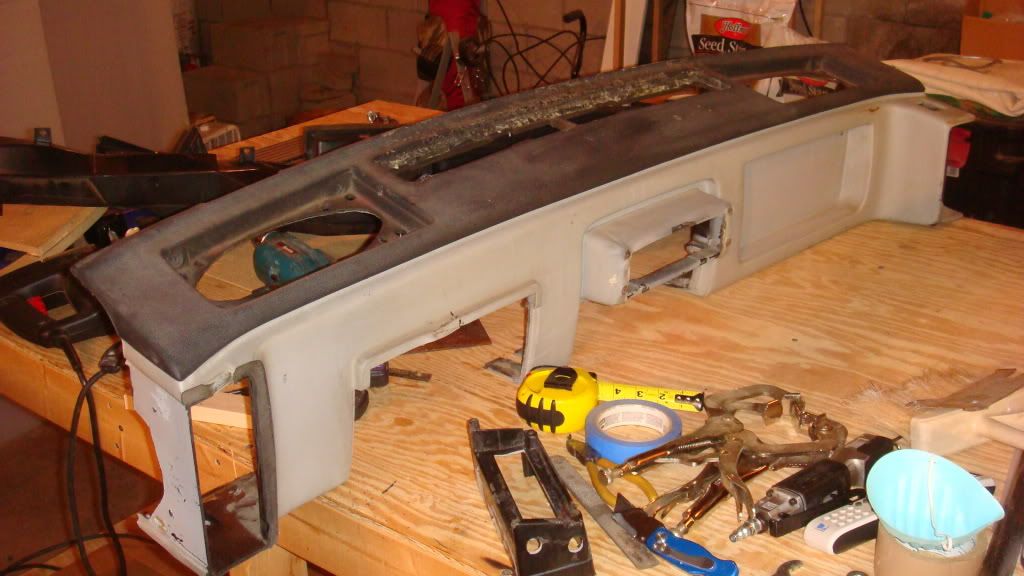
Managed to get the pics off my camera. You can see here where I'm starting to cut the stock dash. I cut both end vent outlets off, and cut out all of the center that serves as a guide for the console:
This is the wood forms for the cor-plast already set in place ready for the sheeting.
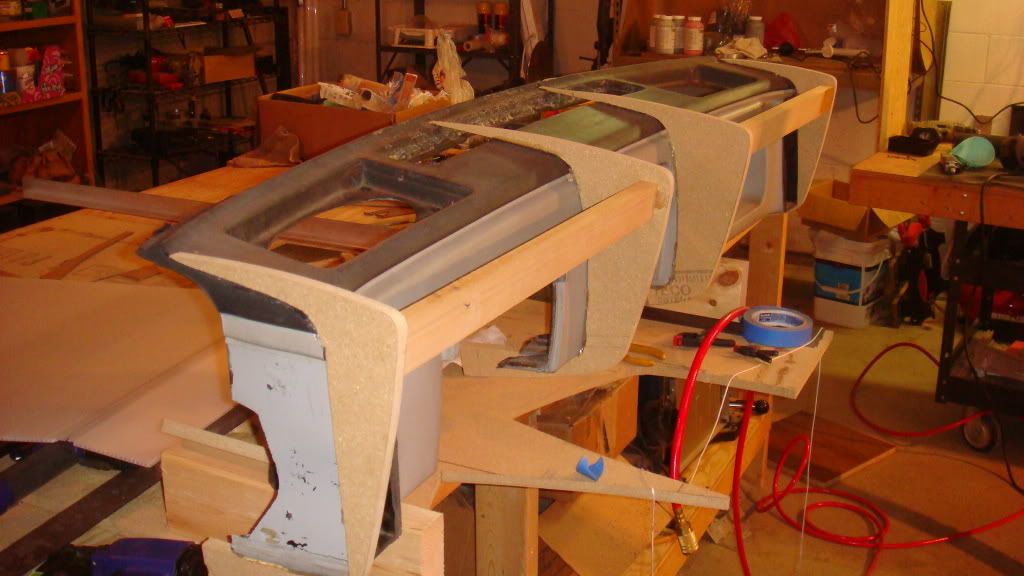
I'm using a heavy duty hot glue for all of the attachment of parts at this point, as after construction, everything will come apart, the wood will be removed, the inside of the dash will get a few layers of fiberglass leaving the cor-plast as a core, and then the shell will be glassed to the skeleton as I described earlier. Then I can fab up my HVAC vents I'm ready to go.
|
|
|
|
Taijiguy
|
AUG 25, 04:35 PM
|
|
Bump
I was inspired last night. I've wanted to give a nod to the stock dash, but wasn't sure how to pull that off. In a (rare) moment of brilliance I came up with a plan. Started it last night and should have an update tonight if anyone is interested?
|
|
|
|
Ang84Indy
|
AUG 25, 06:57 PM
|
|
|
|
|
Rolling Thunder
|
AUG 25, 07:35 PM
|
|
If you need to make new grills on your dash, maybe for ventilation or speakers, I have some good sized scrap that you can have for cheap. A whole sheet costs about $50 and I'm sure you wouldn't want to pay that for a few small patches.

pm me if interested. If not, free idea 
|
|
|
|
Taijiguy
|
AUG 26, 12:14 AM
|
|
PM sent.
So I made some pretty good progress tonight. Well "pretty good" being relative.I'm moving kinda slow on this, being really careful to get the measurements right and everything lined up correctly. Plus, all the parts are being hand fabricated, so in order for them to fit right I have to spend a pretty fair amount of time on the sander, with a hand file, and hand sanding. A project like this really needs to have a nice fit and finish or it's a waste. I only want to do it once.
Anyway, I got my idea well on the way and I have to admit, the image I have in my head is a nice one, and the project is starting to take a similar shape. It's late, but I got a couple new pictures to toss up. Will get them posted tomorrow. I'll be finishing the instrument clusters in the next day or so (hopefully) and will start in on the 12" touch screen this weekend if all goes well. I'd like to have all the glass work done by next weekend., but don't know if I'll be able to spend as much time on it as I have the last few days.
Speaking of which, if anyone has, or has a line on a good price for some glass mat and cloth I'd be very interested, I could order some off Ebay, but hope I can do better through someone on here.
|
|
|
|
americasfuture2k
|
AUG 26, 12:21 AM
|
|
|
|
|

