 
     |
| [Tutorial] How to remove the drip guards from above the side windows (Page 1/2) |

|
JohnWPB
|
JUN 10, 05:21 PM
|
|
I was trying to remove the rain drip guard from my Fiero in preparation for painting but was not sure how they came off. I got a great tip from Mike Murphy on how to do this, and though I would do a simple tutorial on how to do it.
Removing the rain drip guards is actually very easy. The drip guard is made from metal, so it can not be chipped or cracked, but it can be dented or bent quite easily if you are not careful. I used a paint stirring stick, which are free at just about every paint / hardware store. You will also need a safe place to store them, as again, they bend VERY easily.
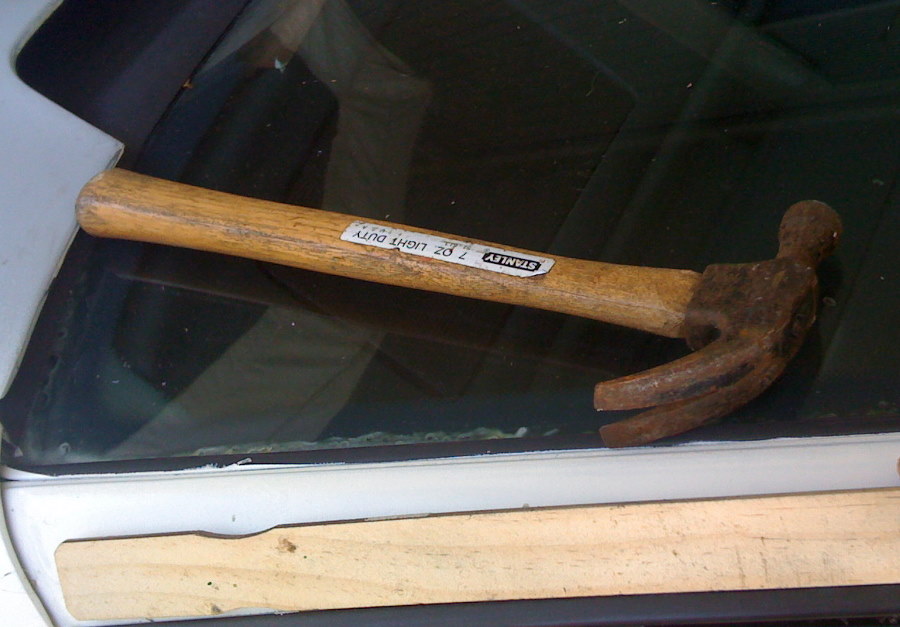
You will need a small piece of wood, and a hammer. (You can also use a metal spatula / putty spreader)

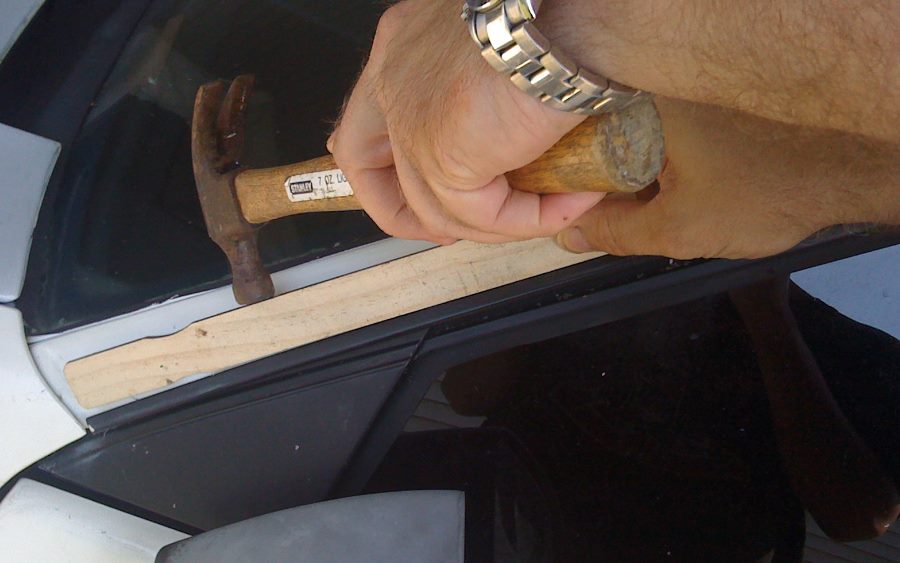
Place the strip of wood even against the rain guard. Lightly tap the hammer against the wood:

Work your way back with the wood and hammer till you get to the very back of the railing.

On the Fastback, There is a small metal clip at the very back, it does not have a screw or any hardware holding it in place. It is probably just extra support for holding the end of the drip rail in place:

This clip will probably prevent the drip guard from moving straight down while tapping, as the sail panel's rolled edge is in the way. Simply pick up the rest of the now loose drip guard, and angle it, pulling lightly to release the end of the drip guard.
That's all there is to it! I intend on having them painted the same color as my car, but wanted to remove them so I could sand correctly behind them, as well as sand them, before putting them back on.
KEYWORDS: Rain Guard Drip Molding Remove Removal Take Off Tutorial[This message has been edited by JohnWPB (edited 04-18-2019).]
|
|

|
americasfuture2k
|
JUN 10, 05:31 PM
|
|
|

|
Dennis LaGrua
|
JUN 10, 05:34 PM
|
|
Just removed a set today. Used a large scraper, inserted them in the gutter groove and tapped lightly with a hammer. They came right out.
------------------
" THE BLACK PARALYZER" -87GT 3800SC Series III engine, 3.4" Pulley, N* TB, LS1 MAF, Flotech Exhaust Autolite 104's Custom CAI 4T65eHD w. custom axles, HP Tuners VCM Suite.
"THE COLUSSUS"
87GT - ALL OUT 3.4L Turbocharged engine, Garrett Hybrid Turbo, MSD ign., modified TH125H
" ON THE LOOSE WITHOUT THE JUICE " [This message has been edited by Dennis LaGrua (edited 06-10-2009).]
|
|

|
JohnWPB
|
JUN 18, 09:42 AM
|
|
|
Yea, a wide paint scraper should do the trick as well.... Nice tip!
|
|

|
Larryh86GT
|
JUN 18, 09:57 AM
|
|
Nice tip. I'll be pulling mine off in a couple weeks to put replacement sail panels on. 
Larry------------------

|
|

|
88FieroGT TTops
|
MAR 01, 08:11 PM
|
|
|
Hmmm--I have T-Tops---no drip guards for me---look at all the stuff that collected behind them ------------------
Pat Jones
|
|

|
JohnWPB
|
OCT 30, 09:14 PM
|
|
|
All the images in the first post were broken links. I was able to find them tonight and replace them.
|
|

|
AtkRWC
|
SEP 15, 11:52 PM
|
|
|
Very timely tip. Was wondering how to do this. Thanks so much for the info.
|
|

|
Rick6375
|
APR 17, 06:38 AM
|
|
|
Planning to buff the paint on my recently purchased 84 SE and this is going to be helpful, more so because the right side drip edge has a small, 1" long dent in it I will try to fix before reinstalling. ------------------
84Fiero SE 4 cylinder auto
|
|

|
smaisy
|
JUL 20, 04:19 PM
|
|
|
I got mine done with some paint scrapers! Thanks for the advice though!
|
|
    
  |
|


