|
| How to : Seperate Fastback Tail Lights without damage (Page 1/1) |

|
Danyel
|
SEP 08, 10:56 PM
|
|
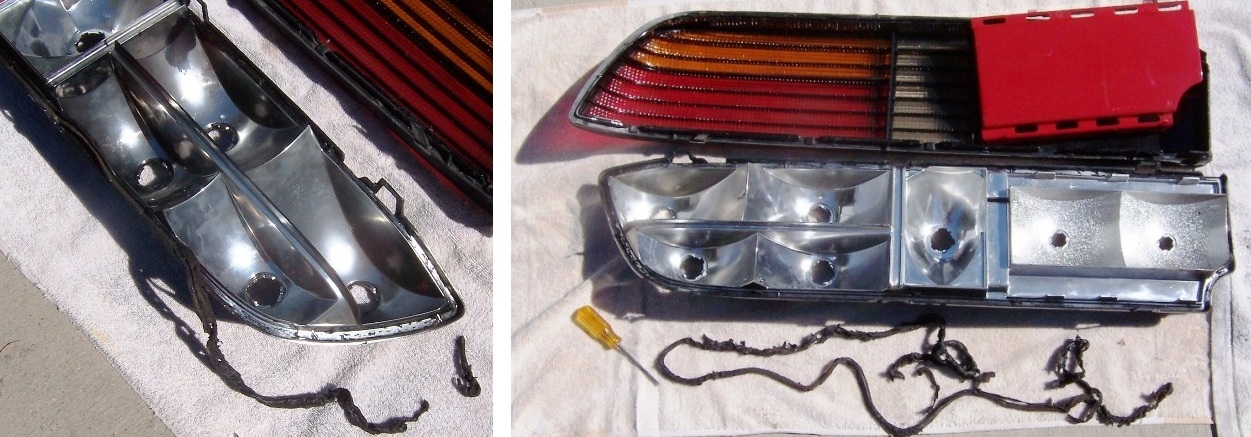
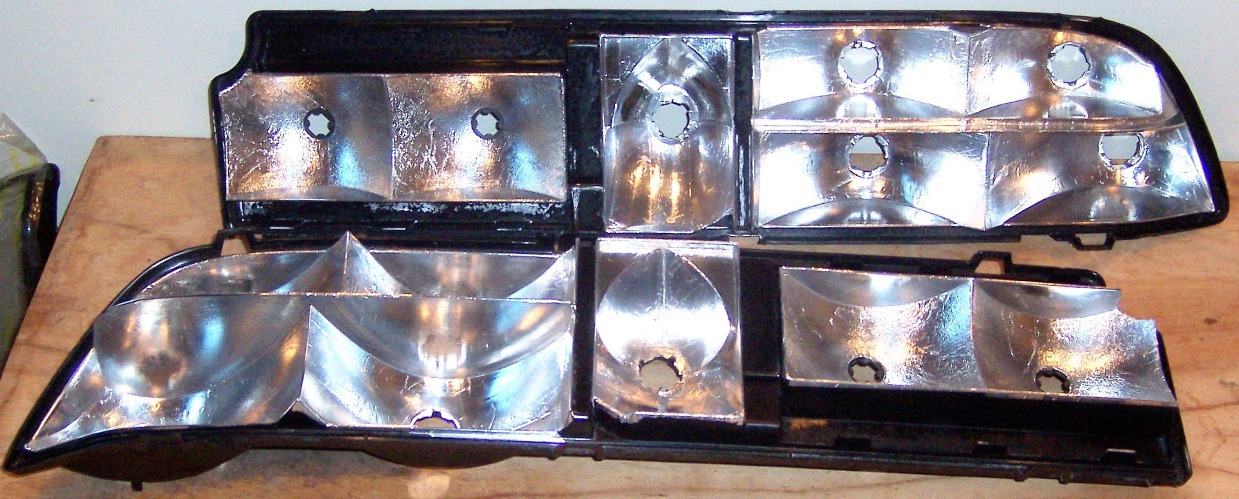
The secret to removing the lenses from the assemblies without breaking them is as follows:
1. Use a HAIR DRYER to heat the contour of the lenses where they latch together and also all around where they make contact with the rear assembly. This is to make sure the butyl that seals the lenses to the assembly gets hot and soft. (Hot to the touch NOT BURNING HOT) (DO NOT USE HEAT GUN WAY TOO HOT )

2. You will notice there are V shaped latches with plastic hooks inside, on the top and bottom of the lenses that hold everything together ... DO NOT PRY UP THESE LATCHES with a screwdriver !!!! You must slide a piece of plastic about the thickness of a credit card in between the latch and the hook so that the hook releases. (See Pic Below) Once you've inserted all the cards and the hooks have released reheat the contour a little more ....gently pull apart the two making sure all your latches are unhooked. You will see the lenses will spread and open...

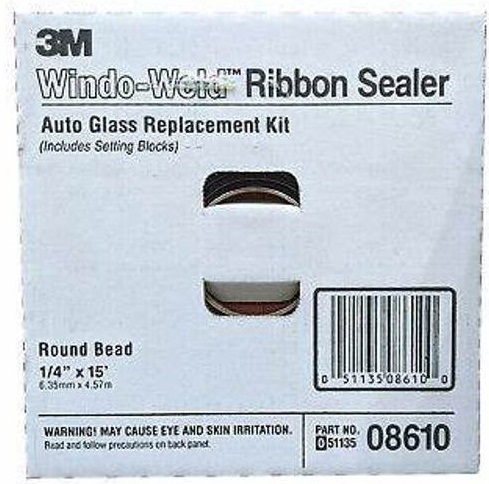
3. Once apart let the butyl cool.... it is easier to clean up and remove the old when cold. You can put new sealant butyl that can be bought in any good automotive shop... the strip maybe thicker but you can stretch it thinner to fit in the slot and reseal the lenses.....
Take you time and be CAREFUL these lenses are VERY VERY BRITTLE
Have fun
------------------

My Build Thread
Tylers Toy
|
|

|
cam-a-lot
|
SEP 10, 09:41 AM
|
|
Great tip
Can you please send me your new OEM set so I can practice on it? I promise to return them, unless they mysteriously get lost in the mail. You know... like swap harnesses regularly do in Canada 
Or perhaps you can give me your address and exact location of where you keep the lenses and other goodies, so I can pay you a quiet 3 AM visit next time I am in Froggieland  And don't forget to leave the doors unlocked before going to bed! And don't forget to leave the doors unlocked before going to bed!
|
|
|
|
Danyel
|
SEP 10, 10:59 AM
|
|
| quote | Originally posted by cam-a-lot:
Great tip
Can you please send me your new OEM set so I can practice on it? I promise to return them, unless they mysteriously get lost in the mail. You know... like swap harnesses regularly do in Canada
Or perhaps you can give me your address and exact location of where you keep the lenses and other goodies, so I can pay you a quiet 3 AM visit next time I am in Froggieland And don't forget to leave the doors unlocked before going to bed!
|
|
No problem .... if you come to visit .... as long as you like Rottweillers....his name in Mushy .... called him that because I gave him a metal hammer to play with.....when he was finished with it... the damm thing was all soft and mushy 
regards
Danyel
PS do you know why they call us FROGs ?? Ie Froggieland?
.
|
|
|
|
2tone86gt
|
SEP 28, 08:25 PM
|
|
|
Thanks for the tip danyel... Hopefully another set of unused fiero store lenses show up on ebay again i'd love to give this a try to restore mine.
|
|
|
|
fierobear
|
JUL 26, 12:37 AM
|
|
| quote | Originally posted by Danyel:
The secret to removing the lenses from the assemblies without breaking them is as follows:
1. Use a HAIR DRYER to heat the contour of the lenses where they latch together and also all around where they make contact with the rear assembly. This is to make sure the butyl that seals the lenses to the assembly gets hot and soft. (Hot to the touch NOT BURNING HOT) (DO NOT USE HEAT GUN WAY TOO HOT )
2. You will notice there are V shaped latches with plastic hooks inside, on the top and bottom of the lenses that hold everything together ... DO NOT PRY UP THESE LATCHES with a screwdriver !!!! You must slide a piece of plastic about the thickness of a credit card in between the latch and the hook so that the hook releases. (See Pic Below) Once you've inserted all the cards and the hooks have released reheat the contour a little more ....gently pull apart the two making sure all your latches are unhooked. You will see the lenses will spread and open...
3. Once apart let the butyl cool.... it is easier to clean up and remove the old when cold. You can put new sealant butyl that can be bought in any good automotive shop... the strip maybe thicker but you can stretch it thinner to fit in the slot and reseal the lenses.....
Take you time and be CAREFUL these lenses are VERY VERY BRITTLE
Have fun
|
|
A putty knife also works for this.
|
|
|
|
Australian
|
AUG 12, 04:40 AM
|
|
|
The mastic will stick to everything so if you get it on hands stop what you are doing and use some alcohol to clean hands before you smear it over both sides of lenses.
|
|
|
|
Old Lar
|
MAY 21, 08:25 PM
|
|
|
Separating the lens from the back was the hardest part of the swap for me. I sprayed some penetration oil on the seam. I had a plastic putty knife to get the clip apart. Very carefully prying the clip apart.
|
|
|
|
Vintage-Nut
|
JAN 18, 09:37 AM
|
|
|
|