
 
     |
| Fuel Pump Replacement How-To (56K beware) (Page 1/6) |

|
Brocephus
|
DEC 02, 11:59 PM
|
|
Ok, this is somewhat of a continuation thread that finishes telling the tale of how I fixed the problems I was experiencing with my stock '84 4-spd. But I decided to create a new thread so as to make it more compatible with the search function. Now, on with the show.
My engine was cutting out and missing badly. When under a load and the gas pedal on the floor, the rpms would flatten out at roughly 3000 and without careful manipulation of the throttle, it would go no higher. I changed all vacuum lines, tested all sensors, removed and thoroughly cleaned the intake manifold and changed the intake manifold gasket (it was sucking air). I changed the throttle body mounting gasket while I had it off to eliminate it as a source of vacuum leakage. I swapped the distributor for a known good one. I swapped out all sensors with known good ones. I reset the timing and double checked it countless times. I performed a compression test. I did a vacuum test. I tested the output of my alternator and verified battery voltage. Everything was in great condition but the engine ran like complete garbage. I even hired a priest, a rabbi and two voodoo masters and all I ended up with was a fondled Fiero with a kosher miss and a shrunken head. Nothing I did seemed to work and I was quickly becoming frustrated until I posted here and Frizlefrak reminded me to be a troubleshooter, not a trouble-guesser.....
| quote | Originally posted by Frizlefrak:They need 3 things to run correctly;
1. Suitable compression
2. The correct mixture of fuel and air for a given engine speed and load.
3. A suitably strong spark delivered at the correct time. |
|
The only test I hadn't done was a fuel pressure test. Reading my gauge with the key on/engine off, it was only 4.5 psi. Engine running, it was still less than 7 psi. These cars MUST have no less than 8-13 psi fuel pressure in order to run correctly. So my hat is off to Friz and the PFF crew and my a$$ is off to the parts house and The Man Palace.
------------------------------------------------------------------------------------------
This how-to is more for complete Fiero noobs. We were all Fiero noobs at one time and the only way to ensure the heart of the Pegasus will continue to beat after us old farts are gone is to ensure the acceptance and proper mentoring of tomorrow's old farts.
Estimated time of fuel pump replacement: 2 hours (includes making coffee and recommended breaks)
Before you leave the parts house with your new fuel pump and filter screen (had to buy mine seperately as the fuel pump did not come with one), open all boxes and packages. Ensure proper fitment of the filter screen to the pump. Ensure you have the necessary O-ring, rubber hose, nuts and lock washers. Nothing worse than getting halfway through a repair and realizing you have the wrong part. Amazing how you only realize this exactly 5 minutes after the parts house closed.
Once you get back to your shop/driveway/parking lot/side of road, you need to gather some things that will make the job much more tolerable. First, a cup of coffee always makes any job more enjoyable. As if they really need be told, our European brothers should just skip the coffee and brew a pot of tea. Second, since neither coffee or tea can put out a gasoline fire, go in the kitchen and grab the ABC fire extinguisher and set it within easy reach of your car. If you have two of them, even better. Set one up close and another 15 or so feet away. Next up, comfort. Find a radio (other than the one in your car) and turn it on. Then, grab a piece of cardboard to lay on, if you can. It'll help soak up any gas you might spill and keep you from swimming in a puddle of it. Most of us will never be so lucky as to change a fuel pump on a car with little to no gas in it. Spilling a little bit is inevitable anyway because of the way the lines have to be taken apart. As for tools, in addition to the below, you'll also need a pair of pliers or Channellocks, a 10mm and a 7mm socket.
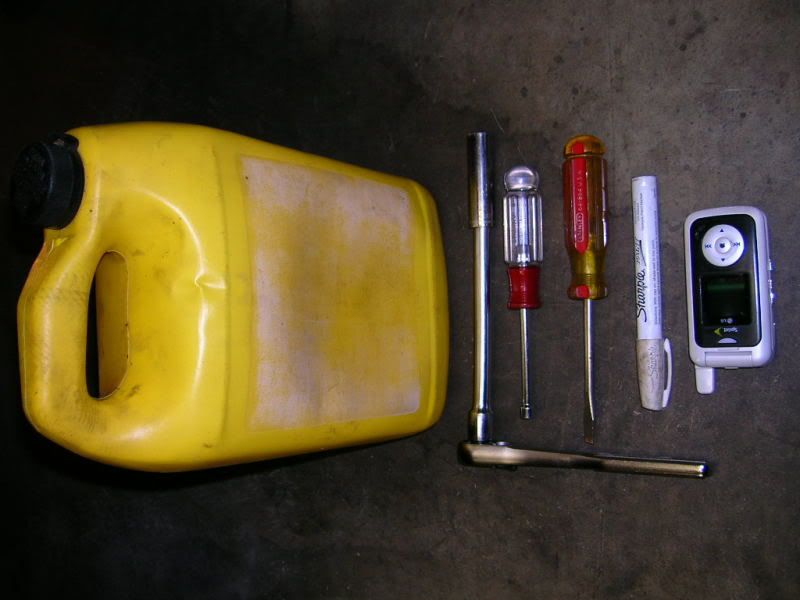
Yes, that's an empty coolant bottle and no it's not for gasoline I use it to lay my head on when working under cars. The cell phone is there for when I'm out in "The Man Palace". It's a 24'x44' insulated shop and no one will hear me scream if I do something stupid.
Time to get your Pegasus in the air. I lift mine front and back and put jackstands in for support. I trusted a jack to support a car for me for just a couple minutes....once. My arm was fine after a couple days, but the plastic bumper of the car had to be replaced.
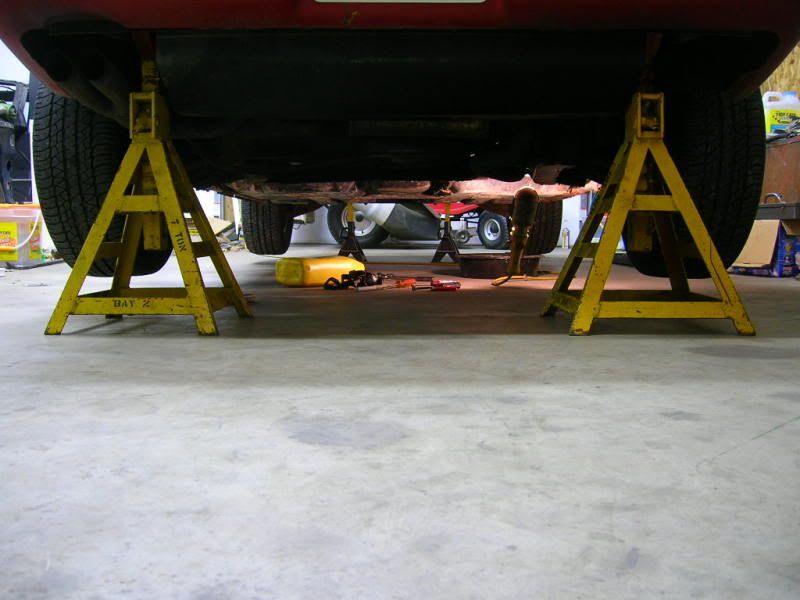
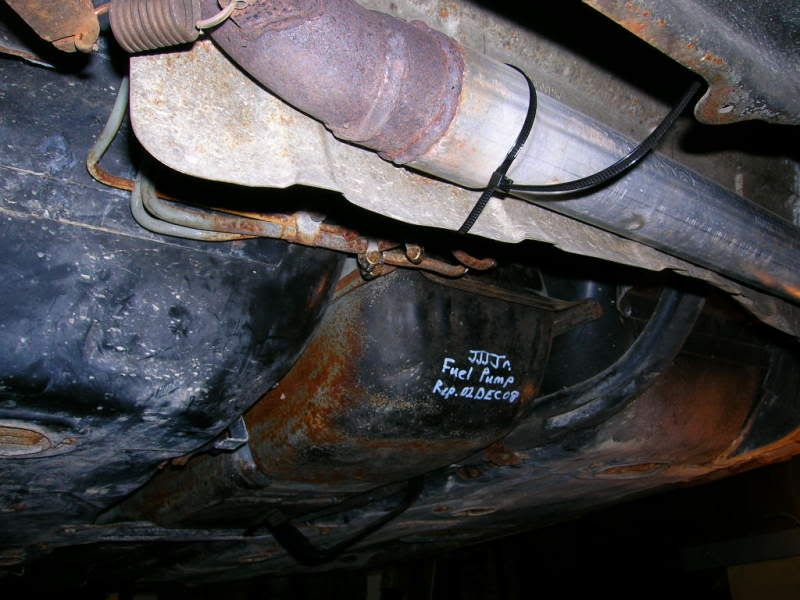
Ok, it's in the air you're underneath it. Let's see what you're lookin' at. Looking from rear to front, you should something similar to this. That crossmember with the four 13mm bolts in it, is the last thing I pull out before dropping the tank.
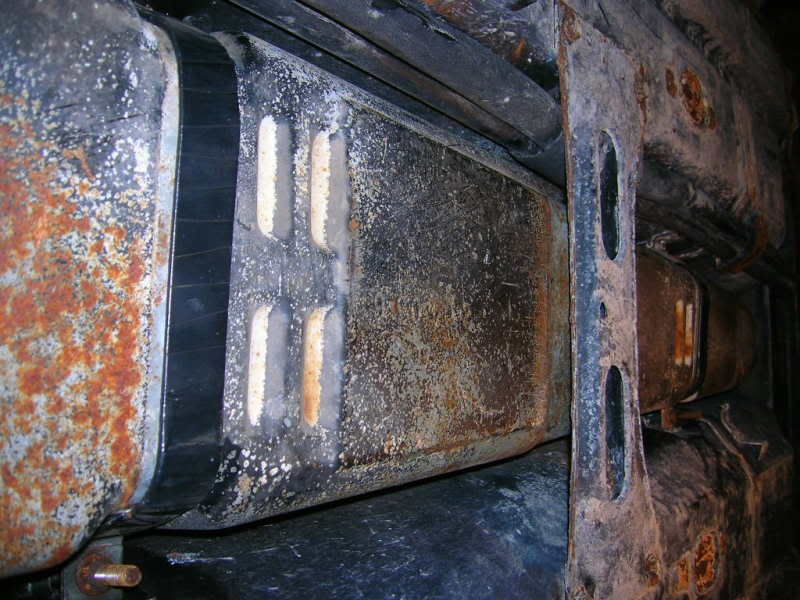
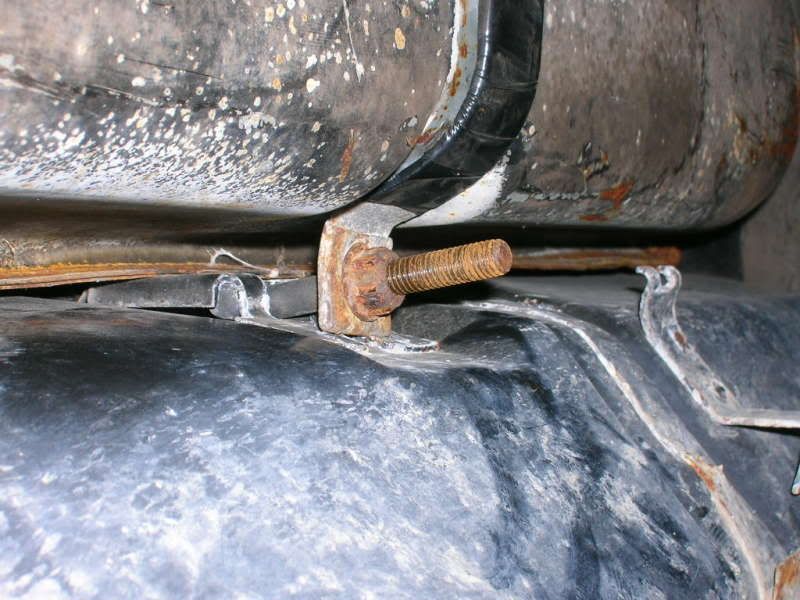
These straps are the only thing holding your fuel tank aloft. They're held in place by one 13mm nut. Don't pop 'em off of there until you've removed the rubber hoses from their fittings as you'll need the tank to sit still while you're pryin' on 'em.
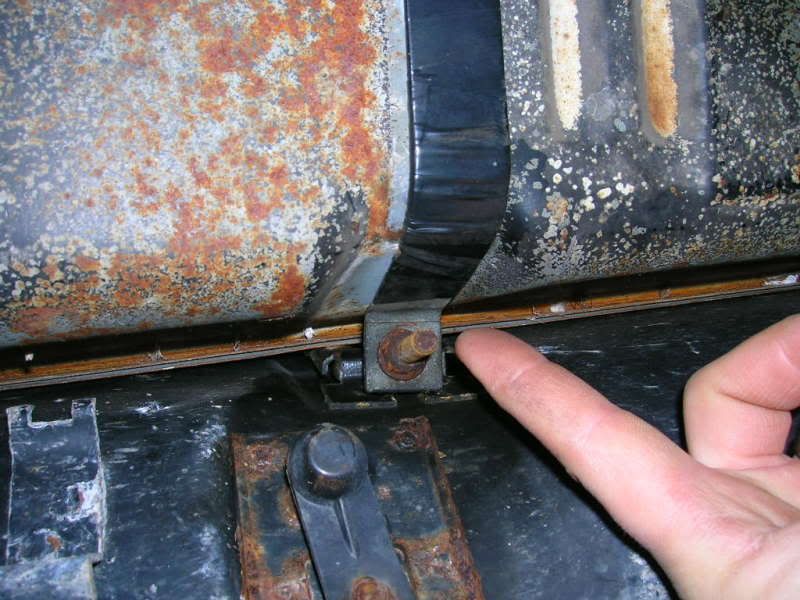
One last thing, while your under the car, locate the wiring harness that runs from atop the tank, through the firewall and up the back of the passenger compartment. This will need to come out with the tank.
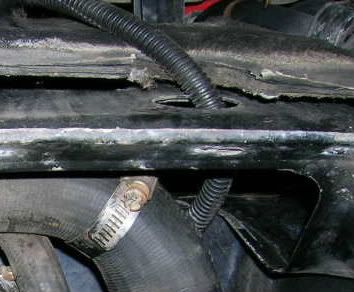
Now get out from under the car, gather your tools and lay 'em next to the car where you can get to 'em. Pop the engine cover and locate the fuel pump wires. Disconnect the two plugs and make sure they're not held in with any wiring harness retainer clips.

Now, dust yourself off and jump in your car. Crank the engine. It might start, it might not. What you're doing is bleeding off the remaining fuel pressure in the fuel lines. Once this is done, head to the back to the engine compartment.

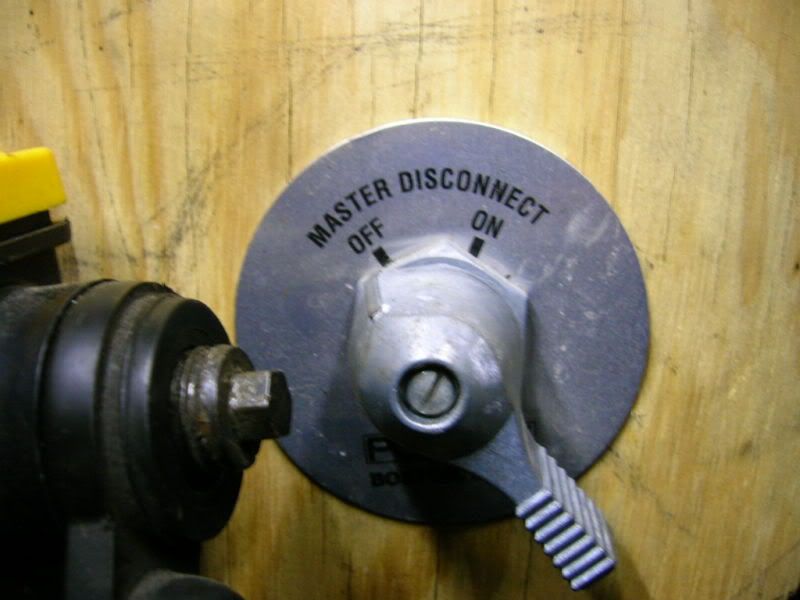
At this point, you need to disconnect the negative power cable from the battery. You're going to be messing with gasoline and let's not kid ourselves; sh!t happens. It doesn't need to happen with gasoline and you under a car. I got tired of doing this with my Fiero, so I installed a master power switch on the negative cable.
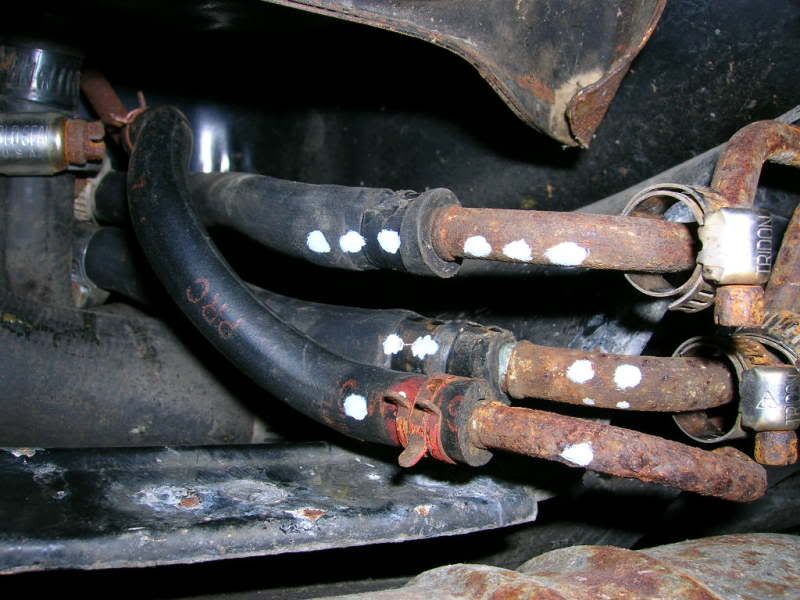
Now your ready. Among the pictured tools above was a paint pen. I marked each of my hoses with a series of dots to let me know where they came from and where they'll need to go back to.
Take a second to squirt these bolt threads with some PB Blaster, WD-40, or even 3-in-1 will work. If nothing else, pull your dipstick out and use some oil from the end of it. You'll thank yourself in about 15 minutes.
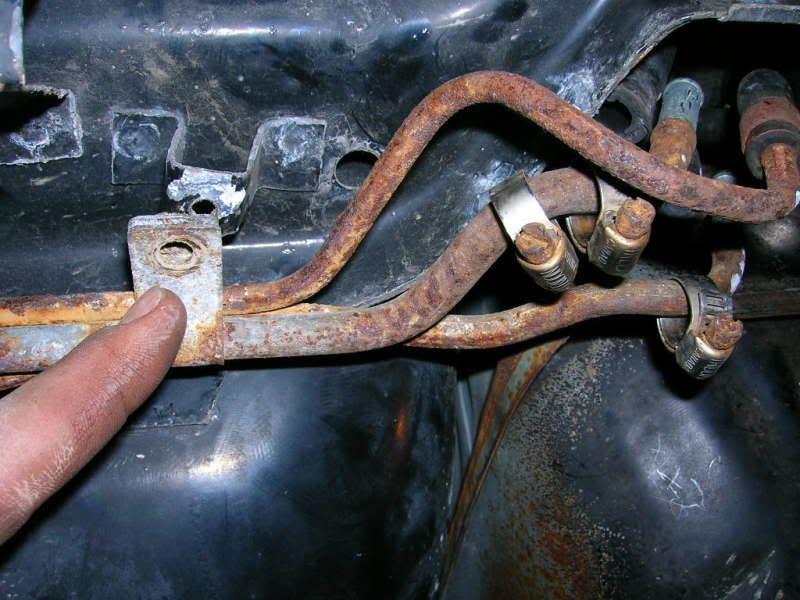
Grab a 10mm socket and take the screw out of the bracket that holds your fuel lines in place. This will make pulling the hoses off of the lines much easier.
Then grab a 7mm socket and remove the bottom two screws that hold your heat shield against the firewall. Again, this will make getting to your fuel lines MUCH easier. Put a Zip-Tie through one of the screw holes and tie it around your cat (if you have one). 
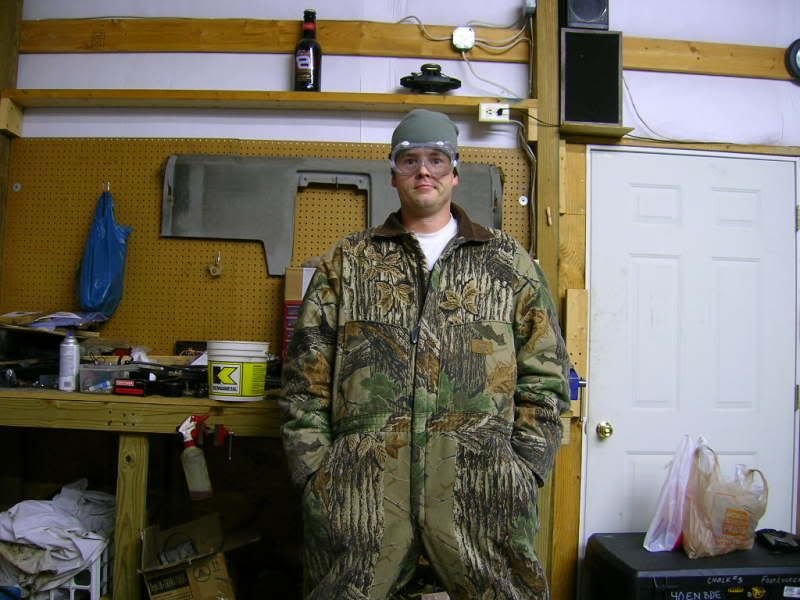
Grab a pair of safety glasses or if you're lucky enough to have a full face shield, that's even better. Yes, this means you. Gasoline in the eyes sucks total a$$. And for you heroes out there, working with gas with your eyes closed isn't the smartest idea either.
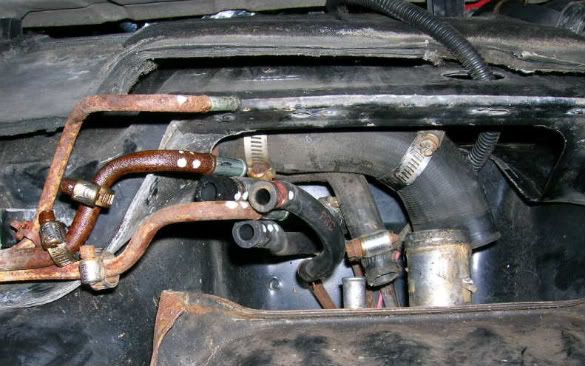
Begin seperating your hoses from your lines by first loosening 5 Hi-Torque hose clamps and a red, what I call, pinch ring clip. When removing the hoses from the lines, fuel WILL drip out of one or two of them. Have a drip pan or a good sized rag handy to catch the river and drips.
While you're waiting for the hoses to quit bleeding, put your jack under that crossmember under the tank. Then slide the drip pan or gas-soaked rag out of the way and remove the two nuts securing the tank straps. Once they swing down, they can be bent to stay out of the way. Don't get too carried away with the bending though as they're most likely rusty and bending them will only weaken them.
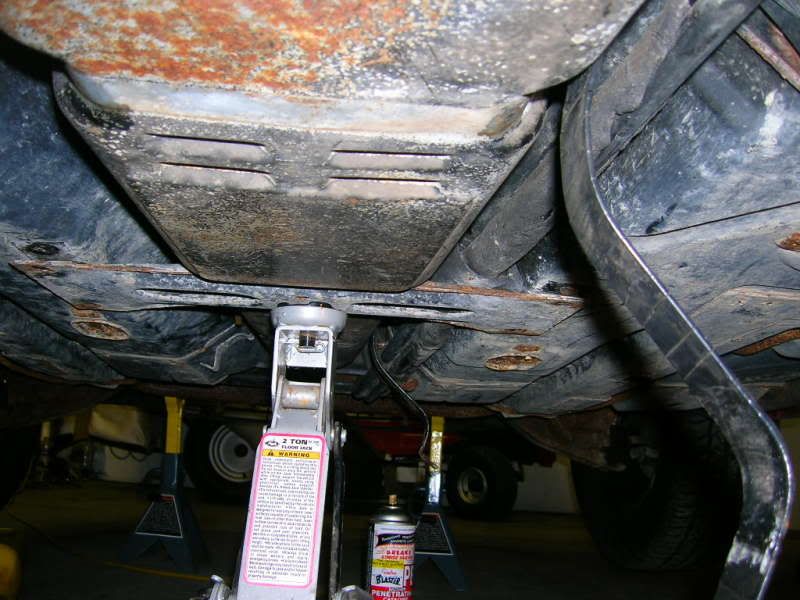
Remove the four bolts holding the crossmember in place. I didn't take any pictures of this process as I had my hands full of tank, hehe. Also, do not forget to pull the wiring harness through the hole in the firewall.
Your jack will be holding the entire weight of your tank at this point. If there's an easy way to do this next part, I'm not aware of it. I got under the tank, supported its weight with my arms and knees while lowering the jack to free the crossmember. Be very careful not to slosh the fuel too much or it can gush out of the back and make those around you painfully aware of your presence for the next couple of days. On the way down, the edges of the tank will catch on everything you can think of. Be patient and work it out. If you can, slide it towards the back of the car a little and this will make things a bit easier. Once it's free of the car, begin rolling out from underneath the tank while keeping the tank upright. Once you get the tank on the ground, slide it, and yourself, out from under the car.
Take five and smoke 'em if you got 'em. Well...not too close to the tank.
Ok, you see this. This is the top of your fuel pump and float assembly. It is held in with a lock ring that needs to come off.
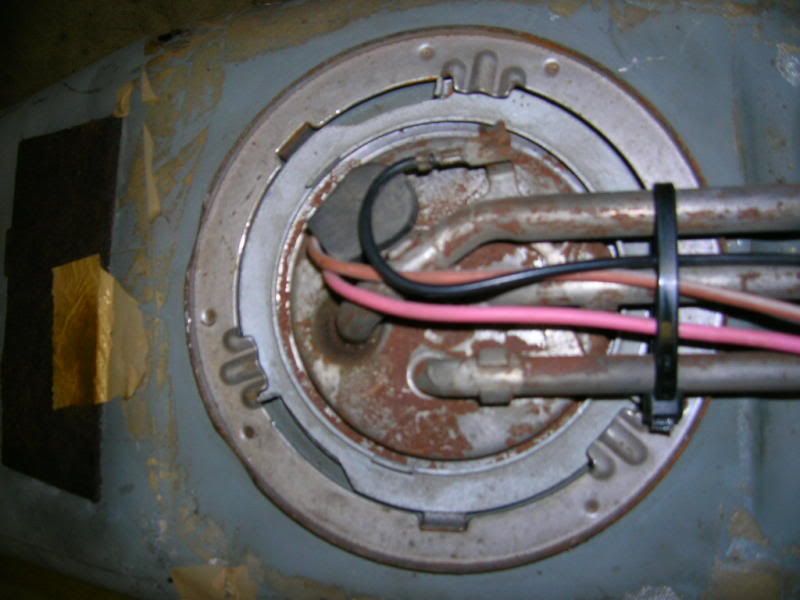
Don't do this to remove it.
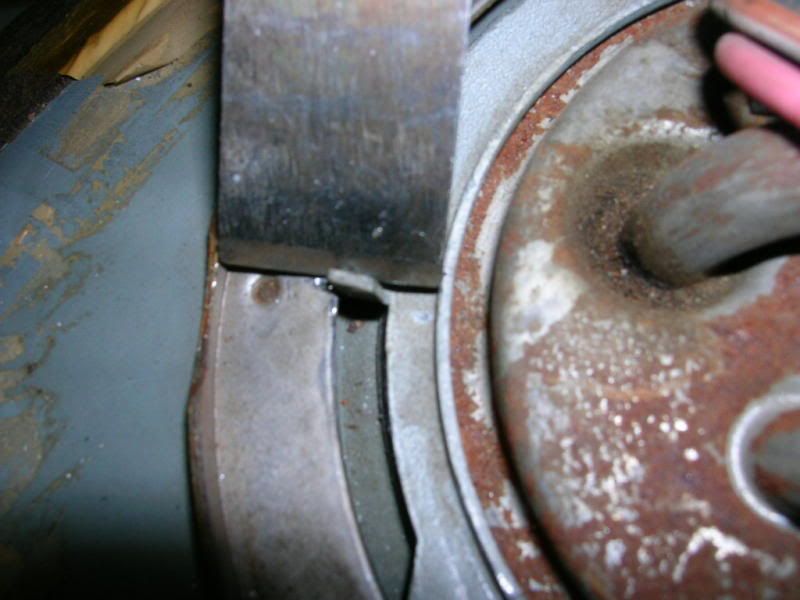
Do this instead and your lock ring will still like you.

Tap your lock ring until it lines up something like this.
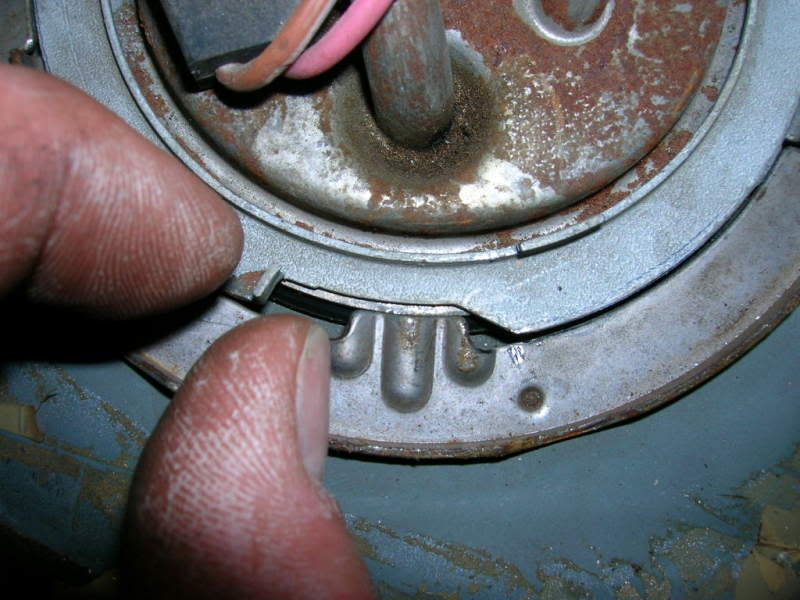
Pull it off and slide it out of the way.
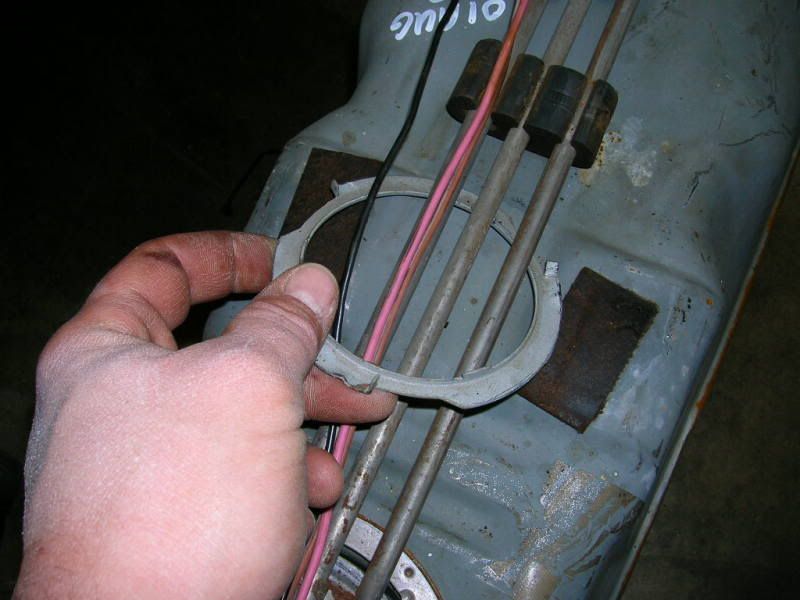
Be careful here. Do not force anything here unless you want to buy a new assembly.
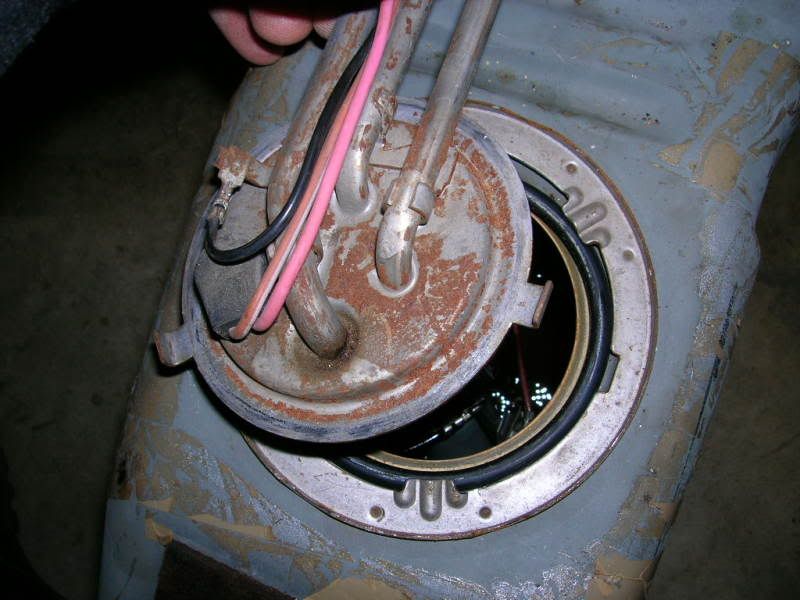
You have to twist, turn, cajole and fondle this thing to get it out of there, but it does come out, I assure you.
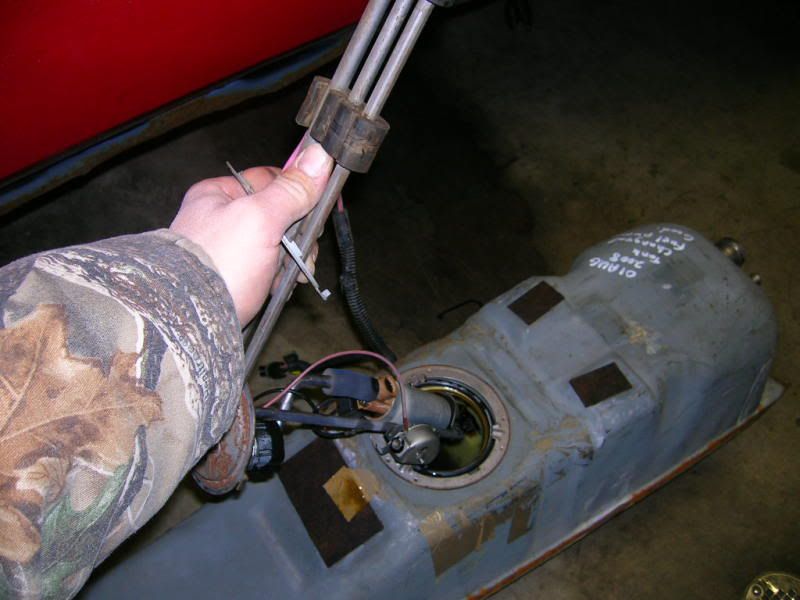
That big, honkin' orange thing is the light at the end of the tunnel. It's also the float part of your float arm; the thing that controls your gas gauge.
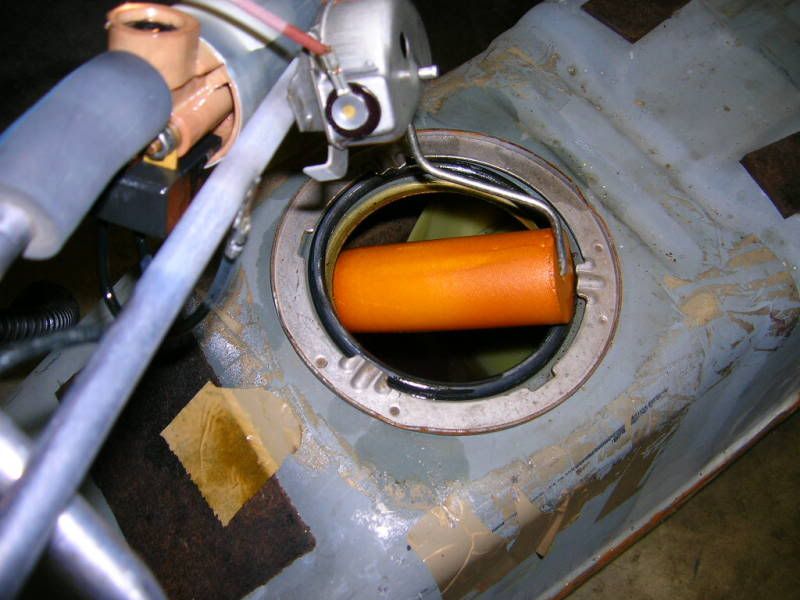
Removal of the old fuel pump is pretty straight forward. Make note of the position of the filter strainer on the bottom of the asembly and then, holding the fuel pump itself, tear it off. I cut the rubber hose that connected the fuel pump to the hard line to facilitate easy removel of the fuel pump. Otherwise, I would have had to push and shove on the fuel pump and yadda yadda yadda....cut it if your kit came with a replacement. Remove the nuts holding the plug onto the fuel pump and chuck 'em in the trash...if your kit came with replacements.
Once free of the old fuel pump, your assembly should look similar to mine.

Slide the new rubber hose connector onto the hard line.
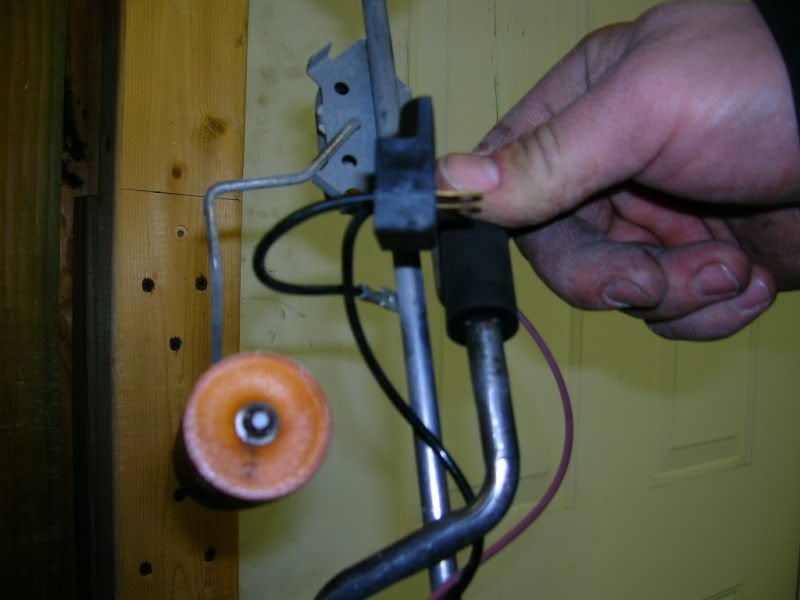
Place the fuel pump with rubber grommet into the carriage and slide the rubber hose connector down onto the fuel pump nipple. My kit came with these cute little clamps for the rubber hose connector.
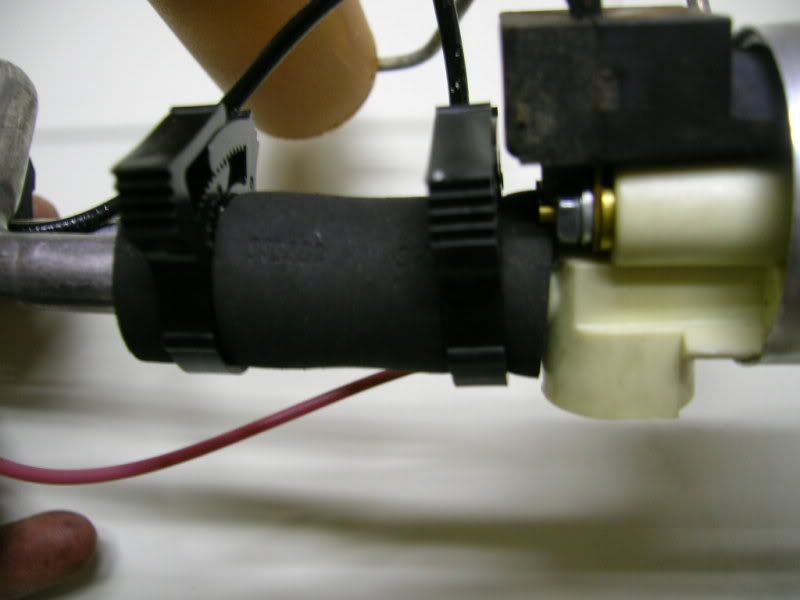
Attach your filter screen the same way the old one was before you tore it off, and your fuel pump assembly should look like mine.
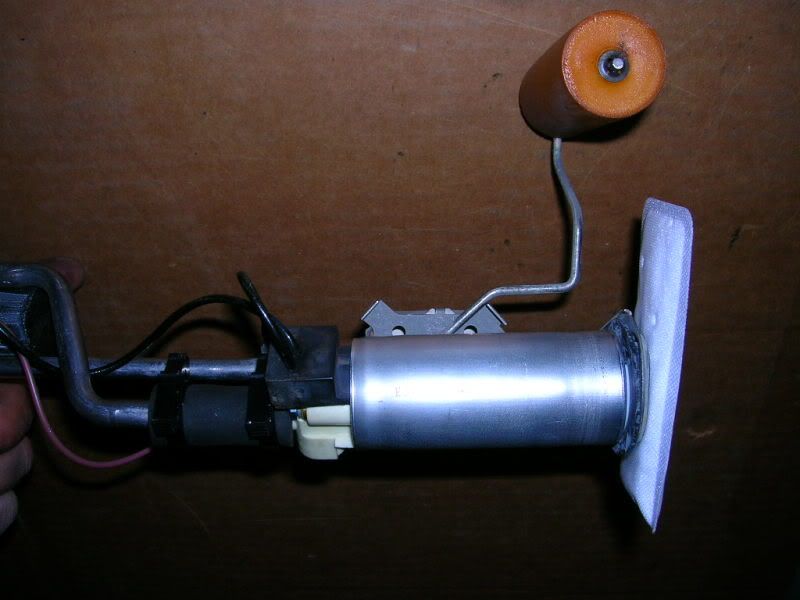
Some of the old timers might yell at me for this, but I coated my O-ring with a light coat of new engine oil prior to installing it so it would have a better chance at sealing correctly. But before you place that O-ring, make certain you wipe all dust and dirt off of the sealing surface. And don't drop the O-ring into the gas tank when your trying to wiggle your fuel pump assembly back into the hole. If you do, wipe it off, reapply the oil and go for take two.

Reinstall your lock ring and make certain you drive it all the way home. The tabs I told you not to hit? Your lock ring needs to turn until those are fully seated against the tank-mounted portion of the lock ring.
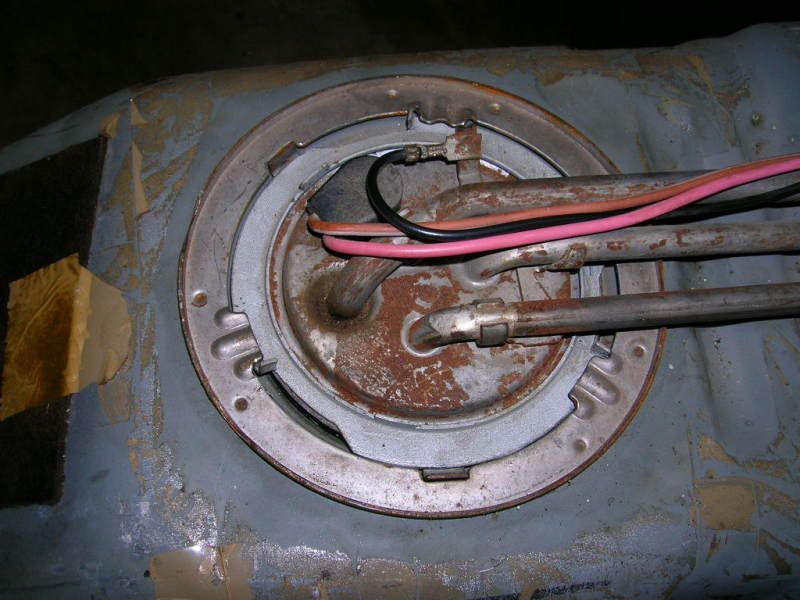
You have the tank out and the fuel pump replaced. Time to put it back in yet? Hehe...yeah right. Now is a great time to take a look at your fuel hoses. Are they dry-rotted? Split, Cut? Hard as Bill Clinton in a roomful of interns? Replace them! Even if it means another trip to the parts house. That's better than another trip through this thread ain't it? Sure, you can replace 'em with the tank in the car, but you have to jack it up, spill gas, get dirty, and blah blah blah. Piss on that crap. Replace 'em now. You'll thank yourself later. Before you get under the car, set some lightweight oil where you can get to it. Not grease, oil. Not brake fluid, oil. Grease will make your lines too slippery and increase the chance of them coming off under pressure and brake fluid will eat your rubber lines.
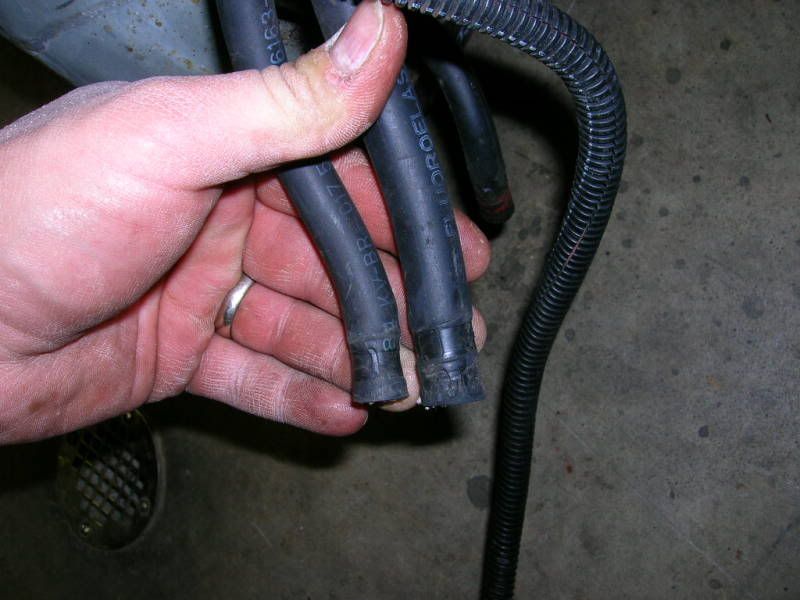
After you get your tank back under the car, make certain the wires running to the fuel pump are where they're supposed to be: within the protective confines of these rubber pieces and not flopping around to get smashed and cut when you put your tank back up in the hole.
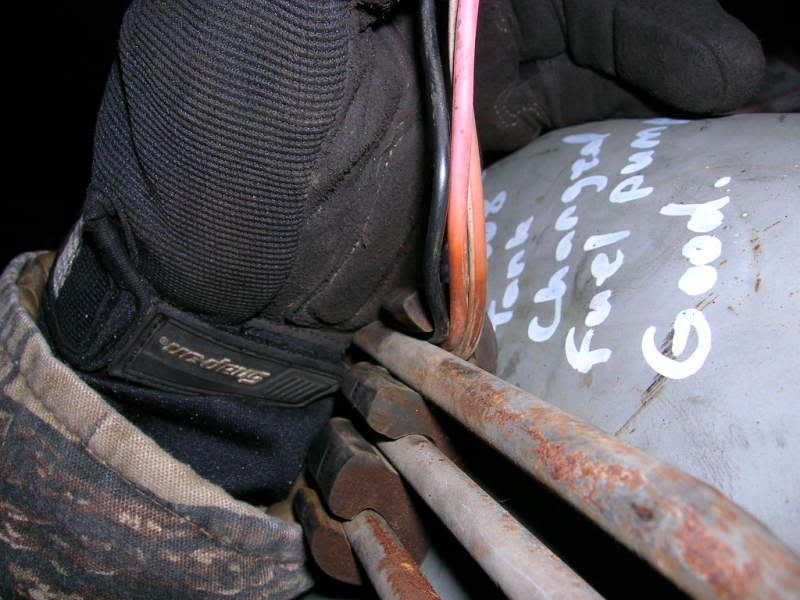
Guess what? I have just as many pics of the tank going back in as I did of it coming out. You got it down so that means you're more than qualified to put it back up. One thing though, I didn't put the crossmember back in first to support the tank as it couldn't be done with one hand. Instead, I put the rear strap back on and threaded a nut onto it. That was sufficient to hold the half empty tank until I could get the front one buttoned up. Then I installed the four bolts in the crossmember.
Caution: Don't tighten anything yet. You might think you'll want to, but you don't need to and when it comes time to slide those lines back on, you may wish you could jostle the tank a bit for some added leverage.
Once you get your tank loosely back in place, reach over and grab that lightweight oil you put where you could easily reach it. Get a little bit on your finger and put a very light coat of oil on the nipples stickin' out of the back of your tank. This will make your life much more pleasant and may just save your hoses a gory death of being forced onto a nipple with a pair of needlenose or whatever else you can find to grip them with. I suggest doing the smaller of the top two first. Put it on and tighten the hose clamp. Then the big one. Put it on and tighten the hose clamp.
The pressure, return and ventilation lines don't really need any oil on them unless you just feel like coating them as a rust preventive. They're fairly easy to slide onto the hardlines and as soon as you get them together, tighten the clamps. With this done, put the metal screw back into the fuel line bracket and drive it home. Then cut your zip tie and screw your heat shield back into place. Cram the wiring harness (that you already poked through the firewall) back up where it belongs, or at least get it as high as you can. Hold your breath and try not to get any falling fiberglass dust in your face. Slide forward a little bit and tighten the crossmember bolts. Before tightening your tank straps however, make sure the tank is positioned exactly as it was before you took it down. This can be done by sliding the tank fore and aft until the clean spots on the tank line back up with the straps. It ain't gotta be perfect, but you want it as close as you can get it. Snug the nuts on your straps, shove your tools out from under the car and...
Take a break. Smoke 'em if you got 'em.

You're almost done. Reach down behind the engine and find your long lost fuel pump wiring. Plug it in.
Reconnect the negative battery cable.
Hook up your fuel pressure gauge if you wish, and turn the ignition to on. Verify pressure. If no pressure is present, turn key off and then back on. You should have pressure.
Check underneath your car for new wet spots indicating a leak. Do not allow yourself to get so excited that you just fire it up and take off. This is not a Yugo. People will care if you burn your Fiero to the ground (especially if you're in it.) Good mechanics discipline themselves to do it right or stupid things happen.
Once you have verified that you have no leaks, fire it up. There's a good chance you may not have a good charge on your battery if you spent any amount of time troubleshooting and attempting to start your car before you diagnosed the fuel pump. As a result, your pump will not pump at its full capacity. Once it's running and the fuel pump is being powered by the alternator, guess what? Check for leaks again! My car made 9.5 psi with just the key on. It made almost 12 psi with the engine running. That extra 2.5 psi might be enough to spring a leak that 9 psi couldn't.
This is what you want to see.
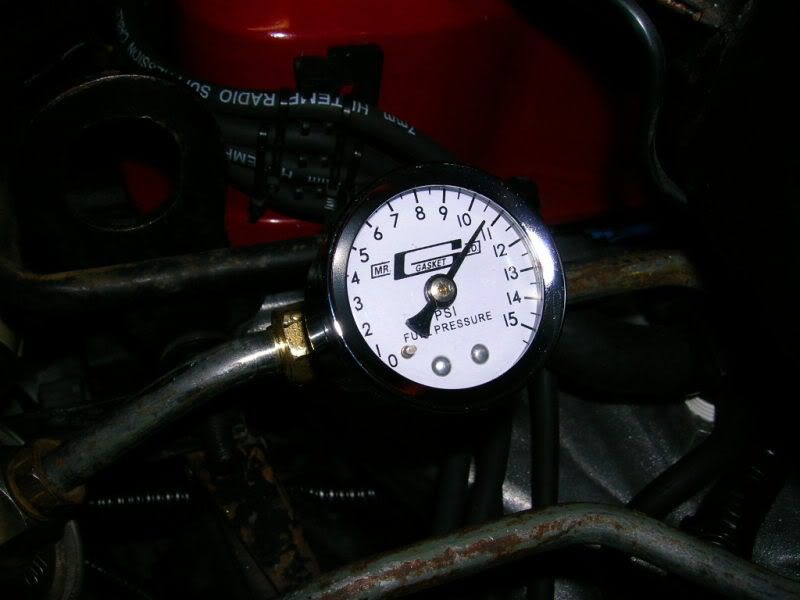
After I made damn sure I had no fuel leaks, I pulled it out of the garage....
...and it runs like a raped ape. 
I was at the end of my rope with this problem and thanks to PFF, it rides again. Enjoy this How-to and I hope it helps you out.
If anyone has anything that they feel needs to be added to this how-to, PM me and I'll edit to taste.[This message has been edited by Brocephus (edited 10-08-2009).]
|
|

|
sjmaye
|
DEC 03, 03:46 AM
|
|
|
Nice post. Although deceptively simple your idea for marking the small lines to the tank is great. I took pics and struggled to make sure I had it right. I should have used your method.
|
|

|
Frizlefrak
|
DEC 03, 04:02 AM
|
|
Well, if there was an Oscar for tech tips, this one would win it. Excellent write up Bro....ya did good. 
Glad to hear all things are well again.
I forgot how rusty things get up north. If you saw the undercarriages of our Southern cars you would hate us. 
OH....almost forgot....I love your master cut off switch on the battery. That just made it very close to the top of my to-do list.[This message has been edited by Frizlefrak (edited 12-03-2008).]
|
|

|
Frizlefrak
|
DEC 03, 04:21 AM
|
|
Oh.....before I forget, here's one tool you might add to your Man Palace next time you're out stimulating the economy....

I paid $45 for this bad boy at Harbor Freight Tools. It's a good soldier and has served me well. So far it has...
1. Helped drop three Fiero gas tanks (once on the same car twice in the same week....when yours truly neglected to replace the pulsator the first time)
2. installed a kitchen full of new cabinets during our last remodel. Makes installing wall cabinets a one man job.
3....oh, and it's even pulled a transmission once...imagine that.
So far, I've never had the good fortune to have a fuel pump fail with an empty tank. Bad karma or something....anyhow, the trans jack is a godsend. I've loaned it out twice, and both times had to beg to get it back. It has come in very handy, especially considering I'm only slightly better than 5 and a half feet and weigh a buck and a half dripping wet...and for some reason don't seem to be getting any stronger in my advanced age. Having a mechanical buddy doing the lifting is a big help. 
I've never run out of uses for it.
|
|

|
Brocephus
|
DEC 03, 08:19 AM
|
|
|

|
Brocephus
|
DEC 03, 08:34 AM
|
|
| quote | Originally posted by sjmaye:
Nice post. Although deceptively simple your idea for marking the small lines to the tank is great. I took pics and struggled to make sure I had it right. I should have used your method. |
|
You know, I'm not altogether sure how I came up with that idea, but it's been a huge help while doing my Nissan to Fiero swap. I had to mark all the wiring harness connectors like that because I can't speak Japanese, hehe.
|
|

|
ltlfrari
|
DEC 03, 08:51 AM
|
|
|

|
Curlrup
|
DEC 03, 08:55 AM
|
|
|

|
Frizlefrak
|
DEC 03, 02:09 PM
|
|
| quote | Originally posted by Brocephus:
Take I-10 to 54.
Go north til you hit Cassidy.
Make a right and talk to the nice men with guns.
That's where I'm from, hehe. I spent 372 days in El Paso and I loved it as much as other hated it. On Fridays and Saturdays, I'd go to Graham's Country Dance Bar and sing karaoke but when I wanted a smaller crowd, I'd go to Incredibles over off of Alabama, just west of Willie Beaumont Hospital.
Well Friz, I need to go start my day and get some coffee.  You take care and I'll talk at ya later. You take care and I'll talk at ya later. 
|
|
Ever get over to Roscoes for a burger? I won't ask about Chicos, that much is a given....it's part of a GI's initiation package to Ft. Bliss. If you ever get back, stay on 54 to the Sun Valley exit, take the exit, and my humble abode is a stone's throw away. Be proud to sip a couple of cold beverages and swap lies with ya.
|
|

|
flimbob
|
DEC 03, 02:14 PM
|
|
|
Great Post! I'll be doing this to fix the lying guage soon.
|
|
    
  |
|


