Pennock's Fiero Forum
  Technical Discussion & Questions - Archive
   T-Top end cap repair W/pics

T H I S   I S   A N   A R C H I V E D   T O P I C
  

Email This Page to Someone! | Printable Version


T-Top end cap repair W/pics by jelly2m8
Started on: 07-21-2003 10:58 PM
Replies: 15
Last post by: Cruz on 10-04-2003 01:17 AM
jelly2m8
Member
Posts: 6235
From: Nova Scotia, Canada
Registered: Jul 2001


Feedback score: N/A
Leave feedback


Total ratings: 243
Rate this member

Report this Post07-21-2003 10:58 PM Click Here to See the Profile for jelly2m8Send a Private Message to jelly2m8Direct Link to This Post
Lately there have been several discussions about replacement T-Top end caps, and the problems associated with having them reproduced.

I am in the group with broken end caps, and I would have willingly paid for a new set, IF they were available. Actually I did recently buy a new passanger side "B" pillar cap from mrfiero although I did not need that one, but it was available.

Being tired of having rattling tops when they were in, one night while laying in bed, I had an idea.

I took my car and my new end cap to my machinest and told him what I had planned, which was a bushing to mount to the steel reinforcement, and protruding through the end cap.

After some measuring on his part and a quick discussion about using brass vs aluminum, we decided that the brass would be more friendly to the locking action the end caps provide.

Today I stopped by the machine shop and picked up my goodies. I had 2 of these made, my rear pillar caps are fine for now.
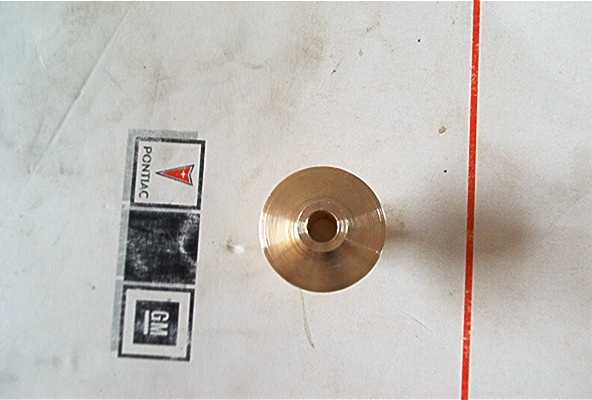
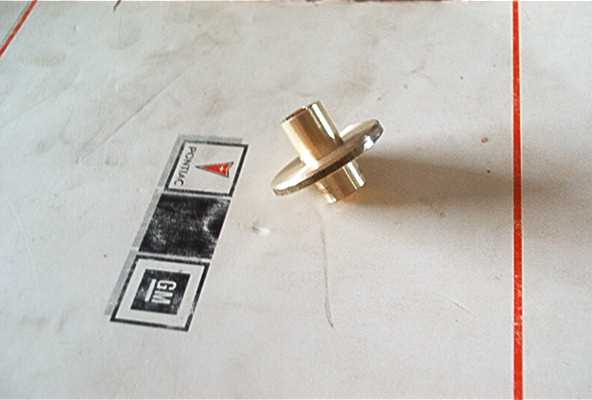
The first thing I did was took the end cap and shaped the broken hole to allow the bushing to pass through. Sorry, no pic of this.


Picture of the drivers end cap removed. That nasty brown stuff is remainants of the old headliner and glue. I decided to replace the 2 original rivets that held the reinforcing plate to the car at this time.
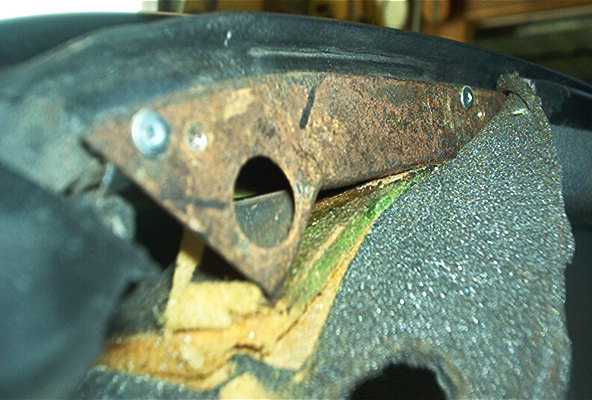
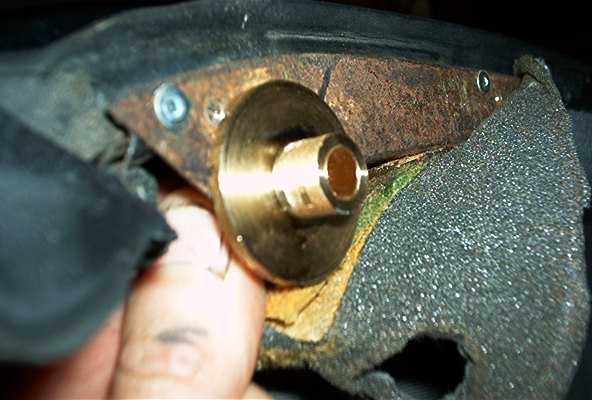
Holding the bushing up in place for a test fit. Using my trusty sharpie I marked 3 locations for mounting holes then traced a few areas I wanted to remove to allow clearance for the trim cap and one of it's mounting screws.
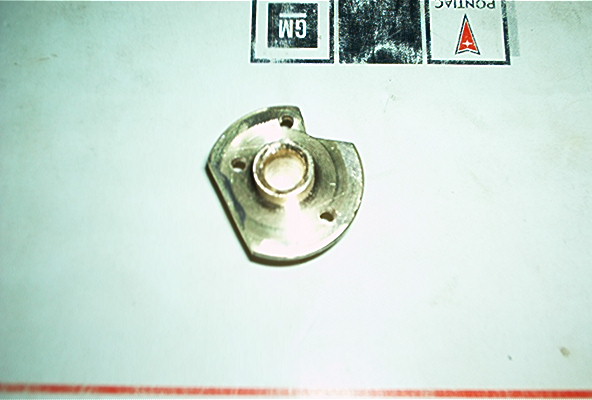
The bushing trimmed and mounting holes drilled. I also tapered the leading edge of the hole for the locking shaft to pass through.
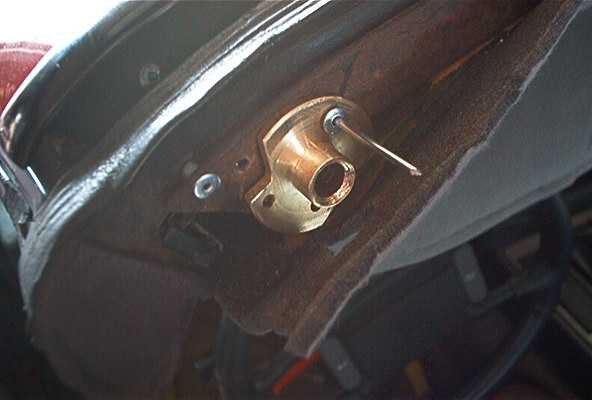
I placed the bushing in position, then installed the end cap over it, and again with the sharpie, I traced around the excess that protruded through the hole.
This I cut down then proceeded to rivet the bushing in place.
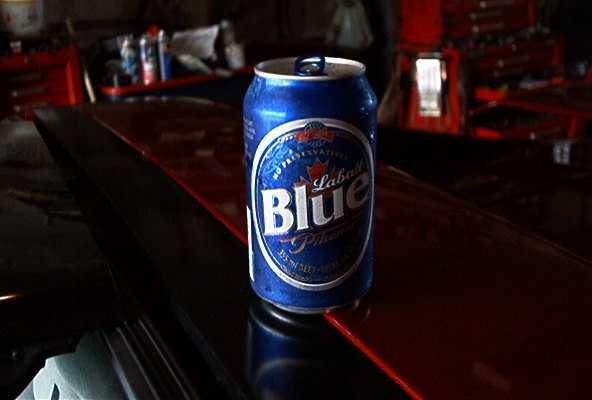
Feeling confident on my project, and being after hours working at my own car, I treated myself,
IP: Logged
PFF
System Bot
jelly2m8
Member
Posts: 6235
From: Nova Scotia, Canada
Registered: Jul 2001


Feedback score: N/A
Leave feedback


Total ratings: 243
Rate this member

Report this Post07-21-2003 11:16 PM Click Here to See the Profile for jelly2m8Send a Private Message to jelly2m8Direct Link to This Post
After installing the 3 rivets ( 1/8"), I installed the T-Top glass for a test fit.
At first the shaft would not pass through the bushing smoothly because the angle was incorrect. A few soft wacks to the bushing flange with a small hammer, and it was ligned up prefectly.

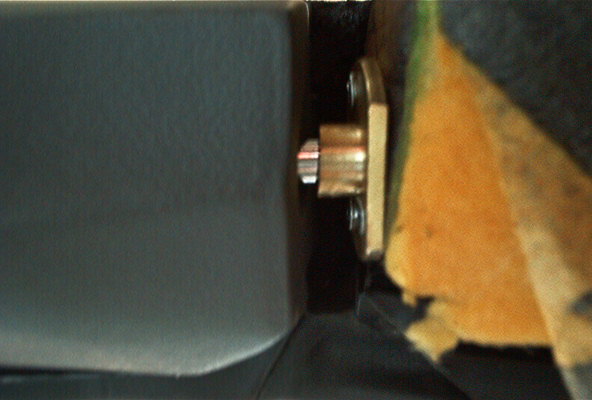
This picture is looking up, sitting inside the car.

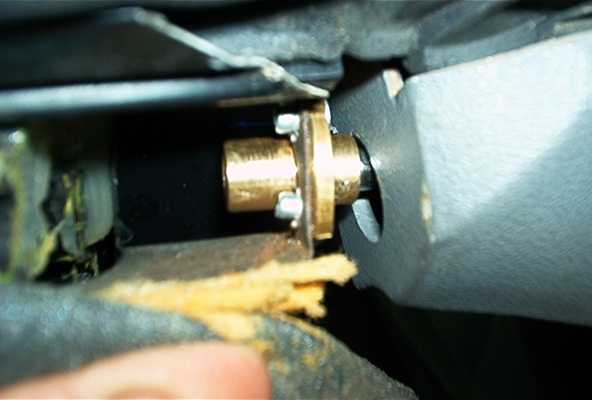
Looking in at the bushing from outside the car.

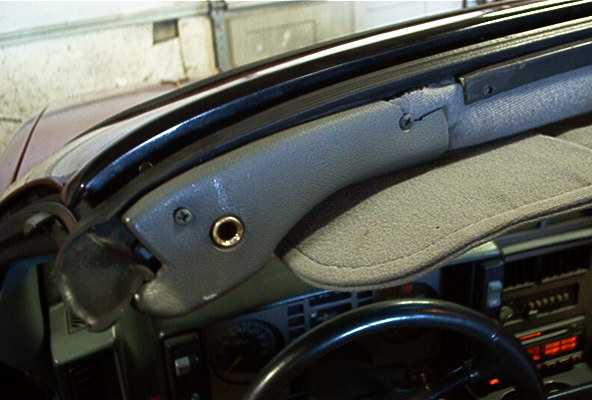
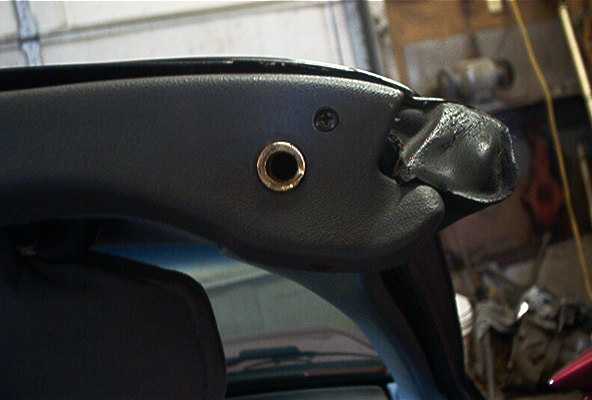
End cap in place.

You'll notice my end cap on this side is broken around the inner mounting hole, that will be a project for another day.
Also the black moulding that goes around the top of the headliner has shrunk up, I need to find a replacement for this.

The drivers side took me about an hour, but the passanger side took less than 15 minutes after knowing basically what I needed to do.

I thought of doing this as something to hold me over untill new endcaps become available, but since I finished them this evening, I believe this is a permanent fix.

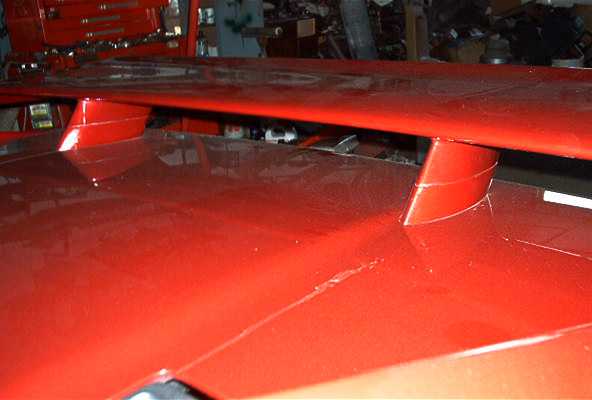
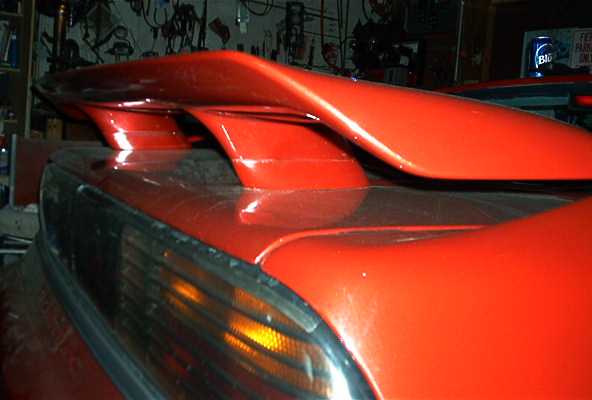
This is another little project I tinkered with last week. I had started making these wing stand extensions back in 91, and I found them kicking around in my shop just this winter!

Gotta throw this pic on here too!


Hope you enjoyed!

[This message has been edited by jelly2m8 (edited 07-21-2003).]

IP: Logged
skitime
Member
Posts: 5765
From: Akron, PA, USA
Registered: Aug 2000


Feedback score:    (10)
Leave feedback


Total ratings: 332
Rate this member

Report this Post07-21-2003 11:41 PM Click Here to See the Profile for skitimeSend a Private Message to skitimeDirect Link to This Post
Great post Jel! That was a great idea.
IP: Logged
Spiff
Member
Posts: 1601
From: York ,PA
Registered: Sep 2001


Feedback score: N/A
Leave feedback


Total ratings: 63
Rate this member

Report this Post07-22-2003 12:20 AM Click Here to See the Profile for SpiffClick Here to visit Spiff's HomePageSend a Private Message to SpiffDirect Link to This Post
Great post Jelly. Now how about getting some more produced for us les mechanically skilled than you. Namely me. How bout a set for the rear also.

Again. Great post.

IP: Logged
fieroparts.com
Member
Posts: 4831
From: Maine 207-934-1969
Registered: Jun 2000


Feedback score:    (57)
Leave feedback


Total ratings: 185
Rate this member

Report this Post07-22-2003 12:25 AM Click Here to See the Profile for fieroparts.comClick Here to visit fieroparts.com's HomePageSend a Private Message to fieroparts.comDirect Link to This Post
Nice work, this will help many T-top owners out of a jam.
IP: Logged
dabadfiero
Member
Posts: 35
From: midwest
Registered: Sep 2002


Feedback score: N/A
Leave feedback

Rate this member

Report this Post07-22-2003 12:44 AM Click Here to See the Profile for dabadfieroSend a Private Message to dabadfieroDirect Link to This Post
another great material to use for your bushing is nylon stock it is very durable and strong, not to mention very easy to machine. this material is widely used in the machine shop for tool fixtures and bushing of all types.
IP: Logged
jscott1
Member
Posts: 21676
From: Houston, TX , USA
Registered: Dec 2001


Feedback score:    (15)
Leave feedback


Total ratings: 415
Rate this member

Report this Post07-22-2003 02:16 AM Click Here to See the Profile for jscott1Send a Private Message to jscott1Direct Link to This Post
Jelly, you are my hero. My "A" pillar caps aren't broken...yet. I'd order a pair from you if you decide to mass produce them. I can't figure out why C&C didn't reinforce those caps better in the first place.

------------------
If you find my advice useful, then please give me a positive rating, thanks...

Firebird Interior Installation Thread

IP: Logged
RossT
Member
Posts: 3038
From: Bismarck, North Dakota
Registered: May 99


Feedback score: (1)
Leave feedback


Total ratings: 54
Rate this member

Report this Post07-22-2003 03:25 AM Click Here to See the Profile for RossTClick Here to visit RossT's HomePageSend a Private Message to RossTDirect Link to This Post
I ran into a guy at the "Dells Run" that did something very simular to what you did.

I will try my best to describe what he did. Instead of a bushing he used something that is found in the electrical department at home depot. I don't know what the term for it is, but it is hard plastic and it slips into the hole in the support frame. They come in different diameters and are color coordinated for each diameter, so you need to measure the diameter of the hole. When the rods are extend they slip into this plastic sleave, and this takes the pressure off the endcaps and screws.

But I like your idea too! When are you going to start selling these things?

IP: Logged
jelly2m8
Member
Posts: 6235
From: Nova Scotia, Canada
Registered: Jul 2001


Feedback score: N/A
Leave feedback


Total ratings: 243
Rate this member

Report this Post07-24-2003 12:21 AM Click Here to See the Profile for jelly2m8Send a Private Message to jelly2m8Direct Link to This Post
Thanks for the replies guys!

Nylon would work great too, the brass may be just a bit overkill, but hey, it will be a LONG time before these wear out

If anyone is interested in these, I can have more made.

I had the outer diameter of the bushing collar made smaller than the hole in the reinforcing plate to allow some adjustment.

I've had to re-adjust the bars in the passanger side roof panel, so I was thinking that if I had any more made, I'd get them done so that the collar was a close fit in the hole of the plate, and just adjust the locking bars as necessary.

These bushings will work in the rear pillar cap also.

IP: Logged
Daniel87GT
Member
Posts: 233
From: Saratoga Springs, UT
Registered: Nov 2000


Feedback score: N/A
Leave feedback

Rate this member

Report this Post07-24-2003 02:52 AM Click Here to See the Profile for Daniel87GTSend a Private Message to Daniel87GTDirect Link to This Post
Sounds like a pretty cool idea to me. How much do you think it would cost for a set?
IP: Logged
BOILERMAKER
Member
Posts: 1334
From: Indianapolis, IN, USA
Registered: May 99


Feedback score: N/A
Leave feedback

Rate this member

Report this Post07-24-2003 08:29 AM Click Here to See the Profile for BOILERMAKERSend a Private Message to BOILERMAKERDirect Link to This Post
I'd buy some!

------------------

Mike

IP: Logged
PFF
System Bot
rkisling
Member
Posts: 69
From: San Francisco, CA USA
Registered: Aug 2003


Feedback score: (1)
Leave feedback

Rate this member

Report this Post10-03-2003 12:10 AM Click Here to See the Profile for rkislingSend a Private Message to rkislingDirect Link to This Post
I would buy a set as well...
IP: Logged
foxgapfiero
Member
Posts: 2445
From: Bangor PA USA
Registered: Sep 2001


Feedback score:    (18)
Leave feedback

Rate this member

Report this Post10-03-2003 06:03 AM Click Here to See the Profile for foxgapfieroSend a Private Message to foxgapfieroDirect Link to This Post
I'll take two, ya never know when a new project might come along....

------------------
Mark Hoagland
861/2GT 3.4 5-speed 355 nose and tailights
88GT T-Top yellow 5-speed
86SE 2M6 auto

IP: Logged
jelly2m8
Member
Posts: 6235
From: Nova Scotia, Canada
Registered: Jul 2001


Feedback score: N/A
Leave feedback


Total ratings: 243
Rate this member

Report this Post10-03-2003 08:43 PM Click Here to See the Profile for jelly2m8Send a Private Message to jelly2m8Direct Link to This Post
If you guys want some of these bushings made up, I can get my machinest to turn a few out.

They will be as shown in the first 2 pics, you will have to drill any holes, or do any trimming / shaping to the bushing.

They will be brass which is easy to work with.

Just gimme a count of how many we need, and I can get a price.

IP: Logged
Tom Slick
Member
Posts: 4342
From: Alvarado, TX
Registered: May 2003


Feedback score:    (24)
Leave feedback


Total ratings: 66
Rate this member

Report this Post10-03-2003 11:30 PM Click Here to See the Profile for Tom SlickSend a Private Message to Tom SlickDirect Link to This Post
count me in.

toms...

------------------

IP: Logged
Cruz
Member
Posts: 96
From: Tumwater, Wa.
Registered: Dec 2002


Feedback score: N/A
Leave feedback

Rate this member

Report this Post10-04-2003 01:17 AM Click Here to See the Profile for CruzClick Here to visit Cruz's HomePageSend a Private Message to CruzDirect Link to This Post
I'm in.......
Has anyone bought any of the endcaps from the fieroparts.com??? are they worth the price??

------------------
Build The Coolest of the cool and DRIVE it!!
87 GT T-top Auto
Gonna Wave At Ya Anyway

IP: Logged


All times are ET (US)

T H I S   I S   A N   A R C H I V E D   T O P I C
  

Contact Us | Back To Main Page

Advertizing on PFF | Fiero Parts Vendors
PFF Merchandise | Fiero Gallery
Real-Time Chat | Fiero Related Auctions on eBay


Copyright (c) 1999, C. Pennock