2002
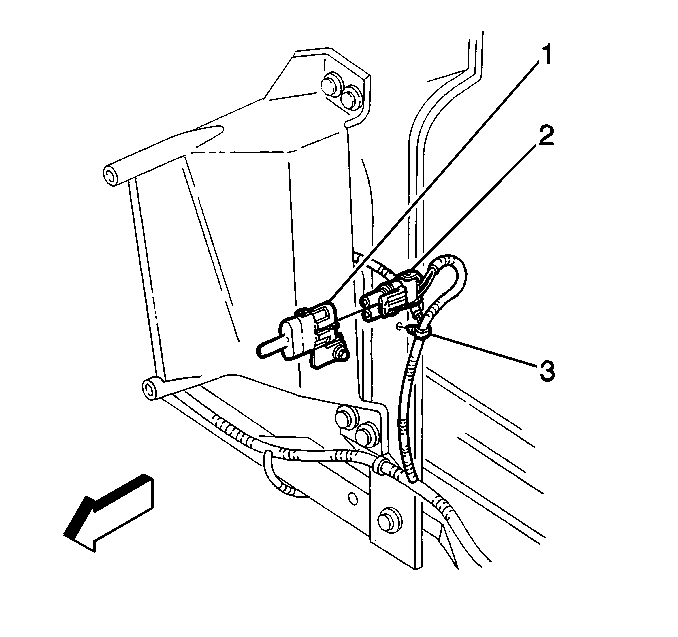
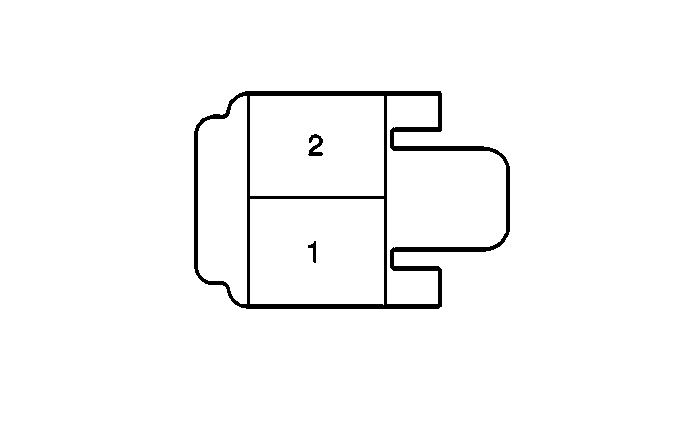
Ambient Air Temperature Sensor
similar location
.
Inside Rearview Mirror Description and Operation
Inside Rearview Mirror with the Automatic Day-Night Feature System Components
The inside rearview mirror with the automatic day-night feature system consist of the following components:
Inside rearview mirror
Driver outside rearview mirror with the automatic day-night feature
Ambient air temperature sensor
Inside Rearview Mirror with the Automatic Day-Night Feature System Operation
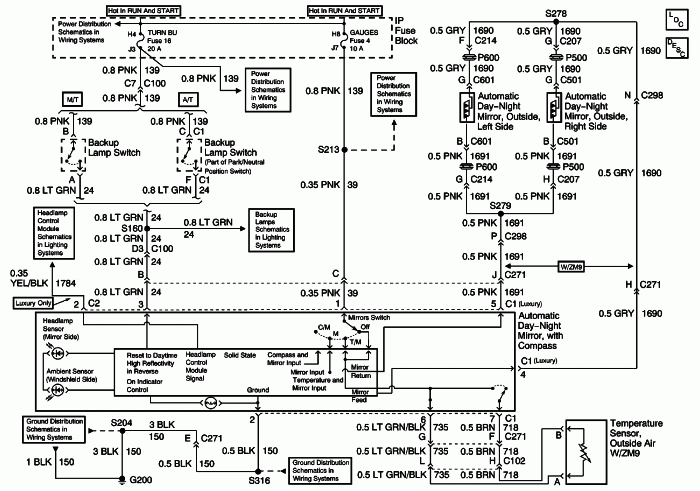
With the ignition switch in the ON position, ignition 1 voltage is supplied through the IGN 1 fuse in the left I/P fuse block to the inside rearview mirror. Ground for the inside rearview mirror is provided by G203.
The inside rearview mirror has 2 photocell sensors. The headlight sensor, located on the front of the mirror or mirror face. The headlight sensor is used to detect a high light condition such as headlights from a car behind. The ambient light sensor located on the back of the mirror or windshield side. The ambient light sensor is used to detect a low light or nighttime condition. In a low light or nighttime condition, with the automatic day-night feature enabled, the mirror will automatically darken the face to reduce the glare from the headlights. With the gear selector lever in the REVERSE position, backup lamp supply voltage is supplied as an input to the inside rearview mirror. This disables the automatic day-night feature of the mirror and allows the face to gradually change to a normal state. In the daytime, the mirror is in a normal state because of the high light condition that is detected by the ambient light sensor.
The inside rearview mirror will also darken the driver outside rearview mirror. The inside rearview mirror supplies a signal and a low reference to the driver outside rearview mirror. Refer to Outside Mirror Description and Operation in Doors for further description and operation of the driver outside rearview mirror.
Compass
The mirror uses two magnetic field sensors for compass direction. One sensor is for north and south; the other is for east and west. The mirror supplies a signal and low reference to each sensor. As the vehicle travels with or against the earth's magnetic pull, there will be a change in voltage on one or both sensors. As a result of the change in voltage, the mirror changes the heading on the compass display.
Temperature Display
The inside rearview mirror supplies a 5 volt signal circuit and low reference circuit to the ambient air temperature sensor. As the outside air temperature gets warmer, the ambient air temperature sensor will pull the voltage lower on the 5 volt signal circuit. The inside rearview mirror monitors this voltage and will show this as a warmer temperature on the display. Temperatures exceeding 112°C (143°F) will be out of the mirror's temperature range which SC will be shown on the temperature display. In colder outside air temperatures, the ambient air temperature sensor will not pull the voltage as low on the 5 volt signal circuit. The inside rearview mirror will show a colder temperature on the display. Temperatures exceeding -40°C (-40°F) will be out of the mirror's temperature range which OC will be shown on the temperature display. In cold temperatures such as 3°C (37°F) or below, the temperature display will show ICE when the ignition is first turned on. The display will toggle between ICE and the actual outside temperature until the temperature update process is complete.
Temperature Display Update Process
The inside rearview mirror has a temperature program that takes in account the fact that the radiator will heat the ambient air temperature sensor if the radiator is warm and the vehicle is not moving. If the vehicle has been off for more than 2 hours, the mirror temperature program assumes that the radiator has cooled and that the temperature supplied by the ambient air temperature sensor is accurate. Because of this, if the vehicle has been off for more than 2 hours, the mirror displays the temperature as reported by the ambient air temperature sensor. When the ambient air temperature sensor reports a new temperature to the mirror, one of the following cases will apply:
Ignition is off for more than 2 hours, then is turned on for more than 3 minutes. The outside temperature is greater than the last temperature recorded by the mirror for 2 minutes. The mirror will increase the last temperature reading by one degree every 2 minutes for 8 consecutive times. If the outside temperature is not matched after the 8th update, the mirror will then display the current outside temperature.
Ignition is off for more than 2 hours, then is turned on for less than 3 minutes. The mirror will update the temperature display every 2 seconds.
Ignition is off for more than 2 hours, then is turned on for more than 3 minutes. The outside temperature is less than the last temperature recorded by the mirror. The mirror will then display the current outside temperature.
Ignition has been off for less than 2 hours. The outside temperature is greater than the last temperature recorded by the mirror for 2 minutes. The mirror will increase the last temperature reading by one degree every 2 minutes for the 8 consecutive times. If the outside temperature is not matched after the 8th update, the mirror will then display the current outside temperature.
Ignition has been off for less than 2 hours. The outside temperature is greater than the last temperature recorded by the mirror, but the ignition is cycled from on to off within 2 minutes. The mirror will display the old temperature.
Ignition has been off for less than 2 hours. The outside temperature is less than the last temperature recorded by the mirror. The mirror will then display the current outside temperature.
Switches of the Inside Rearview Mirror with the Automatic Day-Night Feature, Compass/Temperature Display without OnStar®
The inside rearview mirror has two switches that perform the following functions:
The TEMP switch is used to turn the compass/temperature display on or off, It is also used to enable or disable the automatic day-night feature of the mirror. With the ignition in the ON position, depress the TEMP switch to enable the compass/temperature display. Depress the TEMP switch again to disable the compass/temperature display. The TEMP switch can be held for 4 seconds in order to change the display from Fahrenheit (°F) to Celsius (°C), or from Celsius (°C) to Fahrenheit (°F). Depress the TEMP switch until the green indicator illuminates on the mirror. This indicates that the automatic day-night feature is enabled. To disable the automatic day-night feature of the mirror, depress the TEMP switch until the green indicator turns off.
The COMP switch is used to turn the compass/temperature display on or off. With the ignition in the ON position, depress the COMP switch to turn the compass/temperature display on. Depress the COMP switch again to turn the compass/temperature display off. The COMP switch is also used to place the compass into a calibration or zone mode. For more information, refer to Compass Calibration and Variance Procedure .
Switches of the Inside Rearview Mirror with the Automatic Day-Night Feature, Compass/Temperature Display with OnStar®
The inside rearview mirror has four switches that perform the following functions:
• The on/off switch located at the left side of the mirror performs the following functions:
- To enable or disable the automatic day-night feature of the mirror. With the ignition in the ON position, depress and hold the on/off switch for 6 seconds to enable the automatic day-night feature of the mirror. A green indicator will illuminate on the mirror when the automatic day-night feature is enabled. To disable the automatic day-night feature of the mirror, depress and hold the on/off switch for 6 seconds.
- To turn the compass/temperature display on and off. With the ignition in the ON position, depress the on/off switch to turn the compass/temperature display on. Depress the on/off switch again to turn the compass/temperature display off. The on/off switch can be held for 4 seconds in order to change the display from Fahrenheit (°F) to Celsius (°C), or from Celsius (°C) to Fahrenheit (°F). The on/off switch is also used to place the compass into a calibration or zone mode. For more information, refer to Compass Calibration and Variance Procedure .
• The three switches on the right side of the mirror are for OnStar® operation. For more information, refer to OnStar Description and Operation in Cellular Communications.
.
.
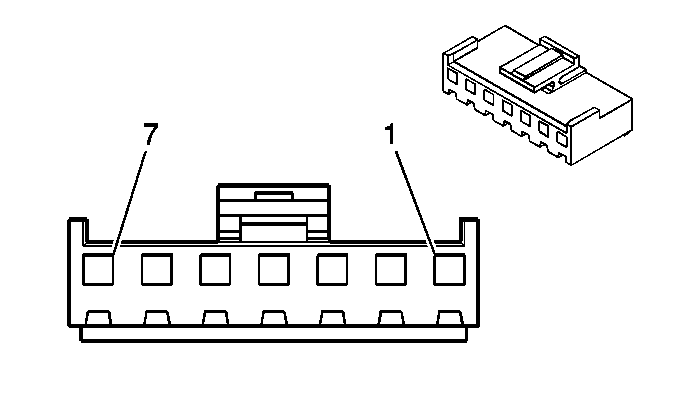
Inside Rearview Mirror Connector
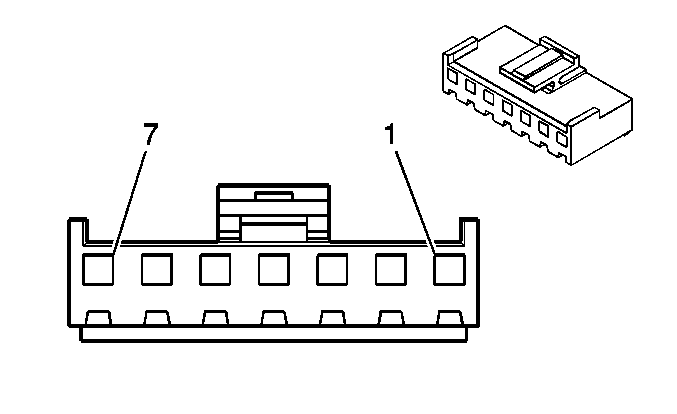
Connector Part Information
12124782
7-Way (BLK)
Pin
Wire Color
Circuit No.
Function
1
PNK
39
Ignition 1 Voltage
2
BLK
1850
Ground
3
LT GRN
1324
Backup Lamp Supply Voltage
4
GRY
1690
Automatic Day/Night Mirror Signal
5
PNK
1691
Automatic Day/Night Mirror Low Reference
6
DK GRN/
WHT
636
Outside Air Temperature Sensor Signal
7
BLK/WHT
1704
Low Reference
------------------
Cadillac Tech
ASE MASTER TECH since 1988

86 Northstar Fiero
85 RX7 former SCCA car
56 TR3 small mouth 6.0L
A.J. Whiteley


