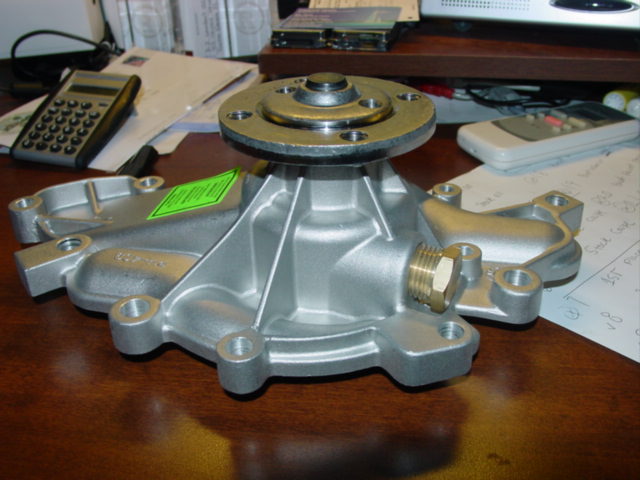
Going to change out the water pump tomorrow on the 88 Formula. The existing one is making noise & you can see the pulley moving back & forth when running. You can move it side to side, almost looks like the bolts are loose in the pulley but there not.
Picked up all the supplies tonight. Pump, belts, antifreeze, RTV, a T-40 star socket, and a few other odds & ends. Paul, of "Pauls Auto Detail", in Port Charlotte is going to let me use his shop & help with the repair.
Anyone have any words of wisdom about this project ?
A tool came with the water pump, the instructions say to install this tool against the timing cover prior to removing the pump. I've never heard of this, but will use it. The auto parts guy said it was used so the timing cover seal doesn't break.
I will try to document the process for those that may need to do the same job later.
Thanks for any info anyone can provide.
[This message has been edited by CoolBlue87GT (edited 04-15-2007).]
IP: Logged
11:57 PM
PFF
System Bot
Apr 15th, 2007
Dennis LaGrua Member
Posts: 16198 From: Hillsborough, NJ U.S.A. Registered: May 2000
When you remove the bolts that hold the water pump you are also removing support for thr timing cover. That is why they make a holding tool that holds the cover firmly in place while you take out the bolts. Changing water pumps is a procedure that you'll need to tackle in a cramped space. Also remove everything around it to free up working space. Even removing the battery helps gain access. It's about a 3 hour job provided that no bolts break and if everything goes smoothly. I also recommend using only new rather than rebuilt water pumps.
And it might be mentioned in other post or the instructions that came with the pump but several of the bolt go into the water jacket so be sure and put sealer on the threads.
Thanks, I'm a little concerned about that thread, it states you don't need to use that tool to hold the timing cover.
quote
Originally posted by Dodgerunner:
And it might be mentioned in other post or the instructions that came with the pump but several of the bolt go into the water jacket so be sure and put sealer on the threads.
Thanks, good idea.
quote
Originally posted by Phil:
Double check the star (torx) bolts as I'm quite sure that Pontiac used 3 different sizes on the pump
Thanks, I think your right, I read something about that in a Michigan Fiero web site. I'd hate to start the project, only to find out I didn't have the other two sizes.
+'s to all.
[This message has been edited by CoolBlue87GT (edited 04-15-2007).]
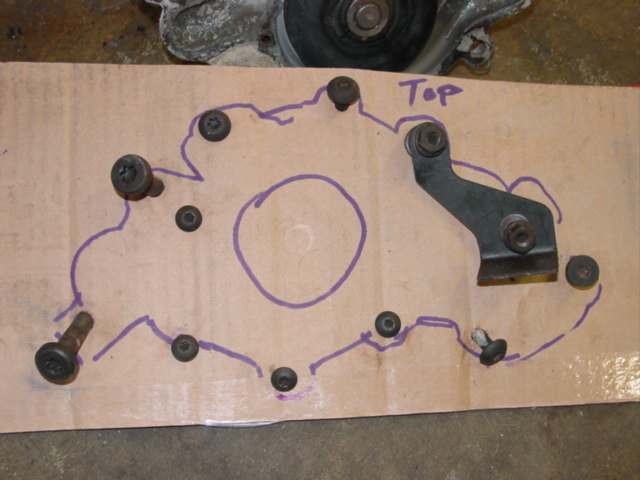
Take lots of pictures, it will help if you forget where something goes. Get a cardboard box and turn it upside down. Sit the new water pump on it and match up some holes in the box now every bolt you removed stick in the correct hole in the new pump. Once you have the old pump off you can remove each bolt and stick it in the old pump and you will never loose track of your bolts. I did not use the temp bracket when I did mine, just make sure you don't hit your cover with anything that may knock it loose. If your bolts are ate up now would be a good time to replace any of them and get rid of the torex heads. I replace 3 of the bottom bolts on mine with new bolts. Before you remove your water pump look at the top of it, there is one bolt that doesn't have any metal behind it. If you tighten this bolt too much it will snap that ear off, the parts store may replace it once but its better not to chance it. Make sure you have the gasket surface is clean and don't go overboard with sealer thats what the gasket is for. Good luck
IP: Logged
09:11 AM
CoolBlue87GT Member
Posts: 8543 From: Punta Gorda, Florida, USA Registered: Apr 2001
When you first break the pulley bolts loose, leave the belt on, and tight. Otherwise, the pulley will try to turn.
It might make it easier to get to things if you remove the wheel and the rubber skirt from the wheel well. It's not required, but it may be helpful.
I found that the toughest part of the job was getting all of the old gasket material off, in the restricted area. It's been a long time since I did a water pump with the engine in the car but if there is room to work, and if you have access to a die grinder, get the little kit that includes the 2" sanding wheel and the fine (green) Scotchbrite pads. That will make short work of cleaning up the gasket surfaces. (Most of the kits come with an assortment, but I seldom use anything other than the fine ones.) Go easy. You don't want to polish away any aluminum. Just old gasket stuff.
I might suggest that if you ever -EVER- felt like doing away with the insulation that is in the engine compartment, now would be an excellent time. Mine's been gone for many years and I have never missed it. Removing it seems like it gives you all kinds of extra space to work. It takes up a great deal of useable working room where it goes down to the frame rail. The engine compartment wall actually angles away from the engine towards the bottom, about 1.5". It's sort of hard to describe, but if you do it, you'll understand. Removing it also helps to prevent that "fiberglass itch".
IP: Logged
12:06 PM
jscott1 Member
Posts: 21676 From: Houston, TX , USA Registered: Dec 2001
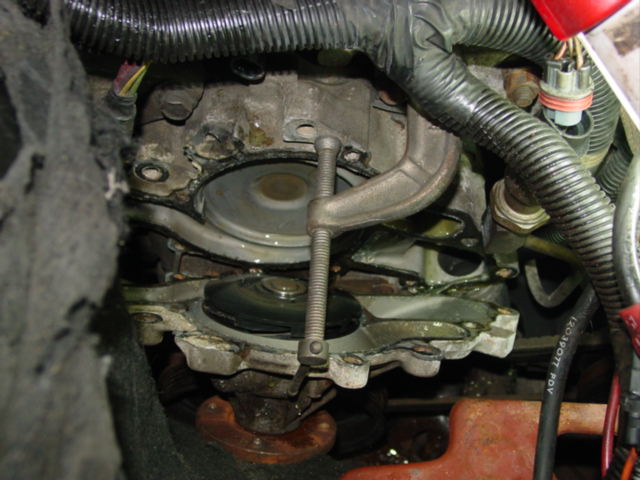
The only thing we couldn't figure out was how to use the hold down bracket that came with the pump. We ended up using a c-clamp. The pump came loose with out any tugging at all. I was ready for it to fight us all the way.
Paul used a little trick, removed the dogbone & motor mount, jacked the engine up about 5 inches, gave all the room needed.
We flushed out the system & added new fluid, burped it a few times. Took so little time, decided to change both belts, oil & filter and the fuel filter, seeing the fuel filter had 98k miles on it.
We used the cardboard idea to keep track of the location of the bolts
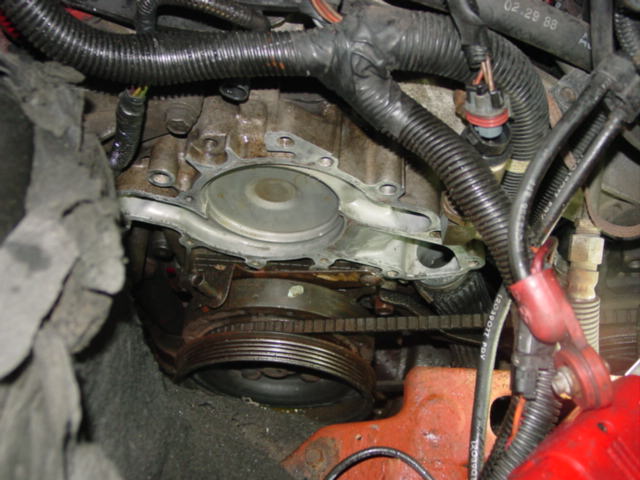
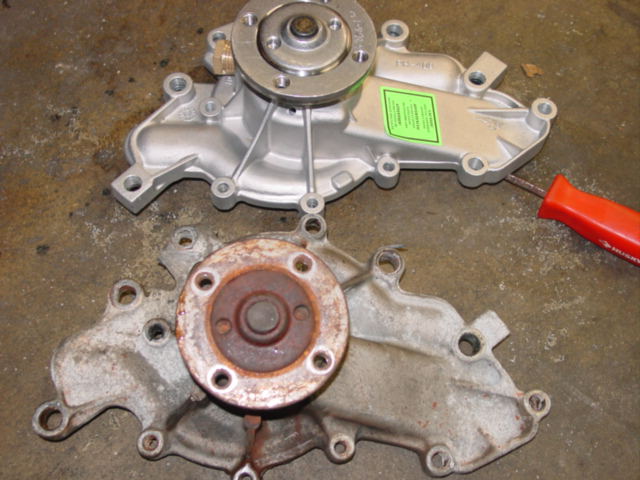
Showing pump that came off with the last bolt. No tugging at all.
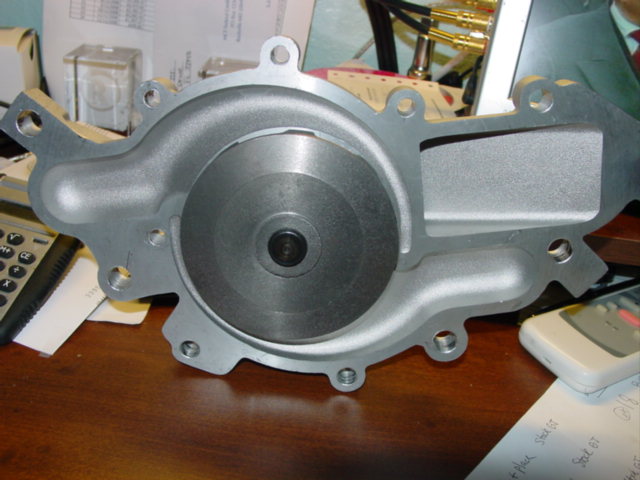
All clean, ready for new pump
All done & running.
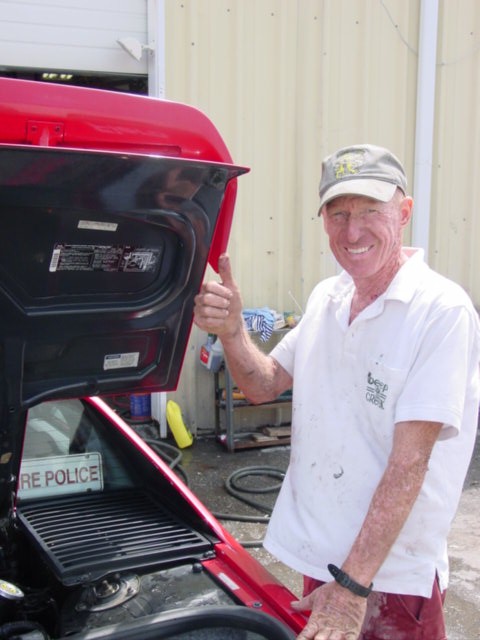
A special thanks to Paul, of Paul's Auto Detail for doing 90% of the work for me. Here's Paul.
[This message has been edited by CoolBlue87GT (edited 04-16-2007).]
IP: Logged
04:30 PM
Apr 16th, 2007
CoolBlue87GT Member
Posts: 8543 From: Punta Gorda, Florida, USA Registered: Apr 2001
Here's the 19 year old fuel filter. If you look close on the cardboard, you'll see little silver bits that poured out of the filter. Not sure what they from, but glad they didn't make it to the injectors. The particles almost looked like a real fine metalic that you would see in most paint jobs.
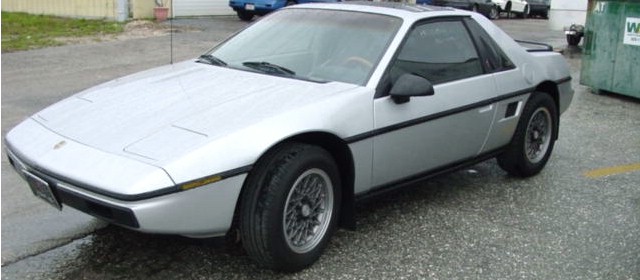
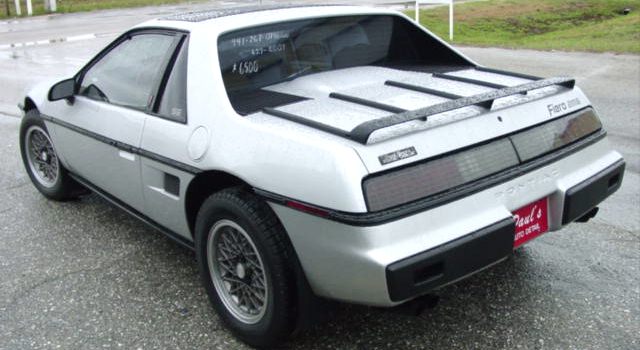
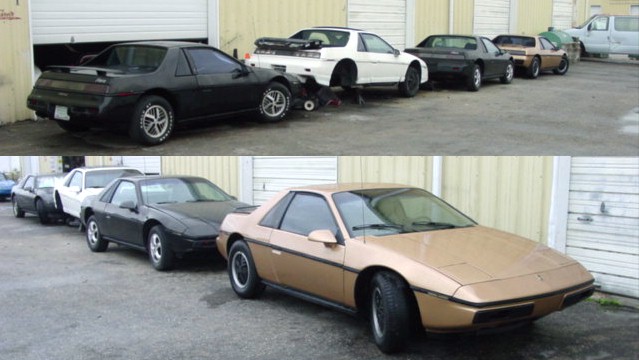
Here's a few of the cars Paul has, most for sale. This is a very sharp Sliver SE
Some might remember this car, it started out as a 25 dollar trashed coupe, Now really nice.
[This message has been edited by CoolBlue87GT (edited 04-16-2007).]
IP: Logged
08:01 AM
css9450 Member
Posts: 5593 From: Glen Ellyn, Illinois, USA Registered: Nov 2002
The only thing we couldn't figure out was how to use the hold down bracket that came with the pump.
Since your picture showed the whole area pretty well, I superimposed onto it where the bracket attaches. The hole goes where that bolt is, so yes you have to remove the alternator bracket, or pivot it out of the way (loosen the bottom bolt, and remove the three upper bolts, and pivot the whole assembly rearwards). Reinstall the alternator bracket bolt to attach the waterpump bracket.
The angled end of the bracket goes towards the right, and the little cutout is towards the bottom. Also, I couldn't get mine to fit until I removed the temo sensor, which is just visible in the picture peeking out from behind the wiring loom.
I know you're all done, but this may help anyone who searches and winds up here in the future. And, your picture was just right for illustrating this process.
IP: Logged
10:22 AM
Xanth Member
Posts: 6886 From: Massachusetts Registered: May 2006
Did you disconnect the hoses from the engine and underbody coolant lines before raising the engine? If not I would just make sure and check them to ensure they didn't get pulled upwards and bent.
Congrats on getting the job done, I'm not looking forward to having to do mine.
------------------ www.FieroDomain.com Over 120 Fiero Links, Articles, Images, Diagnostics
"If any car is both the parade and the rain, it is the Fiero"
IP: Logged
10:53 AM
Carrolles Member
Posts: 2799 From: Alabaster, AL USA Registered: Apr 99
My understanding is that the hold down bracket is not needed on Fieros. It is used on other engines that use the same water pump. I've replaced 4 Fiero water pumps and never used the hold down bracket.
IP: Logged
12:41 PM
css9450 Member
Posts: 5593 From: Glen Ellyn, Illinois, USA Registered: Nov 2002
My understanding is that the hold down bracket is not needed on Fieros. It is used on other engines that use the same water pump.
I've heard that too but didn't want to find out first hand if it didn't work. At any rate, now I have the tool in case I need it for my S-10, or whatever.
IP: Logged
02:43 PM
wayman Member
Posts: 191 From: port charlotte,FL. 33980 Registered: Jan 2006
I would also like to thank the Gang for there advice which we took to heart and helped us with speed in achomplishing the job...i threw in a few extras and with a Quiet Sunday a little rain and no Phone calls the project went uninterupted...something on a weekday would be impossible...Ha. Glad to help Dave . in that he has supported the show and Donated the trophys single-handed...!We have the original "Save The Fiero Sports Car Club" where i am the Founder/President.
IP: Logged
09:25 PM
CoolBlue87GT Member
Posts: 8543 From: Punta Gorda, Florida, USA Registered: Apr 2001
Since your picture showed the whole area pretty well, I superimposed onto it where the bracket attaches.
Oh okay, I see. We kept the alt bracket in place, thats why it didn't fit. The c-clamp worked out okay.
quote
Originally posted by Xanth:
Did you disconnect the hoses from the engine and underbody coolant lines before raising the engine? If not I would just make sure and check them to ensure they didn't get pulled upwards and bent.
Congrats on getting the job done, I'm not looking forward to having to do mine.
No they weren't removed, when raising the engine the few inches, the lines were okay, not bent.
quote
Originally posted by Carrolles:
My understanding is that the hold down bracket is not needed on Fieros. It is used on other engines that use the same water pump. I've replaced 4 Fiero water pumps and never used the hold down bracket.
I would tend to agree with you, but didn't want to take a chance. When the pump came off wit barely a touch, it was a relief.
quote
Originally posted by wayman:
I would also like to thank the Gang for there advice which we took to heart and helped us with speed in achomplishing the job....
For those that don't know, wayman is Paul.
Thanks again Paul, I'll stop by tomarrow after work. Everything is working fine.
IP: Logged
10:32 PM
Nov 6th, 2008
Patrick Member
Posts: 39485 From: Vancouver, British Columbia, Canada Registered: Apr 99
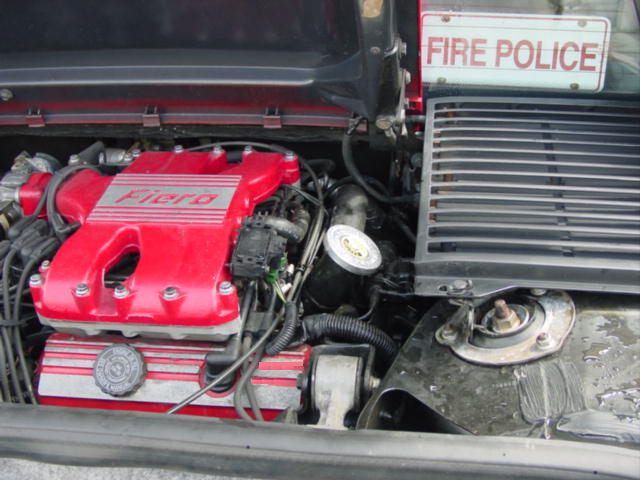
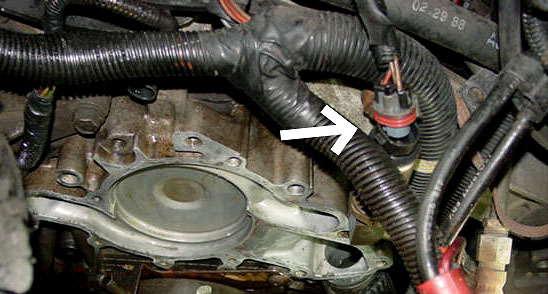
A little off topic, but how does the indicated plug come apart? I was taking all my connections apart to clean them up and add dielectric grease and I wasn't sure how to undo this one.
IP: Logged
03:55 PM
exoticse Member
Posts: 8656 From: Orlando, Fl Registered: Jun 2003
I paid someone $80 to install the water pump for me. Great guy that lives down the road from me. He's worked for GM, Chrysler, and Ford as a mechanic, now he just does it all on his own. He bought and replaced my alternator for $270 and bolts were seized. He had to take the axle off to get to the bracket, then he had to drill out and tap a new hole.
IP: Logged
05:02 PM
86GT3.4DOHC Member
Posts: 10007 From: Marion Ohio Registered: Apr 2004
Originally posted by Dennis LaGrua: I also recommend using only new rather than rebuilt water pumps.
Actually, the "new" castings are MUCH thinner and weaker than the reman units. I had one break when installed, or crack rather, couldnt see it until it leaked when filled. Went through the boxes on the parts store's shelf, the new units were all much thinner in the walls than the reman units. There is really only two bearings (which actually are the seal) in a WP, not a whole lot to screw up when rebuilding one.
What is the purpose of the "C" clamp in the image below? sparx22
The replacement water pump came with a hold down bracket. We could not figure how to mount it, so we used a c-clamp to be safe.
On some applications, the bracket is used to prevent the timing cover to come off when removing the water pump. We found out later, the Fiero does not need it.
So, to answer your question, there was no purpose at all !!!
sparx22, can you edit your abve posting & remove all the photo's ? Thanks
[This message has been edited by CoolBlue87GT (edited 11-24-2008).]
IP: Logged
07:23 PM
Patrick Member
Posts: 39485 From: Vancouver, British Columbia, Canada Registered: Apr 99
Originally posted by Patrick: A little off topic, but how does the indicated plug come apart? I was taking all my connections apart to clean them up and add dielectric grease and I wasn't sure how to undo this one.
quote
Originally posted by Patrick:
Hey CoolBlue, how about a quick response to my question from 11-06-2008 03:55 PM. Thanks.
I had to go outside and take a look & photo. I believe it just pulls out from the top. May have a small metal clip on the back side. I don't remember clearly. Anyone want to chime in on this ?
[This message has been edited by CoolBlue87GT (edited 11-24-2008).]
IP: Logged
09:05 PM
Patrick Member
Posts: 39485 From: Vancouver, British Columbia, Canada Registered: Apr 99
CoolBlue, thanks for having a peek for me and grabbing a quick shot. It's no doubt something very simple to release with the correct technique, but I didn't want to force it apart. Seems to me mine had some sort of a plastic "locking" cap on it as well. I'll have to take another look tomorrow in the daylight.
[This message has been edited by Patrick (edited 11-24-2008).]
IP: Logged
09:28 PM
Raydar Member
Posts: 41656 From: Carrollton GA. Out in the... country. Registered: Oct 1999
A little off topic, but how does the indicated plug come apart? I was taking all my connections apart to clean them up and add dielectric grease and I wasn't sure how to undo this one.
That's the oil pressure sender. What year is your car? 88s are different from all the previous years. (Who woulda guessed..?) I'm not sure how the earlier ones unplug.
[This message has been edited by Raydar (edited 11-24-2008).]
IP: Logged
09:44 PM
PFF
System Bot
Patrick Member
Posts: 39485 From: Vancouver, British Columbia, Canada Registered: Apr 99
That's the oil pressure sender. What year is your car? 88s are different from all the previous years. (Who woulda guessed..?) I'm not sure how the earlier ones unplug.
Raydar, my GT is an '86. I seem to recall there's a complicated looking "locking cap" of some sort on the top of this sending unit on mine. It wasn't obvious (to me) how the assembly unsnapped apart, and I didn't want to damage it trying to force anything.


 Mine's been gone for many years and I have never missed it.


 And, your picture was just right for illustrating this process.


 Thanks.


