I have found the relay connector, which is kind of disappointing, as I didn't take the relay from the parts car, and it doesn't look like any relay I have will fit it. Here is a pic of the relay connector
I cannot find the switch connector though. It must be tucked under the dash, and I am wondering what I would have to remove to find it.
(Edit: this post mistakenly applies to '86 NOT '88 as was requested... see post further below for differences)
Any 15A normally open relay will work. They typically have four terminals numbered 85, 86, 87 & 30. Just cut off the stock fiero connector and crimp on some female bayonet-style push on connectors to the wires. Run the big black/white wire to terminal 87, the small yellow wire to terminal 85, and run the big yellow/black wire to terminal 30, with a small jumper from 30 to 86.
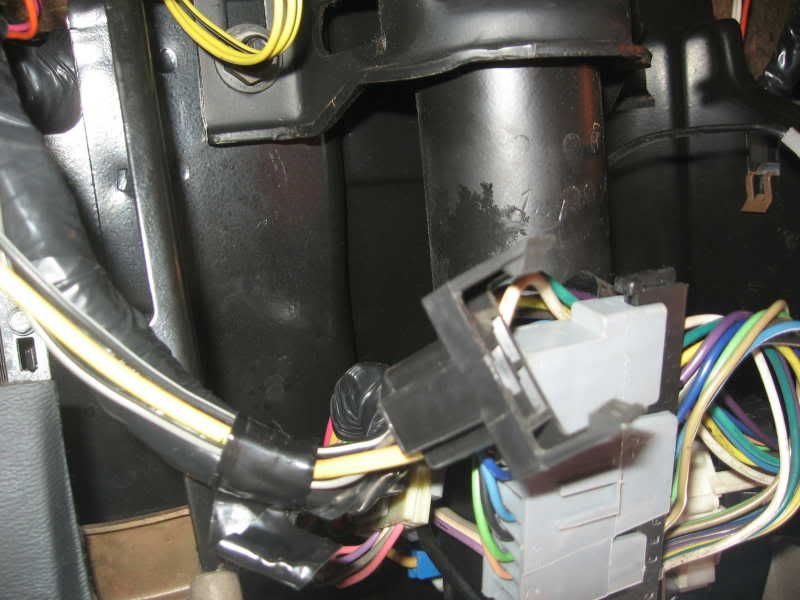
As for the switch wires, I'm surprised they're not there since the big yel/blk wire from the relay runs to the switch. Look for a set of four wires (orn, gry, blk, and yel/blk) leading to a connector there that might be taped out of the way.
[This message has been edited by Bloozberry (edited 04-09-2010).]
IP: Logged
01:10 PM
LitebulbwithaFiero Member
Posts: 3381 From: LaSalle, Michigan Registered: Jun 2008
Hey Blooz, your colors don't match up with mine. I have a big solid yellow wire. A small grey wit black tracer wire and a small black with white tracer wire.
IP: Logged
01:23 PM
edfiero Member
Posts: 971 From: Coatesville, PA Registered: Nov 2004
Weird. I too installed a trunk release on my 88 Forumla that did not come with one. I only had to add the release mechanism to the trunk and the switch on the dash. The wiring was already in the car. I did not have to add any relays.
IP: Logged
01:24 PM
ZombiePenguin Member
Posts: 200 From: Fort Wayne, IN, USA Registered: Mar 2010
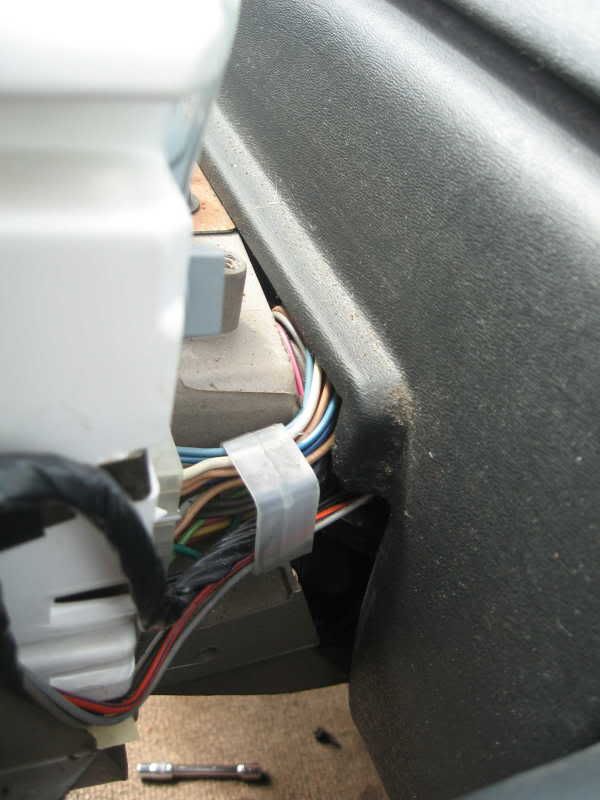
I have an 84 coupe, and i think you are looking for those 4 red and grey wires off to the right hand side of the console, just a hunch but mine has what would appear to be the wire harness for the rear defroster and the trunk popper behind some plastic. not sure if this helps or not
Sorry, I assumed the wires wouldn't have changed color between '86 and '88... the instructions above are for an '86. I'll go check my '88 manual and post the differences.
IP: Logged
01:38 PM
LitebulbwithaFiero Member
Posts: 3381 From: LaSalle, Michigan Registered: Jun 2008
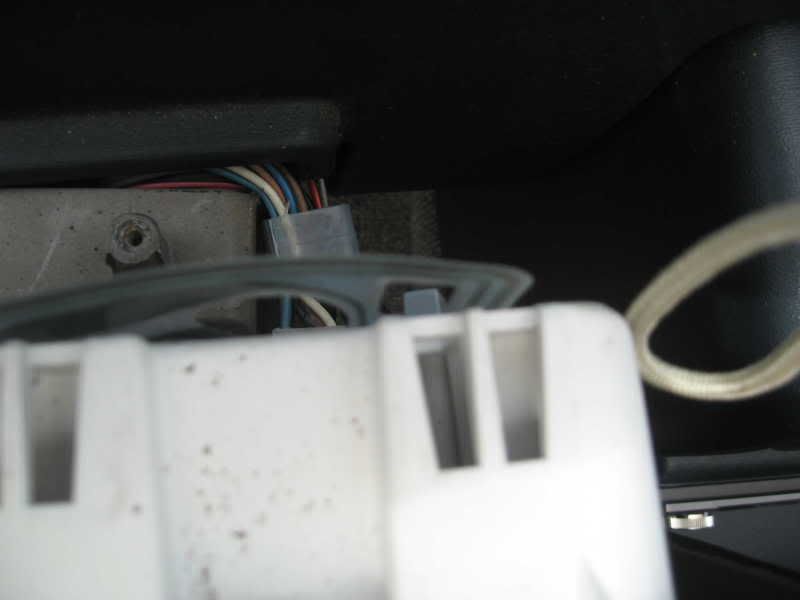
Found it. The orange and grey wires to the side pic lead to the connector that was tucked under the dash. So I got my switch wired up. Next I have to install the solenoid and run the wire for it. Then I will figure out the relay...
(EDIT these instructions are for '88 cars with automatics)
OK... so they ARE different. Use these instructions instead for your '88:
For the relay: just cut off the stock fiero connector and crimp on some female bayonet-style push on connectors to the wires. Run the black/white wire to terminal 87, the big yel wire to terminal 85, and run the gray/black wire to terminal 30, with a small jumper from 30 to 86.
As for the switch wires, follow the gry/blk wire from the relay and you should find the switch connector. Look for a set of four wires (orn/drk blu, gry, blk, and gry/blk).
[This message has been edited by Bloozberry (edited 04-09-2010).]
For tips on installing the solenoid, check out this thread (about halfway down) for a couple pictures of what to do to modify the latch to accept the solenoid.
Yes, you can use the relay for the A/C. When trying to determine which one it is, look for the relay with the light blue, dark blue, black/white, and dark green wires going to it. If you clip the entire connector off with it, just be sure to tape up the light blue and the black/white wires separately so they don't short on anything, nor touch each other. Then, connect the wires as follows:
1. splice the black/white and light blue wires (pin D and A) of the A/C connector together, then connect the two to the grey/black wire for the trunk relay; 2. splice the the dark blue wire of the A/C connector to the yellow wire for the trunk relay; and 3. splice the dark green wire from the A/C connector to the black/white wire for the trunk relay.
IP: Logged
02:19 PM
PFF
System Bot
LitebulbwithaFiero Member
Posts: 3381 From: LaSalle, Michigan Registered: Jun 2008
Yes, you can use the relay for the A/C. When trying to determine which one it is, look for the relay with the light blue, dark blue, black/white, and dark green wires going to it. If you clip the entire connector off with it, just be sure to tape up the light blue and the black/white wires separately so they don't short on anything, nor touch each other. Then, connect the wires as follows:
1. splice the black/white and light blue wires (pin D and A) of the A/C connector together, then connect the two to the grey/black wire for the trunk relay; 2. splice the the dark blue wire of the A/C connector to the yellow wire for the trunk relay; and 3. splice the dark green wire from the A/C connector to the black/white wire for the trunk relay.
I was hoping I edited the post before you saw it. I found the horn relay from my old parts car. At least it is good info in case someone else needs it.
I am all done for today. When I took apart the weather pack connector for the deck lid, it crumbled. It must of been brittle from getting baked by the exhaust. So I am going to wait till my brother comes home, as he might be able to get me a free connector. And if not, I want to make sure he can get me the correct crimp tool.
Weather Pack is reparable... No cutting. No crimp tool. Just a "tool" to remove the connector. beside tool in cave link... Small metal tube from hobby shop, good hardware store, etc.
Read cave... wire service, weather pack section.
Remove connector (one at a time...) and push in new shell. Is standard 1x4 pins shell too.
------------------ Dr. Ian Malcolm: Yeah, but your scientists were so preoccupied with whether or not they could, they didn't stop to think if they should. (Jurassic Park)
Weather Pack is reparable... No cutting. No crimp tool. Just a "tool" to remove the connector. beside tool in cave link... Small metal tube from hobby shop, good hardware store, etc.
Read cave... wire service, weather pack section.
Remove connector (one at a time...) and push in new shell. Is standard 1x4 pins shell too.
No, I didn't read the cave on this, till now. The install should be all done when I get that weather pack connector fixed. I only need to crimp on one terminal for the wire going to the solenoid, as I did not take this from the parts car.