I'm sure that 99% of you already know how to do this, but I'm also sure there is at least 1% of us who would appreciate a very detailed how-to. If any of you are anything like me, then you really like super-detailed step-by-step instructions before you tackle a big project... kinda gives you a little more confidence!
So following are about 60 images, and a full-fledged step-by-step of what worked for me. I am a little limited on some basic tools, so I'm sure some of you have a better way, and suggestions are always welcome!
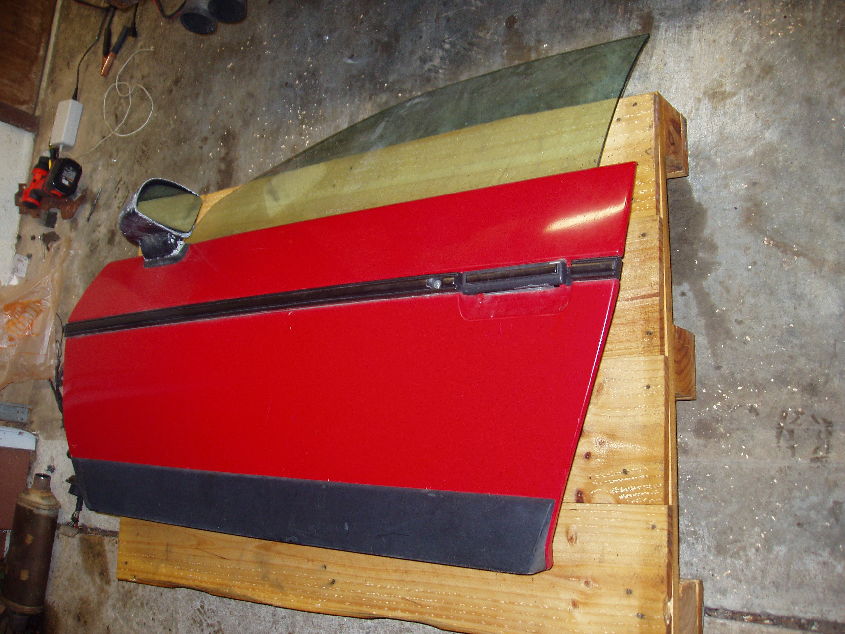
Also, this car is about the most rusted and corroded car in you could possibly get, but if you have a more difficult time with something, please tell me; I'd be interested if someone else's is worse off than mine!
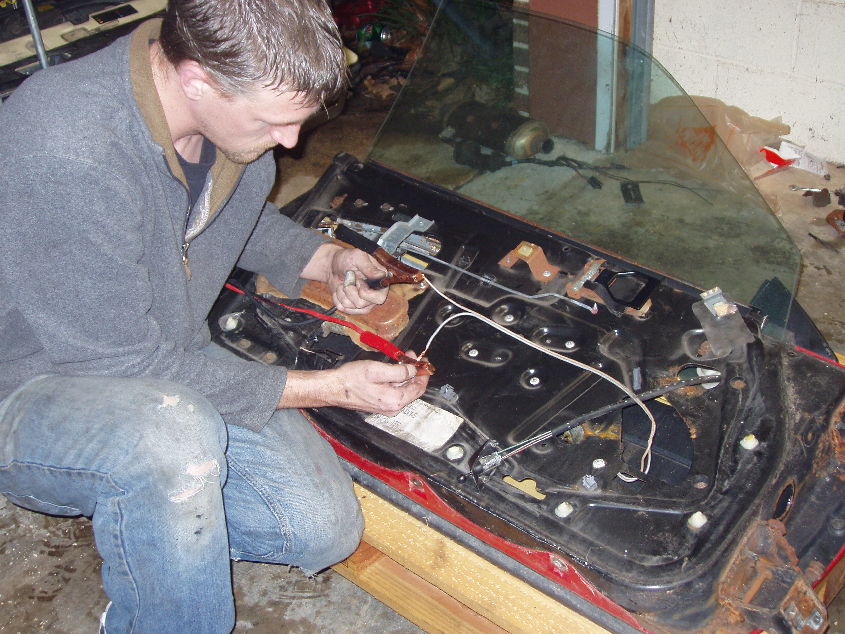
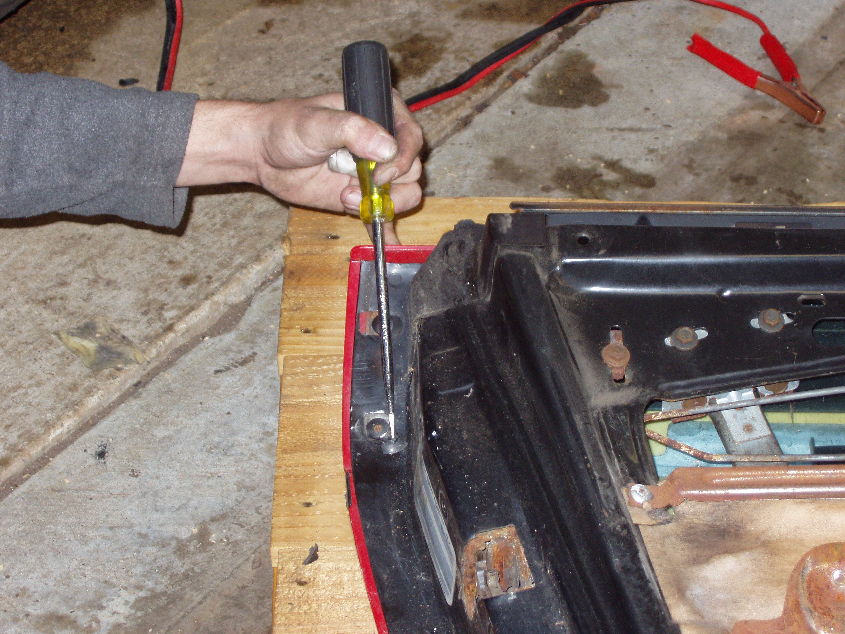
I pulled my doors off with the windows up, so I cut a plug from the harness that fits the window motor. I think I actually used the power door lock plug, but they are the same:
I connected some jumper cables to my other car's battery, and applied negative to the orange wire, and positive to the other, and it rolled the window down:
IP: Logged
10:24 PM
PFF
System Bot
fieroboom Member
Posts: 2132 From: Hayden, AL (BFE) Registered: Oct 2008
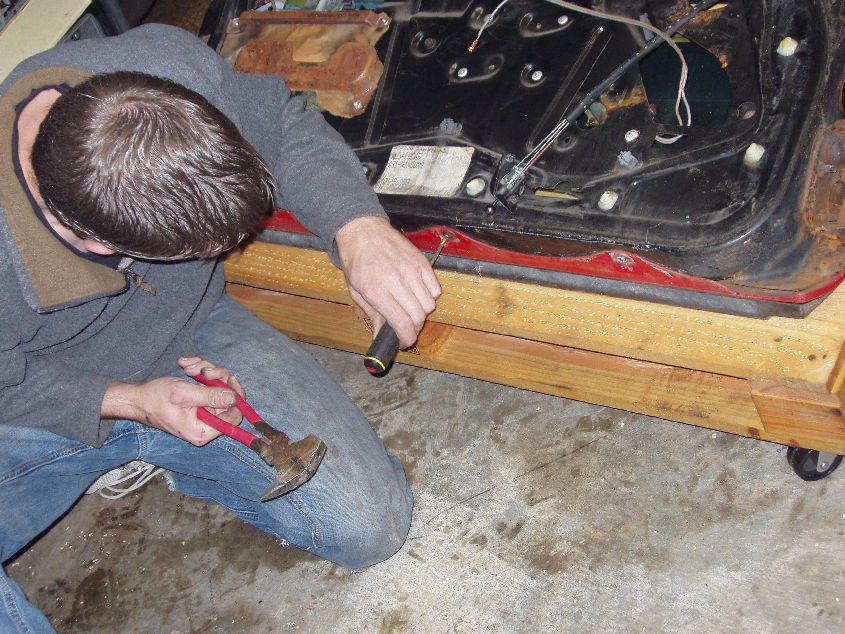
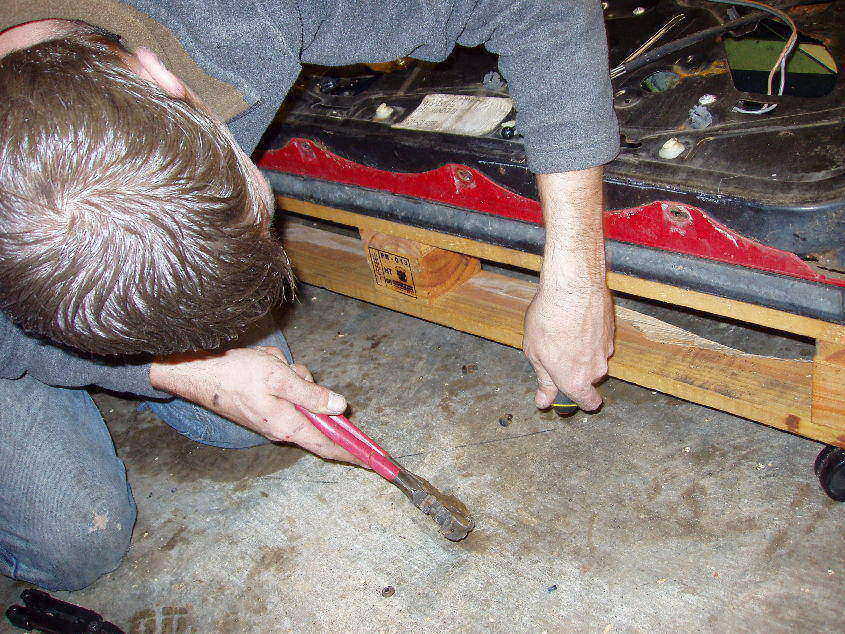
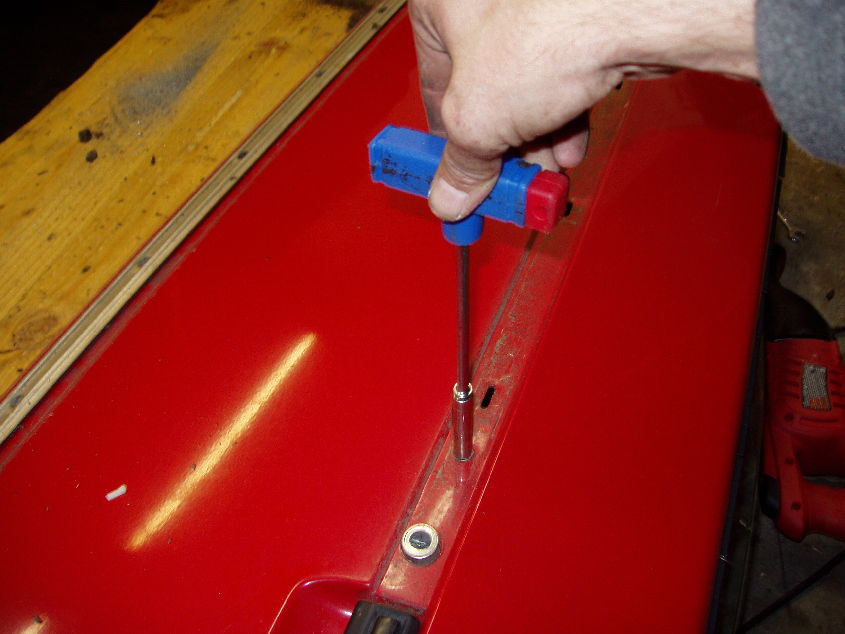
Next, start with the plastic rivets on the bottom of the door. I don't have a real center punch, so I shaped one up from a spare screwdriver I had. Use the punch to knock out the center of the rivets:
Once you knock out the centers, grab some needle-nose pliers, (or a Gerber tool ) and grab the center & outer edge, then twist & pull:
Some of the rivets will come completely out, and some will break in half; either scenario is fine, as long as they separate from the door skin.
IP: Logged
10:30 PM
fieroboom Member
Posts: 2132 From: Hayden, AL (BFE) Registered: Oct 2008
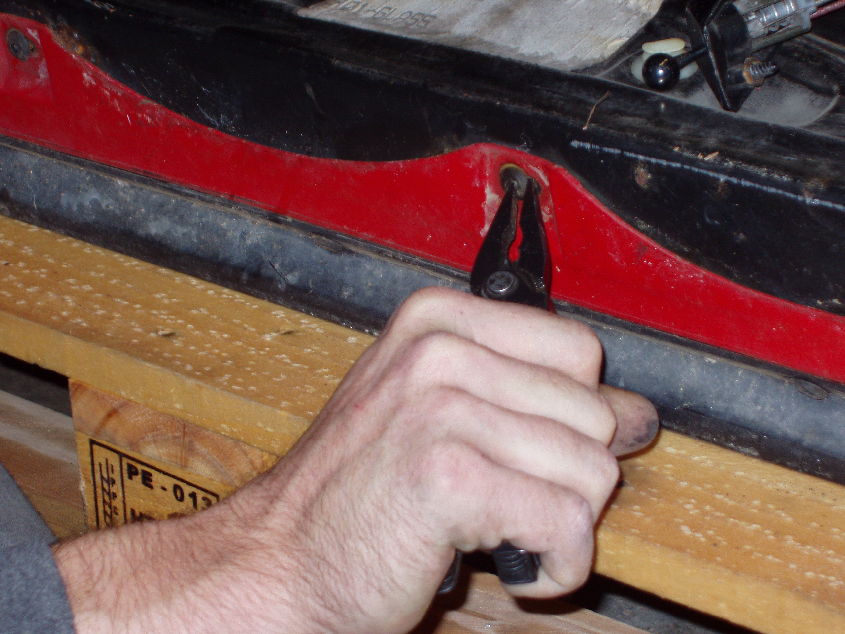
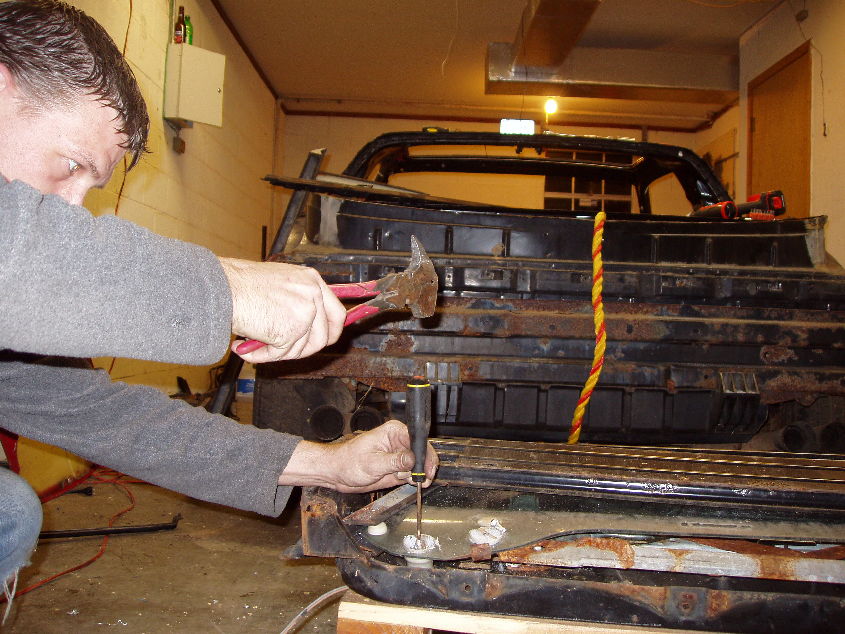
Now, you'll be doing the same process with the trim rivets, but some of them may have the center sticking up quite a bit. You can hit them in with a hammer, but some of them just kinda smashed when I did this on the first door, IMO, it's better to grab your pliers and break the center piece.
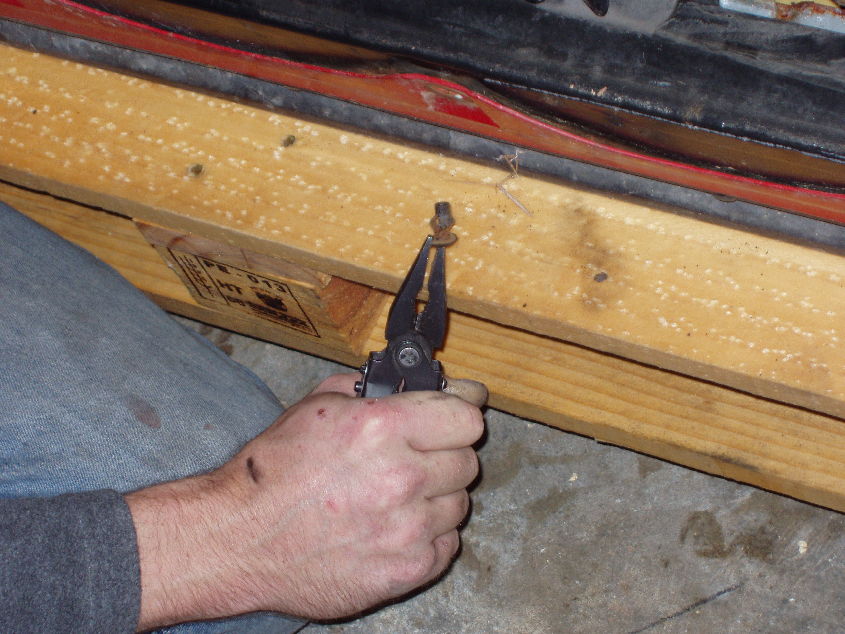
It makes a clean, flush break that you can center-punch:
Now, center punch these rivets the same way you did the bottom of the door skin:
Once those are out, the trim will fall off later when you flip the door.
IP: Logged
10:37 PM
fieroboom Member
Posts: 2132 From: Hayden, AL (BFE) Registered: Oct 2008
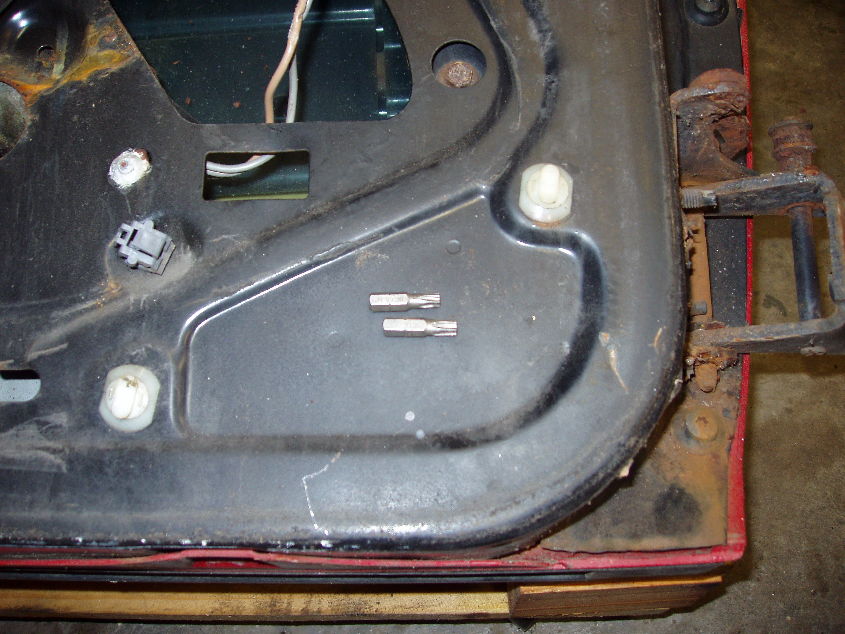
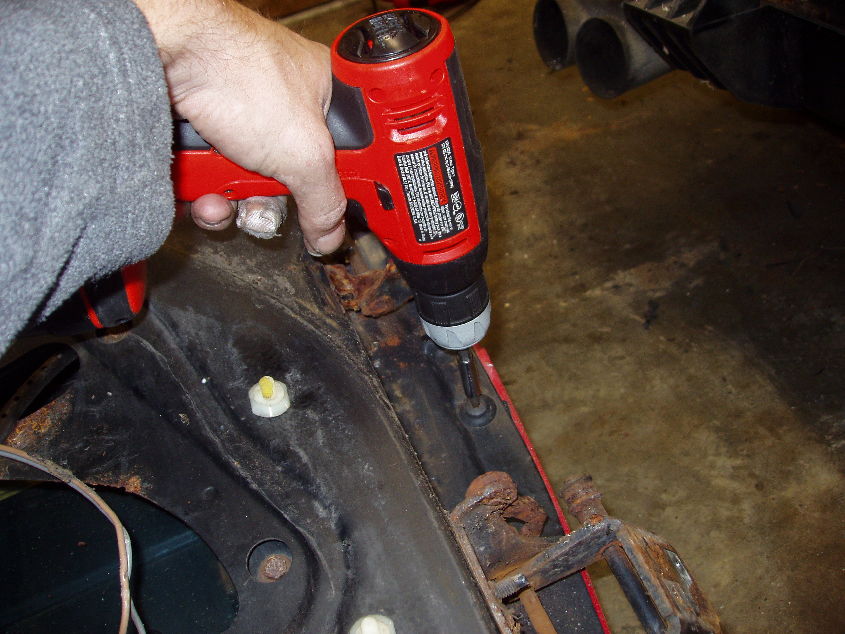
Now we proceed to the actual bolts holding the door skin on. The correct size for these is a VT35 Torx bit, but depending on how much of the plastic is inside the bit area, you may need to start with a VT30:
Take it easy, and find the biggest bit that fits it, then unscrew it:
But... Since this is a rust-prone area, it is possible that they'll just strip and do nothing, no matter what bit you use, which is exactly what happened on most of mine. No problem, just take a good knife (like my Gerber ) and a hammer, place the blade with the sharp edge just at the rim of the bolt, and tap directly down on the blade with the hammer:
This should cut a nice chunk out of the plastic. Now take your mega-flathead screwdriver, and tap the plastic off like you might if it were a corroded E-clip:
IP: Logged
10:46 PM
fieroboom Member
Posts: 2132 From: Hayden, AL (BFE) Registered: Oct 2008
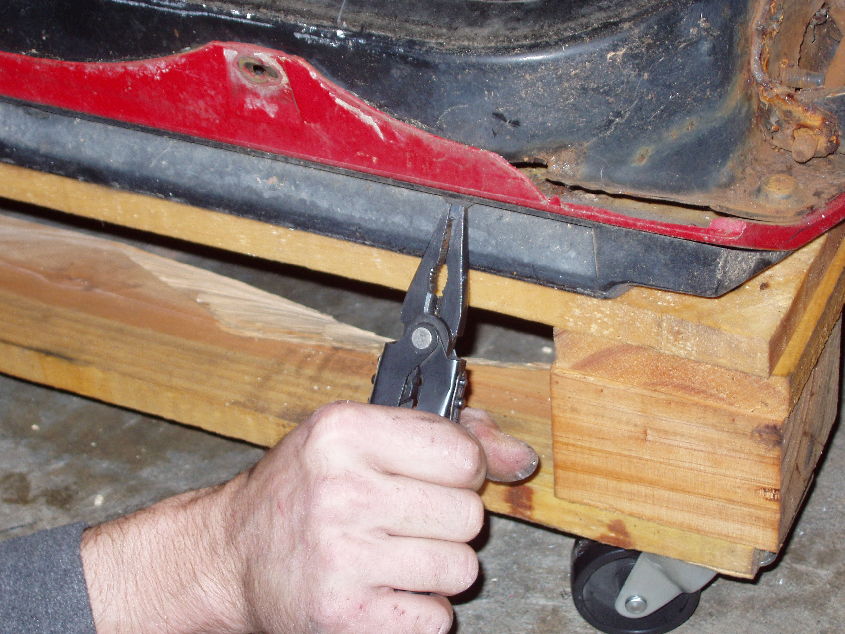
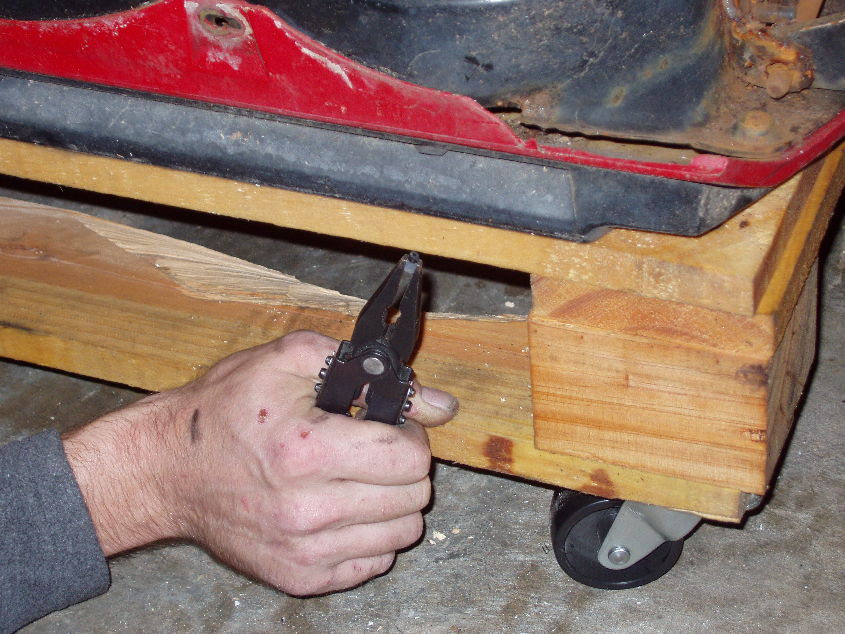
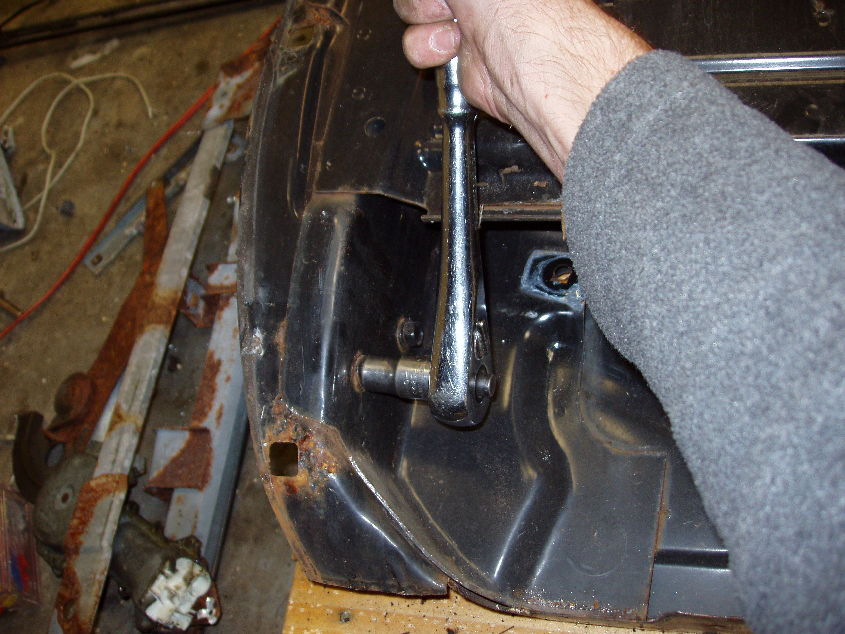
Once the plastic is off, you can leave it alone if you want, because the bolt heads will fit through the mounting holes. But if you're a bit anal (like me.... ), then just take some mega-pliers (vice-grips would work fine), grab the bolt heads, and unscrew them. I have no idea what the name is of the tool I'm using, but I found it at a yard sale for $1, and it has been one of my best tools. If you ever find one, BUY IT!!
IP: Logged
10:51 PM
fieroboom Member
Posts: 2132 From: Hayden, AL (BFE) Registered: Oct 2008
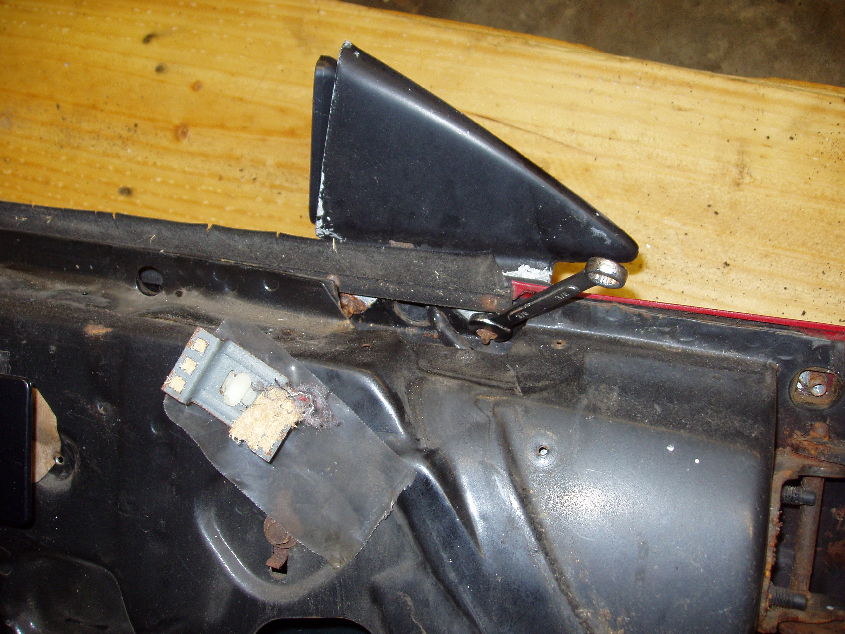
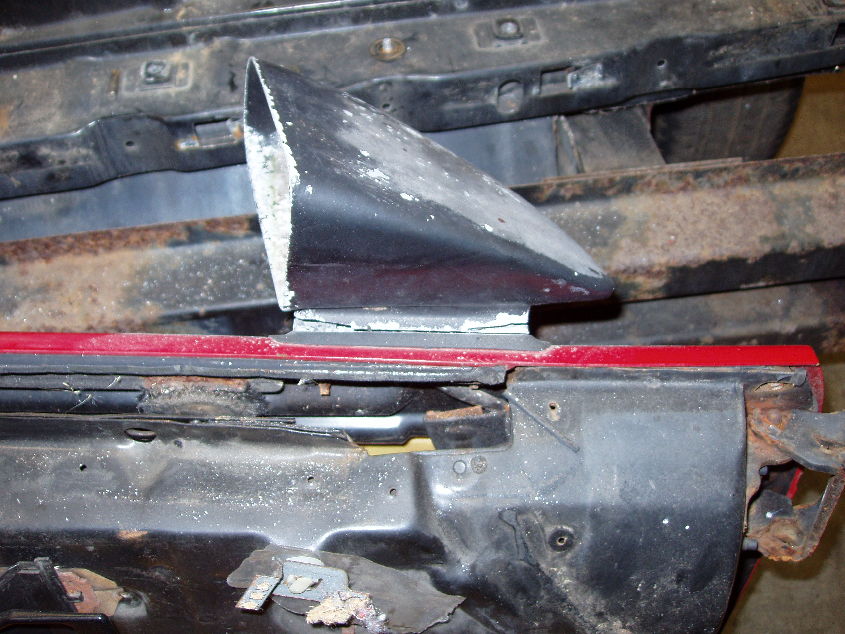
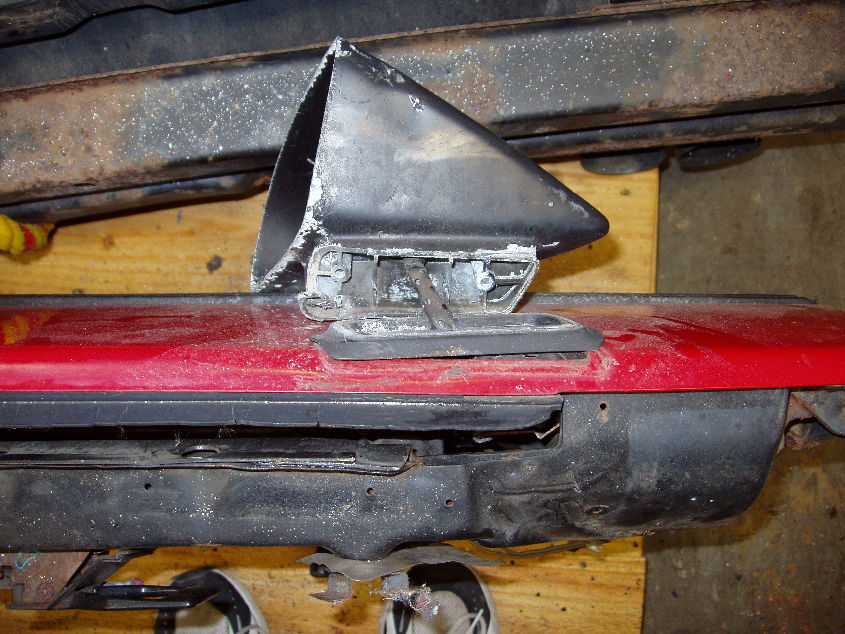
Removing the mirror *should* be fairly straightforward... I believe those are 10mm nuts, but the only wrench I have around that size is a China-made 3/8" that happened to fit:
Straightforward... for me?? Of course not!! The studs in the mirror started to turn, so the nuts weren't coming off. I was more concerned with saving the door skin than the mirror, so I pulled out my new favorite toy (just got it yesterday ) and here's how I did it:
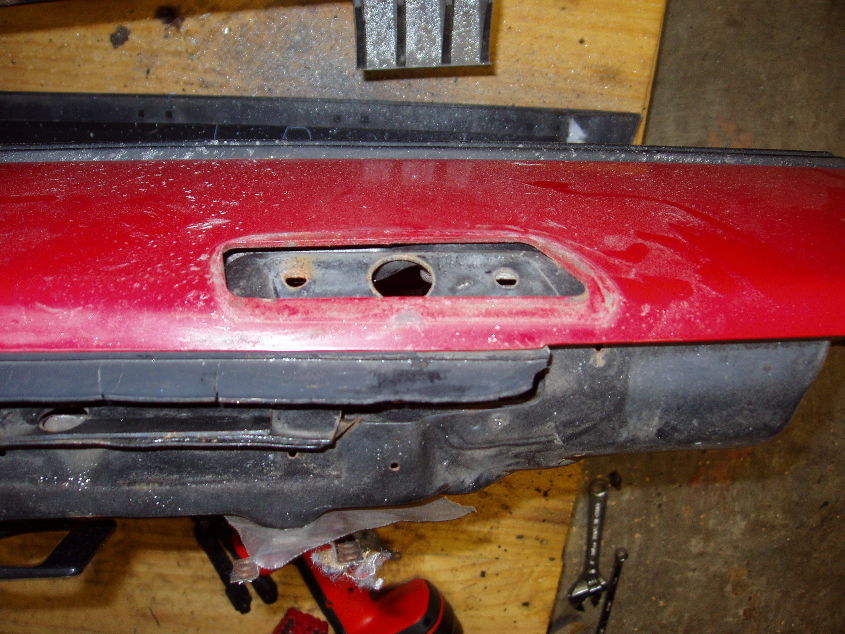
I just cut into it past where the studs were, and it came right off:
IP: Logged
10:59 PM
fieroboom Member
Posts: 2132 From: Hayden, AL (BFE) Registered: Oct 2008
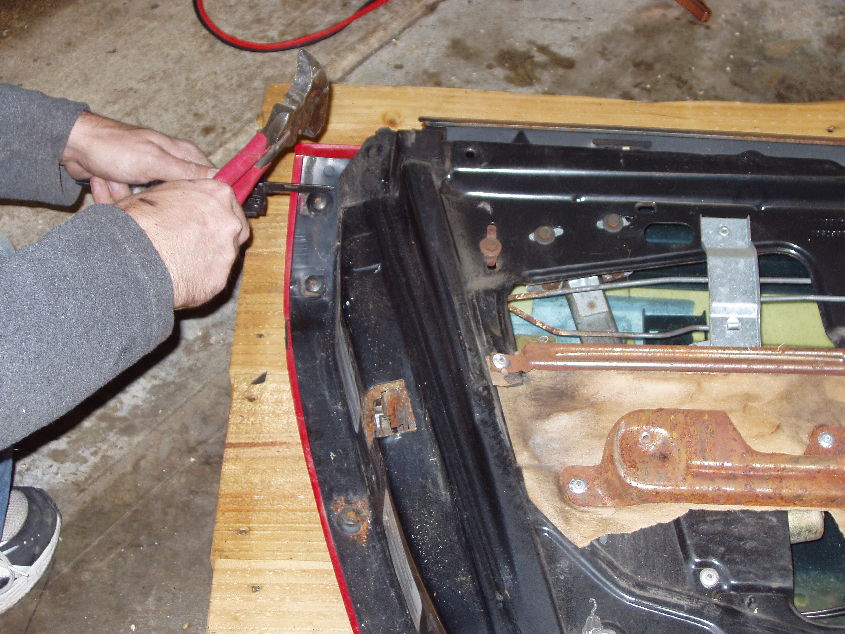
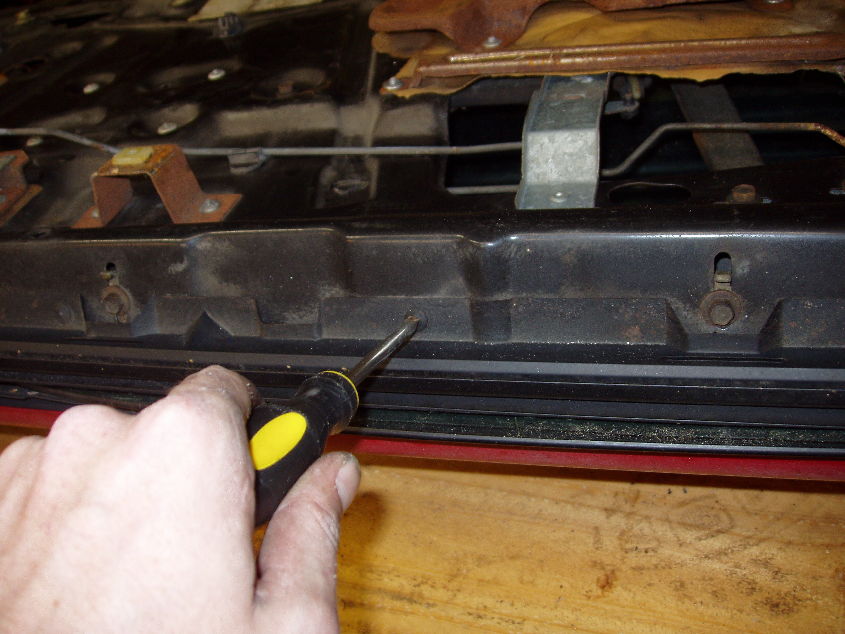
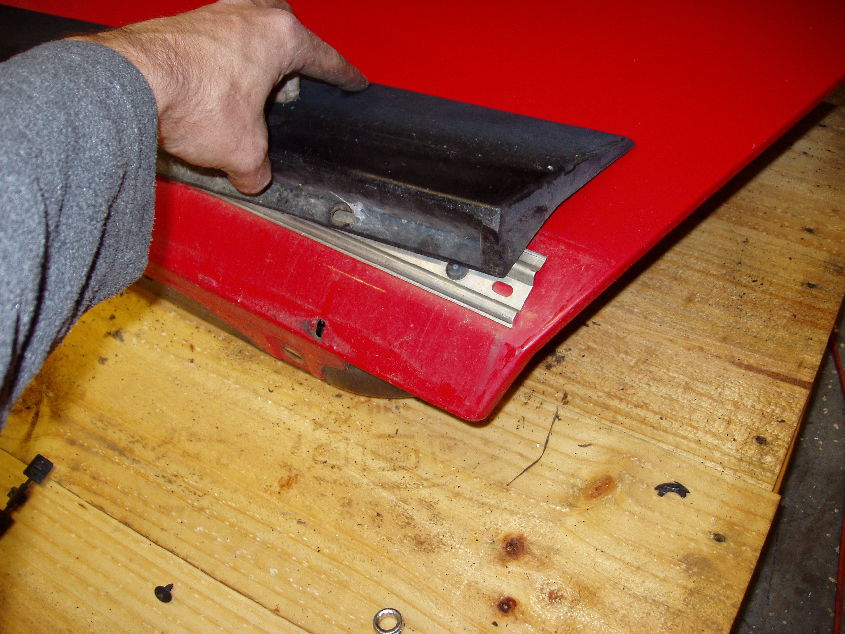
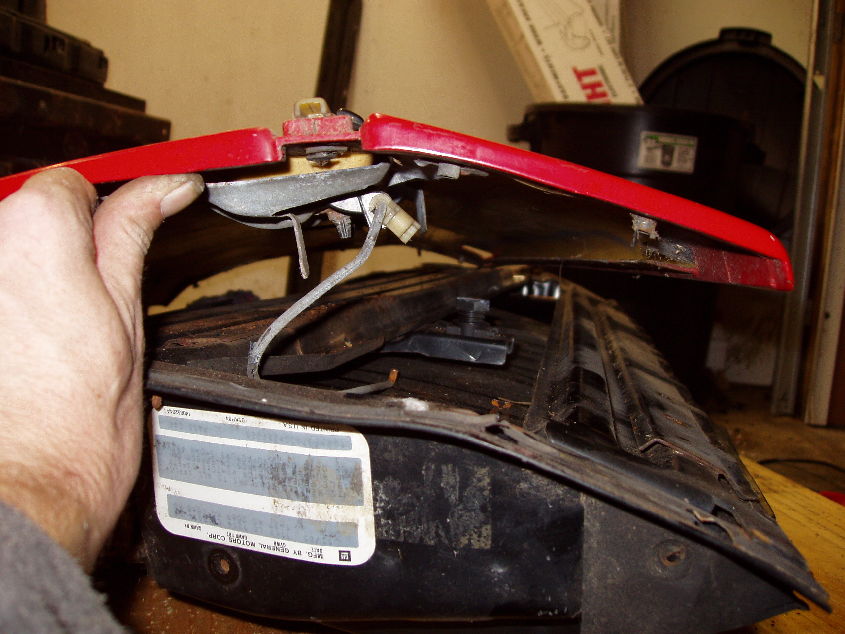
Now, flip the door over and lay it on it's inside surface. For me, the bottom trim piece fell off, but if yours doesn't, just lift "up" on it (ie, towards the top of the door...) and it should slide right off:
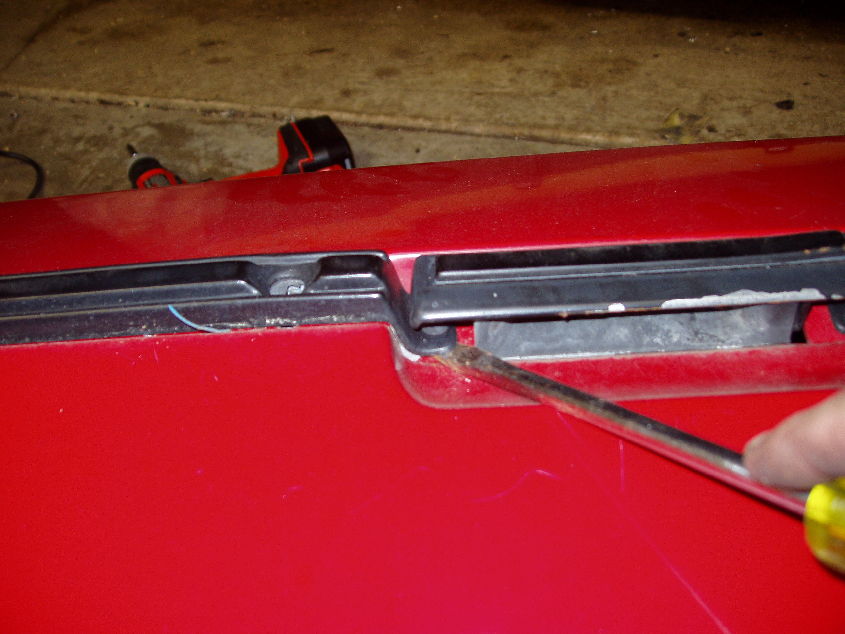
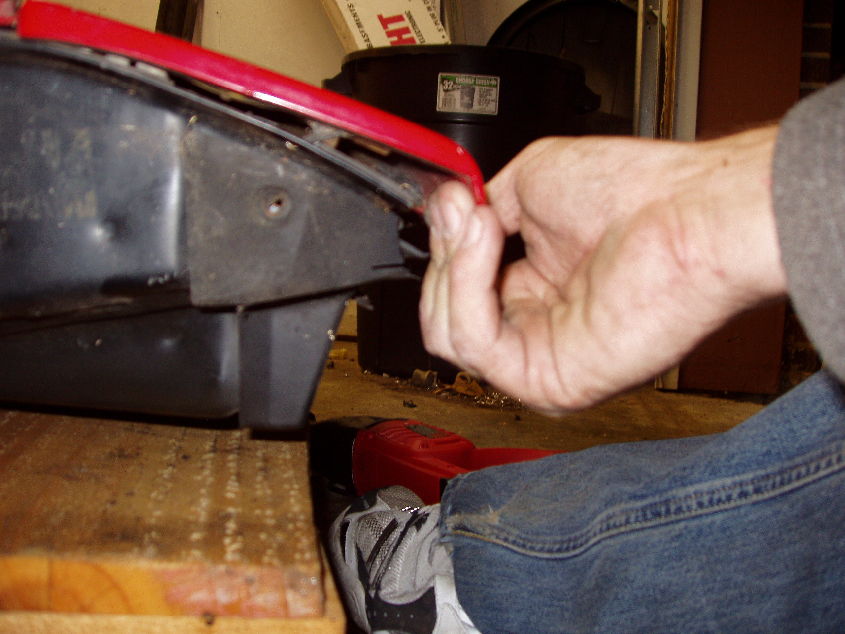
Now, we need to finish getting that skin off, and to do that, we need to get the molding off. Under the door handle, you'll see a small pop fastener. Slide your mega-flathead screwdriver under it, and pop it up:
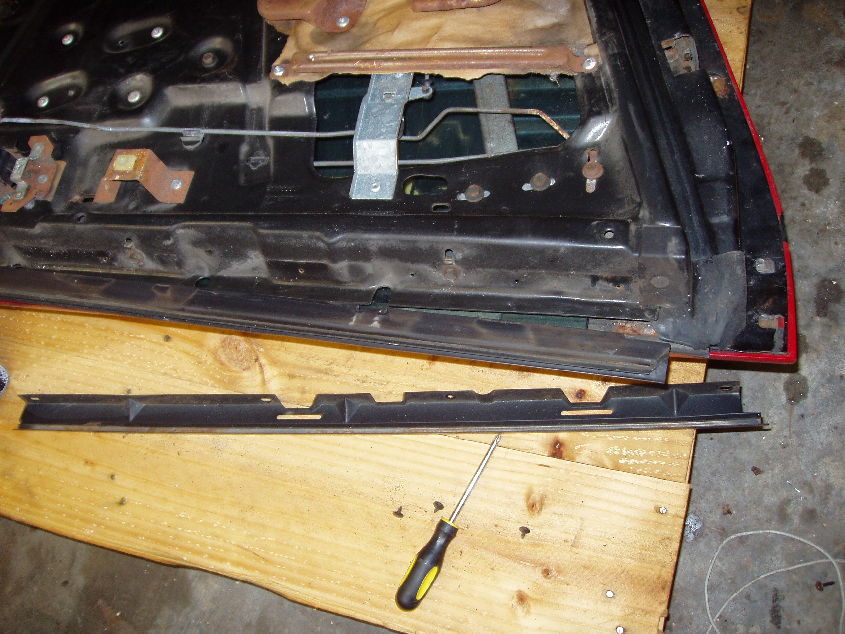
Now, there's probably a better way to do this, but I just took that end and pulled up very quickly, like ripping a band-aid off. This should snap all the little clips, and the molding should be free:
IP: Logged
11:05 PM
fieroboom Member
Posts: 2132 From: Hayden, AL (BFE) Registered: Oct 2008
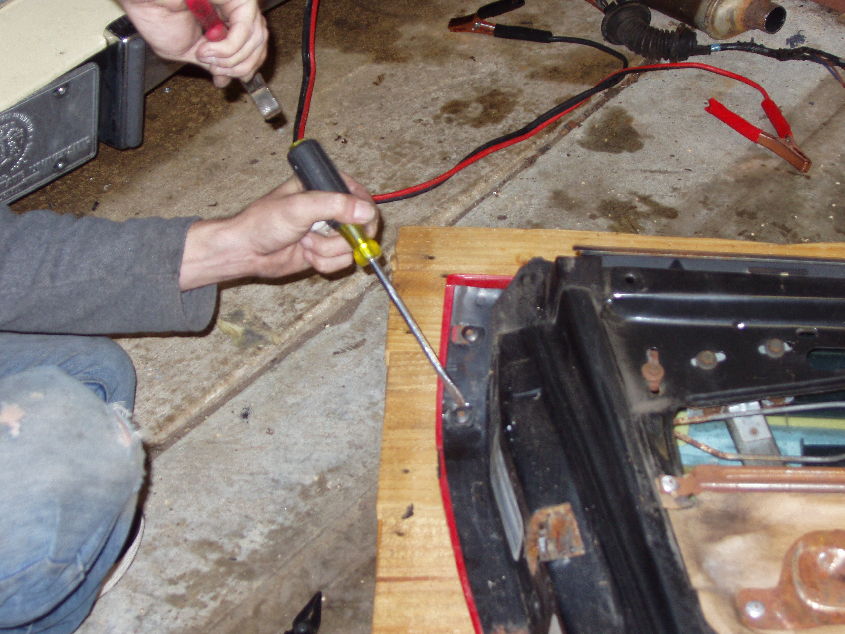
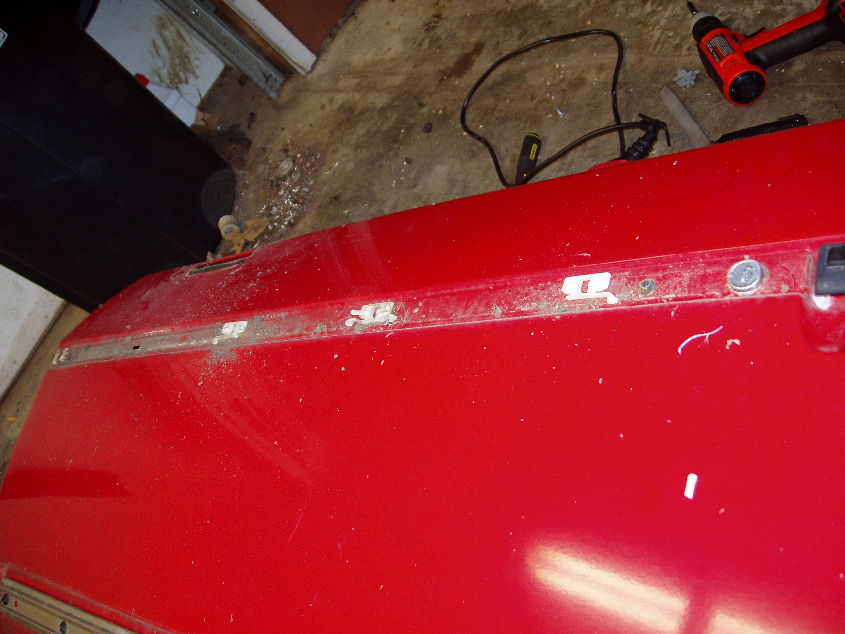
Now, each one of those little white clips may or may not have a retainer in the center of it. If you see a retainer in it, place a flathead screwdriver on it, and hit it with your palm to break the retainer, and the clips will come right out:
There are two bolts that were underneath the molding, so grab your 7mm socket and take them out:
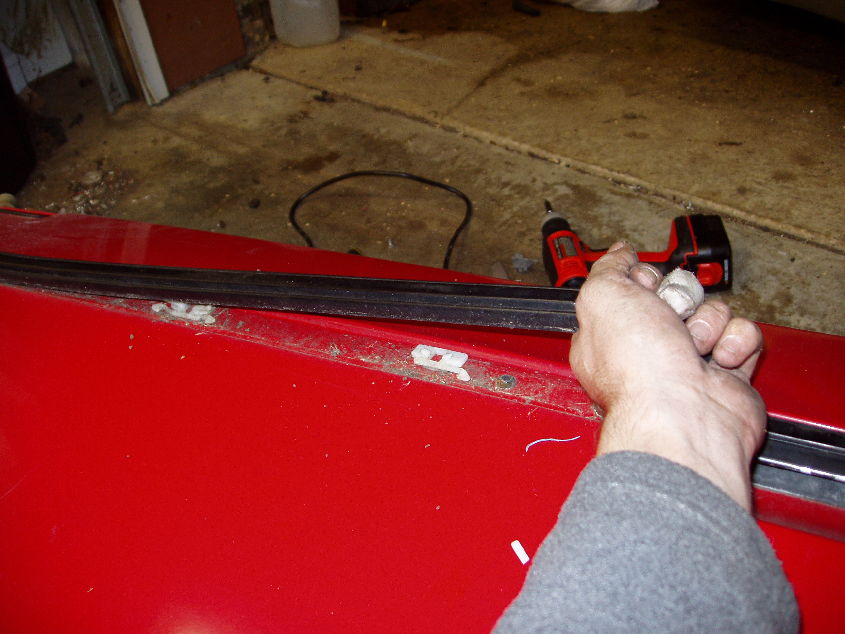
Now grab the bottom edge of the door skin and lift up, as in literal up :
At the same time, grab the other side (top edge of the skin) and pull towards the top of the door... It's kind of an up-and-over motion, similar to the way the interior door panels go off and on:
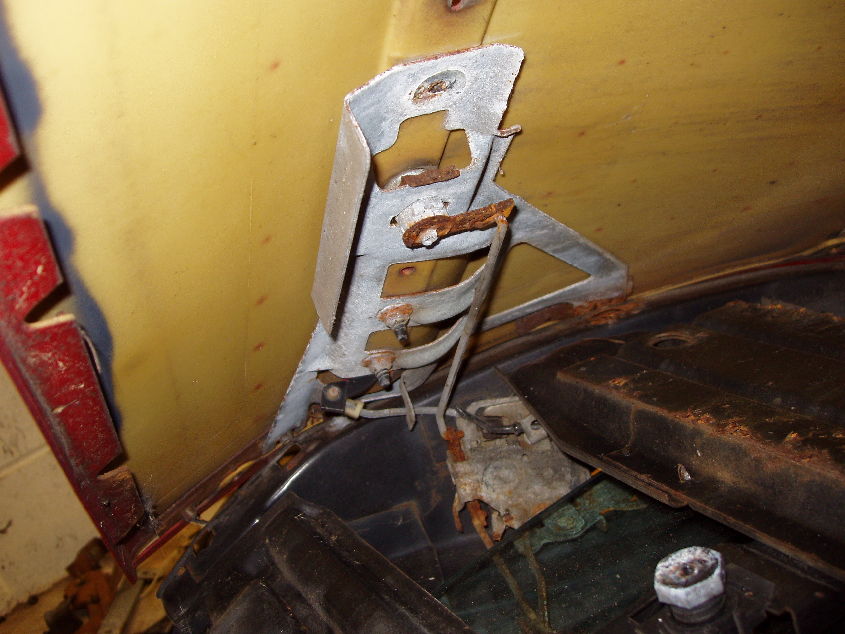
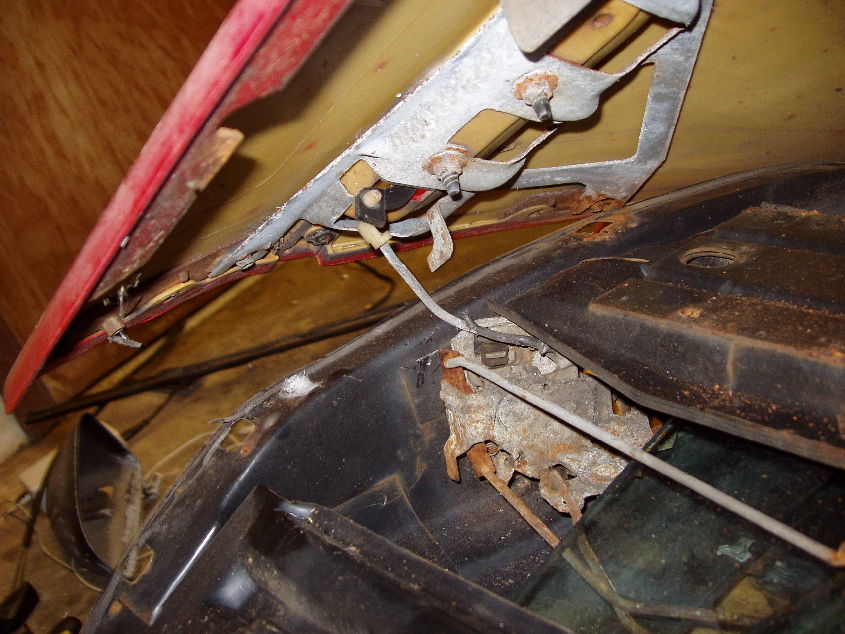
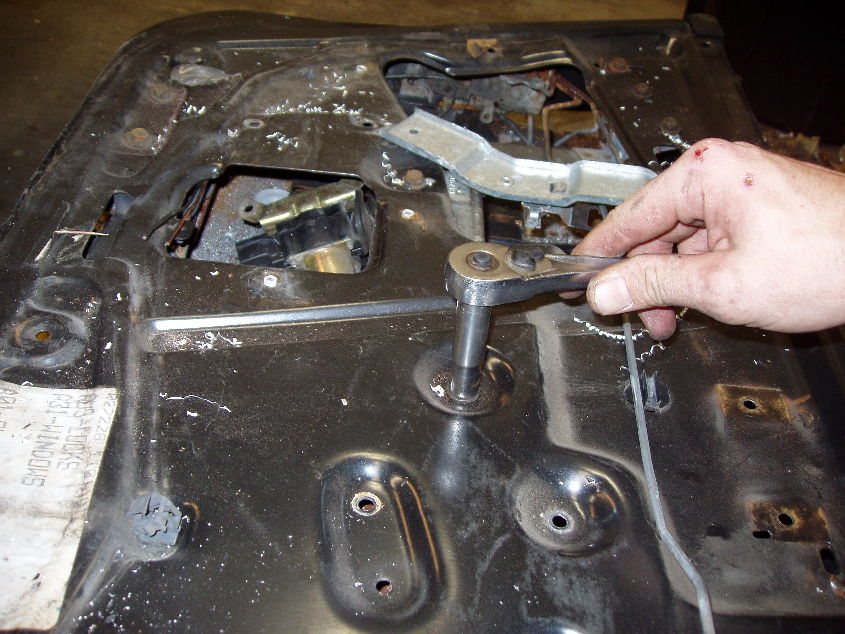
Once the door skin kinda pops free, stop pulling and look underneath it. The linkage to the door handle & lock still need to be disconnected:
The lock should have an E-clip on it, but as you can see, mine is completely rusted. So I grabbed my trusty pliers and twisted & yanked until it fell apart, and the linkage came off. Anyway, the handle linkage has a twist-n-lock plastic retainer on it:
Once you unclip that from the linkage rod, it will pop right out:
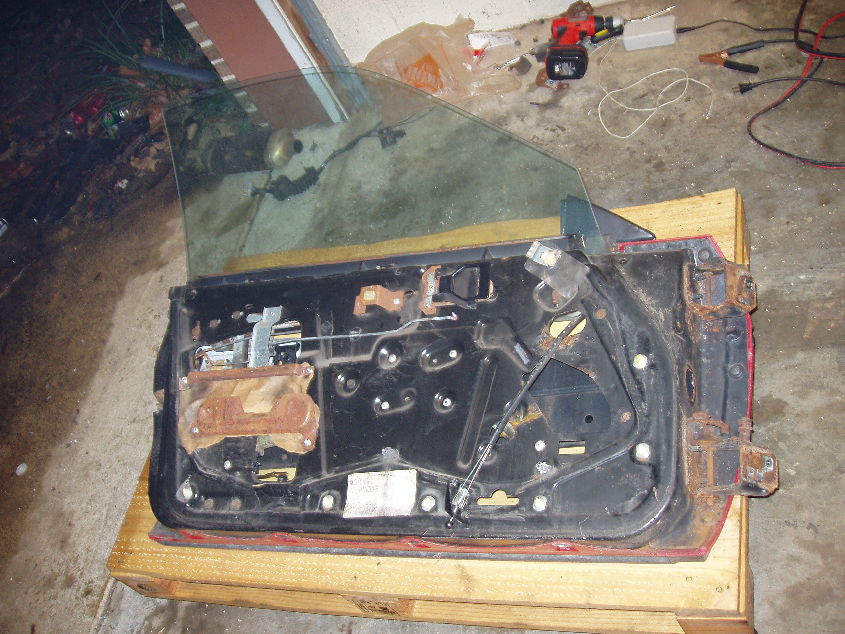
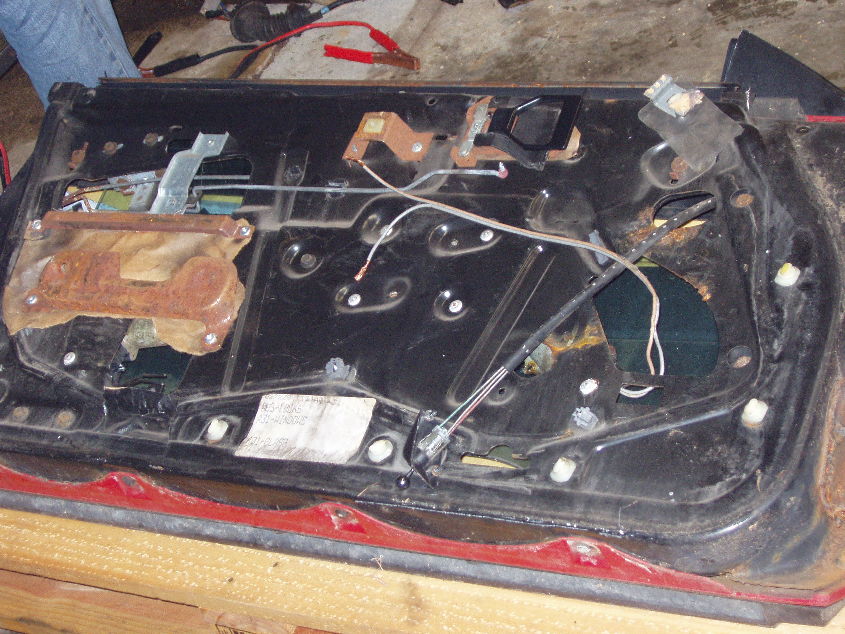
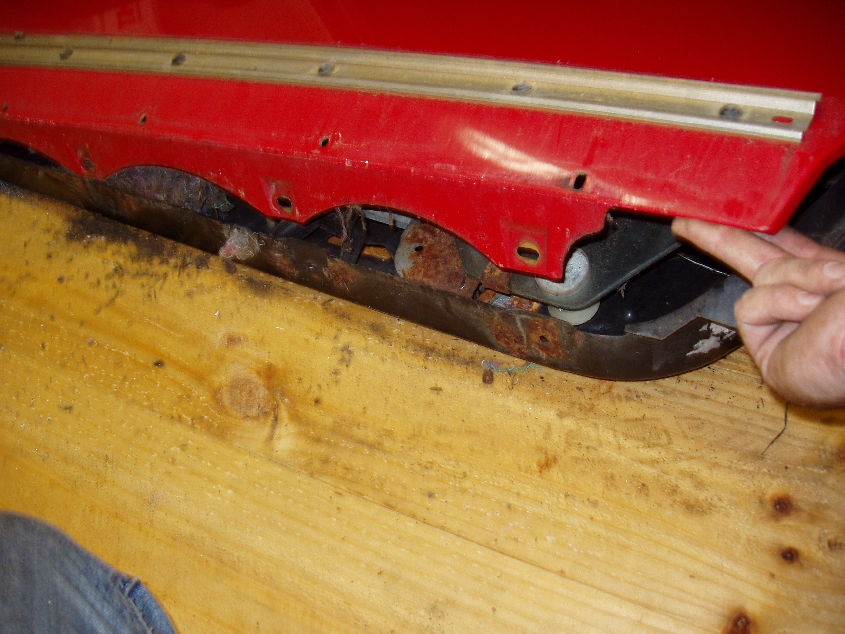
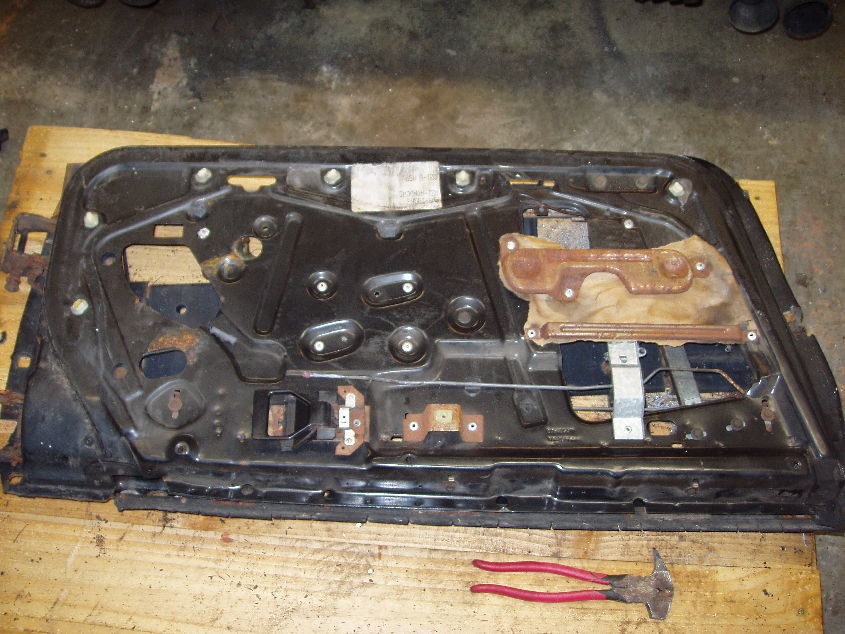
And now your door skin is free...
Note the complimentary rat's nest I received in the bottom of mine...
IP: Logged
11:18 PM
fieroboom Member
Posts: 2132 From: Hayden, AL (BFE) Registered: Oct 2008
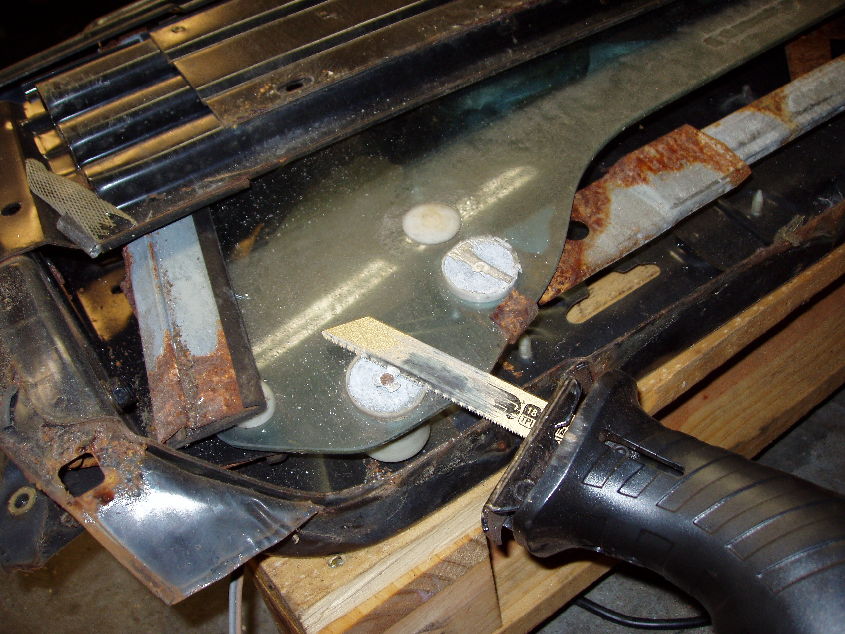
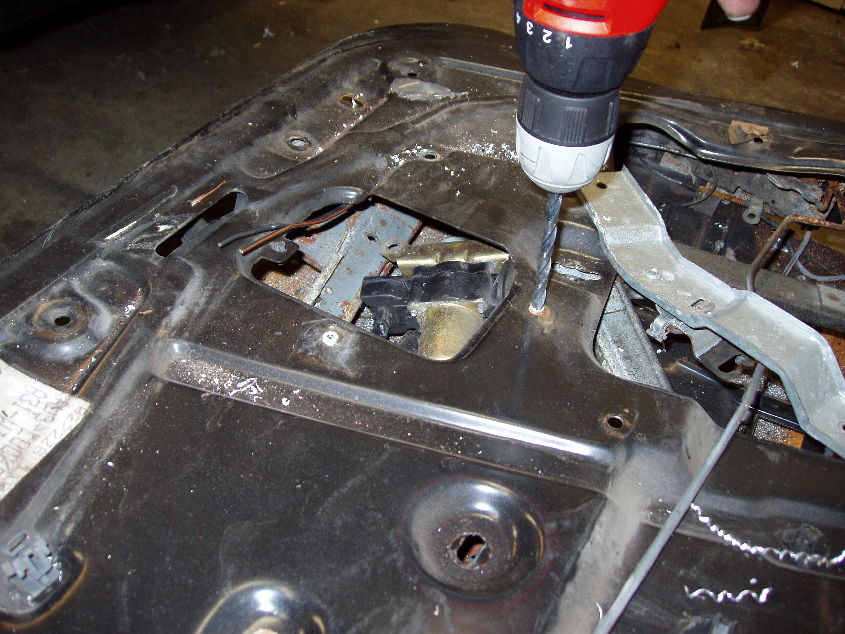
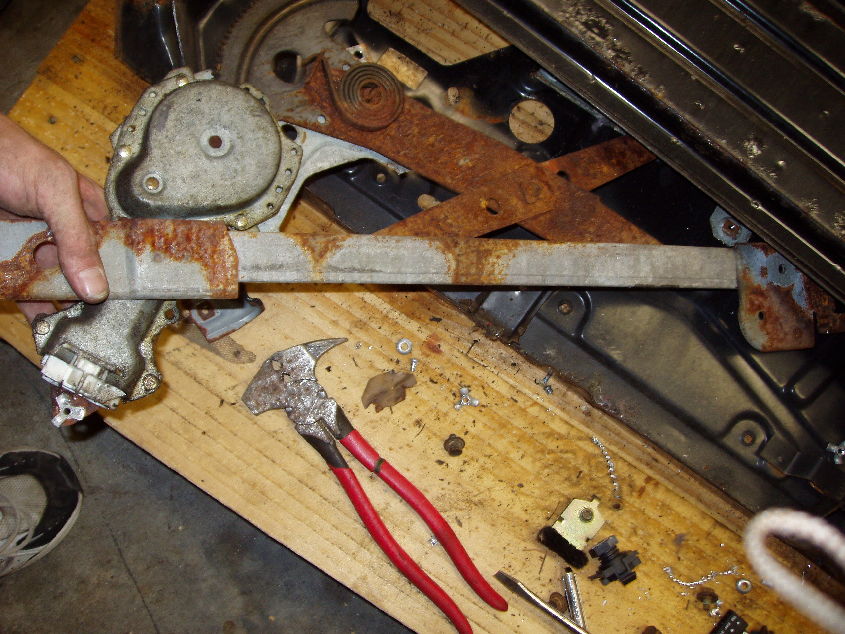
Ok, so now we need to get the glass out... These rivets can be drilled, but it took me 30 mins to drill one, and about 3mins to sawzall the other. All you need to do is cut off the head of the rivet and the three pieces of the sleeve that spread out:
Just be patient, set your saw to a low speed, and sort of bow the blade into the rivet. If you've ever used a sawzall, then you know exactly what I mean. If not, carefully experiment! In the above image, you can see the rivet on the right is already done. You just need to get it as flush as you can.
Once that's done, grab your punch again, and center punch the rivets out. Be careful to aim, then tap once. If it doesn't come out, re-aim, then tap once. Other wise you might miss and shatter the window:
Once you've center punched those four large rivets, wedge your mega-flathead under the plastic, and gently pop it free, then grab the top edge of the glass, and pull it out.
IP: Logged
11:25 PM
fieroboom Member
Posts: 2132 From: Hayden, AL (BFE) Registered: Oct 2008
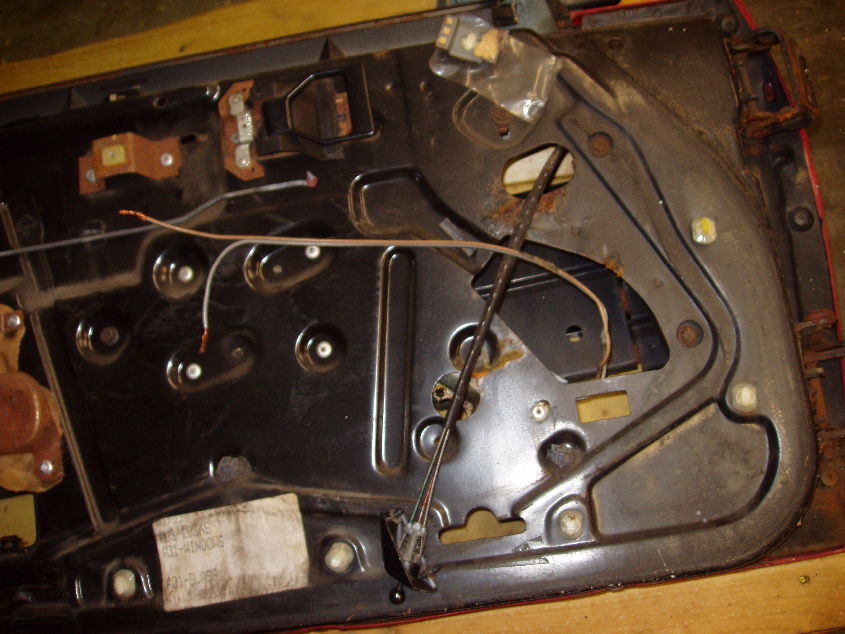
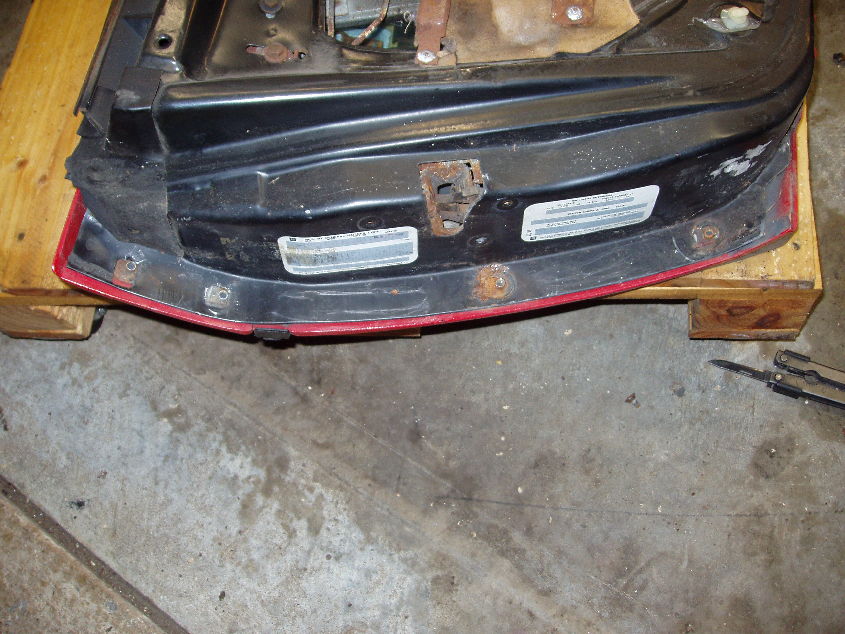
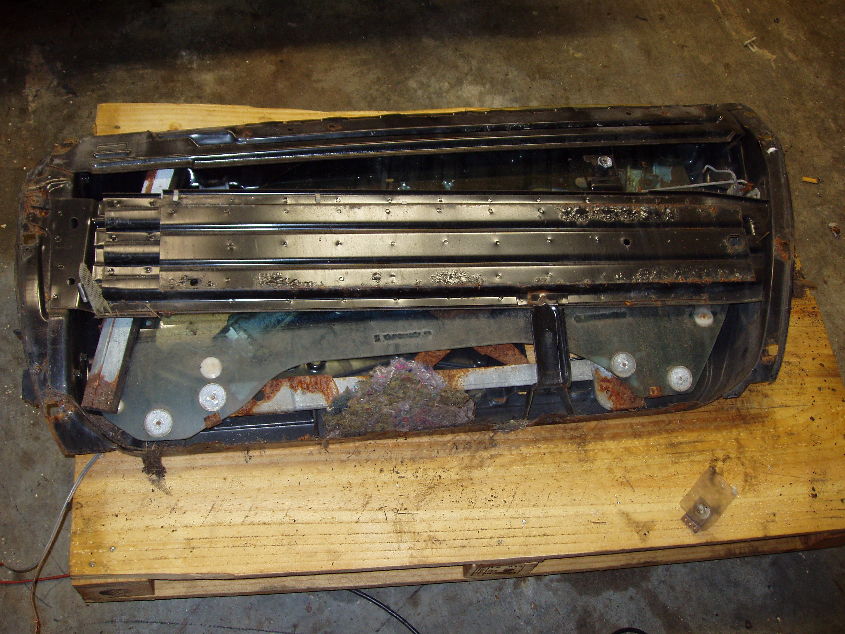
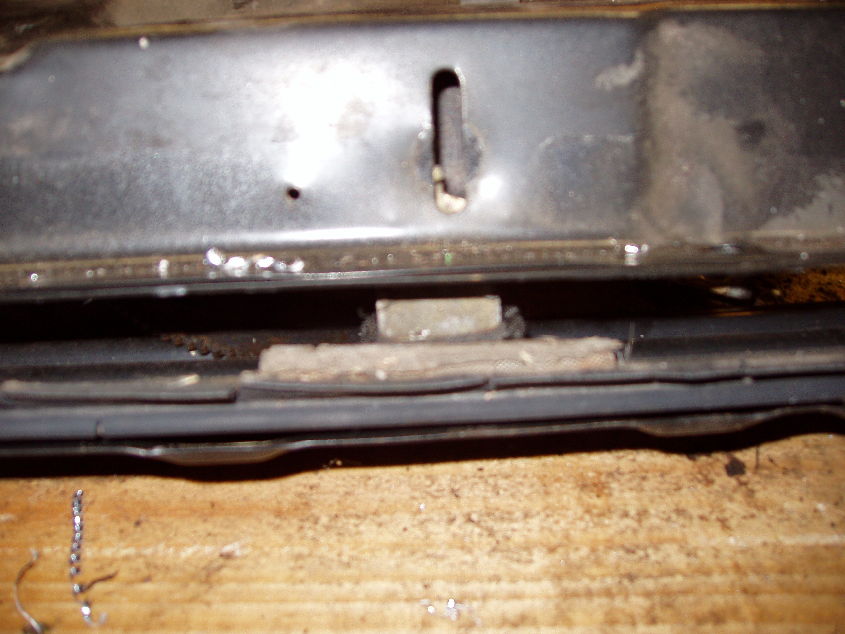
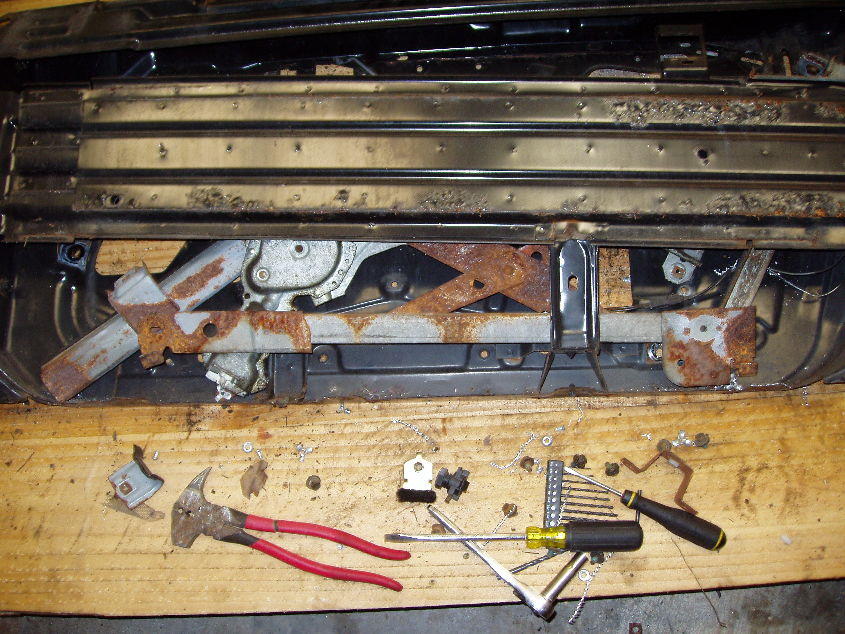
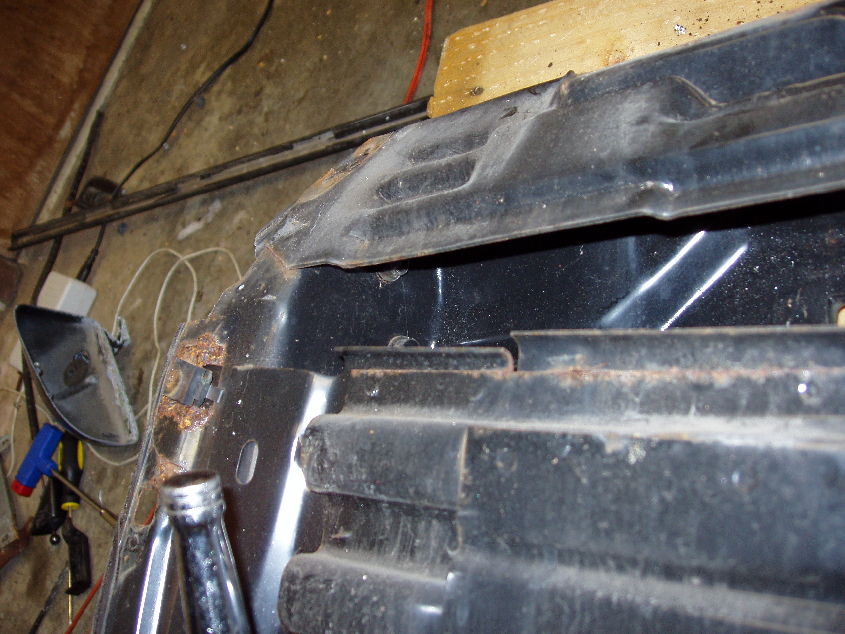
Ok, now flip the door back over onto it's outer side, and you'll see a bunch of aluminum rivets, as well as some bolts:
Center punch all of the rivets. You can see here the rivets in the top piece are punched, and the ones in the bottom piece aren't:
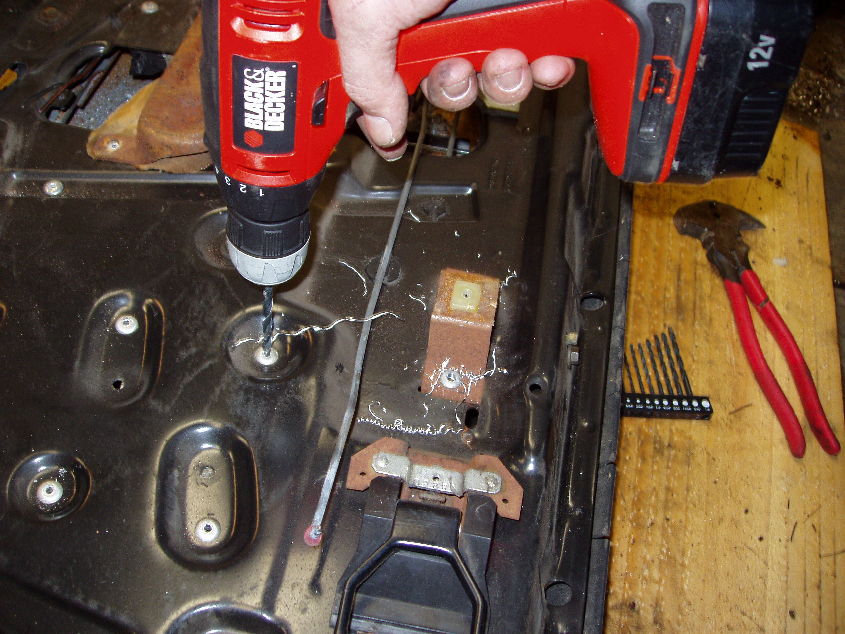
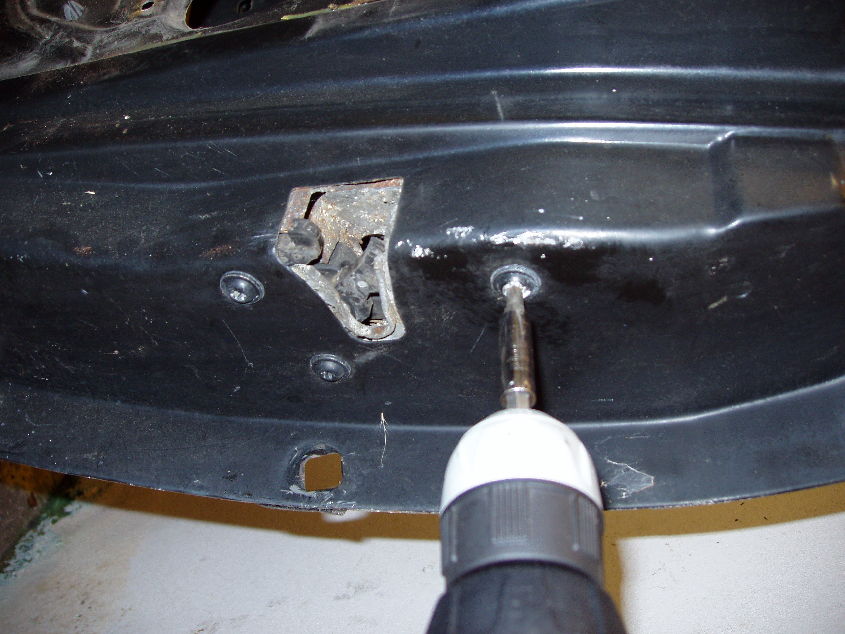
Some of them might pop completely out when you punch them, but for the ones that don't, grab a 1/4" drill bit, and drill them out. Use light pressure on the drill, or else the rivet will just start spinning:
While you're drilling, some rivets will come completely out, and some will just break off. In the next image, you can see the small white collars; those are the ones that broke.
Just drill them again, and they should fall completely through:
IP: Logged
11:41 PM
PFF
System Bot
fieroboom Member
Posts: 2132 From: Hayden, AL (BFE) Registered: Oct 2008
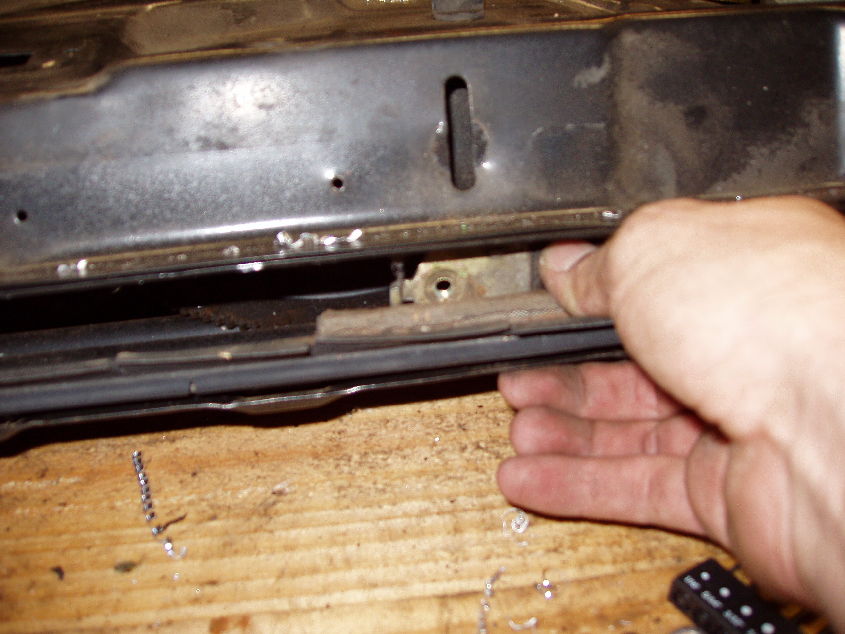
Once all the rivets are done, grab your 10mm socket and take out every bolt you see. You will here parts dropping into the belly of the door.
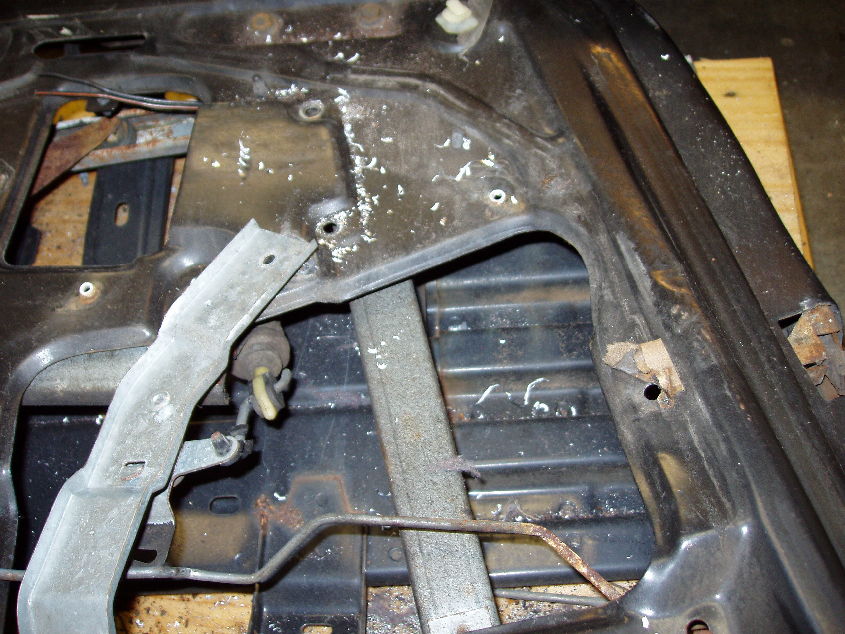
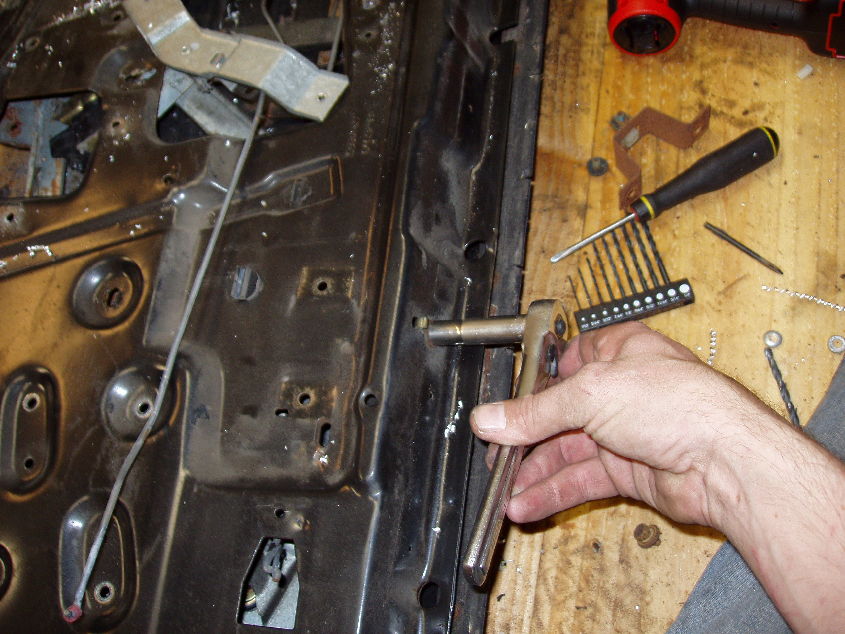
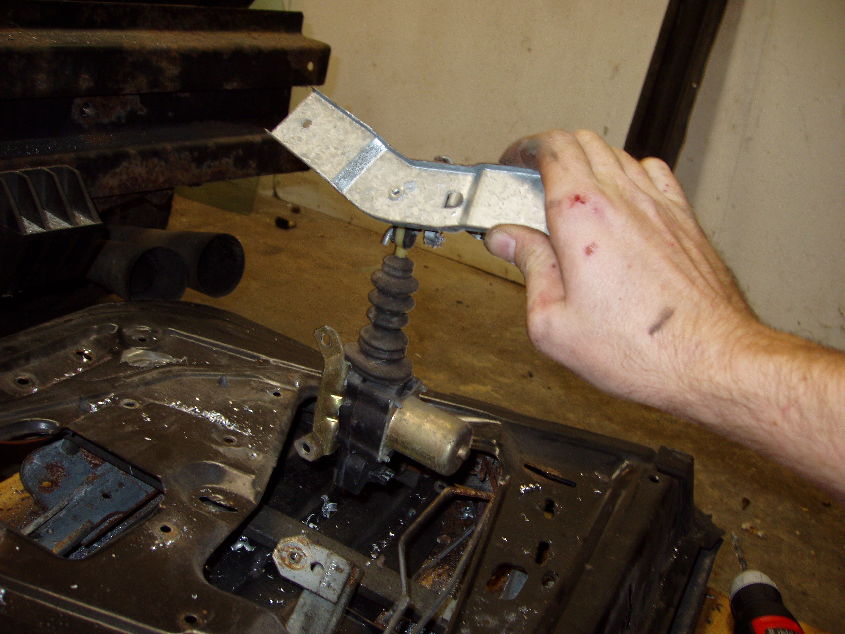
Also, go ahead and remove the bolts along the top edge of the door; these are the inner window guides. You want to remove them while the door is in this position so they don't fall back into the pocket they're mounted in:
Once the bolts for those are out, reach in with your fingers and wiggle the guides out until they fall into the belly of the door. For me, it was easiest to reach in and turn them counter-clockwise:
Sorry, my camera hates close-ups!
IP: Logged
11:46 PM
fieroboom Member
Posts: 2132 From: Hayden, AL (BFE) Registered: Oct 2008
I'm not removing my hinges because I need them on the door, but if you are, now is the time. Grab your 13mm socket (and I would suggest a large rachet), and take out these bolts:
IP: Logged
11:52 PM
fieroboom Member
Posts: 2132 From: Hayden, AL (BFE) Registered: Oct 2008
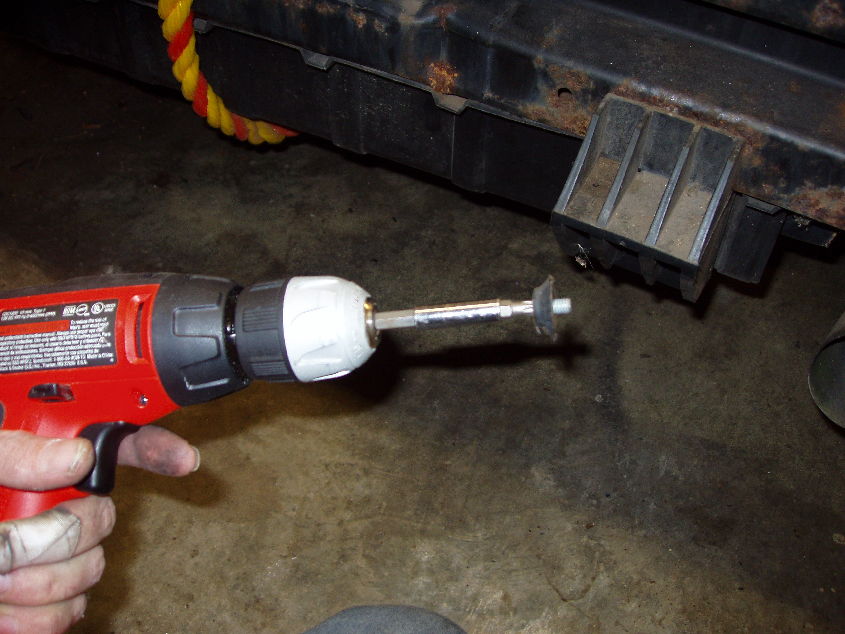
A trick for removing the plastic coated torx bolts on the door skin is to use a small drill bit to remove the platic from the center. This allows the torx bit to go in further and have a greater chance of success of removal w/o stripping.
Good write up!
IP: Logged
08:07 AM
Dec 1st, 2008
fieroboom Member
Posts: 2132 From: Hayden, AL (BFE) Registered: Oct 2008
That orange-handled tool you're using is called a fencing tool. Used for making/ repairing High-tensile steel fences (like on farms).
Awesome, I'm really glad to know what it is. I swear, it will grip anything if you have the space to get the head of in there, and it's got great leverage, cutters, hammer head.... Just an all-around excellent tool. I have certainly gotten my $1 worth out of it! Thanks for the tip! Fencing Tools on eBay
Great thread, goes more into the disassembly than my threads on removing inner door panels and outer door skins did.
Steve
Very nice. I sent Cliff a quick PM asking if we could maybe have a 'How-To' forum where the articles wouldn't archive, and he said he doesn't have that implemented yet, but he can put good-to-know info and how-tos in the "Articles" section on the main page. You should have him take a look at yours and see if he wants to link them there like he did mine. That goes for anybody else that wants to take the time to make a nice, detailed step-by-step; I know I could always use one, even if I've done the task before... Refreshers are great!
IP: Logged
02:57 PM
Fierology Member
Posts: 1209 From: Eastern Tennessee Registered: Dec 2006
Very nice. I sent Cliff a quick PM asking if we could maybe have a 'How-To' forum where the articles wouldn't archive, and he said he doesn't have that implemented yet, but he can put good-to-know info and how-tos in the "Articles" section on the main page. You should have him take a look at yours and see if he wants to link them there like he did mine. That goes for anybody else that wants to take the time to make a nice, detailed step-by-step; I know I could always use one, even if I've done the task before... Refreshers are great!
Yes, Cliff put my column writeup there, that was nice of him. I, too, hope that some sort of section gets set up for articles like yours that sort of has the "cream of the crop" articles for easy finding. I'm wondering if some sort of voting mechanism can be put in place to determine what goes into a section like that, like a rating system for the article itself as opposed to the author.
Your writeup is pretty darned good, definitely a keeper.
JazzMan
IP: Logged
03:49 PM
fieroboom Member
Posts: 2132 From: Hayden, AL (BFE) Registered: Oct 2008
Yes, Cliff put my column writeup there, that was nice of him. I, too, hope that some sort of section gets set up for articles like yours that sort of has the "cream of the crop" articles for easy finding. I'm wondering if some sort of voting mechanism can be put in place to determine what goes into a section like that, like a rating system for the article itself as opposed to the author.
Your writeup is pretty darned good, definitely a keeper.
JazzMan
Thank you. I'm kinda anal about things when I work on my Fieros... I guess it shows. Owning 10 of them makes you very methodical in how you go about things... As far as voting, I'm sure Cliff can only take so many PMs till he makes something happen... hint hint...
IP: Logged
04:02 PM
fierohoho Member
Posts: 3494 From: Corner of No and Where Registered: Apr 2001
I found that when drilling out the aluminum rivets that start to spin if you have a good sharp 1/4" bit and tip the drill to the side a little the rivet will still spin but it will still drill it out, just use a light hand.
fieroboom, I couldn't help but notice the rust on the door and its parts in your pics, is that common down by the gulf states?
I was thinking you got yourself a "Salt Belt" car until I looked to see where you are.
Steve
IP: Logged
05:26 PM
PFF
System Bot
fieroboom Member
Posts: 2132 From: Hayden, AL (BFE) Registered: Oct 2008
I found that when drilling out the aluminum rivets that start to spin if you have a good sharp 1/4" bit and tip the drill to the side a little the rivet will still spin but it will still drill it out, just use a light hand.
fieroboom, I couldn't help but notice the rust on the door and its parts in your pics, is that common down by the gulf states?
I was thinking you got yourself a "Salt Belt" car until I looked to see where you are.
Steve
As for the rivets, I did the same thing! You can also take a small screwdriver, slide it under the lip of the rivet, and twist it so that the upper edge digs into rivet as it wants to spin. But that approach usually works best on particularly large rivets...
As for the car, no, it's not a salt belt car that I'm aware of, but I've yet to do a carfax report on it... But it sat in a back yard uncovered for 10 years before I got it, and another 3 years after I got it, due to being in the Navy. However, I think it's solid proof that an ill-maintained car suffers as bad (or worse) than one that's driven hard daily...
IP: Logged
08:22 PM
caseyret Member
Posts: 109 From: Sidney, OH, USA Registered: Apr 2004
Excellent write up. Sincerely appreciate and reps for doing this. Now the only question is... to put the door back together, what do you use for the rivets, clips, and fasteners that were destroyed in the removal process?
IP: Logged
09:47 PM
fierohoho Member
Posts: 3494 From: Corner of No and Where Registered: Apr 2001
Excellent write up. Sincerely appreciate and reps for doing this. Now the only question is... to put the door back together, what do you use for the rivets, clips, and fasteners that were destroyed in the removal process?
I haven't had a door that far apart but I did add power windows, door locks and mirrors to my project car and I used 1/4" bolts and nylon lock nuts to re-mount those items.
With some of the bolts you have to pay attention to whether or not they need the nut on the outside or inside to clear any moving parts.
As for the plastic rivets on the bottom of the door you can buy the same type of rivet and you will need the riveter too or you could use the same type of push fastener that is used on the wheel well liners.
Steve
IP: Logged
11:39 PM
Dec 2nd, 2008
fieroboom Member
Posts: 2132 From: Hayden, AL (BFE) Registered: Oct 2008
Excellent write up. Sincerely appreciate and reps for doing this. Now the only question is... to put the door back together, what do you use for the rivets, clips, and fasteners that were destroyed in the removal process?
Riveting tools can be found for fairly cheap, and they're very simple to use, or, as stated in the post above mine, you can also use small bolts, but be sure you either use loctite or the nuts with nylon inserts (more preferable), or you'll be pulling it all apart again after a few bumps!
IP: Logged
10:52 AM
lou_dias Member
Posts: 5396 From: Warwick, RI Registered: Jun 2000
Check my sig above for the thread about removing the inner door panel, towards the bottom of the thread I have an easy way to pull the door handle clip without buying any special tool, there's a pic also.
Steve
IP: Logged
01:52 PM
Dec 17th, 2008
Lee Phillips Member
Posts: 42 From: Ridgecrest, CA Registered: Nov 2008
VERY Nice! I hope I don't have to that much disassembly (lubrication of windows and locks, slides, etc; adding power windows; changing to power mirrors) but here's pix of how to do it all. THANKS for posting it!