Since my last update, I've replaced the radiator, installed the upper radiator assembly, installed Rodney Dickman's rubber radiator / condensor skirts for the aero bodied nose, installed the fan, new overflow tank (slightly larger than original, fits well, but it leaves 1/8th of an inch space between the headlight assembly).
I also buffed out my spare passenger side cooling tube which had only 1 or 2 pebble sized dents in the back, VS the factory cooling tube which had rather large kinks from where a tire shop used it to jack the car up.
Spent last night rebuilding the manual transmission pedal assembly I had. I had already taken the entire thing apart, primed and painted everything. With my new pedal from the Fiero Store, and all the necessary parts, I re-assembled everything with white lithium grease in all the joint areas.
I spent the past 30-45 minutes installing the rebuilt pedal assembly to replace the automatic pedal assembly. Under my dash, the car looks like a brand new car. There's no rust, not even surface rust on anything, including the old pedal assembly I took out.
I'm not going to worry about wiring at this point, as there is really no point. I want to finish up everything in the front first before I move on to anything else.
Once the entire front-end is put togeher, and everything is torqued down, all the new lines and hoses put back together, then I'll probably work under-dash, wiring, and center console. Then I'll rebuild the rear-end... swap out the cam in my 3.2, rebuild the suspension back there, etc.
Finally got all the brake lines installed in the front, as well as the clutch line. It took forever to get all the new stainless steel brake lines properly fitted so that they fit correctly through the little holes in that little rubber gasket slot in the front compartment. looks good so far. Rather than bolt the master cyl on, I decided I would just try to get everything hooked up to the proportioning valve first.
Next step is to clean up the brake booster (looks good, but slight surface rust in one spot) and then I'll rebuild the master cyl, paint it, and get everything installed.
You've got a good-looking restoration there! When I saw some of the pictures of your installation, I though someone had grabbed some pictures of my own restoration. Then I saw the drilled rotors and realized it wasn't mine. We've got the same under-body color scheme, which you can see in the link below. Good luck the the rest of your work.
Merry Christmas, Michael
------------------ "A guy know's he's in love when he loses interest in his car for a few days." -Tim Allen
You've got a good-looking restoration there! When I saw some of the pictures of your installation, I though someone had grabbed some pictures of my own restoration. Then I saw the drilled rotors and realized it wasn't mine. We've got the same under-body color scheme, which you can see in the link below. Good luck the the rest of your work.
Merry Christmas, Michael
HAHAH!!! We sure do have the same color scheme... that's hilarious:
Finished rebuilding the drivers side headlight assembly. Now both headlight assemblies are totally rebuilt with every single bushing greased, and functioning perfectly. I also finished installing the rebuilt pedal assembly, the original brake booster (worked perfectly), the rebuilt master cyl, and the clutch master cyl. I also re-installed the spare tire pan.
Next, I took apart the entire cowl area since it was the last part of the front of the car that I haven't fixed, cleaned, and / or painted yet. It was in decent shape for the most part, but I was a little surprised at how dirty it was. There was some surface rust, and even a couple of pin-hole areas in one particular spot where it appeared as though dirt might have collected. The car is basically rust free, but on the flat area between the cowl cover and the panel, there was a bit of rust. I cleaned this up with a wire wheel and a 3M rust grinding pad.
The cleaned up and taped off cowl panel is shown here:
I put four coats of Duplicolor VHT Gloss-Black Epoxy paint. The stuff really goes on thick and really helped fill in any areas that had some imperfections.
Everything you see here is either brand new, rebuilt, or at the very least, cleaned and repainted. Other than the obvious addition of the Rodney Dickman spare tire cover, I'm going to make sure that every part of the car is complete... even down to the rubber band on the floor jack that holds down the arm.
Couple of things that I've done so far since my last post (or am just updating now):
Clutch Line install:
.
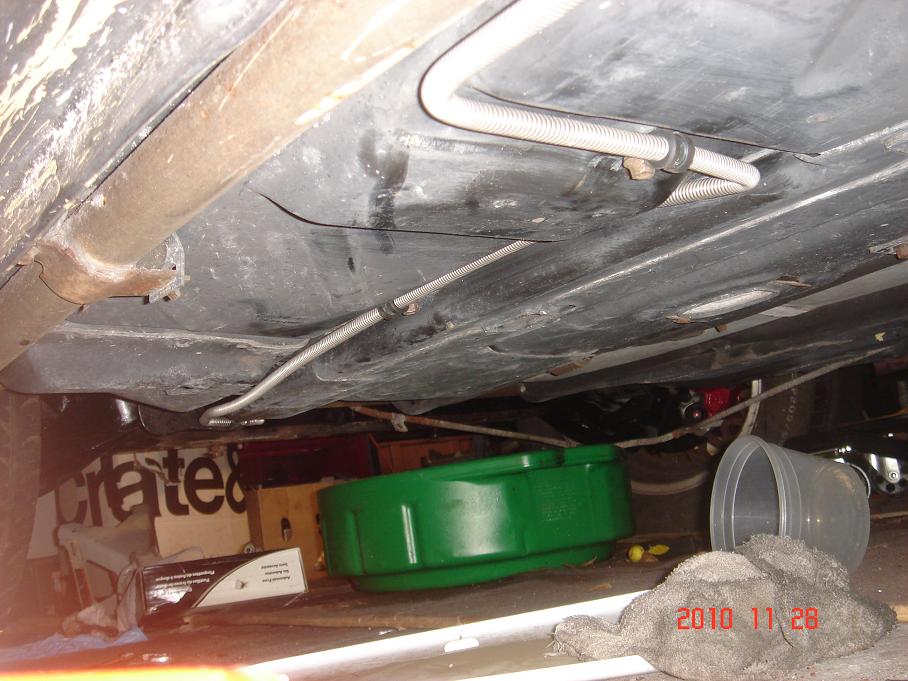
Floor Pans, no rust!
.
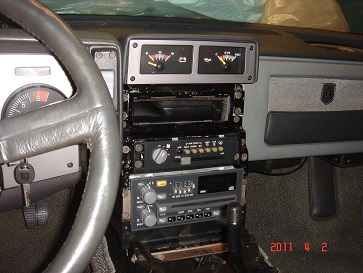
Also, radio wiring completed! When I got the car, an aftermarket Sony CD player had been installed, and the factory harness was trashed. I snagged a pig-tail from a junkyard Fiero, and re-attached it appropriately to my stock harness. I then installed (in the factory location) the intermediate harness for the subwoofer. THEN I installed an adaptor harness that goes from the 12-pin factory harness to the 21-pin harness.
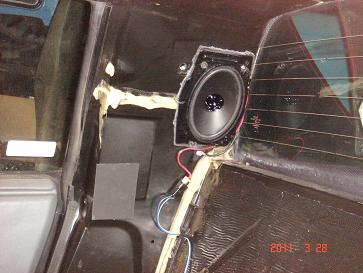
I installed aftermarket rear speakers in the factory shells. I used water-proof speaker baffles also to prevent water infiltration. I went with some BOSS 4x6 50watt / 25rms speakers.
I also swapped out the speaker in my factory subwoofer with one from Rodney Dickman.
I also installed the shifter assembly in the center console, wired up the safety-start switch for the new clutch pedal, replaced the upper drivers side door pin, and a few other odds and ends. Also added some sound deadener throughout the cabin as well.
Side Pillar Speakers installed:
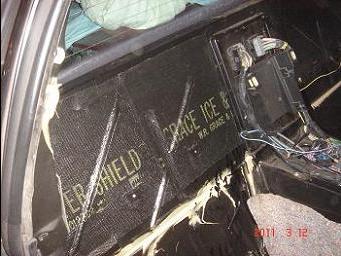
Sound Deadening:
Safety Switch installed.
I'll post some more pictures as soon as I'm finished updating my own site:
I got my headliner MOSTLY in, but won't show pictures of it because it's not done yet.
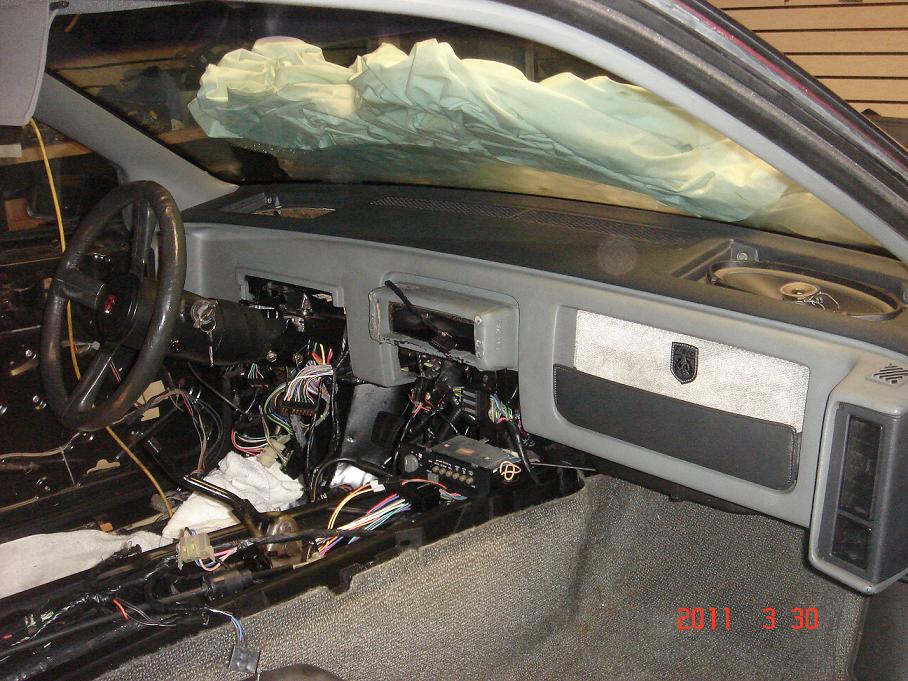
I installed the passenger B-pillar, seat belt assembly, lower trim, seat, and both the drivers side and passenger side A-pillars with all new clips (including the small filler panels).
I am finally able to put back the dash! It's starting to feel like a car again!
IP: Logged
10:16 AM
Apr 1st, 2011
82-T/A [At Work] Member
Posts: 24978 From: Florida USA Registered: Aug 2002
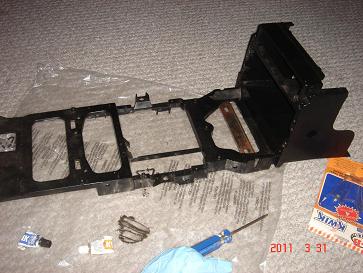
Looking nice ! I spotted the drill bit laying next to the sway bar, after I drilled my broken sway bar bolts out, I used the small access hole in the spaceframe and put a shouldered nut inside the frame rail, you can get a finger in that hole, they were just extra seat track nuts, once I had the new bolts grabbing the nut, I slipped a 13mm boxend wrench inside the rail to hold the nut while I tightened them up. I had the front rebar off and used a telescopic magnet to clean all the debris out of the frame rails and retreive my wrench, sprayed machine oil inside to prevent rusting.
IP: Logged
02:40 PM
Apr 4th, 2011
82-T/A [At Work] Member
Posts: 24978 From: Florida USA Registered: Aug 2002
Looking nice ! I spotted the drill bit laying next to the sway bar, after I drilled my broken sway bar bolts out, I used the small access hole in the spaceframe and put a shouldered nut inside the frame rail, you can get a finger in that hole, they were just extra seat track nuts, once I had the new bolts grabbing the nut, I slipped a 13mm boxend wrench inside the rail to hold the nut while I tightened them up. I had the front rebar off and used a telescopic magnet to clean all the debris out of the frame rails and retreive my wrench, sprayed machine oil inside to prevent rusting.
Yeah, I kind of figured this would be a regular routine in the future, so I bought some hardened bolts, and installed them through the hole I drilled and then used double nuts on them to attach the sway-bar. Seems to work well. Yeah, such a pain...


![Click Here to See the Profile for 82-T/A [At Work]](/forum/Styles/CommonImages/emptyButton.gif)