Pennock's Fiero Forum
  Technical Discussion & Questions - Archive
  It's alive! ALIVE! MWAHAHAHAHAHA!!!

T H I S   I S   A N   A R C H I V E D   T O P I C
  

Email This Page to Someone! | Printable Version


It's alive! ALIVE! MWAHAHAHAHAHA!!! by RWDPLZ
Started on: 03-12-2012 05:09 PM
Replies: 14
Last post by: GM Shane on 06-27-2012 10:18 PM
RWDPLZ
Member
Posts: 15057
From: Michigan
Registered: May 2002


Feedback score:    (11)
Leave feedback


Total ratings: 305
Rate this member

Report this Post03-12-2012 05:09 PM Click Here to See the Profile for RWDPLZClick Here to visit RWDPLZ's HomePageSend a Private Message to RWDPLZDirect Link to This Post
For those of you who don't know, almost two years ago. a combination of Michigan rust and a parking lot hit-and-run left me without a drivable Fiero. I spent a LONG time looking for a new frame to swap my good parts over to, since people here say all the time you can get a frame for next to nothing, or a beat-up project GT for around $1000. In all that time, the only rust-free frames I could find were always on the other side of the country, usually Texas, California, and Florida. Everyone has always said a frame in this condition is a car that should be scrapped, and since I didn't have a welder, the money to buy one, or the skills to use one, I figured a new frame or car was the only way to go.

BUT I WAS WRONG! I came upon an opportunity to buy a broken welder for roughly $50 (plus more than that in shipping). It sounded like an easy fix, so I took the chance, since I could break even parting it out.
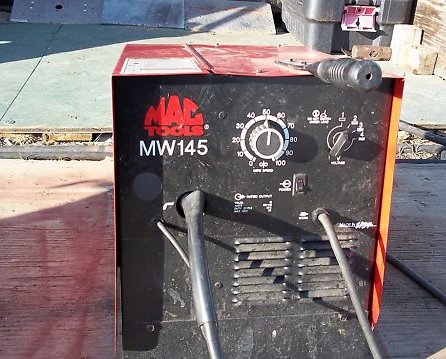


I got the welder, and fixed the problem, which turned out to be a bad motor controller circuit board. A bit of soldering later, and it was fully functional.

https://www.fiero.nl/forum/Forum2/HTML/115721.html

It wouldn't be until months after that, that I actually had the time to start learning how to weld and practicing for the project that needed to be done. I finally fired it up, and got feedback here on what I needed to do.

https://www.fiero.nl/forum/Forum2/HTML/120123.html

Once I was fairly confident in my abilities, I started:

This is what I'm starting out with: My 84 SE, which was running and driving perfectly before the incident. I started and ran the engine every month or so to make sure it still worked, letting it warm up, revving it up a bit, and shutting down. I also changed out the fuel in the gas tank a couple times to make sure it had fresh gas.

Here's how it's sat for a while. I took the rear clip and bumper off to assess the damage way back when. Doesn't look too bad on the surface, right?
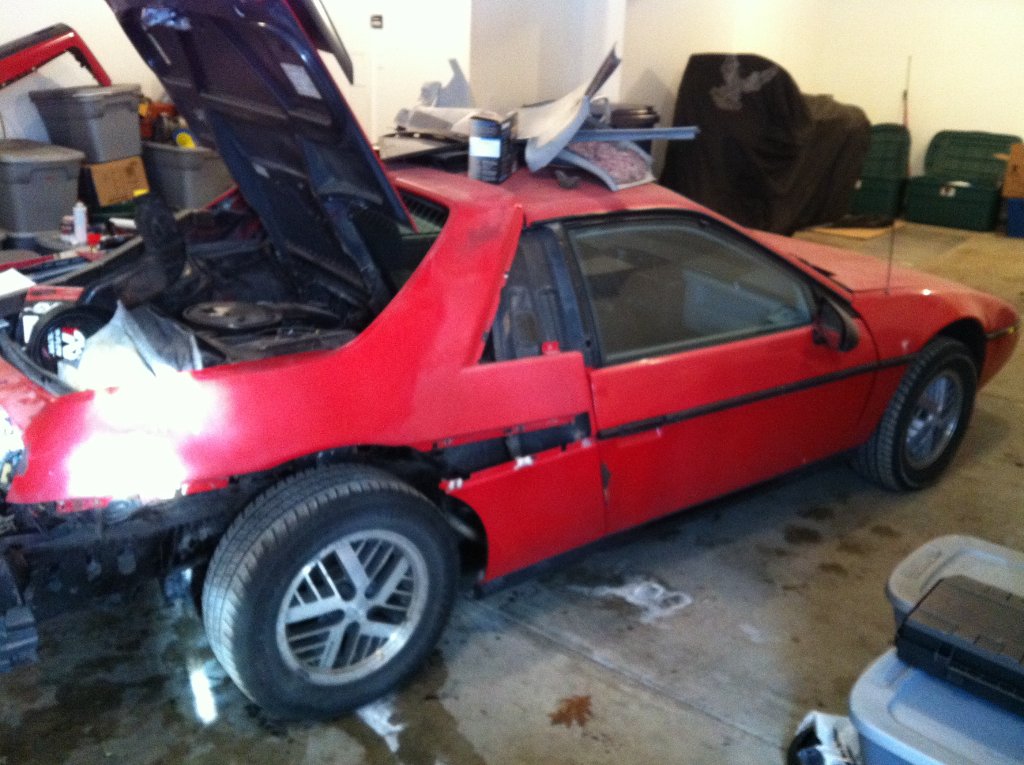


WRONG!
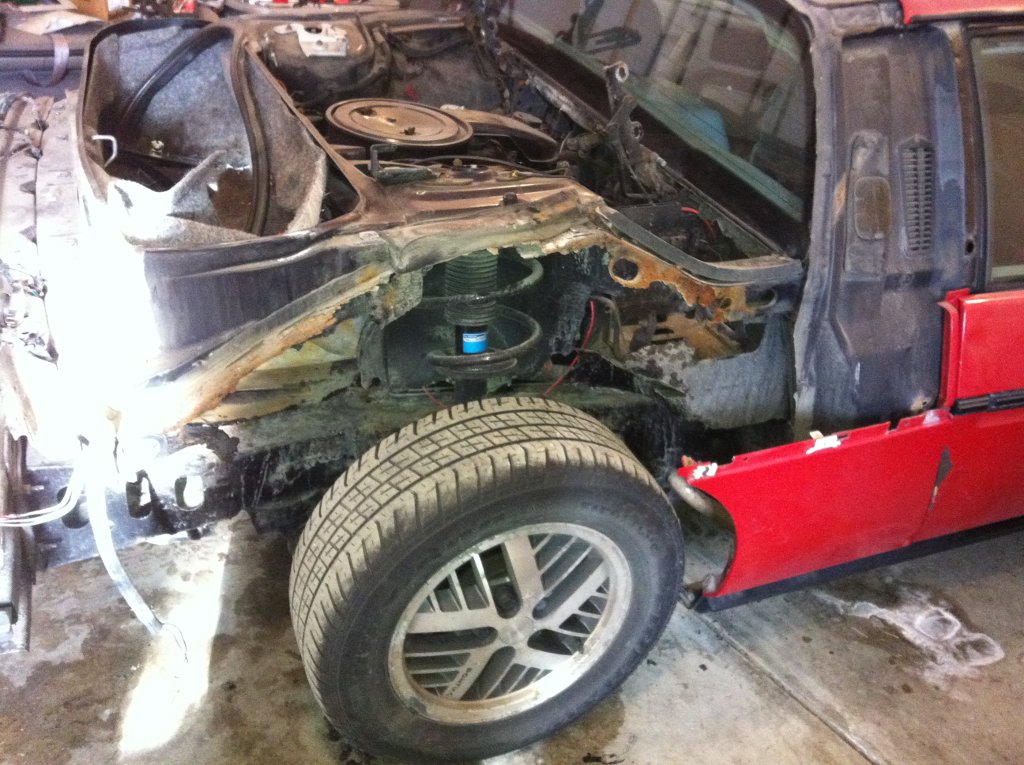


After removing the strut, you can see exactly why the bow in the frame was occurring: the strut tower had actually separated from the lower frame rail! AND the lower rail had a nice hole in it, too.
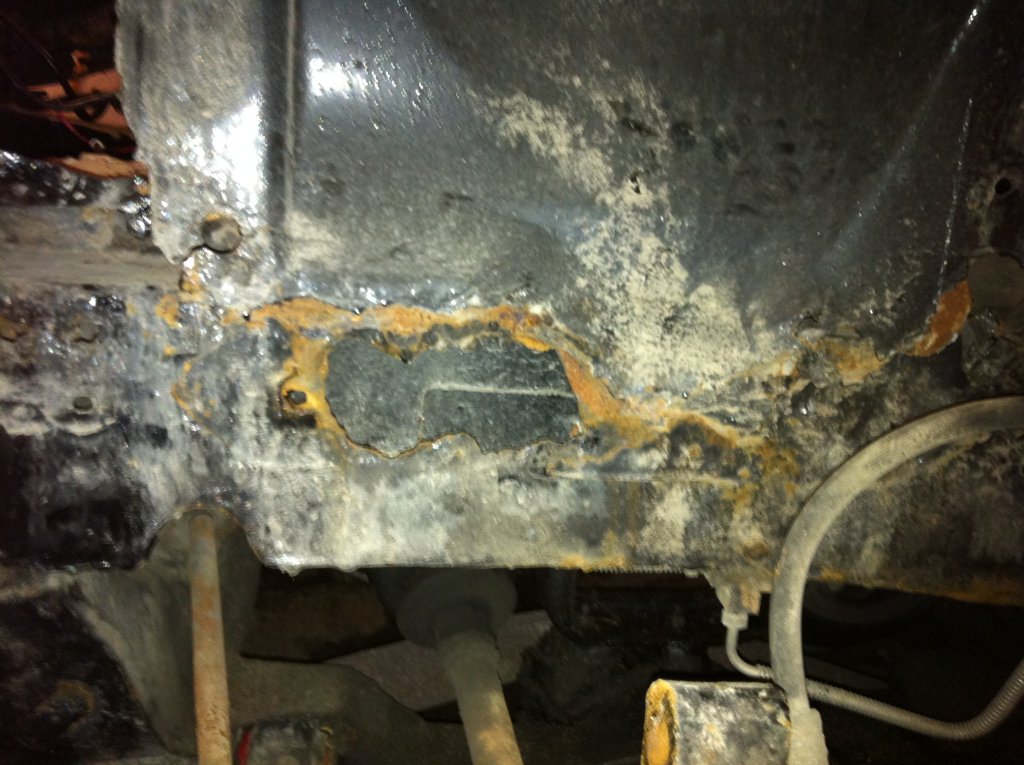


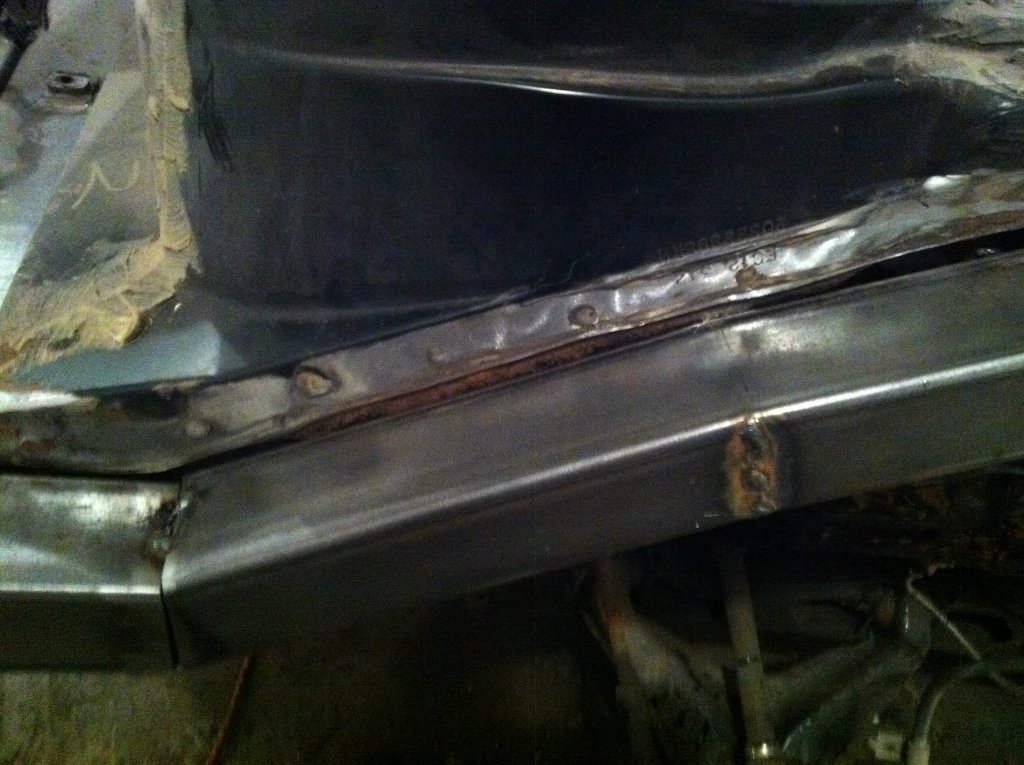
Here's what was left of the bumper side of the passenger rear frame rail
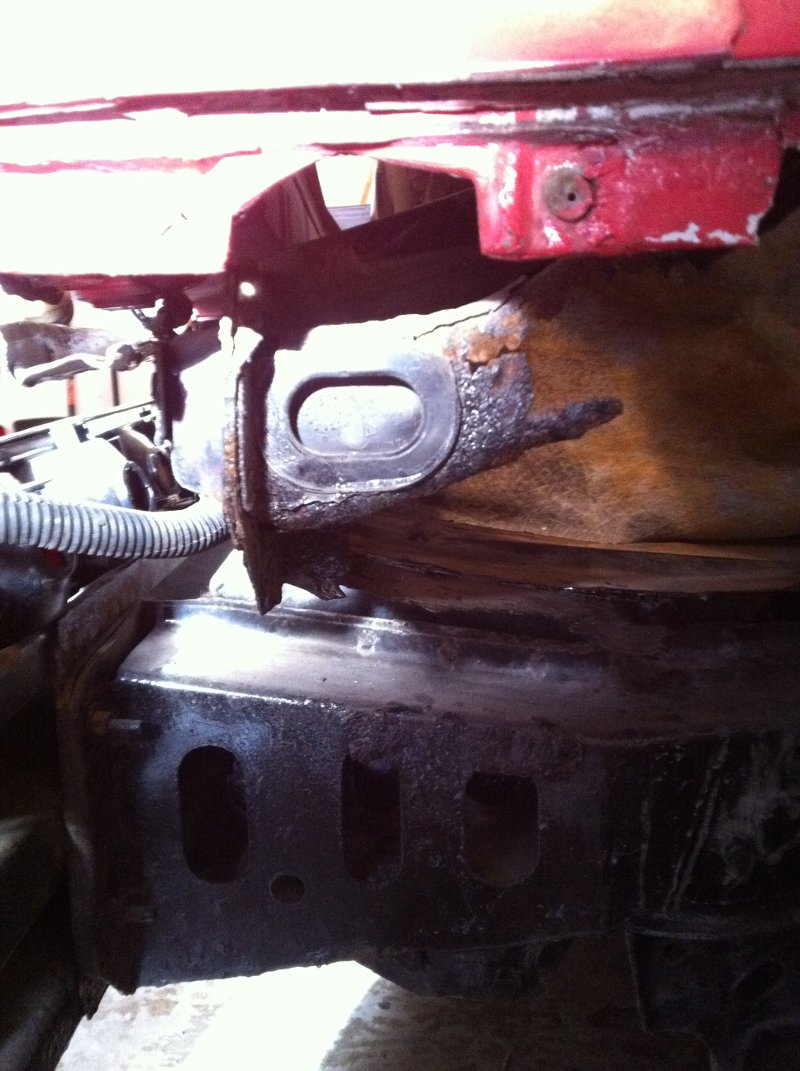


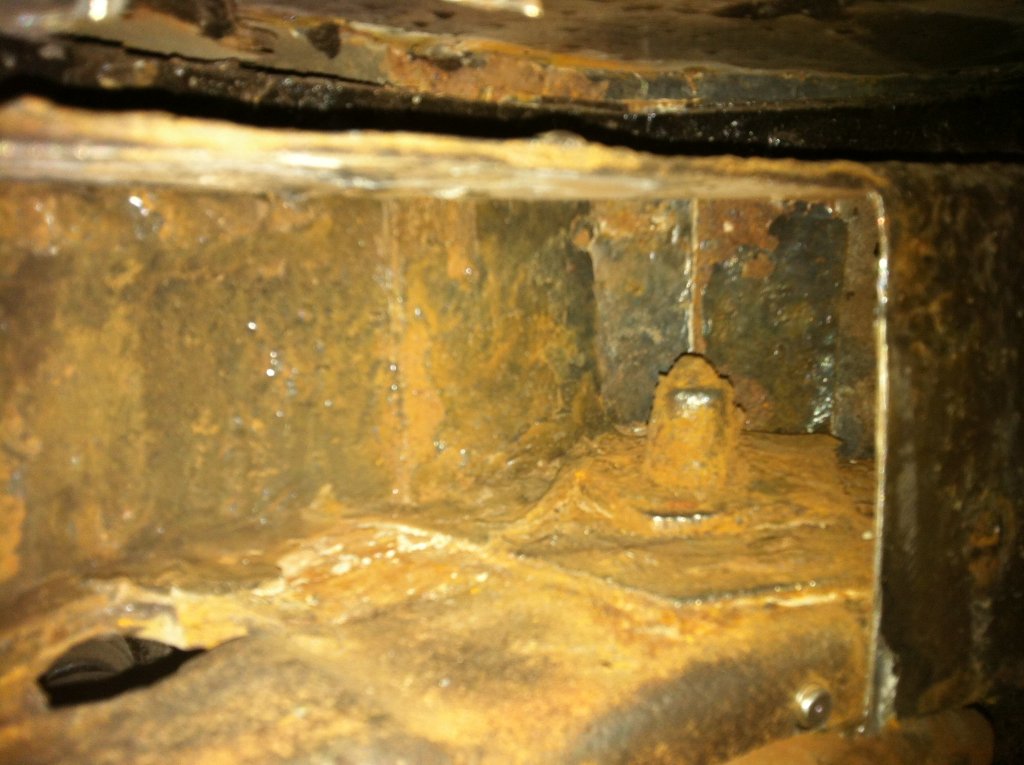
Inside the lower frame rail


Using a sanding disc on a grinder,I was able to find good metal in the lower rail, so if I cut it back far enough, I would have something to weld to
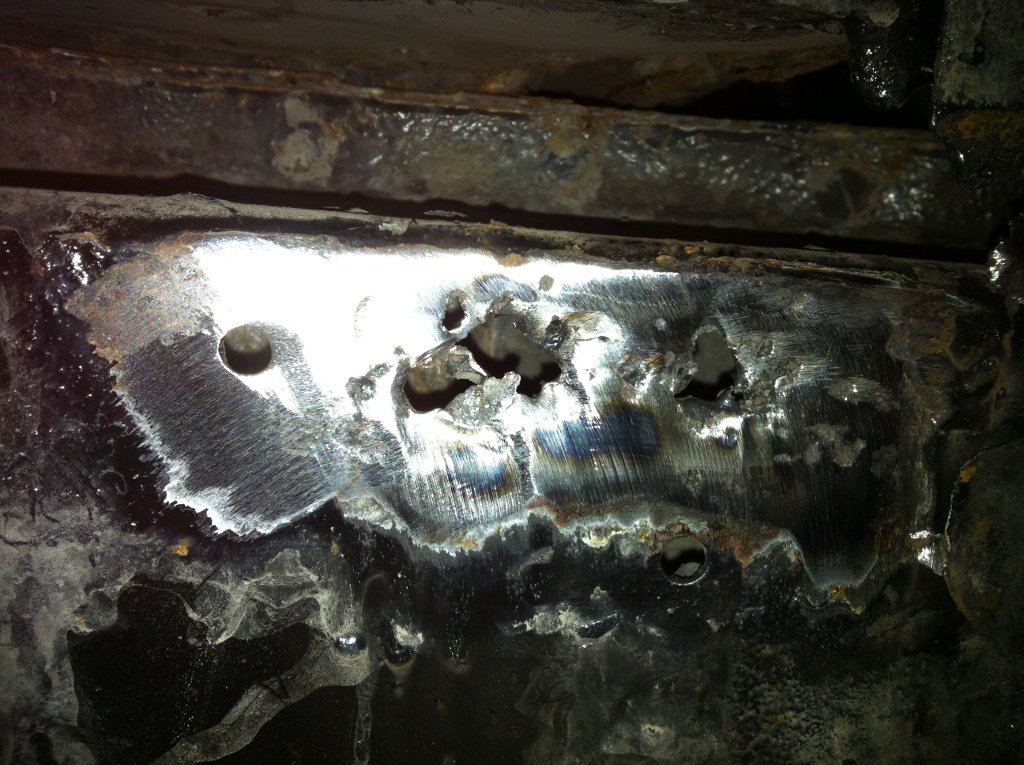


So I started cutting, and cutting, and cutting, and cutting...
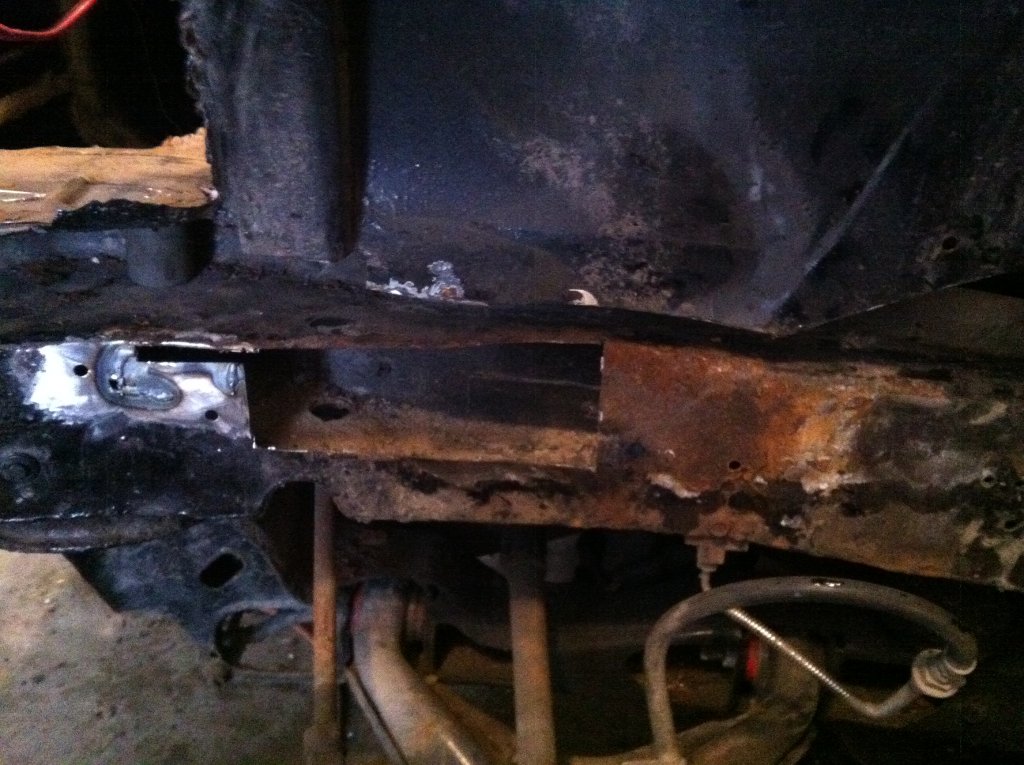


I was hoping I could stop there, but I had to cut even farther over.
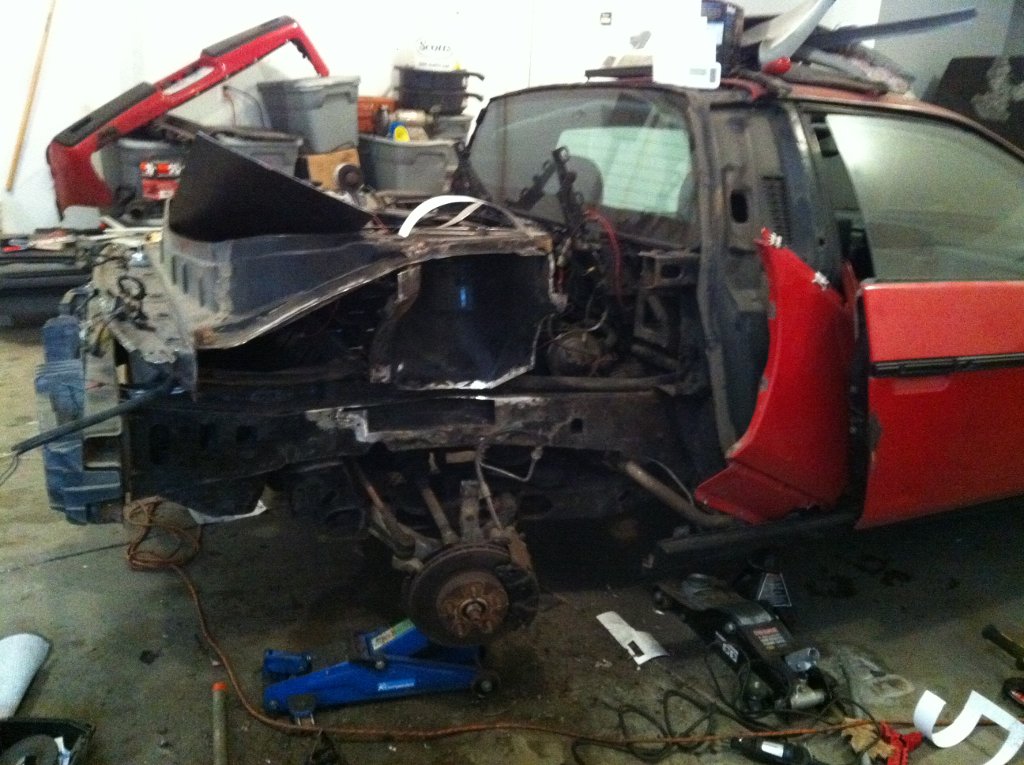


Here's where the spot welds were located in that area:
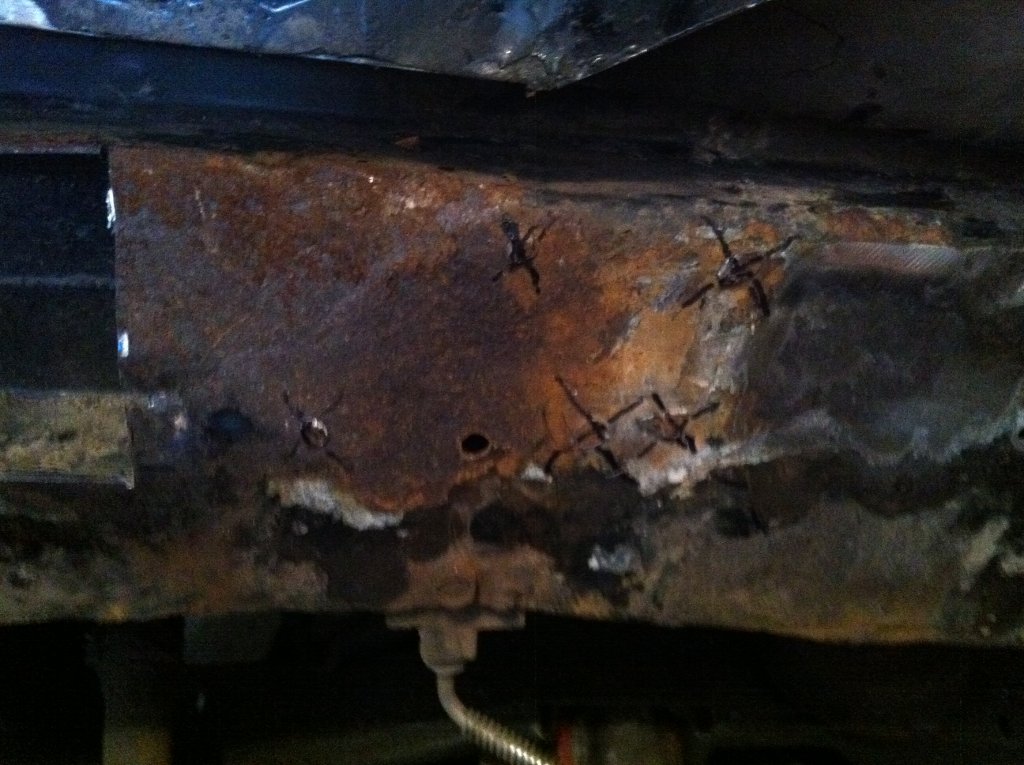


up close
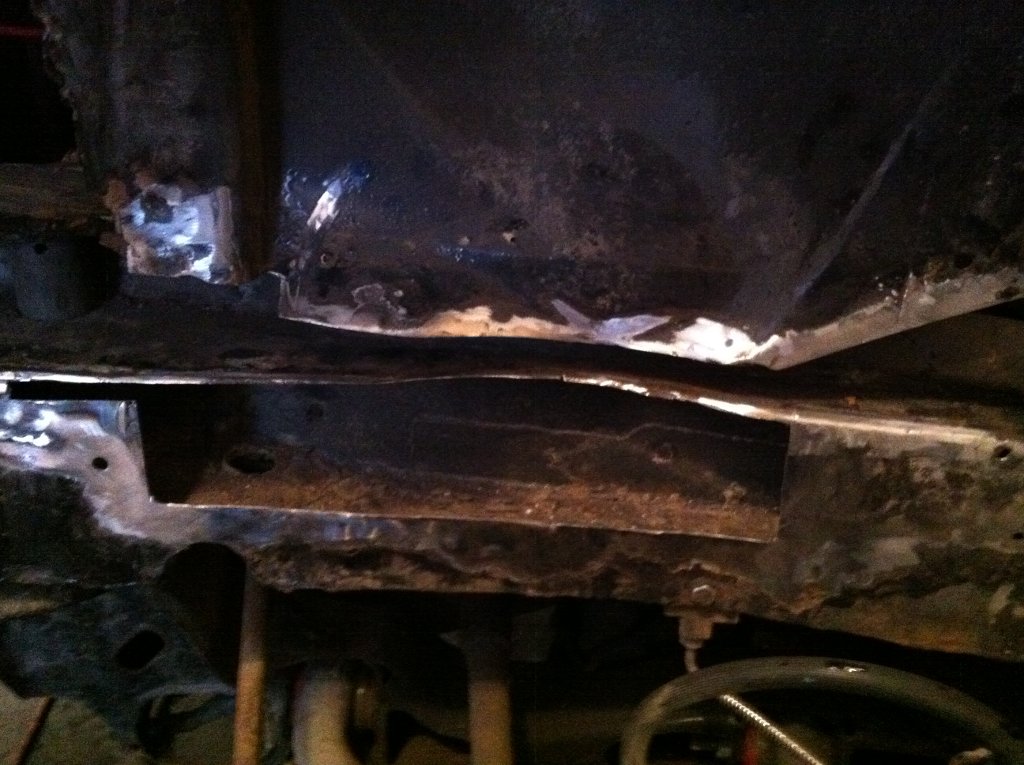


I made cardboard templates, and transferred them to steel sheetmetal, cut them out, and started bending them into shape. For the most part, the parts I was working with wire flat surfaces, with a few curves.
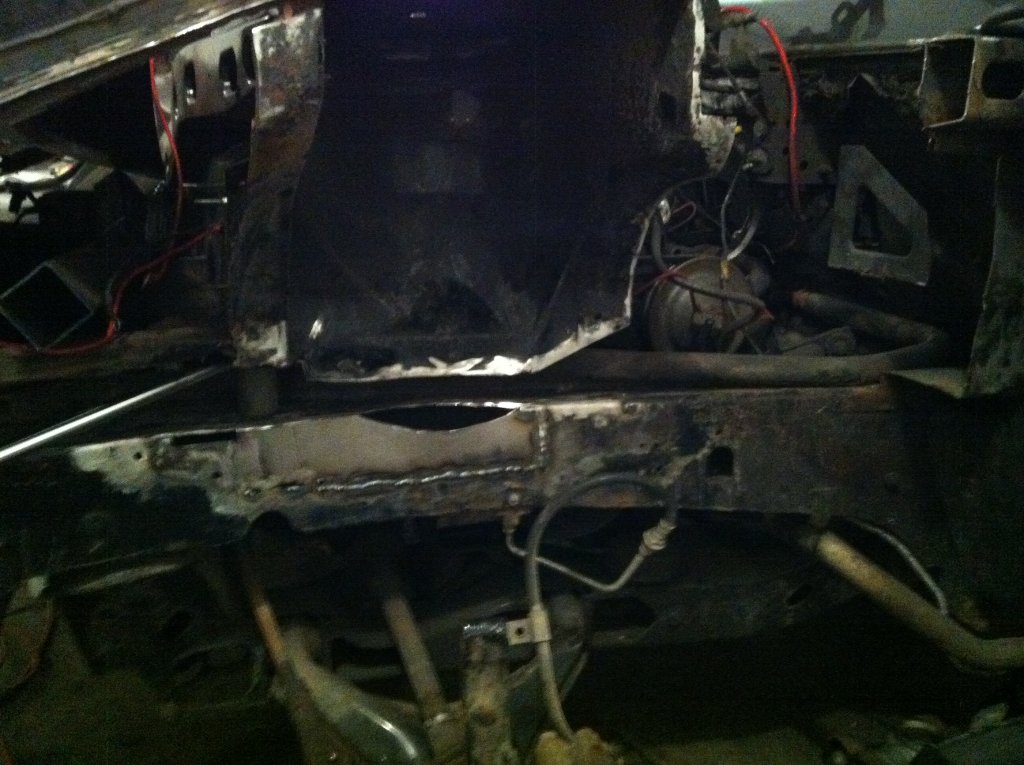
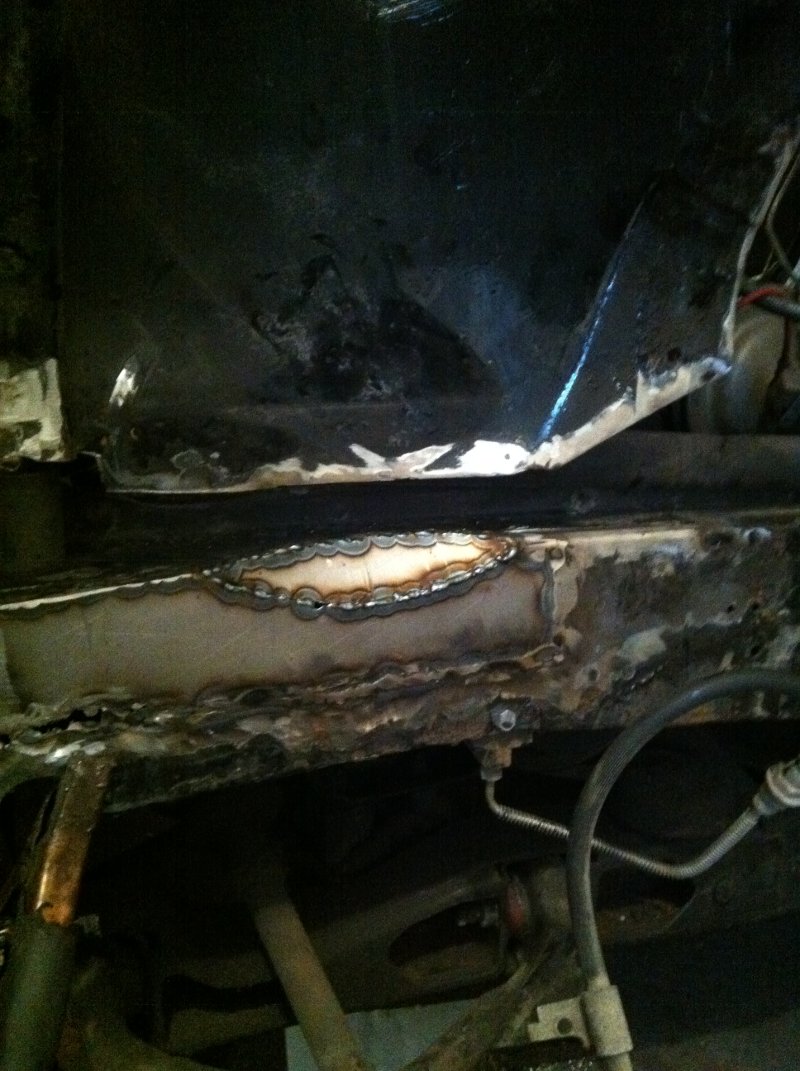


After finishing the lower rail, I POR15'ed the hell out of it.
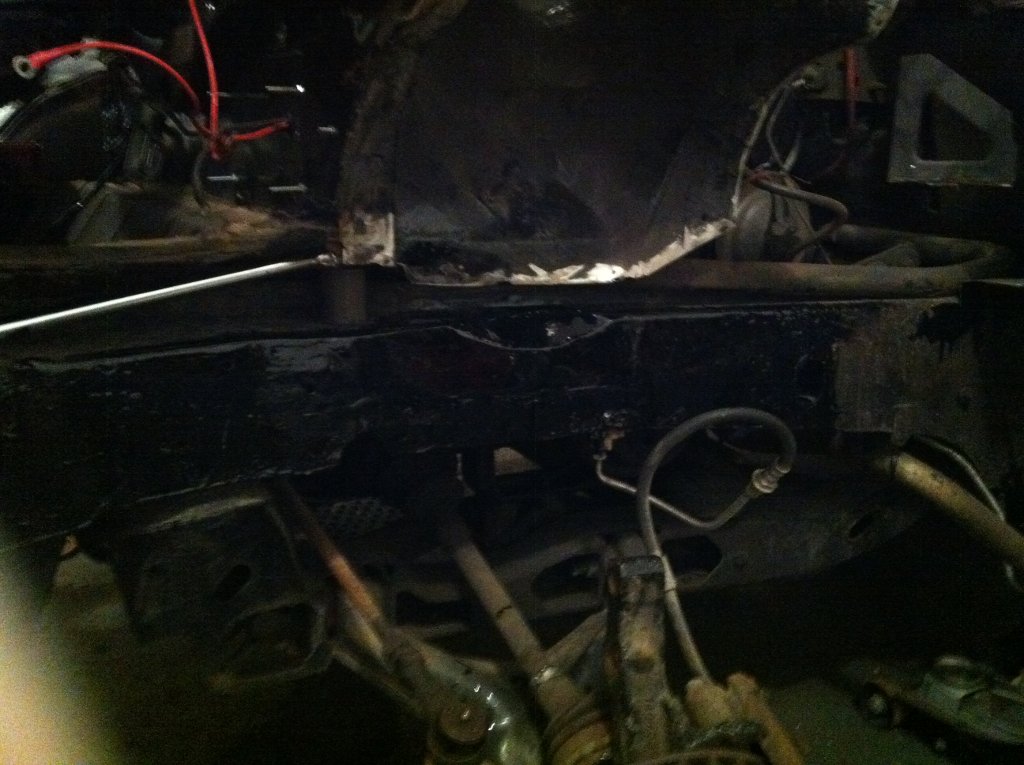


There obviously wasn't much left of the upper passenger rail, and I had to keep cutting back farther and farther, eventually ending up with this. Again, you can see the factory spot weld locations.
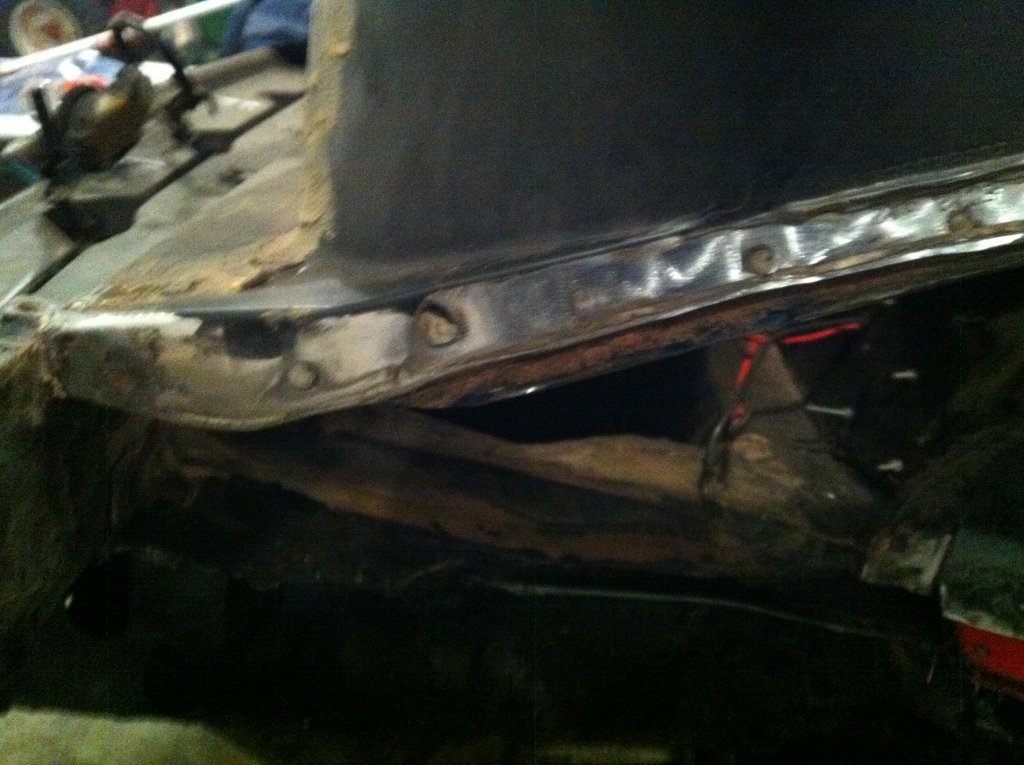
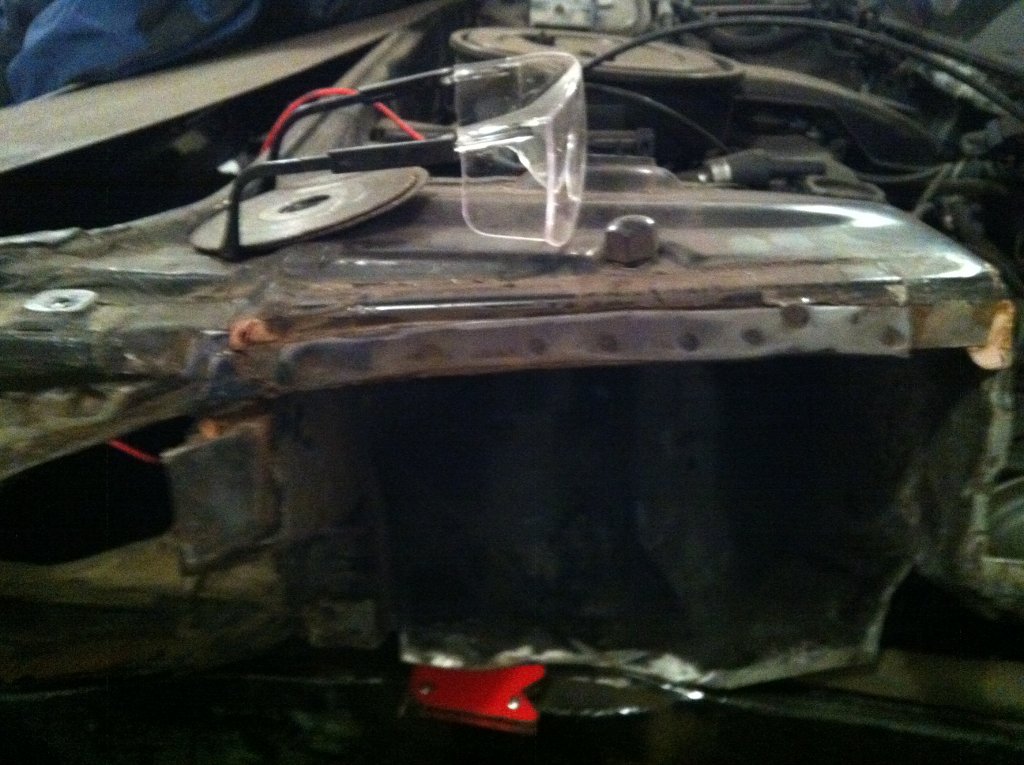
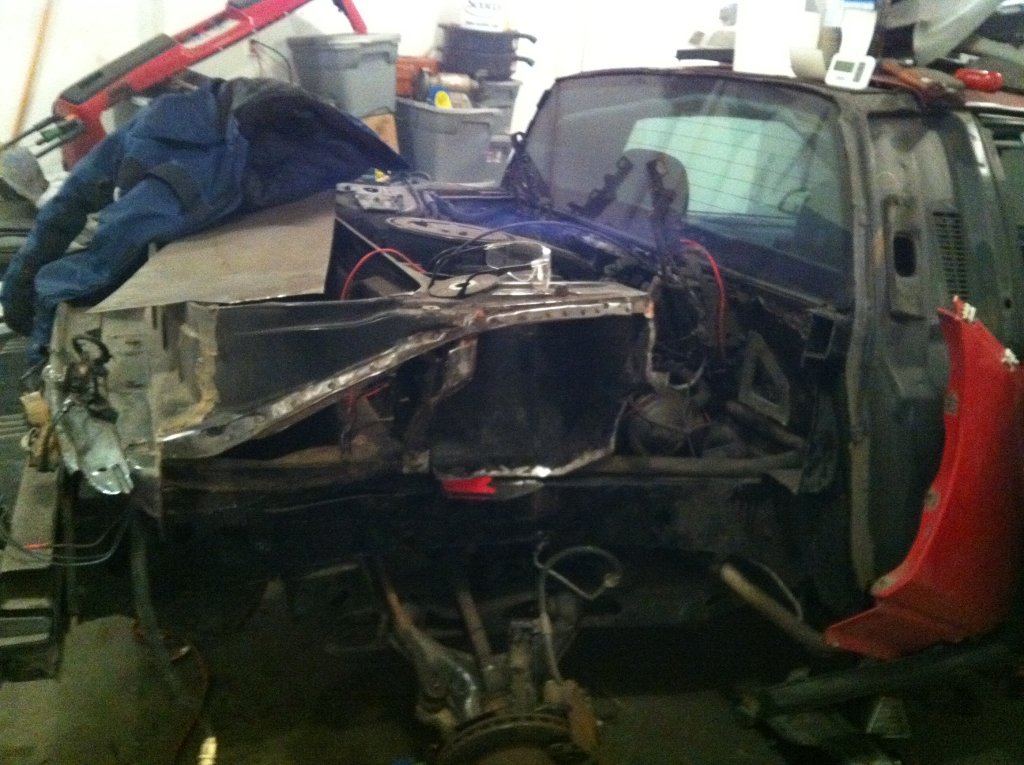


Test fitting the rail, notice the gaps
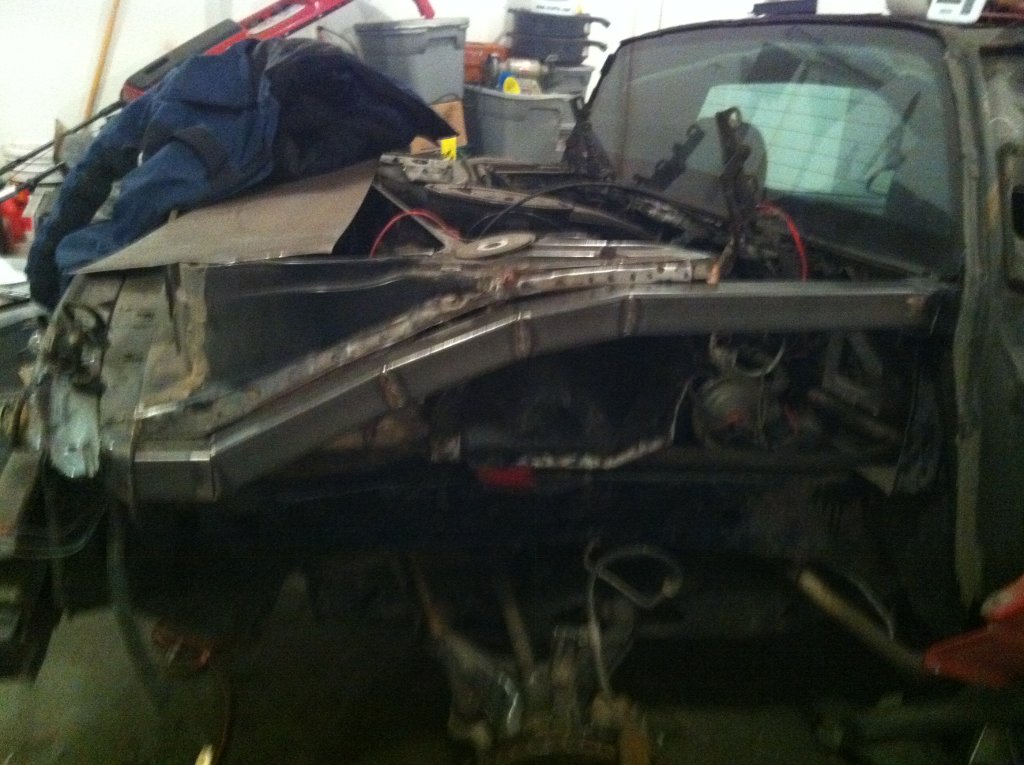


I cut out a piece of sheetmetal the same profile as the frame rail, but taller, and plug welded it to the side of the frame rail. This gave me something to weld onto the original frame with both plug welds to replicate the original spot welds, and lap welds along the edges. The front of the rail was butt welded on 3 sides to the original frame, and fillet welded at the rear. Once it was all welded in, more copious amounts of POR15
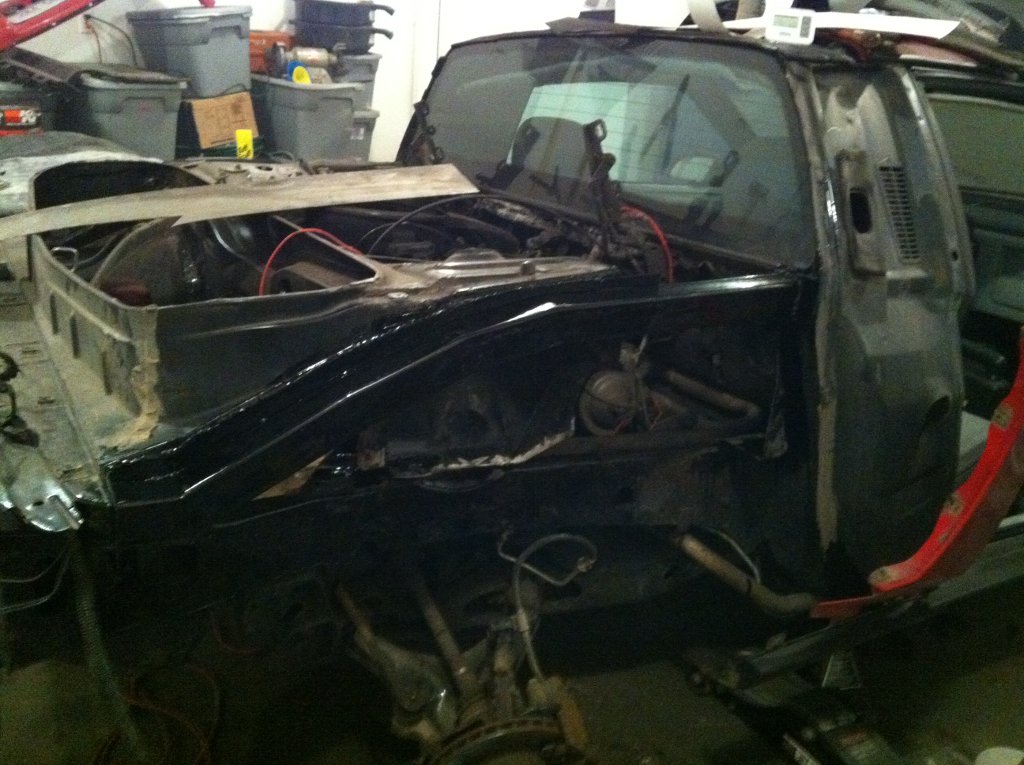


Once that was done, the strut tower: I made templates from what little was left of it, and made a new sheetmetal piece, which I had to constant tweak, pound with a hammer, and test fit repeatedly until it fit properly.
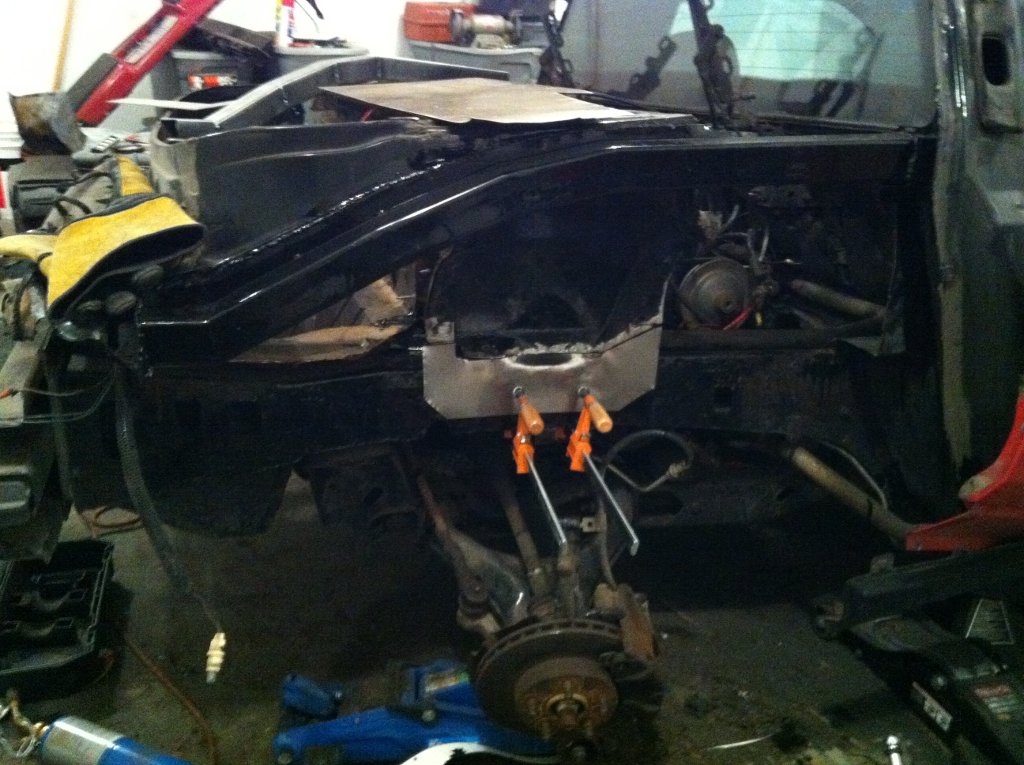


I not only use plug welds to secure it to the lower frame rail, but also lap welded around the outer edge, and butt welded the seam where it met up with the old strut tower. The parts to be welded to, the POR15 was taken off with a wire wheel, and I used a weld-through primer. You can also see the sheetmetal I used in front of the strut tower, where the battery tray used to be. I relocated the battery to the front compartment, because this seemed like the perfect excuse to do so, and the old tray was fairly badly rusted out.


I made the trunk corners using the same methods, cardboard templates, and using tape to hold them in place while test fitting.
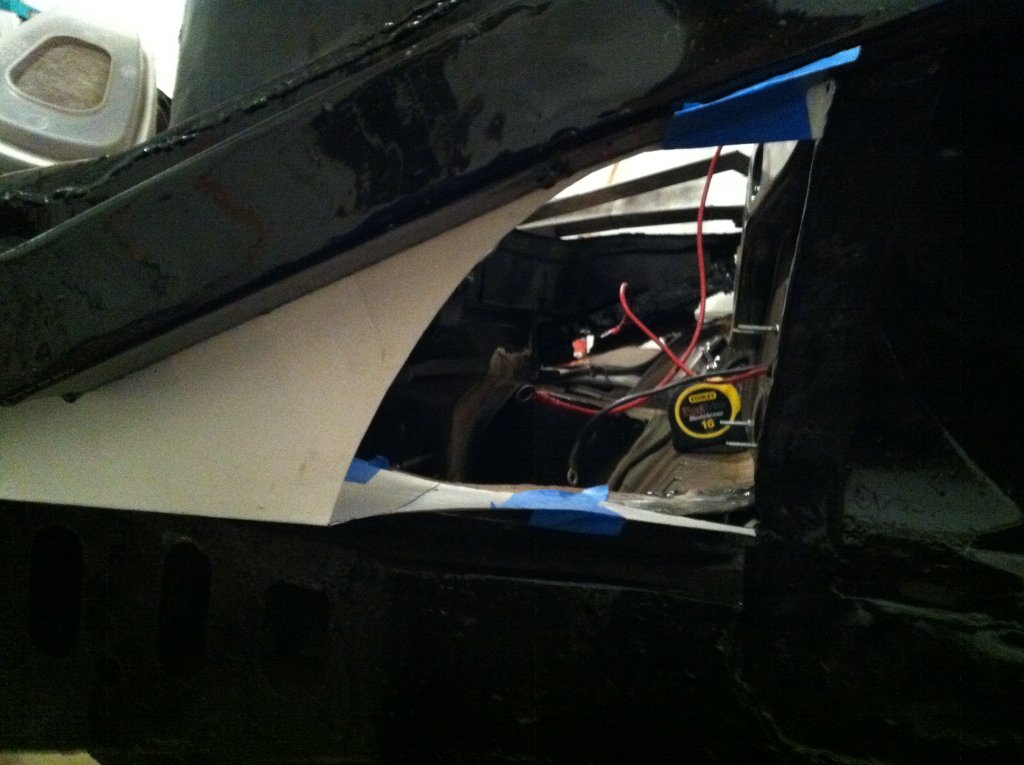


More POR15
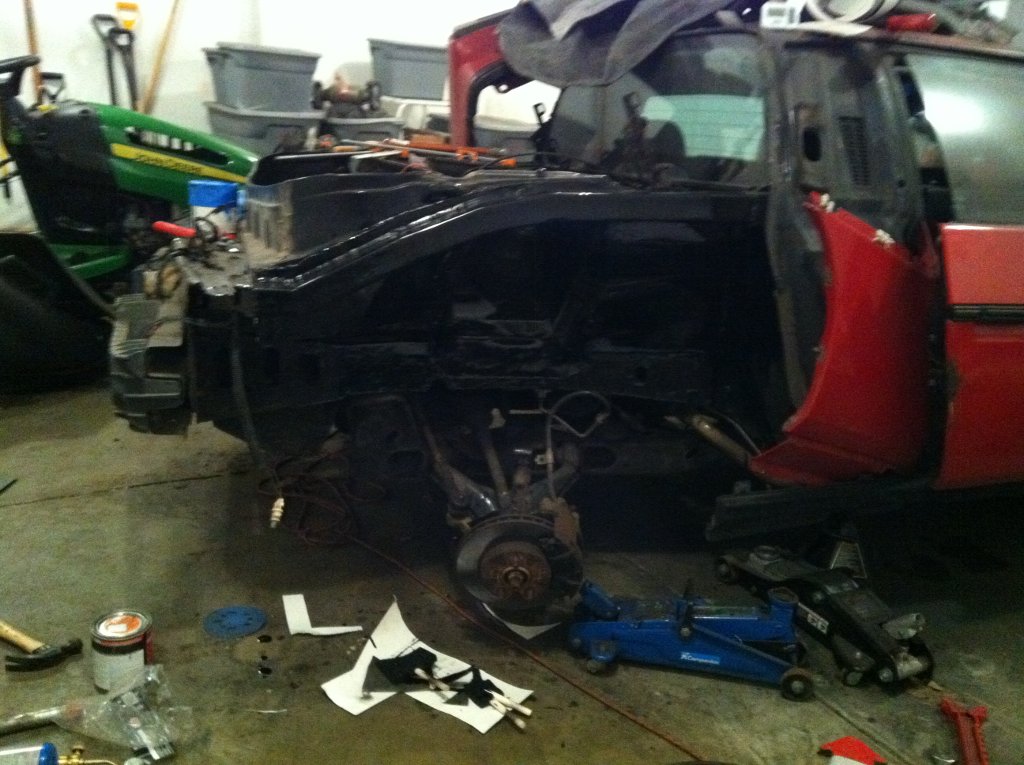


Nice new trunk corner
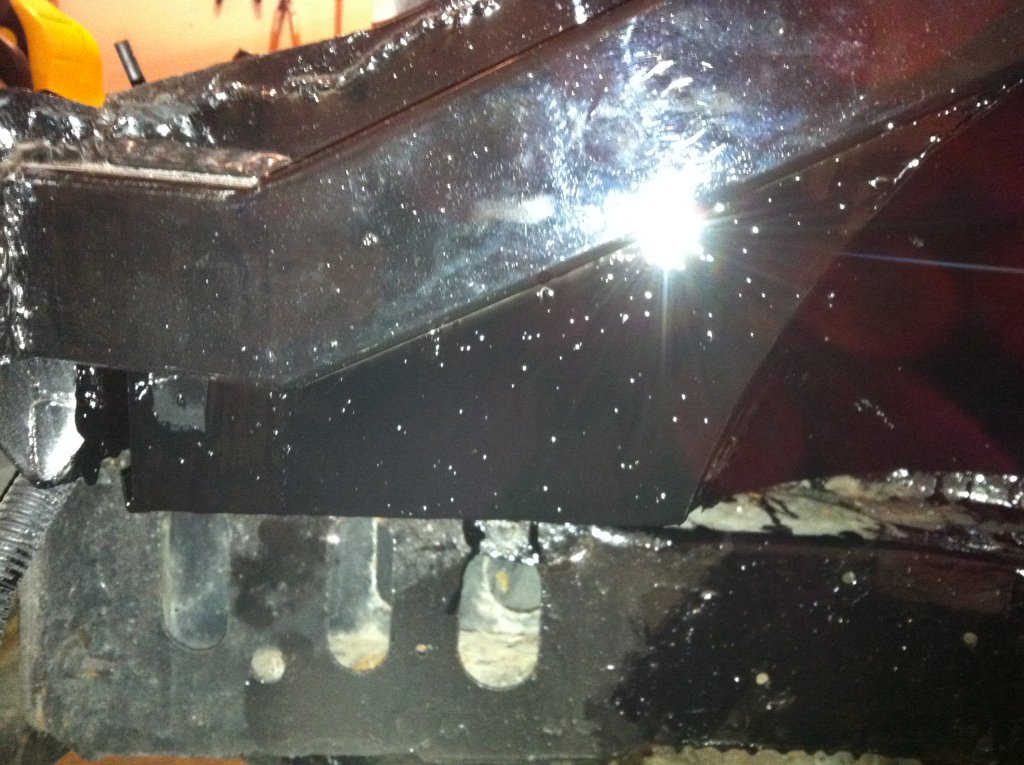


Once the POR15 was dry, all seams were filled with lots of seam sealer
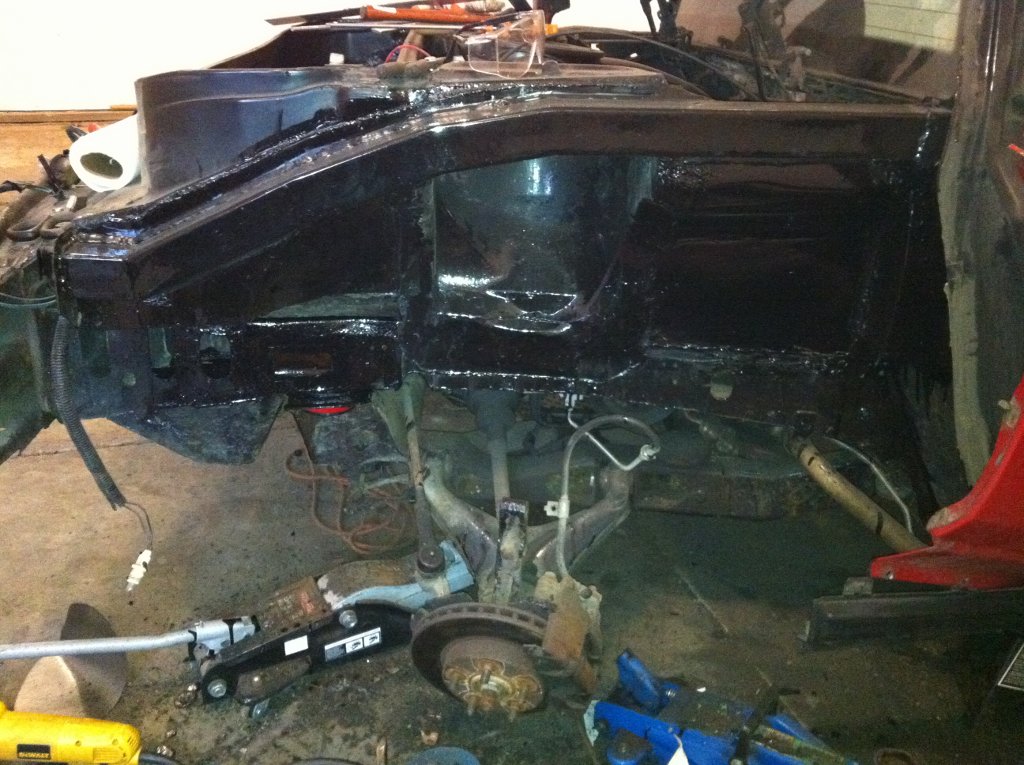


With that side done, I moved to the other side, which was already on it's way to looking like the passenger side. On this side, however, the strut tower was still (barely) attached to the lower frame rail, so I didn't have to keep taking measurements to make sure it was in the right place before welding parts in.

Driver's side lower rail:
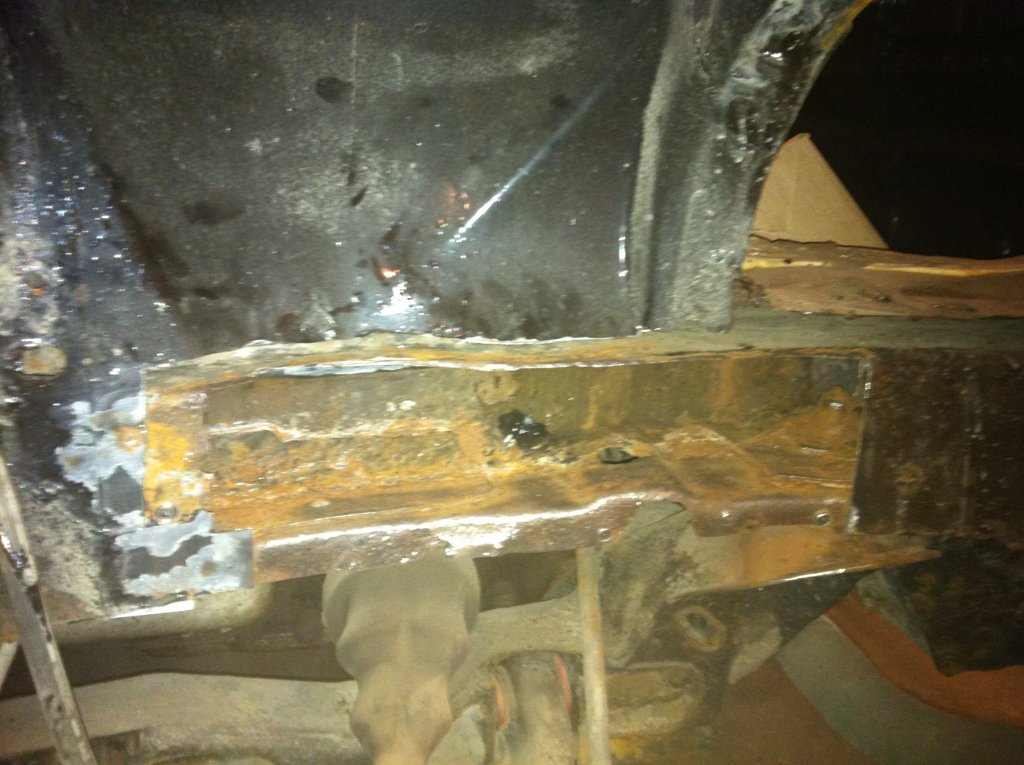


Driver's side upper rail:

[pic somehow deleted?]

More here:

https://www.fiero.nl/forum/Forum2/HTML/120904.html

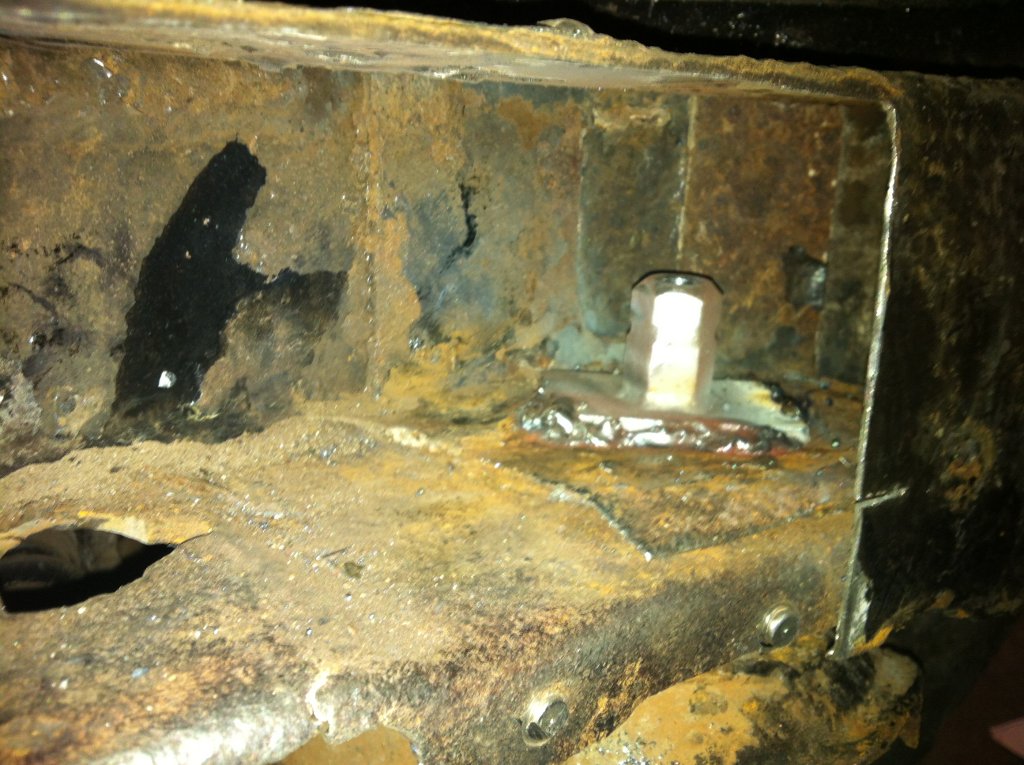
I also installed Rodney's weld-in cradle nuts at the same time. After removing the original, I used a small wire wheel on the end of a drill to clean up the mounting surface as good as possible, set it in place so the bolt could be threaded in most of the way.
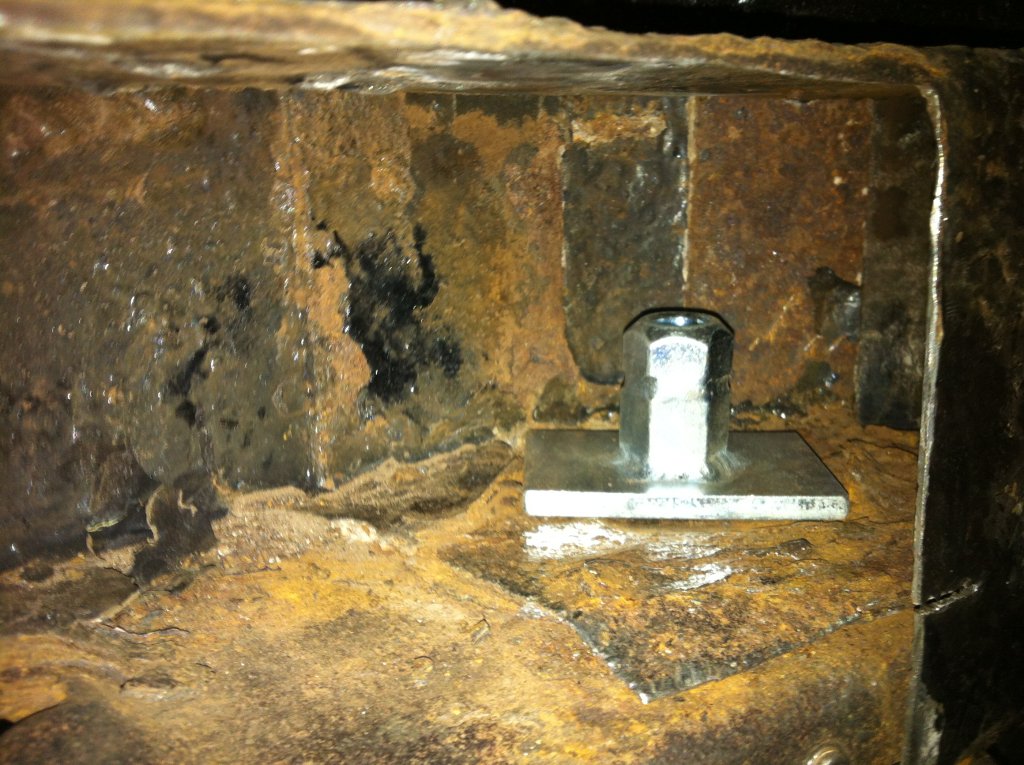


I was able to weld two sides of the nut from the large opening, and the third side through one of the frame rail holes
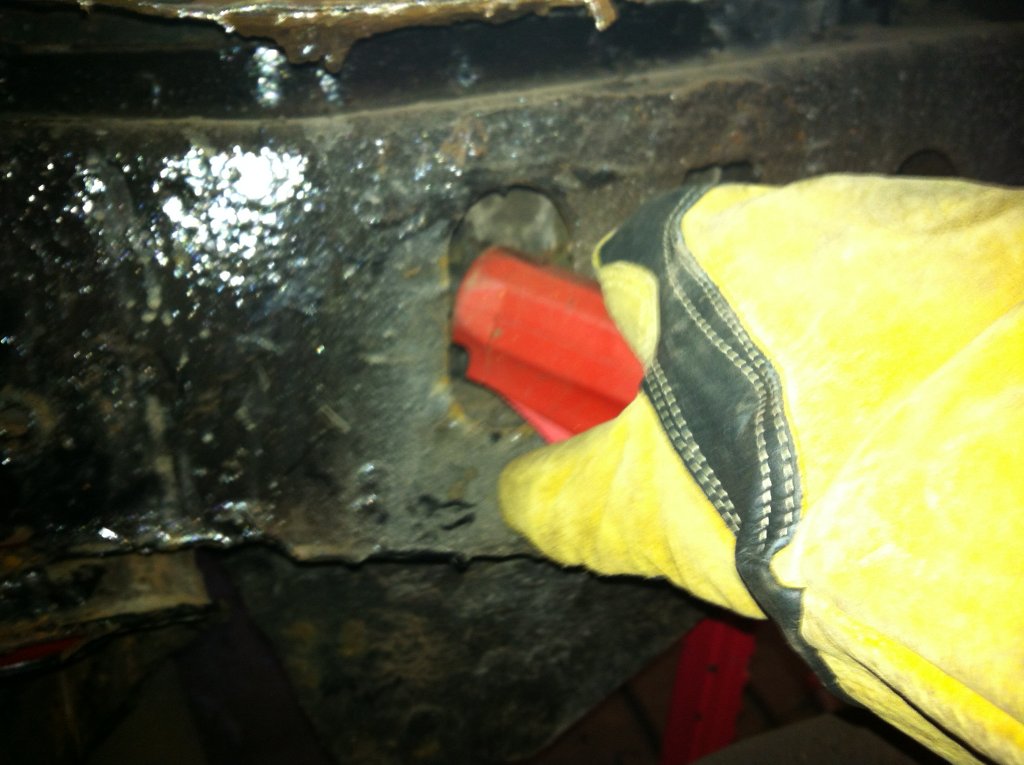


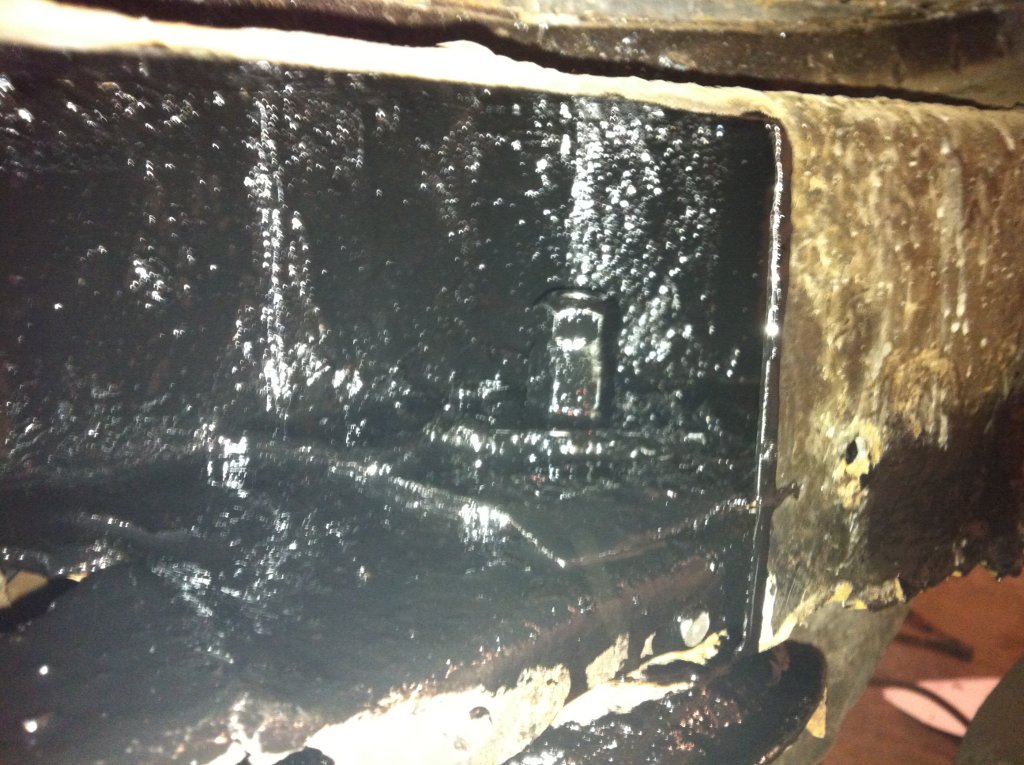
And POR'ed


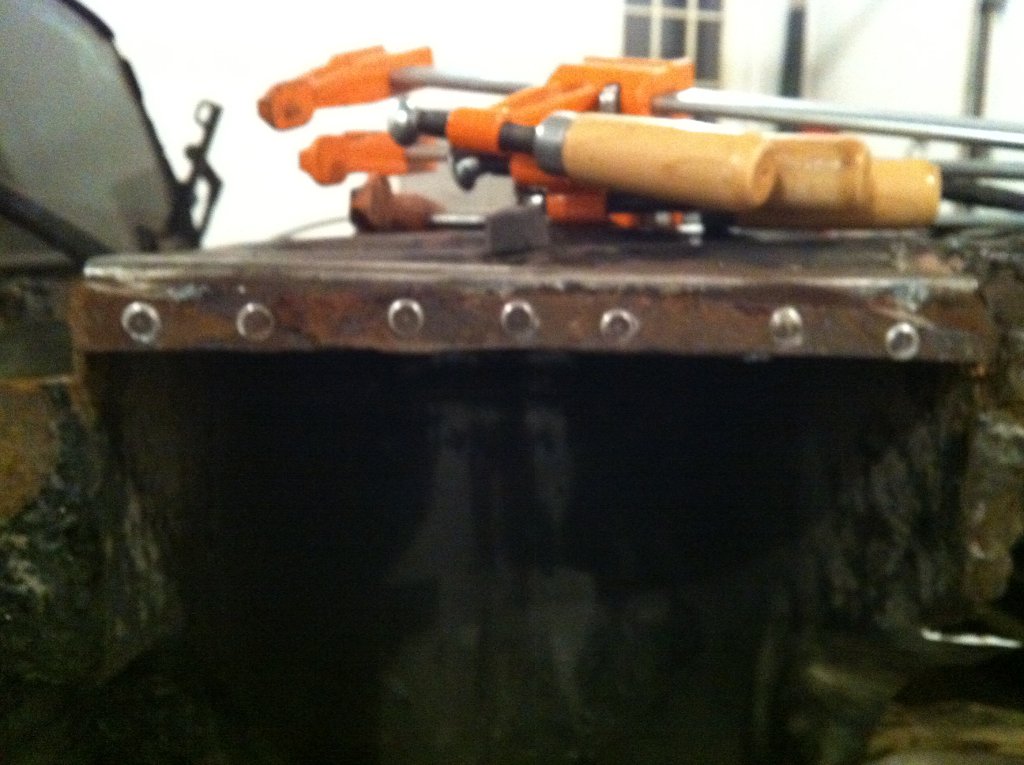
More spot weld locations:


This side was largely a repeat of the other side, except there was a lot more upper rail left to weld the new rail to the old one, as described in rubyredfiero's thread

https://www.fiero.nl/forum/A...060811-2-068409.html

I also used his trunk corner thread as a guide to doing those

https://www.fiero.nl/forum/A...070315-2-068398.html

I used a roughly 1ft long L-shaped piece to plug and seam weld the strut tower to the new upper rail.
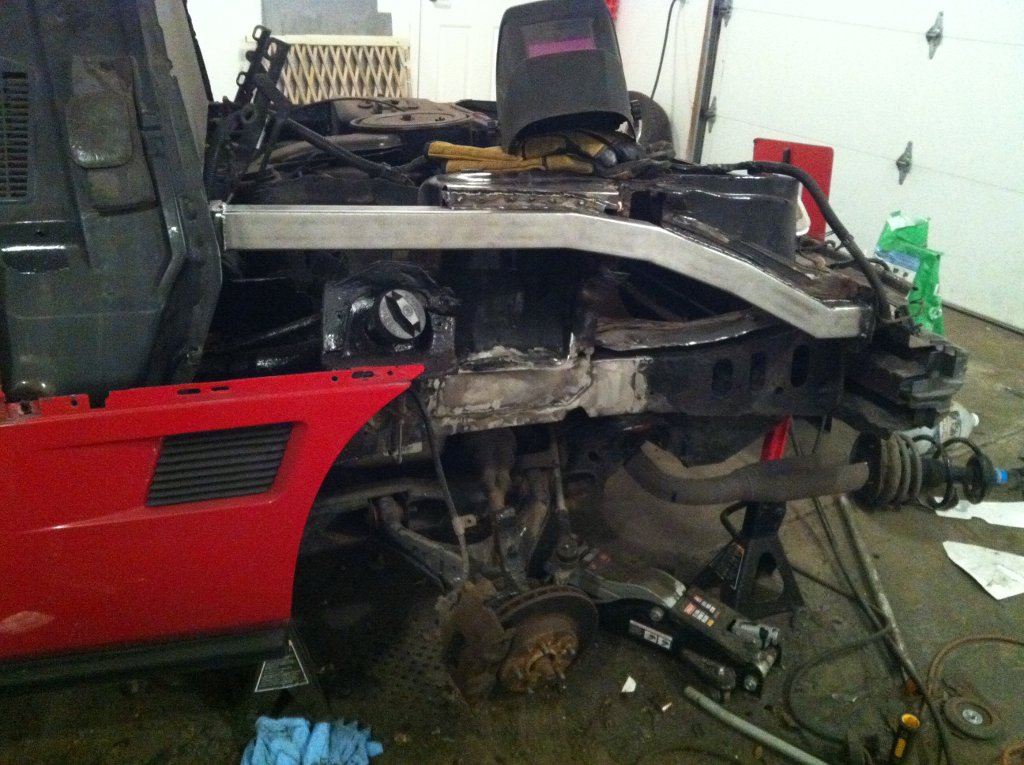


Once all the work was done, I put the car back together, and took it in to get an alignment, after which it drove PERFECTLY. I've been dying to drive my car again, and now I can finally do so. FINALLY! Until the huge snowstorm we had about a week ago.
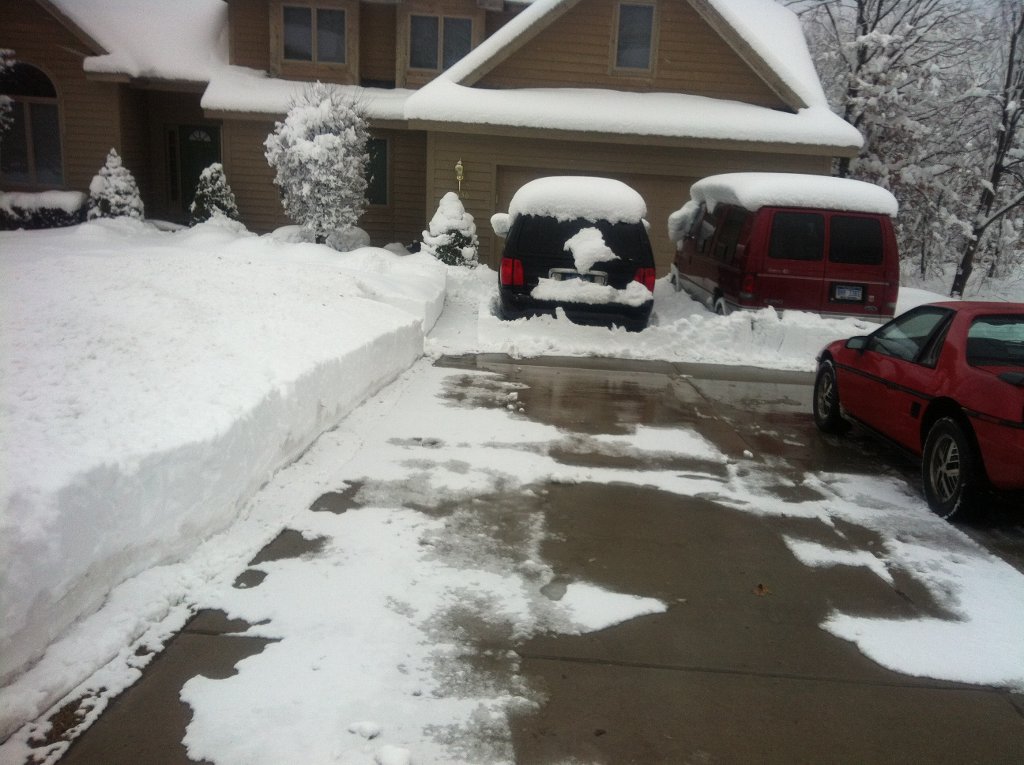
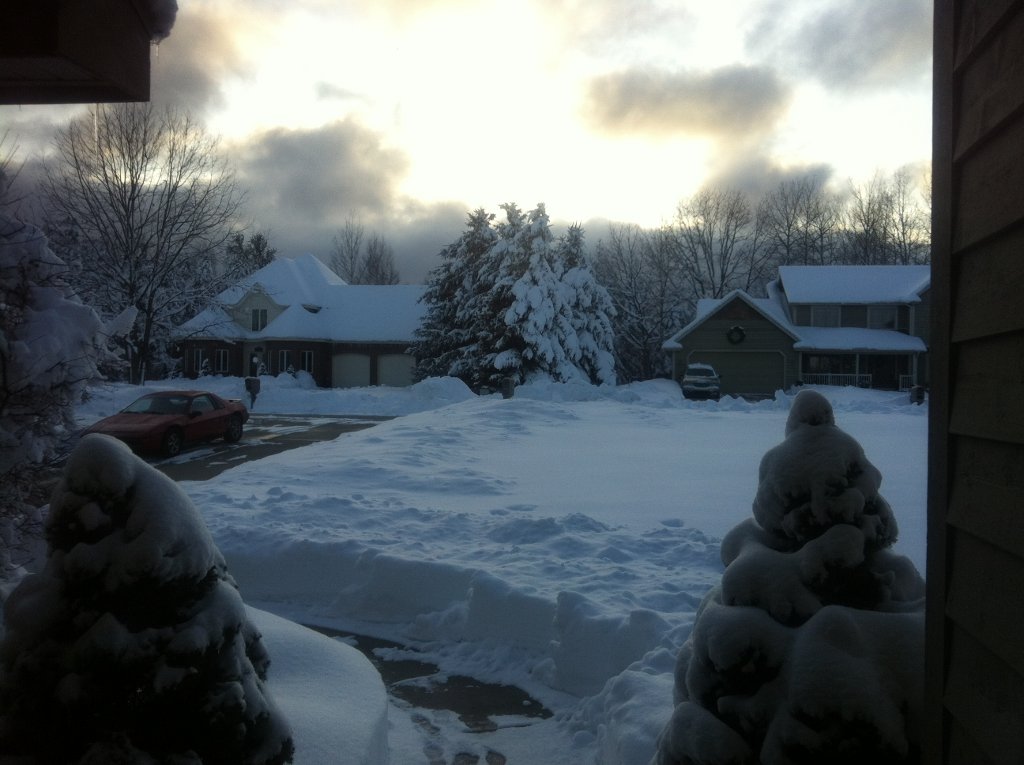


I loaded up the car on a Uhaul auto transport, first time ever towing anything, and drove for about half an hour on roads that varied from dry to like this, for 15 minutes at a time, to get out of town
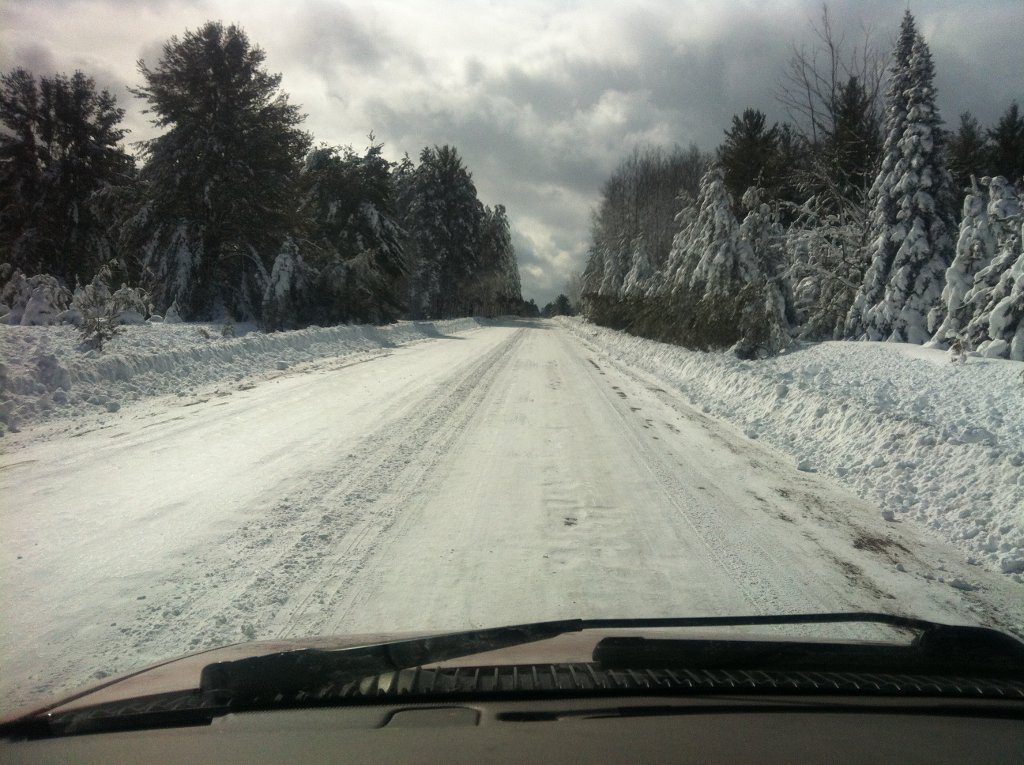


I drove down to Toledo to stay with an Uncle overnight, and drove 11 hours the next day to my father's new place in Mantua, New Jersey.
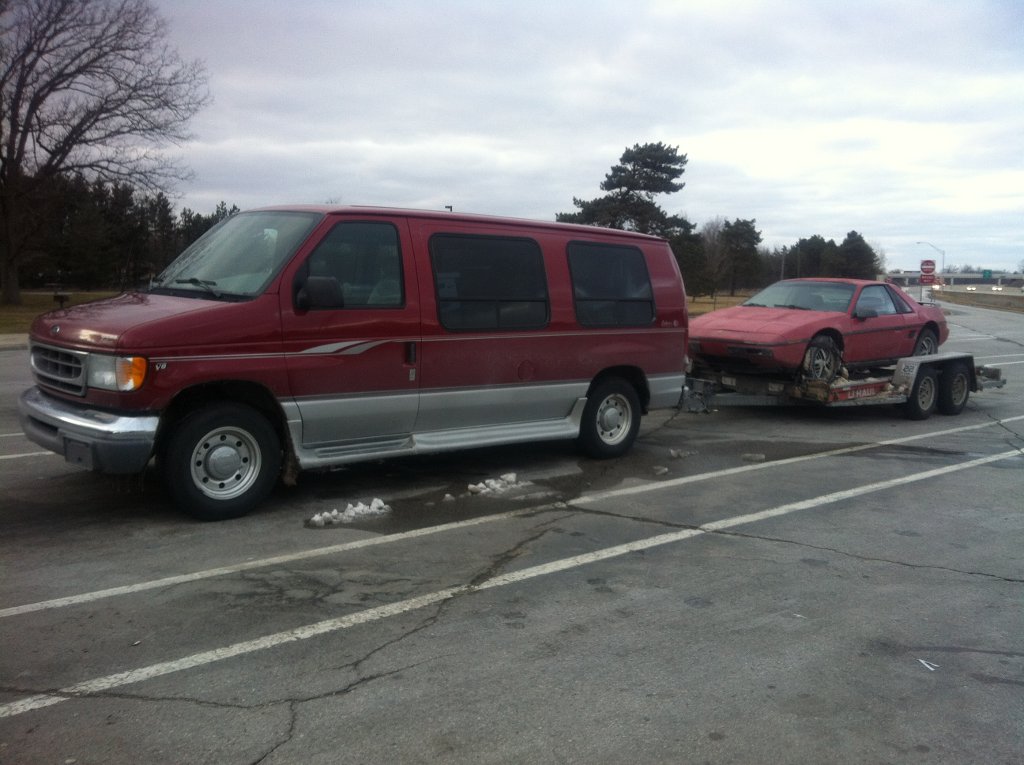


So now I'm down here, with the car, enjoying June weather in March

------------------

1984 Fiero SE

[This message has been edited by RWDPLZ (edited 10-17-2012).]

IP: Logged
PFF
System Bot
Ang84Indy
Member
Posts: 576
From: Ohio
Registered: Jul 2009


Feedback score:    (7)
Leave feedback

Rate this member

Report this Post03-12-2012 06:07 PM Click Here to See the Profile for Ang84IndySend a Private Message to Ang84IndyDirect Link to This Post
Congratulations! Going from a wreck and not knowing how to weld to a running car in less than 2 years is a huge accomplishment!
IP: Logged
spc15tdime
Member
Posts: 229
From: Portage, Michigan
Registered: Jun 2006


Feedback score: N/A
Leave feedback

Rate this member

Report this Post03-12-2012 06:35 PM Click Here to See the Profile for spc15tdimeSend a Private Message to spc15tdimeDirect Link to This Post
Holy cow!, Awesome work man! That is nothing less than very impressive, congratulations on having your ride back AND learning the useful skill of welding, and doing VERY well at it i might add.
IP: Logged
Boostdreamer
Member
Posts: 7175
From: Kingsport, Tennessee USA
Registered: Jun 2007


Feedback score:    (24)
Leave feedback


Total ratings: 98
Rate this member

Report this Post03-12-2012 08:29 PM Click Here to See the Profile for BoostdreamerSend a Private Message to BoostdreamerDirect Link to This Post
Mad props!

------------------
Jonathan
23K mile '85 notchie w/ 88 cradle, '87 2.8/Getrag, Air, PW, PDL, PM - Still under construction
https://www.fiero.nl/forum/Forum2/HTML/121056.html
I'm not a mechanic but I play one in my garage - me
Power tends to corrupt, and absolute power corrupts absolutely - Lord Acton
Those who hammer their guns into plows will plow for those who do not - Thomas Jefferson
The tree of liberty must be refreshed from time to time, with the blood of patriots and tyrants - Thomas Jefferson

IP: Logged
skuzzbomer
Member
Posts: 7492
From: Nashville
Registered: Sep 2009


Feedback score: (3)
Leave feedback


Total ratings: 92
Rate this member

Report this Post03-12-2012 09:16 PM Click Here to See the Profile for skuzzbomerSend a Private Message to skuzzbomerDirect Link to This Post
Holy crap, man... You were driving it like that?

Amazing.
IP: Logged
nitroheadz28
Member
Posts: 4774
From: Brooklyn, NY
Registered: Mar 2010


Feedback score:    (26)
Leave feedback


Total ratings: 94
Rate this member

Report this Post03-12-2012 09:30 PM Click Here to See the Profile for nitroheadz28Send a Private Message to nitroheadz28Direct Link to This Post
You're my hero
IP: Logged
no2pencil
Member
Posts: 1523
From: Fort Lauderdale, FL
Registered: Oct 2009


Feedback score: (3)
Leave feedback

Rate this member

Report this Post03-12-2012 09:44 PM Click Here to See the Profile for no2pencilSend a Private Message to no2pencilDirect Link to This Post
(In Ohio) Our Fiero's have had some minor rust, but nothing like yours! We used the metal from PC cases as filler for missing metal. It was no where near the structure repair you've done here.

Just to add to what the others have said, great job!
IP: Logged
FieroMaster88
Member
Posts: 7680
From: Mattawan, MI
Registered: Nov 2000


Feedback score:    (43)
Leave feedback


Total ratings: 168
Rate this member

Report this Post03-12-2012 09:47 PM Click Here to See the Profile for FieroMaster88Send a Private Message to FieroMaster88Direct Link to This Post
Nice work! I need to do the same to my Indy.

------------------

88 Coupe: 2.0L Turbo 4 Cylinder
84 Indy #64: Restoration Project!

IP: Logged
twofatguys
Member
Posts: 16465
From: Wheaton Mo. / Virginia Beach Va.
Registered: Jul 2004


Feedback score: (2)
Leave feedback


Total ratings: 227
Rate this member

Report this Post03-12-2012 09:49 PM Click Here to See the Profile for twofatguysSend a Private Message to twofatguysDirect Link to This Post

I had a good frame car you could have had man. I didn't know you were looking.
Brad
IP: Logged
Jfrost
Member
Posts: 1092
From: Brookfield, IL
Registered: Jul 2009


Feedback score:    (29)
Leave feedback

Rate this member

Report this Post03-12-2012 09:56 PM Click Here to See the Profile for JfrostSend a Private Message to JfrostDirect Link to This Post
Great work on bringing your Fiero back to life! Very inspirational to those who don't know how to do this kind of work (me included) to show it just takes practice and determination.
IP: Logged
mattwa
Member
Posts: 7106
From: Lorain, Ohio
Registered: Sep 2008


Feedback score:    (41)
Leave feedback


Total ratings: 88
Rate this member

Report this Post03-13-2012 10:08 AM Click Here to See the Profile for mattwaSend a Private Message to mattwaDirect Link to This Post
Wow, that's awesome! Great job. Much more metal-work then I'd ever do on a Fiero. I can understand how difficult it must have been to start with nothing and get accurate placement of parts like that. I did find it funny that you made trunk "corners"...literally. Heck you could have extended it down to make a larger trunk if you wanted to!

At least I feel better about my rusted frame now. Lol.
IP: Logged
PFF
System Bot
RWDPLZ
Member
Posts: 15057
From: Michigan
Registered: May 2002


Feedback score:    (11)
Leave feedback


Total ratings: 305
Rate this member

Report this Post03-13-2012 04:53 PM Click Here to See the Profile for RWDPLZClick Here to visit RWDPLZ's HomePageSend a Private Message to RWDPLZDirect Link to This Post
Thanks for all the kind words! The car had so much rust because it's been a Michigan car all it's life, has usually been a daily driver, and pretty much all it's previous owners abused and neglected the hell out of the poor thing! It's also just coming up on 180,000 miles.
IP: Logged
NetCam
Member
Posts: 1490
From: Milton, Ontario, Canada
Registered: Mar 2012


Feedback score: N/A
Leave feedback

Rate this member

Report this Post03-13-2012 05:08 PM Click Here to See the Profile for NetCamClick Here to visit NetCam's HomePageSend a Private Message to NetCamDirect Link to This Post
That is amazing, you have the patience of a saint!
IP: Logged
mattwa
Member
Posts: 7106
From: Lorain, Ohio
Registered: Sep 2008


Feedback score:    (41)
Leave feedback


Total ratings: 88
Rate this member

Report this Post03-13-2012 06:30 PM Click Here to See the Profile for mattwaSend a Private Message to mattwaDirect Link to This Post
 
quote
Originally posted by RWDPLZ:

Thanks for all the kind words! The car had so much rust because it's been a Michigan car all it's life, has usually been a daily driver, and pretty much all it's previous owners abused and neglected the hell out of the poor thing! It's also just coming up on 180,000 miles.


Hard to believe just a few hundred miles in location differences can make such a difference. We own an 85 SE with 183k miles on it, and it doesn't have one single spot of rust. It was originally from Virginia or around there.
IP: Logged
GM Shane
Member
Posts: 175
From: Traverse City, MI
Registered: Aug 2005


Feedback score: (2)
Leave feedback

Rate this member

Report this Post06-27-2012 10:18 PM Click Here to See the Profile for GM ShaneSend a Private Message to GM ShaneDirect Link to This Post
Sorry I missed this when it was new. Nice job!

I can't believe you left town immediately after that snow storm. That was a ***** .
IP: Logged


All times are ET (US)

T H I S   I S   A N   A R C H I V E D   T O P I C
  

Contact Us | Back To Main Page

Advertizing on PFF | Fiero Parts Vendors
PFF Merchandise | Fiero Gallery
Real-Time Chat | Fiero Related Auctions on eBay


Copyright (c) 1999, C. Pennock