|
|
|

|
Who said this was easy? - My TPI-V8 swap :-) by Alex4mula
| Started on | : 10-07-2004 03:36 PM |
| Replies | : 283 |
| Last post by | : Alex4mula on 07-27-2005 03:26 PM |
|
|
|
|
Nov 5th, 2004
|
Jake_Dragon
Member Posts: 32977
From: USA
Registered: Jan 2001
|
Thanks!
I hope I can do a tenth of the job you have done.
IP: Logged


|
03:25 PM
|
|
mrfixit58
Member Posts: 3330
From: Seffner, Fl, USA
Registered: Jul 99
|
| | | quote | | Originally posted by Alex4mula:
... I decided to skip the FL Fantasy of Flight event to finish details during this weekend. Early next week hopefully this baby will be fired up for the fist time. Wish me luck! 
|
|
Here's hoping you'll have a lot of GOOD luck. I'll miss you at the FOF but understand your wanting to get the car running. It looks great so far. By the way, did you powdercoat the tranny, too? It looks fantastic,
------------------
Roy double-click on this link to follow my interior build-up https://www.fiero.nl/forum/Forum1/HTML/023174.html Blue 87 GT w/ 4th generation Firebird interior.
Suncoast Fieros
Judged "Best Custom Interior" at the 20th Anniversary Show @ Pontiac, Mich - 7/2003
Judged "Best Custom Interior" at the 8th Annual Fiero Fun Weekend @ Daytona - 3/2004
IP: Logged


|
03:38 PM
|
|
Alex4mula
Member Posts: 7405
From: Canton, MI US
Registered: Dec 1999
|
| | | quote | | Originally posted by mrfixit58:
Here's hoping you'll have a lot of GOOD luck. I'll miss you at the FOF but understand your wanting to get the car running. It looks great so far.
By the way, did you powdercoat the tranny, too? It looks fantastic,
|
|
It didn't fit in the oven  So I used the same caliper paint I used for my calipers. They have aged very well so I hope it does ok in the tranny too. So I used the same caliper paint I used for my calipers. They have aged very well so I hope it does ok in the tranny too.
IP: Logged


|
03:41 PM
|
|
MinnGreenGT
Member Posts: 11545
From: Lakeville, MN 55044
Registered: Jul 2001
|
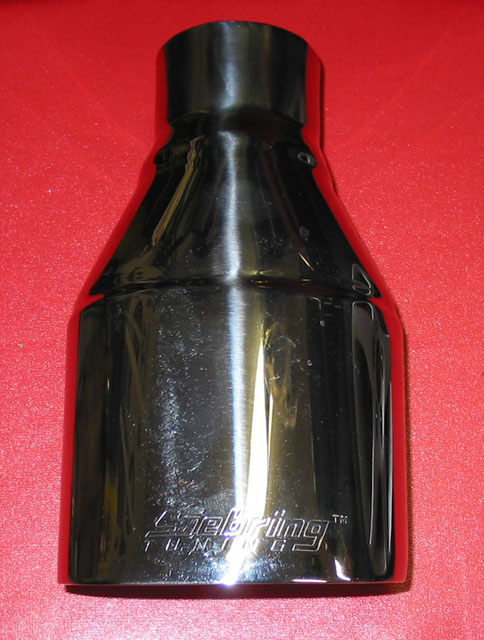
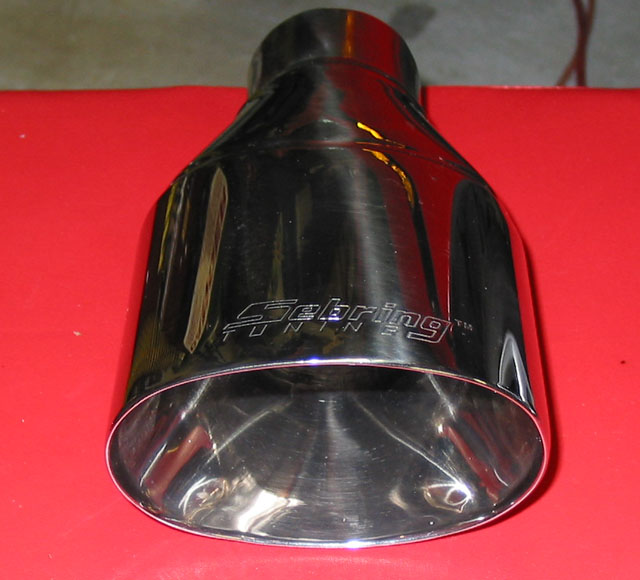
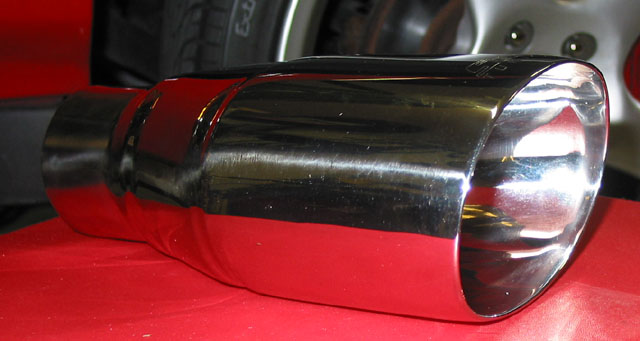
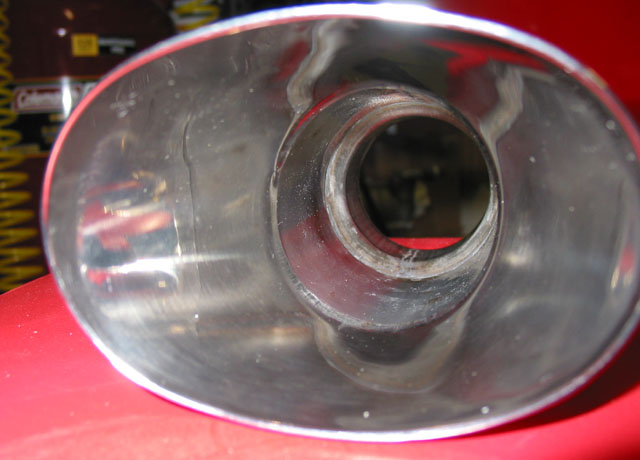
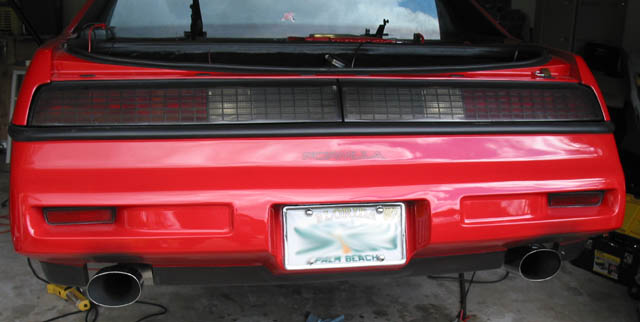
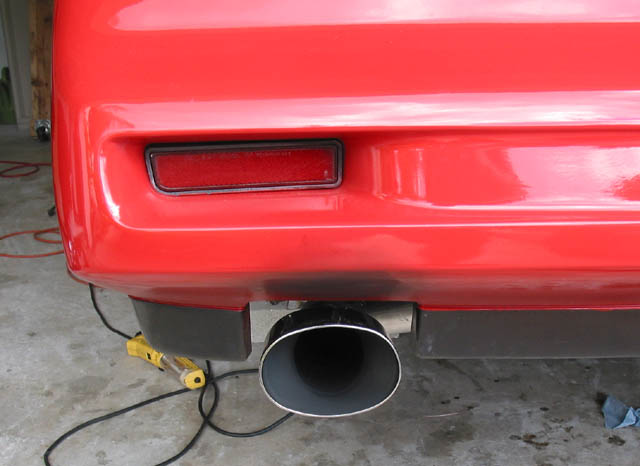
Lookin' good... what kind of mufflers are those? I don't recall seeing anything quite like those before - I'll be interested to see how they sound!
IP: Logged


|
03:47 PM
|
|
Alex4mula
Member Posts: 7405
From: Canton, MI US
Registered: Dec 1999
|
Me neither. Bought them at Ebay from a source from California but they are not listed. Someone else bought them for me so I don't have any info. Sorry. [This message has been edited by Alex4mula (edited 11-05-2004).]
IP: Logged


|
04:56 PM
|
|
|
Nov 6th, 2004
|
fieroguru
Member Posts: 12436
From: Champaign, IL
Registered: Aug 2003
|
Alex, before you go cutting to make the rear waterpump elbow fit, you may want to consider tapping the 1" hole in the block for the 3/4" pipe thread. Then you could thread the elbow directly to the block. Then use some 3/8" set screws with sealant to seal the bolt holes Another option would be to tap the aluminum flange fitting further in to allow the elbow to go further into the flange. You may have to cut some threads off the backside of the elbow to get this to work. Harbor Freight has a 5 piece pipe thread tap kit with for around $40 if you don't have pipe taps that large You need the distance from the block to be about 1 5/8" to allow the flange to be raised up into the car with the engine. You can attach this flange once the engine is in the car, but it is a HUGE, HUGE pain - definately worth the effort to make it attach to the engine while the engine is out and come up into the car with the engine.
IP: Logged


|
07:25 PM
|
|
Alex4mula
Member Posts: 7405
From: Canton, MI US
Registered: Dec 1999
|
Thanks Fieroguru. I bought today the Harbor Freight pipe threader. Was on sale for $20  Removing the flange with the engine on is not too bad at all. I thought it was going to be harder but it wasn't. Will see how it goes soon 
IP: Logged


|
07:48 PM
|
|
|
Nov 7th, 2004
|
Alex4mula
Member Posts: 7405
From: Canton, MI US
Registered: Dec 1999
|
Problems don't seem to end. Well, finally I was able to make the 90� AN fitting to fit into the space. Bought the big pipe threader and it went in almost another 1/2" (item on right is the die); 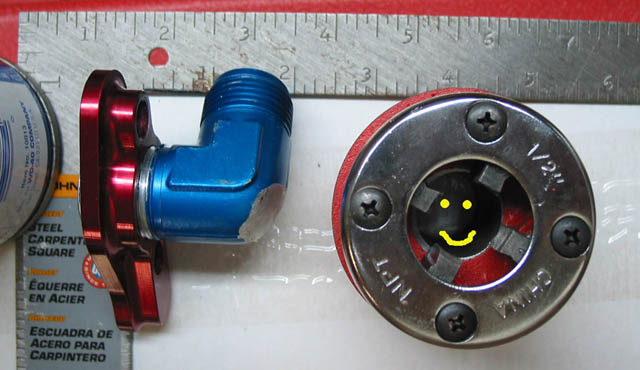
This is the clearance now. About 1/8"; 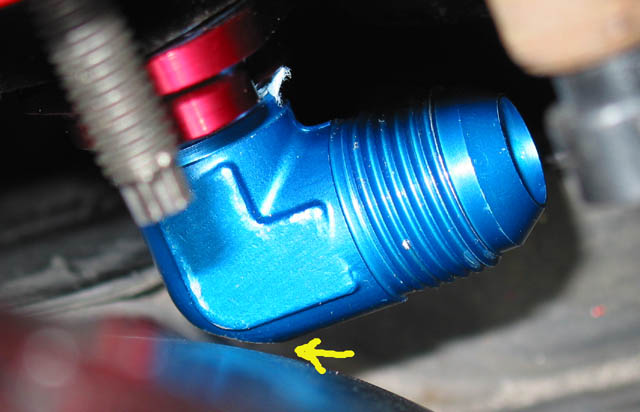
Finally here is the hose routing I'm planing to use. The fuel lines are in the way of everything but the can be moved more easily. The distance from right flange to pump is very short so I'll have to route it that way in order to use the fittings I have. Anyway if I use another type I think it will end up something like this. Will see. Hope at the end there is still space for an air filter  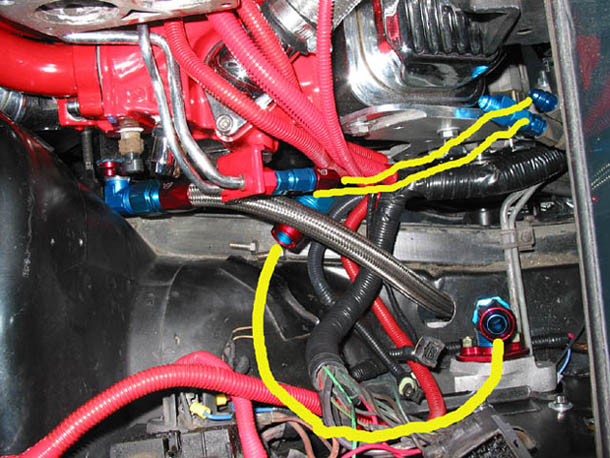
IP: Logged


|
10:27 AM
|
|
LS1swap
Member Posts: 1181
From: McHenry,IL.USA
Registered: Jan 2001
|
I know this is going to sound crude...... but if clearance is that close I think I would take a 5lb mall and give it a little love tap to get an extra 3/8 " clearance. not enough to kink it just enough to dent it.
IP: Logged


|
11:45 AM
|
|
Alex4mula
Member Posts: 7405
From: Canton, MI US
Registered: Dec 1999
|
I know. That was another option too. But that side is solid mounted and it won't move forward. 
IP: Logged


|
07:17 PM
|
|
|
Nov 8th, 2004
|
mrfixit58
Member Posts: 3330
From: Seffner, Fl, USA
Registered: Jul 99
|
Alex, Lookin' good! But, I agree with LS1swap. I'b take a ball-peen hammer and put a slight dent in the strut tower for clearance. The last thing you want to happen to to break the that 90-degree fitting. Besides, who's going to notice? Keep up the GREAT posts,
Roy
IP: Logged


|
08:49 AM
|
|
|
PFF
System Bot
|
|
Alex4mula
Member Posts: 7405
From: Canton, MI US
Registered: Dec 1999
|
Today I had to make a hole at the shock tower  Something I totally didn't noticed becasue I focused on the TPS. The IAC connector was in the way. I saw this thing and tried about 20 times and never thought about it until today when we were finally installing it for a last time. I have a lot of pics that I need to resize and post. Hopefully tomorrow is the big day for fire up 
IP: Logged


|
08:01 PM
|
|
Alex4mula
Member Posts: 7405
From: Canton, MI US
Registered: Dec 1999
|
Ok. Here is the little hole I needed to do in order to fit the TB with IAC in place. I'll cover it to avoid dirt getting in. I may put a little door or something. 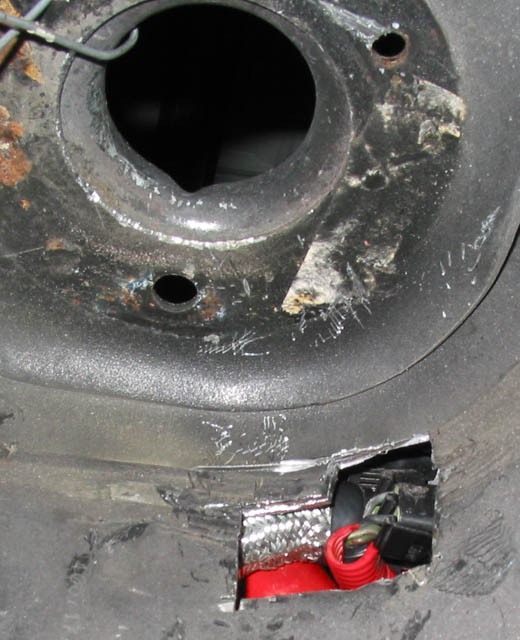
Here is how the final piping looks. At the end we took a different route and we had more empty space available; 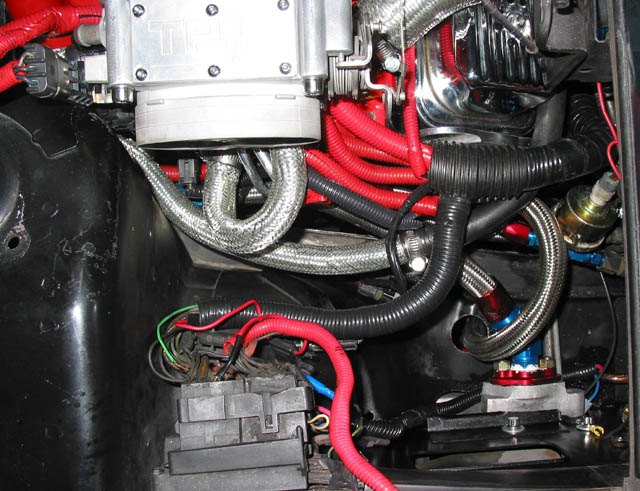
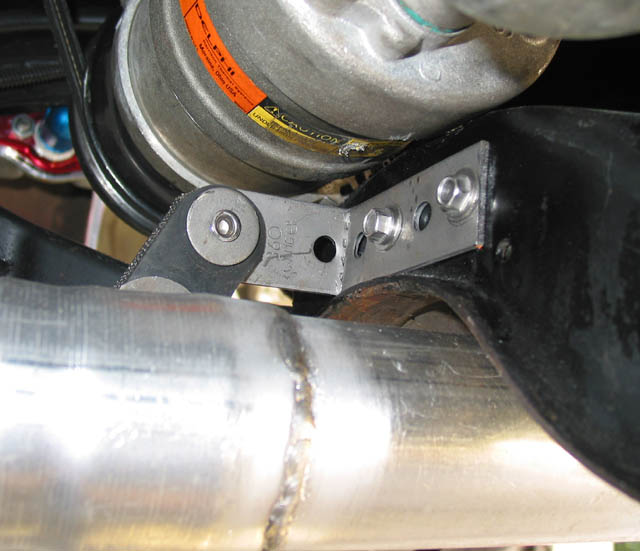
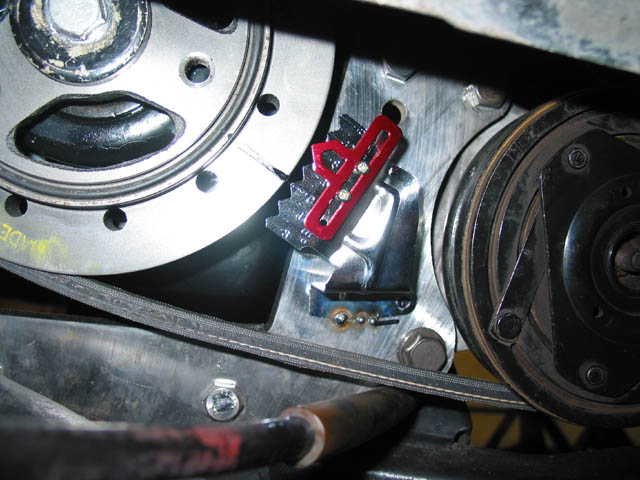
Now here is a little tip to help time these SBC swaps. A timing tab didn't fit in the stock location and even if it could fit then making the light to go into all that mess from the top would be difficult. So I installed it on the front mount at the bottom. The angles above 4� may not be perfect but it is much better than nothing or than looking to the flywheel.  With the tire off it is very accessible as you can see here; With the tire off it is very accessible as you can see here; 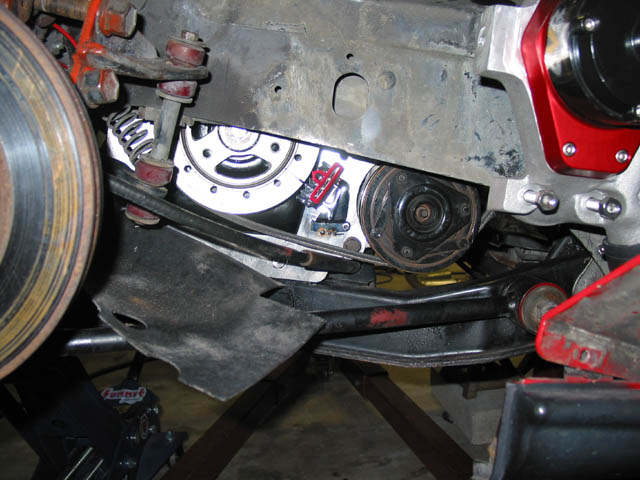
IP: Logged


|
08:43 PM
|
|
Alex4mula
Member Posts: 7405
From: Canton, MI US
Registered: Dec 1999
|
IP: Logged


|
08:47 PM
|
|
Alex4mula
Member Posts: 7405
From: Canton, MI US
Registered: Dec 1999
|
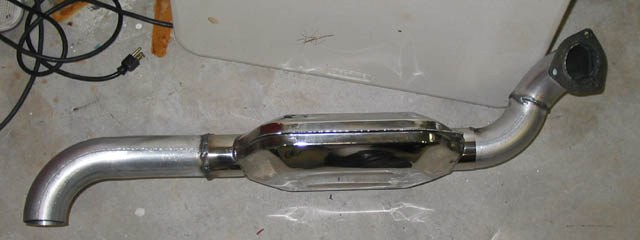
Finally here is the trunk side exhaust piece. Small and simple. I wonder who else is interested on all this. Always see the same people replying. Not that that is bad  More to come later. C'ya  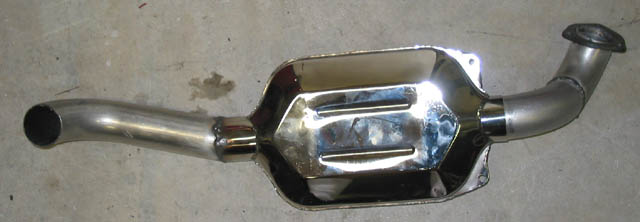
IP: Logged


|
08:50 PM
|
|
Fire451
Member Posts: 314
From: British columbia, Canada
Registered: Sep 2002
|
Got to say I love your car and the attention to detail that you have.... You are making me want to get my V8 sooner then planned.... Thanks for showing all the problem areas and how you went about solving them. + for you ------------------

86 SE 2.9L
Best ET : 14.9 @ 90 MPH
IP: Logged


|
08:55 PM
|
|
vwaltdog
Member Posts: 418
From: Tewksbury, MA
Registered: Nov 2002
|
[QUOTE] Originally posted by Alex4mula:Finally here is the trunk side exhaust piece. Small and simple. I wonder who else is interested on all this. Always see the same people replying. Not that that is bad  More to come later. C'ya More to come later. C'ya  I am!! I love these engine swap threads I just don't do a lot of posting. You do awesome work!! 
IP: Logged


|
09:43 PM
|
|
Jake_Dragon
Member Posts: 32977
From: USA
Registered: Jan 2001
|
Are you using the stock rubber tranny mounts? The reason I ask is on the 84 I just bought the front tranny mount is trashed. The strut rod helped with the back one but it is not in great shape. This also caused the weld on the motor mount to bust and have to be welded several times. I plan on mounting the motor in my GT with solid mounts. The previous owner of the motor I have said the machine shop that did the motor would put it over 320 HP with the head work and cam. All I know is that is the reason the car was sitting so long and why I got it so cheap. Every time he drove the car it would brake something. If I could give you another + I would thanks for sharing your install with us.
IP: Logged


|
09:52 PM
|
|
GSXRBOBBY
Member Posts: 3122
From: Southern Indiana USA
Registered: Aug 2003
|
Lookin good.  ------------------ Bobby from NW Indiana 93 Northstar and 5 speed Getrag thespeedshop@sbcglobal.net My build thread [This message has been edited by GSXRBOBBY (edited 11-08-2004).]
IP: Logged


|
10:28 PM
|
|
KissMySSFiero
Member Posts: 5548
From: Tarpon Springs, FL USA
Registered: Nov 2000
|
| | | quote | | Originally posted by Alex4mula: Ok. Here is the little hole I needed to do in order to fit the TB with IAC in place. I'll cover it to avoid dirt getting in. I may put a little door or something. |
|
oh, your not gonna want to hear this, but you could have avoided this. If you used the coolant passage from an LT1 throttle body, the IAC points toward the throttle body, instead of to the strut tower. You could need to change the connector, but thats not too big of a deal since your already building your harness.
IP: Logged


|
10:35 PM
|
|
|
Nov 9th, 2004
|
Rhino88gt
Member Posts: 718
From: Maumelle, AR
Registered: Jun 2003
|
You get a + from me!!
Great job on the details!
IP: Logged


|
05:02 AM
|
|
|
PFF
System Bot
|
|
|
|
Alex4mula
Member Posts: 7405
From: Canton, MI US
Registered: Dec 1999
|
Jake_Dragon; Yes I'm using rubber tranny mounts. I'll try those first to avoid extra vibrations. If I break something then I'll weld the block to the cradle  (solid mount it!). KissMySSFiero; You mean swaping just the bottom part? Oh well. It is done. But thanks anyway for the tip. I can still change it in the future to get things more accessible 
IP: Logged


|
06:37 AM
|
|
tesmith66
Member Posts: 7355
From: Jerseyville, IL
Registered: Sep 2001
|
I solid mounted mine. It's hard core. I suggest the rubber mounts. ------------------
1986 SE 350 V8
IP: Logged


|
07:01 AM
|
|
RCR
Member Posts: 4416
From: Shelby Twp Mi
Registered: Sep 2002
|
Nice job Alex. Your fab work is pretty good. (Love reading posts on fabrication) And your write-up is excellent. Bob
IP: Logged


|
08:39 AM
|
|
mrfixit58
Member Posts: 3330
From: Seffner, Fl, USA
Registered: Jul 99
|
| | | quote | | Originally posted by KissMySSFiero:
... If you used the coolant passage from an LT1 throttle body, the IAC points toward the throttle body, instead of to the strut tower. You could need to change the connector, but thats not too big of a deal since your already building your harness.
|
|
I would love to hear more about this. Pictures would really help.
Roy
IP: Logged


|
10:03 AM
|
|
FIEROPHREK
Member Posts: 4424
From: a dig
Registered: Mar 2004
|
Hey Alex4mula. Are those cats from a 96/97 f-body? My bro and i are doing a cam and head swap on his 30th anniversary and the passenger side cat looks identicle. Just wondering keep up the good work! 
IP: Logged


|
10:19 AM
|
|
Jake_Dragon
Member Posts: 32977
From: USA
Registered: Jan 2001
|
| | | quote | | Originally posted by tesmith66: I solid mounted mine. It's hard core. I suggest the rubber mounts. |
|
Hijack
I will be disassembling an Archie kit install in an 84 and putting it in an 86GT.
The motor mount is welded solid and the tranny mounts �were� rubber but are torn apart after 5000 miles of driving.
The motor mount weld is broken and will have to be fixed when I put it in to my 86.
Is your cradle solid mounted? I am also going to mount it with aluminum bushings.
If solid mounts are not used then what will keep the front motor mount weld from braking? [This message has been edited by Jake_Dragon (edited 11-09-2004).]
IP: Logged


|
11:14 AM
|
|
Jake_Dragon
Member Posts: 32977
From: USA
Registered: Jan 2001
|
| | | quote | Originally posted by Jake_Dragon:
Hijack
I will be disassembling an Archie kit install in an 84 and putting it in an 86GT.
The motor mount is welded solid and the tranny mounts �were� rubber but are torn apart after 5000 miles of driving.
The motor mount weld is broken and will have to be fixed when I put it in to my 86.
Is your cradle solid mounted? I am also going to mount it with aluminum bushings.
If solid mounts are not used then what will keep the front motor mount weld from braking? |
|
Or something like this with polly tranny mounts would work

Look at the motor mount. He used some sway bar bushings.
IP: Logged


|
11:20 AM
|
|
tesmith66
Member Posts: 7355
From: Jerseyville, IL
Registered: Sep 2001
|
| | | quote | | Originally posted by Jake_Dragon:
Hijack
I will be disassembling an Archie kit install in an 84 and putting it in an 86GT.
The motor mount is welded solid and the tranny mounts �were� rubber but are torn apart after 5000 miles of driving.
The motor mount weld is broken and will have to be fixed when I put it in to my 86.
Is your cradle solid mounted? I am also going to mount it with aluminum bushings.
If solid mounts are not used then what will keep the front motor mount weld from braking?
|
|
I solid mounted the tranny, front engine mount AND cradle. It is HARSH. I will switch to poly tranny mounts and some sort od poly front mount next time I pull the motor. If you wnat any more detail, PM or email me.
[/end hijack] ------------------
1986 SE 350 V8
IP: Logged


|
01:21 PM
|
|
GKDINC
Member Posts: 1813
From: East Tawas MI
Registered: Dec 2001
|
Keep up the good work Alex, it won't be to long before you are wearing that V-8 smile.  Have a Nice Day Thanks Gary
IP: Logged


|
03:06 PM
|
|
Alex4mula
Member Posts: 7405
From: Canton, MI US
Registered: Dec 1999
|
| | | quote | Originally posted by FIEROPHREK:
Hey Alex4mula. Are those cats from a 96/97 f-body? My bro and i are doing a cam and head swap on his 30th anniversary and the passenger side cat looks identicle. Just wondering keep up the good work!  |
|
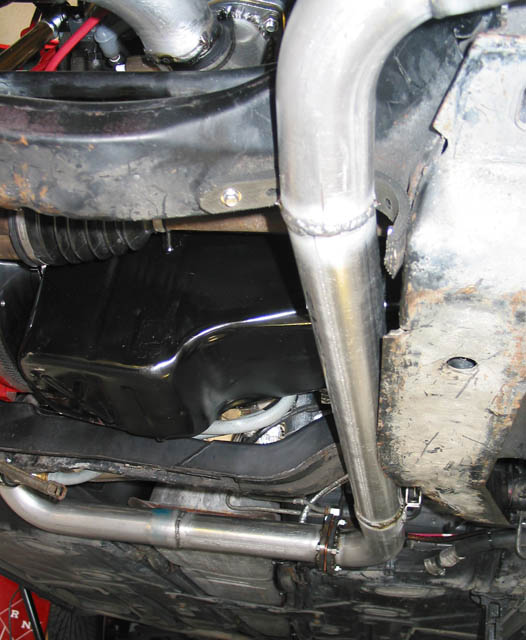
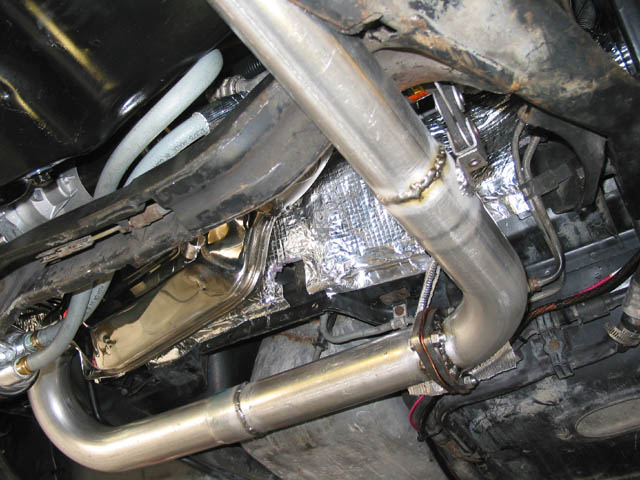
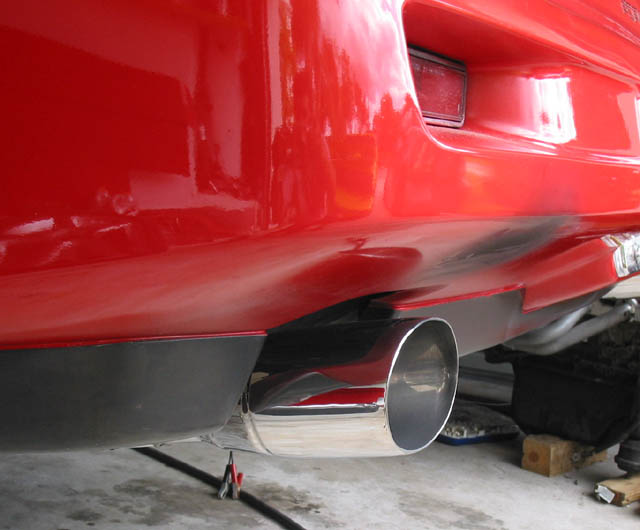
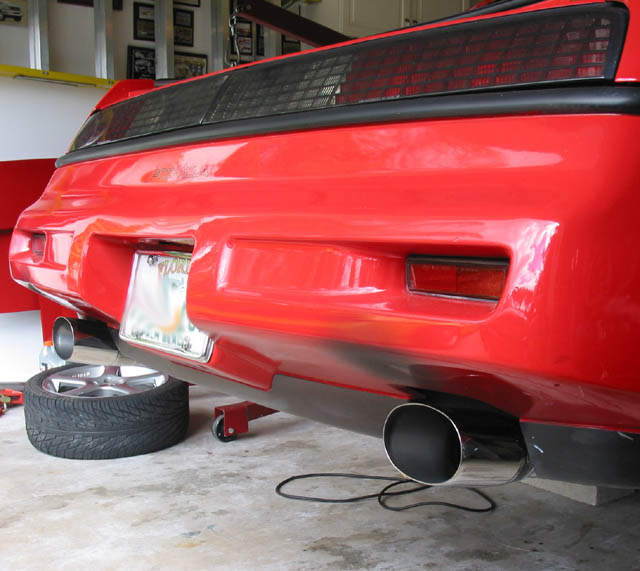
Those are mufflers not cats. Thanks all for the sheering up. All the axhaust work is a work of art from Lou. We finished it up today (pics later). Also I have to say that he inspired many of the things I have done and his attention to detail is contagious. So I have to thank him inmensely for me being ablr to get the results you are seeing here. Today we tried to fire up the baby for first time. After couple of MY basic errors like me wiring the plugs in 1-2-3-4-5-6-7-8 order and fixing a loose connection we had spark but injectors are not firing. It starts a little with the cold start injector which is not supposed to be using. We are braking new grounds here using the Fiero harness and 165 ECM so we need to go back and study the hole thing and see what may be mising. After two days of hard work what is left is technical work. Will let you know soon. 
IP: Logged


|
08:16 PM
|
|
|
PFF
System Bot
|
|
tstroud
Member Posts: 527
From: Chariton, Iowa
Registered: Feb 2002
|
| | | quote | | Originally posted by Jake_Dragon: If solid mounts are not used then what will keep the front motor mount weld from braking? |
|
Exactly!
Either make all the mounts flexible or all solid, otherwise something will break.
Mine has the engine solid mounted to the cradle at all points and the cradle is rubber mounted to the car.
It is smooth as silk. My engine is a smooth running engine too. It would be different if it was a cammed up, rough running engine.
YMMV
IP: Logged


|
11:00 PM
|
|
|
Nov 10th, 2004
|
KissMySSFiero
Member Posts: 5548
From: Tarpon Springs, FL USA
Registered: Nov 2000
|
I'd also recommend all mounts being the same. I'm doing all of mine solid with a solid mounted cradle. If its too harsh I'll change it to poly or rubber later. I've been in 2 88's with solid mounted engines, and both were not too harsh. The cars were owned by Paul Vargas and CrazyD. I'll get pics of the LT1 vs TPI throttle bodies tonight. I dont think I'll be able to post pics for a few days. I'm going out of town til friday. Good work on the harness. I'm still up in the air if I will be building my own harness with a factory ecm, build a harness for my Accel ecm, or just use the accel harness with its ecm. I feel the factory ecm is much more versitile and reliable. but I have the other stuff already. I have all winter to decide now.
IP: Logged


|
11:22 AM
|
|
|
Nov 13th, 2004
|
Alex4mula
Member Posts: 7405
From: Canton, MI US
Registered: Dec 1999
|
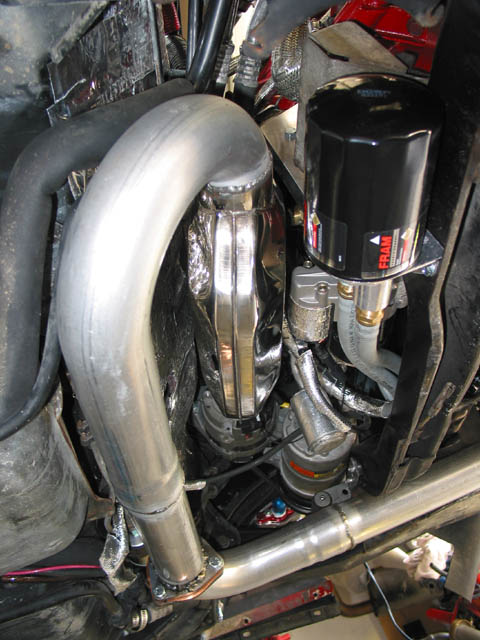
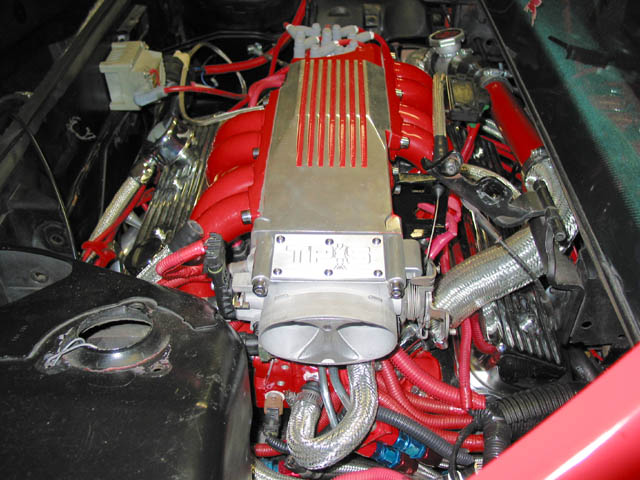
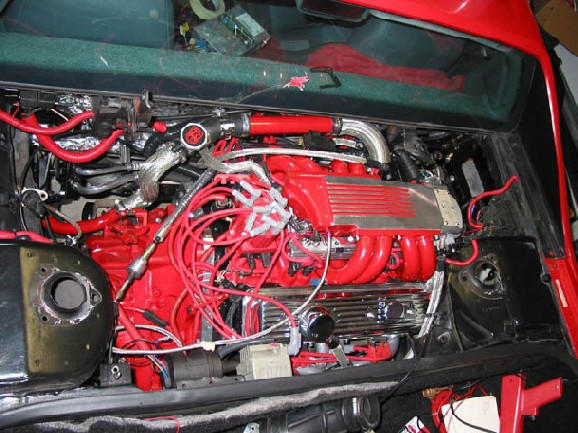
Let me post the final pictures. This is how the engine finally sit in the car; 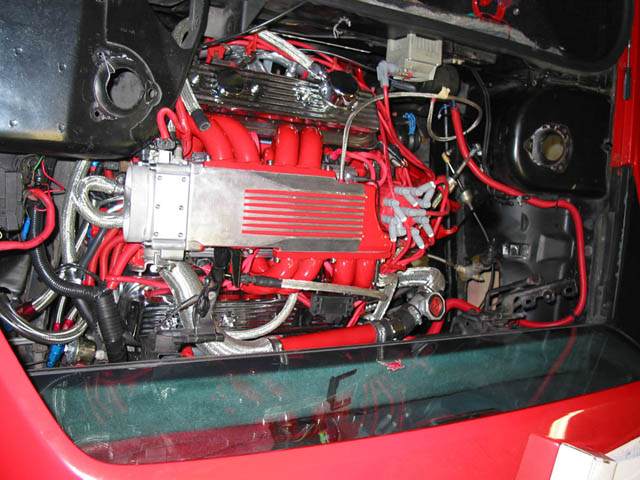
This is the finished axhaust outside the car; 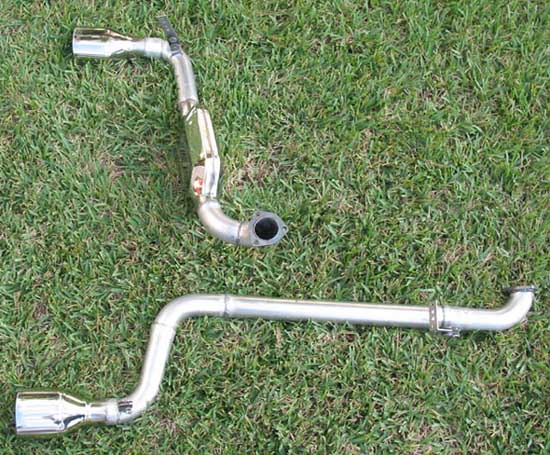
IP: Logged


|
01:31 PM
|
|
Alex4mula
Member Posts: 7405
From: Canton, MI US
Registered: Dec 1999
|
More exhaust pics in and outside; This is the trunk side;
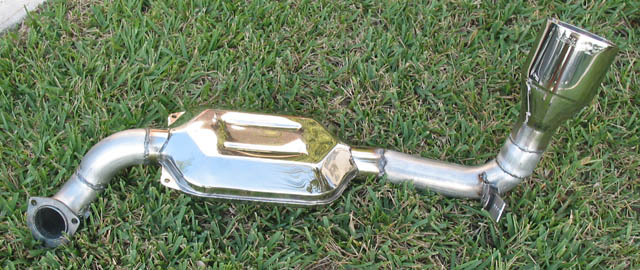 This is the connection to the firewall side;
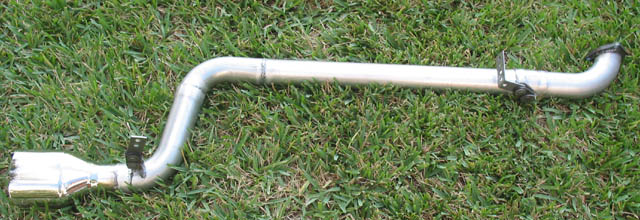
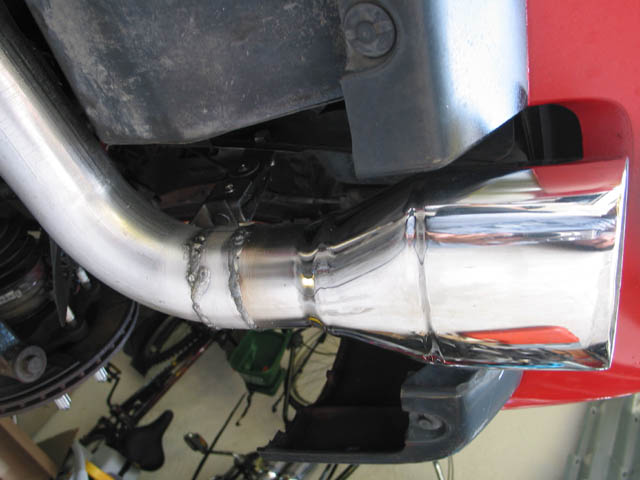
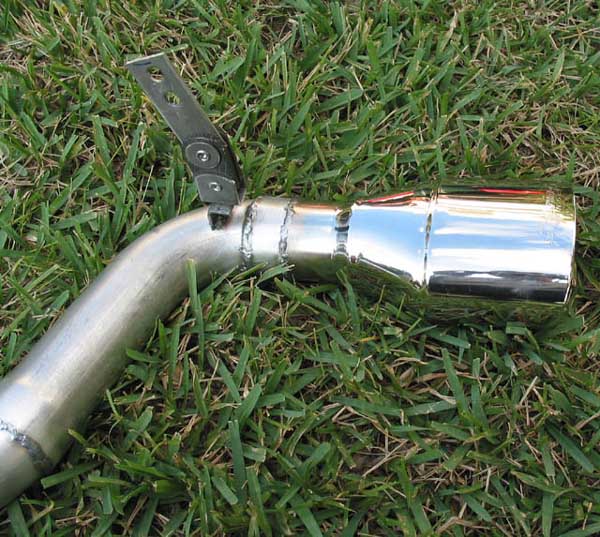 Same tip installed;
IP: Logged


|
01:35 PM
|
|
Alex4mula
Member Posts: 7405
From: Canton, MI US
Registered: Dec 1999
|
IP: Logged


|
01:37 PM
|
|
Alex4mula
Member Posts: 7405
From: Canton, MI US
Registered: Dec 1999
|
All is 2 1/2" mandrel bent pipe. The firewall piece has two flanges for easy removal for service in that area. This is the O2 sensor below. I added another bung to the rear to connect tunning device. 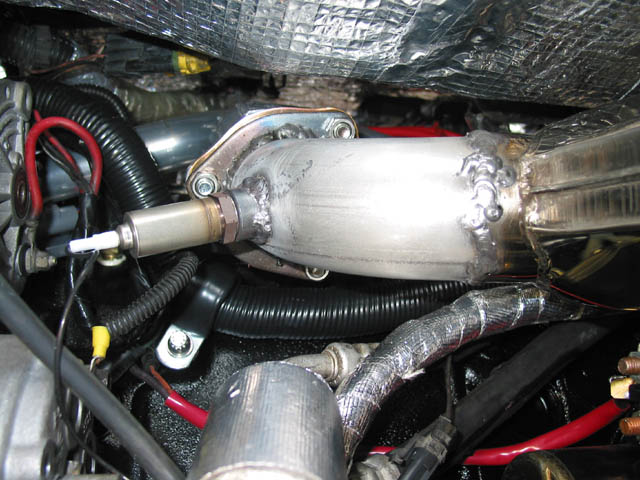
This is the trunk side and tip bracket; 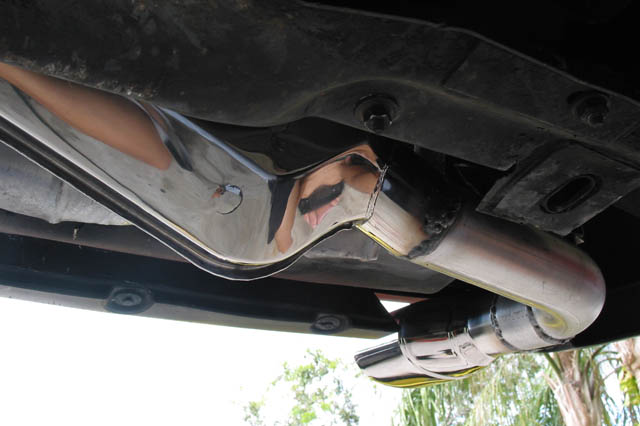
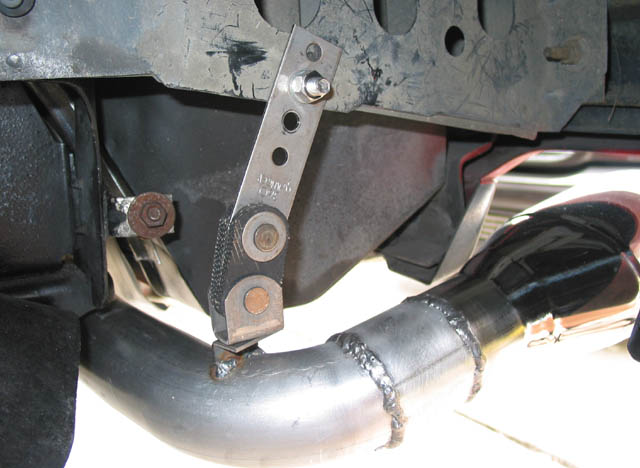
IP: Logged


|
01:41 PM
|
|
Alex4mula
Member Posts: 7405
From: Canton, MI US
Registered: Dec 1999
|
IP: Logged


|
01:47 PM
|
|
Formula88
Member Posts: 53788
From: Raleigh NC
Registered: Jan 2001
|
Looking good!
IP: Logged


|
03:17 PM
|
|
|
Nov 14th, 2004
|
Alex4mula
Member Posts: 7405
From: Canton, MI US
Registered: Dec 1999
|
I still can't find what's wrong with this setup  Have revised wiring several times and made changes but still dumps too much fuel. Injectors were rebuilt and flow tested so I doubt it is in that area. ...
Anyone knows where I can get the rubber elbow type that connects the TB and air filter? Tks
IP: Logged


|
10:10 PM
|
|


 So I used the same caliper paint I used for my calipers. They have aged very well so I hope it does ok in the tranny too.
 Removing the flange with the engine on is not too bad at all. I thought it was going to be harder but it wasn't. Will see how it goes soon


