|
|
|

|
FieroGT stretch Concept by Amida
| Started on | : 02-11-2006 05:08 PM |
| Replies | : 854 |
| Last post by | : Amida on 03-05-2009 02:44 PM |
|
|
|
|
May 9th, 2007
|
Amida
Member Posts: 2357
From: Seattle, WA. USA
Registered: Jul 2003
|
I saw a Cadillac XLR again the other day which put a bug in my head to do another sketch. This is another stretched Fiero idea. Bubbajoexxx has paved the way with the longitudinal Northstar/Porsche drivetrain. The 1" mini-chop is utilized again in this idea to teardrop the roof & keep the stock door glass. Windshield is replaced with the extended glass which provides more curve. Factory Cadillac lighting might work if the lines aren't too steep on this design. I kind of like this! 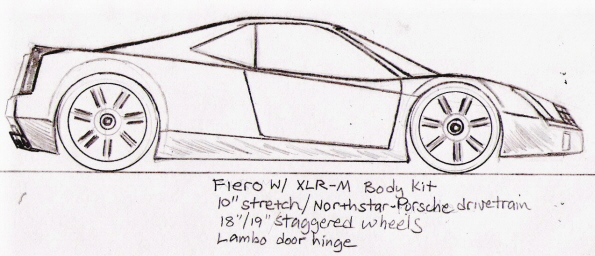
IP: Logged


|
12:22 PM
|
|
kwagner
Member Posts: 4258
From: Pittsburgh, PA
Registered: Apr 2005
|
Looks nice, it has some nice lines. Did you have to modify the windshield/door windows at all to fit the shape?
IP: Logged


|
01:25 PM
|
|
|
May 10th, 2007
|
Amida
Member Posts: 2357
From: Seattle, WA. USA
Registered: Jul 2003
|
| | | quote | Originally posted by kwagner:
Looks nice, it has some nice lines. Did you have to modify the windshield/door windows at all to fit the shape? |
|
It's a mini chop, 1 inch. Windshield is the extended glass used in Ferrari replicas, but stock glass should work just as well. Thanks.
IP: Logged


|
12:18 AM
|
|
|
Jun 12th, 2007
|
CETICARS
Member Posts: 188
From: Tx
Registered: Nov 2004
|
IP: Logged


|
07:54 PM
|
|
|
Jun 13th, 2007
|
Amida
Member Posts: 2357
From: Seattle, WA. USA
Registered: Jul 2003
|
| | | quote | Originally posted by CETICARS:
do you sell the top picture ,the fiero upper top bumper no sides |
|
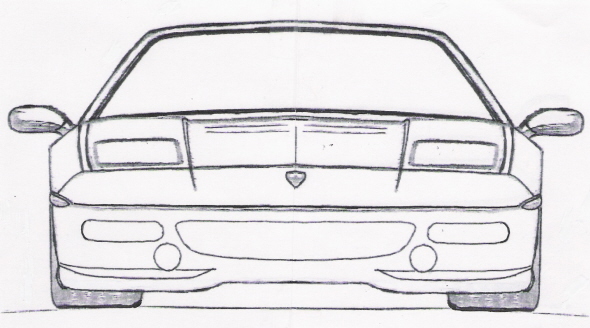
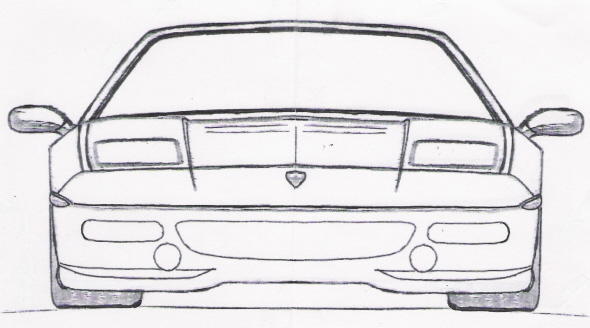 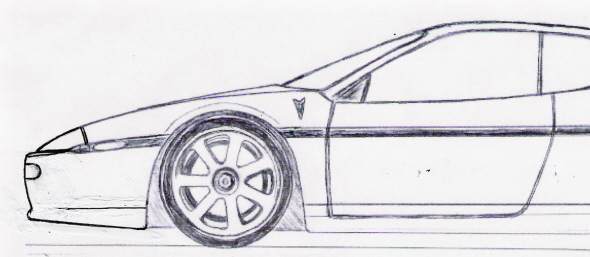 The 355 nose design is underway right now. I'll be posting a new thread on that when I get the model finished. I've been a little tied up working on interiors so I only get to work on the nose on weekends. The top section may/maynot be a separate piece; depends on how well it fits when I mock it up on the car. It would be more cost effective to build it as a one piece unit, but for me, personally, I like the separate panel look so I'm hopeful that it'll work. [This message has been edited by Amida (edited 06-14-2007).]
IP: Logged


|
02:46 PM
|
|
whadeduck
Member Posts: 8907
From: Aventura, FL
Registered: Jul 2004
|
Yes, yes. Let him finish the interior work he has going on.  I'd like to see you work on the 355 nose though. Will you be using real Ferrari lights? Or a cheaper replacement? ------------------
Whade' "The Duck Formerly Known As Wade" Duck
'87 GT Auto
'88 Ferrario
'84 Indy
IP: Logged


|
03:04 PM
|
|
|
Jun 14th, 2007
|
Amida
Member Posts: 2357
From: Seattle, WA. USA
Registered: Jul 2003
|
IP: Logged


|
01:58 PM
|
|
CoryFiero
Member Posts: 4341
From: Indiana
Registered: Oct 2001
|
Hmm so if the light wraps around the the side of the bumper like that I think legally we can get rid of the side markers on the trim.. or the trim altogether.
IP: Logged


|
02:18 PM
|
|
whadeduck
Member Posts: 8907
From: Aventura, FL
Registered: Jul 2004
|
May be an option. But I think it might be better to leave it on then cover it over should you choose to delete the molding. Good thing about the Sebring lights is you can choose the white or amber signals. Also, what size are the holes for the driving lights? ------------------ Whade' "The Duck Formerly Known As Wade" Duck '87 GT Auto '88 Ferrario '84 Indy [This message has been edited by whadeduck (edited 06-14-2007).]
IP: Logged


|
02:49 PM
|
|
madcurl
Member Posts: 21401
From: In a Van down by the Kern River
Registered: Jul 2003
|
Hmm. Try the 300M (old style) wrap around side maker lamps.
IP: Logged


|
03:44 PM
|
|
|
Jun 15th, 2007
|
fierogtrouge
Member Posts: 63
From: Fleurimont Qu�bec Canada
Registered: Sep 2005
|
nice project
IP: Logged


|
12:37 AM
|
|
|
PFF
System Bot
|
|
Gokart Mozart
Member Posts: 12143
From: Metro Detroit
Registered: Mar 2003
|
| | | quote | Originally posted by Amida:
So, I'll be using the Avenger/Sebring units that are a very close match & can be bought on Ebay for about $20 each.
|
|
Have you noticed the Aveo?
IP: Logged


|
09:52 AM
|
|
Amida
Member Posts: 2357
From: Seattle, WA. USA
Registered: Jul 2003
|
| | | quote | Originally posted by Gokart Mozart:
Have you noticed the Aveo? |
|
Let me tell you, when I'm driving down the street I'm paying more attention to the turn lights on the cars passing by than on my driving. I'm going to rear-end some car some day because I wasn't paying attention to my driving. Been looking for turn light solution for a 512TR nose for later on.
IP: Logged


|
10:23 AM
|
|
|
Jun 22nd, 2007
|
Amida
Member Posts: 2357
From: Seattle, WA. USA
Registered: Jul 2003
|
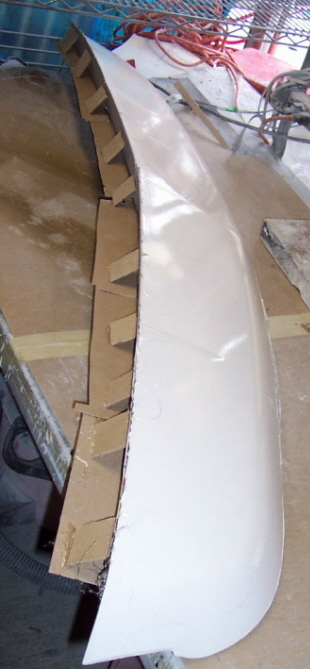
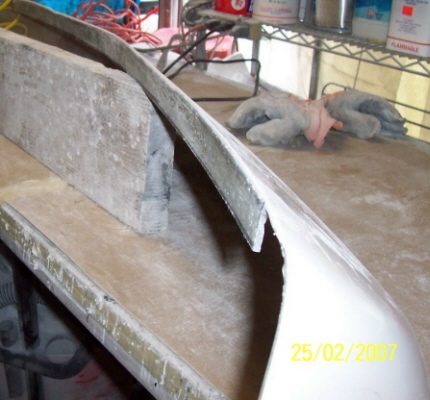
The FieroGT nose is too flimsy & distorted to even bother with moulding the lower tray so I started from scratch on a sheet of flat steel to get a true flat surface. Used some coremat to keep it rigid for the full scale model. The goal is to mount the new nose like a stock factory piece.   The original 355 nose is a few inches wider so I will need to take away from the grill area & possibly from the sides as well. 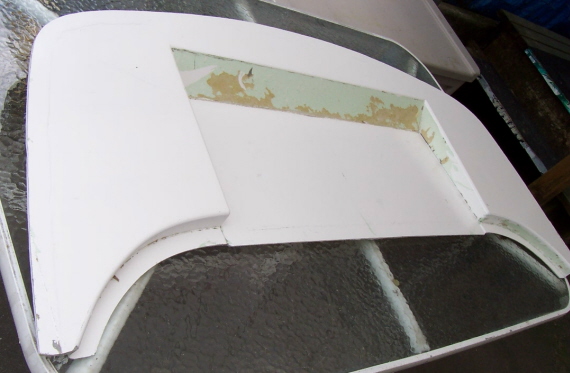 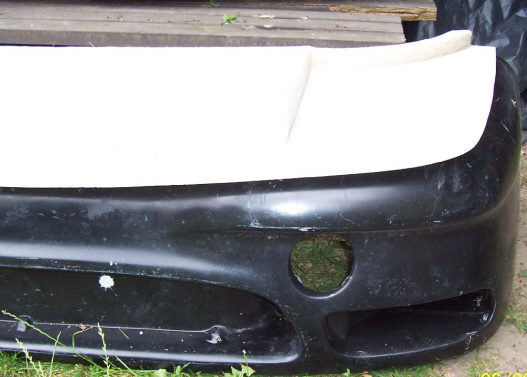 [This message has been edited by Amida (edited 06-22-2007).]
IP: Logged


|
04:14 PM
|
|
CoryFiero
Member Posts: 4341
From: Indiana
Registered: Oct 2001
|
I have been holding out for Fiero1Fan to put out another 355 nose, but if this looks good!! Do you have any idea on when the project will be completed and when you might pop the first one out for sale? Any idea of a rough price? Thanks and keep up the GREAT work. ------------------
88 GT built 3.2 5 speed
To be unveiled on July 24th 2008 at the 25th Anniversary show in Pontiac Michigan. Top secret until then. You won't miss it!
IP: Logged


|
06:40 PM
|
|
Tom Slick
Member Posts: 4342
From: Alvarado, TX
Registered: May 2003
|
rob if your new front fascia is as good as your interior work just tell me when i can send my money.
IP: Logged


|
10:32 PM
|
|
|
Jun 23rd, 2007
|
Amida
Member Posts: 2357
From: Seattle, WA. USA
Registered: Jul 2003
|
| | | quote | Originally posted by CoryFiero:
I have been holding out for Fiero1Fan to put out another 355 nose, but if this looks good!! Do you have any idea on when the project will be completed and when you might pop the first one out for sale? Any idea of a rough price?
Thanks and keep up the GREAT work.
|
|
I should be finished with this nose & have the demo unit on my '88 Formula by the end of summer, or sooner. It ought to turn out pretty nicely. Although the paint on the car is crap I'm going to paint the nose to match anyway; maybe all the car needs is a good polish. When I think everything checks out & looks good to me I'll make it available & start a new thread in the Mall. I'm not sure yet how much it's going to cost me, but I'm hoping I can offer the noses at around $400usd+s&h. Lights & grill work will have to be options. Thanks. Rob Fiero Interior Conversions FierOvation Seattle, WA. USA [This message has been edited by Amida (edited 06-23-2007).]
IP: Logged


|
10:32 AM
|
|
Amida
Member Posts: 2357
From: Seattle, WA. USA
Registered: Jul 2003
|
| | | quote | Originally posted by Tom Slick:
rob if your new front fascia is as good as your interior work just tell me when i can send my money.
|
|
Hey Thomas, How's the car coming together? Did you find a good upholsterer in your area ?
IP: Logged


|
10:36 AM
|
|
Amida
Member Posts: 2357
From: Seattle, WA. USA
Registered: Jul 2003
|
The lower tray form mounts to the car without problem. I'm using GT lower brackets. The formula & coupe noses use slightly different lower brackets. 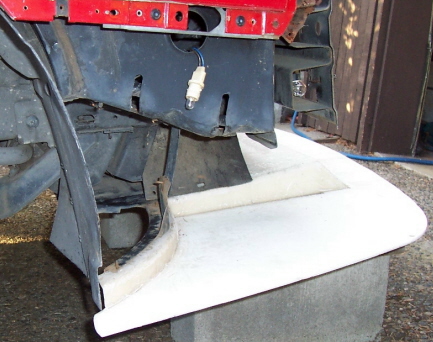  I experimented with a fiberglass plaster mix to take a mould of the GT nose. The material does not shrink or warp. Here I've captured the the shape of the factory side mounting flange & wheel arch which will be preserved in the new nose. Difference in airdam angle can already be seen. I always thought the GT nose was angled much too high. 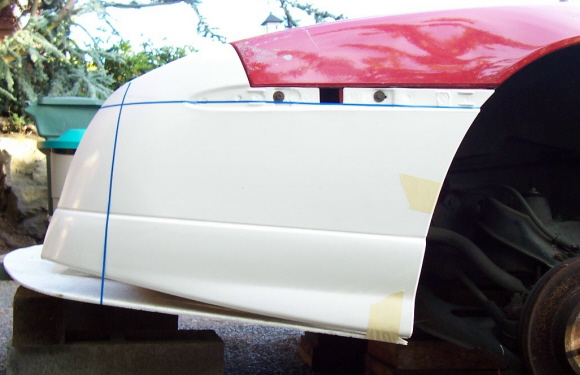
IP: Logged


|
11:08 AM
|
|
RCR
Member Posts: 4416
From: Shelby Twp Mi
Registered: Sep 2002
|
Rob...You crazy genius you...Tell us more about the "plaster and fiberglass mix".
Bob
IP: Logged


|
11:20 AM
|
|
Amida
Member Posts: 2357
From: Seattle, WA. USA
Registered: Jul 2003
|
| | | quote | Originally posted by RCR:
Rob...You crazy genius you...Tell us more about the "plaster and fiberglass mix".
Bob |
|
Bob, did you finally get your interior done? I'm no genius...you can buy the stuff at art supply outlets. I go my stuff from Chavant the clay modeller supplier. It's only temprary stuff good for maybe one or two parts. But, It's non toxic & easy to use....plaster is heavy though. oh, and it's safe on car paint just as long as it is removed soon after the plaster sets & before it gets too hot. [This message has been edited by Amida (edited 06-23-2007).]
IP: Logged


|
11:39 AM
|
|
|
PFF
System Bot
|
|
|
|
CoryFiero
Member Posts: 4341
From: Indiana
Registered: Oct 2001
|
| | | quote | Originally posted by Amida:
I'm not sure yet how much it's going to cost me, but I'm hoping I can offer the noses at around $400usd+s&h. Lights & grill work will have to be options.
|
|
Sound good to me. Keep us updated on the project, I will be first in line. ------------------
88 GT built 3.2 5 speed
To be unveiled on July 24th 2008 at the 25th Anniversary show in Pontiac Michigan. Top secret until then. You won't miss it!
IP: Logged


|
01:03 PM
|
|
|
Jun 27th, 2007
|
Amida
Member Posts: 2357
From: Seattle, WA. USA
Registered: Jul 2003
|
| | | quote | Originally posted by CoryFiero:
Sound good to me. Keep us updated on the project, I will be first in line.
|
|
What engine is a 3.2? Is that a stroked 2.8? or newer dohc type?
IP: Logged


|
09:55 AM
|
|
CoryFiero
Member Posts: 4341
From: Indiana
Registered: Oct 2001
|
It's a brand new 3.1 crank stroked to a 3.2 with lots of other goodies. Any progress on the front end 
IP: Logged


|
02:38 PM
|
|
|
Jun 28th, 2007
|
Amida
Member Posts: 2357
From: Seattle, WA. USA
Registered: Jul 2003
|
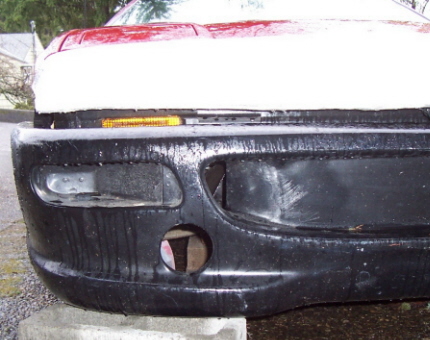
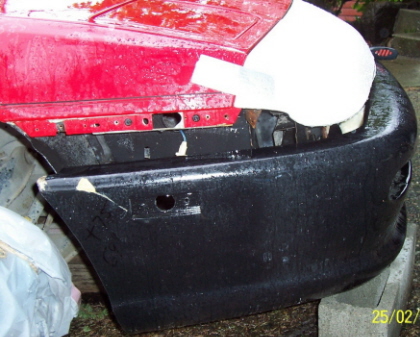
The upper valance panel gets a new mounting flange to mate with the lower nose. The panel gap will be about 1/8"-3/16" as in the f355 nose. 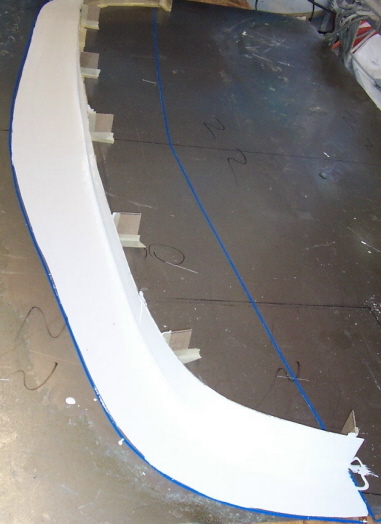 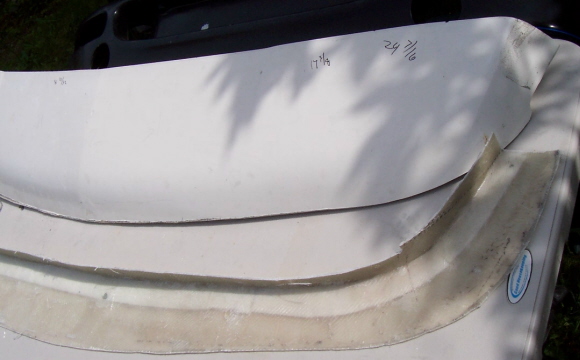 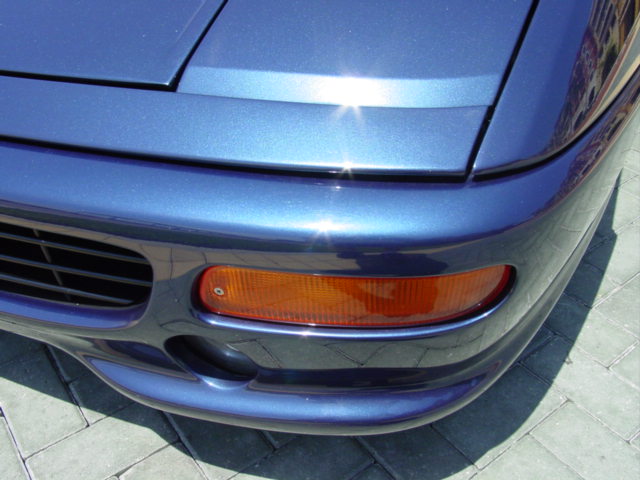 / / / Base reference lines will be established next to help with alignment & positioning of the new nose. Say goodbye to the old aero fascia. 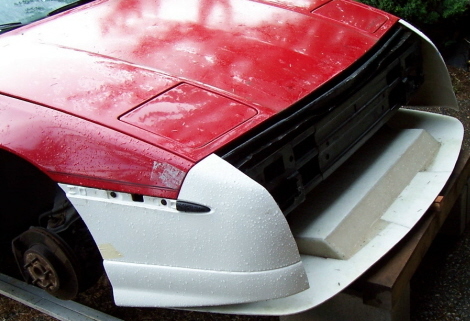  [This message has been edited by Amida (edited 06-28-2007).]
IP: Logged


|
10:54 PM
|
|
|
Jun 29th, 2007
|
Fie Ro
Member Posts: 3735
From: Soest, The Netherlands
Registered: Sep 2001
|
| | | quote | Originally posted by Amida:
Base reference lines will be established next to help with alignment & positioning of the new nose. Say goodbye to the old aero fascia.

|
|
ha, seeing this pic makes me think of a modular nose...keeping the basic outline as the main frame and exchangeable (different) front inserts for easy customising....sorry, got sidetracked  Anyway, nice work ! 
IP: Logged


|
01:36 PM
|
|
CETICARS
Member Posts: 188
From: Tx
Registered: Nov 2004
|
[QUOTE][B]Originally posted by CETICARS:[B]
I WANT TO BUY A FIBERGLASS TOP NOSE ONLY
NOT A WHOLE BUMPER , HOW MUCH $
IP: Logged


|
02:39 PM
|
|
CETICARS
Member Posts: 188
From: Tx
Registered: Nov 2004
|
| | | quote | Originally posted by CETICARS:
do you sell the top picture ,the fiero upper top bumper no sides |
|
I WANT TO BUY A FIBERGLASS TOP NOSE ONLY NOT A WHOLE BUMPER , HOW MUCH $
IP: Logged


|
02:41 PM
|
|
|
Jul 6th, 2007
|
Amida
Member Posts: 2357
From: Seattle, WA. USA
Registered: Jul 2003
|
| | | quote | Originally posted by CETICARS:
I WANT TO BUY A FIBERGLASS TOP NOSE ONLY
NOT A WHOLE BUMPER , HOW MUCH $ |
|
I really can't say right now if the top will end up being a separate piece. I have to first see if the idea works correctly.
IP: Logged


|
11:34 PM
|
|
Amida
Member Posts: 2357
From: Seattle, WA. USA
Registered: Jul 2003
|
Here is a comparison between the Scorpion ( bottom ) , F355, & Sebring lights ( top ). Scorpion lights are much longer; around 2 inches longer. Sebring lights are about 1 inch shorter & about 1/2 inch narrower. I prefer the Ferrari lights but at $500 per set that's a bit too rich for alot of people.  
IP: Logged


|
11:44 PM
|
|
|
Jul 14th, 2007
|
CoryFiero
Member Posts: 4341
From: Indiana
Registered: Oct 2001
|
Quick bump for progress! 
IP: Logged


|
08:26 PM
|
|
|
PFF
System Bot
|
|
|
Jul 17th, 2007
|
Amida
Member Posts: 2357
From: Seattle, WA. USA
Registered: Jul 2003
|
I'm in the mock-up phase now getting the visual on how things are going to line up. I now know that the steel bumper needs to be trimmed a little on each end for the Ferrari lights to fit. I'm not sure yet if the same will be needed for the Sebring/Avenger lights. z z 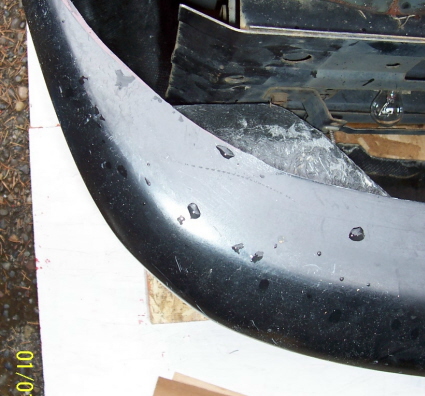 z z The f355 nose is slightly lower than the Fiero by about 3/4". I may shave a little off the bottom to make it less likely to scrape on driveways. z z 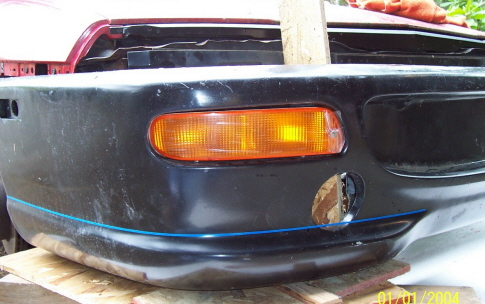 z z I took some time to build a level design table to help establish a baseline. Vehicle ground clearance was set at 4 inches. The blue tape line is parallel to the baseline in the original f355. The steel bumper is interfering with positioning, so after I trim it down I will need to move the nose further back by about 2 inches. Fiero side mouldings & mounting flanges will be added. z z 
IP: Logged


|
02:54 PM
|
|
|
Jul 18th, 2007
|
RCR
Member Posts: 4416
From: Shelby Twp Mi
Registered: Sep 2002
|
Hey Rob, Why don't you temporarily remove the bumper until you get everything fitted? Then trim it as neccessary once it is complete... Bob PS...Sign me up for a proto-type 
IP: Logged


|
07:22 AM
|
|
yellowstone
Member Posts: 9299
From: Düsseldorf/Germany
Registered: Jun 2003
|
The Scorpion lights look like the 2nd gen. Ford Scorpio lights (Euro model) I have in my 355 nose. I thought that model wasn't sold in the US. Where did you get them?  | | | quote | Originally posted by Amida:
Here is a comparison between the Scorpion ( bottom ) , F355, & Sebring lights ( top ). Scorpion lights are much longer; around 2 inches longer. Sebring lights are about 1 inch shorter & about 1/2 inch narrower. I prefer the Ferrari lights but at $500 per set that's a bit too rich for alot of people.

|
|
[This message has been edited by yellowstone (edited 07-18-2007).]
IP: Logged


|
01:01 PM
|
|
|
Jul 19th, 2007
|
Amida
Member Posts: 2357
From: Seattle, WA. USA
Registered: Jul 2003
|
| | | quote | Originally posted by RCR:
Hey Rob,
Why don't you temporarily remove the bumper until you get everything fitted? Then trim it as neccessary once it is complete...
Bob
PS...Sign me up for a proto-type 
|
|
Yes, I'll have to remove the bumper to cut it eventually. Next, I'll create a level plane to help position the new flange onto the upper nose piece. If the angle is off too much the nose will end up with a smiley face which I'd like to avoid.
IP: Logged


|
01:29 AM
|
|
Amida
Member Posts: 2357
From: Seattle, WA. USA
Registered: Jul 2003
|
| | | quote | Originally posted by yellowstone:
The Scorpion lights look like the 2nd gen. Ford Scorpio lights (Euro model) I have in my 355 nose. I thought that model wasn't sold in the US. Where did you get them?

|
|
I'm actually borrowing the scorpion lights for the project. I don't know how they got here. It turns out that they fit the f355 bumper pretty well; the extra length will end up hiding behind the fiberglass. BTW, nice picture of your car.
IP: Logged


|
01:36 AM
|
|
|
Aug 25th, 2007
|
Amida
Member Posts: 2357
From: Seattle, WA. USA
Registered: Jul 2003
|
Before continueing with the mock up I had to set the gaps around the bonnet & make sure all the seams line up as accurately as possible. Hard to believe it took a good day & a half just to do that. I've set the nose to fender gap at 1/8" and 5/32" all around the bonnet. Next, working on a level plattorm, I scribed & trimmed a straight split line on the nose that is parallel to the ground. The straight split line will eliminate any chance of a smiley face effect when viewed from the front.  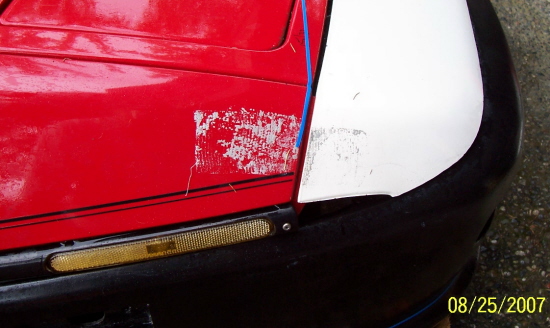 x Here with the new split line cut, I've mocked up the pieces to see how things are going to look. Nothing has been done yet to the original 355 nose, but it's starting to take shape. The sides will need to be shortened and the Fiero side mouldings will be worked in as well. That's it for now, it started to rain.  [This message has been edited by Amida (edited 08-31-2007).]
IP: Logged


|
08:51 PM
|
|
|
Aug 27th, 2007
|
RCR
Member Posts: 4416
From: Shelby Twp Mi
Registered: Sep 2002
|
IP: Logged


|
08:16 PM
|
|
|
Aug 29th, 2007
|
Tusch
Member Posts: 222
From: Dayton, OH
Registered: Mar 2006
|
I really love your work, can't wait to see how this turns out. But if its anything like your designs and your interiors, than it's gotta be awesome! [This message has been edited by Tusch (edited 08-29-2007).]
IP: Logged


|
12:05 PM
|
|
|
Aug 31st, 2007
|
88 Obsession
Member Posts: 131
From: Rochester, NY
Registered: Jun 2007
|
Amida, you are an awesome sketch artist. Great Ideas!!!!!! Keep them coming.
IP: Logged


|
06:38 PM
|
|




 I'd like to see you work on the 355 nose though. Will you be using real Ferrari lights? Or a cheaper replacement?