Well I first want to start out by saying if I would have used the search engine in Pennocks in the beginning, I would not have bought these.
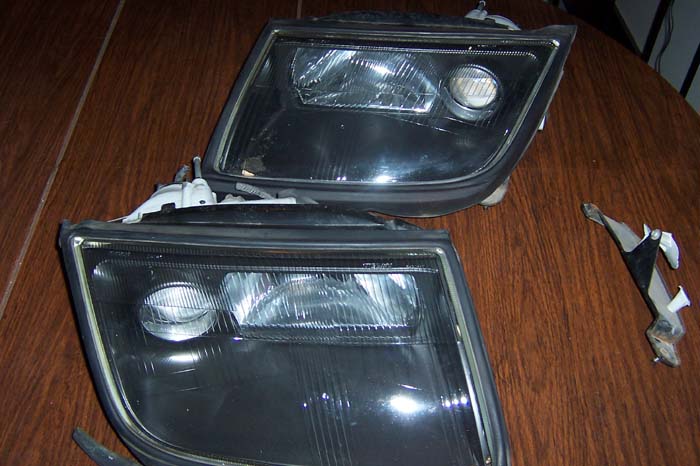
I bought these on Ebay for $165.00. It took almost three weeks to get and they arrived damaged from shipping . The good news is that the glass was intact. Once I had recieved them since I dont really think ahead...lol, I decided to do a search on the Forum to see what I could find about installing them. Thats when I got scared because it doesnt seem anyone on here has done it. I only had seen a pic of a guys car in Germany I think. One pic just showing the tip of the front end. It looked cool though. I decided that since I had them that I would just go for it.
I have a lot of work to do ahead of me but just wanted to show what I have done today.
I always wanted to do those, but I got bigger fish to fry. Maybe if I run across a cheap set of them I'll try it. Best looking flushmounts ever in my opinion.
87 Fiero GT 5sp with Vortec L35 4300 Turbocharged V6 Bully Stage 2 clutch Syclone intake manifold and engine management with Moates adapter and chip burner Air/water intercooler and Devil's Own progressive water/alky injection 50lb injectors, 3 bar map sensor, Walboro fuel pump and Jabasco Intercooler pump LM1 wideband on custom manifolds and 3" stainless exhaust system T31/T04B S4 turbo with a Super T61 in the box S10 caliper conversion. Murphy's Constant Matter will be damaged in direct proportion to its value Murphy's Law of Thermodynamics Things get worse under pressure. Arthur C. Clarke "Any significantly advanced technology is indistinguishable from magic"
IP: Logged
11:52 AM
DrCPU Member
Posts: 708 From: North Dumfries, On, Canada Registered: Jan 2004
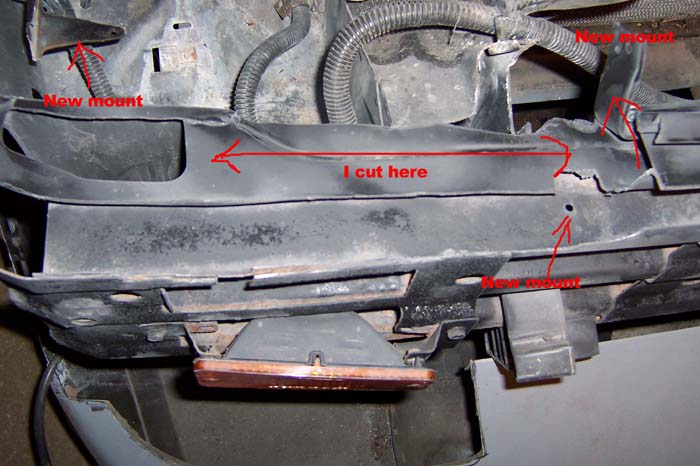
All you lose is two mounts for the front clip on each end. You still have the far end ones to use and the three in the center. I still need to cut a little bit more of the front clip. I just want to be extra careful doing that. Thanks, Chris
[This message has been edited by cornersonrails (edited 12-30-2007).]
I look forward to seeing this finished, im kind of torn between doing a low profile popup set, or something like this. Those are the nicest looking flush mounted lights ive seen, they seem to fit in perfectly.
IP: Logged
02:46 PM
fieroguru Member
Posts: 12346 From: Champaign, IL Registered: Aug 2003
I'd ask that you please take plenty of pictures and notes. This will definitely be a path many (including myself) will follow! The biggest challenge for us will be to try to fashion after the fabricated mounts you are doing. I bet if you were able to craft templates of what to cut out of the hood and clip, as well as detailed instructions, folks would pay you for it as a way to make their process easier, and take advantage of what you're learning.
I'd ask that you please take plenty of pictures and notes. This will definitely be a path many (including myself) will follow! The biggest challenge for us will be to try to fashion after the fabricated mounts you are doing. I bet if you were able to craft templates of what to cut out of the hood and clip, as well as detailed instructions, folks would pay you for it as a way to make their process easier, and take advantage of what you're learning.
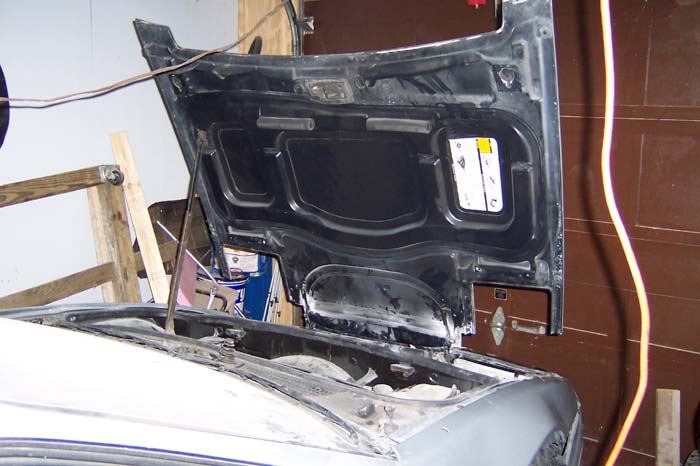
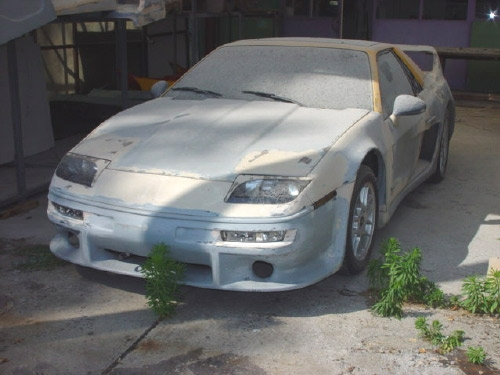
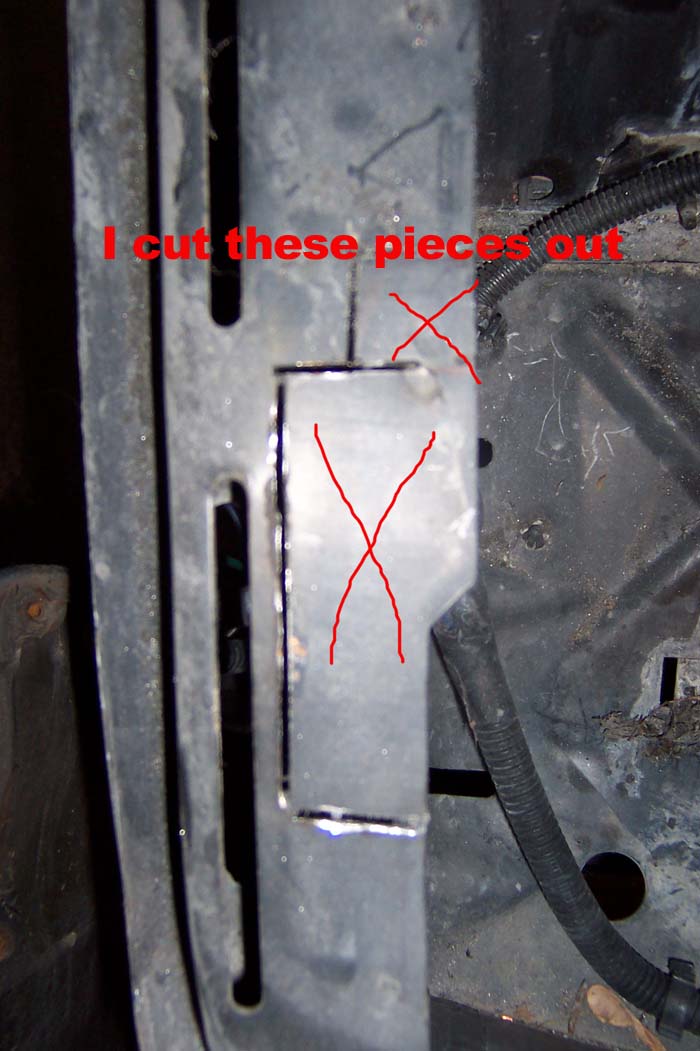
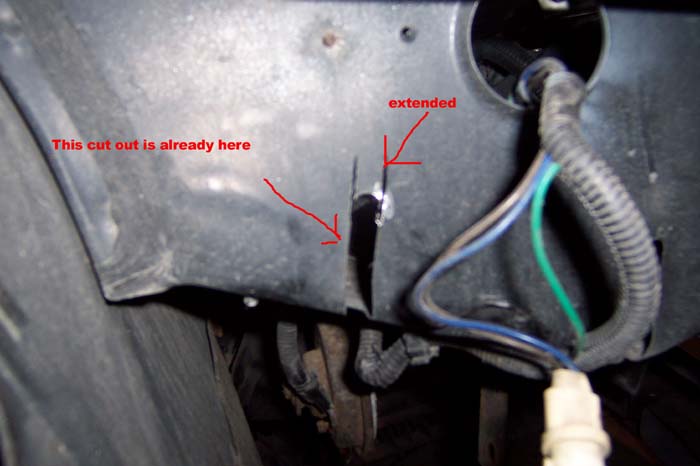
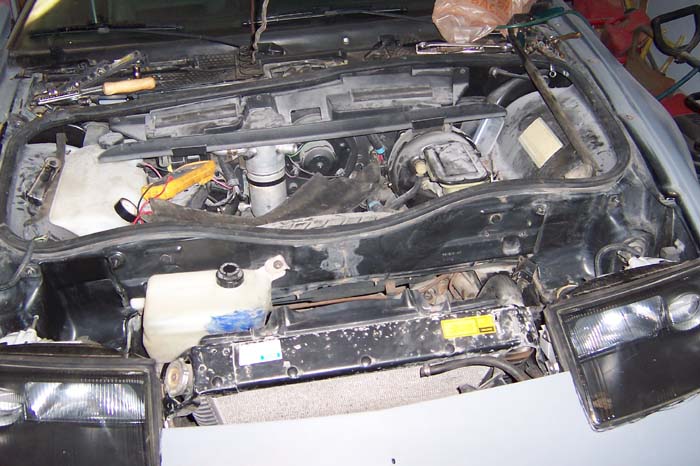
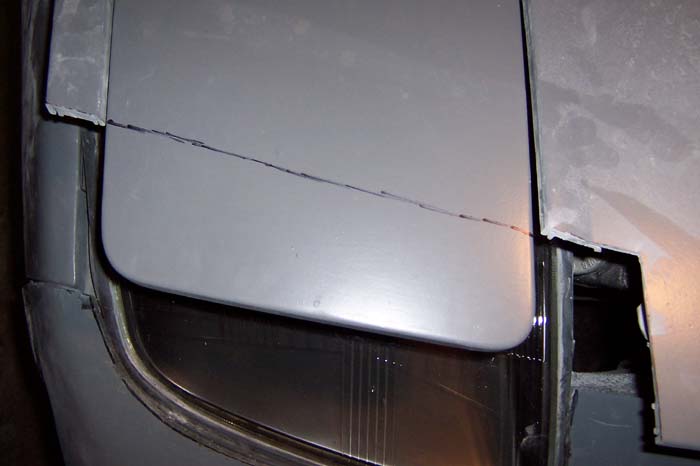
Pictures pictures and more pictures. That I can do, but I would never think about collecting money on doing this project. I am no expert and I am sure many other people can do what I am doing a lot better. I will be more than willing to help people get these lights in their cars. I do appreciate all the feedback and compliments from everyone. Thanks. o.k., Today I wanted to get the hood on to see what kind of problems I would have and this is what I found.
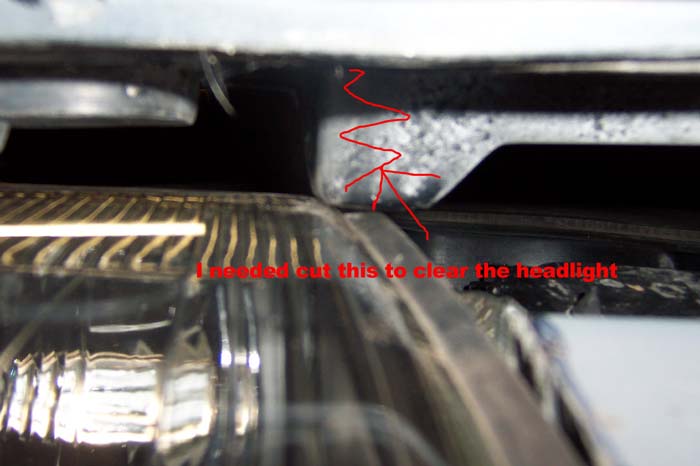
The problem, and what I did...
I lose the one mount but have an idea on how to remount the hood using as much of the original mount as possible.
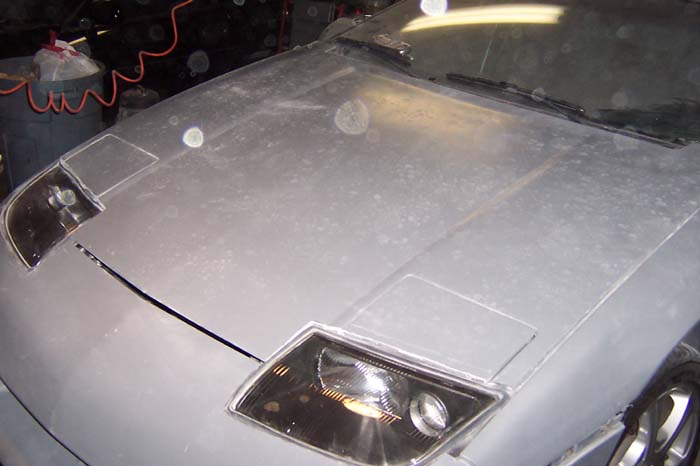
I put the headlight doors back on and my plan will be to use the fiberglass to fill the hole.
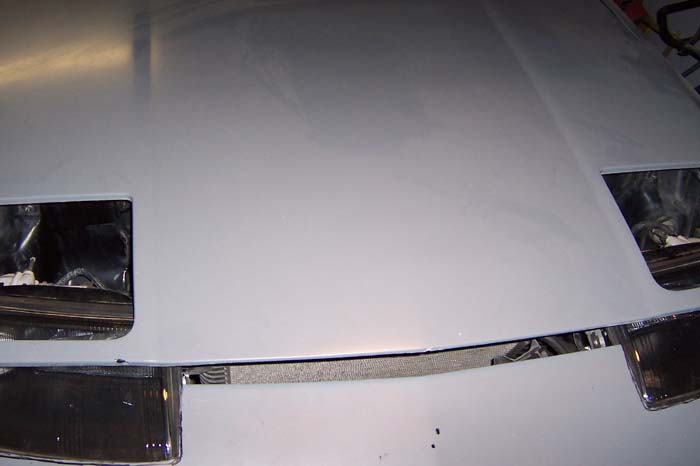
What its kind of going to look like...
one more....
The hood is only sitting there and is not mounted yet. Still have more work to do before getting it back on. It would be a crazy idea to have another set of lights pop up still. Thanks, Chris
IP: Logged
06:30 PM
ALLTRBO Member
Posts: 2023 From: College Park, MD Registered: Mar 2006
WOW. That looks MUCH better than I would have thought if I hadn't seen it.
Unlike most headlight conversions with stock bodies, those follow the body lines nicely! (Well, almost) The gap between the light and fender could be smoothed out (attached) on the fender side, that would seal it up perfectly.
Here's a . Keep it up.
[This message has been edited by ALLTRBO (edited 01-01-2008).]
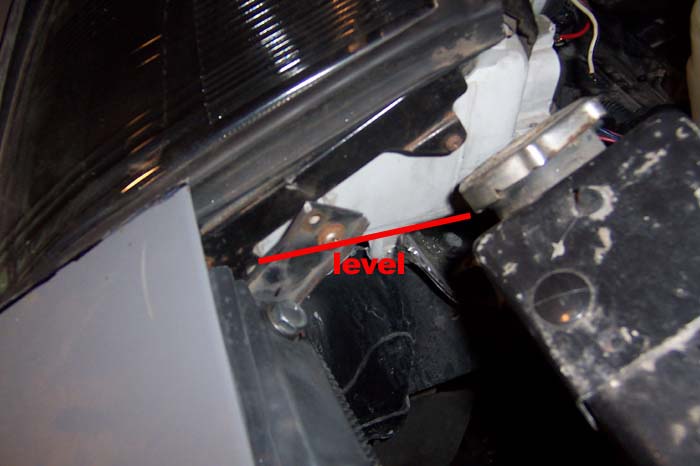
Yeah, thanks! It looked like the lense is fitting up nice and flush with the contour of the Fiero. I just wanted to make sure that the bottom of the fixture was level too so that it wouldn't be blocking the light once the lenses are properly aimed. It's pretty amazing that the slope of the Fiero and the 300Z hoods are so similar.
Hey great work, I think those "z" lights are gonna be very cool looking in the fiero. It amazes me what you PFF guys can do to one of these little cars.
Keep the pics comin
RUNDLC
IP: Logged
11:34 PM
Jan 2nd, 2008
SAFASTRO Member
Posts: 604 From: Calgary, Alberta, Canada Registered: Nov 2006
WOW......great thread! I've been contemplating which lights to use on my build......I can look out my office window, and see a 300z front clip that has been sitting in the autobody shop's parking lot ever since I can remember......I may be paying them a visit now. Keep the pics coming......any chance at standing back a little further, and taking a front angle shot?? Thanks
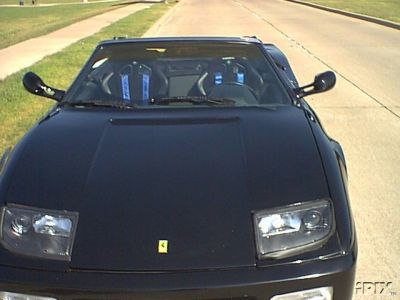
It should look alot like this yellow one. Not sure if this was photoshopped but it looks alright.
I had seen that in a archived thread and I am remember them saying it was photoshopped. Still looks good though.
quote
Originally posted by SAFASTRO:
WOW......great thread! I've been contemplating which lights to use on my build......I can look out my office window, and see a 300z front clip that has been sitting in the autobody shop's parking lot ever since I can remember......I may be paying them a visit now. Keep the pics coming......any chance at standing back a little further, and taking a front angle shot?? Thanks
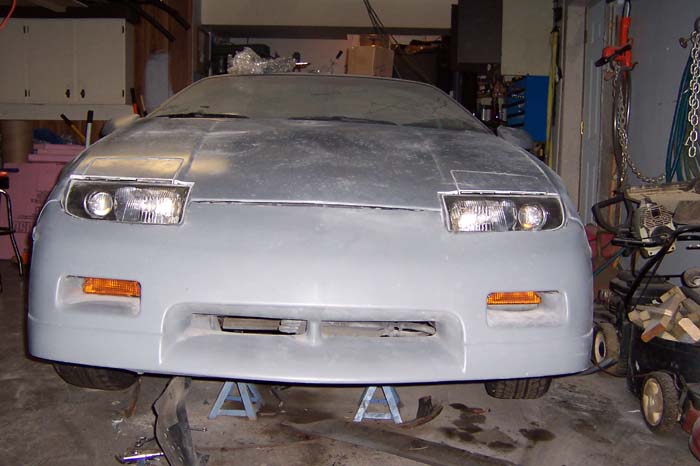
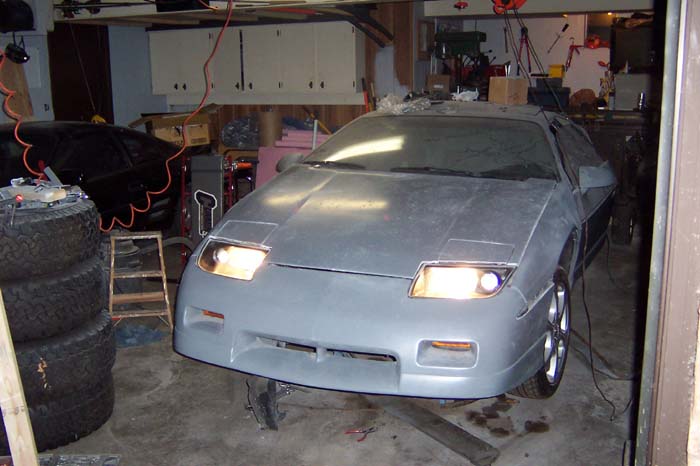
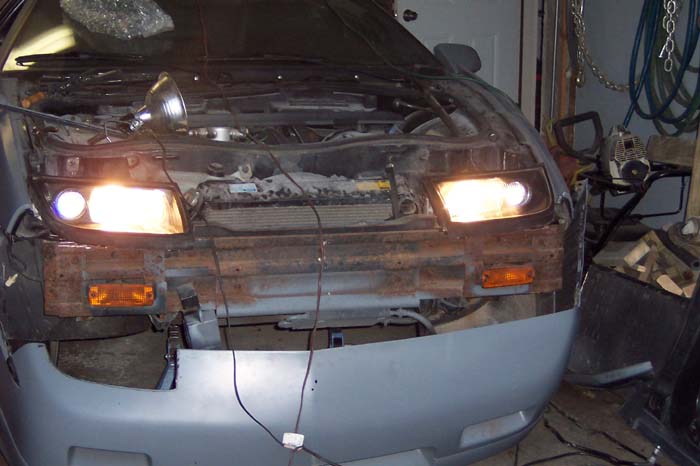
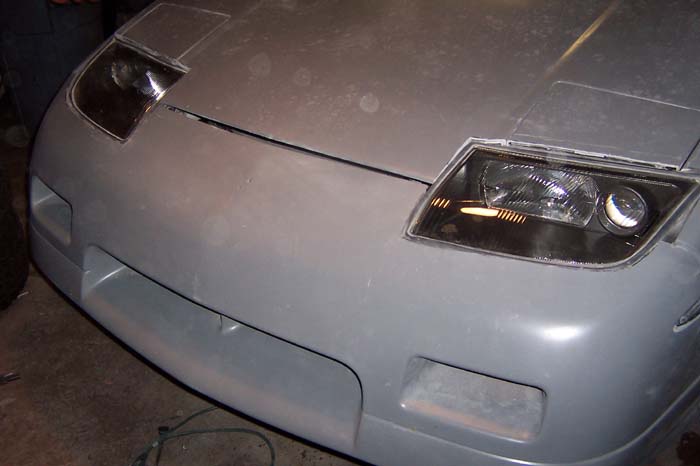
Here are a few pics of the front end
another....
This one I have the lights on and it looks like the small round ones are on but they are'nt. I havent put power to those yet.
Thanks, Chris
IP: Logged
06:00 PM
Jan 4th, 2008
HI-TECH Member
Posts: 1697 From: manteca, california Registered: Jul 2005
Wow, they fit the car almost perfectly! Looks pretty cool. A + for you sir.
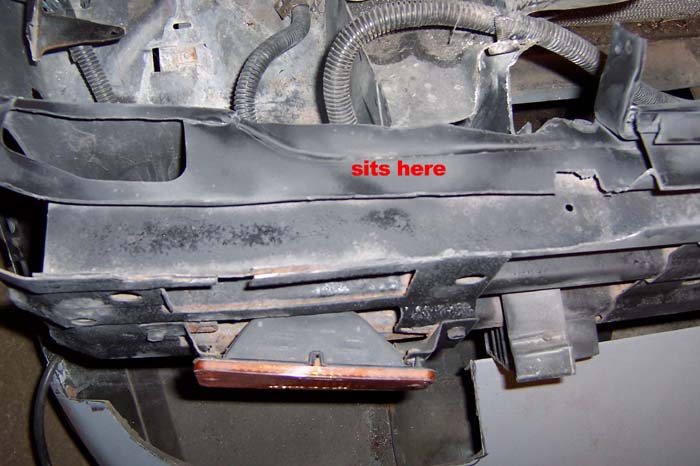
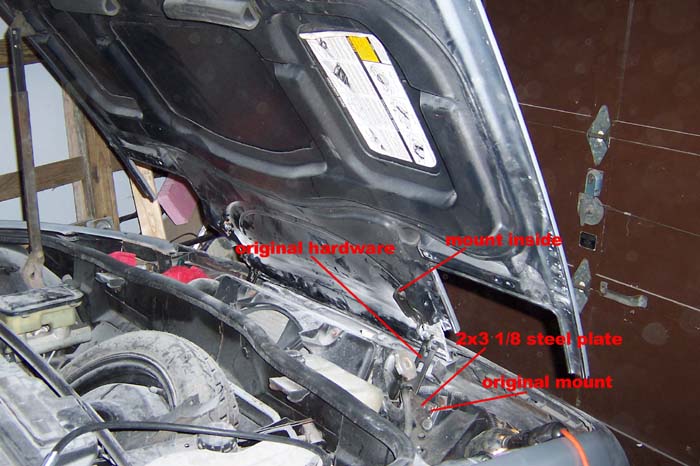
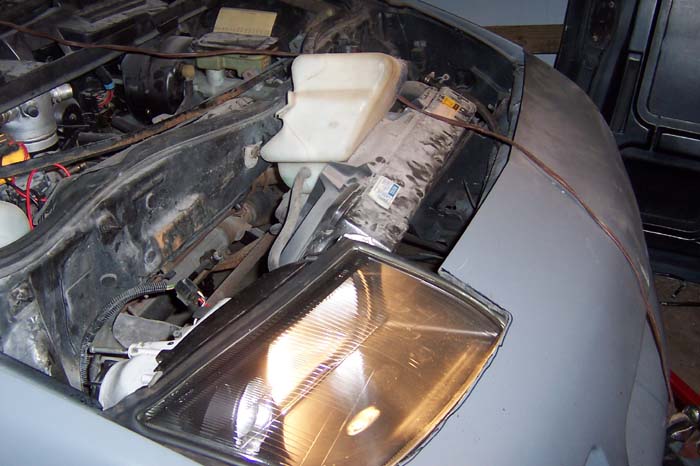
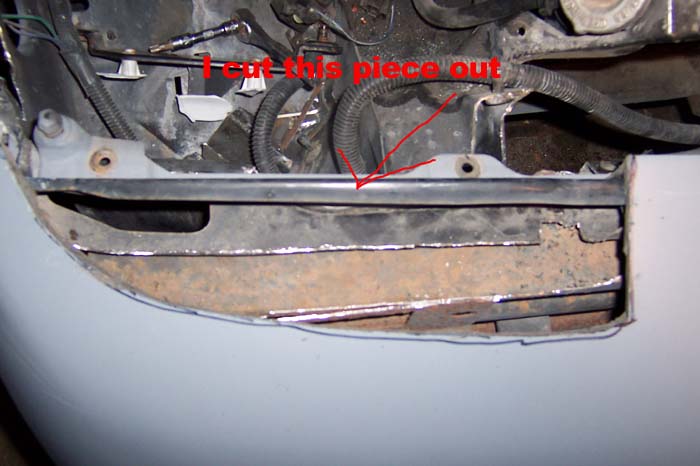
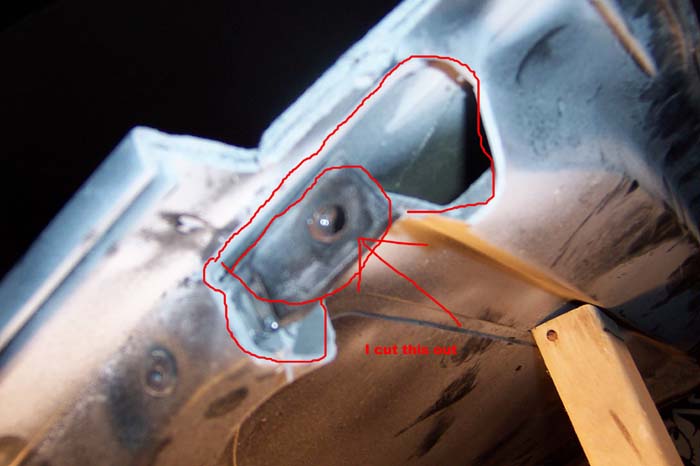
Thanks HC ...o.k. I wanted show everyone what I have done with remounting the hood. You have to cut to just above the second stud bolt in order to get these lights in. As stated and shown above in one of my other posts you have to cut the one mounting position out on the hood in order for the hood to close. So recap.....1 stud left which is the bottom and you have one position left on the hood to bolt to which is the top position when the hood is on. This is what I did to remount the hood.
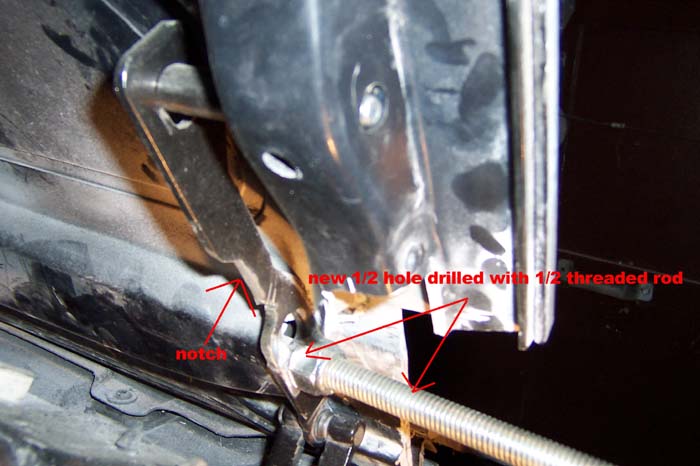
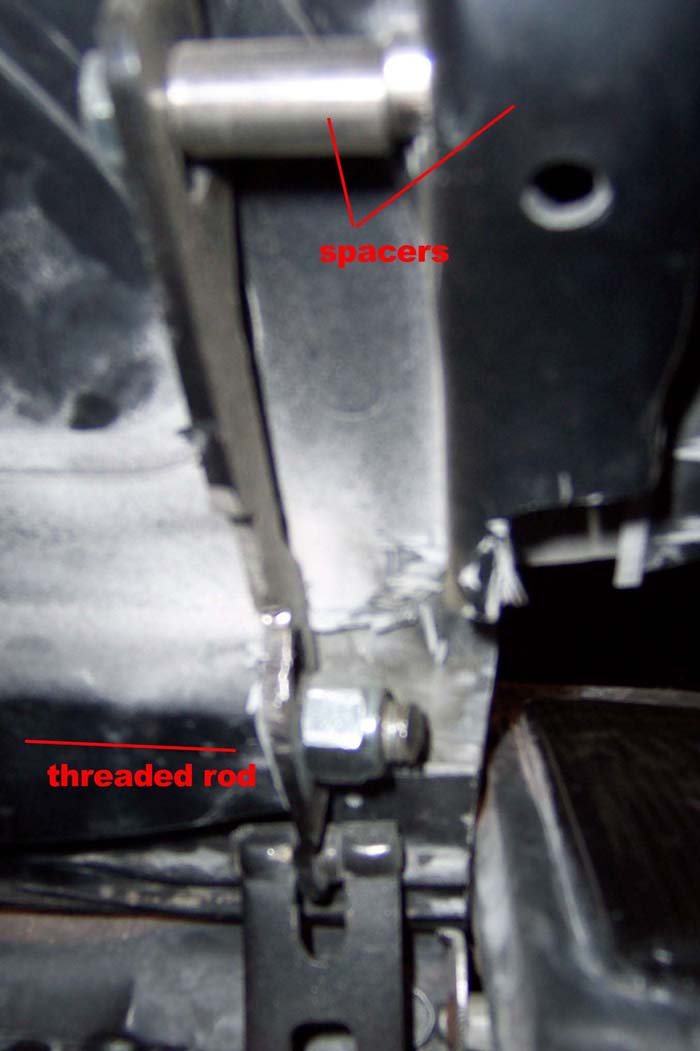
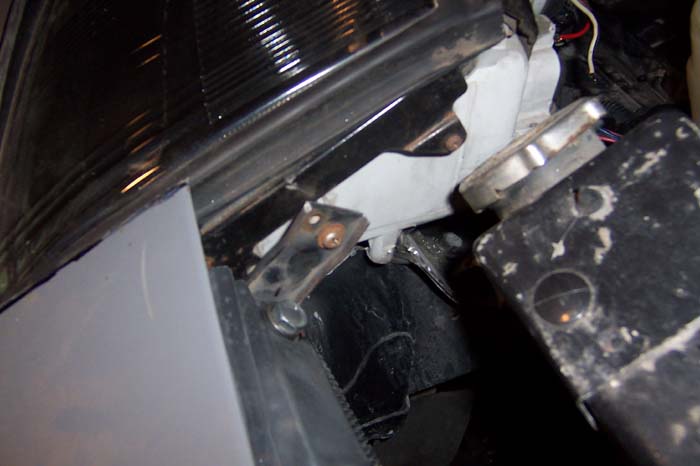
This is a closer look of the mount to the hood. You have to have two spacers. The one is inside the fiberglass and cant be seen but you need this to butt up to the metal bracket inside. Without this spacer the other spacer would just smash through the fiberglass and serve no real function. I also drilled a 1/2 inch hole in the bracket. Then I took a piece of threaded rod and slid it through the fiberglass. This gave me the other mount that I needed.
another picture...
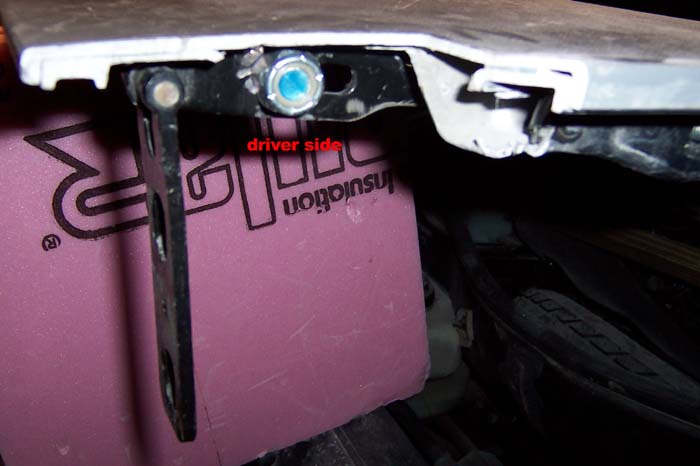
the other side...
The hood is now on. I am happy with how stable it is. It opens and closes just like it should.
I wanted to add that if you look at the way the guy did this car I can tell you that he did not have mess with any of the mounting for the hood. He has moved the headlights out into the fender areas to avoid the problems I just faced. Personally though I like the headlights in more than his.
Thanks, Chris
[This message has been edited by cornersonrails (edited 01-06-2008).]
How did you go about making templates to cut into the top of the front bumper cover? I think is where ill mess up, cutting it right the first time. After its cut i think ill put a rubber trim, or molding on the edge to clean it up nice. TIA
IP: Logged
07:17 AM
cornersonrails Member
Posts: 788 From: Algonquin,Il USA Registered: Jul 2006
How did you go about making templates to cut into the top of the front bumper cover? I think is where ill mess up, cutting it right the first time. After its cut i think ill put a rubber trim, or molding on the edge to clean it up nice. TIA
After getting the 1st light in where I wanted it, I just lifted the front bumper over the light and got it back in position with the car and then took a marker and drew it out. Always take way less to start because you can never go back. I then used a Dremel with a cutting wheel on it. I would say a Dremel is a must have for this project.
Thanks, Chris
IP: Logged
08:03 PM
exoticse Member
Posts: 8655 From: Orlando, Fl Registered: Jun 2003
Going to look really good with the choptop. If you go back to the archived threads you will see i suggested and wanted these headllights a long time ago, but most feedback i got was that they were too big or would not work.
Guess you showed them, they look fantastic !
IP: Logged
11:08 PM
Jan 10th, 2008
gt7 Member
Posts: 277 From: suffolk, va, usa Registered: Feb 2006


 Thanks, Chris
  . Keep it up.