Took the parts list to my fabricator. I will definatly have them back within 2 weeks, he said probalbly one, so They will be shipped out after that. If anyone wants the custom length dogbone I will need to know the length from the center of those two holes ASAP.
Thanks! Jeff Depies
IP: Logged
08:12 PM
Feb 18th, 2006
fieromadman Member
Posts: 2217 From: Oconomowoc WI, USA Registered: Jan 2003
Update for all who purchased, the fabricator called yesterday and had everything done except for the dogbones. He said they should be done tomorrow. I still need to order the plastic pullies and then I'll make a stop at the hardware store and ship them out to you. Should be shipped early next week sometime.
Allright, I went and picked up all of the parts today. They all look very good! While i was out i went and stopped at the parts store to order the plastic pullies that some of you wanted, they will be here tomorrow. I hope to have them all shipped out tomorrow. I still need the hardware, but I'll also be getting that tomorrow if all goes well. Im just hoping that I feel well tomorrow so I get it all done, as I have been under the weather lately.
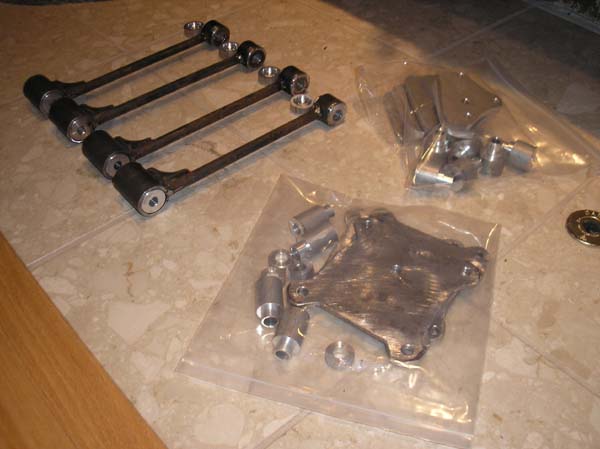
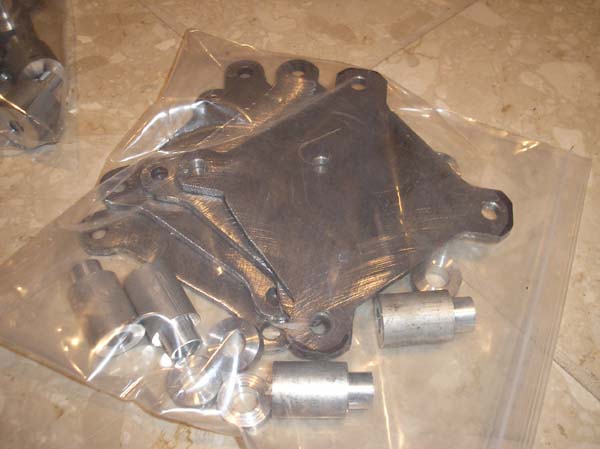
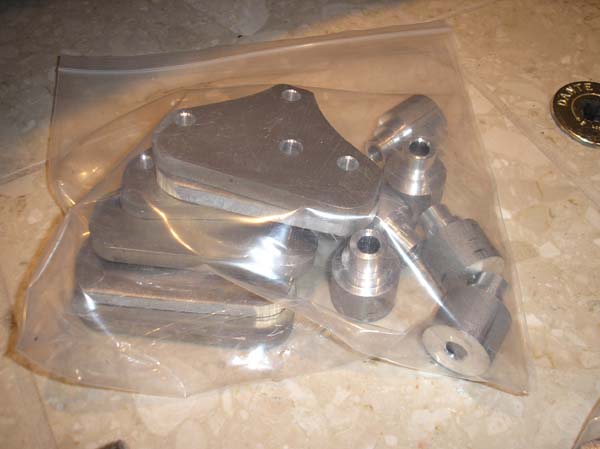
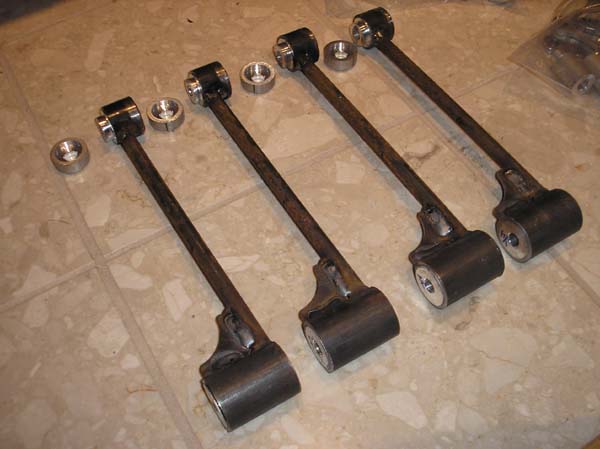
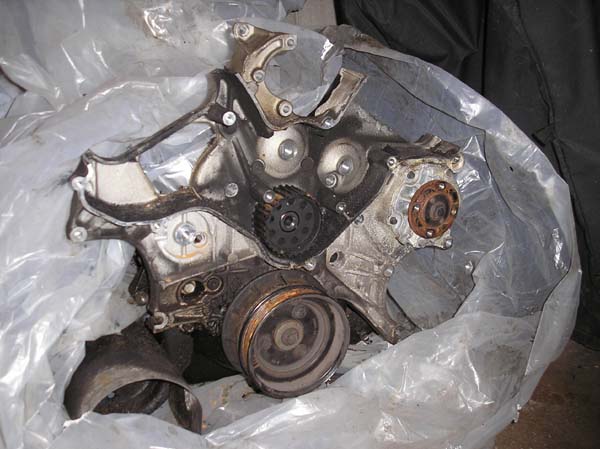
Anyhow, pics of the parts to calm the anxiety, or perhaps add to it!
I'm slightly jealous as these parts are a little nicer than what I have on my car. If I make another batch sometime I think I'll get some new ones of my own.
I hope you feel better. That dogbone on the end a little bit shorter looks great. I bet that ones mine! Now I just got to get the car running again!! Grrrrr
I dont have any spares but I could get another one made. i dont know how long it would take him to make and being that I get a discount for making multiple copies it would probalbly cost you like $10 more. If your okay with that we could work something out. i would have to contact him and see if he wants to make an individual one or just wait for another group.
MRJ, yes the shorter one on the end is yours.
Thanks for the kind words on feeling better, which I am, FINALLY! I picked up the plastic pullies this morning, and i'm about ot make the trip to the hardware store and then I'll box them up and ship them out to you all!
-Jeff
IP: Logged
01:52 PM
fieromadman Member
Posts: 2217 From: Oconomowoc WI, USA Registered: Jan 2003
Okay, I shipped out all of the orders except for carswell's and another guy that isnt on the forum. That was because they wouldnt let me ship to canada in a USPS box. Anyhow, I'll PM everyone else their tracking numbers. People in Canada cant get tracking numbers... lol.. do you see a pattern? Anyhow, in lou of a tracking number for the Canada people I got shipping insurance.
The other orders will definatly be shipped on or by monday. Tomorrow looks very busy but I may be able to squeeze it in.
-Jeff
IP: Logged
08:09 PM
Feb 25th, 2006
Carswell...Wellscar Member
Posts: 947 From: Whitby, ON, Canada Registered: Aug 2004
I'll post pictures in the thread here of how to install if you need the help...? I didnt get around to shipping them today as i expected, so they should be shipped out monday. Thanks! Jeff
ya ..pics are a good idea..if u get some time too ..so what bout the canadian parcels ..will they be sent out monday as well??
matt
Seriously man, do you not read what's said or what? He said he'd ship them out on monday. They were the only ones that didn't get shipped out the other day. He wrote all that above.
IP: Logged
10:42 AM
Feb 27th, 2006
fieromadman Member
Posts: 2217 From: Oconomowoc WI, USA Registered: Jan 2003
I shot a pictoral installation guide for you guys. It was on a core engine that I just have laying around so I couldnt really actually mount the dogbone but I'll explain it the best that I can. Anyhow, I covered up all of the USPS labels on the boxes that Im shipping tomorrow. So, in other words they are all ready to be shipped out tomorrow.
EVERYONE THAT PURCHASED A P/S BRACKET, PLEASE READ THIS:
While I was installing the P/S bracket I ran into some fitament issues. They are not severe, a few minutes with a file and they should be taken care of. I'm REALLY feeling sorry that I didnt test fit them before I sent them out, but I was feeling sick and its really cold out. Anyhow, since you need a file/grinder/cutting tool of some kind to install that bracket it wont be too much more work anyhow. Look in the directions for installing to see where the problem is and how to fix it!
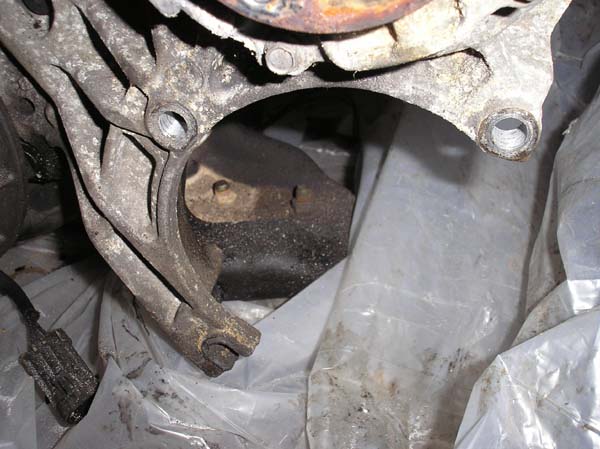
Here is where the bracket interferes with the casting on the engine. It is very minimal, but you will need to use a file or die grinder or hasksaw or sawzall or something like that to remove enough material to get it to fit. You will need one of those tools anyhow in a later step so its not like you'll need that tool just because the part doesnt fit correctly. Like I said earlier, I am really sorry that it doesnt fit 100% correctly, the next batch that I'm going to have made will!
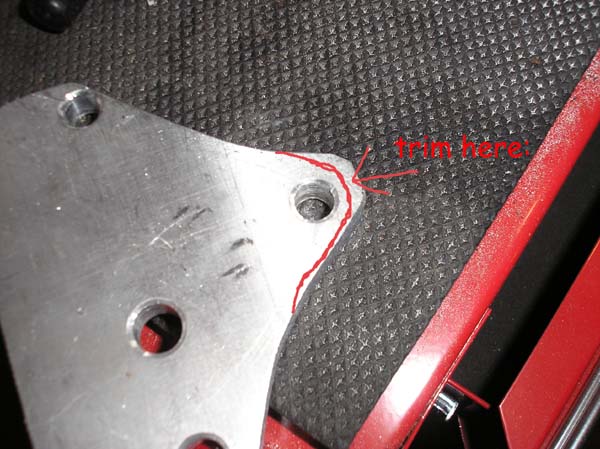
so heres approximatly what I trimmed off of the piece:
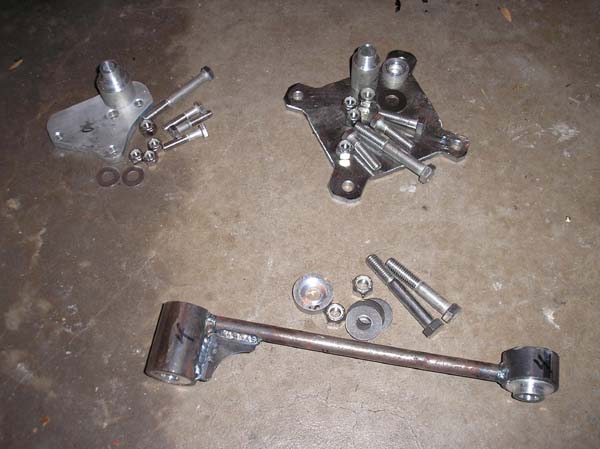
This is a picture of all of the pieces and thier related hardware layed out. If you purchased the hardware from me you obviously allready have it, if not inspect the pictures in the insturctions to see what I used and purchase the same things.
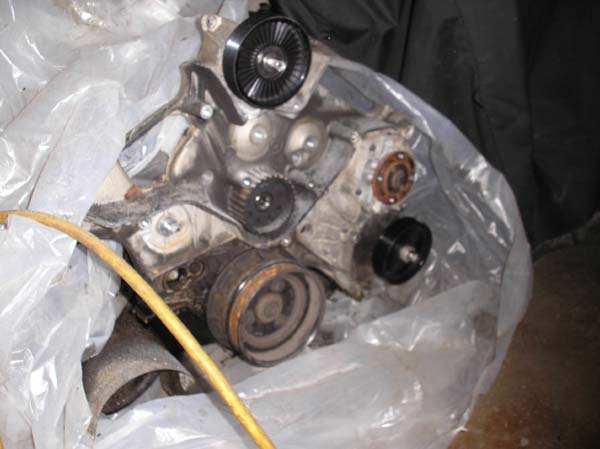
a quick before picture so you can see where we are installing the hardware onto the engine. I know it isnt a very complete example but you should be able to figure out that this is the crank side and figure out where everything else is in relation..
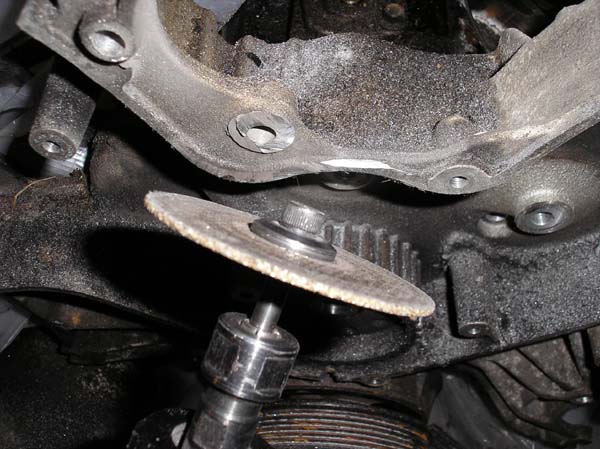
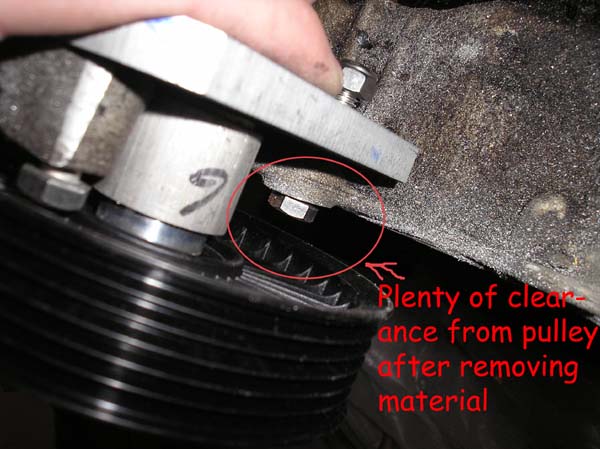
Ok, after you make sure that all of the bolts are fitting correctly after the part is trimmed you will need to trim the area circled so that it clears the plastic pulley after the whole assembly is put together.
I used a die grinder to cut it down about a 1/4 inch.
Then after I ground it down with the die grinder I used a bastard file to make it smooth/straight enough for my liking (you may do more, remember this engine isnt actually going to be used)..
continued on next post...
IP: Logged
02:10 AM
fieromadman Member
Posts: 2217 From: Oconomowoc WI, USA Registered: Jan 2003
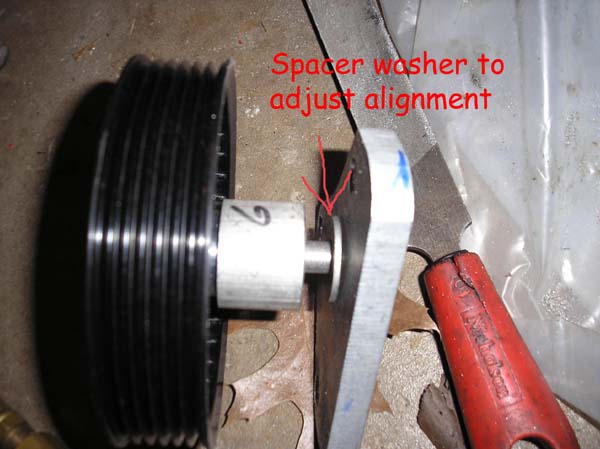
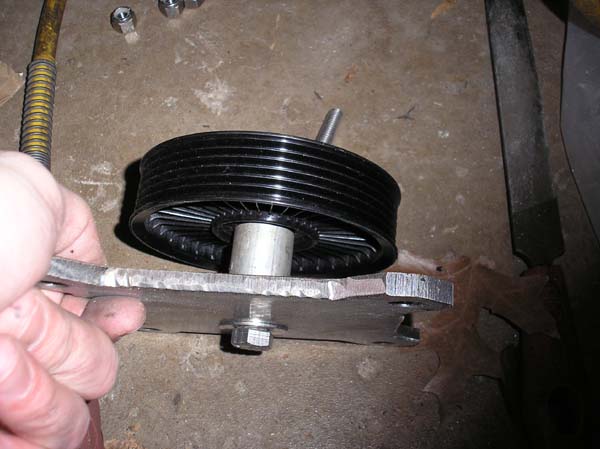
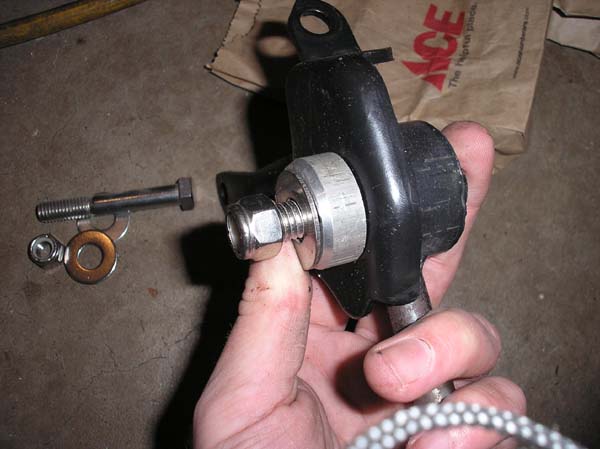
Here is the pulley assembled as It would be when you install it on the engine. Here is where that spacer may be needed that I included with every P/S pulley order:
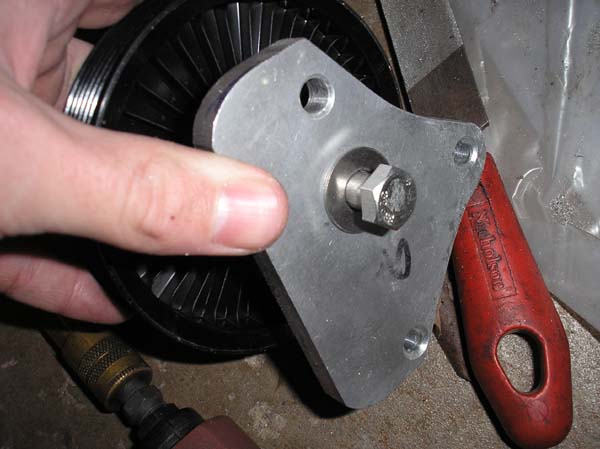
the other views of it assembled. You wont want to try and assemble this part THEN put it on the engine because you wont be able to get the bolts in. I'm just shooting the pictures of it assembled off the engine because it is easiest to shoot pictures that way.
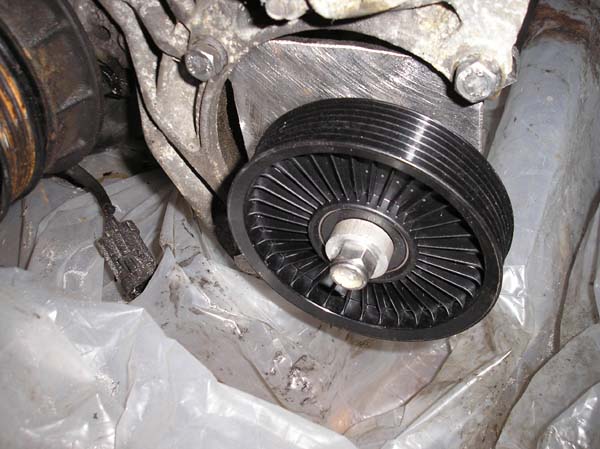
The pulley all installed on the engine. I didnt tighten any bolts, but you get the idea!
shows the clearance of the trimmed area...
and onto the A/C pulley... this is the area that it is going to be installed...
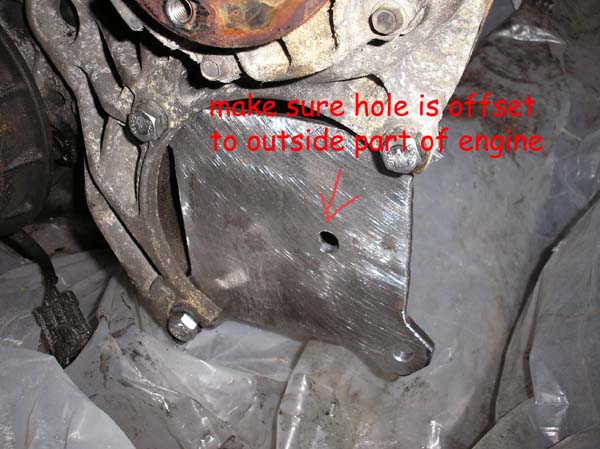
You will want to install the bracket with the mounting hole towards the outside of the engine because the pulley circumfrence that is used is smaller than the A/C pulley it replaces so you need to make the pulley offset at a greater distance to use the stock length belt. I am using the bracket mounted this way with the P/S bracket and an underdrive pulley and still running the stock length belt. Speaking of the underdrive pulley, I would highly recommend getting one while you are installing these pullies anyhow.
Continued on next post...
IP: Logged
02:25 AM
fieromadman Member
Posts: 2217 From: Oconomowoc WI, USA Registered: Jan 2003
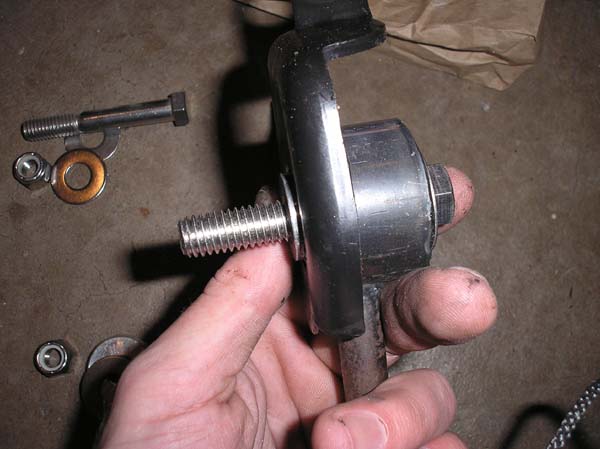
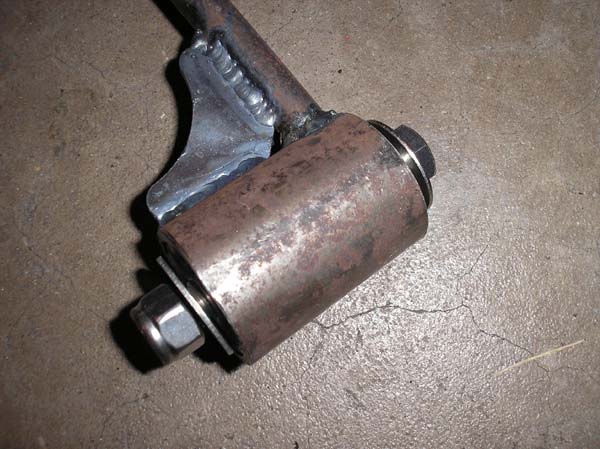
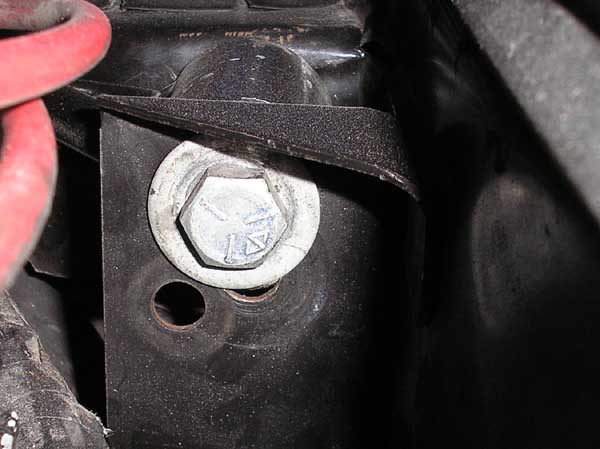
I dont have the bracket installed on the engine that it attaches to but I have the bracket to demonstrate. Obviously I also dont have the engine in the car to show you how I re-drilled the holes etc, but that is self explainitory, and I'm going to re-post a picture that I posted earlier in this thread to show you what I did there. Once again though, you may not need to re-drill the hole at all if you trim the dogbone tot he correct length and have it re-welded. Anyhow, this is the engine end of the dogbone mount in the bracket that you attach it to on the engine. You can see that the one piece of aluminum that is insterted into that dogbone end protrudes further than the mount bracket. That is because the other piece of aluminum the goes over it sandwiches the piece and keeps it from torqing the bracket.
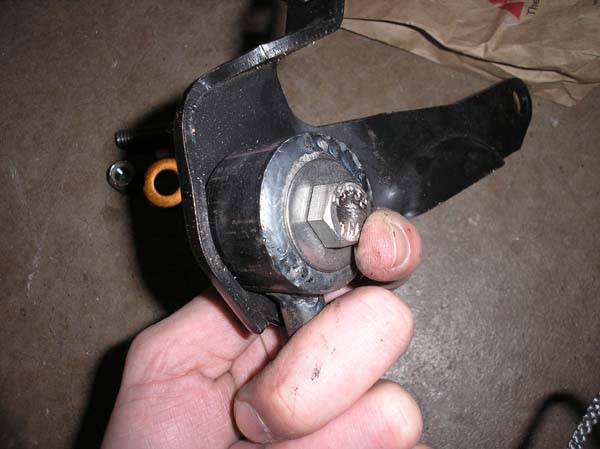
The other side that apprears on the bracket
All of the pieces on that end assembled (but not tightened) as they would be when installing in the engine bay.
the other end.. hardware inserted..
This is how it would be installed in the car. I just re-drilled the holes further up and at the correct length that I needed.
And that should be all! If you have any questions please let me know. I'm sorry about that bracket not itting perfectly I told my fabricator to copy mine exactly because I had ot cut mine down to fit, but I guess that he still didnt do that....
Excellent instructions, thanks for posting them. Don't worry about the clearance issue on the one bracket, you're right that it would be easy to modify to fit with a file or grinder.
Thanks Again! Nolan
IP: Logged
12:39 PM
fieromadman Member
Posts: 2217 From: Oconomowoc WI, USA Registered: Jan 2003
Thanks Nolan, I was hoping that the effort would be worth it. Anyhow, I'm about to leave to ship out the remaining two packages. Thought that I would let everyone know!
-Jeff
IP: Logged
01:43 PM
PFF
System Bot
fieromadman Member
Posts: 2217 From: Oconomowoc WI, USA Registered: Jan 2003
all the packages have been shipped...... if you dont get the package within a 2 weeks somethings up. For domestic orders i have tracking numbers, for canadia I got insurance. let me know if soemthing goes wrong.


 Anyhow, I'll PM everyone else their tracking numbers. People in Canada cant get tracking numbers... lol.. do you see a pattern? Anyhow, in lou of a tracking number for the Canada people I got shipping insurance.
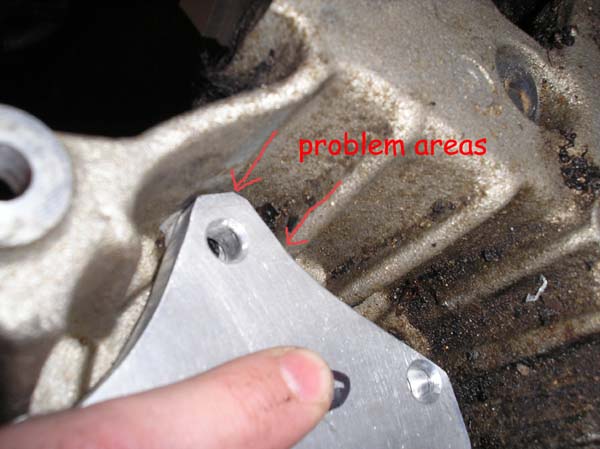


 I told my fabricator to copy mine exactly because I had ot cut mine down to fit, but I guess that he still didnt do that....