Pennock's Fiero Forum
  General Fiero Chat
  Project L67 Fiero (Page 1)

Post New Topic  Post A Reply
Email This Page to Someone! | Printable Version

This topic is 2 pages long:  1   2 
Previous Page | Next Page
next newest topic | next oldest topic
Project L67 Fiero by Jfrost
Started on: 07-26-2013 12:44 AM
Replies: 44 (2587 views)
Last post by: Jfrost on 08-30-2015 12:18 AM
Jfrost
Member
Posts: 1092
From: Brookfield, IL
Registered: Jul 2009


Feedback score:    (29)
Leave feedback

Rate this member

Report this Post07-26-2013 12:44 AM Click Here to See the Profile for JfrostSend a Private Message to JfrostEdit/Delete MessageReply w/QuoteDirect Link to This Post
I figured it was time I finally start my build thread on PFF. For the last year and a half I have been documenting my build on a local car forum here in Chicago. The next few posts or so will just be catching up to where I currently stand with the build right now. Most of the posts will be pictures mixed with a bit of text describing what’s going on.

Here we go….

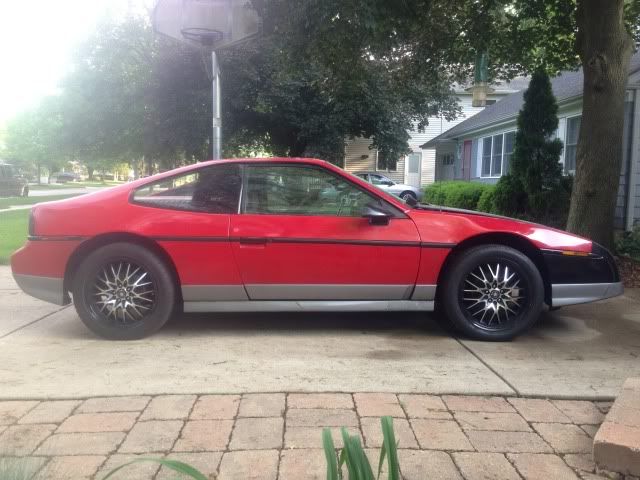
I was finally able to bring my Fiero home from my house at school and figured it was about time I start my build thread. The car is a 1986 Fiero GT I bought from PaulV being stored just down the street from my house. The car sat for many years in a field and the paint is all faded but only has 69k miles on. Paul was stripping it down and selling parts off of it. When I bought it the interior was completely gone except for the steering column/wheel and wiring along with the front bumper. Lucky for me I already had another 86 Fiero GT I was parting out due to the frame being rusted and engine being shot. I took the interior and front bumper and swapped them onto the red Fiero, and had a running and driving car.

What drove me to Fiero's is I was trying to find a car to swap a L67 into that was rear wheel drive, affordable and provide a somewhat unique build. While a L67 swap is nothing new in a Fiero, it is still a unique car with a relatively easy and well documented swap. Trans bolts up and I get to have a manual L67, something I've always wanted. I stumbled across Fiero's during my research for a vehicle to transplant and L67 into, I've since been bitten by the Fiero bug. I've bought both of my Fiero's for less than a grand total which worked out great with my budget being in grad school.
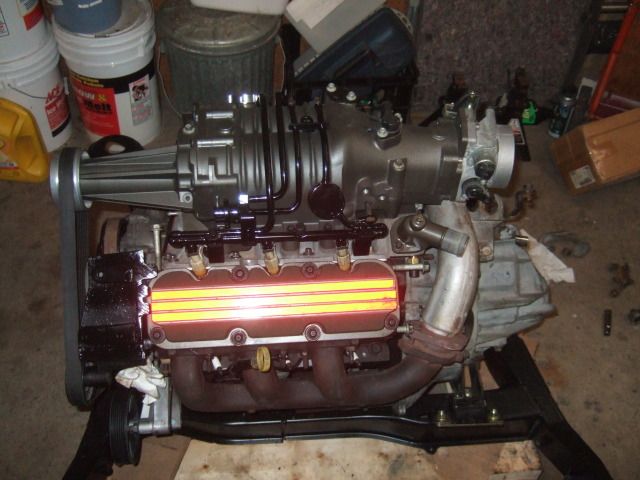
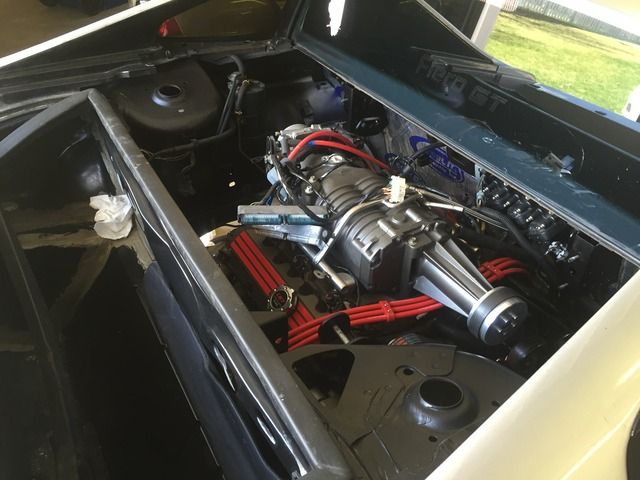
The plans for the car are an L67 swap using the stock Fiero 4spd manual trans, a GenV, Northstar TB and a 3.6 s/c pulley to start off with. All the parts were taken from my GTP when I returned it back to stock.

Here are some pictures of the progress so far:
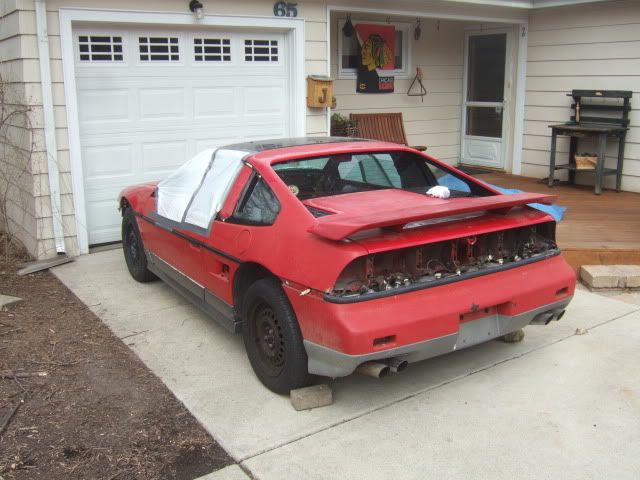


When I got the car, had to cover it up to protect from the rain.
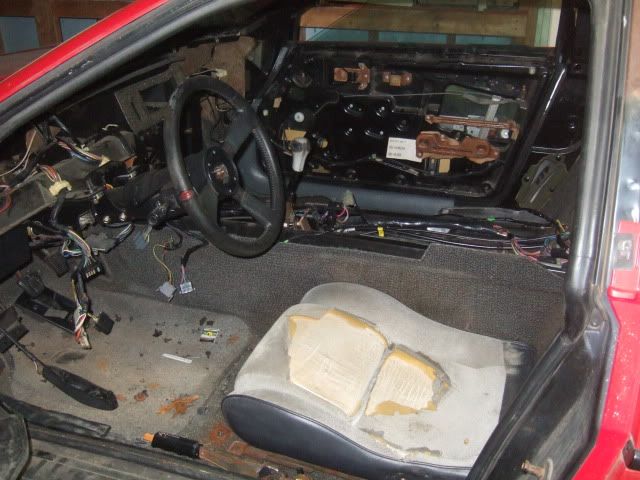


Interior before
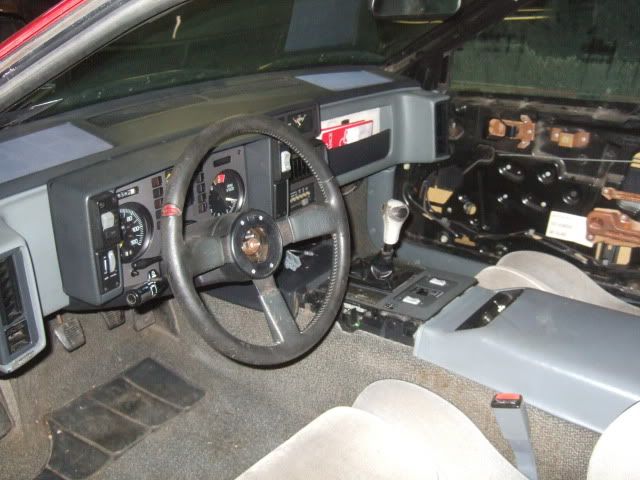


Not the most recent picture, door panels are now on
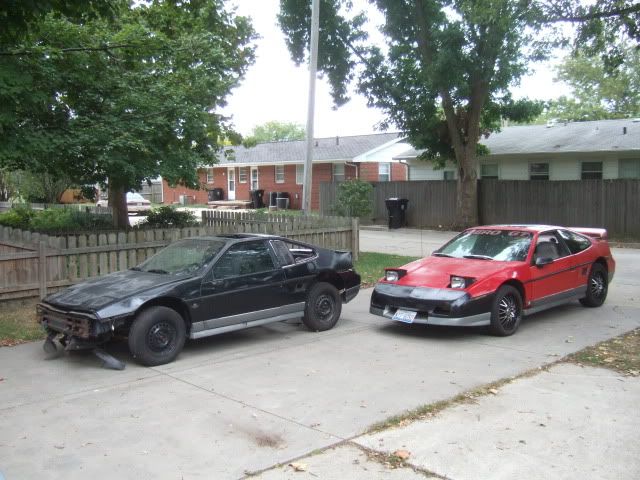


Donor car and the recipient
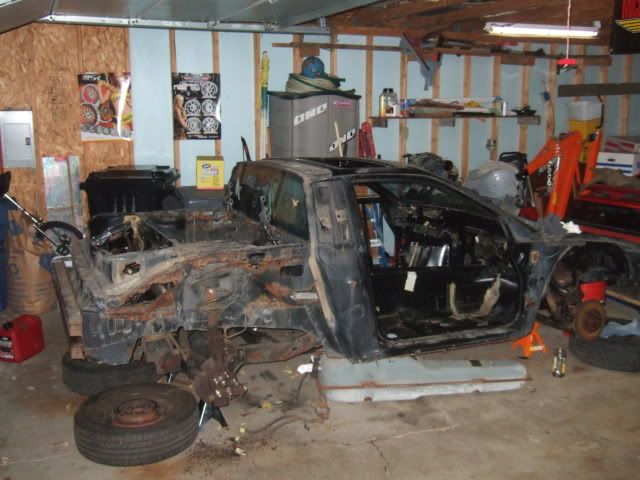


Donor car stripped down and ready for the junkyard. You can somewhat make out the rust damage on the rear frame rails that lead me to junk the car.
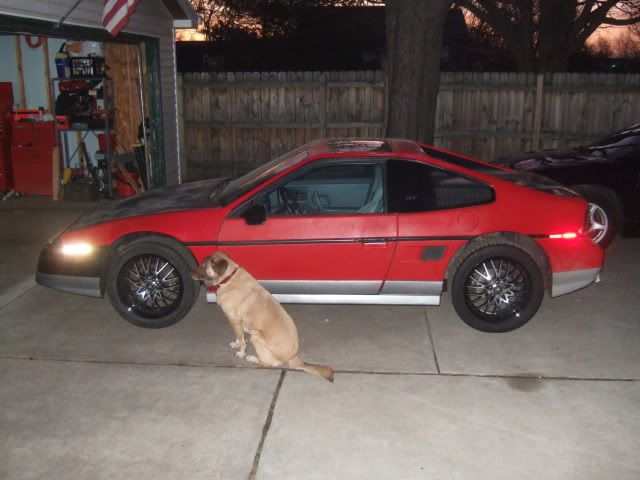


Red project Fiero as it sits today
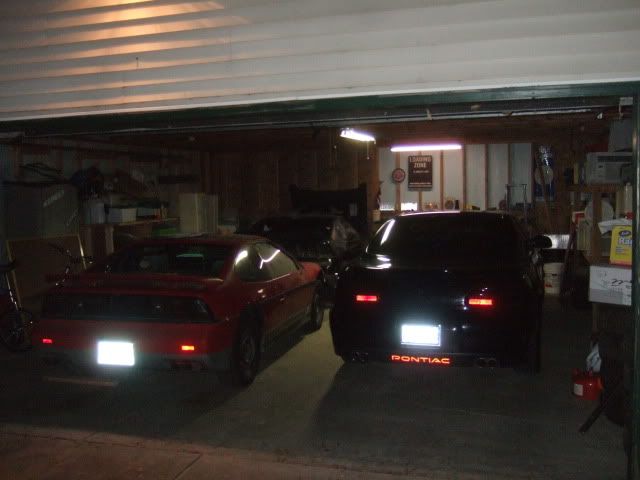


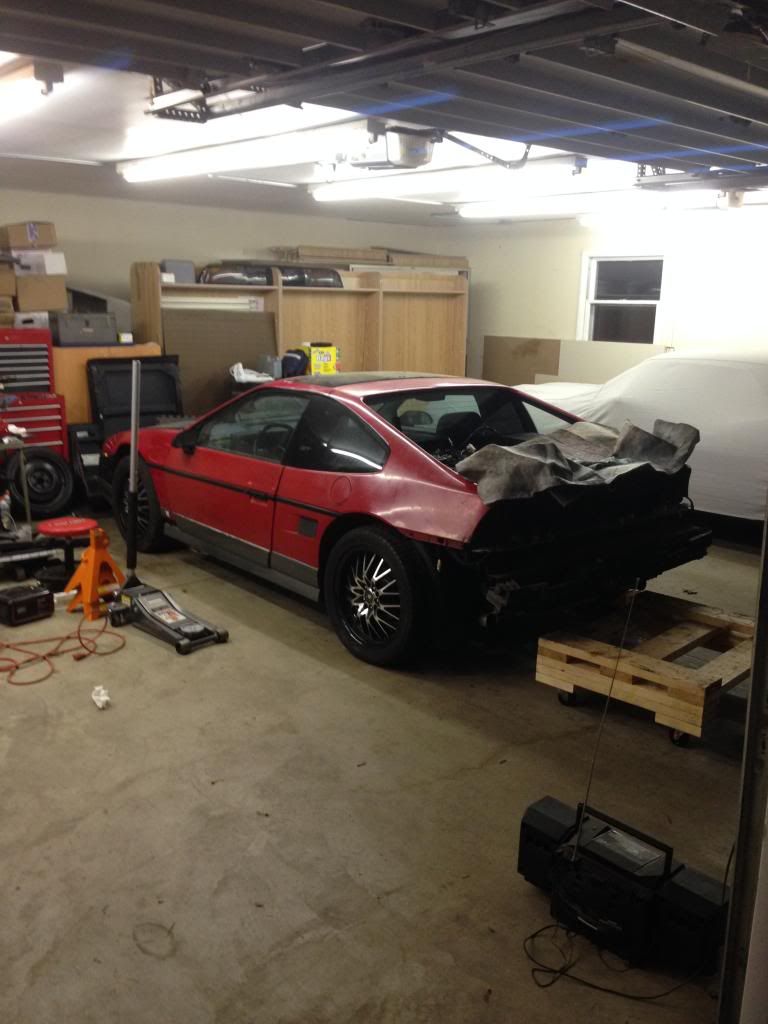
I’m going from this amazing spacious garage at school
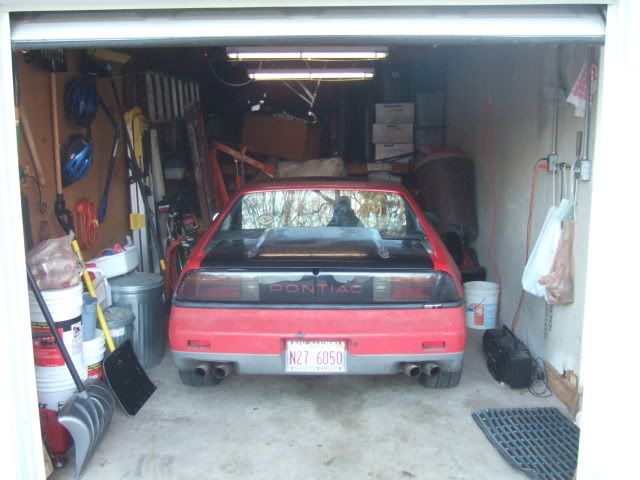


To this garage, I was spoiled at my last place.
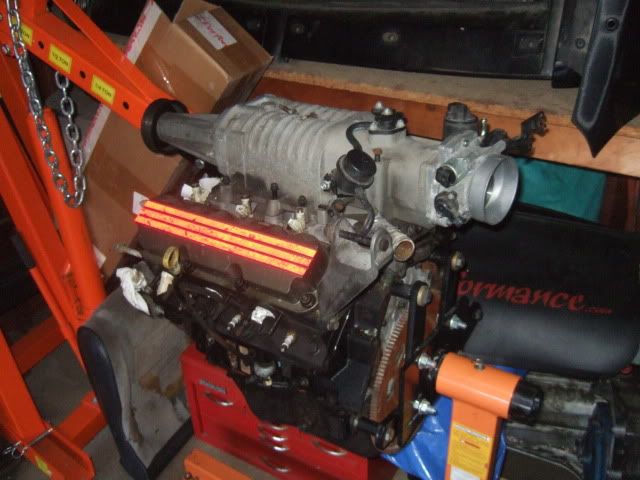


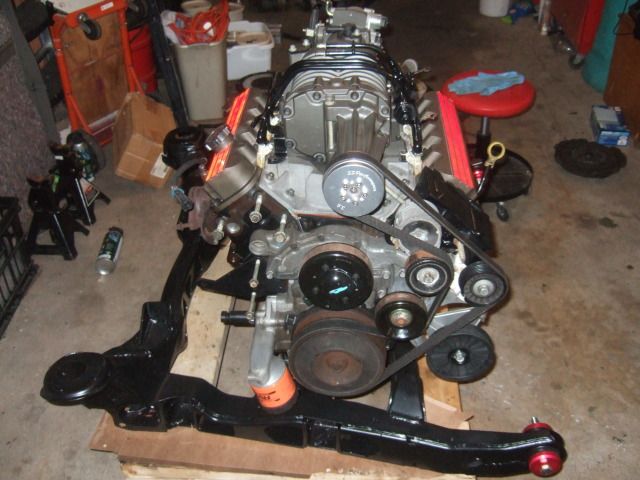
Donor engine waiting to be installed

Misc. swap parts:
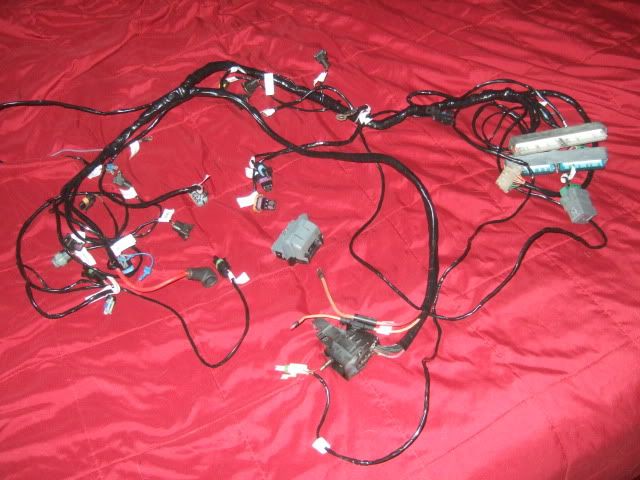


Phonedawgz engine
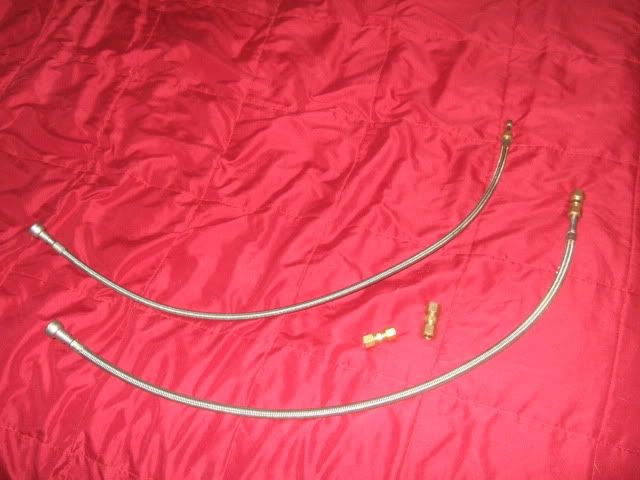


Fuel lines to connect the L67 fuel rail to the Fiero's fuel lines.
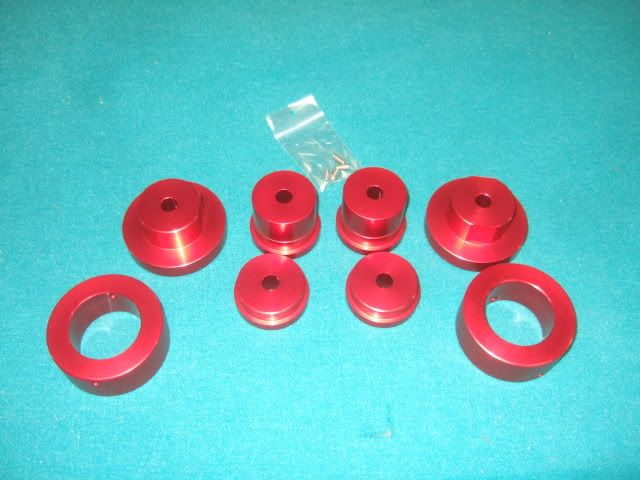


Aluminum rear cradle bushings
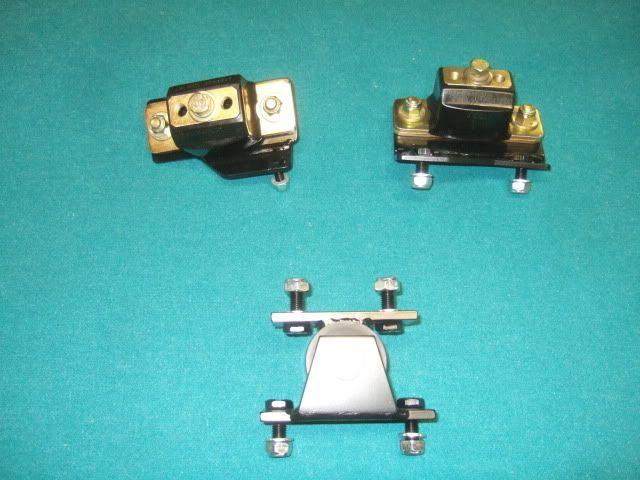


Poly transmission and engine mounts
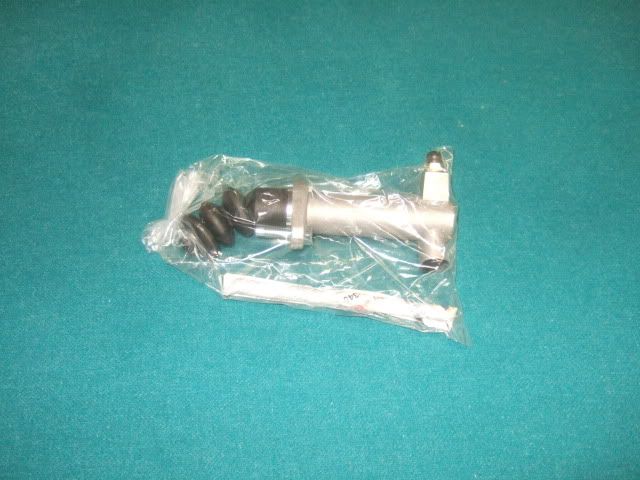


New slave cylinder
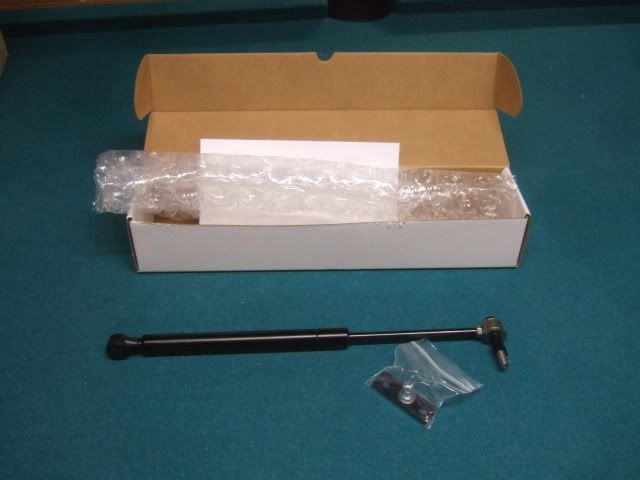


Rear decklid shock kit.
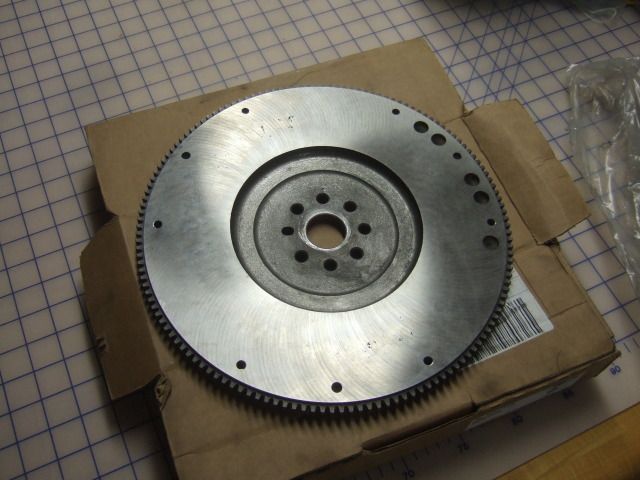


Cut and balanced flywheel
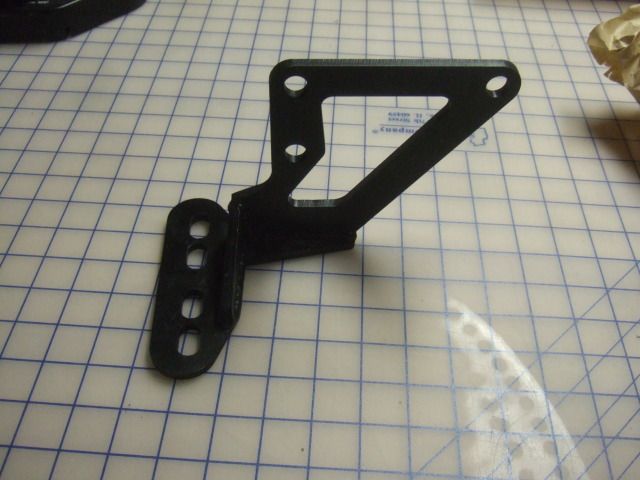


Engine mount
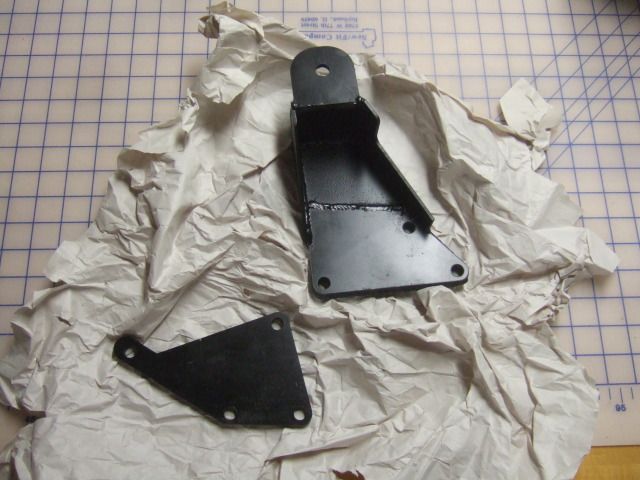


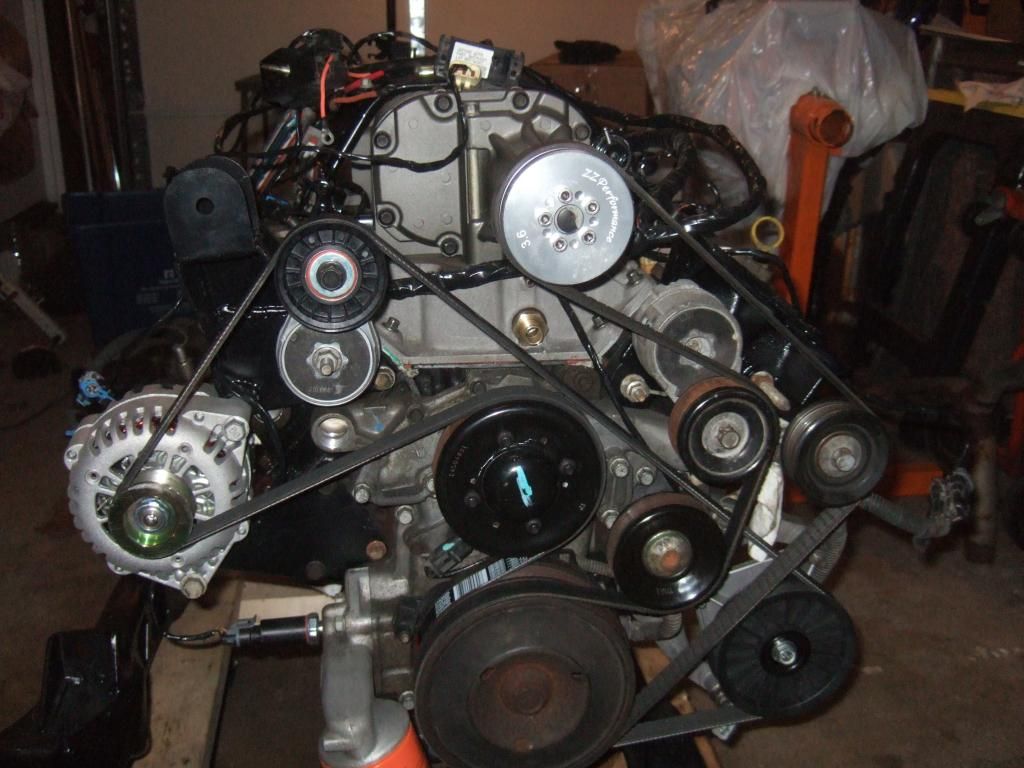
Low mount alternator kit

To give an idea of where I started with my Fiero L67 swap here are pictures from the first Fiero I intended to use in the swap.
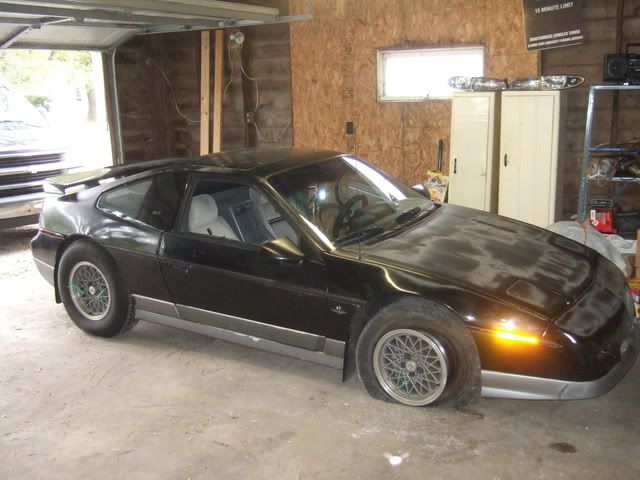


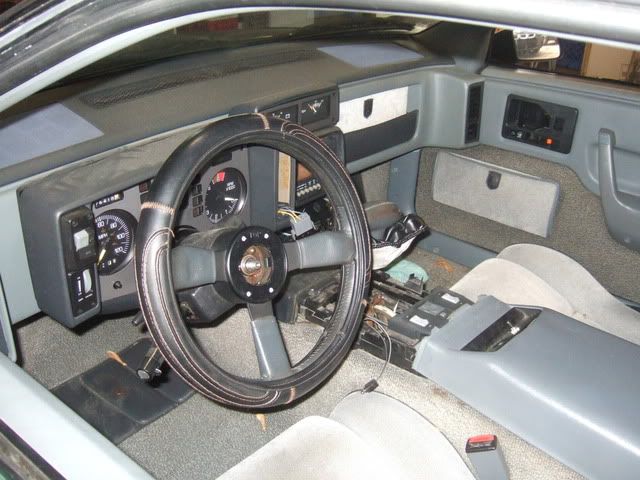
This is how the car looked when I picked it up. It was in rough shape as it had been sitting for a bit and had 176k miles on it. The original owner said it just needed a new ignition switch to get the car running. That was partially true. I don’t really know what happened, but somehow the engine mount sheared in half, the harmonic balancer wore out and caused the engine to run like crap. The engine would start and run but would die if I didn’t keep on the gas. The interior was in remarkably nice shape for its age and the mileage.


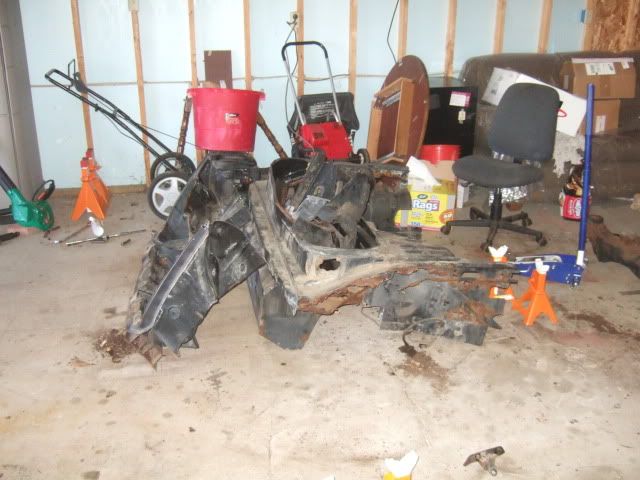
Unfortunately once I removed the engine I realized the rust damage on the Fiero was beyond my capabilities to fix.
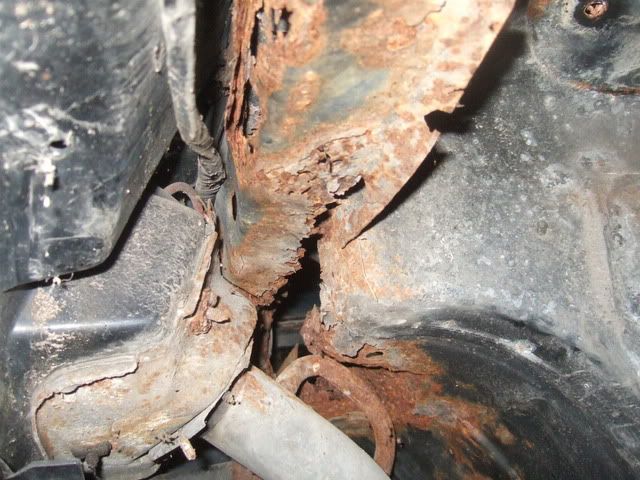


This is the driver’s side rear frame rail that was pretty well rusted away.
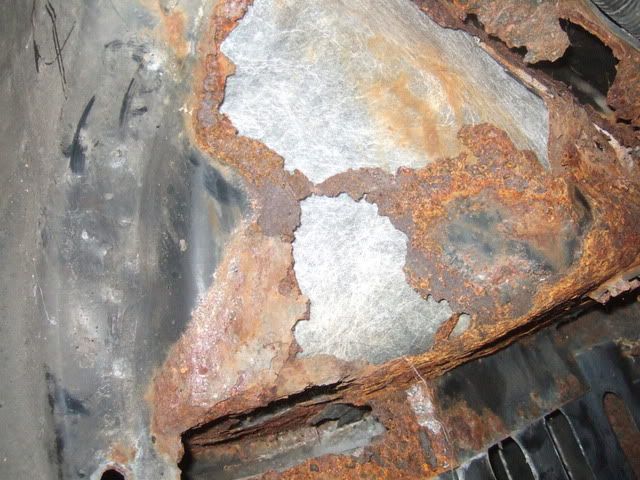


The trunk was pretty well rusted away at the corners as well.

This is what led me to buy my current Fiero to build up, lower mileage, less and more manageable rust damage. I’ve removed the majority of the parts from my first Fiero to save for my current build and to save usable parts from the scrapper

I was able to finally send the junk Fiero to the scrapyard.
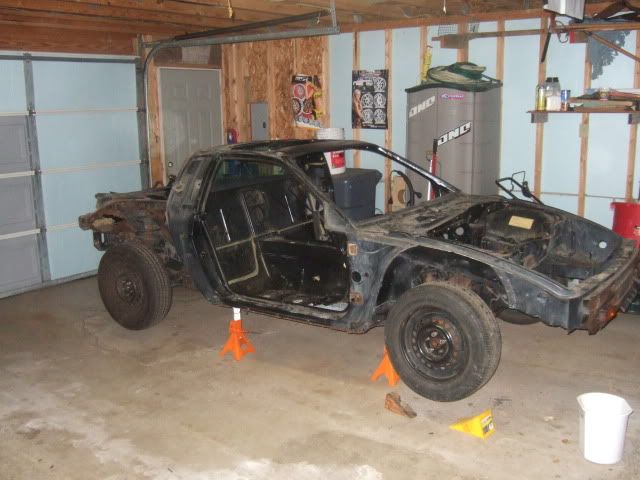


Before
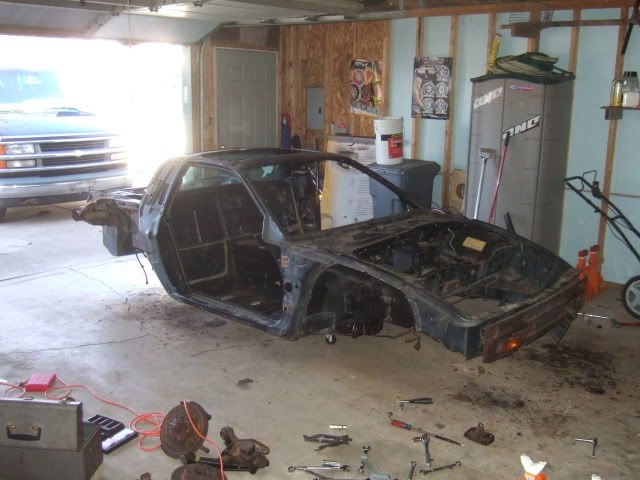


After
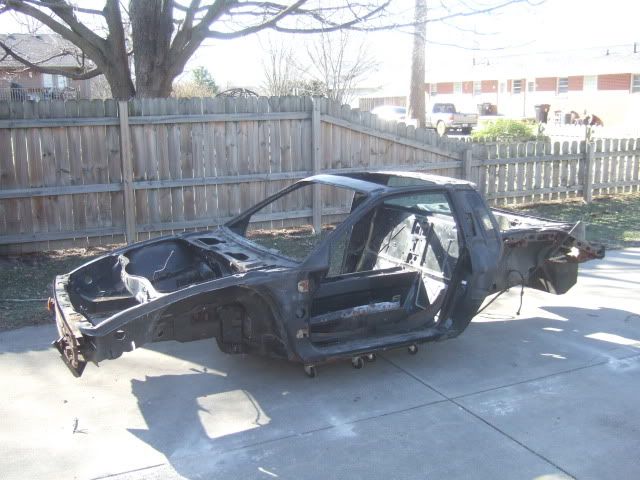


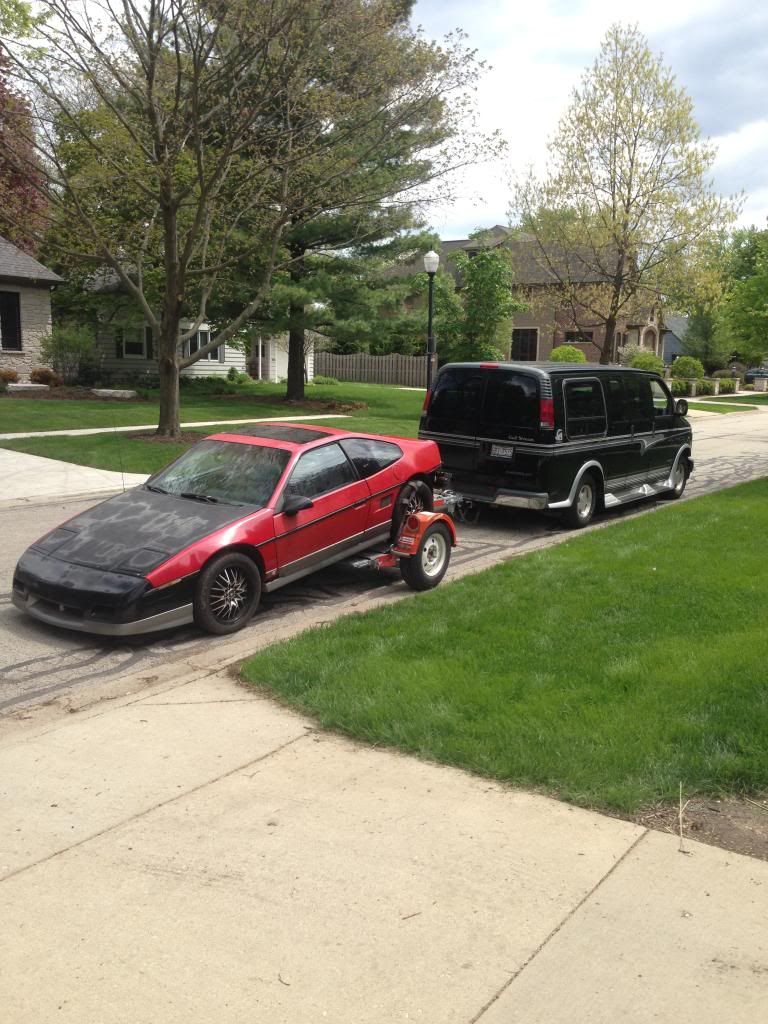
Junkyard wouldn't pick up the car without wheels so I had to improvise to get it there.
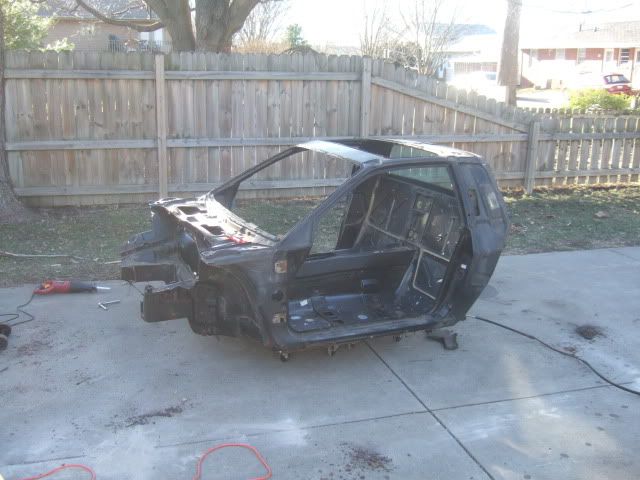


I installed a newer headlight harness. I had to solder connectors in on the old one and must have mismatched a few wires (one connector alone had 3 identical red wires) as the headlights wouldn't pop up and I had parasitic draw. Now one headlight pops up, the other one I believe the motor/relay is shot. Progress none the less.
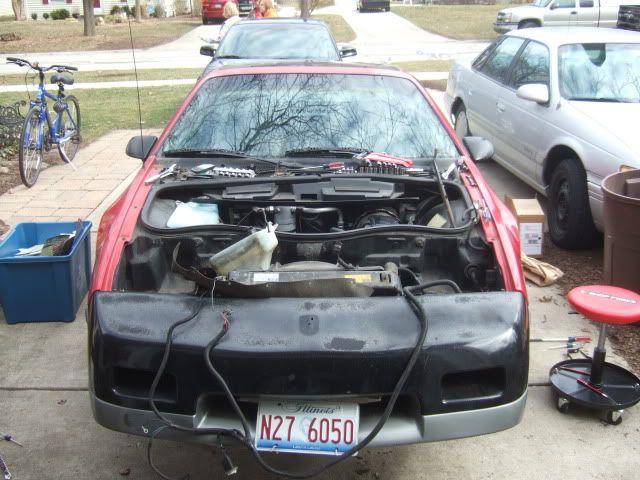
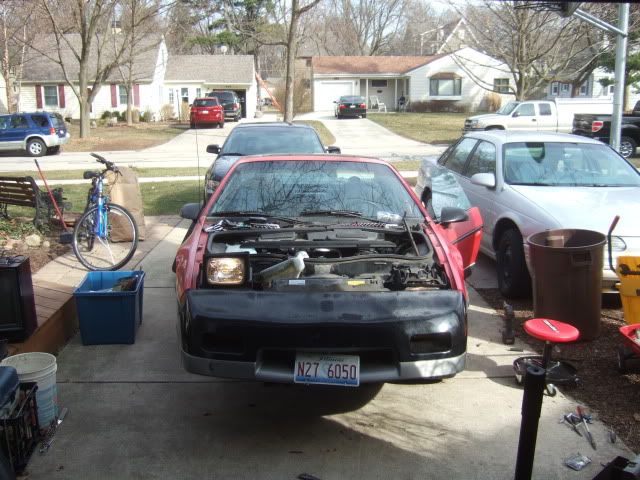
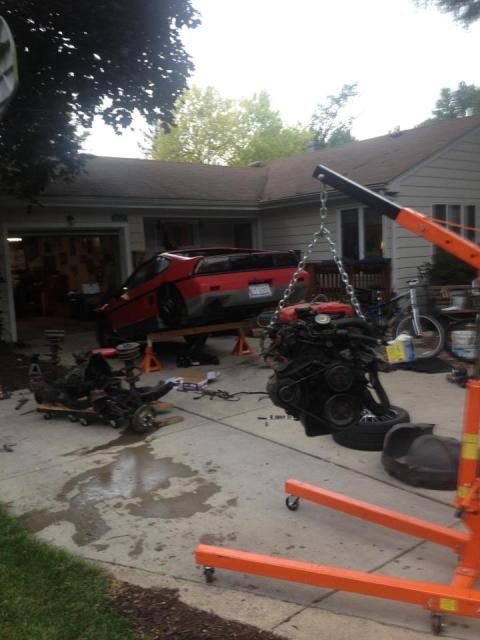


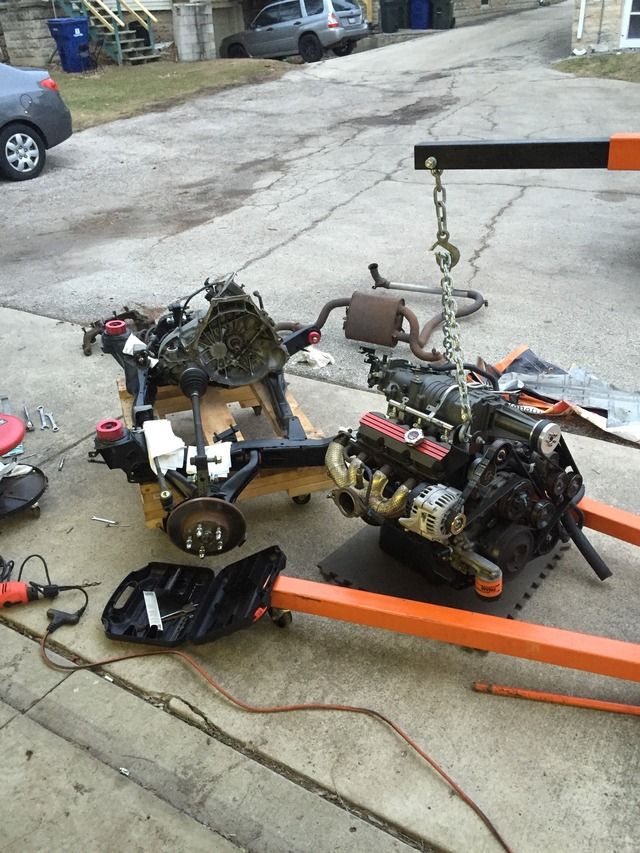
The tired old 2.8 V6 is out
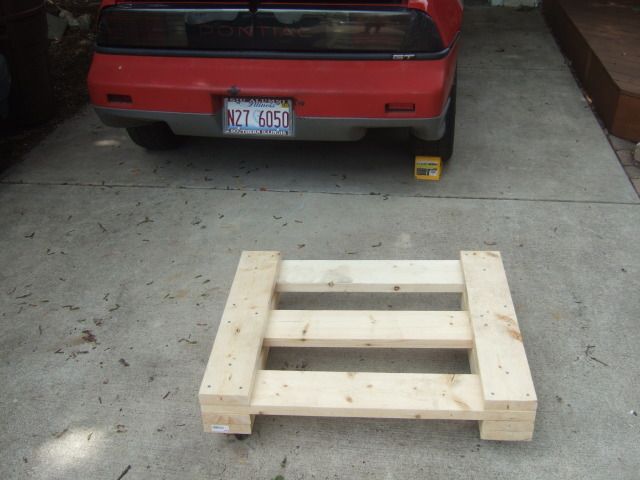


Built an engine cradle dolly to help with the engine swap
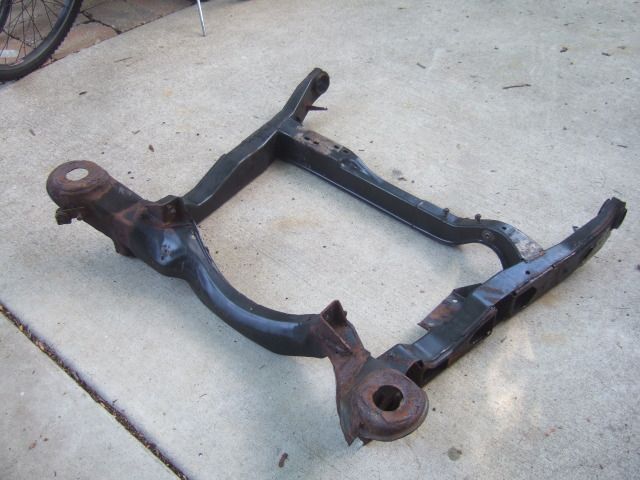


The old engine cradle after everything is removed
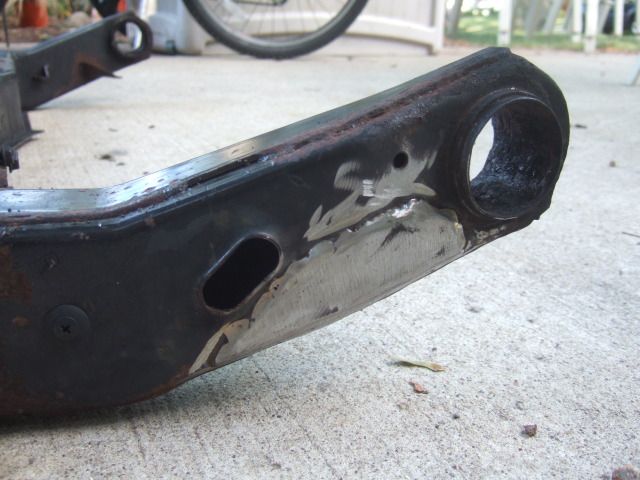


A shop patched a rusted spot before the cradle got powder coated.
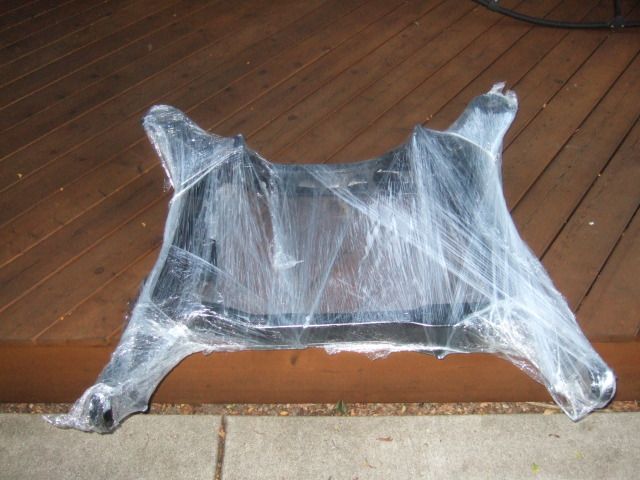


Gift wrapped goodness back from powder coating
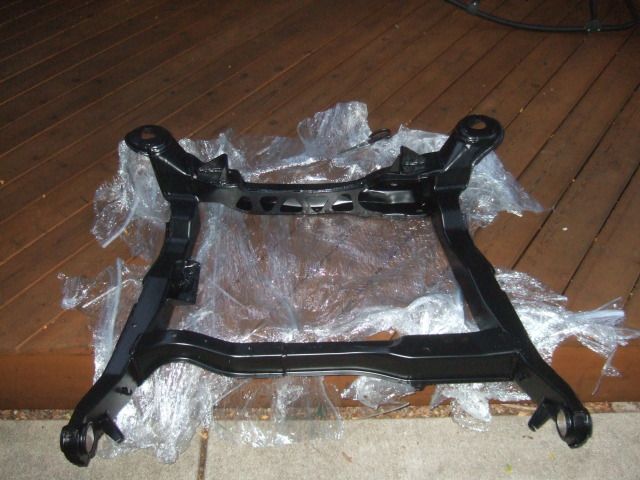


Engine cradle unwrapped
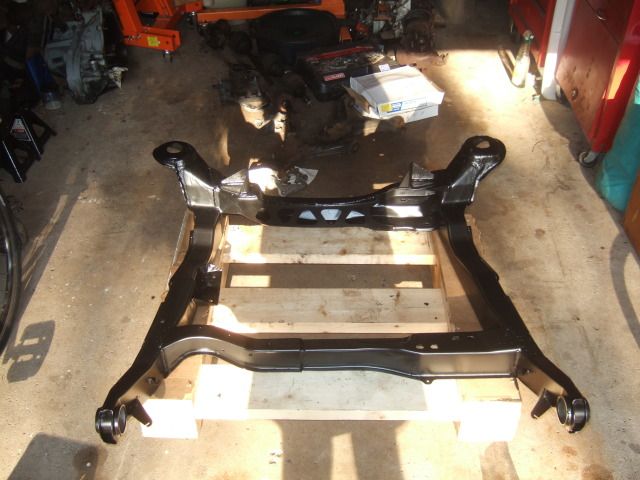


Engine cradle on the dolly awaiting the engine/trans mounts....

Here are some more pictures...
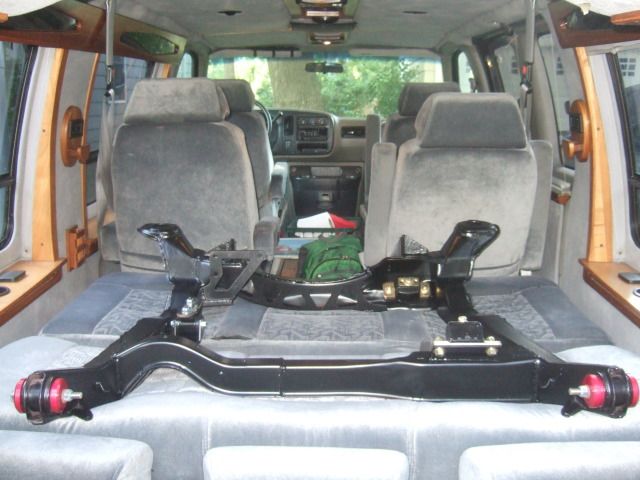


The engine cradle with the mounts test fitted.
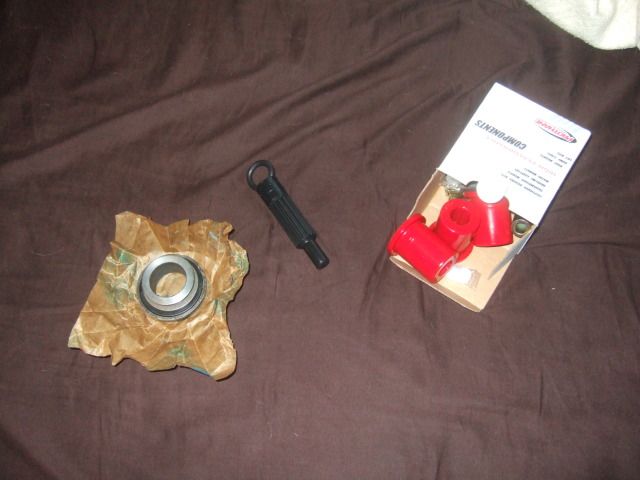


Trans release bearing and poly rear lower control arm bushings.
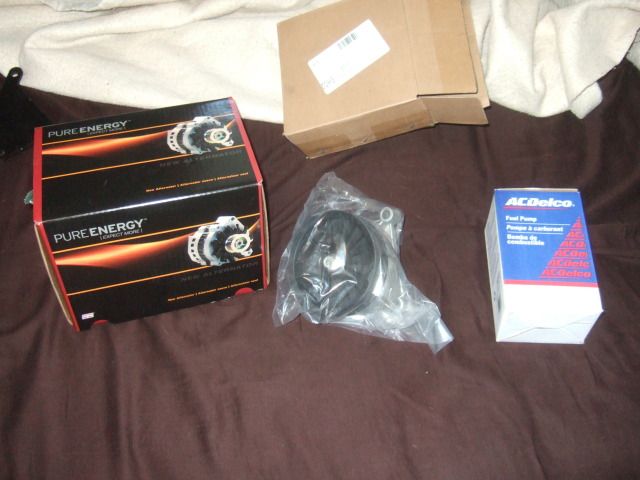


105 amp alternator, a/c delete pulley and new AC Delco EP 381 fuel pump.
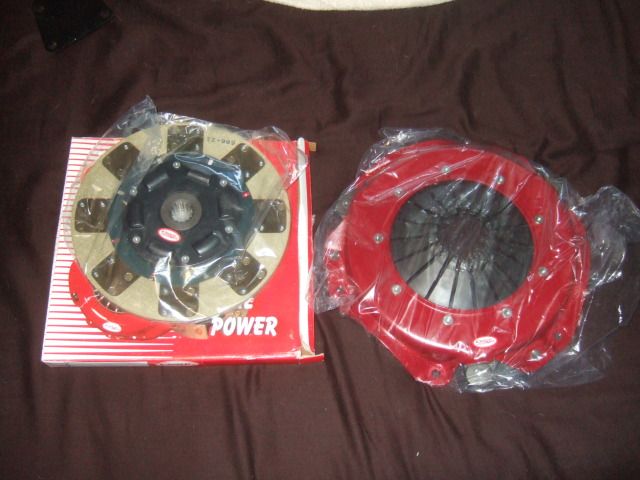


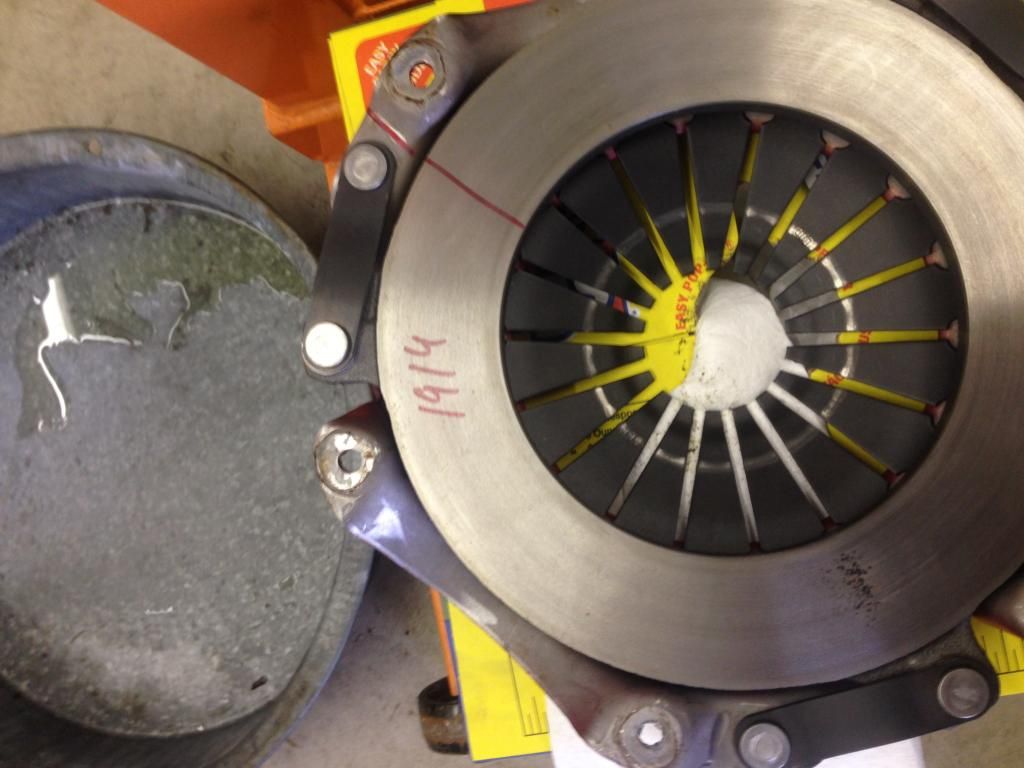
Clutch Net pressure plate and clutch disc.
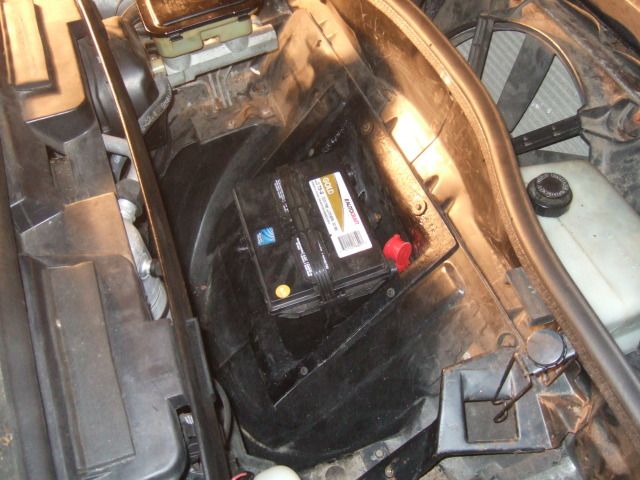


Front mount battery installed
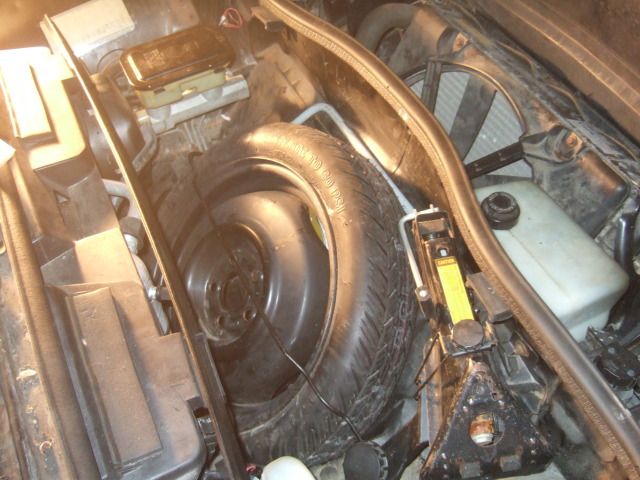


I found a Fiero in a local junkyard (1984) and it had the full spare tire set up on it as well as a few other nice items. The spare tire jack/mount on the 84's are a bit different than the later years but at least I now I have the spare tire to complete the battery install.
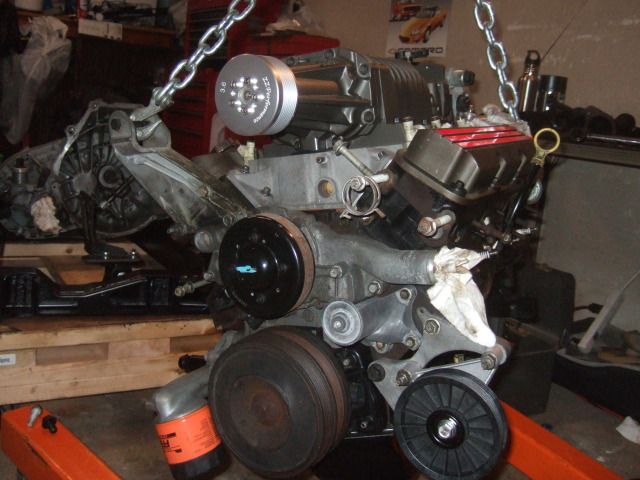
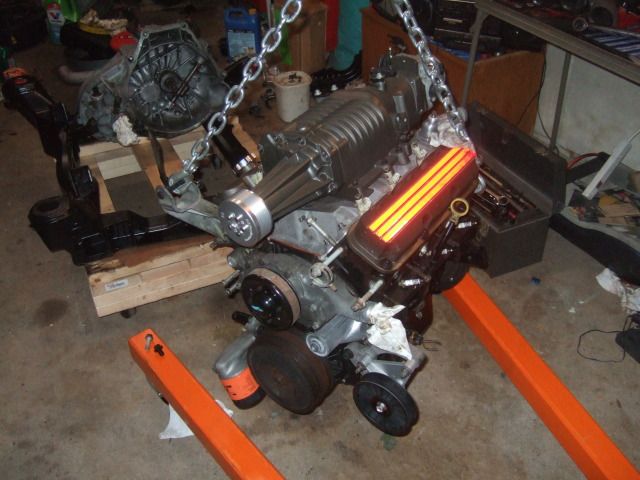
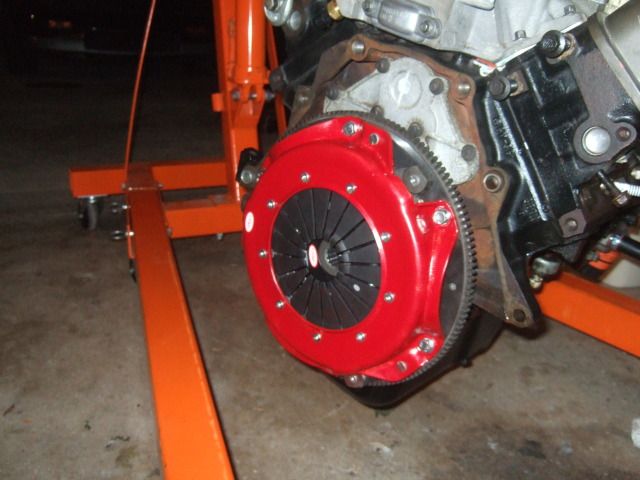
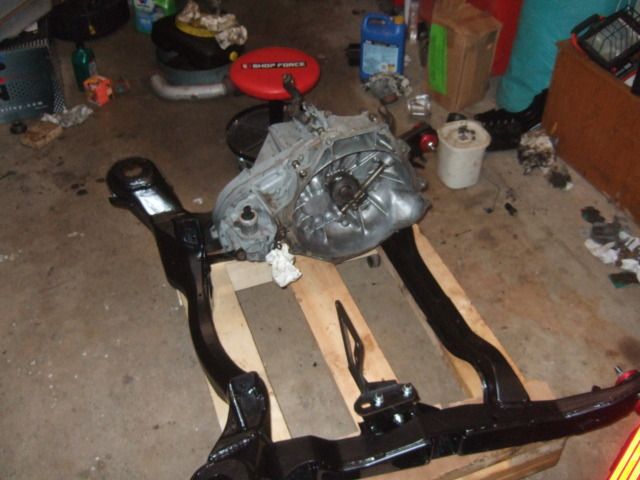
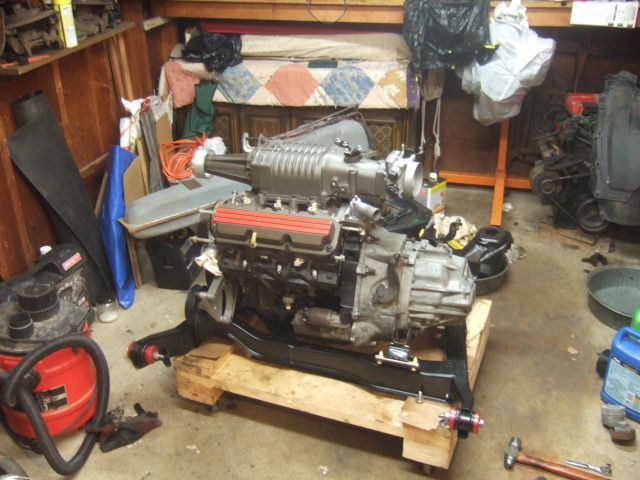


I modified the ignition coil bracket to fit in the engine bay.

Before:
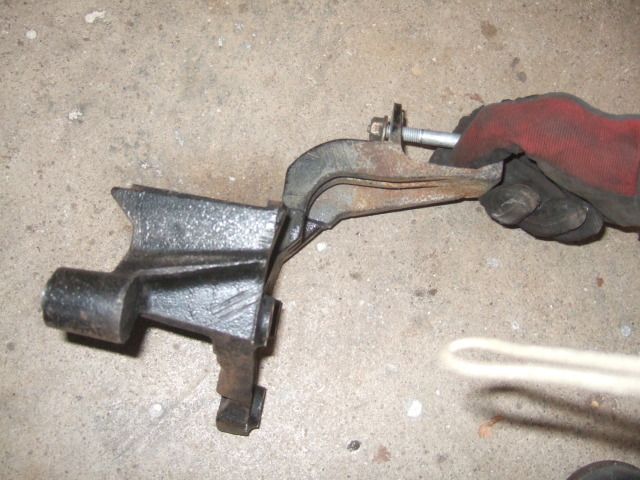

After:
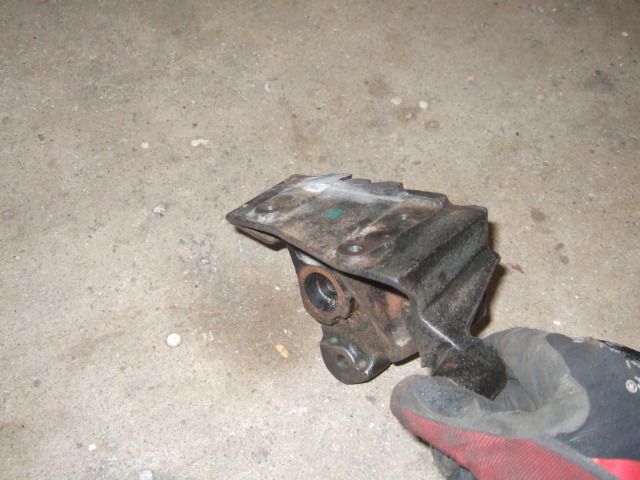


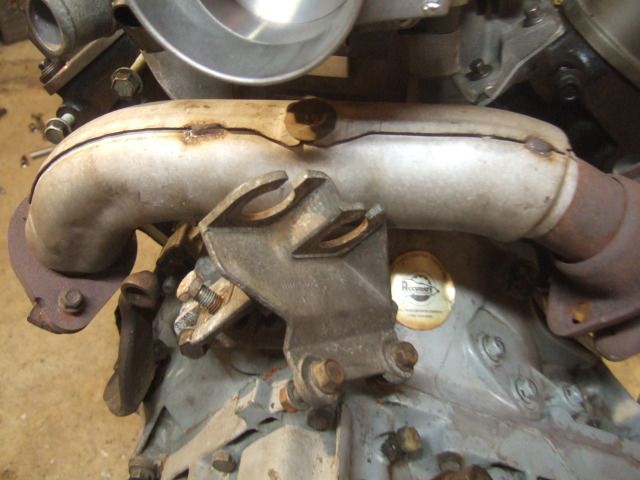
The shifter bracket interferes with the crossover pipe as expected

Painted the gas tank with POR-15 and installed a new fuel pump.

Pictures:
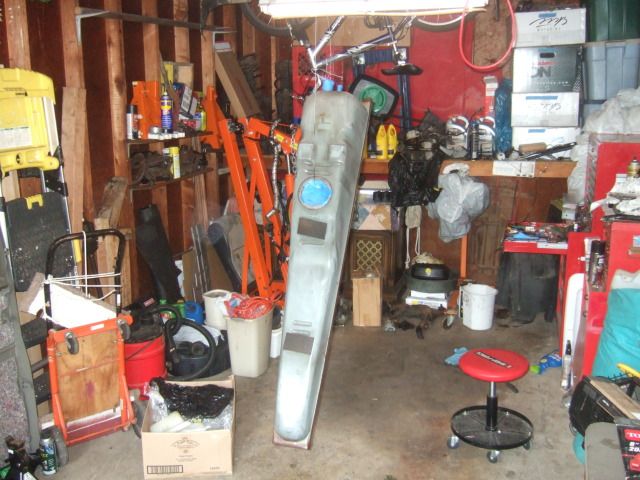


Gas tank being prepped for paint.
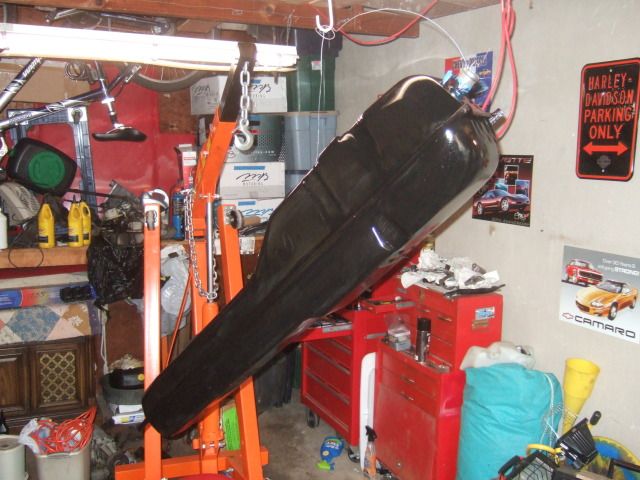


Gas tank after 1 coat of paint.
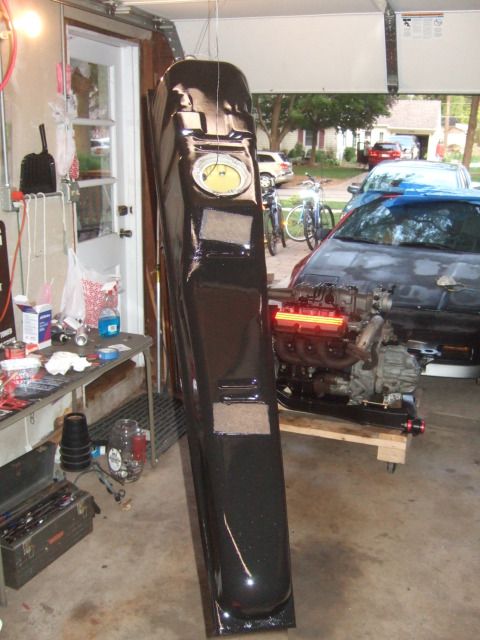


Gas tank after 3 coats of POR-15.
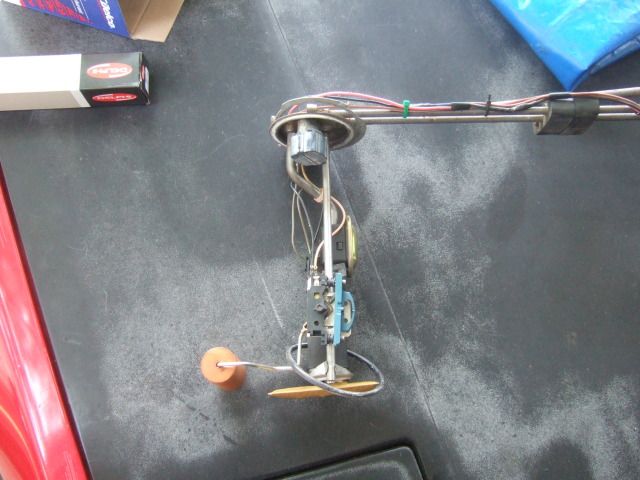


Old fuel pump
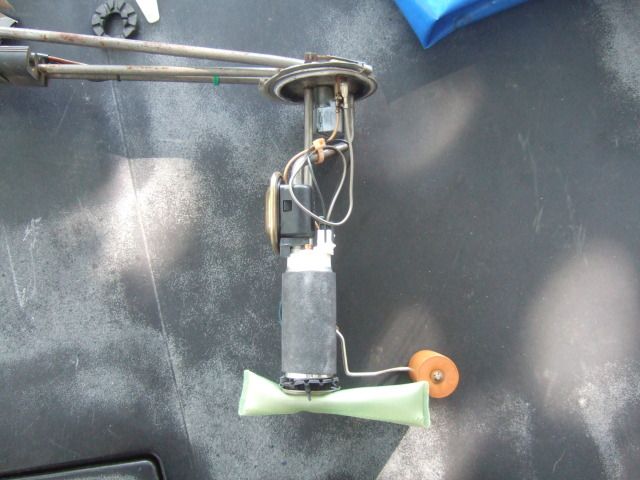


New fuel pump and strainer installed
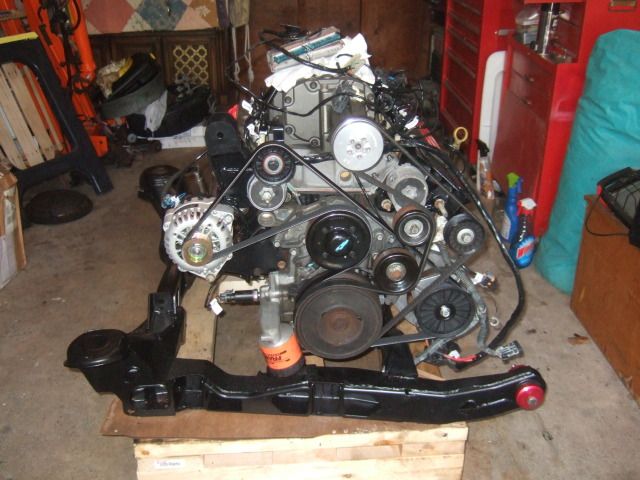


Found and routed an accessory belt that fit with the low mount alternator bracket
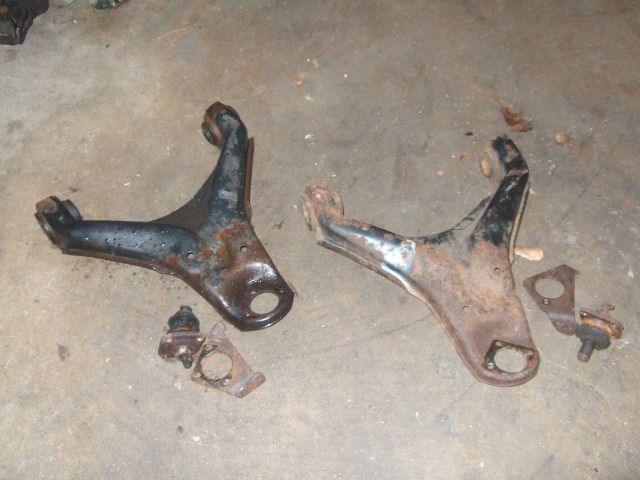


Stripped the rear lower control arms to be powder coated eventually
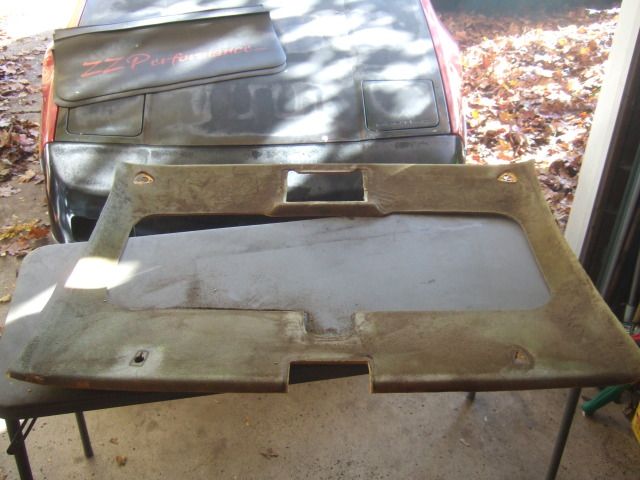


The headliner board being stripped of the old adhesive.
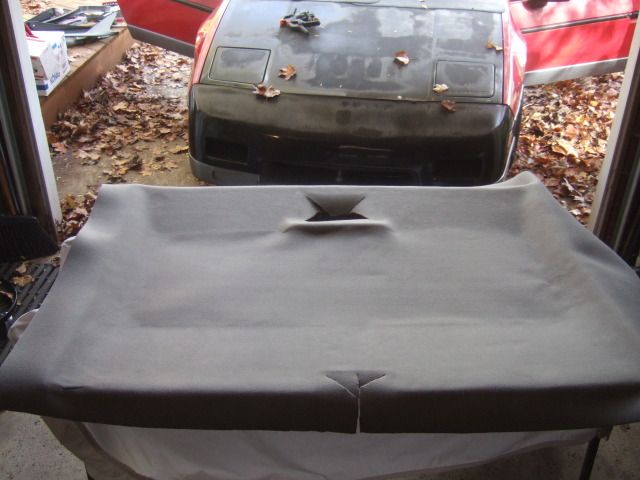


Starting to trim to fit the board.
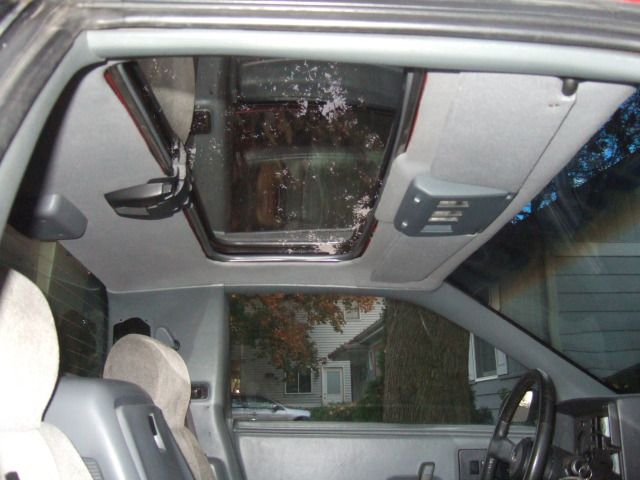


If you look close you can see the red from the underside of the roof showing through...oops.


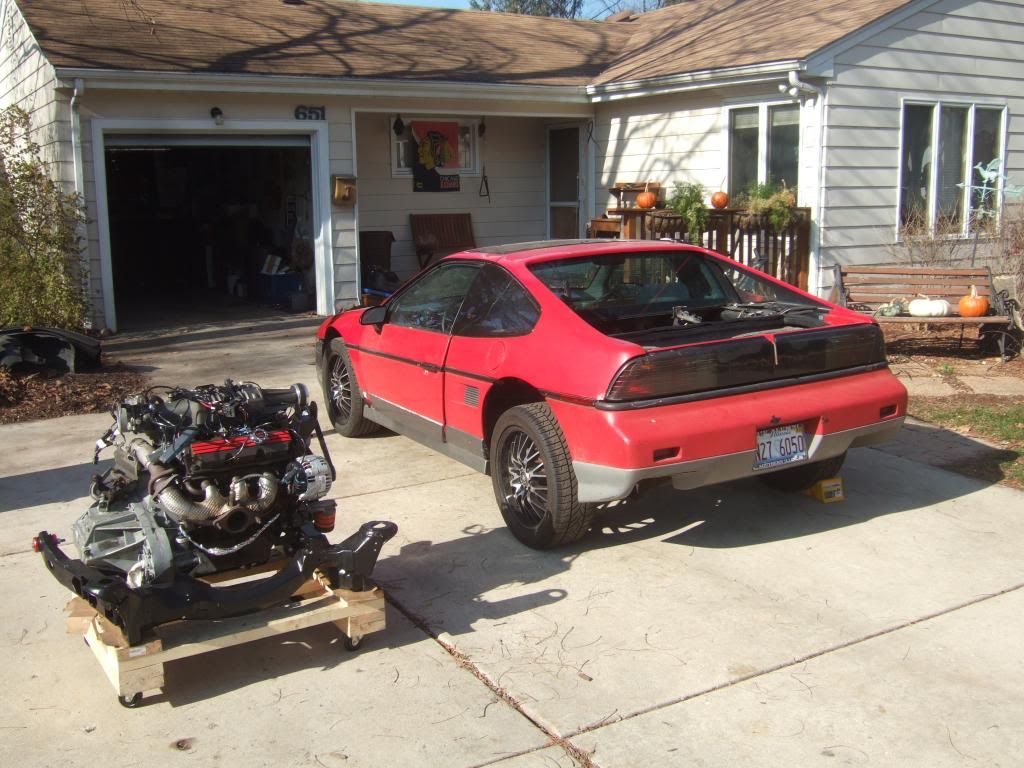
Tapped the lower intake to attach heater hose


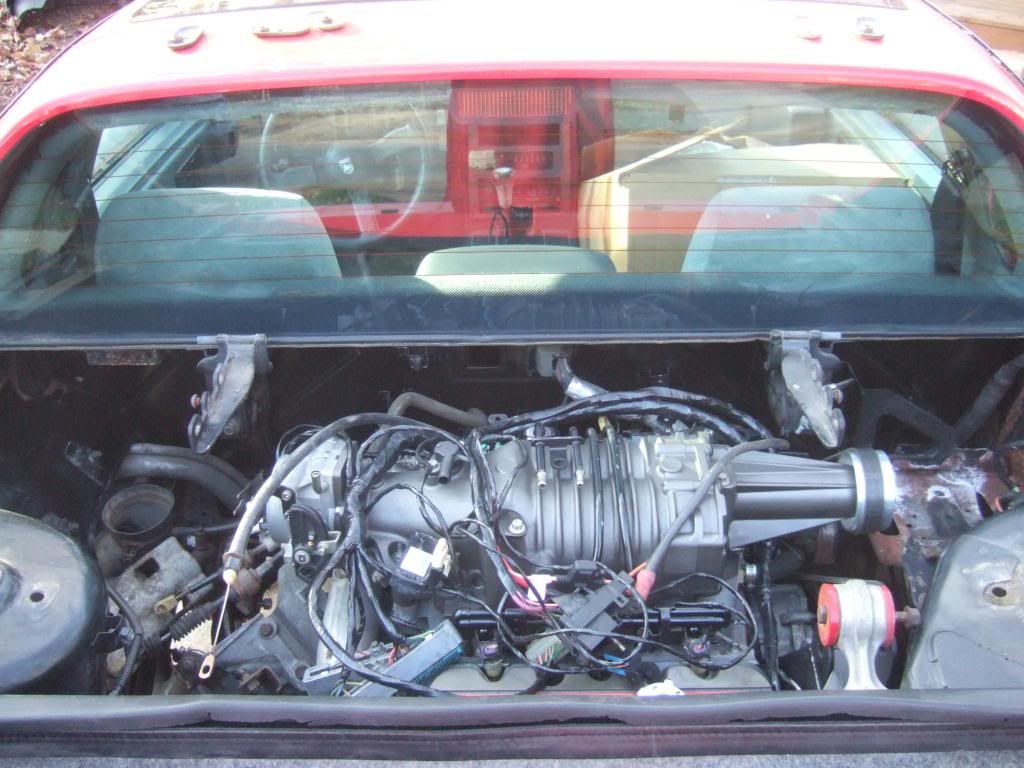
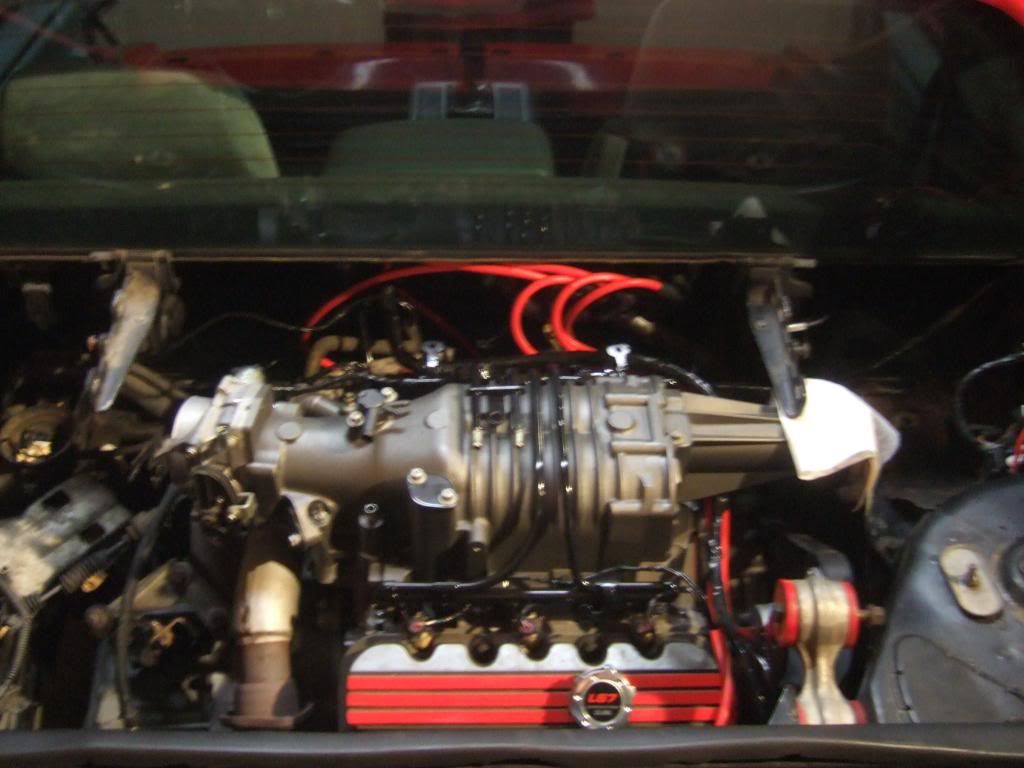
Finally installed the engine
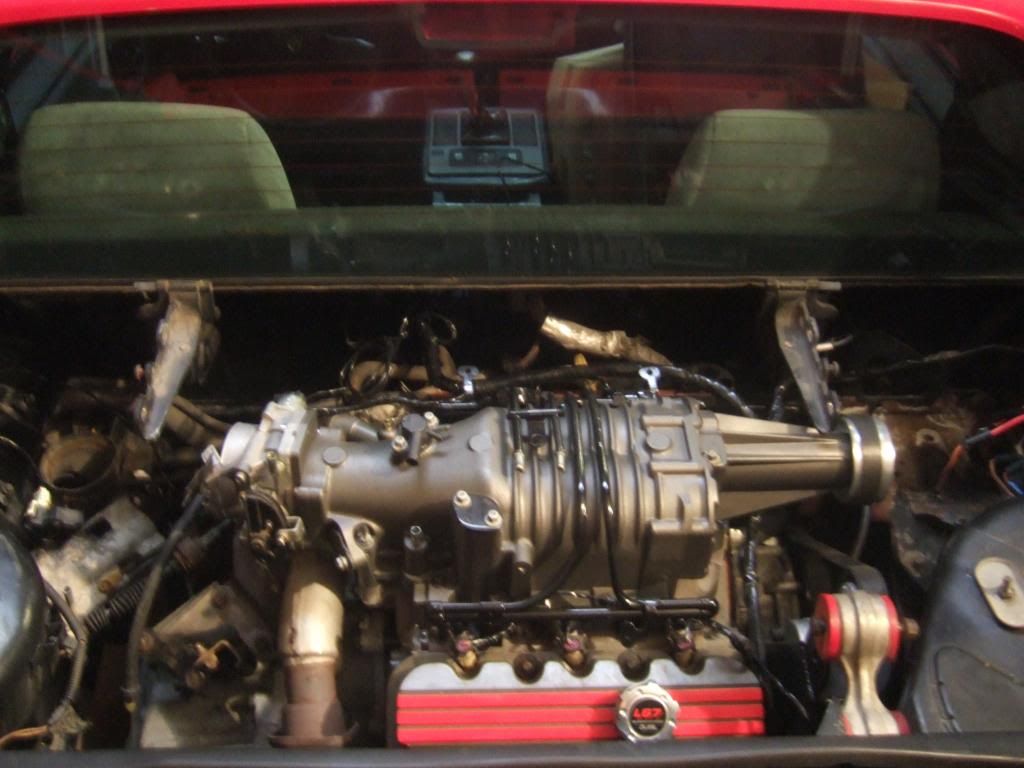


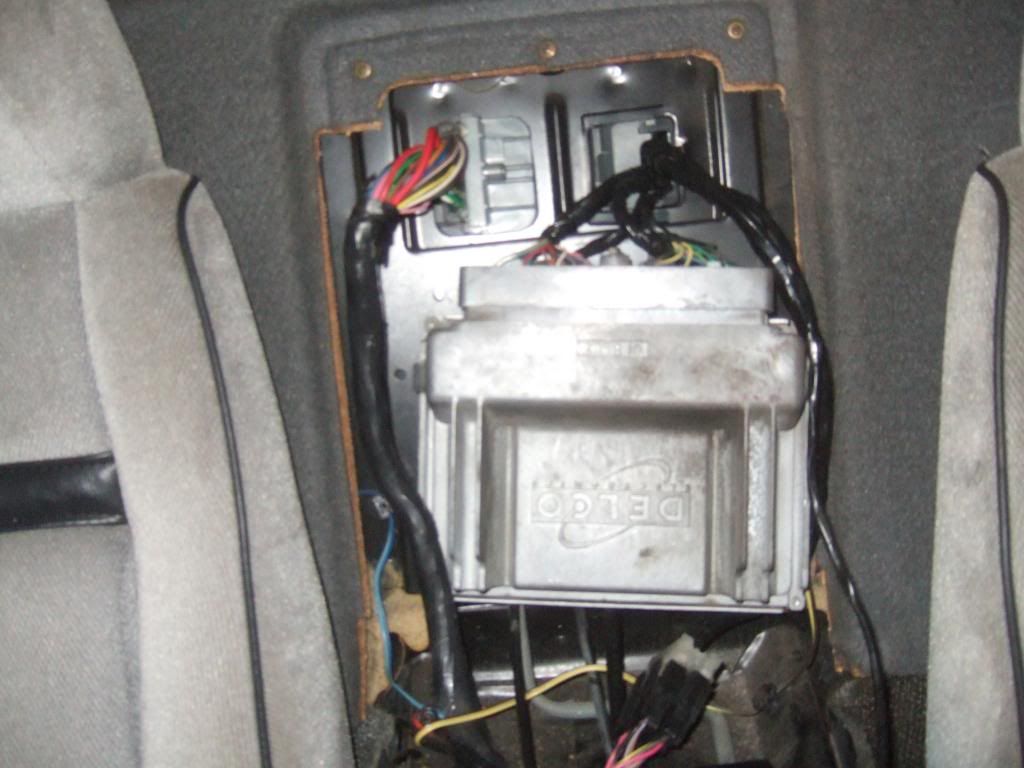
Engine harness properly routed
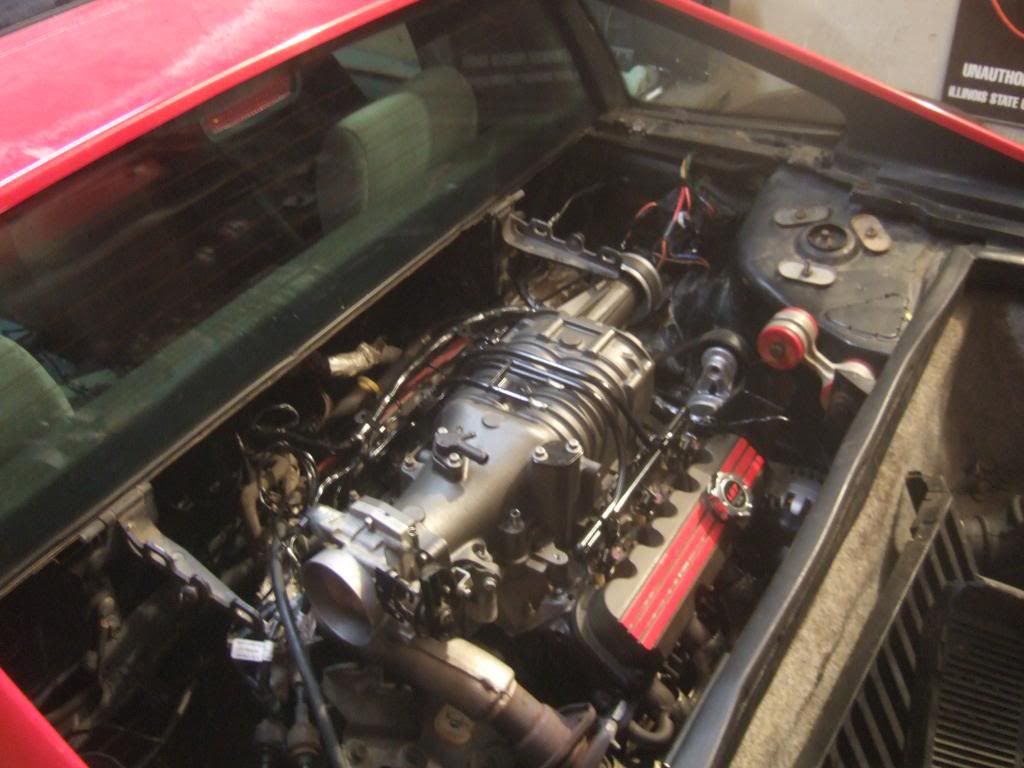


Ignition coil bracket and spark plug wires routed
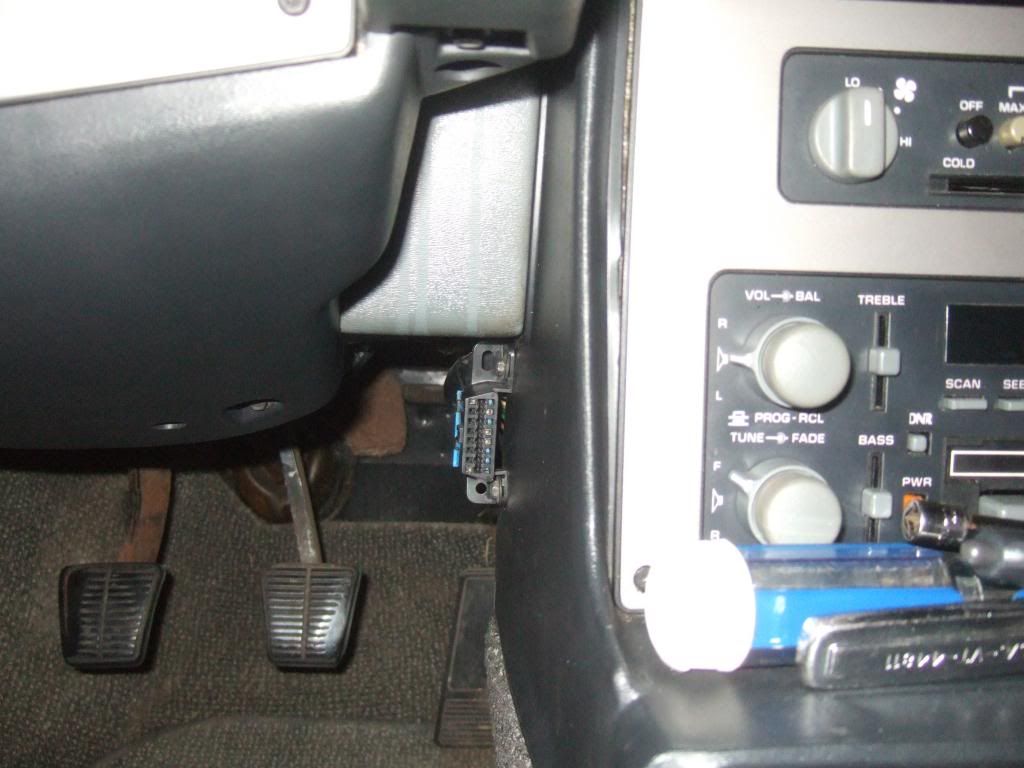


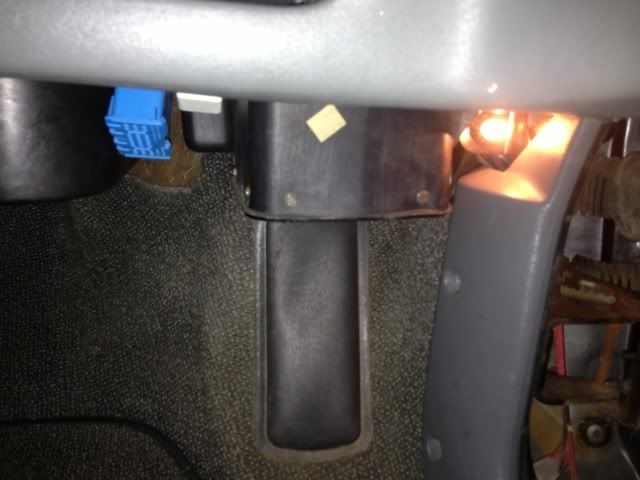
OBDII connector mounted under the dash


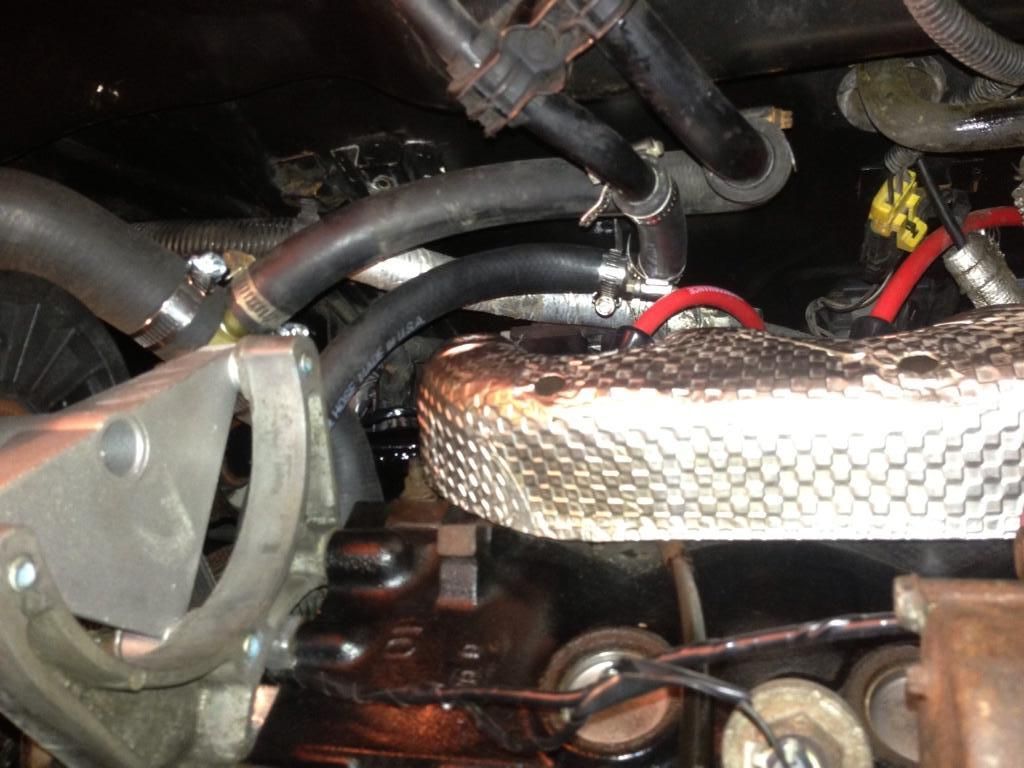
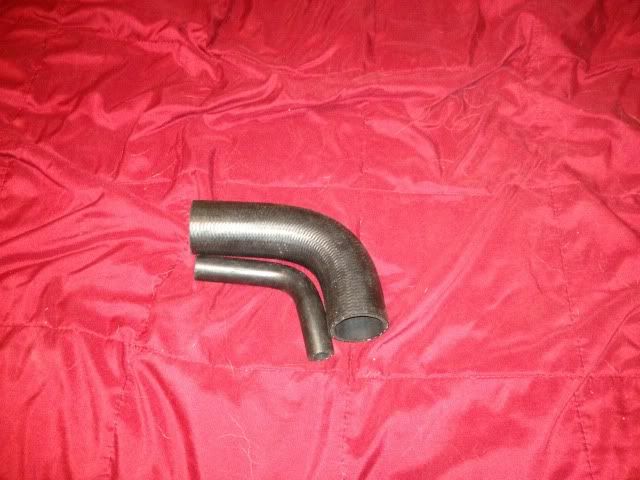
Heater line hose adapters routed
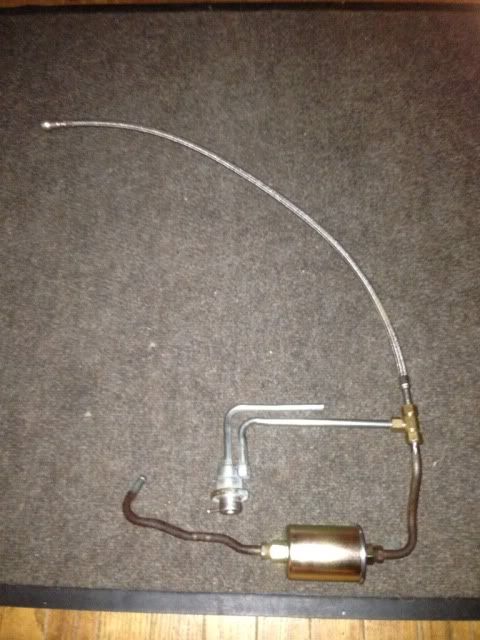


This is my returnless fuel line routing and set up
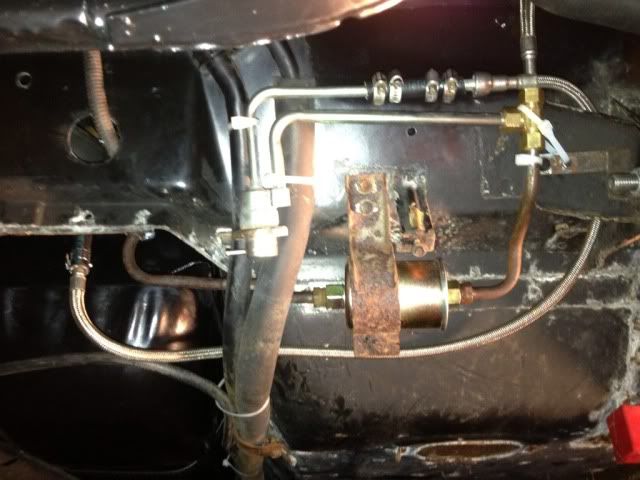


Mounted on the car


Modified L32 fuel rail installed
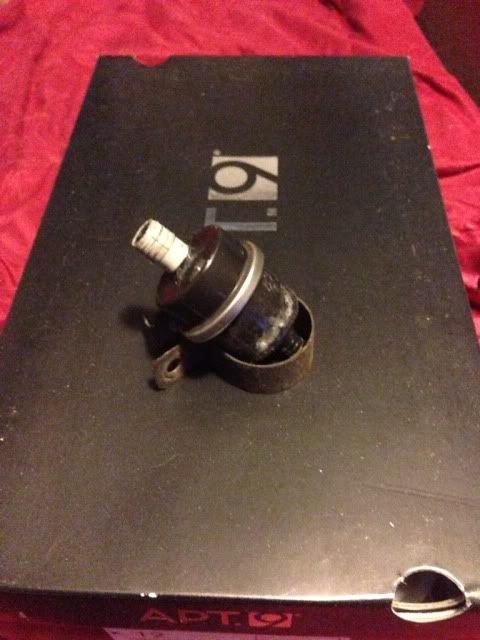


Cut the end off of a stock L32 brake check valve to install over the Fiero one. This enabled me to use an L32 style brake hose.
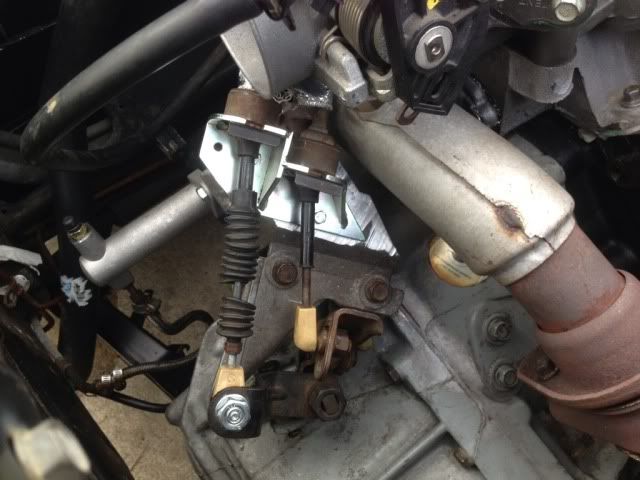


To clear the exhaust crossover, I bought a 4 speed shift bracket replacement from Rodney Dickman. I cut off the original eyelets and shifted it over just enough to clear. So far it works great and I can access all gears (with the engine off….more info on that later)

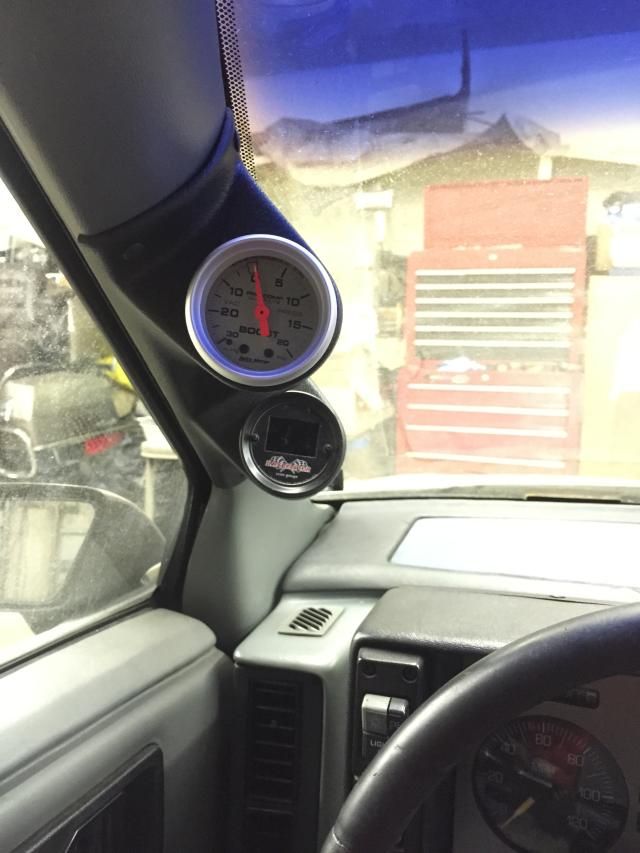
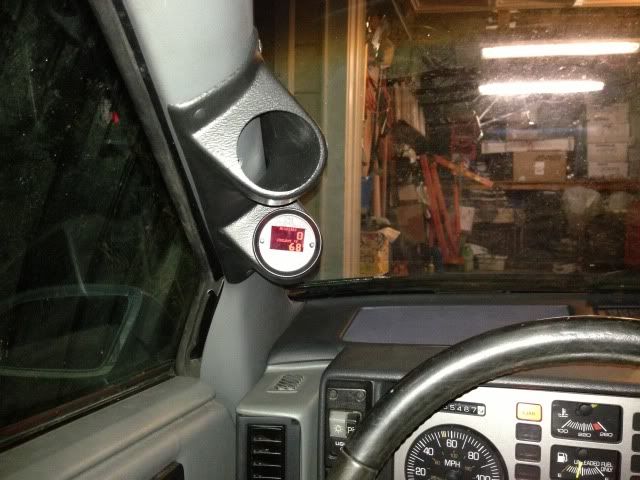
I installed an A-pillar gauge pod, for now I only have the scan gauge, eventually a wideband will fill the extra spot.


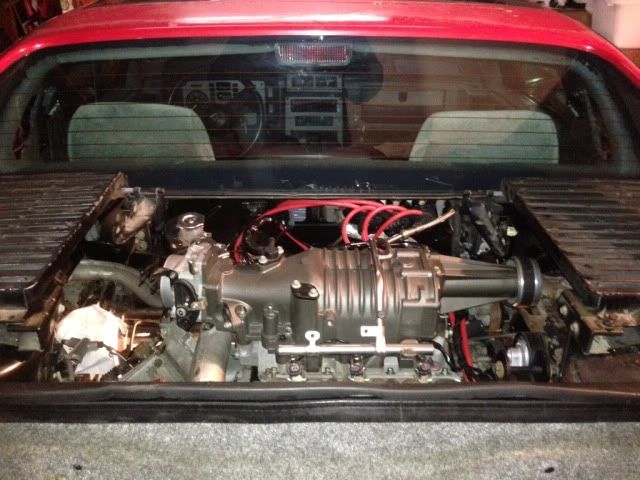
Installed the stock performance setup, car originally came optioned with it.
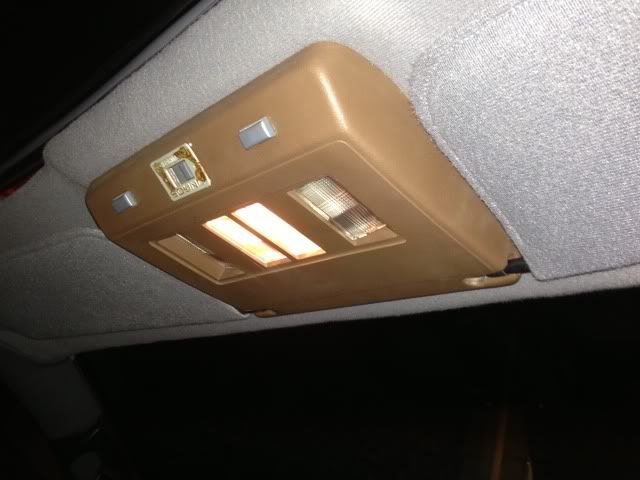


Here is the trim piece. Obviously the color doesn't match but I plan on eventually painting the interior black. Otherwise if I have a spare grey panel I'll try and cut the holes necessary for the bass control, and transfer over the wiring to it.


Here is the bottom of the sub box. I still need to buy the speaker for it, but at least it is installed for now.

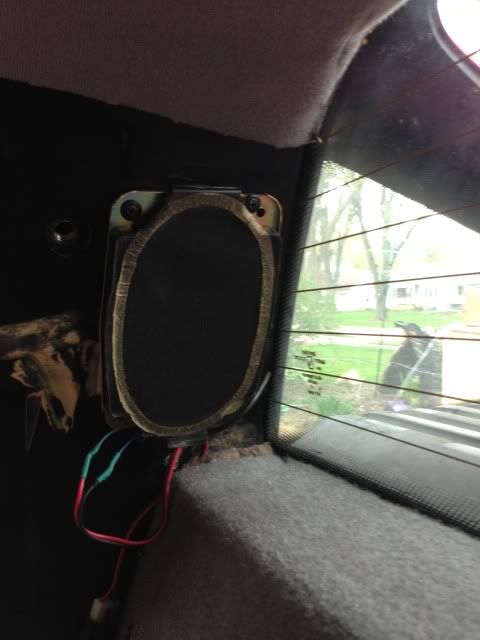
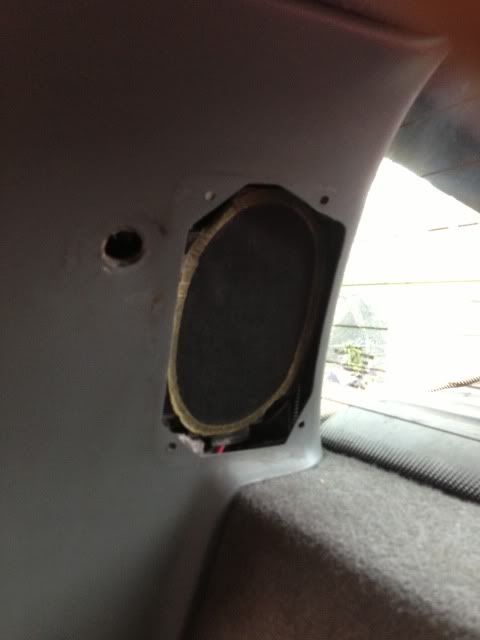
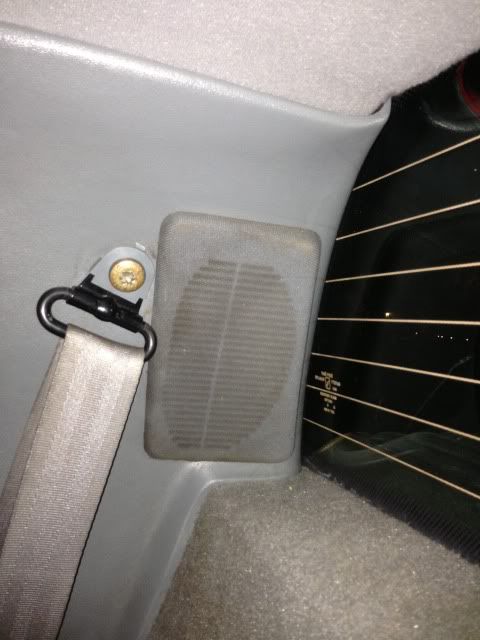
A friend had given me a set of speakers from his 03 Sierra a few months ago seeing if I could find a use for them. As luck would have it they were the same size as the rear speakers for the Fiero. So after a little modifying I was able to mount them and solder in the correct connector I pulled from a junkyard. For no cost to me I now have working rear speakers and have full audio from all speakers, minus the sub of course.


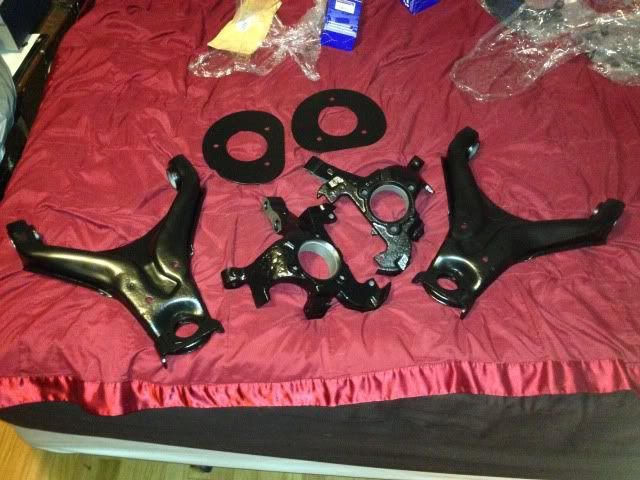
I got the rear control arms, knuckles and spaces plates powder coated.
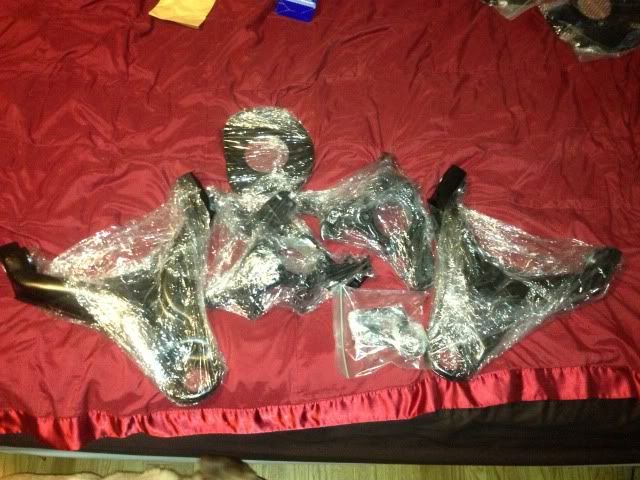


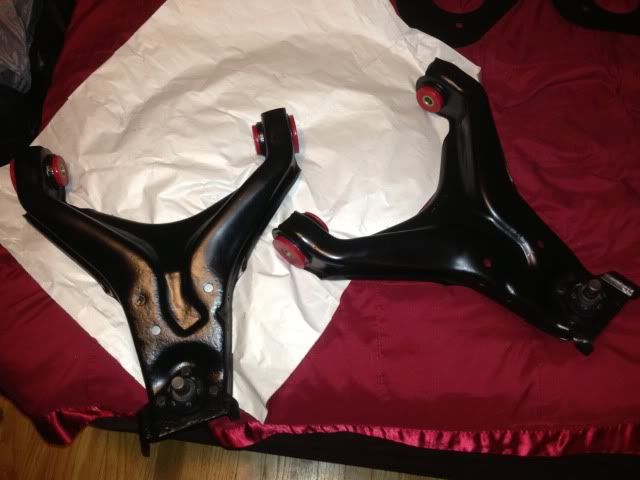
I installed the poly control arm bushings and new ball joints.
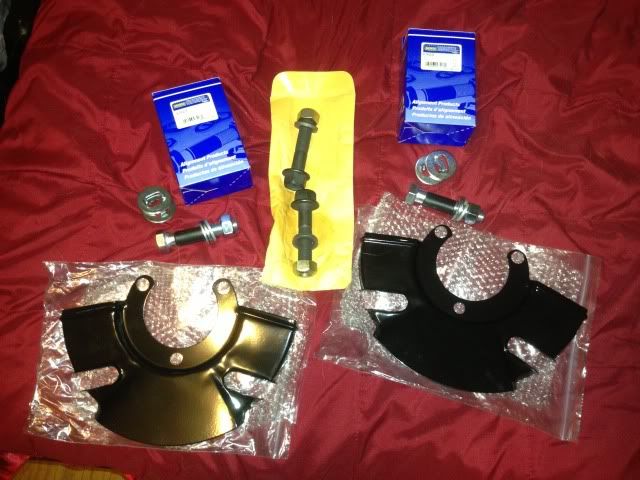


I ordered new brake backing plates, rear strut bolts and camber bolts, new fuel rubber fuel tank hose, as well as the new stainless steel clutch line, too big to post up yet.
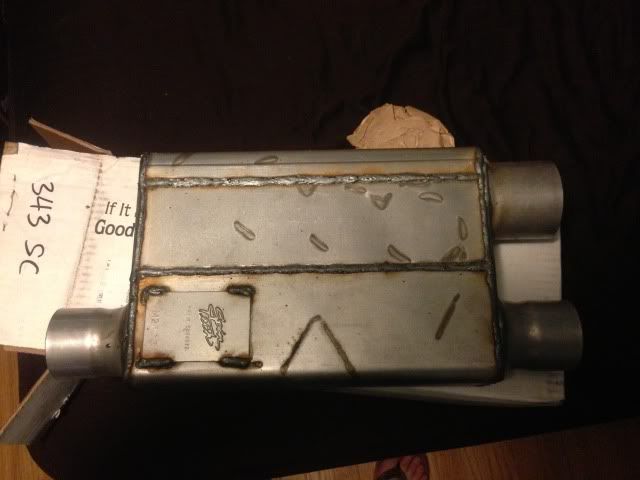


The muffler I’m using is Spintech sport case: 3' inlet and dual 2.5' outlet.

I bought a set of KYB rear struts and built coilovers out of them.
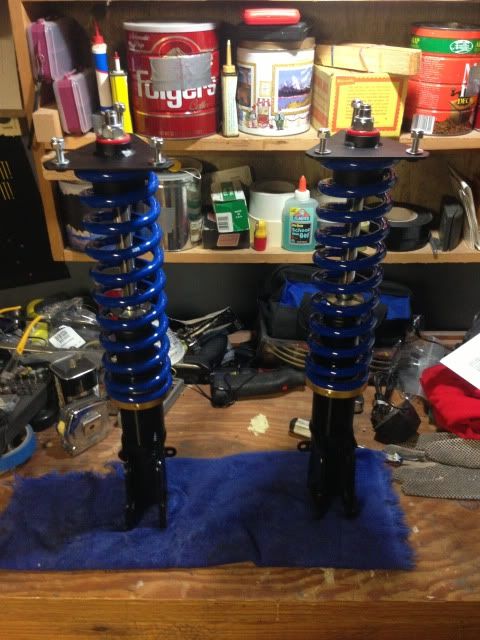


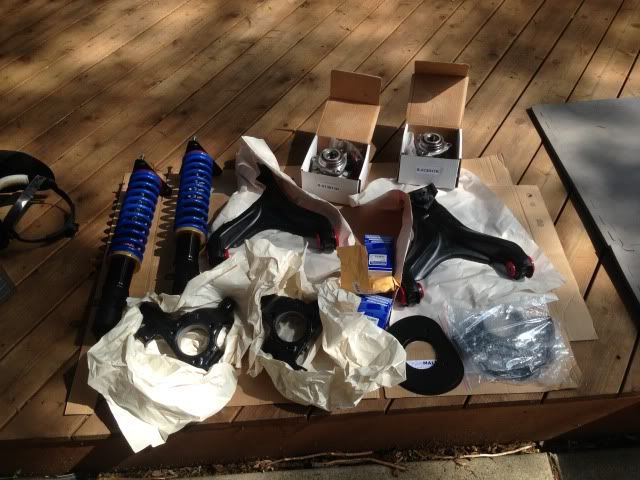
Today I installed all of the rear suspension parts, seen below.


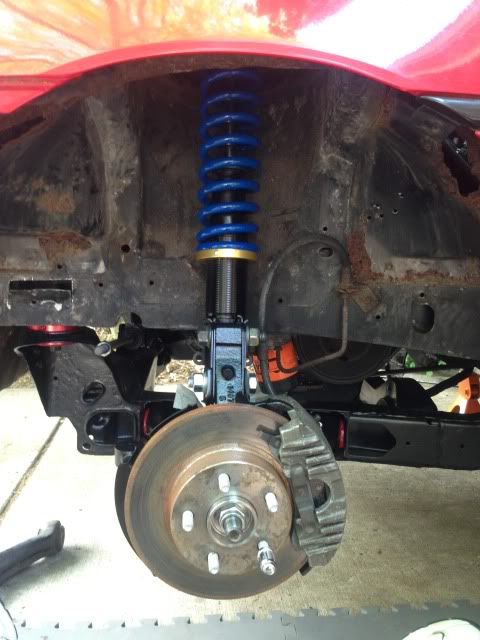
Here is everything installed, you can't see it but theres a new wheel bearing behind the rotor. Rear brake pads/rotors and calipers are new from a year ago, but obviously show some rust from sitting so long.


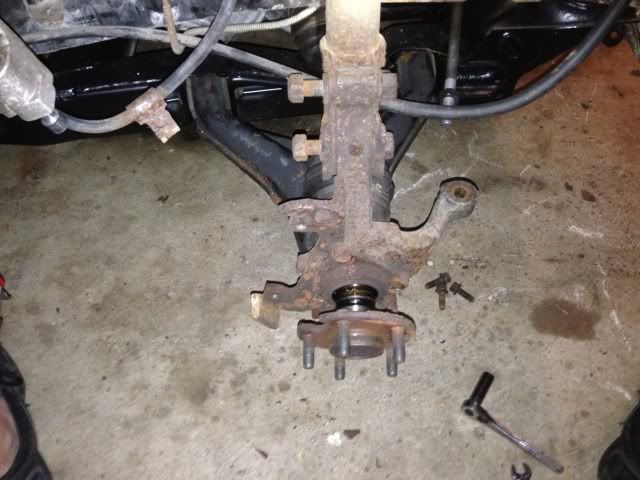
I was debating on whether to install the new wheel bearings since the ones on the car only have 66k miles on them, but I'm glad I did. The front piece of the bearing separated from the rear. I'm sure this was what caused pushing the car in/out of the garage to be difficult.
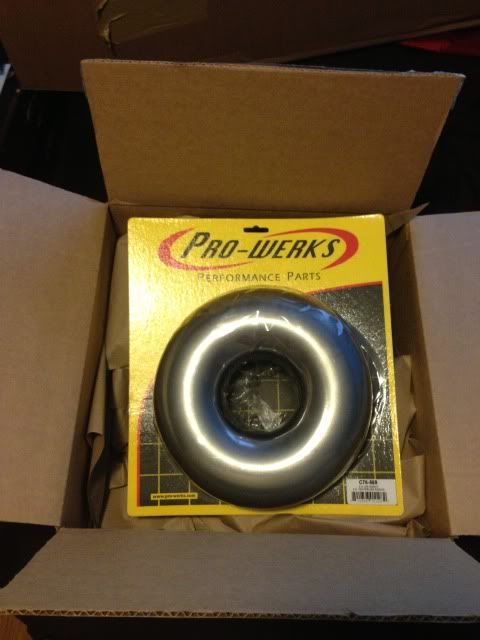
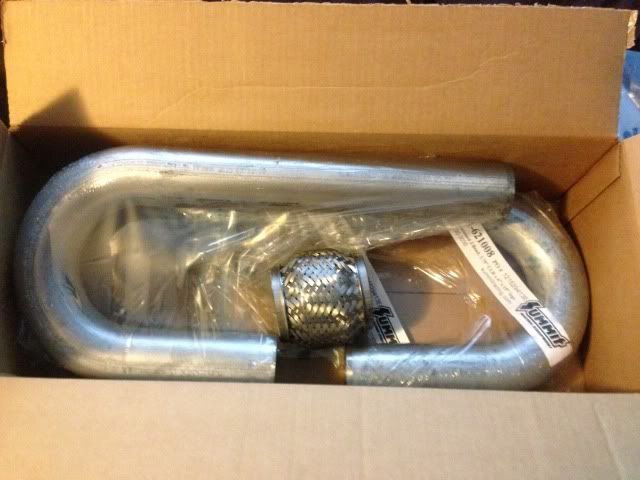


Those are the parts I’m using to build the exhaust

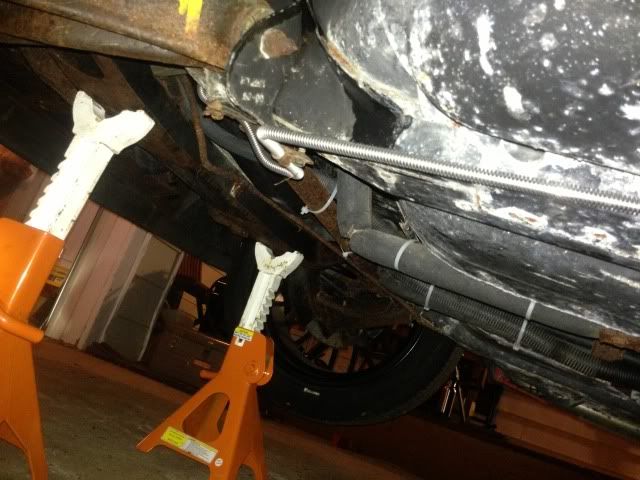
Installed a new clutch line as the original one ruptured.


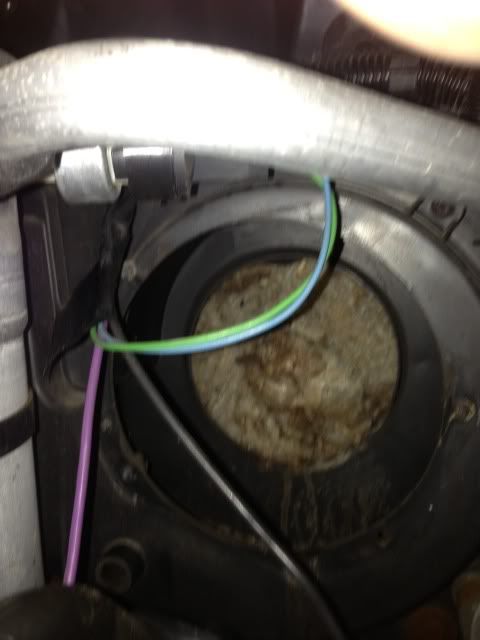
I found a nice mouse nest inside the blower motor housing.


Installed new front KYB shocks.
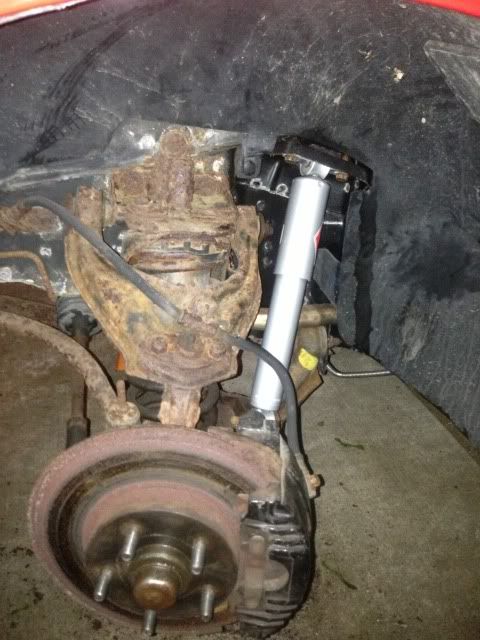


This is how the car sits after lowering the rear and installing the new front shocks.
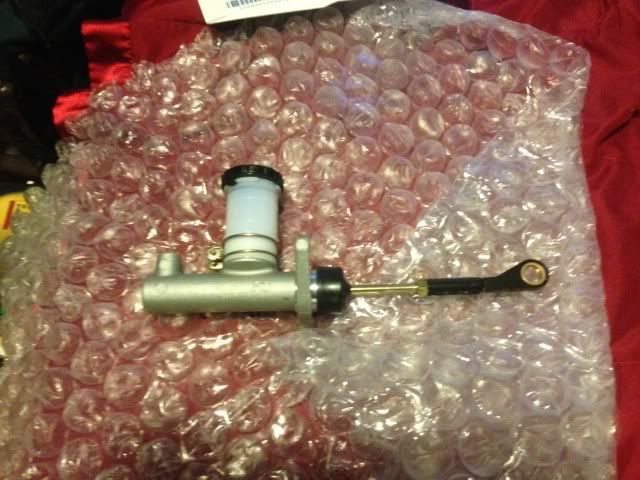


New RD master cylinder
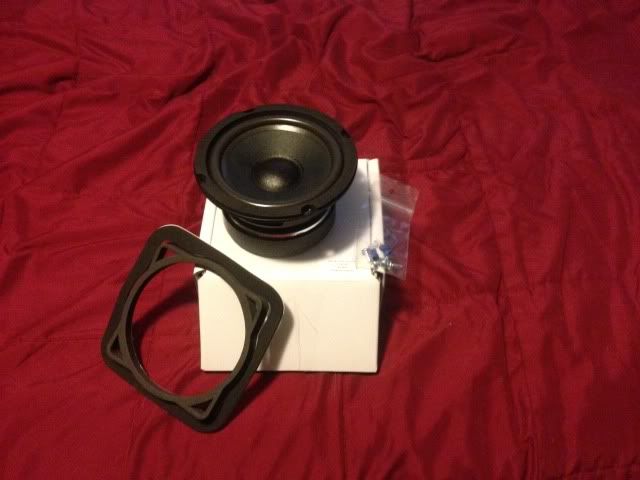


New RD sub woofer
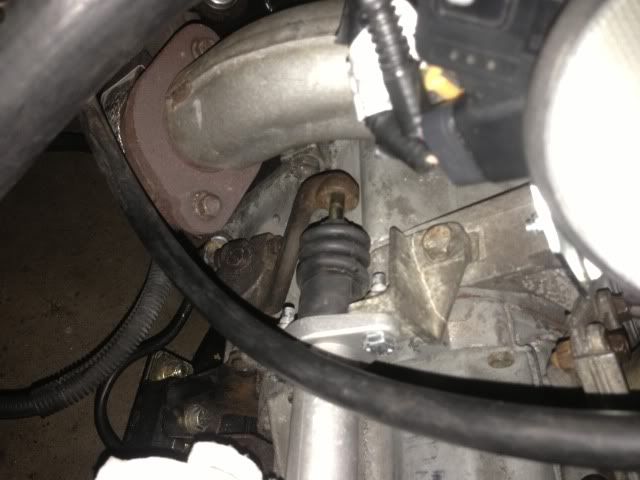


Original slave cylinder bracket cracked so I had to order a new one.

Here is a pick of the slave heat shield and new mounting bracket installed.
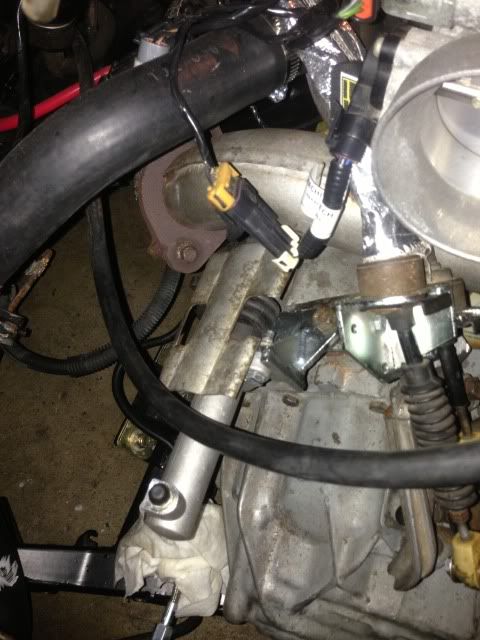


The exhaust is mocked up and ready to go, the only issue is how low it hangs. I have about 4’ ground clearance under the muffler. I’ll have to do either cut the trunk or modify the downpipe to raise it up more.
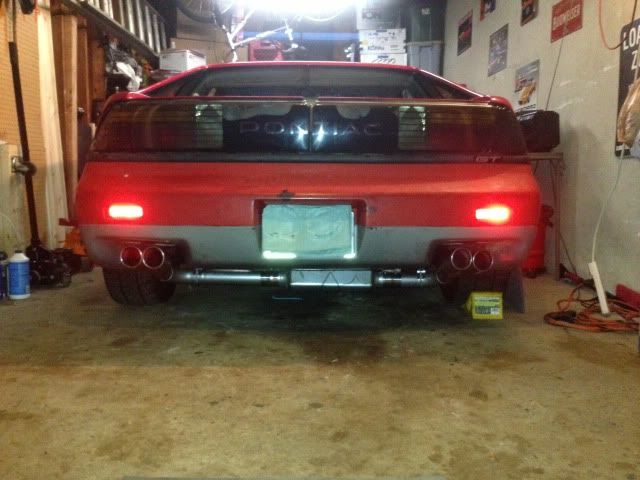
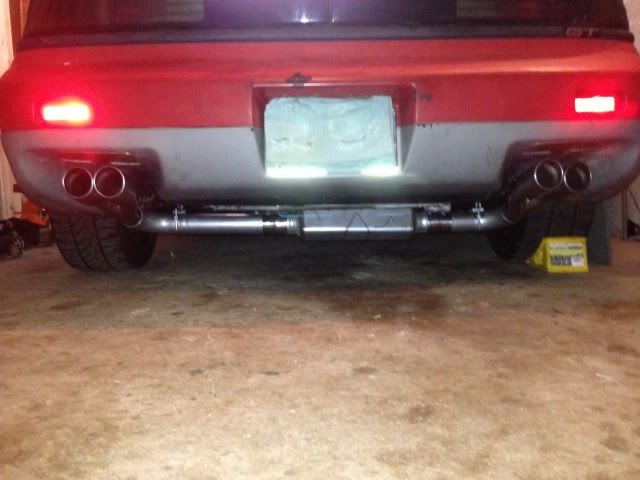
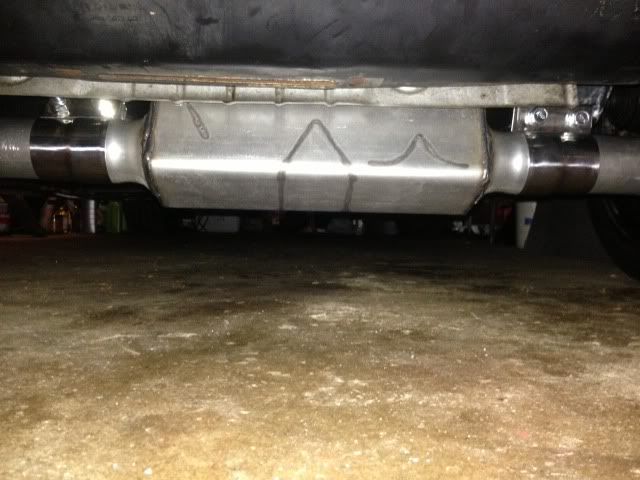


------------------
Project L67 Fiero

[This message has been edited by Jfrost (edited 07-27-2013).]

IP: Logged
PFF
System Bot
Jfrost
Member
Posts: 1092
From: Brookfield, IL
Registered: Jul 2009


Feedback score:    (29)
Leave feedback

Rate this member

Report this Post07-26-2013 12:45 AM Click Here to See the Profile for JfrostSend a Private Message to JfrostEdit/Delete MessageReply w/QuoteDirect Link to This Post
Reserved for edits
IP: Logged
Jfrost
Member
Posts: 1092
From: Brookfield, IL
Registered: Jul 2009


Feedback score:    (29)
Leave feedback

Rate this member

Report this Post07-26-2013 12:47 AM Click Here to See the Profile for JfrostSend a Private Message to JfrostEdit/Delete MessageReply w/QuoteDirect Link to This Post

Jfrost

1092 posts
Member since Jul 2009
Reserved for edits
IP: Logged
Jfrost
Member
Posts: 1092
From: Brookfield, IL
Registered: Jul 2009


Feedback score:    (29)
Leave feedback

Rate this member

Report this Post07-26-2013 12:49 AM Click Here to See the Profile for JfrostSend a Private Message to JfrostEdit/Delete MessageReply w/QuoteDirect Link to This Post

Jfrost

1092 posts
Member since Jul 2009
The current issues that still need to be resolved are raising the exhaust via cutting the trunk or re-working the downpipe, and figuring out the clutch: car still won't go into gear after several attempts at bleedint it.
IP: Logged
solotwo
Member
Posts: 5374
From: Grand Rapids, MI. USA
Registered: Jun 2002


Feedback score:    (9)
Leave feedback


Total ratings: 62
Rate this member

Report this Post07-26-2013 01:07 AM Click Here to See the Profile for solotwoSend a Private Message to solotwoEdit/Delete MessageReply w/QuoteDirect Link to This Post
I would change the exhaust and leave the trunk alone. These cars do not have a lot of storage space.
IP: Logged
thismanyfieros
Member
Posts: 3468
From: Red Deer, alberta,canada
Registered: Dec 2002


Feedback score:    (15)
Leave feedback


Total ratings: 120
Rate this member

Report this Post07-26-2013 01:08 AM Click Here to See the Profile for thismanyfierosSend a Private Message to thismanyfierosEdit/Delete MessageReply w/QuoteDirect Link to This Post
Check your clutch pedal it should be out at least an inch further then your brake pedal.. If not adjust the master out and try it again..
IP: Logged
Jfrost
Member
Posts: 1092
From: Brookfield, IL
Registered: Jul 2009


Feedback score:    (29)
Leave feedback

Rate this member

Report this Post11-14-2014 01:15 AM Click Here to See the Profile for JfrostSend a Private Message to JfrostEdit/Delete MessageReply w/QuoteDirect Link to This Post
So some big updates:

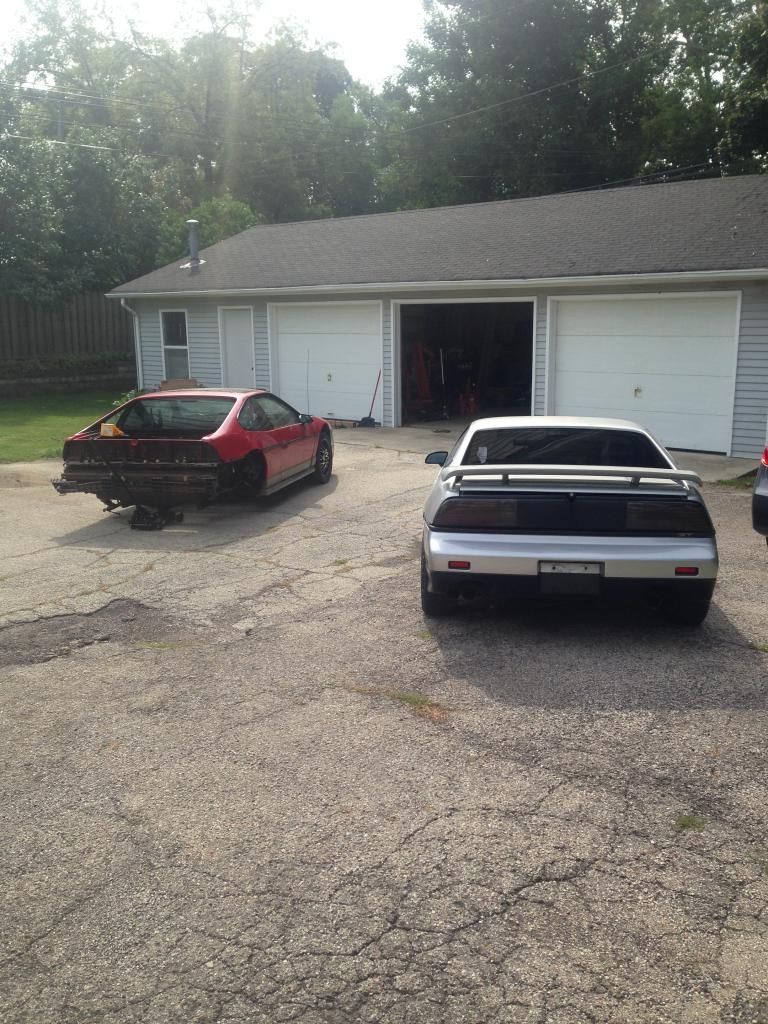
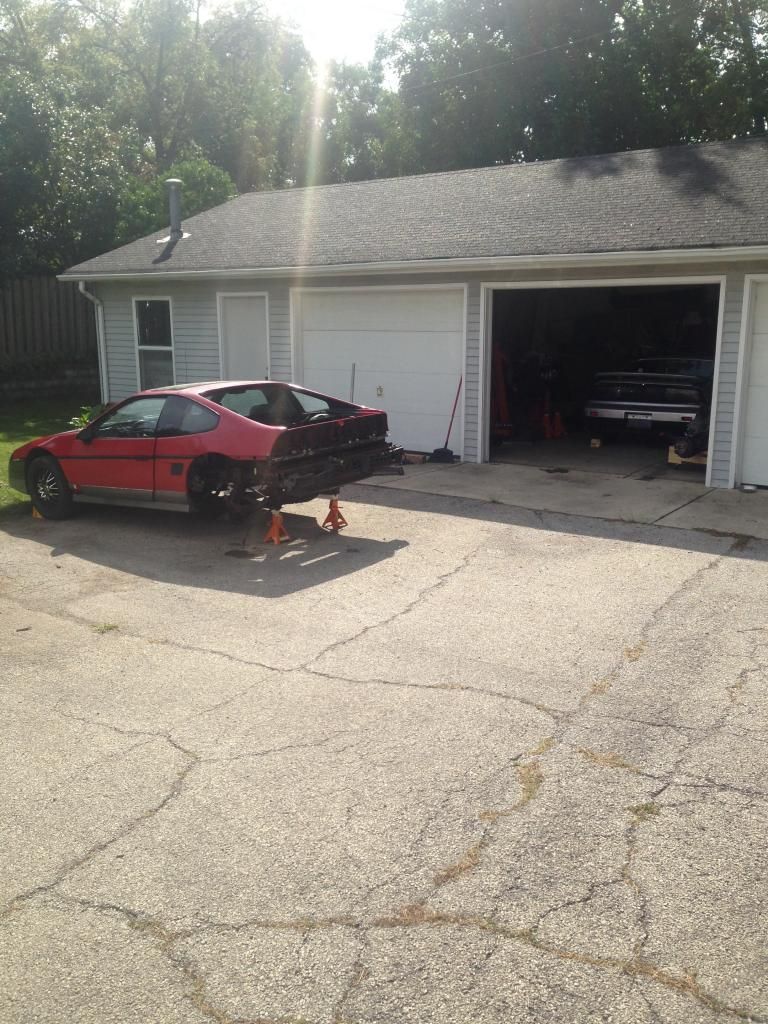
I moved to a new place, have a garage out back with actual workable space, got a new Fiero and will be sending the red one to the scrapper unfortunately. I'm in the process of stripping the red car and only have the body panels and front suspension to remove, interior is completely gutted.

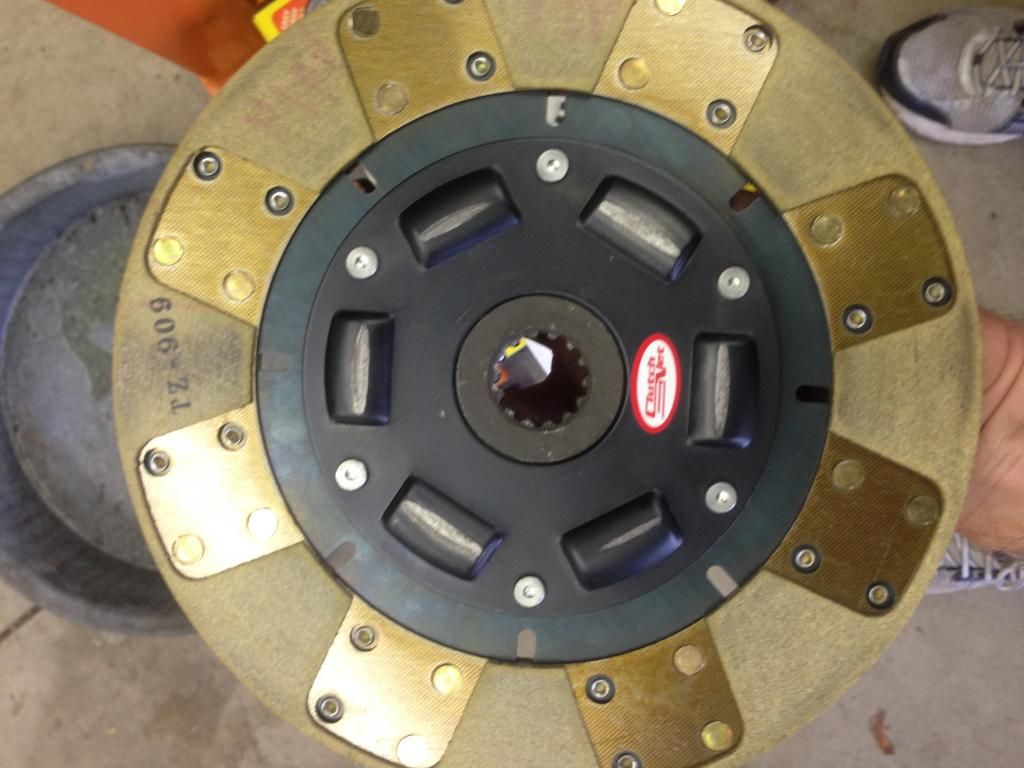
I figured out my clutch engagement issue which came down to an extra "plate" added to the clutch disc that interfered with the pressure plate. I sent it back to ClutchNet to have removed and have my fingers crossed it will work now.

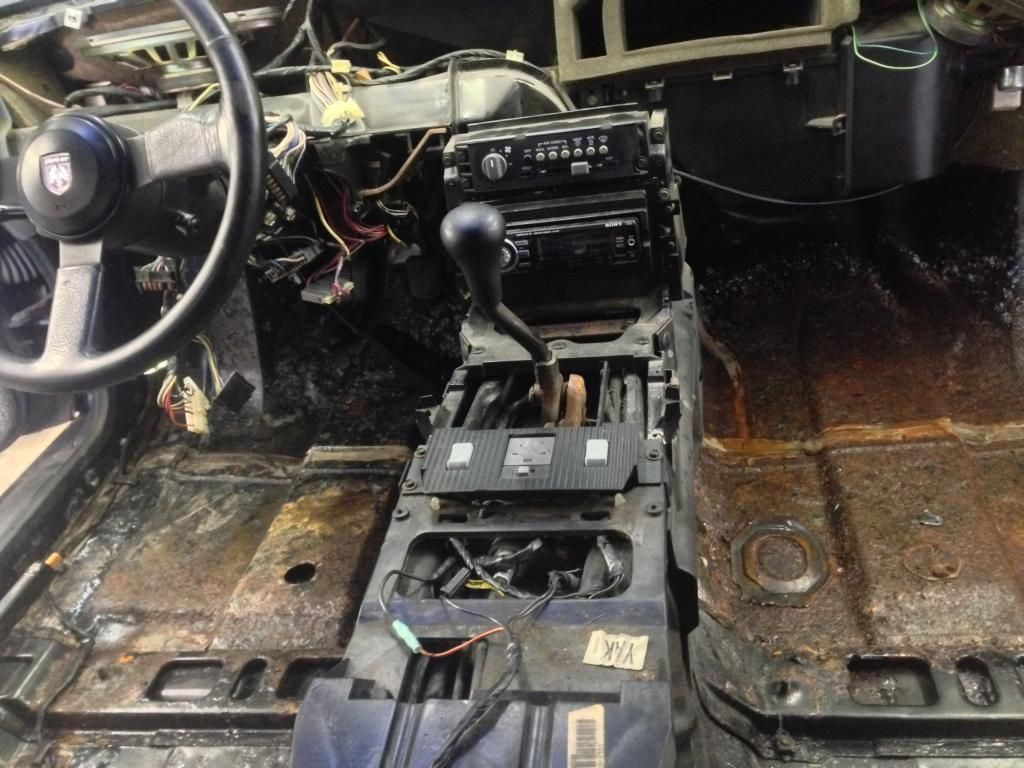
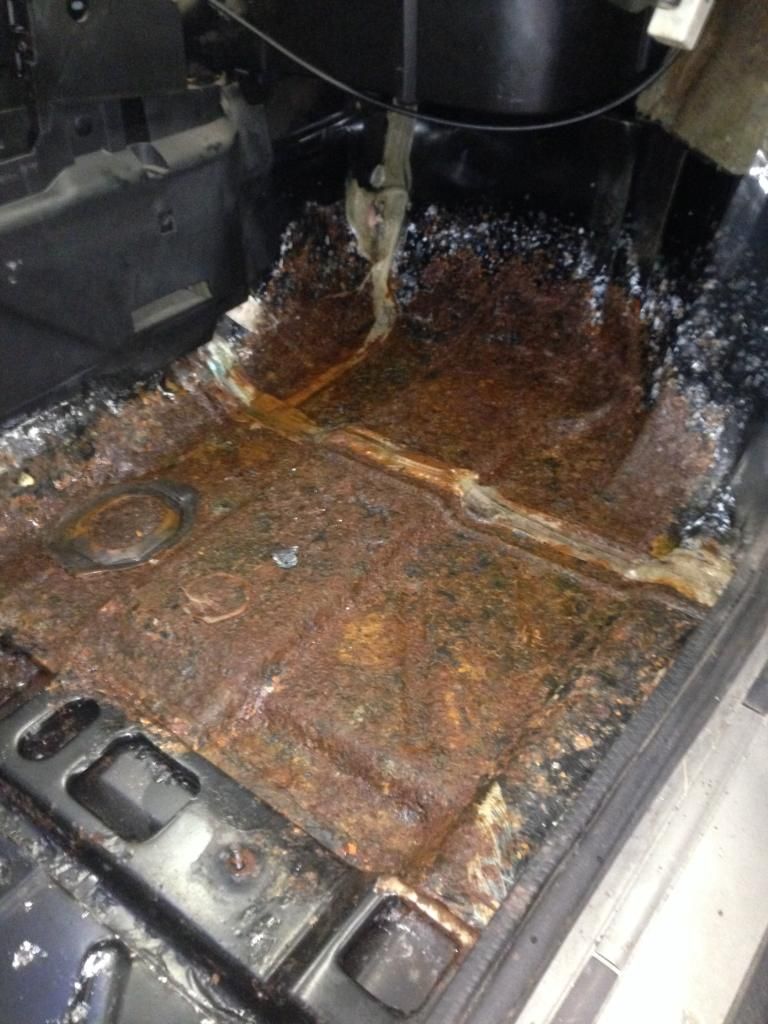
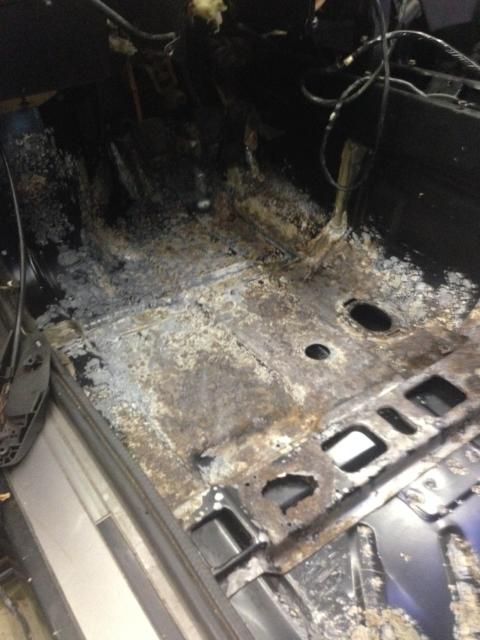
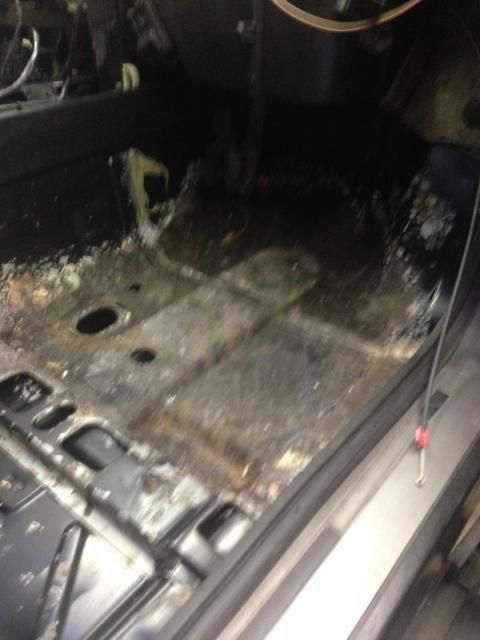
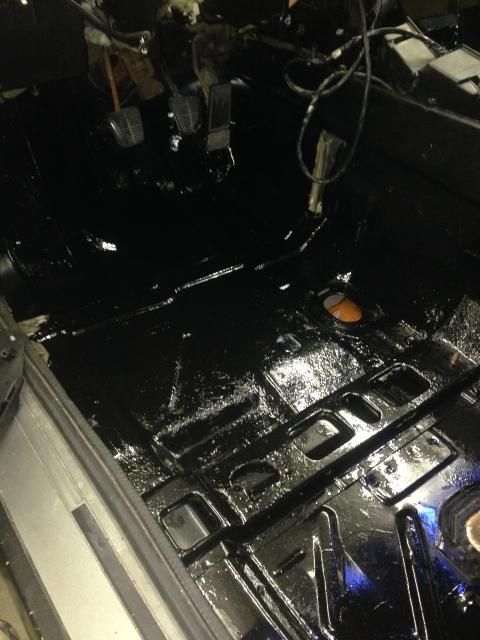
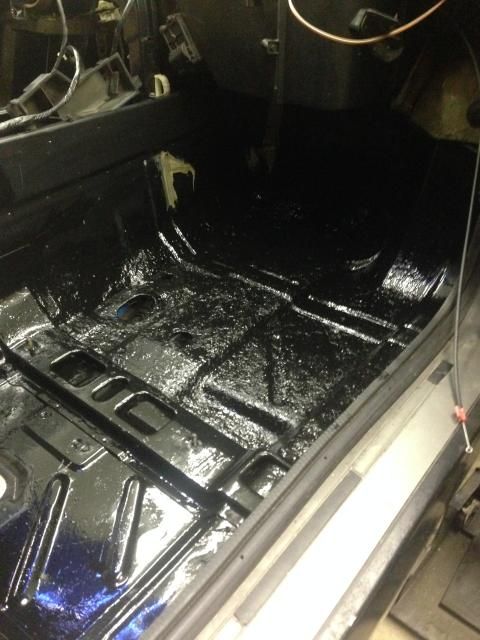
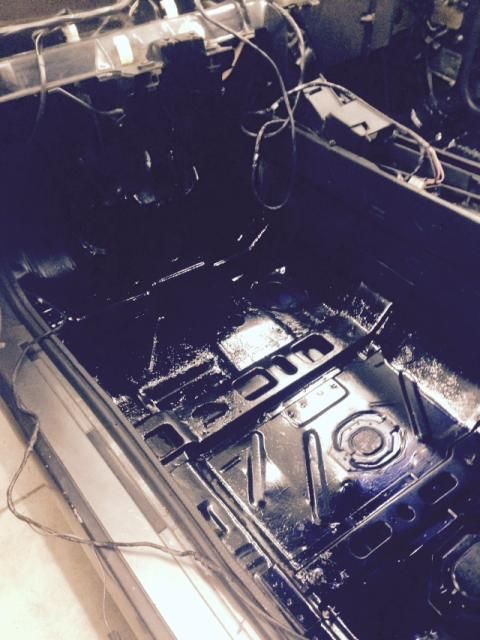
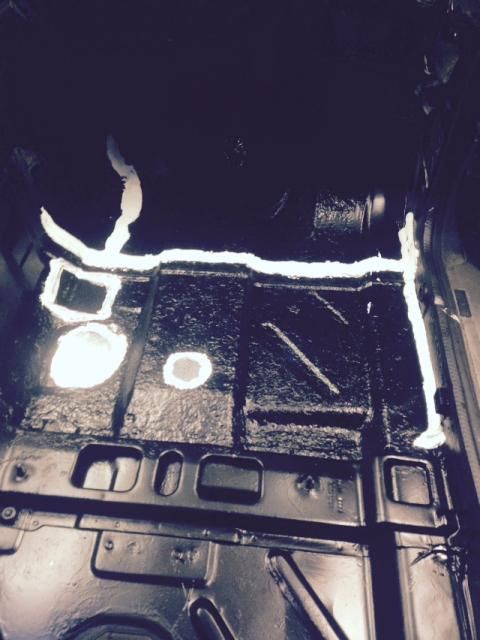
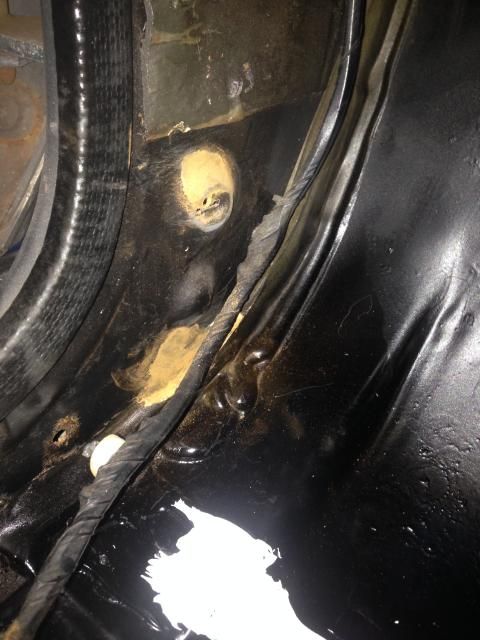
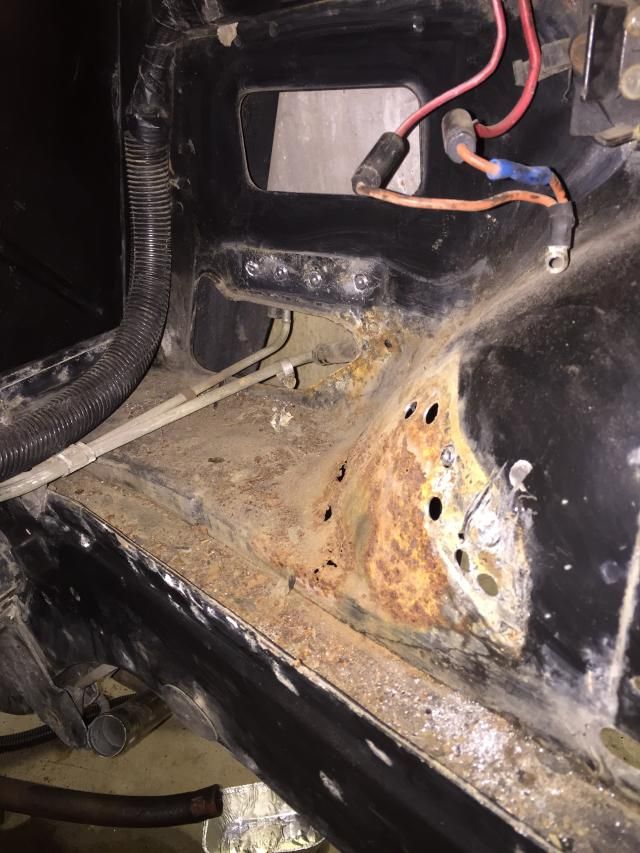
While I was addressing the clutch issues on the red car inside the garage, the new to me silver Fiero sat outside under a tarp for a few months. I knew the windshield had a leak as the material around it was severely degraded so I used an old tarp to protect it from the elements, that was a very bad idea. The tarp didn't seal it properly and water seeped in, unbeknownst to me, and sat for a month or so eating away at the floor boards. Long story short I came to find a musty smell inside the car, stripped the interior out, and discovered a rusty mess below. This delayed progress significantly as I debated what to do. I ended up POR-15'ing the floor, painted over it and resealed the floors.

Next on the list to is to start the reassembly process on the silver car, finish stripping the red one, and swap the L67 cradle in. I'm switching the silver 87 to a 4 spd trans as that is what was going in the red car. The previous owner, or the owner before him, installed a Viper alarm system in the 87 and, needless to say, hacked the hell out of the main cabin harness, more than what I wished to repair. So I'll take the 4 spd harness, in much better overall shape, and install it in the 87.

Below is a pictorial summary up to where I am today with progress:


Moving to the new "home"


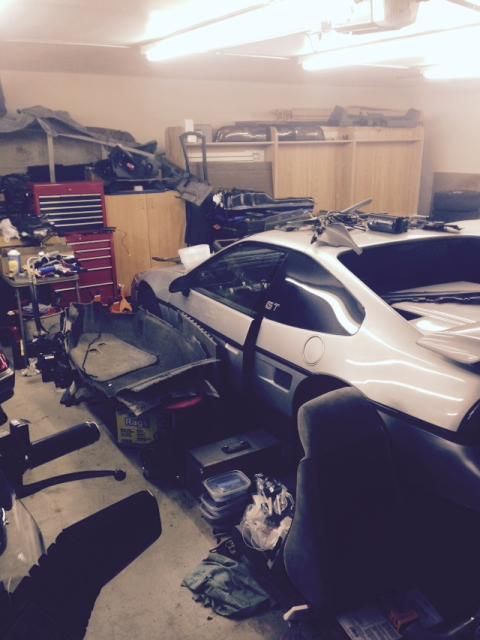
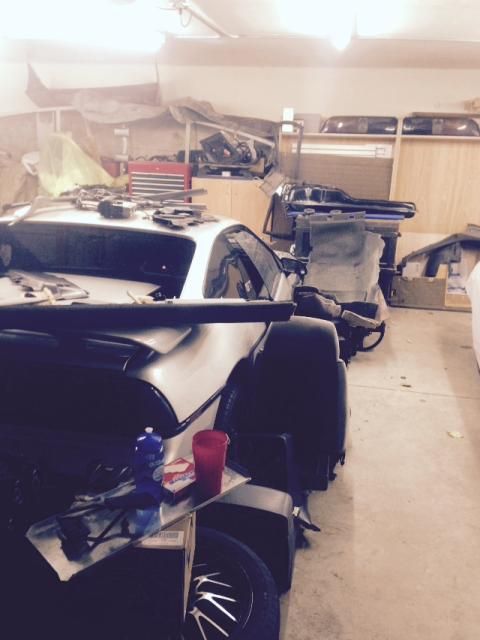
I've go the middle stall of a 3 car garage behind my place


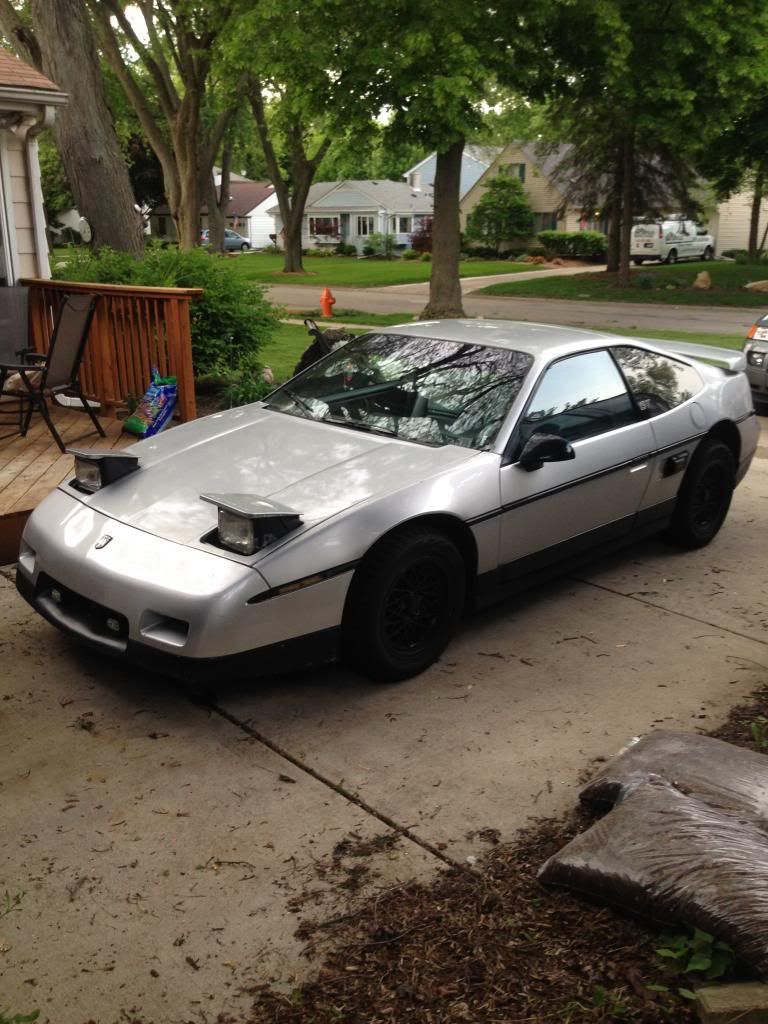
The 87 the day I brought it home


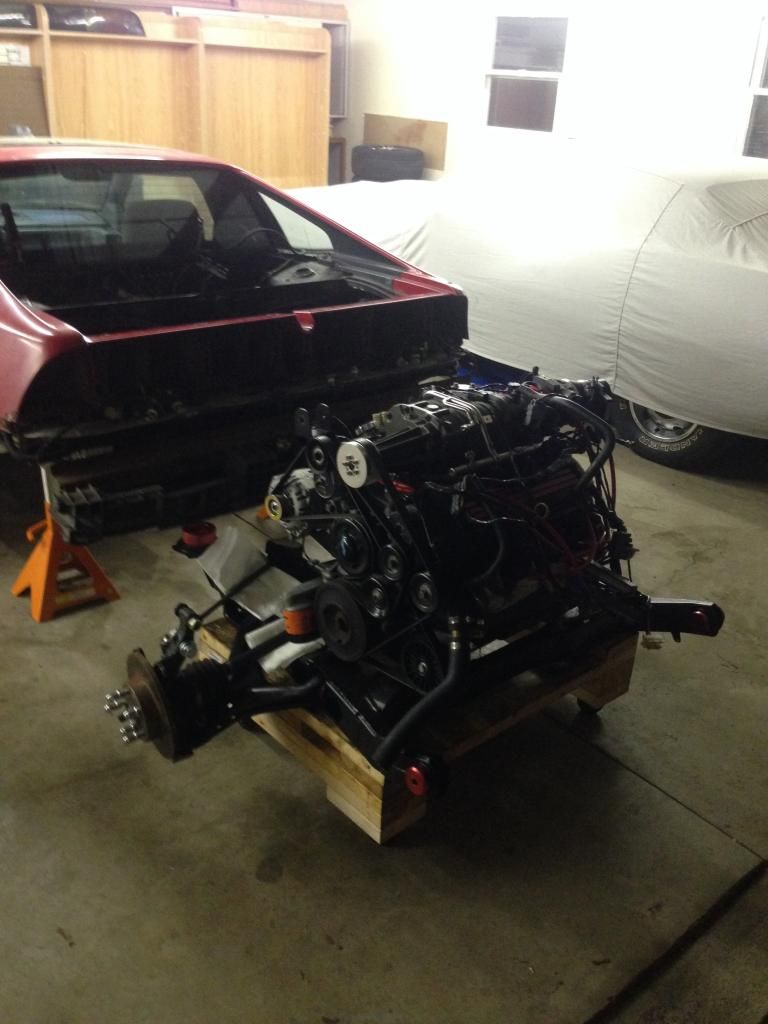
Removed the engine to investigate my clutch engagement issues


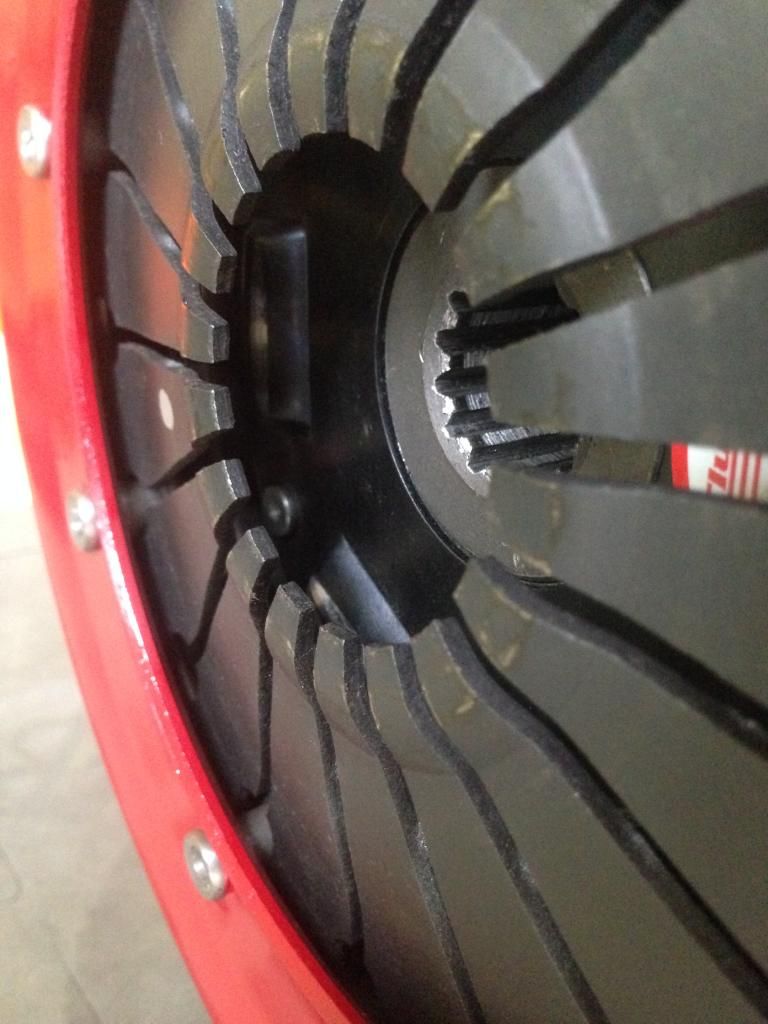
Engine out, can see where the pressure plate was hitting the disc


Pressure plate contact area


Clutch disc with the black plate on top that wasn't supposed to be there and hopefully what caused my issues. Don't have a pic after getting it back from ClutchNet after they removed it.


Changing of the guard


Damage done from a leaking windshield


Passenger side is the worst of the two


After cleaning and prepping the floors for POR-15


After 3 coats of POR-15


Floors after 2 coats of semi-gloss body paint


With having, in essence, two cars I've stripped out I'm starting to run out of places to put parts. I try to be a good co-tenant and ensure all my stuff does not cross into the other renters garage space. With that said, parts get stacked on top of each other, on the shelves in the background, my basement, glassed off porch, office, anywhere I can find space!


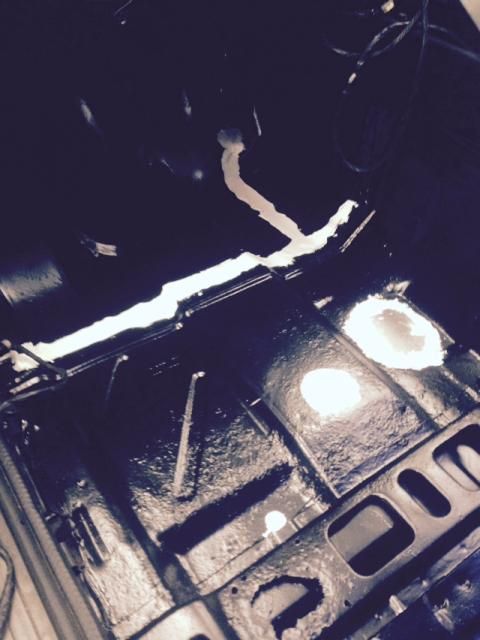
Floors sealed and new floor plugs installed. I used air ducting for a house to cut the plates out of, turned out pretty nice.


I'll make an effort to update this thread more frequently as I have my "more active" build thread on a car forum local to Chicago.

------------------
Project L67 Fiero

[This message has been edited by Jfrost (edited 11-14-2014).]

IP: Logged
turbo86se
Member
Posts: 2098
From: Carroll Valley, PA
Registered: Oct 1999


Feedback score: (4)
Leave feedback

Rate this member

Report this Post11-15-2014 10:10 AM Click Here to See the Profile for turbo86seSend a Private Message to turbo86seEdit/Delete MessageReply w/QuoteDirect Link to This Post
Awesome build so far. Your floor boards aren't that bad, mine leaked towards the rear plug and it's nasty. I want to post a pic asking best way to fix them but honestly I'm embarrassed b/c of how bad they are. Do you have a pic or two of how you routed the battery cables for the FMB? My tank is coming out soon and I'm going to tackle this at the same time while it's out. Thank you!
IP: Logged
Jfrost
Member
Posts: 1092
From: Brookfield, IL
Registered: Jul 2009


Feedback score:    (29)
Leave feedback

Rate this member

Report this Post11-15-2014 10:56 AM Click Here to See the Profile for JfrostSend a Private Message to JfrostEdit/Delete MessageReply w/QuoteDirect Link to This Post
 
quote
Originally posted by turbo86se:

Awesome build so far. Your floor boards aren't that bad, mine leaked towards the rear plug and it's nasty. I want to post a pic asking best way to fix them but honestly I'm embarrassed b/c of how bad they are. Do you have a pic or two of how you routed the battery cables for the FMB? My tank is coming out soon and I'm going to tackle this at the same time while it's out. Thank you!


Thanks! If your boards are that bad it might be best to cut them out and weld in replacements.

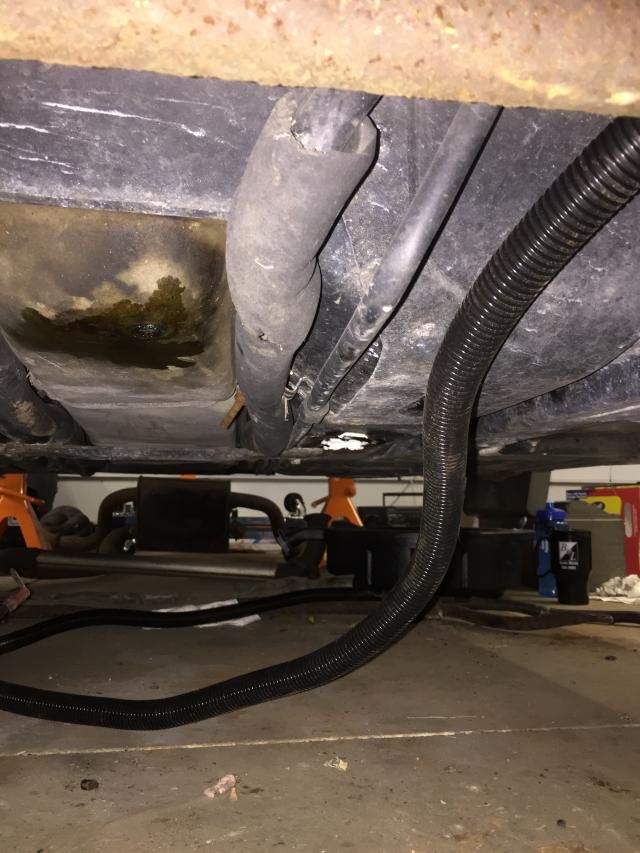
I didn't have any pics of the cables under the car, but I ran them along the heater and ac lines by the gas tank. I tucked them up there and used zip ties to secure them in place.
IP: Logged
davylong86
Member
Posts: 915
From: waterloo,il
Registered: Mar 2014


Feedback score: (1)
Leave feedback

Rate this member

Report this Post11-15-2014 03:41 PM Click Here to See the Profile for davylong86Send a Private Message to davylong86Edit/Delete MessageReply w/QuoteDirect Link to This Post
Jfrost, Thanks for taking time to document and post pics of your project. It helps all of us that are taking on projects on our cars and aren't sure what we might find when we start stripping it apart. Keep up the good work. (side note) that garage is nice!
IP: Logged
Jfrost
Member
Posts: 1092
From: Brookfield, IL
Registered: Jul 2009


Feedback score:    (29)
Leave feedback

Rate this member

Report this Post11-15-2014 04:03 PM Click Here to See the Profile for JfrostSend a Private Message to JfrostEdit/Delete MessageReply w/QuoteDirect Link to This Post
 
quote
Originally posted by davylong86:

Jfrost, Thanks for taking time to document and post pics of your project. It helps all of us that are taking on projects on our cars and aren't sure what we might find when we start stripping it apart. Keep up the good work. (side note) that garage is nice!


I'm glad to do it. Im very much a visual learner so having so many pics of I'll I've done hopefully helps others!

The garage is very cool. I'm lucky to rent to middle stall which gives me some wiggle room on each side. Plus the other tenants rarely go in there. There's a grouping of 3 Goldwig motorcycles on the left and a Dodge Challenger or Charger in the right.
IP: Logged
PFF
System Bot
mitchjl22
Member
Posts: 1144
From: Boise, Idaho
Registered: Sep 2011


Feedback score: (5)
Leave feedback

Rate this member

Report this Post11-16-2014 02:20 AM Click Here to See the Profile for mitchjl22Send a Private Message to mitchjl22Edit/Delete MessageReply w/QuoteDirect Link to This Post
Looks awesome. Keep up your good work.

-Mitch

------------------
My Car - 87' GT 3800sc
https://www.fiero.nl/forum/F.../HTML/121571.html#p0

IP: Logged
Jfrost
Member
Posts: 1092
From: Brookfield, IL
Registered: Jul 2009


Feedback score:    (29)
Leave feedback

Rate this member

Report this Post11-17-2014 01:01 AM Click Here to See the Profile for JfrostSend a Private Message to JfrostEdit/Delete MessageReply w/QuoteDirect Link to This Post
 
quote
Originally posted by mitchjl22:

Looks awesome. Keep up your good work.

-Mitch


Thanks!

IP: Logged
Jfrost
Member
Posts: 1092
From: Brookfield, IL
Registered: Jul 2009


Feedback score:    (29)
Leave feedback

Rate this member

Report this Post11-17-2014 01:05 AM Click Here to See the Profile for JfrostSend a Private Message to JfrostEdit/Delete MessageReply w/QuoteDirect Link to This Post

Jfrost

1092 posts
Member since Jul 2009
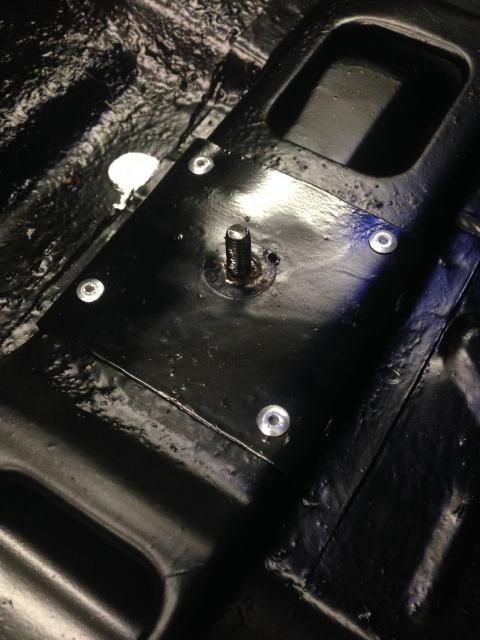
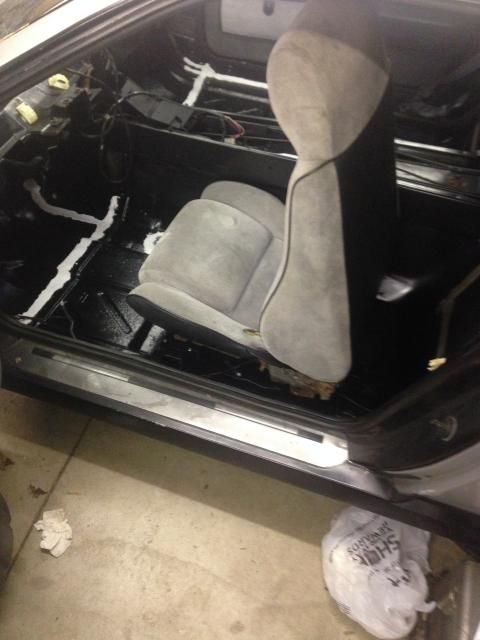
It was a busy weekend so I wasnt able to spend too much time in the garage. I was able to get the floor plate made, welded, painted and installed. A local muffler shop tacked the bolt to the floor plate but due to the metal being so thin a small whole was burned in it. He was able to fill it in and I also used some JB Weld to firm things up even more. A total of six rivets hold the plate in place, and I test fit the chair and everything lines up nicely.


Up next is a thorough cleaning of the carpets/mats before reinstalling them. The body sealant is now fully dried and ready to go.
IP: Logged
Jfrost
Member
Posts: 1092
From: Brookfield, IL
Registered: Jul 2009


Feedback score:    (29)
Leave feedback

Rate this member

Report this Post11-28-2014 10:25 PM Click Here to See the Profile for JfrostSend a Private Message to JfrostEdit/Delete MessageReply w/QuoteDirect Link to This Post
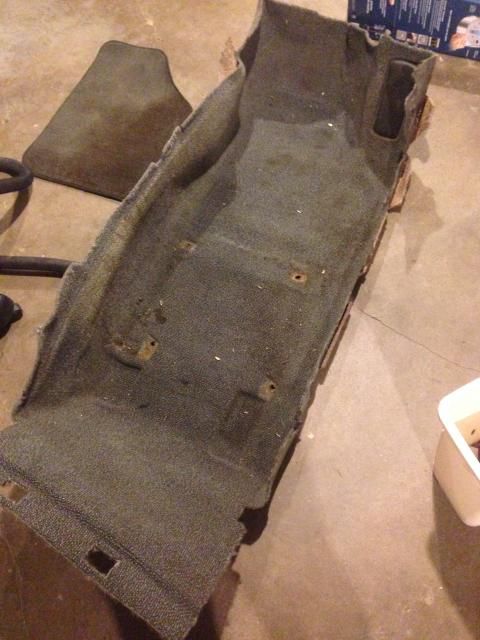
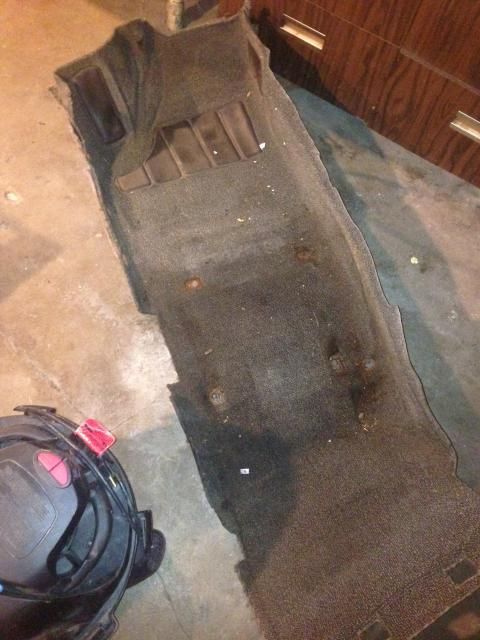
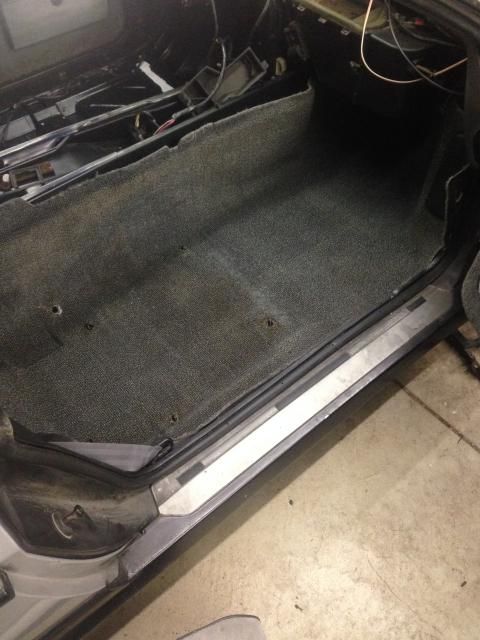
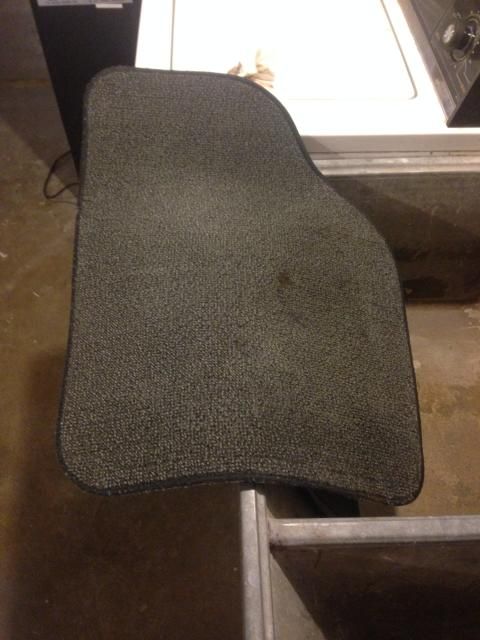
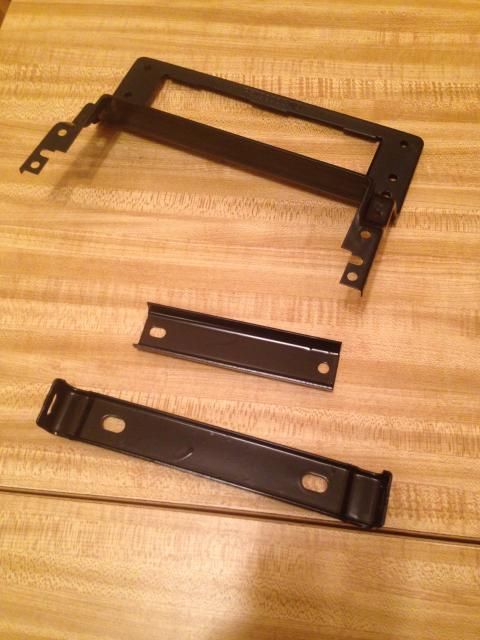
Over the last week or so I've gotten a few items accomplished: fixed some minor rust patches I missed on the floor, cleaned and installed the carpets, prepped/painted 3 metal interior pieces and removed/recovered the headliner.

I found a few small rust patches I missed when repairing/painting the floor boards. I sanded these down and repainted to cover them up.


Cartpets Before


Carpets After


The biggest improvement is definitely with the passenger side floor mat, night and day difference. The carpets are far from perfect but a whole let better than before. The amount of scrubbing needed to get to this point was quite a lot however, when warmer weather arrives again I can use a pressure washer which will make quick work of the remaining dirt.

I also painted a few interior pieces that are normally bare metal but had developed a decent amount of surface rust. I sanded them down to remove the rust and then painted over them. I got a little carried away as there are some runs in the paint, but overall they look good. No before pics unfortunately.


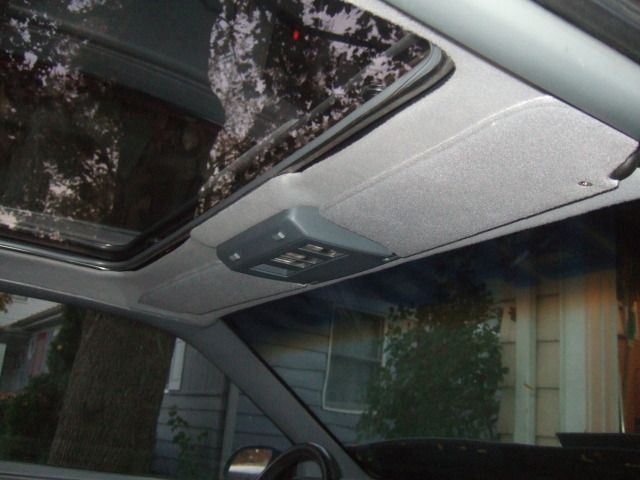
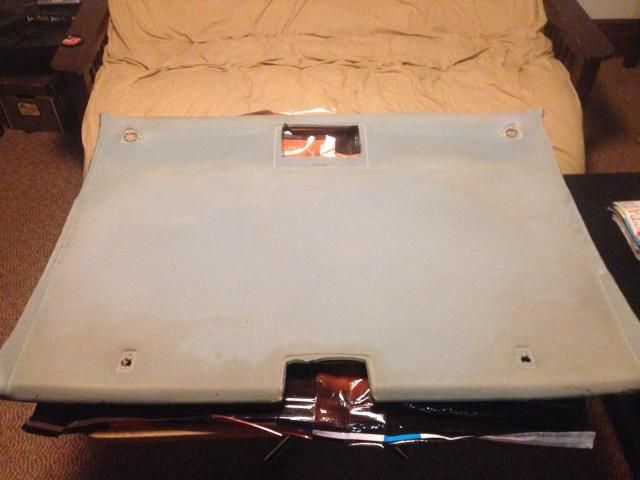
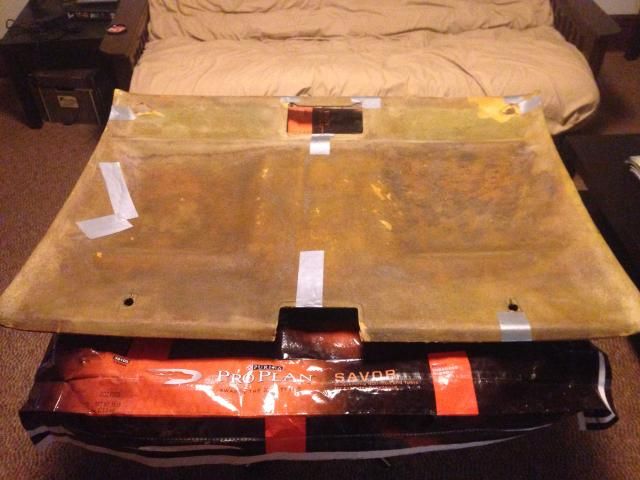
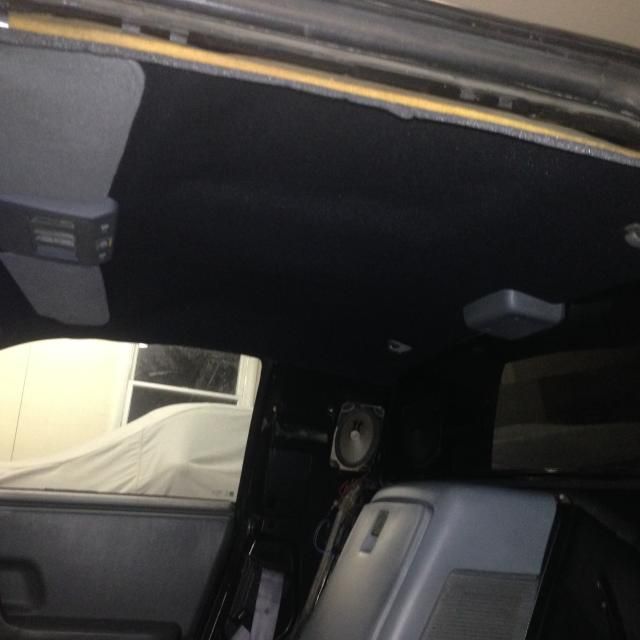
The next major accomplishment was removing/recovering the headliner. The old material was sagging and, once removed, I discovered there were some noticeable stains. The old liner wasn't fully detached so I had to be careful as to not damage the underlying board. I removed the remaining adhesive and had to reattach the front section, seen in the background of the pic below, as it had fully separated from the main board.


You can see the stains in the foreground section of the board.


Taped up some sections that were cracked and needed reinforcement.


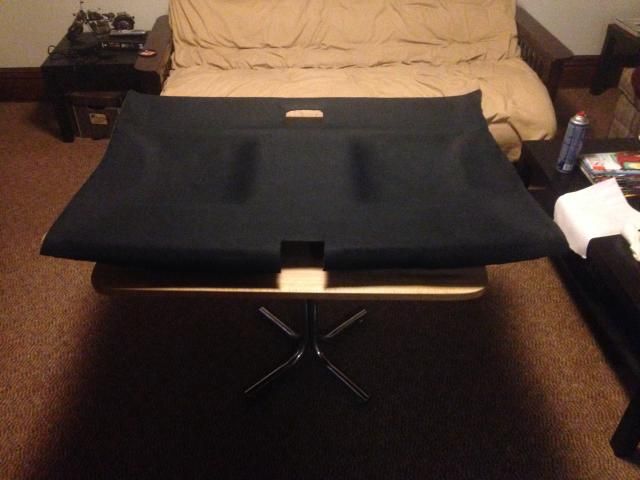
New material installed.

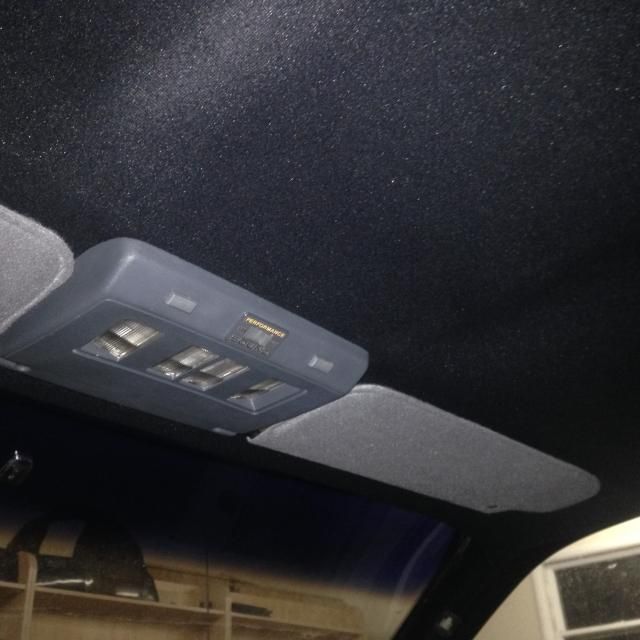
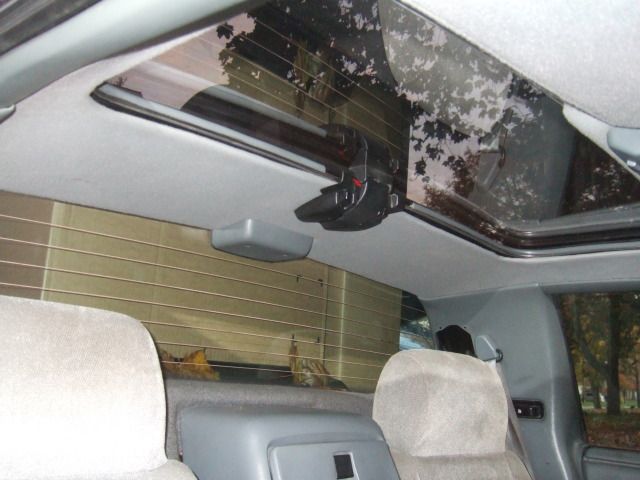
I went with black as I'll eventually have the rest of the interior redone in black. I took advantage of Black Friday sales today and hit up Jo Anne Fabrics to pick up 2 yards of this headliner material at 50% off, not too bad at all! I got enough material to do two headliners as I'll eventually switch in the sunroof and will need to redo the sunroof headliner board I recovered for the red Fiero. It'll be a pain in the ass to remove the material, I'm anticipating, as the adhesive is relatively fresh.

Next up on the to-do list is fixing the main cabin wiring harness: I need to extend the speaker wires to reach the speakers and replace poorly attached connectors already installed. I pulled wires from an old harness, from the first Fiero I owned and parted out, so that the colors will match and not be some random color/size.

After that I'll prep/paint the seat frame rails, where they would touch the carpet, as they are heavily rusted and would further discolor/stain the now (relatively) clean carpets. Also, I'll need to switch the rails among the seats: the ones in the silver car don't slide as well as the ones from the red car and they have much less rust to remove/paint.

I'll install the headliner and then start to reassemble the rest of the interior, wiring harness, seats and trim pieces. I also may start to fiddle with painting some of the trim pieces black, spares ones I have that is, to see how they'll look in the car.

Also in the last week I took advantage of a Fiero parts giveaway event and picked up a few parts, most importantly the passenger side underbody coolant tube. As I've mentioned previously, the one currently installed in the silver car is patched together with about a 6' rubber section instead of the regular stainless steel. This one has a slight bend in it but shouldn't cause any cooling issues. I also picked up a spare sunroof glass, two wind deflectors for the sunroof and an engine coolant tube. The guy I got the parts from is who sold me the red car almost 4 years ago. He is losing his garage where he stored/parted out many Fieros and was giving most parts away for free. All the items I grabbed were free, but I threw him some money for his time.

I spent one night this week cleaning up my garage space, moving a lot of the parts stored alongside the Fiero inside my house in the basement. It's a whole lot easier to move around now inside which is great.

Sunday is reserved for car work, haven't decided if it will be removing the remaining body panels and suspension from the red car outside, depends on the weather, or on the silver car in the garage. Regardless I hope to have some more updates then. Happy Thanksgiving everyone!
IP: Logged
Danyel
Member
Posts: 6089
From: Lévis, Québec, Canada
Registered: Sep 2008


Feedback score:    (91)
Leave feedback


Total ratings: 171
Rate this member

Report this Post11-29-2014 11:53 AM Click Here to See the Profile for DanyelClick Here to visit Danyel's HomePageSend a Private Message to DanyelEdit/Delete MessageReply w/QuoteDirect Link to This Post
placed in my favorites !!! Good job !!

------------------

My Build Thread
Tylers Toy

IP: Logged
Jfrost
Member
Posts: 1092
From: Brookfield, IL
Registered: Jul 2009


Feedback score:    (29)
Leave feedback

Rate this member

Report this Post12-09-2014 05:07 PM Click Here to See the Profile for JfrostSend a Private Message to JfrostEdit/Delete MessageReply w/QuoteDirect Link to This Post
 
quote
Originally posted by Danyel:

placed in my favorites !!! Good job !!


Thanks! I hope not to disappoint.
IP: Logged
Jfrost
Member
Posts: 1092
From: Brookfield, IL
Registered: Jul 2009


Feedback score:    (29)
Leave feedback

Rate this member

Report this Post12-09-2014 05:08 PM Click Here to See the Profile for JfrostSend a Private Message to JfrostEdit/Delete MessageReply w/QuoteDirect Link to This Post

Jfrost

1092 posts
Member since Jul 2009
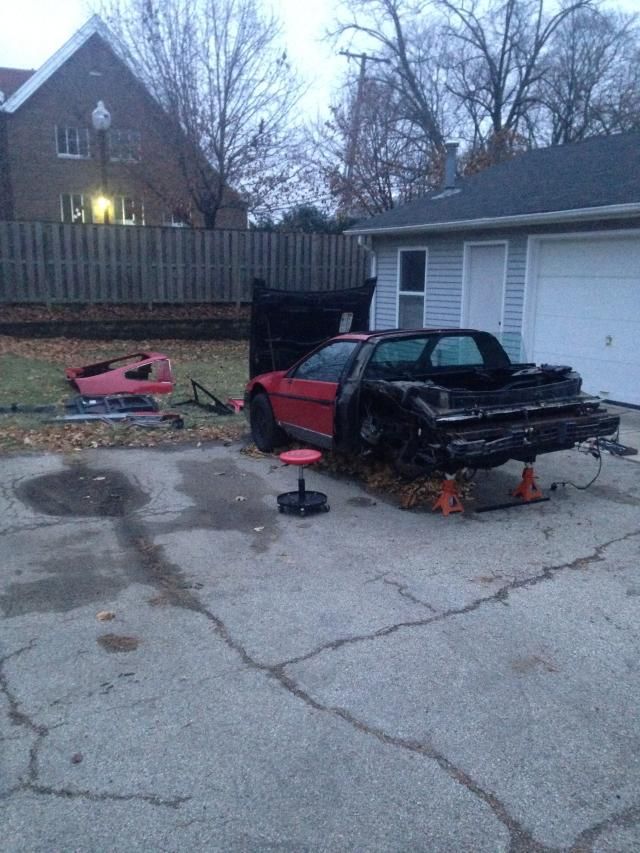
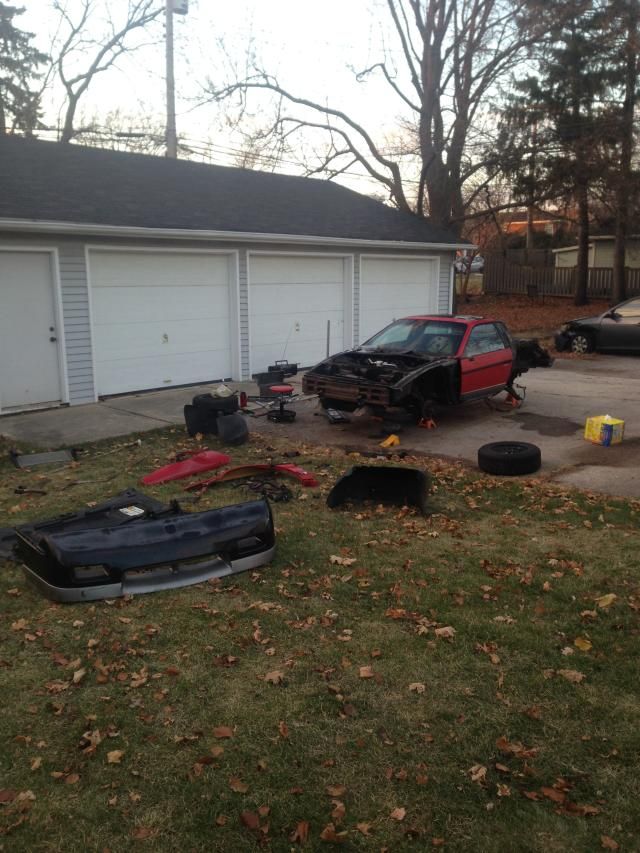
With Thanksgiving and all the past few weeks I haven't made any tremendous progress on the car. I've spent most of the time taking advantage of a few relatively warm days to strip parts from the Fiero outside. I have the majority of the body panels removed, aside from the door skins and roof panel, and only have the front suspension and windshield left to remove.

First days results


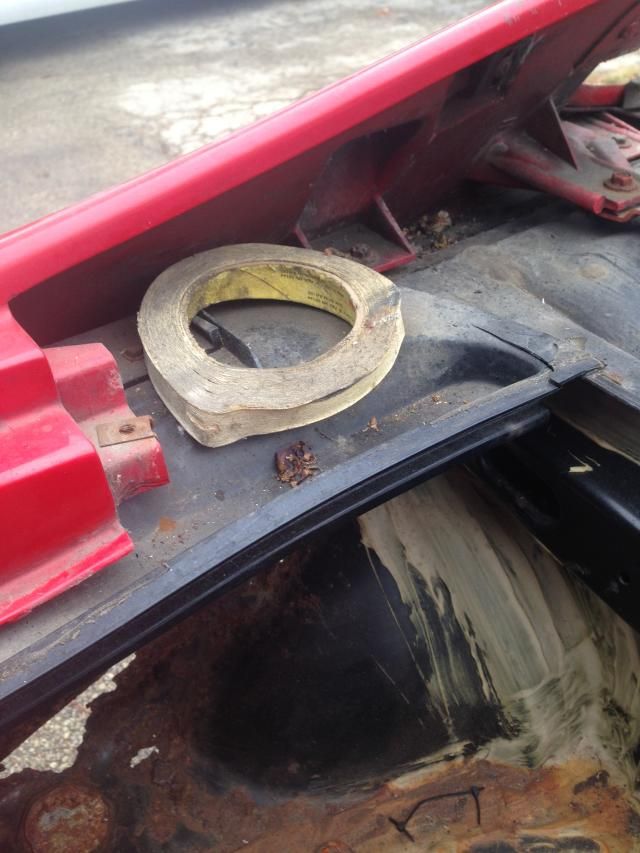
Found a little surprise when removing the rear clip, some adhesive tape left inside when the car was being assembled.


Second days results


I also repaired the main wiring harness that had a few sections that needed patching up. The weather this weekend will be in the high 40's, maybe even the 50's, so I plan to re-install the harness then. Hopefully I can get the interior reassembled as well.

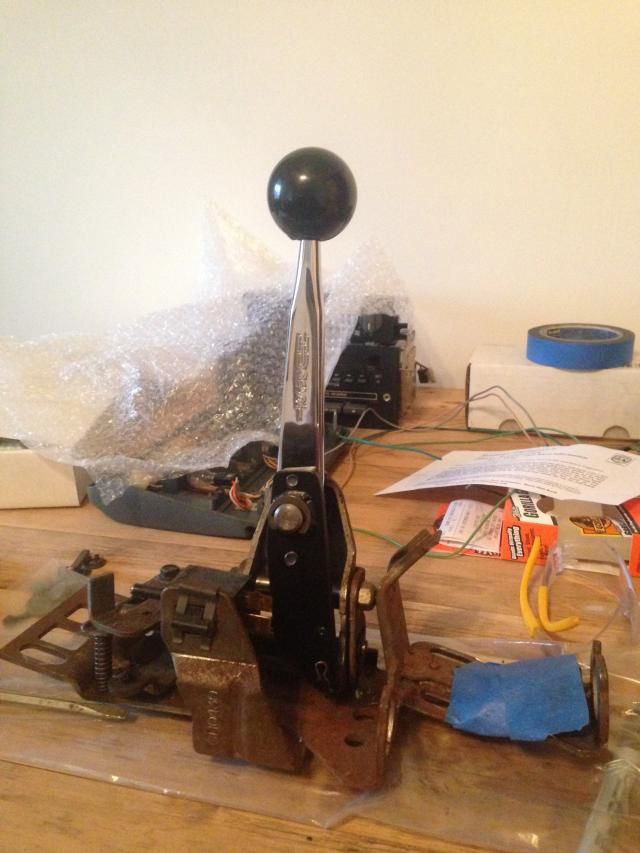
Not sure if I had mentioned this before but I bought a Hurst shifter to replace the stock unit. I installed it on the assembly and look forward to seeing it in the car. I'll eventually get an actual Hurst shift knob with the 4spd shift pattern engraved in it. I like the look and have seen a few installed in other Fieros, should look pretty awesome!

IP: Logged
Jfrost
Member
Posts: 1092
From: Brookfield, IL
Registered: Jul 2009


Feedback score:    (29)
Leave feedback

Rate this member

Report this Post12-18-2014 02:05 AM Click Here to See the Profile for JfrostSend a Private Message to JfrostEdit/Delete MessageReply w/QuoteDirect Link to This Post
Time for some actual progress updates!

Over the past weekend I did more work on friends cars than on mine unfortunately so I was only able to start routing the cabin wiring harness. I secured the section from the rear bulkhead to the engine harness junction in the engine bay and spent some time removing a few more parts from the red Fiero outside. I attempted to remove the front springs and upper/lower control arms but bolts are so rusty its proving too much of a hassle to remove them. I'll attempt one last time to remove the parts but won't stress over it. I was also able to install the headliner, sunvisors, overhead console, rear brake light assembly and coat hanger brackets. I'll have the sunvisors redone in the same material as the headliner, I have extras from making it. The overhead console I plan on leaving as is color wise, but am up in the air about painting the rear brake light cover and coat hanger brackets black to match. What are you thoughts on the color combo?


Its hard to see in the pic, but the headliner fabric is drooping a bit above the passenger seat as I didn't apply enough adhesive on the weird angles on the liner board. I'm not sure how I'll exactly fix it as I can't remove the liner and apply more adhesive.

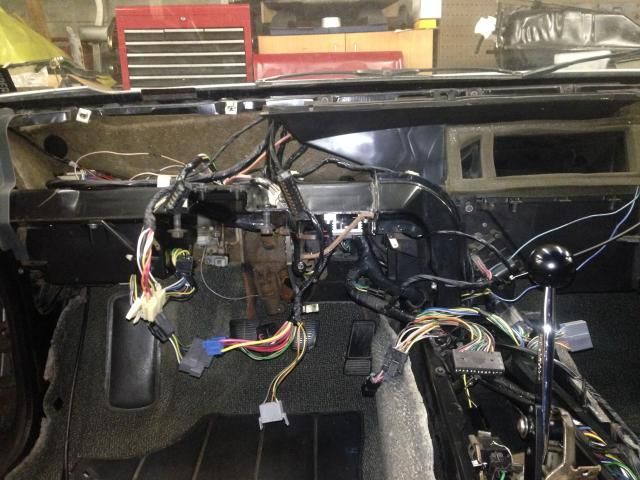
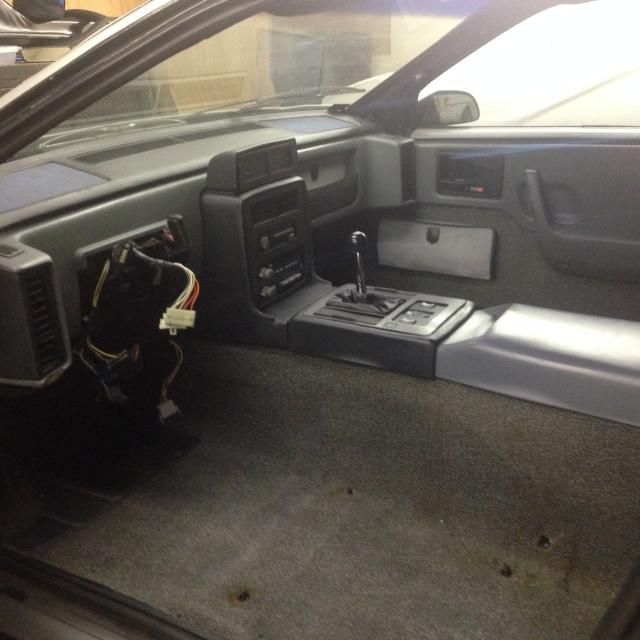
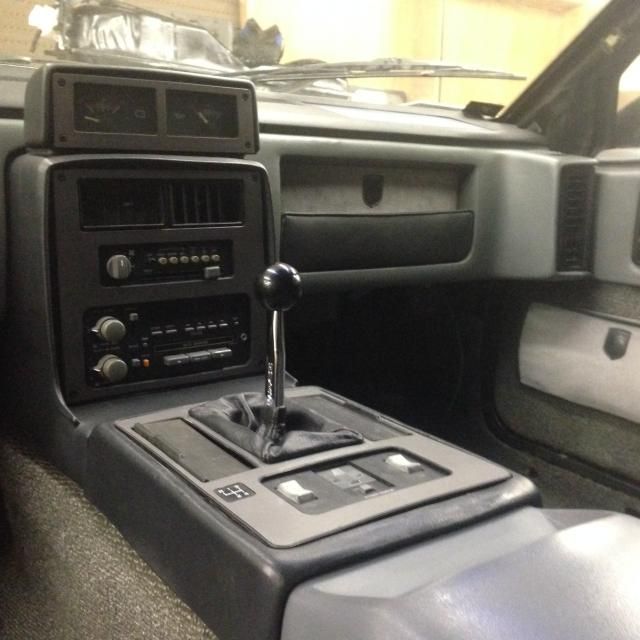
Yesterday I was able to start routing the front section of the harness and got everything lined up. Tonight I installed the dash, HVAC control head, radio, aux gauge pod as well as all the center section trim. The goal was to test fit everything to make sure I routed the wiring harness correctly. Everything lined up fine for the center section, tomorrow I'll work on the main console and gauges. I have to switch out the center temp/gas gauge as the needles fell off, but I have a spare so that should be quick and easy. What I'm worried about is the console plugs lining up correctly as there isn't a lot of slack in the wires to move around. Hopefully all goes well and I don't have to reroute, or worst case remove the dash, to adjust the wiring.


Harness routed and installed


Dash and center trim pieces installed


Its nice to see actual progress and the car actually looking like a car, on the interior that is

I spent several hours today cleaning the dash and all the other trim parts I installed tonight. Its amazing the difference using a extra strength Magic Eraser made on cleaning everything. The dash especially had a lot of built in dirt, grime and stains that regular cleaner coudln't remove. The dash isn't perfect as it has cracks and such in it, but its nice having it all a lot cleaner now.

[This message has been edited by Jfrost (edited 12-18-2014).]

IP: Logged
zzzhuh
Member
Posts: 826
From: Colorado
Registered: Jan 2014


Feedback score: (2)
Leave feedback

Rate this member

Report this Post03-31-2015 02:15 AM Click Here to See the Profile for zzzhuhSend a Private Message to zzzhuhEdit/Delete MessageReply w/QuoteDirect Link to This Post
Progress?
IP: Logged
chrissin712
Member
Posts: 191
From: Chicago, IL
Registered: Feb 2014


Feedback score: (2)
Leave feedback

Rate this member

Report this Post03-31-2015 05:53 PM Click Here to See the Profile for chrissin712Send a Private Message to chrissin712Edit/Delete MessageReply w/QuoteDirect Link to This Post

Why did you scrap the red car? It looked like a great project when I saw it.
Any progress? Spring is coming up quick!!!

Where did you order the parts to build your exhaust? I need to make a similar setup and think I want to use that same muffler.
IP: Logged
PFF
System Bot
Jfrost
Member
Posts: 1092
From: Brookfield, IL
Registered: Jul 2009


Feedback score:    (29)
Leave feedback

Rate this member

Report this Post03-31-2015 09:45 PM Click Here to See the Profile for JfrostSend a Private Message to JfrostEdit/Delete MessageReply w/QuoteDirect Link to This Post
 
quote
Originally posted by chrissin712:


Why did you scrap the red car? It looked like a great project when I saw it.
Any progress? Spring is coming up quick!!!

Where did you order the parts to build your exhaust? I need to make a similar setup and think I want to use that same muffler.


The red car had too many rust issues in the back for me to deal with, it wasn't an easy decision to scrap it but I needed it gone (landlord got tired of it sitting outside). All the important parts were saved for my use and/or others who need them.

I purchased the exhaust J-pipes through either Jegs or Summit as well as the flex coupler. The exhaust donut I bought from some other online store I forgot the name though. The muffler is from Spintech, the one most people get for Fiero's. It sounded good when it was running, looking forward to hearing it again.

As far as progress is concered there has been a lot, I'll make another post with details.

IP: Logged
zzzhuh
Member
Posts: 826
From: Colorado
Registered: Jan 2014


Feedback score: (2)
Leave feedback

Rate this member

Report this Post03-31-2015 09:55 PM Click Here to See the Profile for zzzhuhSend a Private Message to zzzhuhEdit/Delete MessageReply w/QuoteDirect Link to This Post
 
quote
Originally posted by Jfrost:

As far as progress is concered there has been a lot, I'll make another post with details.


Im gonna hold you to that
IP: Logged
Jfrost
Member
Posts: 1092
From: Brookfield, IL
Registered: Jul 2009


Feedback score:    (29)
Leave feedback

Rate this member

Report this Post03-31-2015 10:41 PM Click Here to See the Profile for JfrostSend a Private Message to JfrostEdit/Delete MessageReply w/QuoteDirect Link to This Post
Long overdue for an update considering I'm less then a few weeks away from finally having this car on the road.

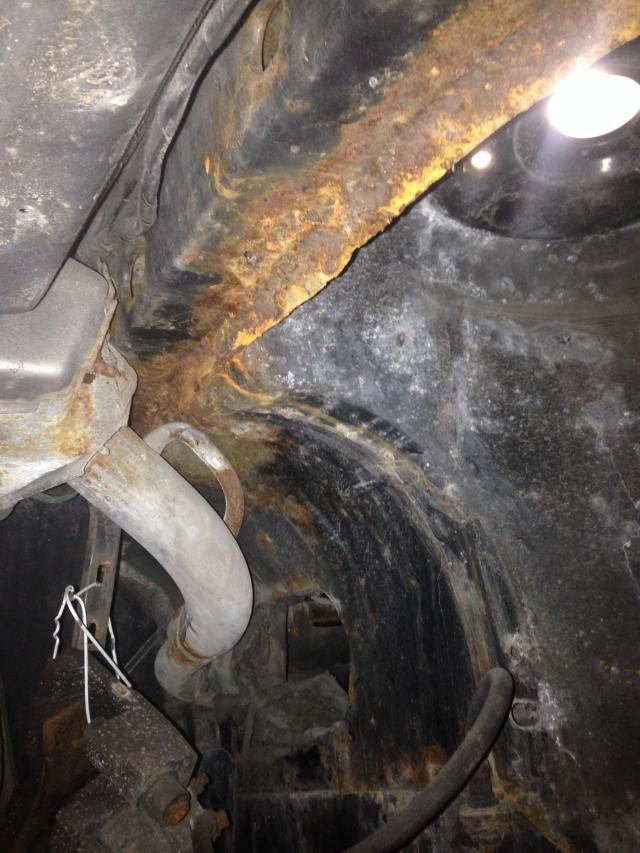
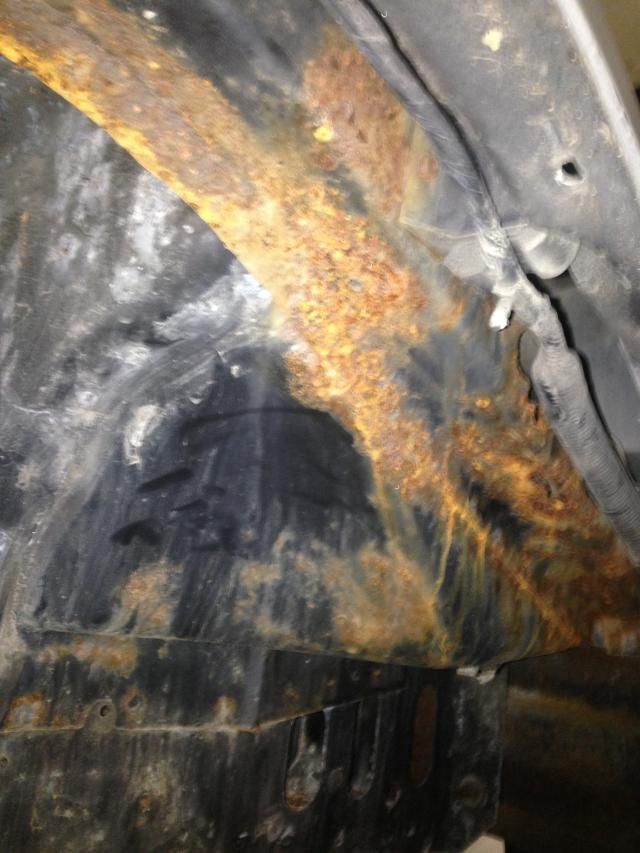
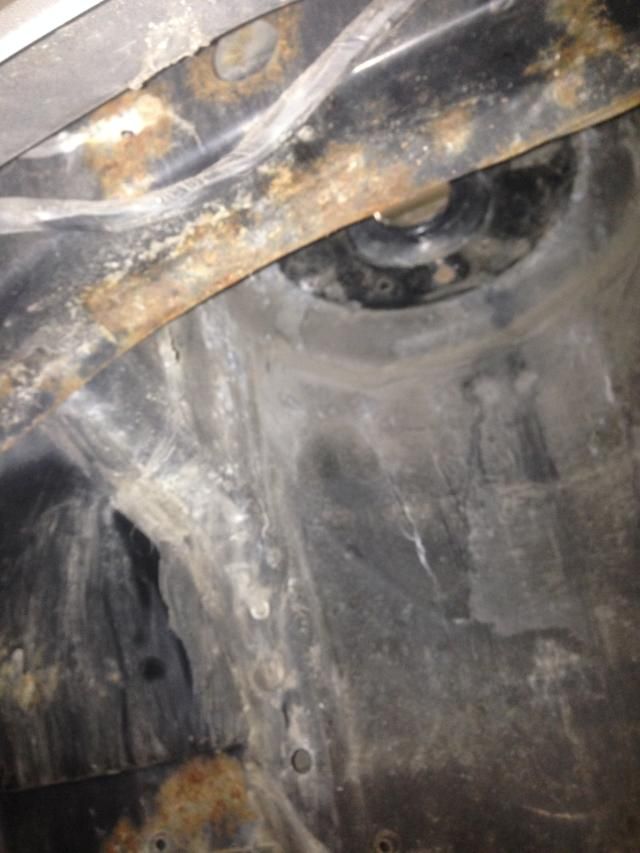
The red Fiero was scrapped and sent to the junkyard with all meaningful parts being removed beforehand. The rust issues were too much for me to address myself and the car needed to be gone. The old engine and cradle assembly are removed and stripped down. I discovered some (mostly) surface rust underneath the wheel well lines which I had anticipated, it's nothing too serious and will be fixed in the fall before the cars put away for the winter (I'll remove the rear clip to properly POR-15 and paint the rear space frame).


Drivers side front portion of wheel well


Drivers side rear section of wheel well


Passengers side, this is the worst portion on this side, the rest is pretty clean.

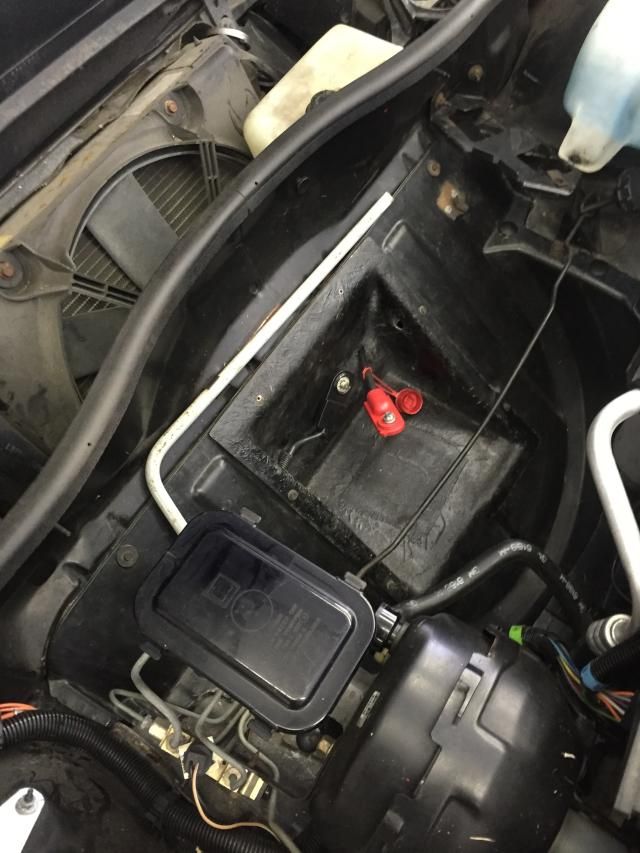
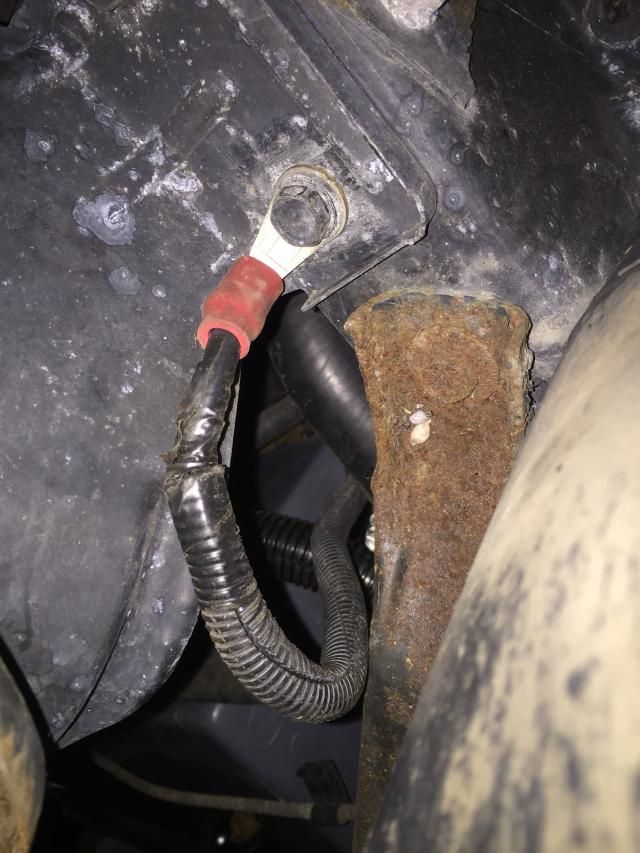
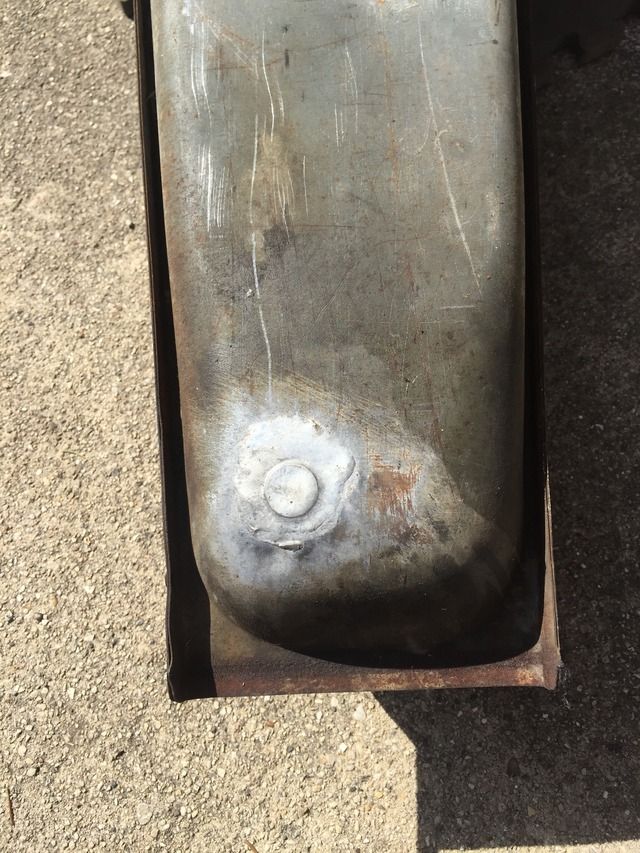
I've installed the front battery tray and routed the battery cables underneath the car and an additional ground wire to the front end by the battery. During this process I noticed the gas tank had a leak at the front of it. After later removing the tank I discovered a small screw and gasket either covering up a smaller hole or the tank was punched to drain it: previous owner stated he replaced the pump and maybe drained the tank that way. I had a local radiator shop patch the tank for piece of mind and it turned out pretty well.


Front mount battery tray/cables installed


Installed the front ground cable on the lower radiator tray assembly


The gas tank leak is evident in this picture


Gas tank repair. When I re-installed the tank I put the sending unit and upgraded fuel pump in it from tank in the old red Fiero.

I also removed the stock battery tray for some extra room and to tackle some rust discovered underneath it. I did a decent job drilling out the spot welds on the fire well, no holes, but the wheel well section didn't go as smoothly. No big worry though since it won't really be visible.


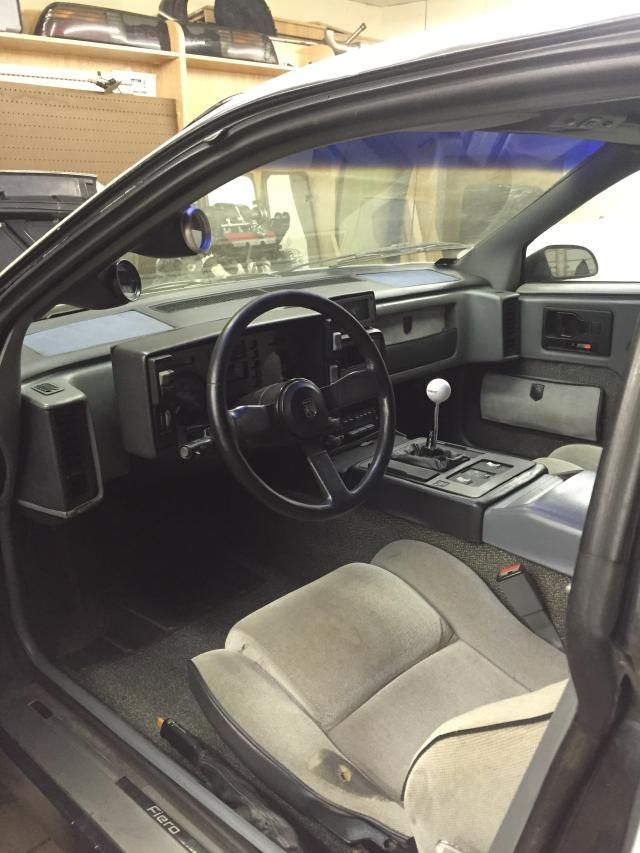
The interior is also now fully installed including the A-pillar gauge pod and a new Hurst shift knob. There is an Aeroforce scan gauge like in the other car as well as a vacuum/boost gauge to fill up the 2nd slot until I get a wideband o2 sensor and gauge.


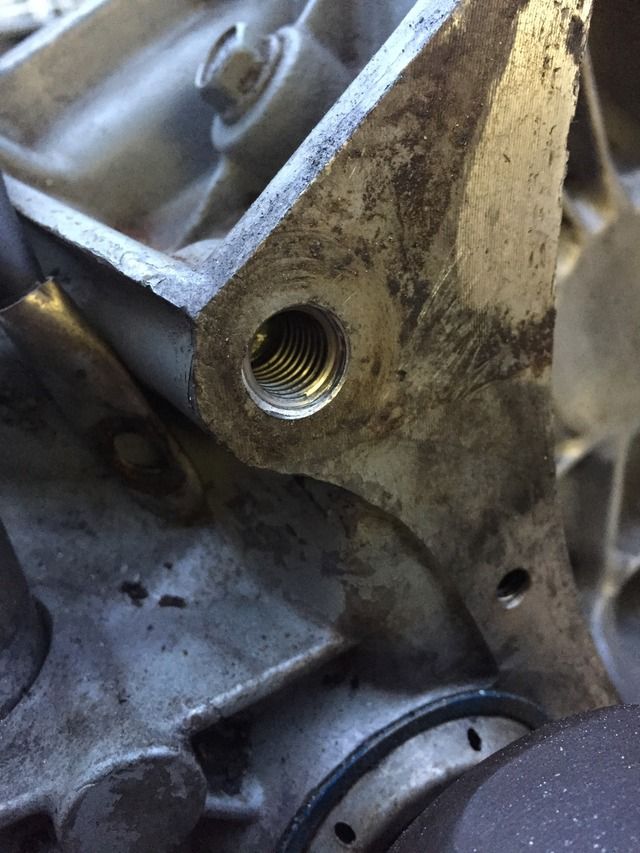
I had to remove the engine from the cradle to install a helicoil on the trans behllhousing. I tried doing this while assembled but the tap wouldn't fit through the engine bellhousing bolt hole. It turned out great and now the bolt tightens properly.


Things taken apart for the heli-coil install


New threads installed.

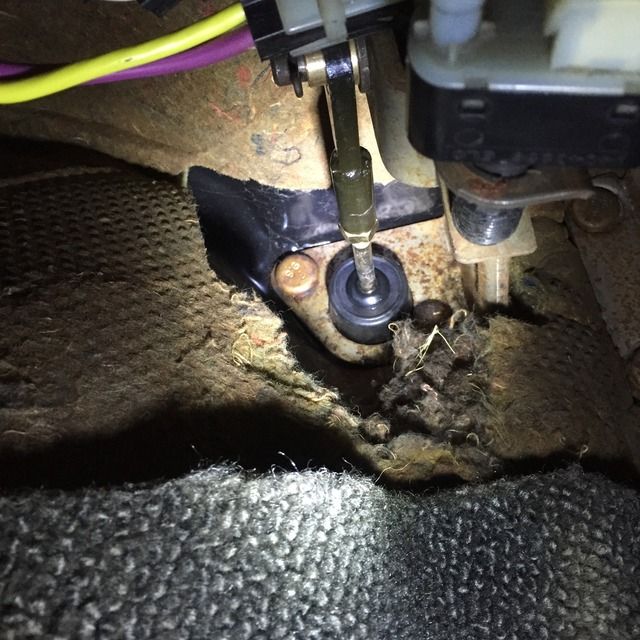
I ordered and installed a bushing from Rodney Dickman to fit the new master cylinder with the different clutch pedal design, fits and works perfectly.


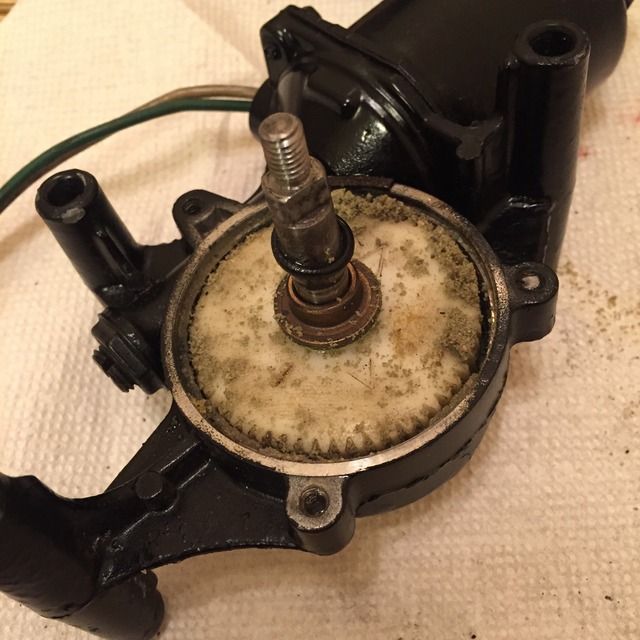
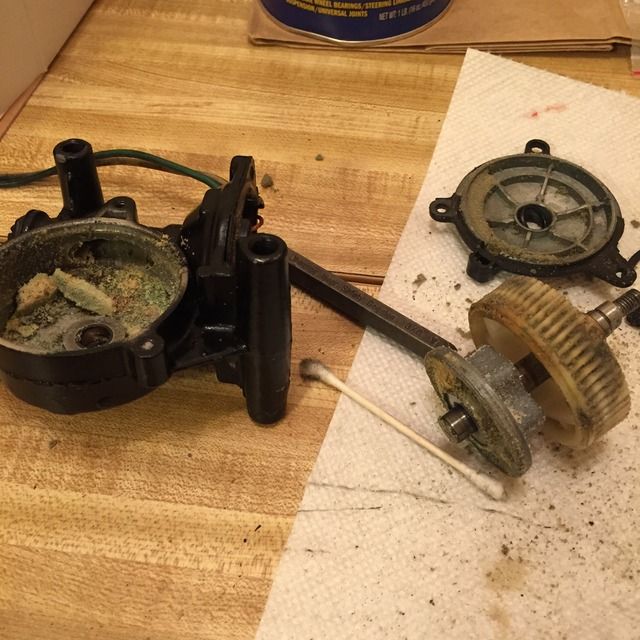
I also ordered headlight motor rebuild kits from Rodney and rebuilt both motors. The drivers side headlight motor was very simple and straight forward to fix. The torque pins were still in tact but original, I still replaced them as they'll likely fail sometime soon. The passengers side rebuild was a different story, two of the bolts broke off and required drilling out and new bolts installed. One bolt was for the gear cover and the other is for the motor housing mount to the gear housing. This motors torque pins were completely disintegrated and created a big mess inside the housing.


It took a while to clean out all the debris but wasn't too bad drilling out the broken bolts. I picked up a pair of bolt/nuts from Ace that fit perfect in the new bigger openings. I tested the motor once reassembled and it worked perfectly, didn't test the drivers side as I didn't have to fully disassemble it. The drivers side chrome headlamp surround had two mounting brackets broken off so it was loose and held in by tape. Luckily I still had the headlight assemblies from my other Fiero and swapped in a working one.

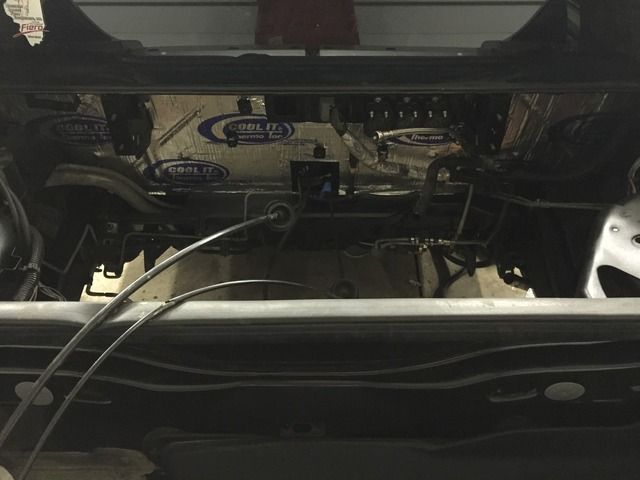
I also created a template for the heat shielding I'll be installing to replace the stock and deteriorating junk I removed.


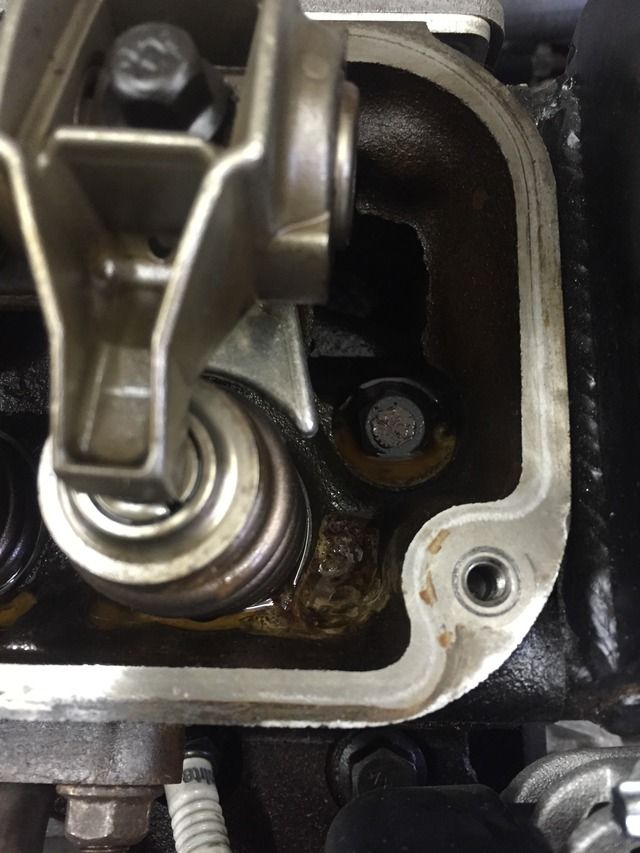
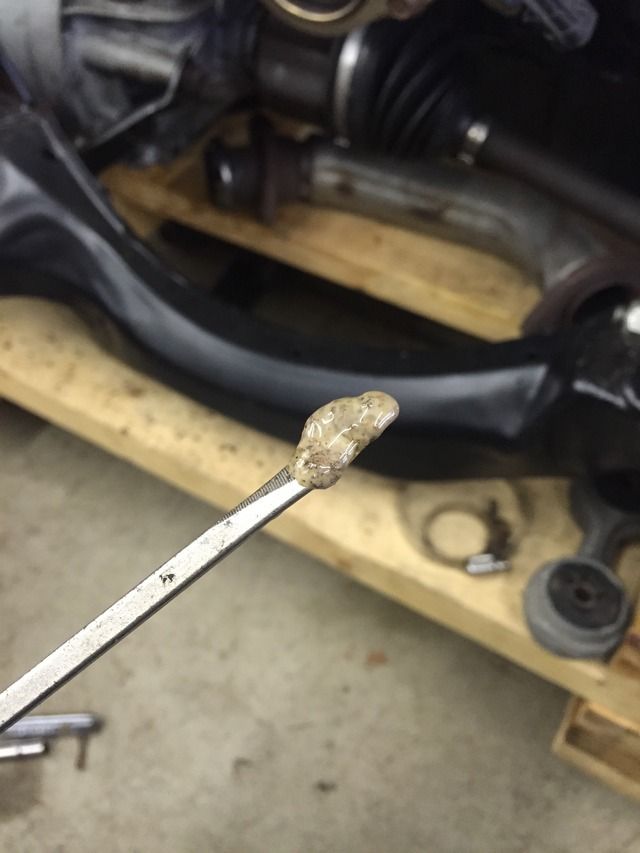
Over the weekend I got the engine cradle fully prepped to go back in the car. I re-installed the engine harness and added some plastic sheathing to protect from heat. I also got the the plug wires installed and re-routed a coolant line away from the serpentine belt to prevent rubbing. I did have a brief scare when installing new valve cover gaskets and discovered a milky sludge in the head oil. Turns out moisture seeped in where the gaskets were leaking and mixed with the oil, causing the discoloration. I'll swap out the oil before starting it and then again after letting it run a bit, I don't want to risk any damage from the bad oil.


The rear cylinder head, by the trunk, was worse than the front one.


The gunk pulled from the rear head, this was the worst of it.

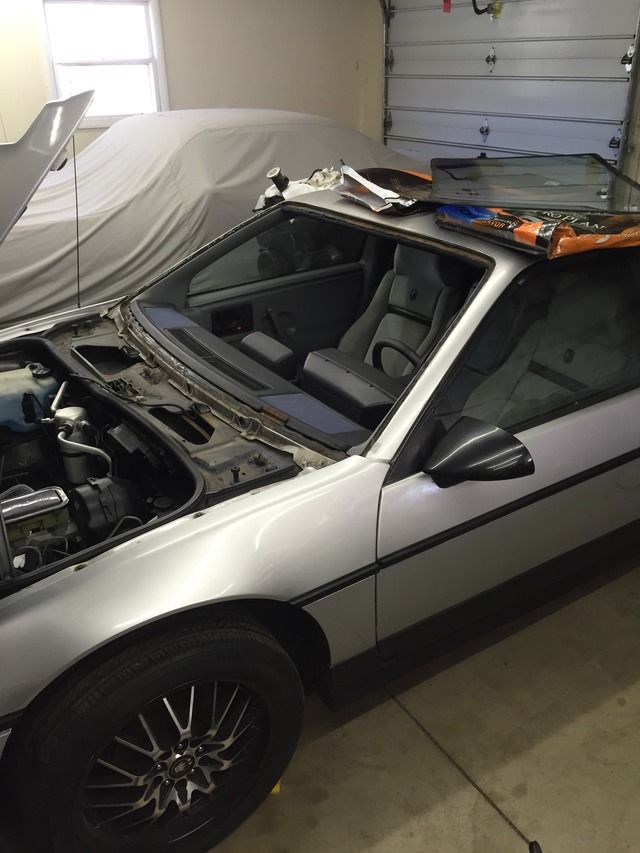
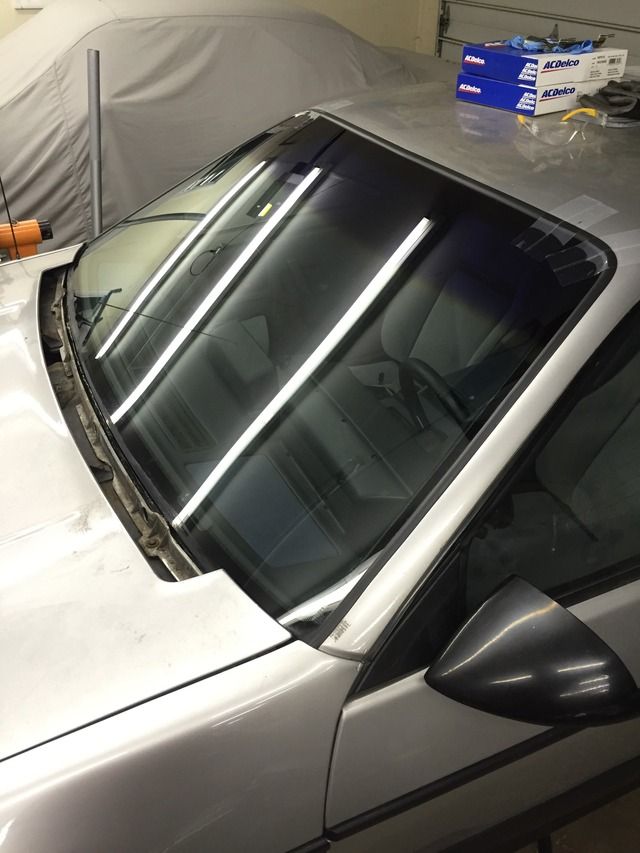
Yesterday I had a glass company come out and reseal the windshield so I won't have to worry about leaks again. I had the windshield and old sealant removed by the time they arrived which saved me $25 of the install, $125 all said and done. Overall I am very happy with the results, the new glass molding is a bit bigger than the stock stuff but looks good. There are some scratches here and there on the glass but nothing too bad.


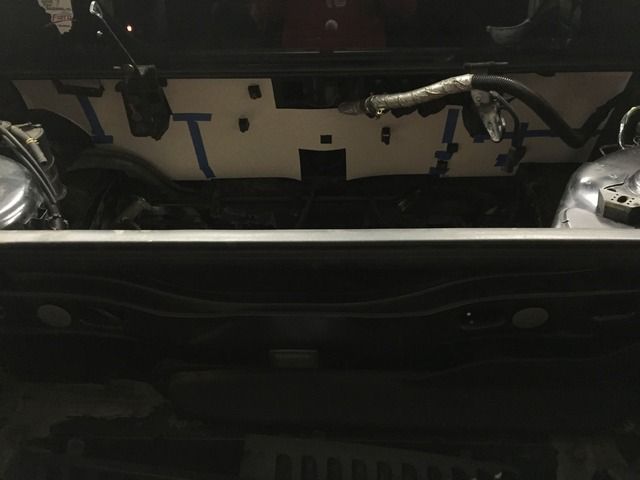
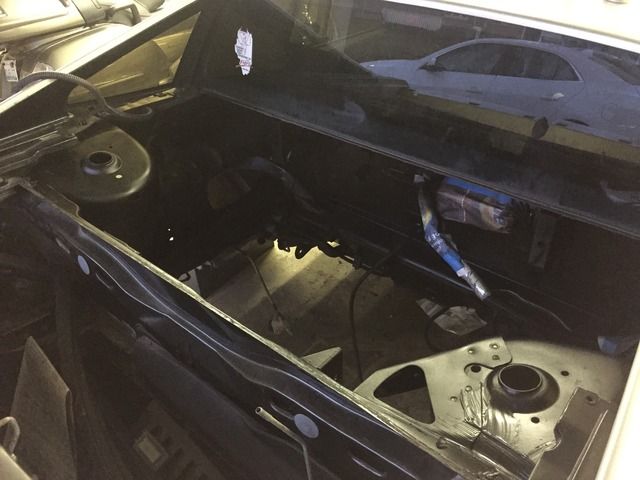
And last but not least today I prepped and painted the engine bay so I can install the engine and cradle assembly. I POR-15'd the rusty areas and then painted over them with a semi-gloss back paint, looks like it is going to turn out great!


This weekend the weather on Saturday looks perfect for me to install the cradle back in the car and get things moving. I'm hoping to have the car on the road here in the next 2 weeks or less.

------------------
Project L67 Fiero

IP: Logged
Jfrost
Member
Posts: 1092
From: Brookfield, IL
Registered: Jul 2009


Feedback score:    (29)
Leave feedback

Rate this member

Report this Post03-31-2015 10:42 PM Click Here to See the Profile for JfrostSend a Private Message to JfrostEdit/Delete MessageReply w/QuoteDirect Link to This Post

Jfrost

1092 posts
Member since Jul 2009
 
quote
Originally posted by zzzhuh:


Im gonna hold you to that


I think I just delivered on that promise
IP: Logged
chrissin712
Member
Posts: 191
From: Chicago, IL
Registered: Feb 2014


Feedback score: (2)
Leave feedback

Rate this member

Report this Post04-01-2015 10:26 AM Click Here to See the Profile for chrissin712Send a Private Message to chrissin712Edit/Delete MessageReply w/QuoteDirect Link to This Post
 
quote
Originally posted by Jfrost:


I think I just delivered on that promise


Can I hold you to the running in 2 weeks comment then? lol
Looks good so far!
IP: Logged
zzzhuh
Member
Posts: 826
From: Colorado
Registered: Jan 2014


Feedback score: (2)
Leave feedback

Rate this member

Report this Post04-01-2015 02:16 PM Click Here to See the Profile for zzzhuhSend a Private Message to zzzhuhEdit/Delete MessageReply w/QuoteDirect Link to This Post
IP: Logged
chrissin712
Member
Posts: 191
From: Chicago, IL
Registered: Feb 2014


Feedback score: (2)
Leave feedback

Rate this member

Report this Post04-02-2015 01:33 PM Click Here to See the Profile for chrissin712Send a Private Message to chrissin712Edit/Delete MessageReply w/QuoteDirect Link to This Post
 
quote
Originally posted by zzzhuh:


This thread needs more updates... and not another car getting parted out!
BTW any chance you have a headliner for a sunroof car laying around in your storage?
IP: Logged
Jfrost
Member
Posts: 1092
From: Brookfield, IL
Registered: Jul 2009


Feedback score:    (29)
Leave feedback

Rate this member

Report this Post04-02-2015 02:06 PM Click Here to See the Profile for JfrostSend a Private Message to JfrostEdit/Delete MessageReply w/QuoteDirect Link to This Post
 
quote
Originally posted by chrissin712:


Can I hold you to the running in 2 weeks comment then? lol
Looks good so far!


Go for it, engine should be in Saturday and started by Sunday at the latest. I've started to regain the excitement about this build once again since I'm so close to it running.
IP: Logged
Jfrost
Member
Posts: 1092
From: Brookfield, IL
Registered: Jul 2009


Feedback score:    (29)
Leave feedback

Rate this member

Report this Post04-02-2015 02:07 PM Click Here to See the Profile for JfrostSend a Private Message to JfrostEdit/Delete MessageReply w/QuoteDirect Link to This Post

Jfrost

1092 posts
Member since Jul 2009
 
quote
Originally posted by chrissin712:


This thread needs more updates... and not another car getting parted out!
BTW any chance you have a headliner for a sunroof car laying around in your storage?


More updates are on the way, don't worry.

I do have a another headliner but it is being saved for the time being, sorry.
IP: Logged
Jfrost
Member
Posts: 1092
From: Brookfield, IL
Registered: Jul 2009


Feedback score:    (29)
Leave feedback

Rate this member

Report this Post04-02-2015 11:31 PM Click Here to See the Profile for JfrostSend a Private Message to JfrostEdit/Delete MessageReply w/QuoteDirect Link to This Post

Jfrost

1092 posts
Member since Jul 2009
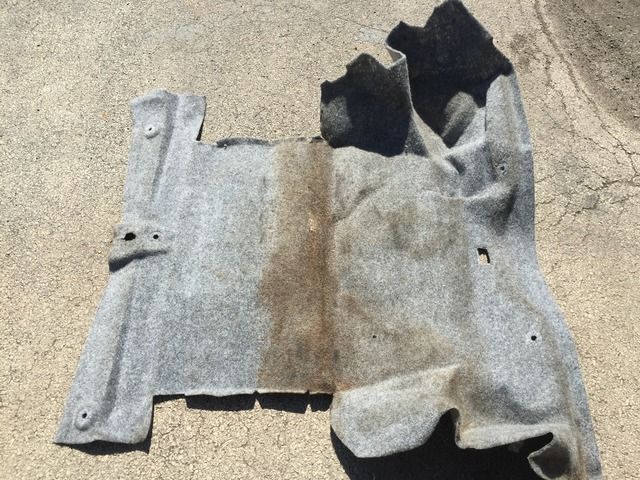
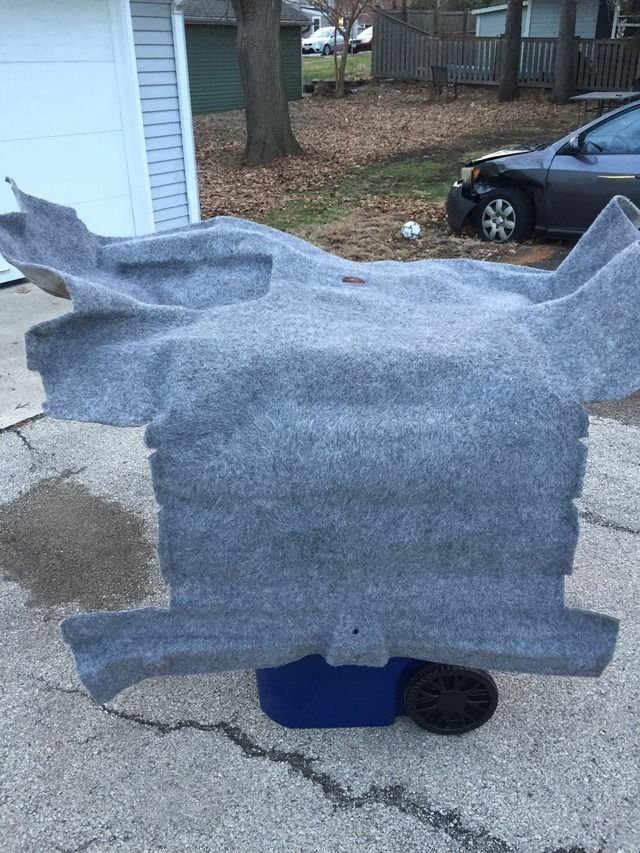
With yesterdays beautiful weather here I cleaned to trunk carpet outside and it turned out great. I followed to How-To guide in the FAQ section and it worked really well. I only had to do 2 cleanings with resolve and then one with CLR for a few small rust stains.


There are still a few very small spots here and there but overall I am very happy.

Today I got quite a bit done. The rear firewall heat shielding is cut and installed, fuel filter/regulator assembly, evap lines and Charcoal canister as well as a few coolant lines are installed. All that is left for the engine bay is to install the trans shift/select cables and then the engine can go in. I had to make a few trips to the parts store as I wanted to replace all evap and heater hoses in the engine bay while I had everything apart. Its just extra piece of mind. The plan is still to install the engine Saturday and then hopefully have it started by Sunday.


IP: Logged
PFF
System Bot
Jfrost
Member
Posts: 1092
From: Brookfield, IL
Registered: Jul 2009


Feedback score:    (29)
Leave feedback

Rate this member

Report this Post04-04-2015 06:00 PM Click Here to See the Profile for JfrostSend a Private Message to JfrostEdit/Delete MessageReply w/QuoteDirect Link to This Post
It's in!!!


This was easily the longest it's ever taken me to install the cradle. Everything went great until I had to line the front and rear cradle bolts up. There was no wiggle room whatsoever to adjust the cradle and line up the bolt holes. I had to use ratchet straps to pull the cradle into proper alignment. I'm just thankful it's in so I can work on reconnecting everything tomorrow.
IP: Logged
Jfrost
Member
Posts: 1092
From: Brookfield, IL
Registered: Jul 2009


Feedback score:    (29)
Leave feedback

Rate this member

Report this Post08-17-2015 12:42 AM Click Here to See the Profile for JfrostSend a Private Message to JfrostEdit/Delete MessageReply w/QuoteDirect Link to This Post
Engine got almost up to operating temp, about 160, before I shut it off. Had some coolant leaks that were resolved by tightening the clamps a bit more. There is a misfire at idle still that I'm attributing to a leaking brake vacuum line connector. I used engine sealant on the connector and its drying overnight, should be good to go tomorrow.

Coilovers and brakes are installed but still need to be bled, passenger wheel liner installed as well. I bled the clutch lines and tested their operation, I'm able to get into all gears with the pedal depressed. I do run into occasional grinding when going into either reverse or 3rd gear from the syncros. I had issues with the trans before (when I was actually driving it a bit) with getting into reverse but never anything with 3rd gear. I initially blamed these issues on the clutch issues I previously had and believe the noises now are due to low fluid: the axle seals leak a bit and over 2 years I'm sure the fluid level has dropped. I'll check it and add fluid as needed, I really hope I don't run into any major issues with this trans though despite having a spare.

I still need to route the intake ducting into the fender well but may settle for attaching the filter to the MAF sensor to get it on the road sooner. The muffler and exhaust pipes will be installed soon and then I can get the car on the ground and finally drive it. Getting closer and closer.

[This message has been edited by Jfrost (edited 08-17-2015).]

IP: Logged
Jfrost
Member
Posts: 1092
From: Brookfield, IL
Registered: Jul 2009


Feedback score:    (29)
Leave feedback

Rate this member

Report this Post08-17-2015 12:46 AM Click Here to See the Profile for JfrostSend a Private Message to JfrostEdit/Delete MessageReply w/QuoteDirect Link to This Post

Jfrost

1092 posts
Member since Jul 2009
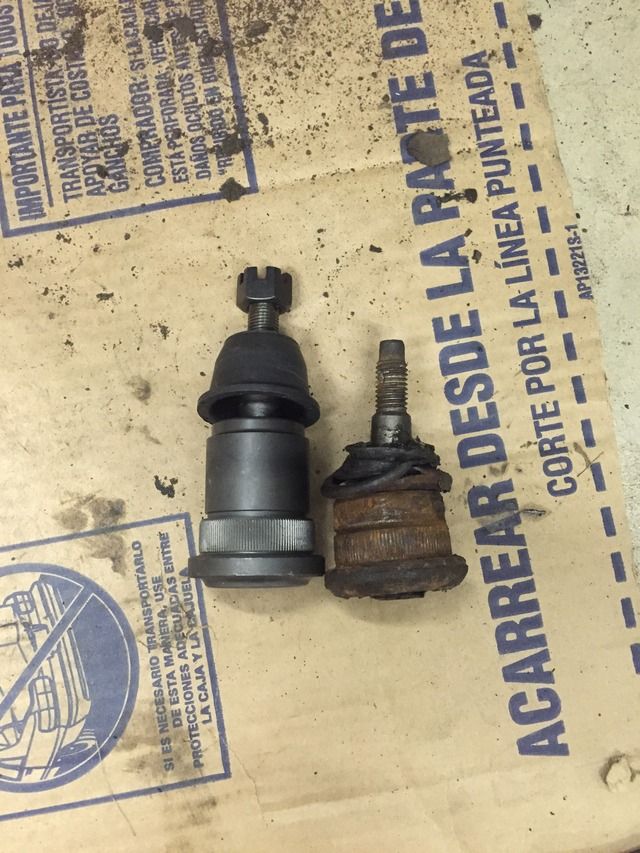
Worked out the issue with the trans after some more adjustments to the cables and after rebuilding the shifter assembly to remove excessive looseness. The stock shifter seems to be inherently sloppy even after the rebuild. A few days after the above videos were taken I was able to drive the car around the block a few times. Trans shifted smooth but the suspension was all over the place. I was about ready to take it for an alignment when I decided to check the front end for looseness. Unsurprisingly there was some considerable movement so I decided to go for broke and rebuild the entire front end: upper/lower ball joints, inner/outer tie rods and zero-lash stabilizer links. I decided to go with 1" lowering ball joints to safely drop the front end. These change the suspension geometry a bit so I had to slot the upper ball joint holes so the adjustable ball joints had more room to move back for an alignment.

The whole process took longer than I had planned due to difficulties with removal of the control arms and an overall lack of free time. One lower control arm bolt on each side needed to be cut out and one of the upper control arm bolts needed considerable persuasion to come out. I also installed poly control arm bushings which overall went in fairly easy: they needed some trimming of the lower bushing cups to fit on the car.

I had the 1' lowering ball joints tac welded in place for extra safety and piece of mind, a local muffler shop did it on the cheap. When reinstalling the suspension I discovered the rubber brake line on the drivers side cracked likely causing the soft/poor brake feel I had when driving. With this in mind I ordered all new brake lines front and rear since its best to replace all considering their age and mileage.


Side by side of the 1' lowering ball joint and the original worn out one. You can see the added height which in turn lowers the front end.


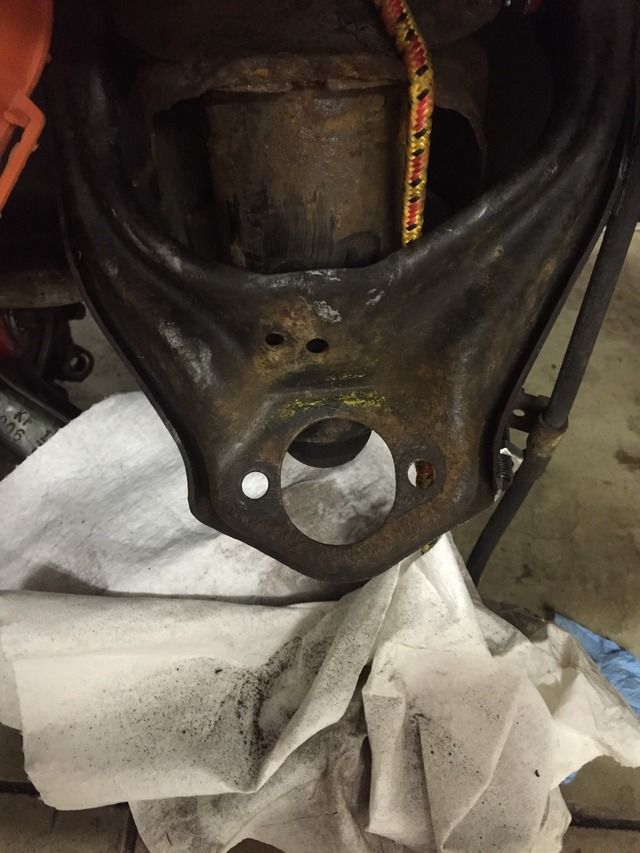
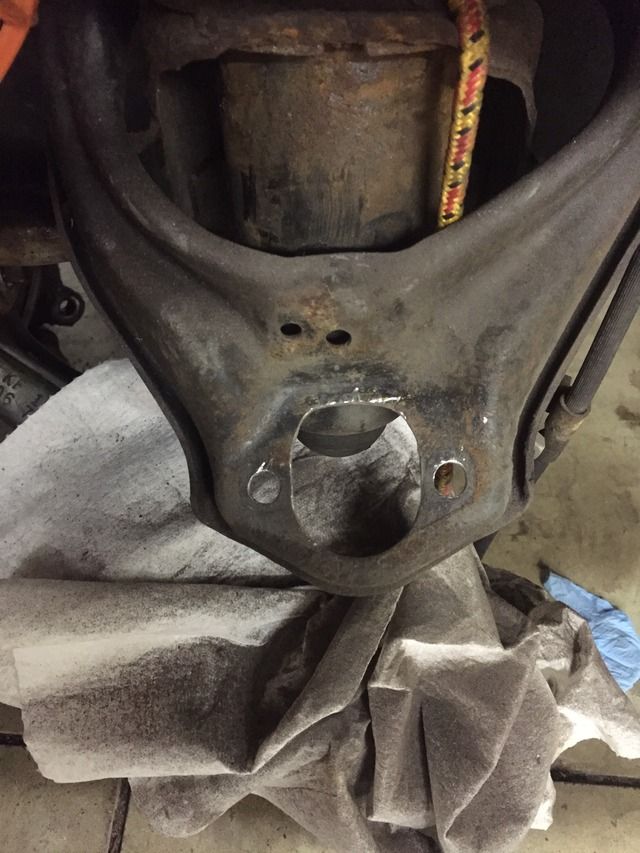
Upper control arm before


And after. No material was removed between the bolt holes and ball joint opening which would be dangerous and weaken the control arm. I ground back to allow the ball joint to fit further inwards enabling a proper alignment.


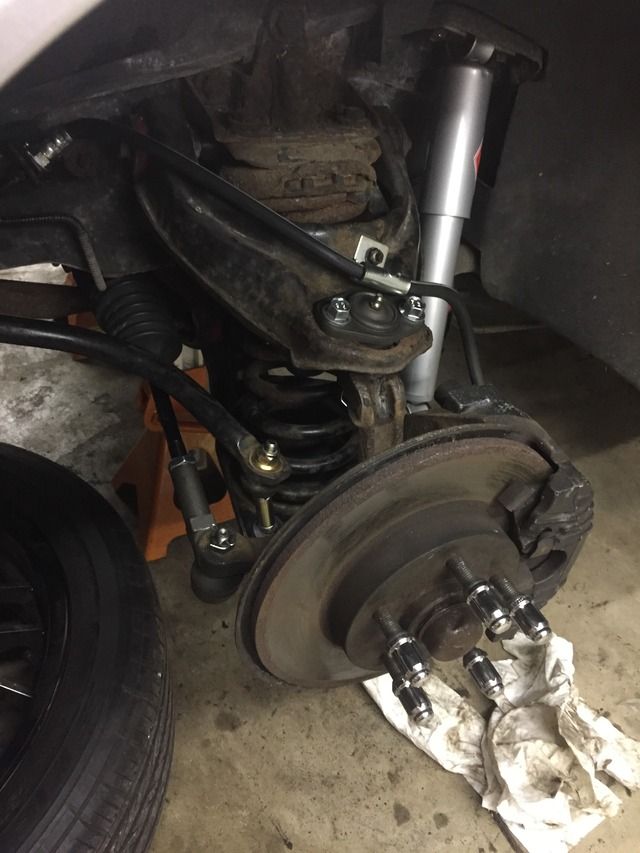
All the new components installed. I also bit the bullet and bought new Wagner Thermo Quiet pads to match the new pads in the rear. The pads originally in had plenty enough meat left to last a while but since I've pretty much rebuilt the entire car from the ground up it would be silly not to get new matching pads. The pads will arrive in a few weeks (nothing local) so until then I cleared up the old pads to use in the interim.

A decent sized coolant leak developed on one of the heater core lines in the rear that I'll need to remedy before its road worthy. There's also the issue of the speedo not working which I believe the gear on the wheel speed sensor fall off into the trans. I was able to get the dash lights workings, needed a new dimmer switch resistor, and will need to get an alignment once the rear brake hoses are replaced and system bled.


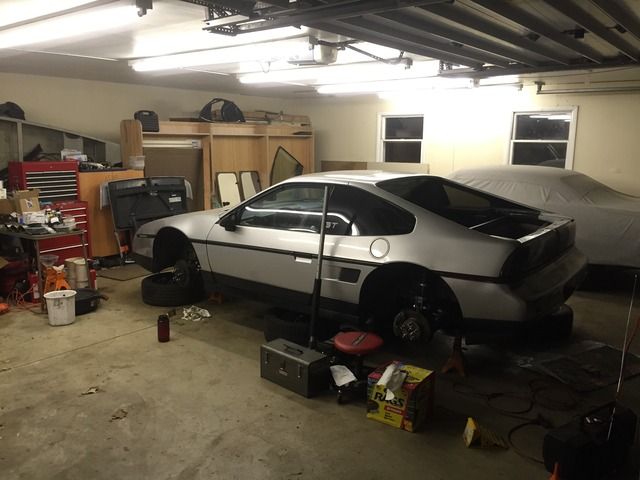
This is how the car will sit until I get back from a much needed vacation to Alaska next week. Once I return it should hopefully be only a matter of days before its on the road again. There were some changes at work that caused an increased work load with a lot more travel which has gotten in the way of progress on the car, but it should settle down a bit when I get back.

[This message has been edited by Jfrost (edited 08-17-2015).]

IP: Logged
Jfrost
Member
Posts: 1092
From: Brookfield, IL
Registered: Jul 2009


Feedback score:    (29)
Leave feedback

Rate this member

Report this Post08-17-2015 12:47 AM Click Here to See the Profile for JfrostSend a Private Message to JfrostEdit/Delete MessageReply w/QuoteDirect Link to This Post

Jfrost

1092 posts
Member since Jul 2009
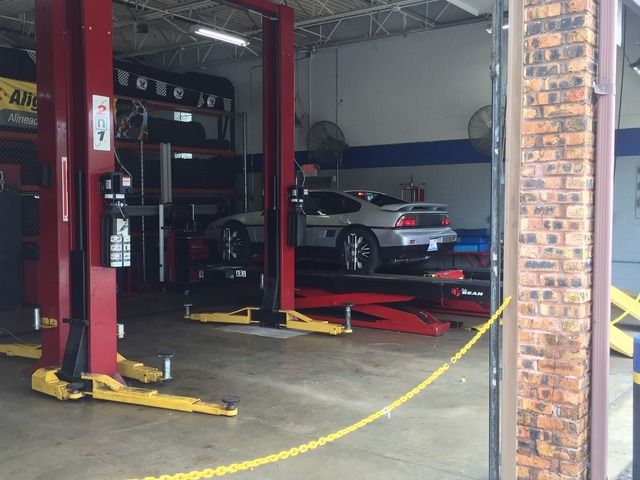
Since returning from vacation I've had an alignment done, remedied the majority of coolant leaks, bled the brakes, installed the speedo gear, connected the PCV valve to the throttle body and gone for a few test drives with only one major incident. When coming back from a DQ visit with the GF I stopped by my parents house for a visit. Upon leaving I said something along the lines of "see ya later unless I have to Fred Flintstone the car home." Sure enough, car wouldn't start and I did in fact have to have my brother and mom help push the car home (luckily only a few blocks away). Karma. Turns out the fuel pump died and upon dropping the tank I didn't see any obvious issues with the internal wiring/pump. I tested the pump connector directly with 12v before dropping the tank and nothing worked. When I removed the pump and applied 12v directly to it sure enough it kicked on. I'm uneasy about it failing again and may just go with a different fuel pump better suited to running e85, something I'm considering down the road.

After going for the longest ride yet, about 20 min tonight, there are still some issues with shifting that need to be addressed. First gear won't work at all and when under moderate acceleration going into 3rd/4th gear won't catch. I'll fiddle around with adjusting the cables more but may end up needing to adjust the bracket to allow for better travel/movement of the cables.

The alignment came out pretty good, I do need to slot the RF upper control arm more in order to slide the ball joint inwards to get total camber within spec. It is great though driving around a car that, for the most part, tracks straight under load and over bumps.


More updates and, hopefully some more videos, to come soon.
IP: Logged
Jfrost
Member
Posts: 1092
From: Brookfield, IL
Registered: Jul 2009


Feedback score:    (29)
Leave feedback

Rate this member

Report this Post08-17-2015 12:48 AM Click Here to See the Profile for JfrostSend a Private Message to JfrostEdit/Delete MessageReply w/QuoteDirect Link to This Post

Jfrost

1092 posts
Member since Jul 2009
I've put some more miles on the car and so far so good. There are still some shifting issues that I'll have to reorient the shift cable setup to remedy. I adjusted the cables tonight and was able to get 1st gear at times but shifting from 2nd to 3rd wouldn't always work the first try. I have some ideas on how I'll remedy the situation and report back after trying.

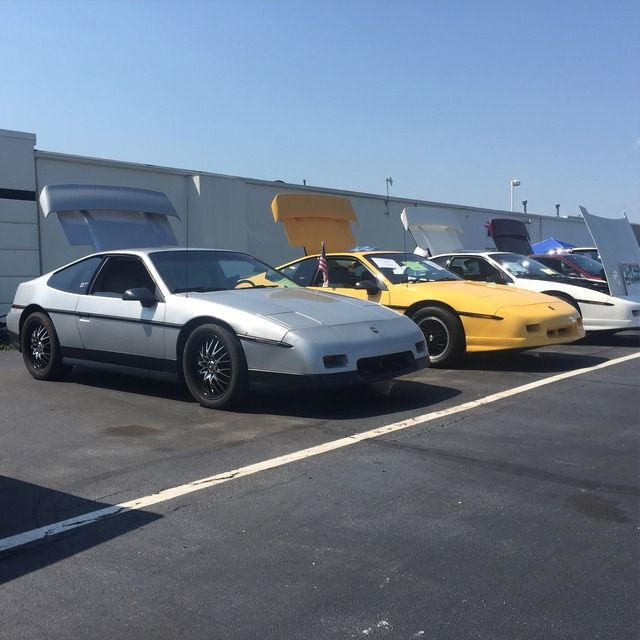
Participated in my first car show ever on Saturday at Woody Buick GMC here in Naperville. It was a Pontiac/Oakland, Buick and Oldsmobile show but had a few Chevy's in it as well. There were a total of 6 Fiero's there including mine, two of which are very nice examples of an 88 Fiero. I was the only Fiero with an engine swap there. Got to meet the President and board member of the local Fiero club which was fun to chat and talk shop. We were the newest cars there, save for a 97 Riviera, so as expected no awards or anything. It was still fun to show off what I've done, mainly talking with the other Fiero guys, and I may attend more shows in the future.


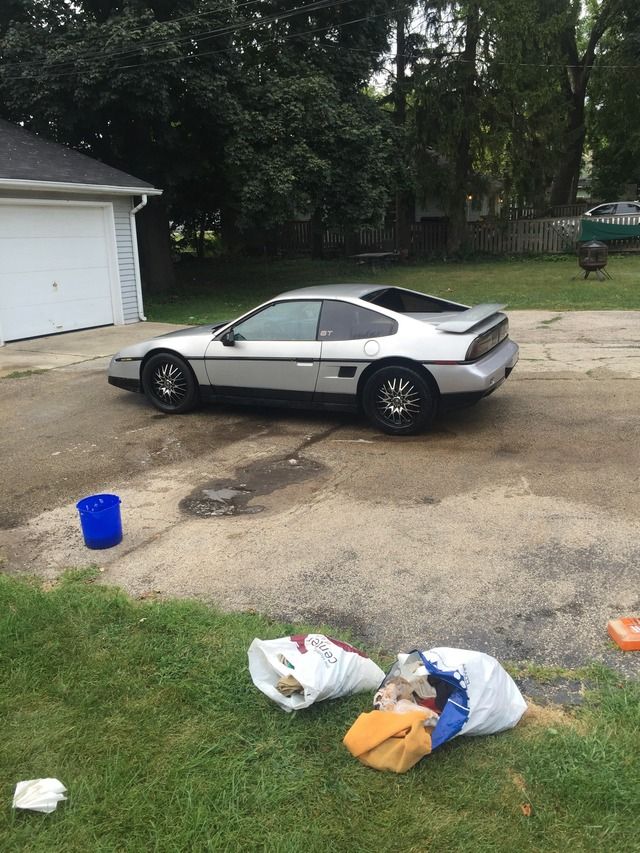
Washing the car the day before the show. It dawned on me during this that it had been 2+ years since I had last hand washed a car. These cars are so easy to wash due to their size which is nice.


My car next to a yellow 88 GT and an all original 88 GT with 56k miles on it, completely spotless and beautiful.


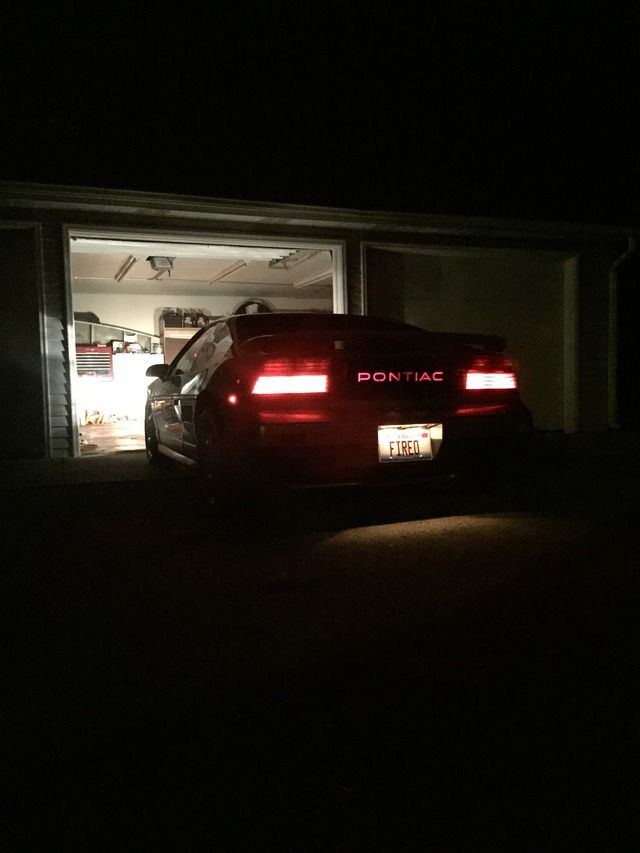
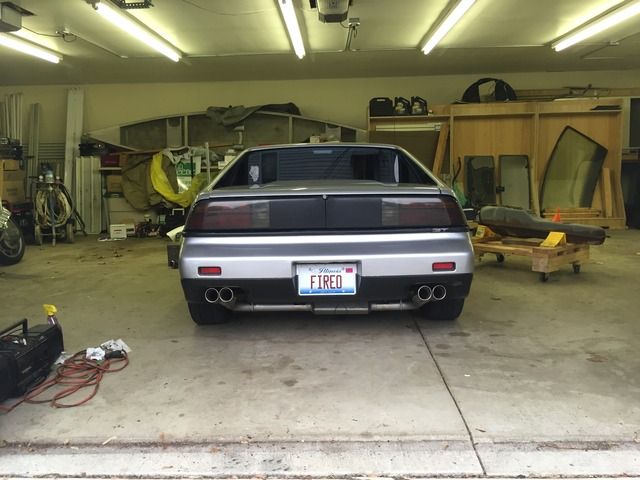
After tonight's drive I grabbed this shot. One of my favorite features of the Fiero are the rear tailights and the "PONTIAC" illumination. My tailights are painted in the center section, due to de-lamination, but when the lights are on you can still see it lit up. I'll eventually swap out to better lenses but for now these work.

Other items on the list to fix are the blacked out lower trim. I'm debating between repainting them black or going with Plasti Dip in either silver to match or black to keep the same theme. I'm also trying to figure out the best way to remove the rear spoiler as I prefer the look without them. I have a spare rear decklid that I could swap on, removing the original w/spoiler, fill in the holes and then paint to match the car. We'll see but I want to figure something out soon.

------------------
Project L67 Fiero

[This message has been edited by Jfrost (edited 08-17-2015).]

IP: Logged
Jfrost
Member
Posts: 1092
From: Brookfield, IL
Registered: Jul 2009


Feedback score:    (29)
Leave feedback

Rate this member

Report this Post08-17-2015 09:25 AM Click Here to See the Profile for JfrostSend a Private Message to JfrostEdit/Delete MessageReply w/QuoteDirect Link to This Post

Jfrost

1092 posts
Member since Jul 2009
Last nights posts were copied from the build thread on another site, havent gone through to edit them yet for here.
IP: Logged
BV MotorSports
Member
Posts: 4821
From: Oak Hill, WV
Registered: May 2001


Feedback score:    (7)
Leave feedback


Total ratings: 189
Rate this member

Report this Post08-18-2015 04:03 PM Click Here to See the Profile for BV MotorSportsSend a Private Message to BV MotorSportsEdit/Delete MessageReply w/QuoteDirect Link to This Post
I used that pivot style engine mount on my 1st L67 swap. It had a nasty habit of bending my L shape engine mount. The same one you have too. It allows too much front to back engine movement.
IP: Logged
Jfrost
Member
Posts: 1092
From: Brookfield, IL
Registered: Jul 2009


Feedback score:    (29)
Leave feedback

Rate this member

Report this Post08-20-2015 12:08 AM Click Here to See the Profile for JfrostSend a Private Message to JfrostEdit/Delete MessageReply w/QuoteDirect Link to This Post
I've put about 60 miles on the car the past few days, more than 30 of which happened tonight. I've reoriented the shifter bracket and adjusted the cables some more and now have 1st gear at all times. Going from 2nd to 3rd requires a little "twirl" of the shifter before it'll go into gear though. The select cable is binding a bit but it works well enough for now while I continue to break in the clutch.

While driving tonight I did two different stints on the highway, both relatively short, to see how things went/felt at higher speeds. Peaked at about 72 while merging and cruised for a bit at 55, 60, 65 & 70 to see where the RPM's were at. At 70 mph it's turning 3.5k rpm which is higher than I'm used to. Crusing at 60 feels much more comfortable and natural so far, right around 3k rpm. Without exhaust tips the noise bleeds into the cabin quite a bit however, once installed I feel the noise level will be much more comfortable.

For the first time tonight I got above half throttle, about 60%, but did not hear the supercharger keep in with boost, something I feel would have happened on the GTP at that throttle percentage. I'll double check the lines and arrangement to ensure everything is setup correctly.

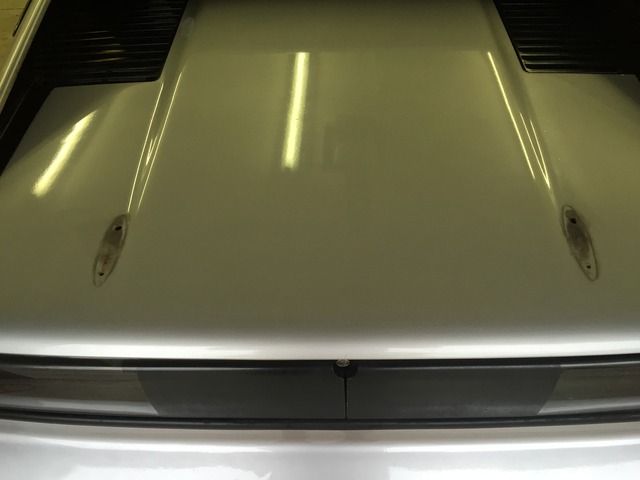
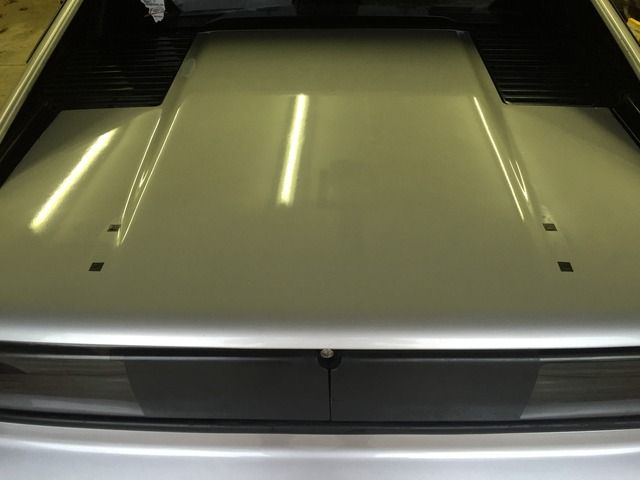
Last night I decided to finally take off the spoiler. I prefer the look without and it was getting in the way when looking back through the rear view mirror. I'll need to find a more permanent fix for the now open holes on the rear decklid, right now electrical tape will work (seeing as the car won't be driven in rain). Also, I mocked up the exhaust tips checking for orientation. I ordered new exhaust band clamps to install these and hopefully quiet the cabin from exhaust drone. They should arrive later this week and look forward to test riding them. These are the same exhaust tips that were on my GTP way back in 2008. They'll need some cleaning up but I love the way they fill out the exhaust outlets in the rear bumper.


Dirty underside of the spoiler after removal.


Cleaned up and electrical tape covering the holes for now.


Mock-up with the exhaust tips. Can't wait for the clamps to arrive so these will be a permanent addition to the car. I still need to fix the exhaust so it doesn't hang so low, but that'll wait for winter.

I'll continue to put miles on the car and test for any issues with the swap. Here's hoping nothing major rears its ugly head.
IP: Logged
Jfrost
Member
Posts: 1092
From: Brookfield, IL
Registered: Jul 2009


Feedback score:    (29)
Leave feedback

Rate this member

Report this Post08-20-2015 12:10 AM Click Here to See the Profile for JfrostSend a Private Message to JfrostEdit/Delete MessageReply w/QuoteDirect Link to This Post

Jfrost

1092 posts
Member since Jul 2009
 
quote
Originally posted by BV MotorSports:

I used that pivot style engine mount on my 1st L67 swap. It had a nasty habit of bending my L shape engine mount. The same one you have too. It allows too much front to back engine movement.


Are you referring to the front engine mount in the stock Fiero location? I have poly engine/trans mounts from Rodney and an engine bracket from another former member here, he who shall not be named. So far I haven't noticed any excess movement yet I am still breaking in the clutch and car.
IP: Logged
Previous Page | Next Page

This topic is 2 pages long:  1   2 
next newest topic | next oldest topic

All times are ET (US)

Post New Topic  Post A Reply
Hop to:

Contact Us | Back To Main Page

Advertizing on PFF | Fiero Parts Vendors
PFF Merchandise | Fiero Gallery
Real-Time Chat | Fiero Related Auctions on eBay


Copyright (c) 1999, C. Pennock