I got that tool from Rodney Dickman what a waste of money, this can be done without that tool with no issues. Thanks for posting this info too bad I did not see it before I did mine.
I did it with this method and let me say it's VERY easy to do. I had no trouble whatsoever. Course i forgot to replace the window guides so i had to take it apart again... Hardest part was making the drivers side into a passengers side dew wipe.
For some reason, my window wouldn't go high enough, and I didn't have Rodney's tool. So I cut a Phillips bit short with my side cutter, gripped it hard in a pair of small vice grips, and used that. I loosened the inside felt pads to give me more room, and found that you have more room with the window up than down. Also, with the window up, there's no worry about scratching it, because you can't see the part you might scratch. Worked out ok. Now I need to turn a driver side dew wipe into a passenger side so I can do the other side, like here.
I forgot to mention the vapor barrier. As you can see, I took mine completely out and am going to replace it with dynamat as I think that gives the door a more solid sound when it closes. The Finale door panels have a much larger air volume and sound pretty "cheap" due to the resonance when you shut the doors because of that unless you use the dynamat.
John Stricker
It's been a while since this post. Any pics of the dynomat installed? Just wondered how it was applied behind a door panel.
I never took any pictures of the dynamat installed and I've since sold the roadster, so no pictures will probably ever be taken. Just take your time and it will go on, although I did make custom door panels for that car, I don't see why it wouldn't work with the stock ones.
John Stricker
quote
Originally posted by sjmaye:
It's been a while since this post. Any pics of the dynomat installed? Just wondered how it was applied behind a door panel.
I never took any pictures of the dynamat installed and I've since sold the roadster, so no pictures will probably ever be taken. Just take your time and it will go on, although I did make custom door panels for that car, I don't see why it wouldn't work with the stock ones.
John Stricker
Do you install the Dynamat over the entire area behind the door panel or do you focus on covering the access openings to the interior of the door cavity?
Wow! Some of you do really go thru a lot of trouble with these. I guess I may be lucky. With Rodney tool I have been able to replace them in two cars without touching any door glass part at all. Just remove trim, insert tool, be carefull and take screws out. Still nice write up if the going gets though
I laid it over the whole panel, then used a heat gun and a small roller and rolled it into every nook and cranny, which stretched it thinner than it is from the box. But I didn't have a door handle, window crank, etc., etc., to worry about either.
John Stricker
quote
Originally posted by sjmaye: Do you install the Dynamat over the entire area behind the door panel or do you focus on covering the access openings to the interior of the door cavity?
To each his own, Alex. I have a tool just like Rodney's that I made. It works, but it's a PITA IMHO. I can do it faster with a lot less cursing and swearing this way. You must have the fingers of a girl.
John Stricker
quote
Originally posted by Alex4mula:
Wow! Some of you do really go thru a lot of trouble with these. I guess I may be lucky. With Rodney tool I have been able to replace them in two cars without touching any door glass part at all. Just remove trim, insert tool, be carefull and take screws out. Still nice write up if the going gets though
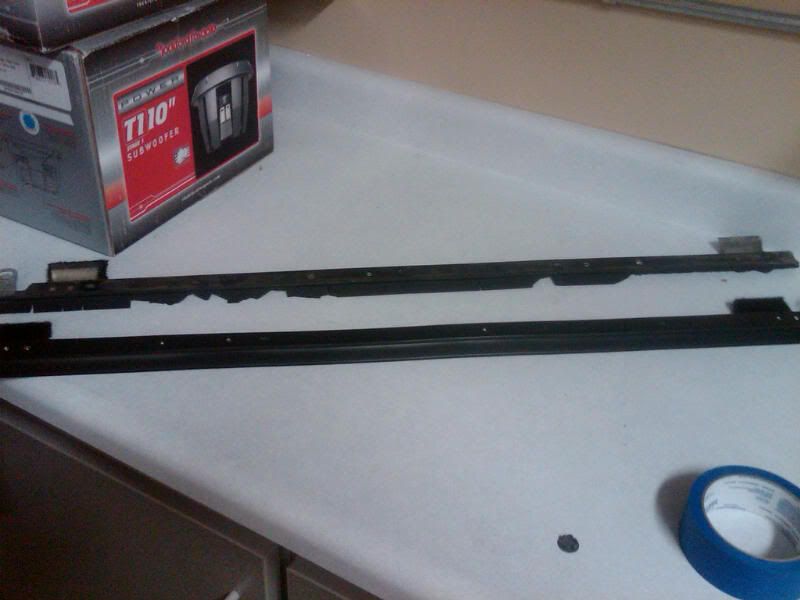
I used this method today installing my new Dew-wipes from DIY Stu and it went fairly easy. I dropped a few screws and nuts in the door. Those were a pain to get out. But overall, it's a nice straightfoward process.
And I must say, the new dew-wipes look so much better. I am very happy with the result.
2. How would I go about "poloishing" the scratches out of the door glass?
Thanks in advance.
By now, I'm sure everyone know's they can get dew wipes from The Fiero Store. But has anyone figured out the best way to polish the scratches out of the glass?
By now, I'm sure everyone know's they can get dew wipes from The Fiero Store. But has anyone figured out the best way to polish the scratches out of the glass?
Eastwood has a polish kit for glass. Get it. A bottle of Cerium Oxide and polishing pads. All you need is a variable speed electric drill. The kit is designed to remove wiper scratches from windshields. I have used this a lot. With a little practice you can fix any scratch in glass. If I can find a link I will post it but you should be able to find it at Eastwood Automotive. Hope this wotks: http://www.eastwoodco.com/s...=597&iProductID=2010
Guess I can't post a link. Anyway the pro kit is around $46
[This message has been edited by reverend (edited 10-19-2008).]
Just finished following the step-by-step instructions to do both doors. I did the wipes, got the power locks working again and made the doors solid again. This post saved me hours of figuring out the operation by myself. Thanks.......this site is so cool
Agree! These directions were truely a blessing! The first window took all day, and I had to biggest issue with that fricken rear screw...but the second window went pretty easy. I cleaned the window track and added new lithium grease and the window moves so much smoother. I really needed to change the window motors, as it was a bit slow. It's a bit faster now, but eventually I'll need to figure out how to get to the motors.
I did take the advice of someone on this thread to replace the vapor paper with dynamat. That stuff is expensive!...but I found a pretty good replacement on ebay "Fatmat". Had alot of good comments and feedback, and it was pretty easy to apply once I cut out the pattern and used a heat gun. The door sounds much more solid and it has lowered the interior noise by at least 30%.
I decided to make my own dew wipe screw removal wrench. I took a #2 Phillips bit that fits into a 1/4" bit holder and ground down the shank so only enough hex shaft remained to fit into a small open end wrench. I silver soldered the bit into the 1/4" end of the wrench. And YES that is one UGLY solder job! This wrench is 4 1/2" in length. This most likely come close to what Rodney sells, not sure never saw his tool.
Since I am painting my car the inner and outer door panels are off. I sprayed all the screws with PB Blaster. On my side are: none rusted screws, door panels removed, and not so large hands. As an Electrician I can fit my entire hand thru a one gang box hole in a wall which is 2" x 4".
Anyway using the paint mixing stick against the glass to put pressure on the screw head I was able to change one dew wipe faster than it took to make the tool. I will allow the PB blaster to soak overnight on the driver’s side and change it tomorrow.
I used masking tape on the glass to guard against scratches. I installed the original screws using the black automotive stick sealer to hold the screws to my fingers to get them started. I put the good screws from the far end positions back in the center to insure the best engagement with the Phillips head and thus the inner screws to the outside.
Once the screw is broken loose if your door panel is off you can turn the screw with needle nose pliers from end piercing through the door. Then when loose enough back it out with you "girly" fingers as posted above.
Sometimes I wish my hands were larger, but not today! Sparx22
[This message has been edited by sparx22 (edited 03-23-2009).]
Started working on this project this morning and got kind of stuck. So I did some searching and came across this method, after starting over both doors took little over half an hour. Anyone looking to put new wipes on, this is the way to go!!!
thank you for the knowledge. the job was easy apart from 2 rusted screws which came out after some patience.
jon m
And these would be impossible to get out with a "special tool". I used the under the glass method and still had one of the screws break. There's no way you can get enough bite with a "special tool" to break a screw.
And these would be impossible to get out with a "special tool". I used the under the glass method and still had one of the screws break. There's no way you can get enough bite with a "special tool" to break a screw.
I ended up stripping the the PITA middle screw with the RDickman tool... Not knocking Rodney, I bought the tool as more of a donation to his other great Fiero parts I've bought and DO work like the idler pulley and stainless steel vacuum lines (that run under the intake plenum).
So, I found this thread and I wish I found it sooner. What a great write up jstricker! I finally installed the GM original I bought about 8 years ago. My old dew wipe was so destroyed and weather beaten. The rubber was so brittle, dried, and cracked it literally fell apart on me as I attempted to remove it. Now I can tackle the RH door with more confidence.
------------------ =-Eric the Dread
1988 Fiero GT 2.8L V6 2001 Grand Prix GTP SC3.8L V6
I too replaced my dew wipes with DIY-Stu's. Not quite the hassel that I was expecting. Then again, a fellow Fiero owner lent me his dew wipe screwdriver. Really made it loads easier.
When you have the middle screw out, you can move to the PITA screw to the rear, that is the second one from the back. For this one, you have to slide the window BACK on the regulator arms. There is a point at which you will gain access to the screw, again you might have to help lift a little bit with a screwdriver on the glass, but you should have enough clearance.
I did mine today as well but for the life of me I couldn't figure out what John meant by back on the regulator arms. Back which way? Back toward the outer door skin, back toward the door hinge, back toward the door catch? I couldn't get the glass to move. So I ended up removing the PITA screw with the tool I made "a la Rodney". After fighting with it for 20 minutes it came out. Then I accidentally pushed on guide track itself and the glass shifted toward the door latch and I felt like a complete idiot!
The first one took me about 2 hours, the second took about 20 minutes. Thanks John, your write up saved me a huge amount of grief!
A+ to you!
[This message has been edited by infinitewill (edited 07-16-2009).]
So when you move the window up as high as possible to get those two middle screws, can you move it too far? Like, can you make it come out of the door entirely?
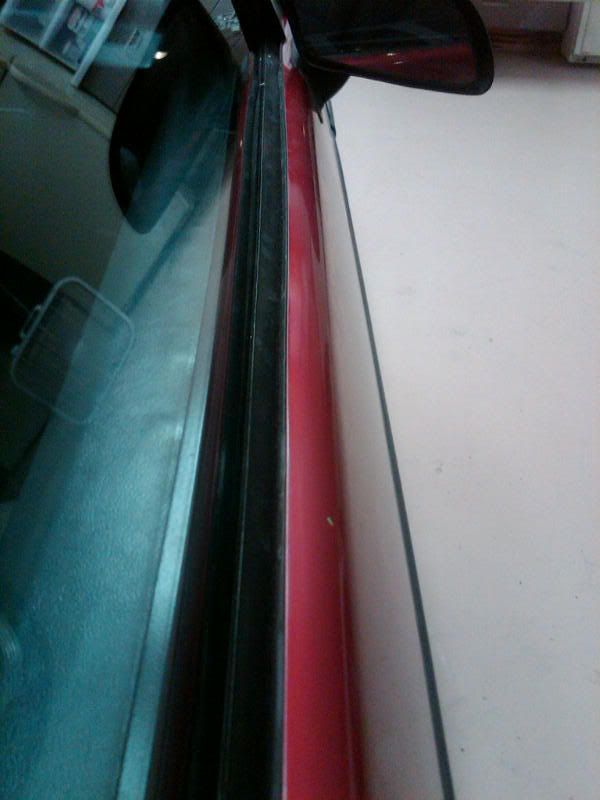
Spent the evening installing DIY-Stu's passenger side outer dew wipe. Many, many thanks to both OP and Stu for making my car look that much better! They really needed it
I noticed that the door used for this dew wipe change was a power window door. Not sure if the proceedure for manual windows is the same. Can anyone confirm that you can raise your manual windows up as high as this write up with out causing something to "go wrong". In other words, when you raise/lower the window with a manual crank, is it possible to go to far and then not get the manual gear assembly back together (the large gear and sissor drive in the middle).
Im not familiar with the inner workings of the door, so when I look at my door i see the guides on the sides, I see the bolts that are holding the window stops but of course I have a window crank assembly across the middle and the window crank on the lower forward area. If you remove the window track as pointed out, does this screw up the tracking for the manual windows.
I just want to be sure that with manual windows, you would do the same steps. I'd hate to get to a point where I can't get my doors back together because something has gotten off track.


 I have a tool just like Rodney's that I made. It works, but it's a PITA IMHO. I can do it faster with a lot less cursing and swearing this way. You must have the fingers of a girl.


 Not knocking Rodney, I bought the tool as more of a donation to his other great Fiero parts I've bought and DO work like the idler pulley and stainless steel vacuum lines (that run under the intake plenum).