At first I decided against starting this thread, but I thought it would be good to document my L67 swap. Here's what I'm working with: A few weeks ago I bought an 88 coupe with no engine. It came with a fastback clip, grills, decklid, and a ton of extra parts, most of them being interior pieces. I bought it for $350. Today I came home with an L67, transmission, axles, wiring and PCM from a 98 Riviera with 104k miles. I paid $575 for all of it and also gave a junk auto tranny for a core. I heard the engine run, and it ran smooth. The supercharger belt had been shredded though, due to a broken pulley which was damaged in the wreck. It doesn't have any play on the end of the pulley though, so I'm not expecting any problems. The oil looked pretty fresh, the air filter was clean, and the car started right up. I'm planning on changing some of the gaskets though to avoid problems later on. The tranny has a warranty on it, so if it doesn't work for some reason I can take it back. These trannys seems to go cheap anyway, so I'm not too worried about it. Here's a few pics:
PCM and wiring Engine shot Another engine shot Yet another engine shot Axles I don't have any pics of the car yet, but will get some soon.
- Not only do I have to swap in the L67, but I have quite a bit of restoration to do as well. The car does not have any headlights, the radiator is missing, the interior has been gutted, it needs a drivers side coolant pipe, and many other things. I'm not going to rush this swap, as I want to take my time and do it all right the first time around. - Interior wise, I have a dash from my 86, along with gauges I could swap in. Since I have an OBDII computer, I have opted to swap in a dash from a car with OBDII compatible gauges. This won't be my first interior swap, as I have swapped in a 97 Camaro dash in my 86 with a 1990 3.1 MPFI OBD1 computer. I'm thinking about using a 94 Camaro dash, but am open for suggestions. I also need to figure out what sort of shifter I want, since the car is currently a 5 speed. - Exterior wise, I am thinking about keeping the 14" alloys that are on it. I would use Beretta wheels, but since the front offset is different, it would cause them to stick out. I'm also going to keep the fastback clip on it, but I would need to either buy some GT tails, or buy/make a kit to adapt Corvette tails on it. We have tail lights from an 88 Z24 Cavalier I thought about using, but it would be a lot of work for something so little. I like the look of the coupe bumpers and fastback clip, so I won't be needing different bumpers. As far as a color, the car is currently red with a black hood. No clue what color I want to paint it. I would like to fab up an extractor hood though. The body is the thing I am least concerned about at the moment. - For the suspension, I think it is going to stay mostly stock. I really liked the results I got from my poly bushings on my 86, and think that I will do them on the 88 as well. Besides that, I probably wont do anything besides shocks/struts when the time comes. - As far as the engine swap, there is a ton of work I need to do. I want to take my time, and make everything look clean and neat. Most likely I will be fabbing up my own motor mounts, and using other members ideas on mounts. I can't say I have many ideas right now, seeing as the cradle is still in the car. My goal is to have all rubber mounts and to have it mounted as solid as I can. Wiring wise, I would like to do a setup like mcaanda has on his car, with the harness plugs and coil packs where the battery should be. Most likely I will stick the ECM under the center console though, and fab up some sort of water shield for the coil packs. There's so many things to take into consideration for this swap, but I'm really looking forward to it. I'm going to try and keep a running total on how much I spend on the car restoring it and swapping the engine in.
Let me hear your suggestions on the swap and I will try to keep it as best updated as I can. I probably wont have the car in our new shed for a while, but as soon as I can I am going to start working on it. I just hope to get some pointers and to help out anyone else considering this swap.
[This message has been edited by toadson (edited 08-05-2009).]
you know what they say. the pictures are worth a 1000 words... at least that is what I was trying to tell you in a previous post... lots of pics here > http://www.fastfieros.com/projects < use the ideas, and modify to your liking.
Good Luck !
Loyde
[This message has been edited by FastFieros (edited 09-04-2007).]
Thanks. I don't want anything to get started in this thread. I'm always willing to use other people's ideas and I dont mind if they use mine. Simple as that.
You will find that the swap will end up being alot of work in the long run but well worth it once it is on the road. The biggest thing is to take your time and not to rush anything that way it stays a nice/clean install. You will want to rush it torward the end because of the excitment of almost having it on the road but thats when you really want to take your time. And once it is on the road and little issues start coming up down the road, dont let that get to you, it always works out in the end.
I kept a running total on how much my swap/restoration cost.. and it climbs up fast
You can get a lot of info from poking around the swap threads...not all of it works though.. most times i found asking some one who knows for sure is the best way to go about it.. that way you avoid taking a couple trips to autozone for getting the wrong thing. I must have asked 15 different people about this swap in private messages .. and not one turned me down for info
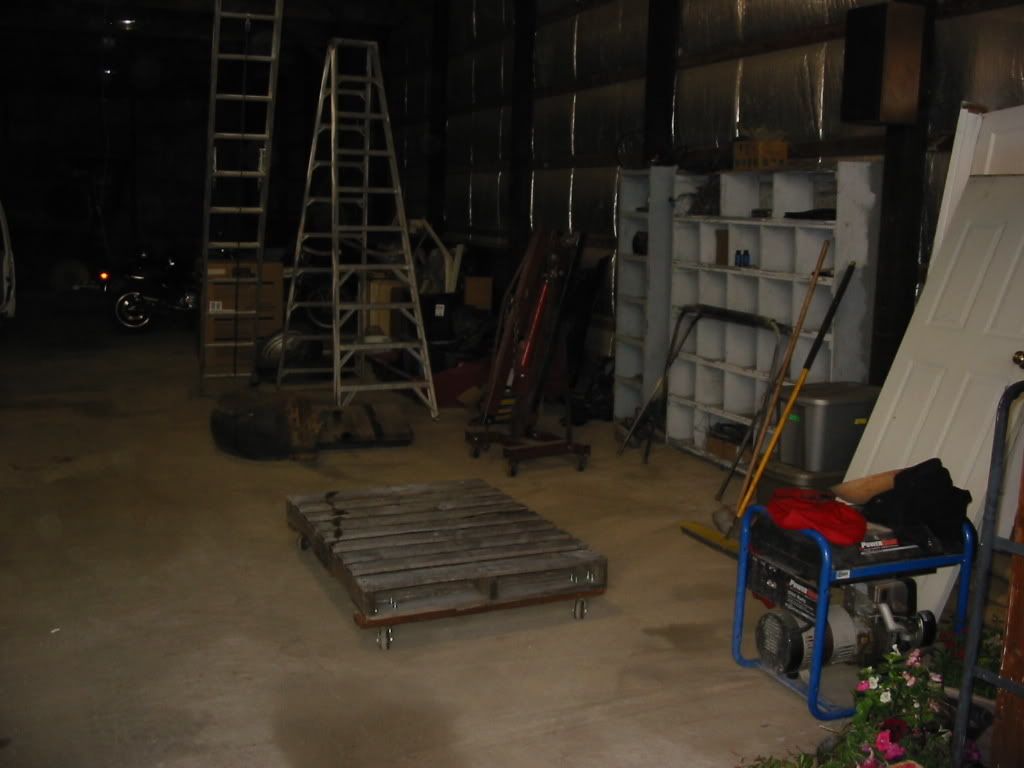
Not much of an update, but I got a few pics of the car. My dad and I also unloaded the engine out of my truck onto a small furniture dolly, so I can push the thing around if I need to. Our new shed still has quite a bit of stuff from the previous owner, as he still has about a month to get it all out. This is all thats keeping me from getting the car inside and disassembling it. The plan as of right now, is to drop the cradle, drop the front suspension, and put the body up on body stands. This way, I can clean/repaint the bottom of the floor, remove the clutch line and run new brake lines. Heres some of the pics I snapped:
Two shots of the fastback clip and the engine. It was dark in the shed, so the pics look like crap.
Heres some of the stuff I got with the car. You cant see most of it, since its sitting in the tubs. I got quite a bit for the price I paid though.
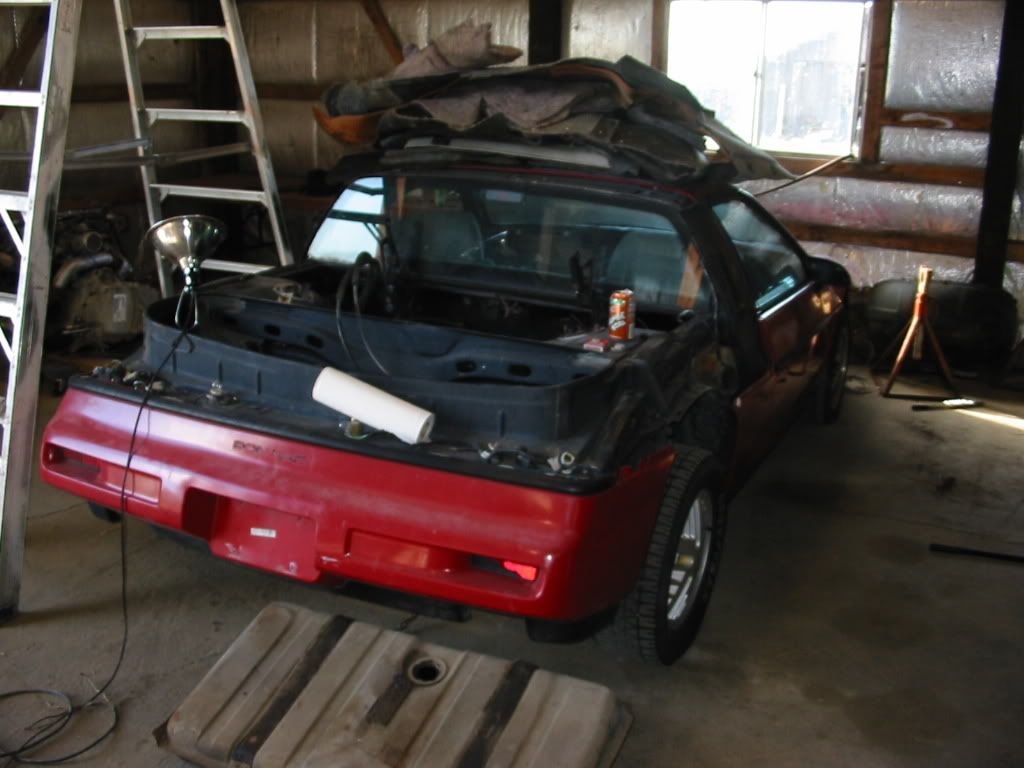
Just a few outside shots of the car as it sits.
Interior shot. I removed the drivers seat for the next pic
This is under the drivers seat. The floor is dented, as if someone tried to jack the car up using the floor. Now the dent is all rusted up. Something I need to fix.
Can you believe this car was up near Chicago for the first 10 years of its life? I can't. These frame rails are nearly perfect. The trunk is a different story though.
It could be worse, but what I find funny is that the trunk is much rustier than my 86, but my drivers side 86 frame rail is wasted. How does that make sense?
Greasy engine bay. It beats being rusty!
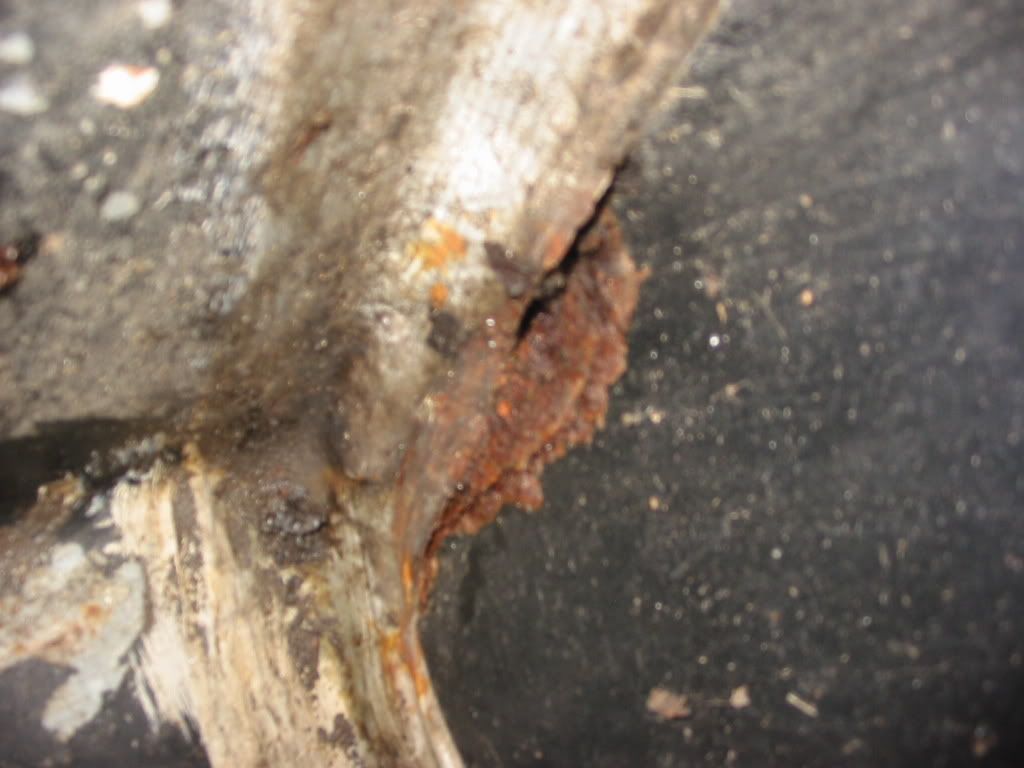
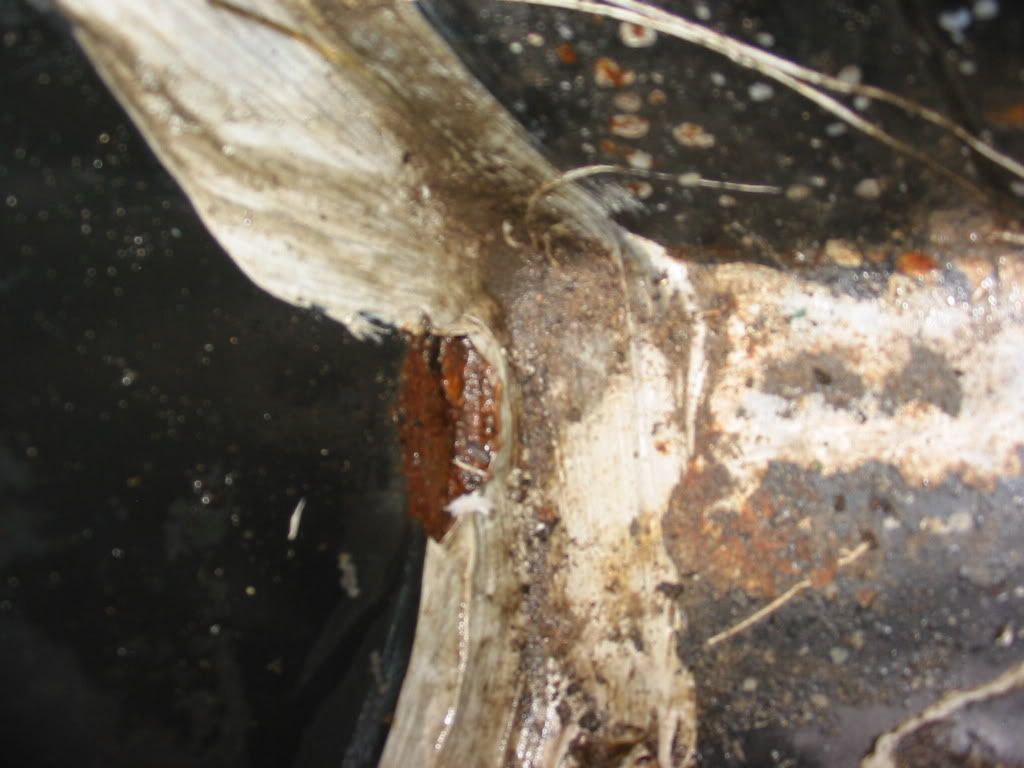
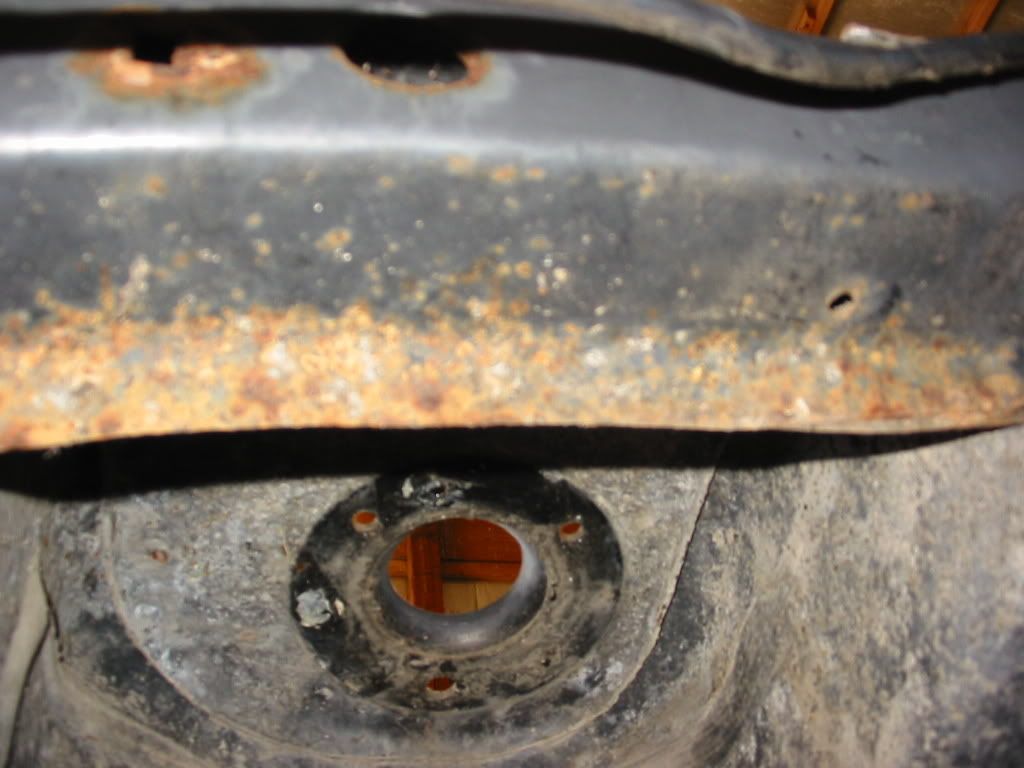
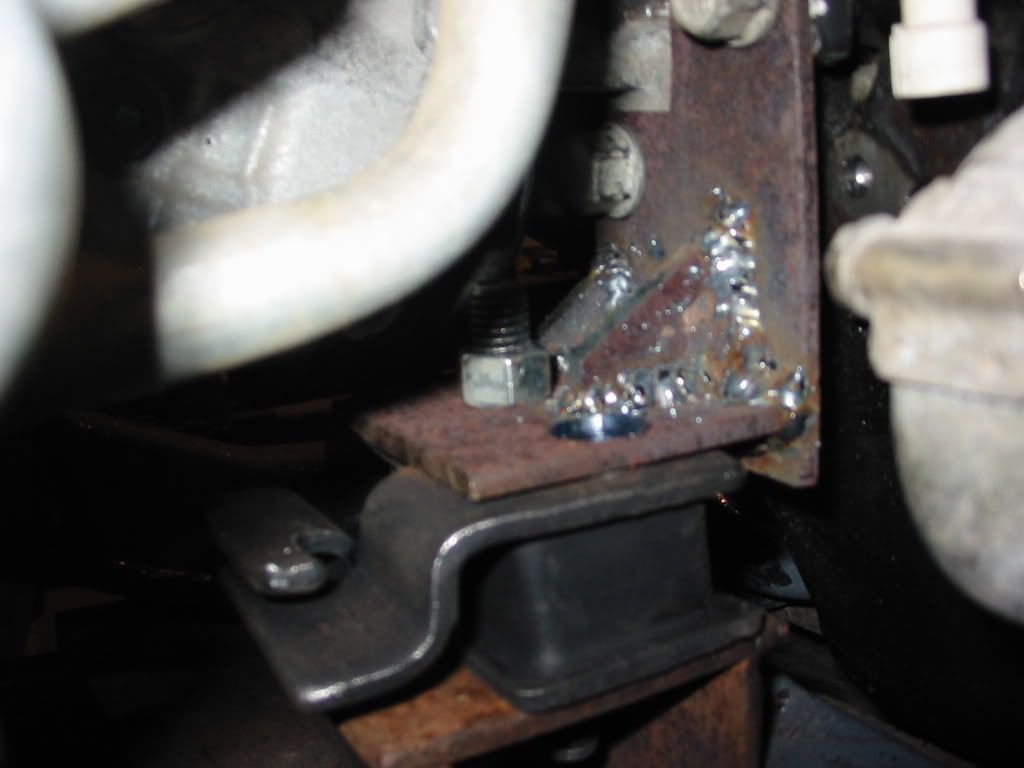
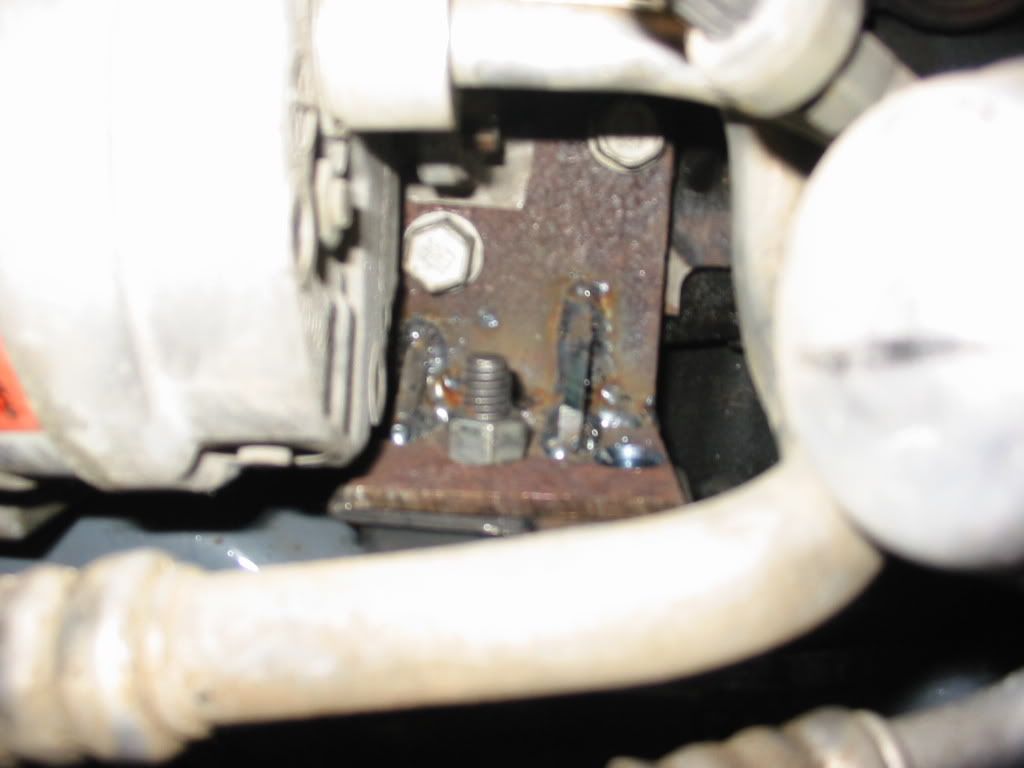
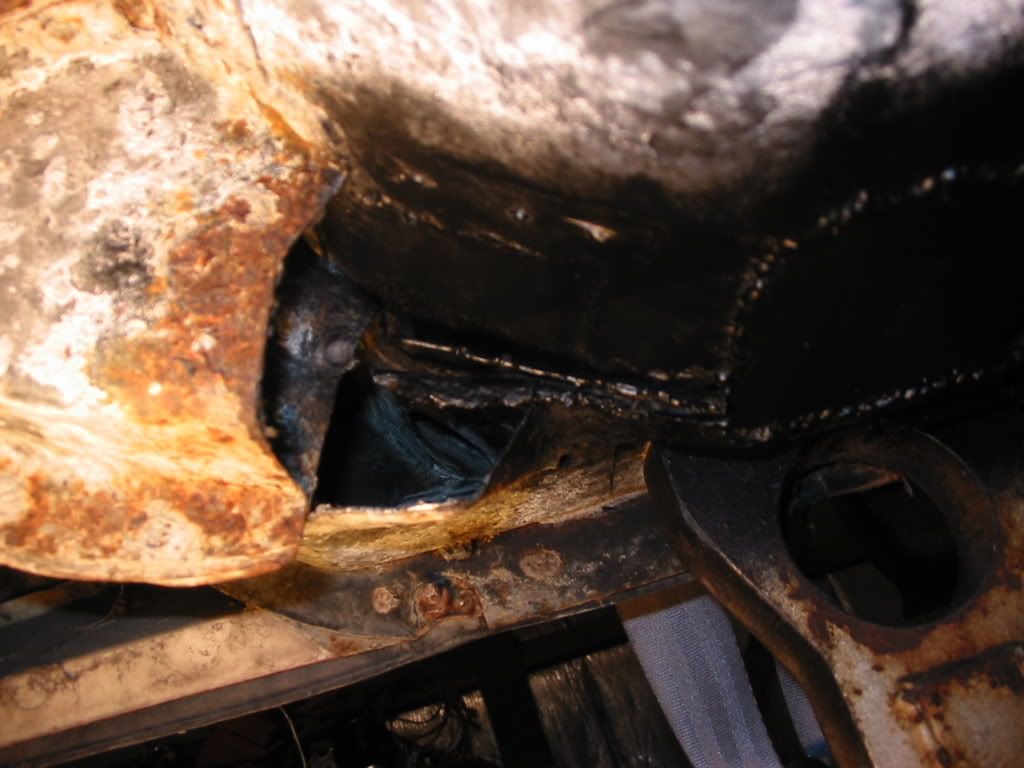
I saved the best for last. This is what the previous owner did to get the rear cradle bolts...... Is it that much harder to remove the rear bumper and get them? Thats what I did on my 86, as I HATE doing stuff like this. It will be welded up before the car is finished.
Thats it for now. I may go ahead and mess with the wiring harness. What a mess that will be. more to come later!
[This message has been edited by toadson (edited 08-05-2009).]
I worked on stripping down the wiring harness Thursday and then try to organize it on Friday. I still have plenty of loose wires that I can't figure out, and I am missing one half of one of the huge wiring harness plugs. I spent Saturday and Sunday getting certified for scuba diving and just got home. Sometime this week I will work on it some more and hopefully get a good idea how everything goes!
Does anyone know where I can get the pinouts for the two big block connectors(not C1 and C2)? I know the one block connector connects to the engine harness, but I'm not sure what the second one is for. I'm assuming it is mostly power wires and the sort, but a diagram would be great.
Been a while since I've done anything related to this swap, but I picked up a few things at the GM dealer while I was there today. Bought a supercharger gasket and two bottles of supercharger oil. I asked about lower intake gaskets, and the guy told me he hadn't sold one in about 5 years. I'm not sure whether or not to replace it, or just to do the supercharger gasket and oil. The engine reeks of used supercharger oil, and the snout looks a bit oily. It may have just leaked out while it was sitting in the back of my truck, or at least I hope so. Lately I've been making my 86 more suitable for a daily driver, so I haven't messed with the wiring too much. I think I'm getting it all lined out though, so as soon as I can get the car in our new shed, the real work will begin. That should be in a few weeks, so expect more updates then.
A few weeks ago I bought a set of headlights, radiator and cooling fan from a buddy of mine for $54. The other night I went on a little shopping spree at ZZP and bought the following: Lower Intake O-Rings, Aluminum Lower Intake Gasket, Valve Cover Gaskets, Oversized Throttle Body Gasket, ZZP Modular Pulley System, 3.4 Pulley, Flex Plate Bolts, and I rented the pulley puller. The total was $317.11, and I get $75 back when I return the puller. Over the last few weeks I was able to pull some wiring off the Riviera I got the engine from, including the relay connector, the IAT and connector, and the battery cable which is about 10 ft long. They give all the wiring away at the junkyard, so it cost me nothing. Its hard to believe they give away 10 ft long 6 (or maybe its 4, not sure) gauge wire, but its true! So far my running total, with the cost of the car, is $1316.11. Also, the previous owner of the shed we bought a few months back is finally getting around to clearing his stuff out. Soon there will be room for my 88, and the work will begin.
[This message has been edited by toadson (edited 10-04-2007).]
I've finally gotten a start on the swap. A few days ago I got the Fiero in our new shed and got it up in the air. Man is it filthy under that thing. Only thing I've gotten around to so far, thanks to the cold weather and the darkness, is removing the old exhaust and dropping the gas tank. So far every nut I've tried to take loose has caused me to twist off the studs, including the gas tank straps. Both of my shift cables studs broke off too, where they connect to the transmission. They were pretty much junk anyway, and since I'll be using an auto transmission its not a big deal. Anyway I've got the gas tank at my house tonight, and am going to check it out later tonight. I've got some muratic acid to clean the inside out, and since I just got done doing this on my 86, I've had plenty of practice. I also have a new Walbro pump for it, so I'm planning on cleaning the tank a few times (assuming theres no pinholes), painting the outside, ordering new straps and studs, installing the new pump, and finally putting it back in the car. Assuming everything goes smoothly, I'll be dropping the cradle out next week sometime when I get the car parked in a better spot. I'll post pics of the tank later, as I'm sure its going to be a rusty one.
Have you tried PB Blaster? I've had very good luck with it compared to Liquid Wrench. Oh well, after you are done you know every single bolt will have been touched....
I've finally started to get somewhere on this project. I've got some pics, but I'm too lazy to post them tonight. As of right now, I have the car in the air, with a dolly i built underneath the cradle. All I have to do is get the rusty cradle bolts loose and it will be out from under the car. I'm beginning to wonder if this car is even worth restoring after seeing more and more rust underneath. part of the subframe has a huge hole rusted in it, and I'm sure nobody makes patch panels for it. I'll try to get some pictures of the really rusty areas so you can see what I'm talking about. I might have some time to mess with it tomorrow, and if I do I will post some pics. Nothing interesting has happened yet, just a bunch of rust related issues.
Ok heres a few pics Heres the new shed I've been working in lately. It still needs heat, but we've got decent lighting now and I bring a bag of tools with me when I want to work on the cars. We should be getting our air compressor and all the tools out there in Spring.
Few pics of the 69 Camaro and the 88 Fiero
I built this dolly for the 88 cradle to sit on. I forgot to make it high enough to clear the cherry pickers legs, so it could use to be another inch taller.
One last shot of the engine compartment
Re-organized all of our junk in the shed so I would have some room.
The Fiero almost ready for the cradle to be dropped
This pic is really crappy, because there wasn't much light under the car when I took it. I'm just trying to show you the rust I was talking about. These frame rails under the car are the absolute rustiest part of the underbody. The passengers side is still solid, but I will need to do some work on this rail.
I didn't have enough time to drop the cradle tonight, or mess with the car for that matter. As soon as I get it out, I'll post some pics of the cradle fresh out of the car. Right now Im just hoping its not going to be too rusty to do the swap. Sadly enough, the 69 Camaro bolts have been way easier to take loose on all of the underbody compared to my Fiero. Its a pretty solid car, with the only panel needing replacement being the trunk.
[This message has been edited by toadson (edited 08-05-2009).]
Forgot the camera today, but I got the cradle out from under the car. I think the car should be fine rust wise, as the lower frame rail should be a pretty simple fix. I think I'm going to fix all the body rust, and clean up the cradle for starters. It's been too cold here to do too much outside, so I'm not sure when I will get a chance to sandblast the cradle. I must say, the car hasn't been too fun of an experience so far. I keep finding more half-assed rigging, and more rust. I'm sure it will get fun once I dont have to heat up every bolt I want to remove.
Got some more pics and an update. After many hours of heating bolts I got all of the suspension unbolted from the cradle. I now have the bare cradle in my driveway, and started to sandblast it, but the blaster kept clogging up. Someone we let borrow it had put some really course blasting material in it, and wouldn't work. My dad went to the lumberyard to get some sand, and they said told him they legally cant sell it anymore, due to it being a health hazard. They gave him some other stuff instead, and it turned out to be the the really coarse stuff that clogs the sandblaster. So as soon as I can find some sand, the cradle will be blasted. I took the time to cut a peice of metal out to box the front of the cradle, and also cut the exhaust hanger brackets from the cradle. I'm planning on welding some gussets up in their place, and anywhere else I find suitable I will box. The way I see it, this thing needs to be pretty stout.
Heres a few pics of the cradle when it came out of the car
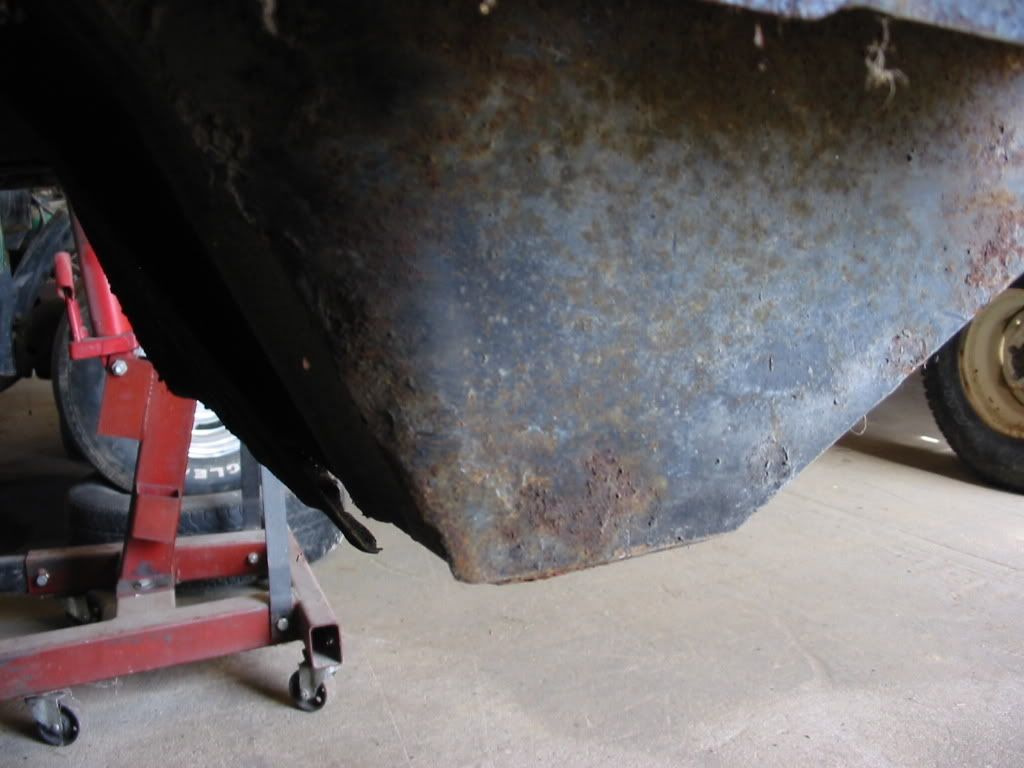
Underbody shots. She sure is rusty
Enormous hole in this frame rail
As you can see in this pic, I ended up using the previous owners hack to get to the cradle bolts to heat them. Im thinking he never did get them out, as the stock pyramid nuts were in place.
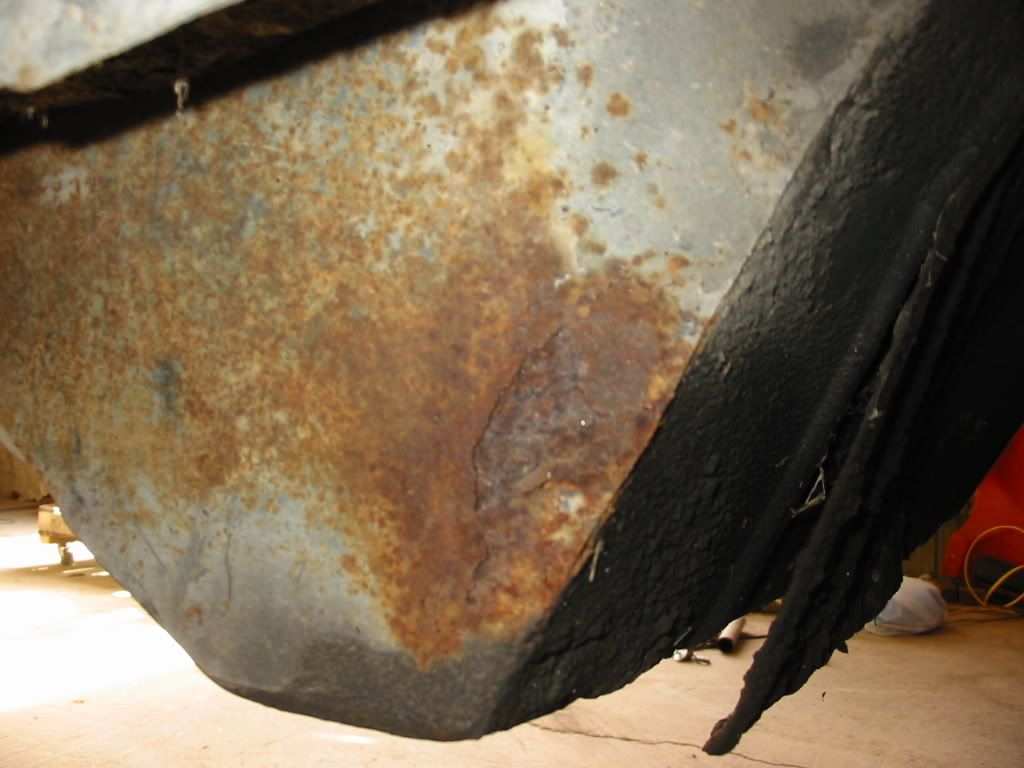
Passenger side wheel well shots
Battery box
Fiero shot
Here is the cradle with almost all of the suspension removed
After I got the cradle home
Heres some shots, showing what I got done with about 10 seconds of sandblasting.... As you can see, there was a ton of rust on the mounting points before I blasted one.
Here is the piece I cut to box the front frame rail
And thats it for now. I'd like to get this thing cleaned up, and start welding on it. Then I will have to figure out how I want to install the motor and trans mounts, and finally paint it.
[This message has been edited by toadson (edited 08-05-2009).]
No luck on finding any sand. I gave the cradle an acid bath, mostly focusing on the front where I am going to box it. Afterwards I shot some paint inside the cradle, along with some undercoating. Then I welded the piece in place. One last shot of the crappy cradle
After an acid bath and paint
Boxed
After this I began tearing into the car some more. Basically just removed the exhaust shields from the body, looked for more rust, took the clutch line out - just a bunch of little things. I brought home the rear suspension tonight, and plan on sandblasting all of it as soon as I find more sand. I'm also going to try and put some axles together, so I can have those out of the way.
[This message has been edited by toadson (edited 08-05-2009).]
My dad said the same thing about Clay East. Im going to check Farm and Home later, as Ive heard they have it too. Just looking at the pics again, I wish they didnt turn out so crappy. The welds looks funny in those pictures, almost like I missed spots or something. I think I need some better lighting, as most of my pics look like crap. Not much I can do about that though, lol.
I like those cradle pictures, my friend and I are designing some fancy rear links right now and those will be handy.
3800s suck btw.
Aahhahahahahahahaha
I got ahold of some sand today, and disassembled the rear suspension. I started sandblasting, and within 10 minutes the sandblaster was plugging up. I dont feel like messing with it, so Im thinking about giving all the suspension parts an acid bath. I suppose I will have to get it going to get the cradle blasted, but after dealing with the rusty suspension today I didnt feel like tinkering with it.
[This message has been edited by toadson (edited 11-10-2007).]
Finally starting to make some progress. After countless hours messing with my sandblaster, I said screw it. I wire wheeled the cradle and painted it with (ugly) grey POR15. I ordered black, but the guy accidentally sent grey instead. He offered to pay return shipipng, but I didn't feel like it was a big enough deal to mess with hsipping it back. I'm going to topcoat it with John Deere Blitz Black anyway. I did find a long crack that started at one of the transmission mount bolt holes.
Here is a shot of the crack after I ground it out
After welding it up
Ground off
Cradle before I wire wheeled it
Ugly grey POR15
I also got two motor mounts figured out today. More pics to follow in the next post
[This message has been edited by toadson (edited 08-05-2009).]
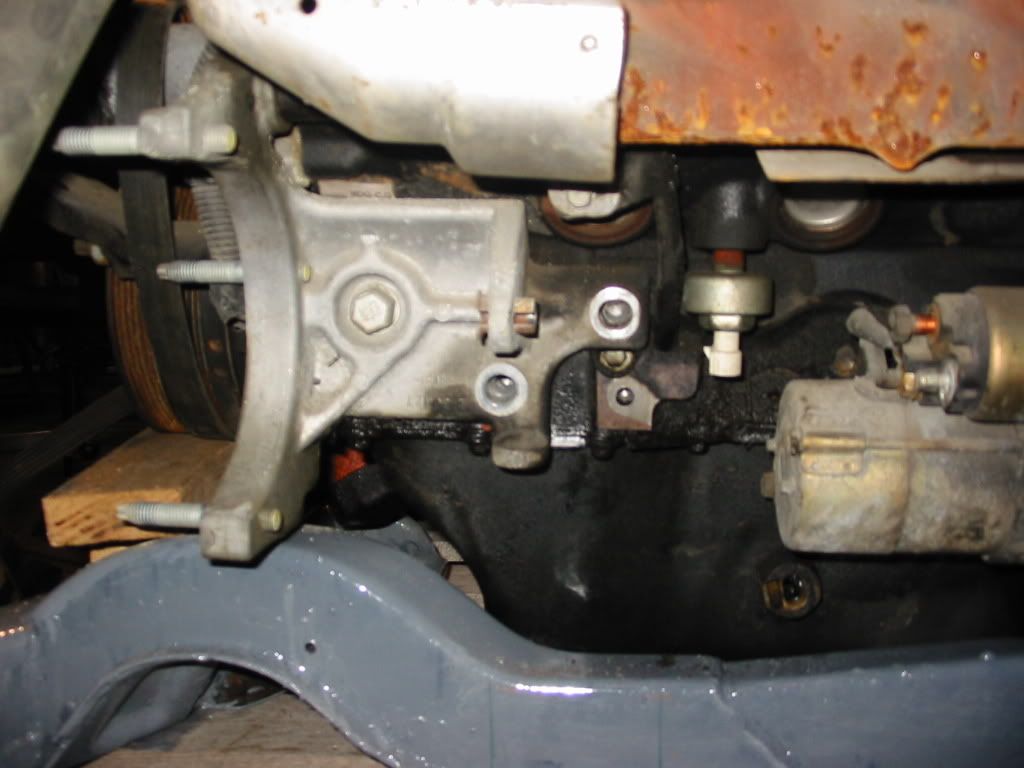
First thing I did today was getting the engine and trans shimmed into place. DarkHorizons build thread really helped me figure out the location and gave me some ideas for mounts. Here is the engine and trans shimmed into place
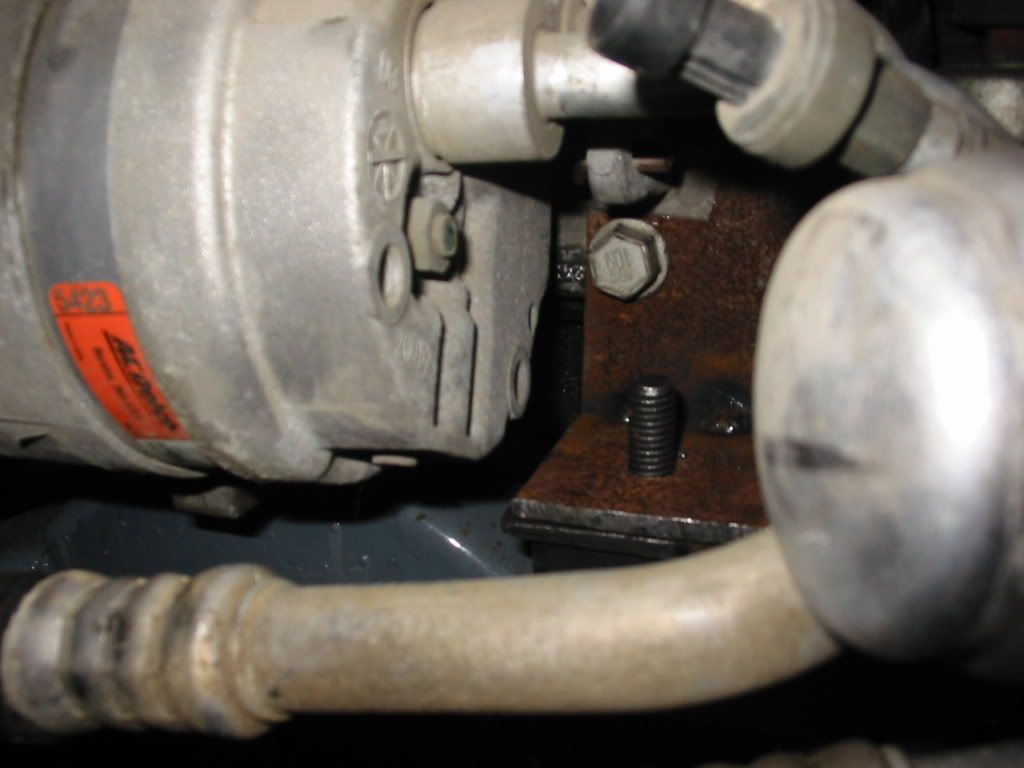
AC compressor bracket - I cut the tab that stuck out for a small bolt to thread into
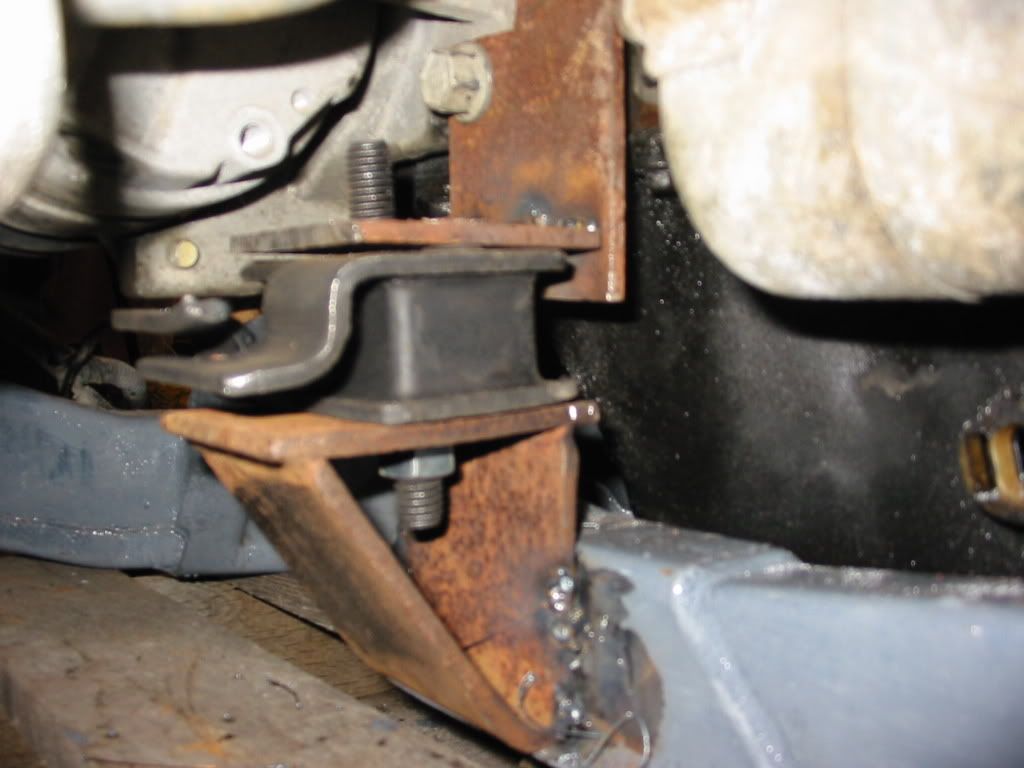
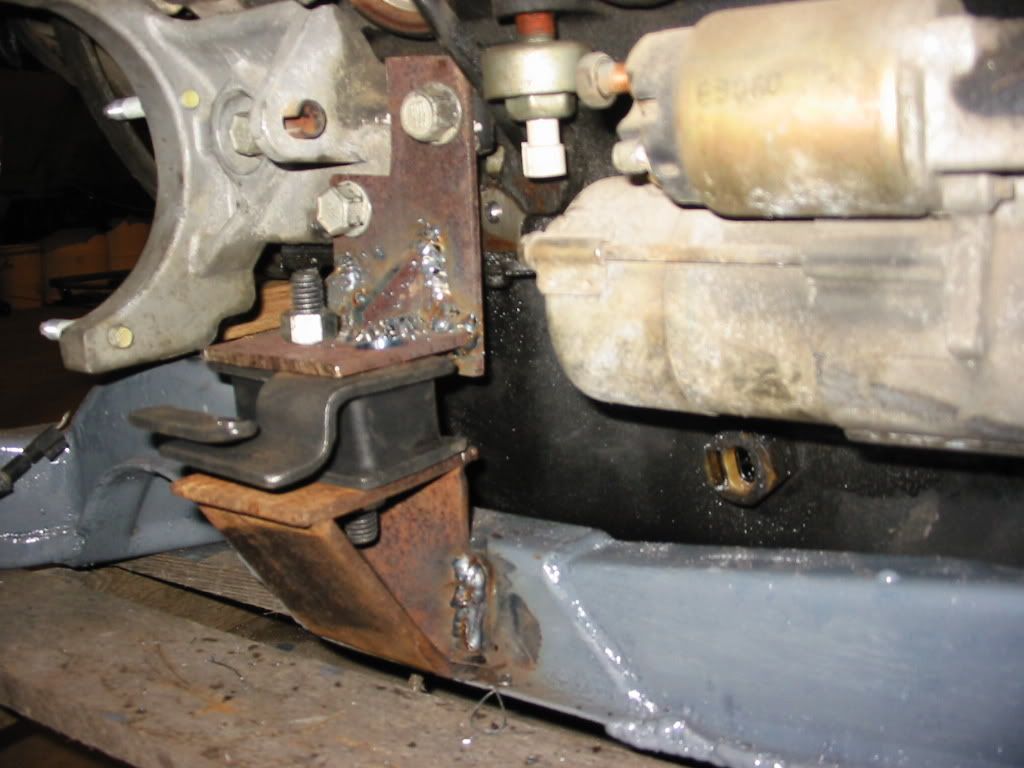
Heres one motor mount shimmed into place
Tacked
Done
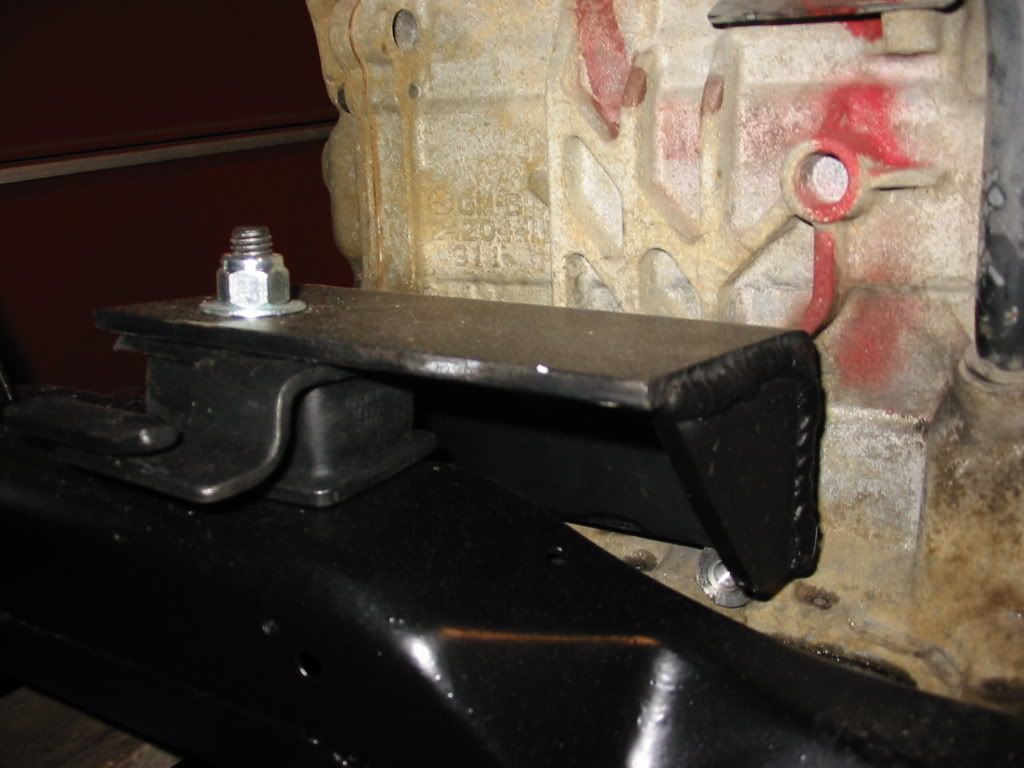
Trans mount parts - I used the stock Riviera bracket and wleded some flat steel to it
Welded up parts
Heres the bracket I welded on the cradle Done
Both mounts done
This is all I got done on the second trans mount
I'm still planning on welded up the mounts on the cradle more, and using gussets where I can to strengthen them up. Im going to have to wait until I get all the mounts done though, so I can lift up the engine and get to the backsides of the mounts. I'm hoping to finish the 2nd trans mount tomorrow and start on the last engine mount. Thats it for now.
[This message has been edited by toadson (edited 08-05-2009).]
Finally got some more done over the past week and a half. Ive finished up the mounts, and started tackling some of the rust on the car.
Heres one of the mounts
And another
My dad picked up a few new toys
You wouldnt believe how small this plasma cutter is
Heres the cradle with the engine mounted on it. Painted it with John Deere Blitz Black
Two of the finished mounts
Cut out some trunk rust with the new plasma cutter
Had to cut the old battery box out too.... I'll drill out the spotwelds some other time.
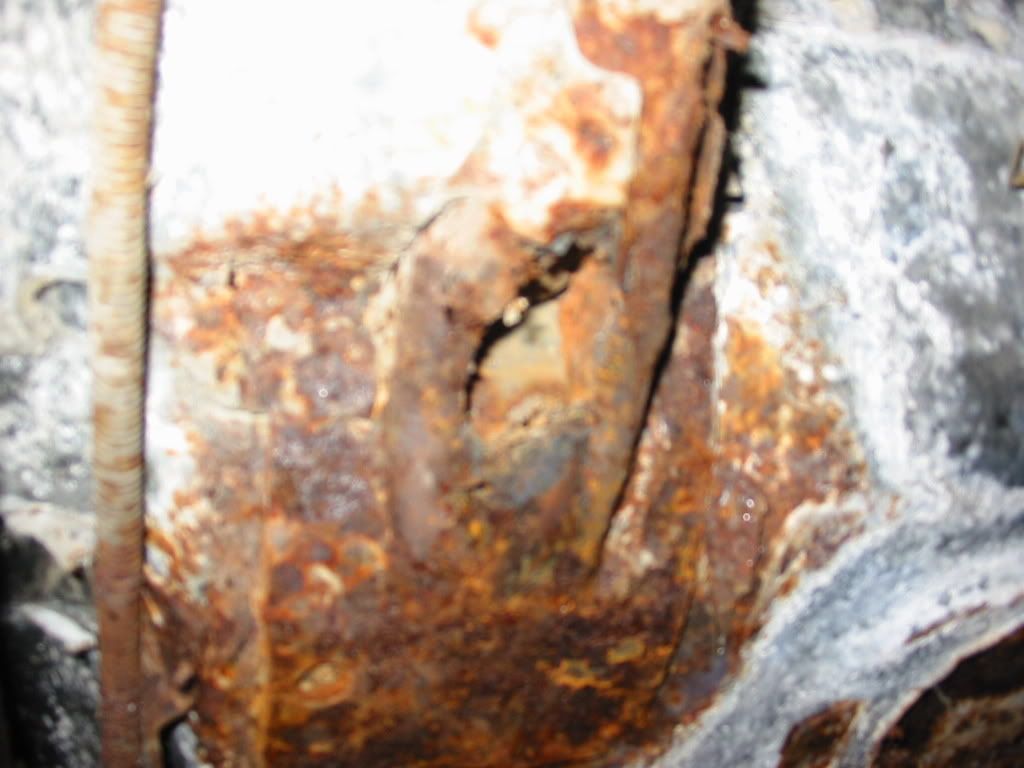
Here is one last shot of the rotting lower frame rail before I cut it open
I am suprised the cradle didnt push up into the frame rail.... this mounting point is almost gone
Oh yeah.... this rusty spot in the floor above the rotting frame rail.... its really solid
More fun with the plasma cutter
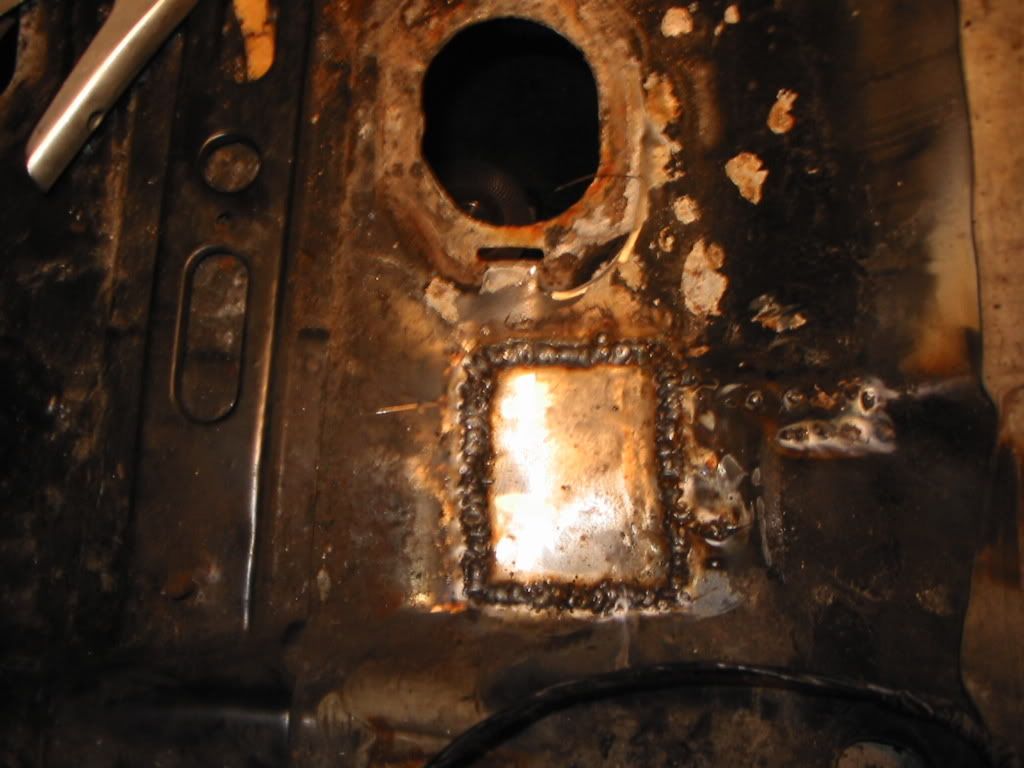
See this old tranny mount heat shield? It's going to be my patch panel for the floor. Its just the right thickness, and galvanized like the rest of the floor
Pic of the patch piece next to its new home
Welded in
I ground down the welds and hit it with some paint. Thats all I got done for now. My next mission is to make the lower frame rail, and fix the mounting point for the cradle.
[This message has been edited by toadson (edited 08-05-2009).]
Just wanted to add something that I noticed. Only my drivers side lower frame rail is rotting out, and I think I know why. The hole that the parking brake cable runs through in the wheel well is the perfect spot for dirt, salt, and water to get in. I believe that dirt packed in next to the frame rail, rotted its way through into the frame rail, then finally rotted the actual rail itself. By this crappy description, you probably have no idea what I am talking about. I am planning on adding some drain holes to both of my lower frame rails, since Pontiac didn't do so. There was so must dirt and rust inside the thing that it was unbelievable. Maybe I'm onto something, but I think that adding the drain holes would help in some cases. GM wanted our cars to rot out anyways, so we would buy new ones that rot even faster. Ha
May I suggest resizing your pics, gives me fits to have to click each one. I'm lazy though
Im the same way, but I do it this way so the same 500 pics dont load and take a bunch of time to load the page. As for the swaybar, I'm not really planning on running one. Unless I find one cheap or something. I couldnt think of anyother way to make that mount.
I can't wait until winter break. Heres what I've accomplished in the last few days.
Just a few shots of the rust repair. I started on making a new lower frame rail and then switched to working on my engine. This is all I've got so far. Ooooh. The "patch panel" even has a GM part number! Nasty
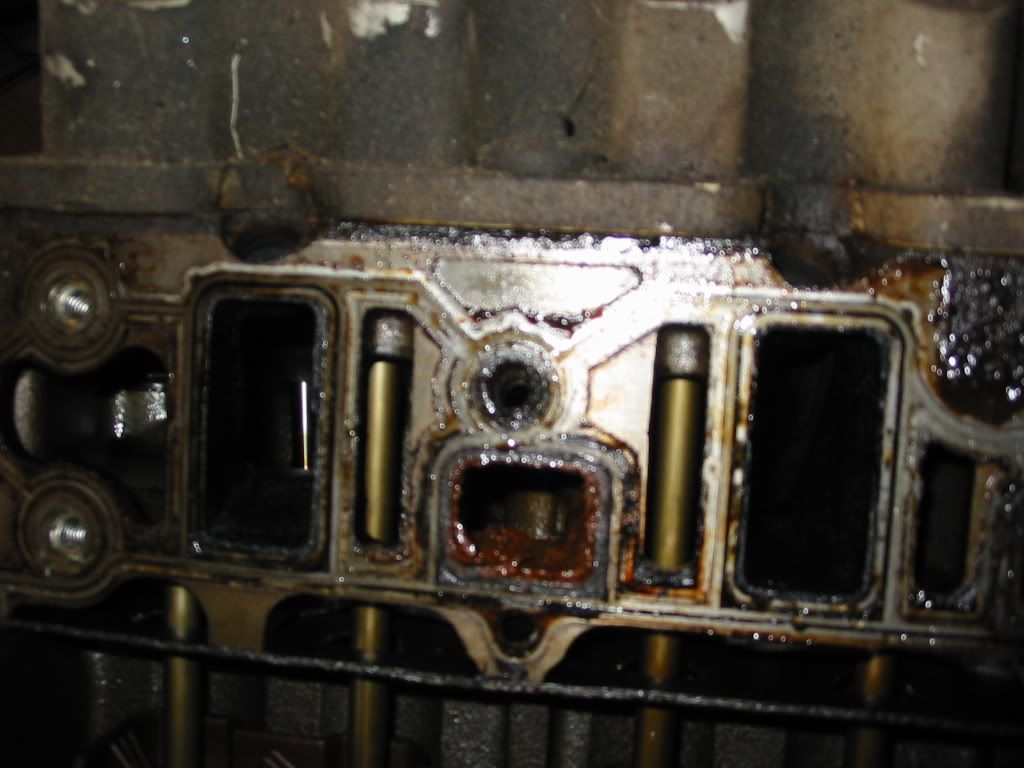
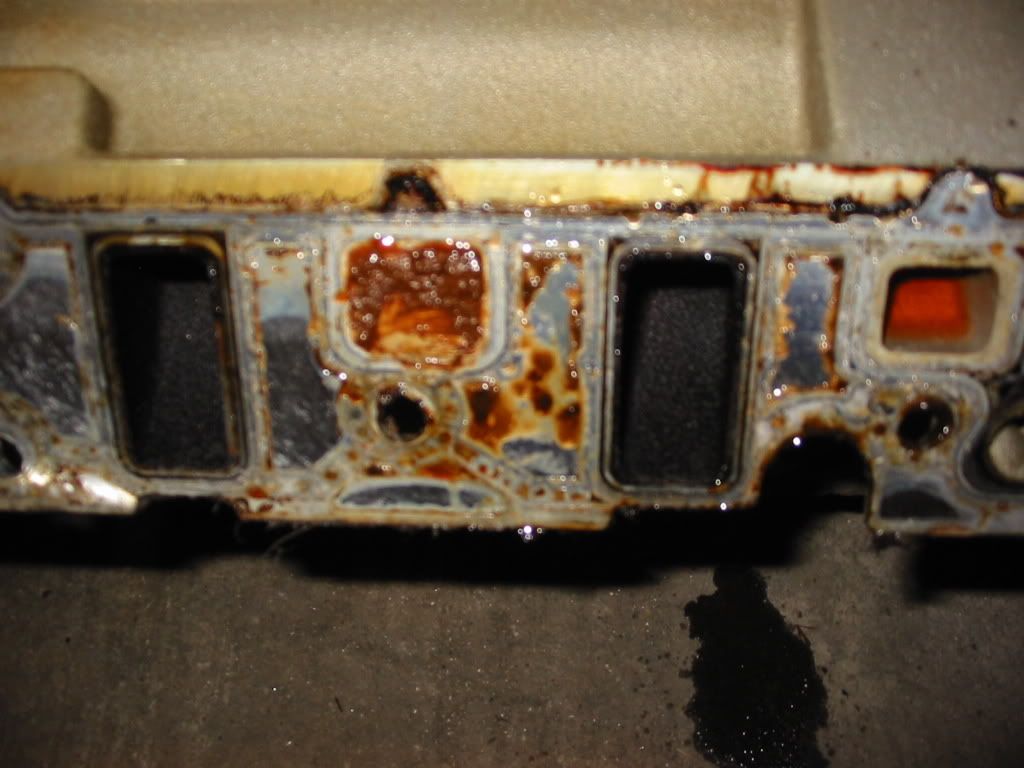
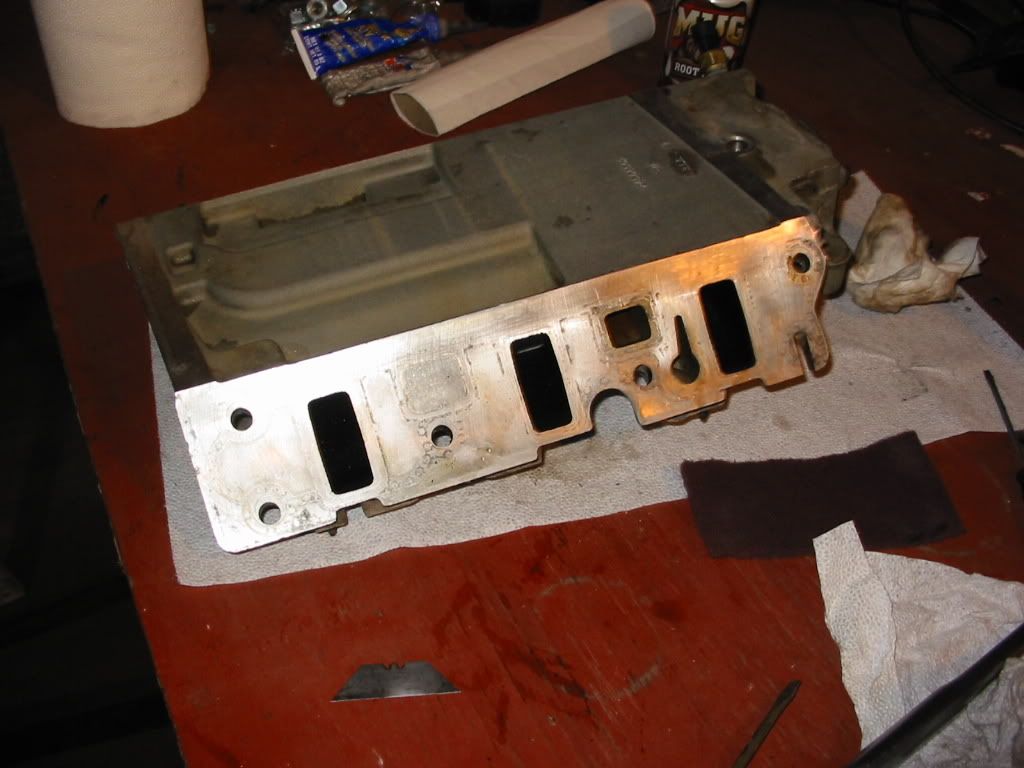
As I mentioned, I switched to putting new gaskets on my engine. Got sick of the rust repair for a while, so I had to switch things up. Just a shot of the intake with the blower off. These next few pictures show why everyone hates dex cool. The intake gaskets were about to give
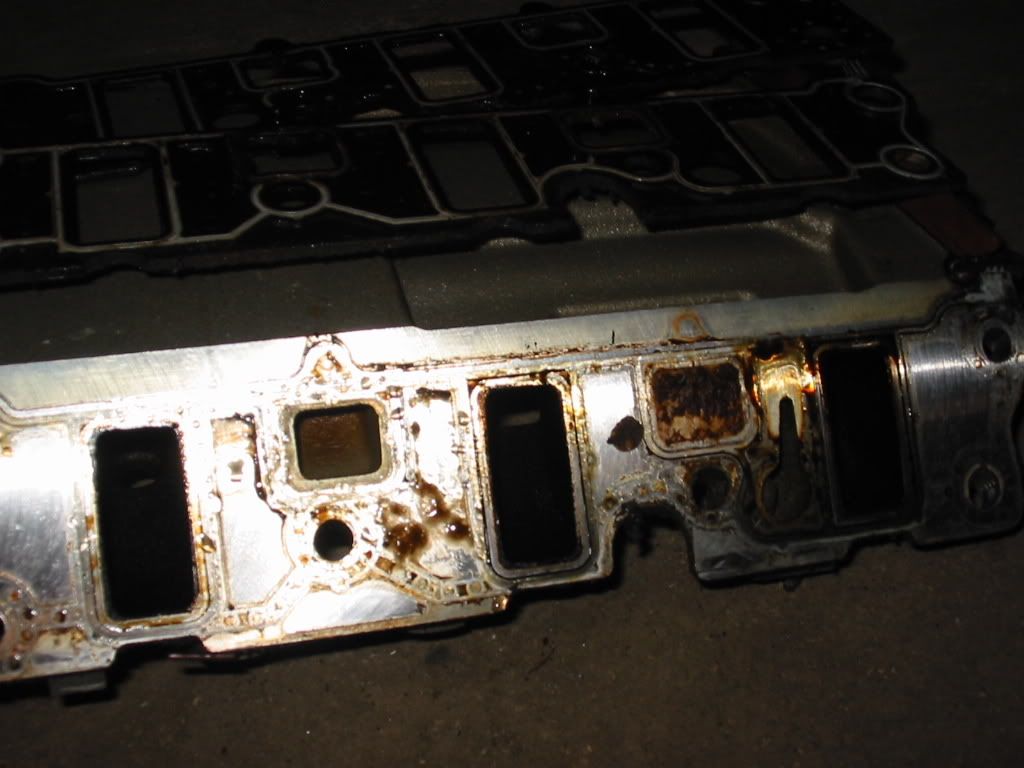
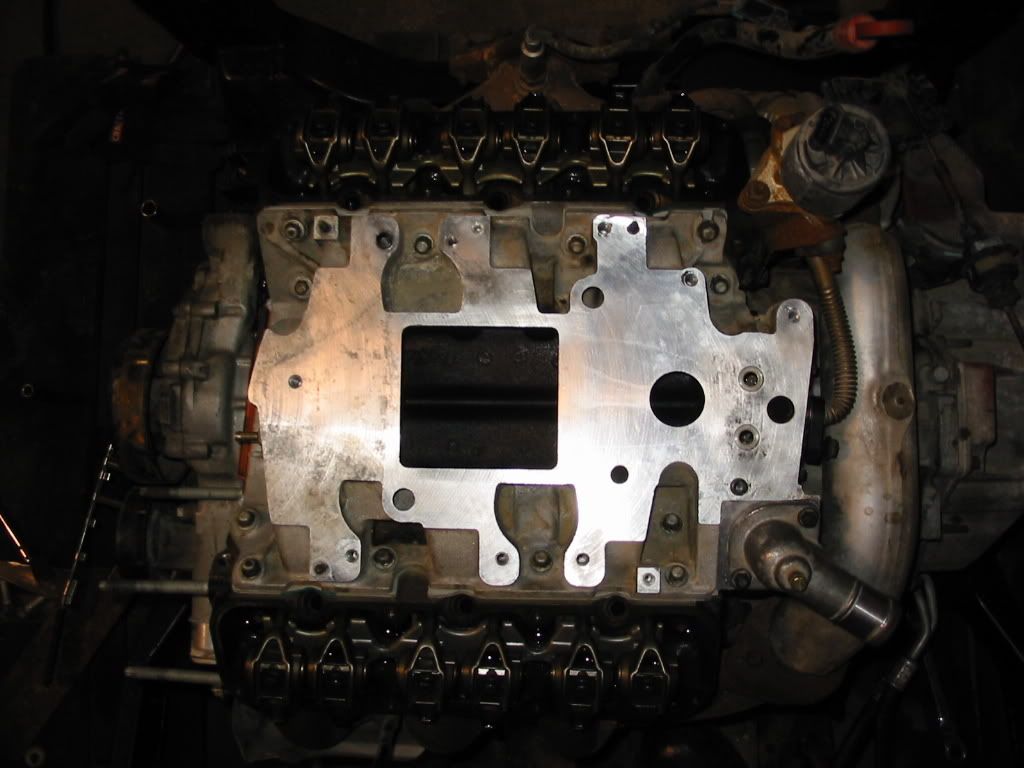
Intake all cleaned up Heres the engine after I pulled the intake off
Aluminum gaskets and a little detailing Intake back in its spot
Next are these greasy things
Cleaned up, and reinstalled on their opposite sides, so the oil fil neck is towards the trunk
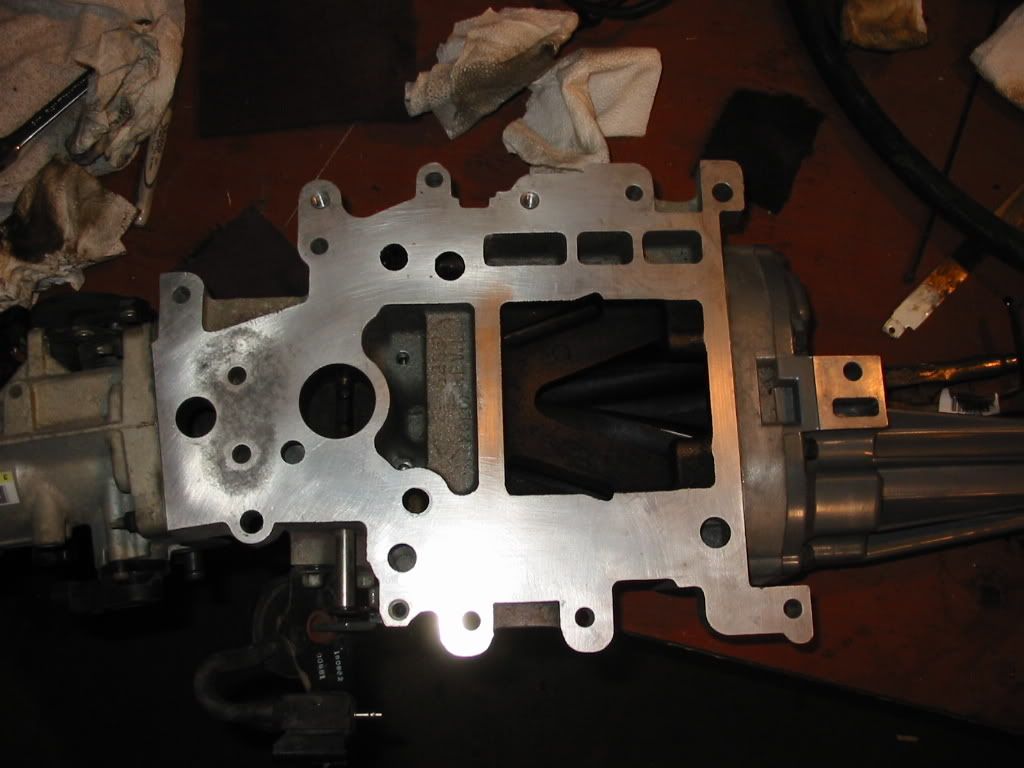
New blower gasket and o-rings
Underside of the M90
Reinstalled.... needs a little cleaning on the outside but that can wait
Can you guess what I'm doing next?
ZZP's Gen 2 pulley puller is awesome. Worked like a charm.
Heres something I've never seen a pic of. The M90 with no pulley
And like magic, my supercharger with ZZP's modular pulley system and 3.4 pulley. Woot!
If I have time to mess with the car more this weekend, it will probably be spent fixing rust. I ordered poly bushings and stainless gas tank straps from the Fierostore a few days ago. Now I need to find a frickin gas tank!
[This message has been edited by toadson (edited 08-05-2009).]
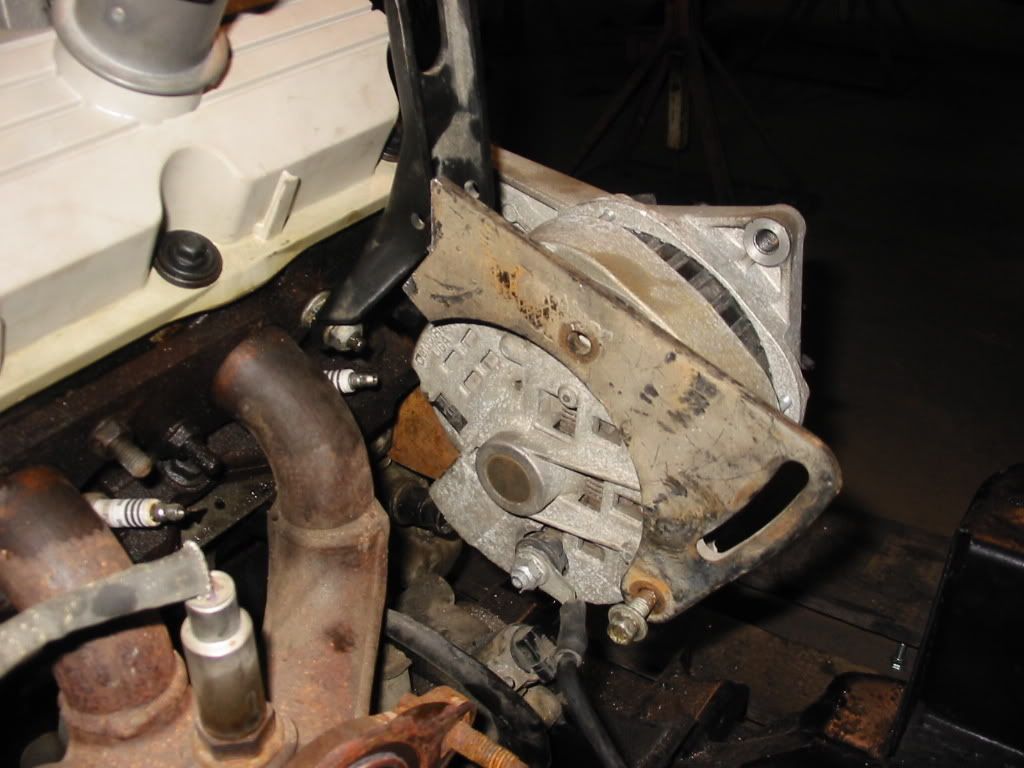
Haven't done much in the past few days. I put the fuel injectors and fuel rail back on, and started on mounting the alternator. I hope it clears the trunk when I install the cradle. Here are just a few pics of where I'm mounting it. I robbed the Grand Prix dogbone bracket off a 98 GTP block I have. My Riviera engine had a bracket that the coolant went through, and did not have a dogbone. I installed it and used one of the bolts and a spacer to mount the alternator.
For the second mounting point, I used flat steel. It's think, but if it were any thicker the alternator would stick out too far and would not line up with the crank pulley. I ended up shaving off just a little bit to fit the curve of the alternator.
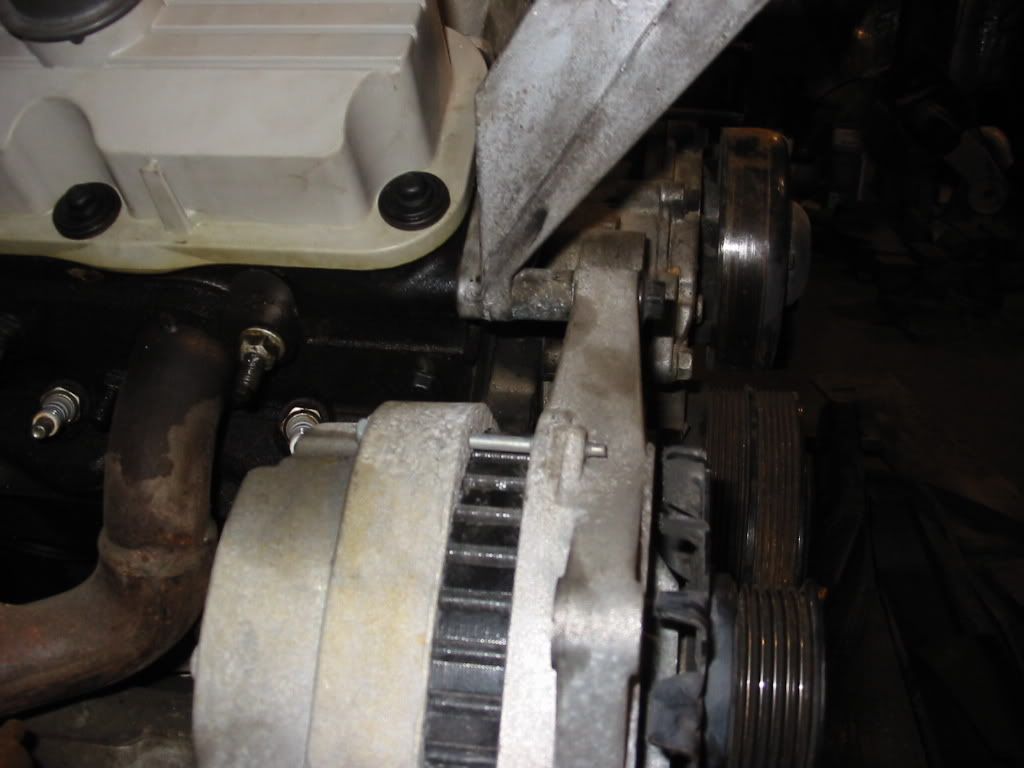
Here it is with the alternator installed
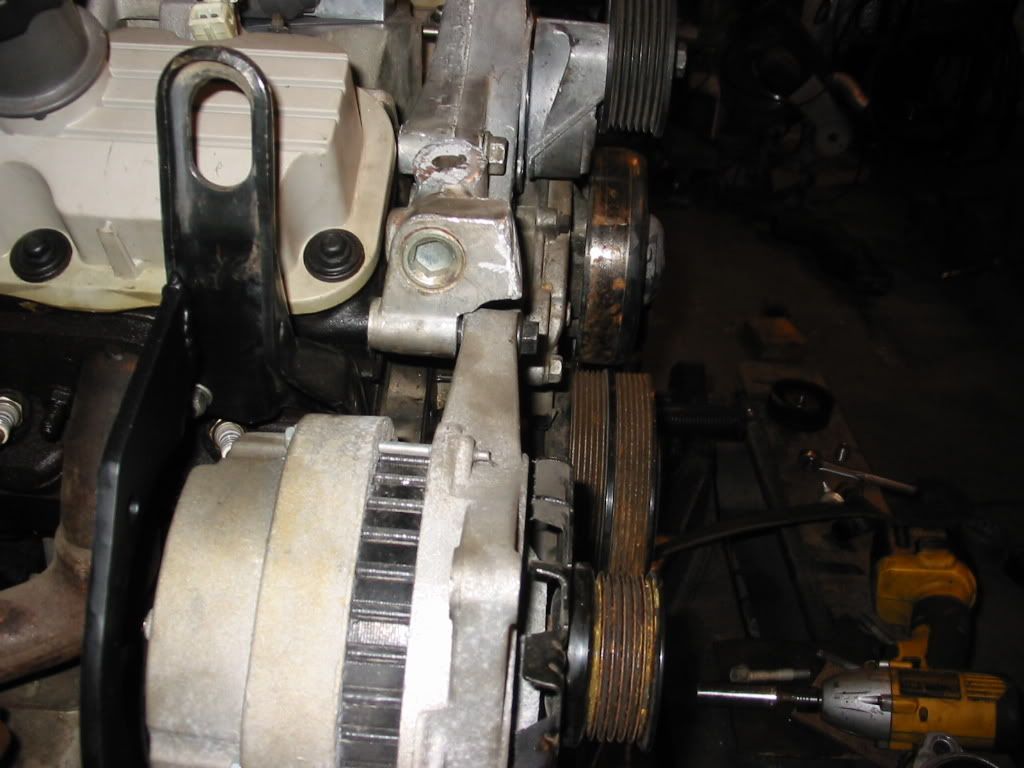
Crappy shot of the pulleys. I still need to mount some tensioners and idlers.
I'm still planning on making some sort of brace for the backside of the alternator, to keep it from twisting. I'm going to dig through our parts trailer sometime to see if I can't find some more tensioners, because I can't think of a way to make the Riviera ones work.
[This message has been edited by toadson (edited 08-05-2009).]
Holy Hell!! man thats a sweet project, i jyust checkd out all your pics and what not. Your Brave!! my buddy has a 99 monte carlo, with the 3800 and we r guna do a top swap on it, but hes got some goodies for it so he can run a smaller pulley! Good luck man i cant wait to see more pics and see her when shes done!
p.s. look up "Devils Injection" for your 3800, you minte like what you see
Originally posted by Hartzellse87: p.s. look up "Devils Injection" for your 3800, you minte like what you see
HAH, alc injection was tried so many times on blower cars, that it is just determined to be pointless. Dispersion is too hard to get right with the stupid no runner intake manifold, and there are concerns of the blower getting goobered. A few fiero guys here have tried it, and promptly abandoned it due to the massive headache it caused.
The thing I would hate about alchy injection is that if your engine DEPENDS on it (you have a tiny pulley and no mods), and your pump fails or you run out of fluid, you could damage/blow up your engine. I'm sticking with the 3.4, a tune, ported exhaust manifolds, 180* thermostat, 3" exhaust and I want to reuse the stock Fiero intake if I can. Hopefully I wont see any KR*, but if I do I will have to figure out what to try next.
Thanks for the compliments, I still have a ton of work to do before I ever get it running. Mostly fixing rust, figuring out the pulley setup, and doing some wiring. This is the 2nd project I'll be wiring, so at least I have a little experience with it. I'm going to take my time and make sure the wiring is neat. I redid the wiring on my 86 swap and it was a bit of a pain with the engine in the car.
I finished up the alternator mounting brackets today. I tried to think of a way to put a tensioner on, but it started snowing pretty good and didn't want to get stuck out in the shed (it was 42* in there). I already had two mounting points done, but darkhorizon mentioned that the dogbone bracket I had on there would either hit or be too close to the strut tower, so I removed it. I found a spacer that was probably in my old Fiero bushings, and it was the perfect length for what I needed. So, I had to come up with a mounting bracket for the rear of the alternator. I used one of the engine lift brackets, and this alternator bracket I found.
Here it is cut to fit up against the engine lift bracket.
Before I did any welding, I heated up part of the alternator bracket, to bend it where it meets the engine lift bracket. I figured it would look better and be stronger that way. Here it is welded up. The final cuts were made, and the bracket painted
Installed
Now the challenge is to figure out a tensioner for the accessories pulleys.
[This message has been edited by toadson (edited 08-05-2009).]
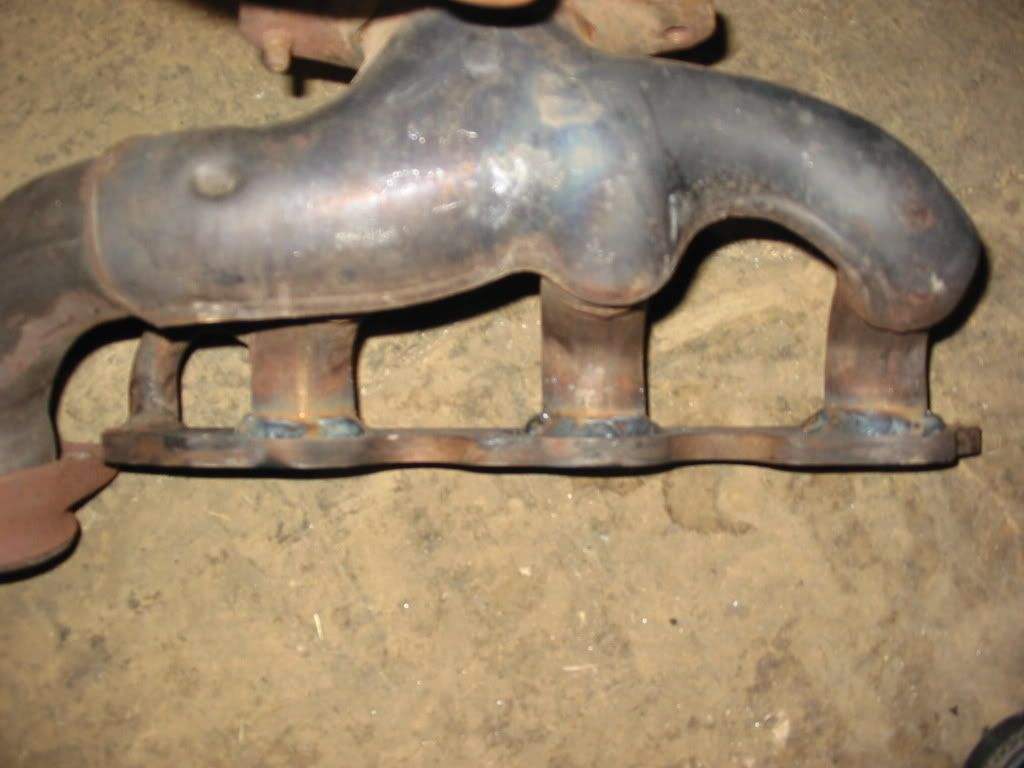
I pretty much wasted my time yesterday thinking of pulley tensioner setups, but got something figured out today for the acc belt tensioner. I took this bracket from the Riviera and cut it up With this setup, the bracket acts as a spacer for the alternator. I still need to clean up all the cuts a lot. I then finished my frame rail under the car, and welded up one of the exhaust manifolds so I could port it. Since GM welded the rear manifold tubes on the inside, it creates a bit of a restriction. You weld on the outside of the manifold, and then take a Dremel to the insides. Nothing new of course, since this info has been around for years.
Here is my finished frame rail. I dont like how it hangs down from the floor, so I might end up cutting some of it off to make it flush with the floor. Thats all for now. The next few days will be spent studying for finals, hooking up a wood burner for our shed, and helping my cousin work on his S10, and hopefully finding a new front end for my truck.
[This message has been edited by toadson (edited 08-05-2009).]
I once again scrapped my idea for the acc belt. I made a new idler bracket to put in place of the tensioner that I hacked up. I used part of the old tube mounting bracket for the alternator, and a lot of other metal pieces. My goal was to make it simple, and I kept welding on more pieces to make it stronger, so it ended up looking goofy but it works. I found a bunch of parts off of my spare L67 block, so I now have the pulleys set up for the supercharger. Lately I've been trying to get some work done on my truck, along with many other numerous things, so I haven't messed with this project too much. I started stripping down the wiring harness for the engine, and plan on re-rerouting the wires on it and plugging it all back in. After the wiring, I will fix the rest of the rust on the car and should be close to sticking it back in.


 PCM and wiring
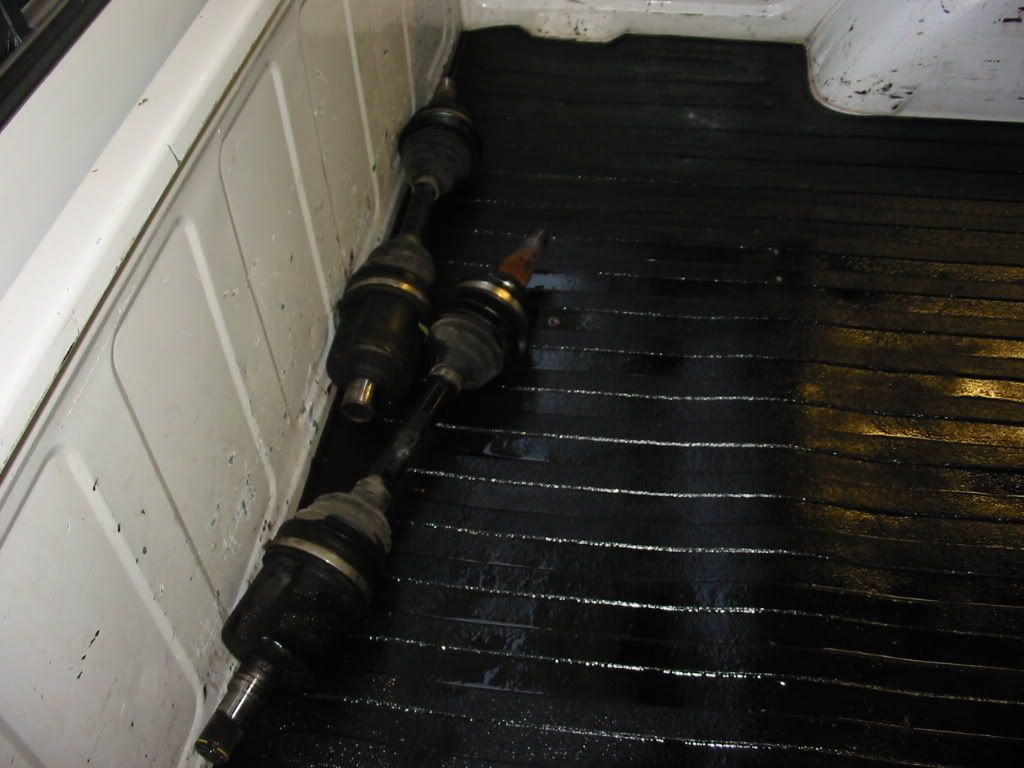 Axles
Axles