This project is still alive. I'm coming home tomorrow from a weeks stay in Florida, and should be working on the car again once I get my truck running again (which SHOULD only take a day). The only other thing I accomplished before I left was some of the engine harness wiring. I lengthened some of the connectors, and have a few more to lengthen before the engine harness will be done. After that I will fix some more rust, put assemble the suspension and stick it back in the car. I hope to have it in sometime next week. I also bought a new digital camera, so I should be able to take more pics with better quality.
The last few months I haven't been doing too much on this swap. As of today, I think I've come to the conclusion to completely strip down the 88 I have, and either scrap the frame or keep it around for a while. I got to thinking how much rusty the car is, and how much time and money it will take to completely go through this car, and IMO is not really worth it. Instead, I'm wanting to swap the 88 cradle L67/trans into my already running 86. I've done a lot of work to the 86 already, meaning that getting the L67 on the road will be a lot less time and money, plus I won't have two Fieros to maintain. I just can't afford to have three vehicles and dump tons of time and money into the 88, when it is so rusty. I only paid $300 for the car and got a ton of extra parts, so I'm not really losing any money if I just scrap the shell. I was wanting to post some pics, but I'm having some problems with photobucket at the moment. I'll get them up asap.
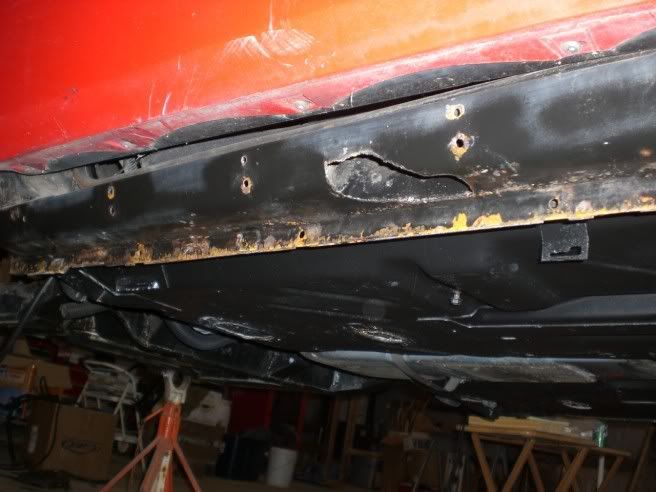
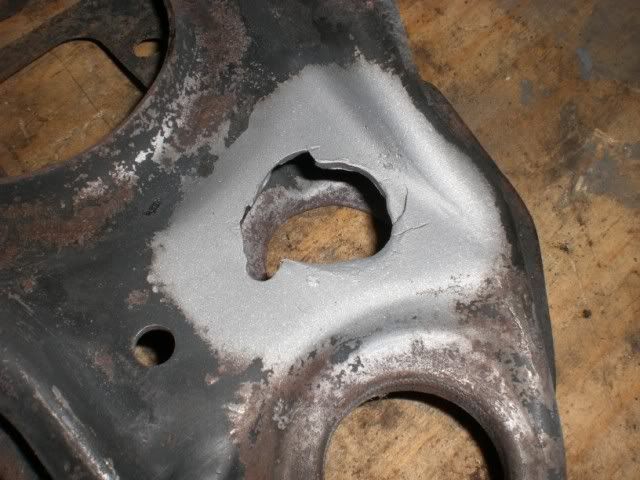
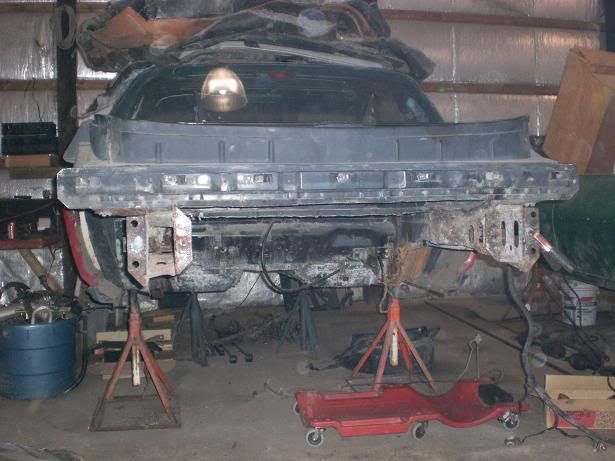
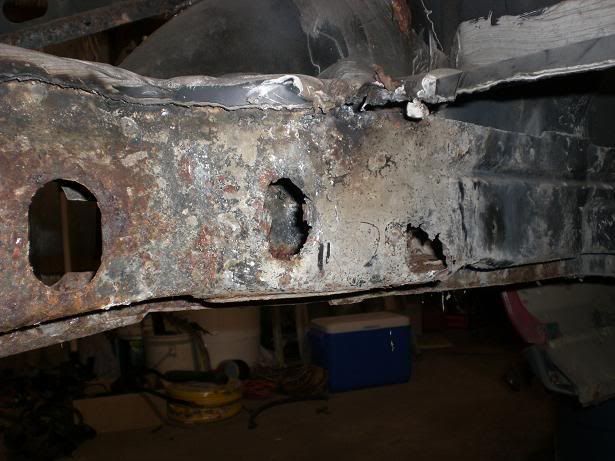
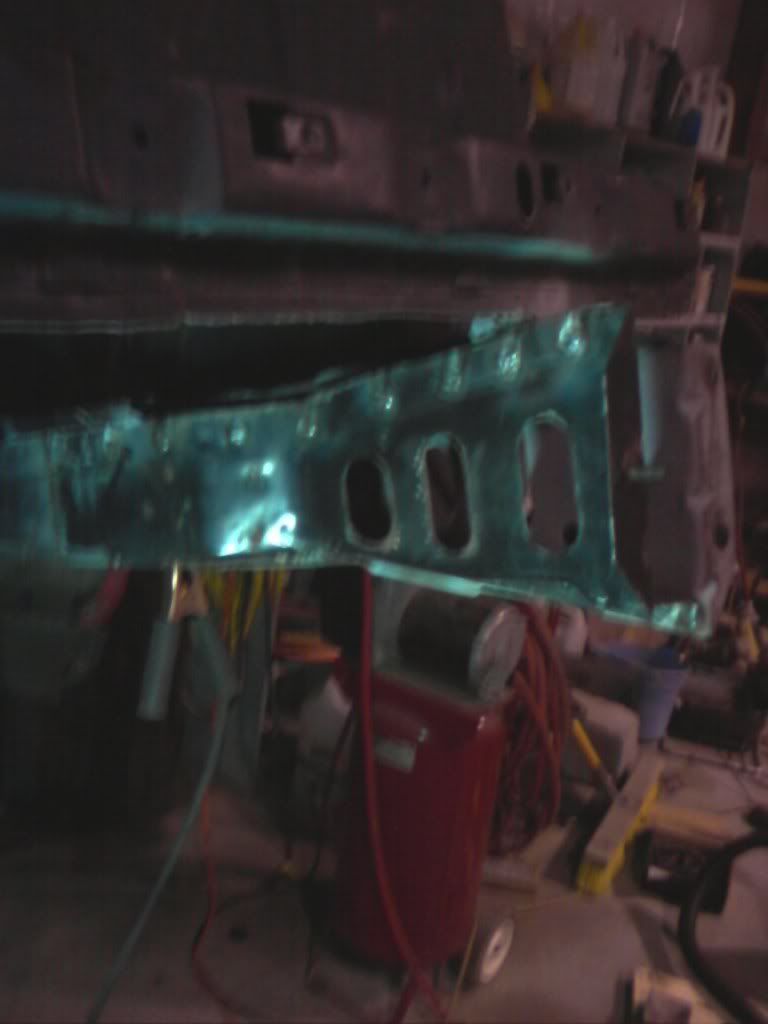
Finally got this photobucket issue figured out. Here are the pics of the rusty rails
No more trunk!
Drivers side rail after tapping on it with a hammer
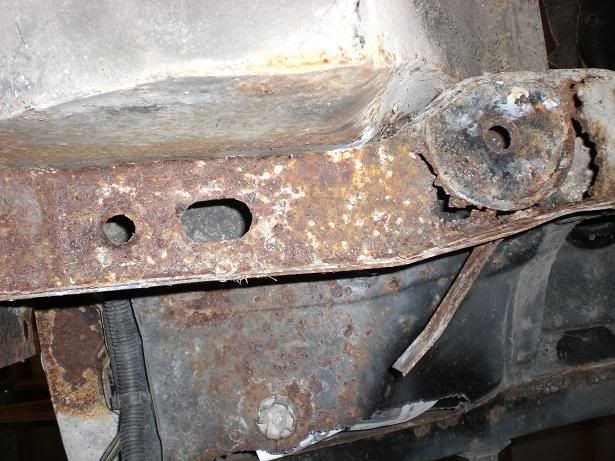
Underside shot of the drivers side rail. The circular metal piece is still intact somehow.
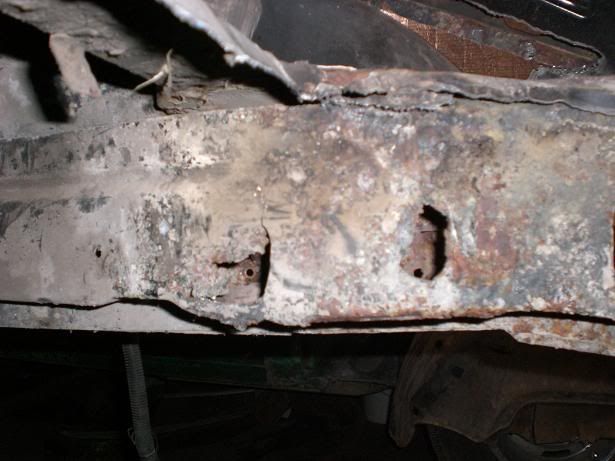
Passengers side rail after tapping on it with a hammer
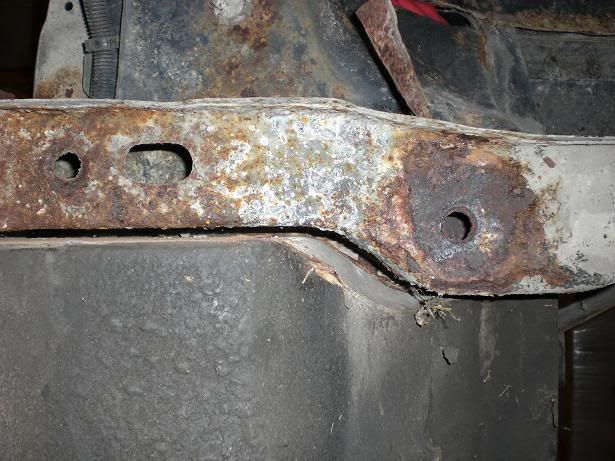
Underside shot of the passengers side rail. The circular piece on this side fell off, and it seems like I poked a hole through it after I took this picture, but I forget.
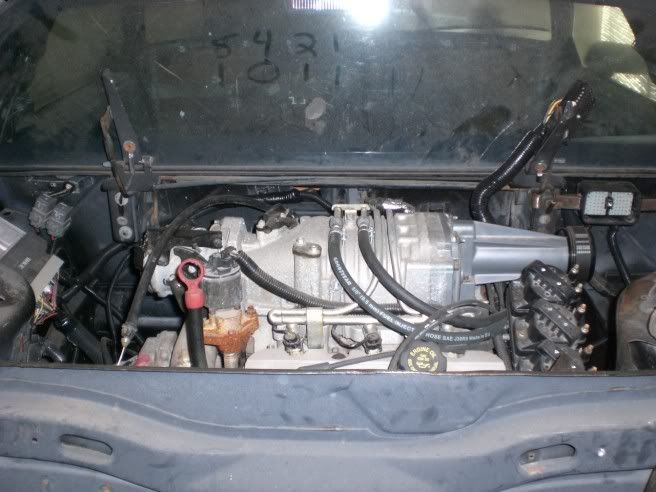
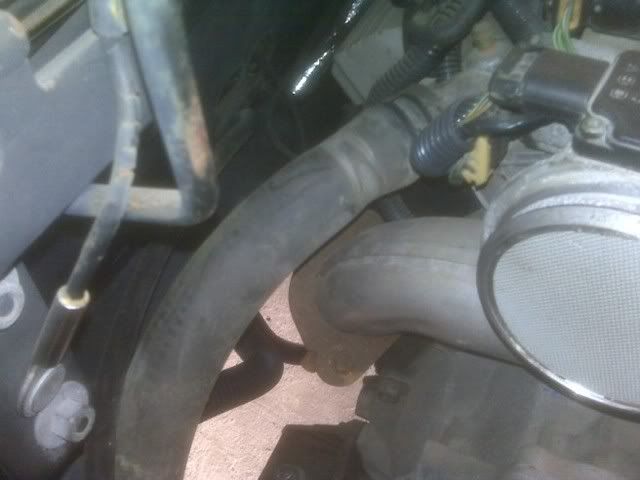
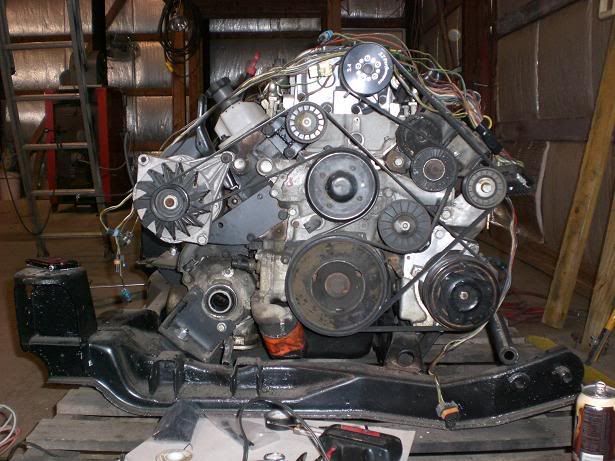
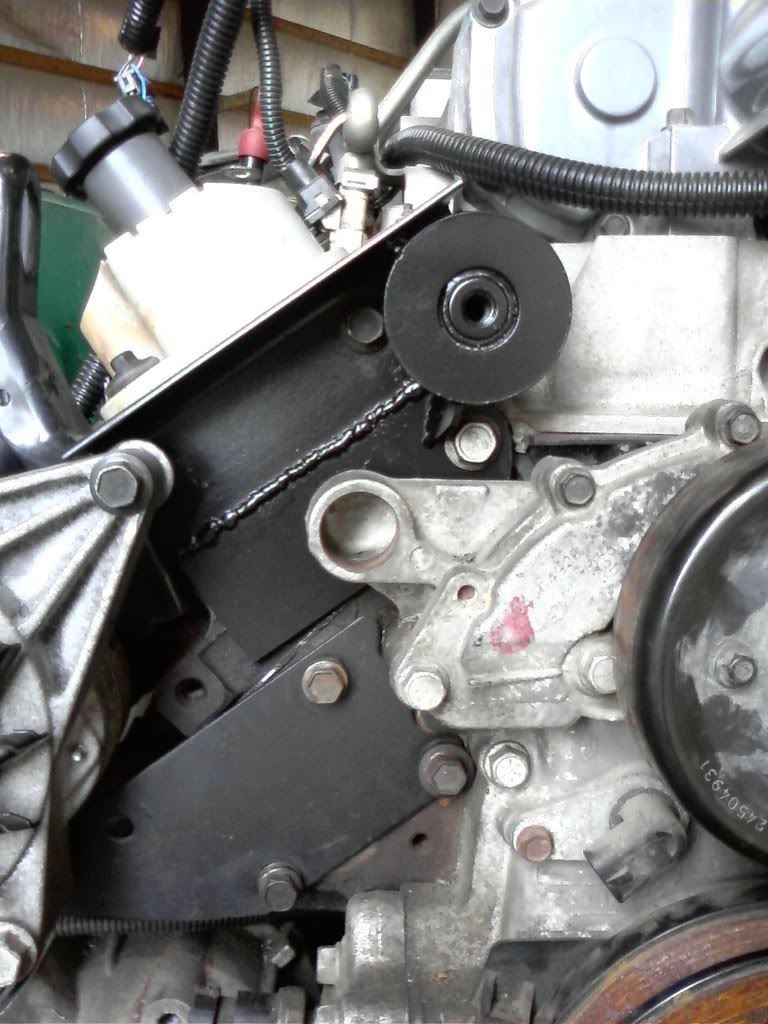
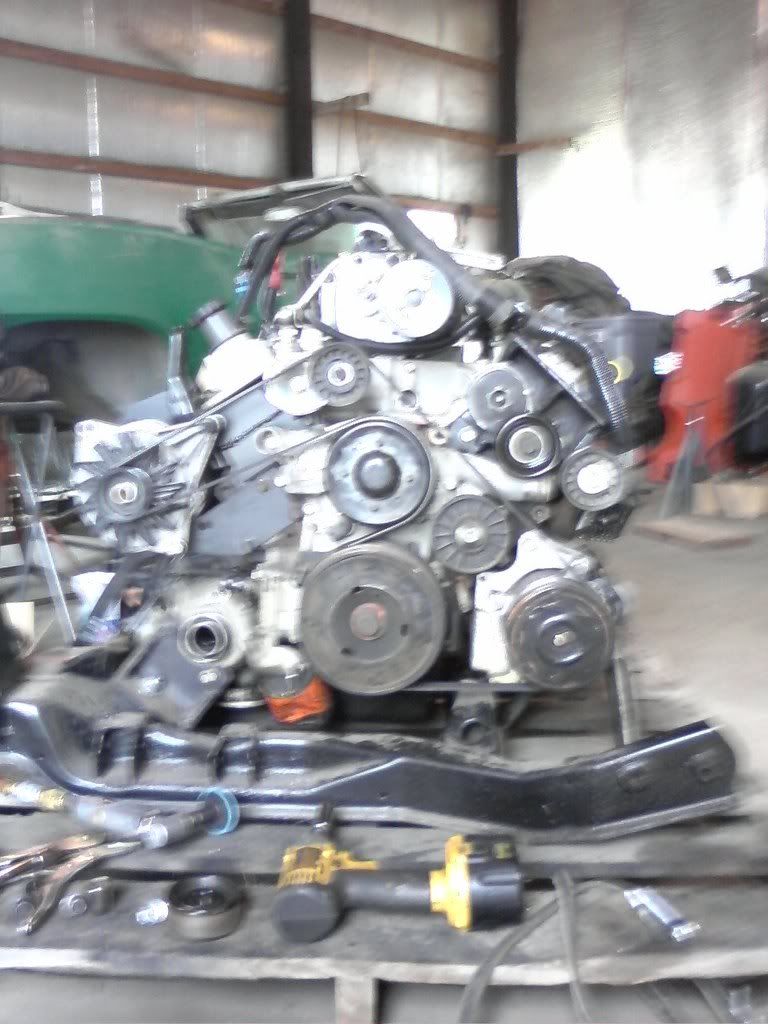
Aside from that, this is how the final belt routing ended up looking. I don't really like how close the acc. belt comes to touching itself though. Note: I removed the idler pulley in this setup in favor of a tensioner. See my posts down below.
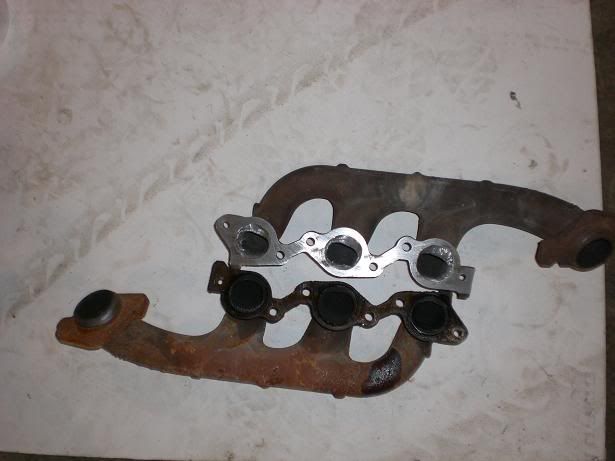
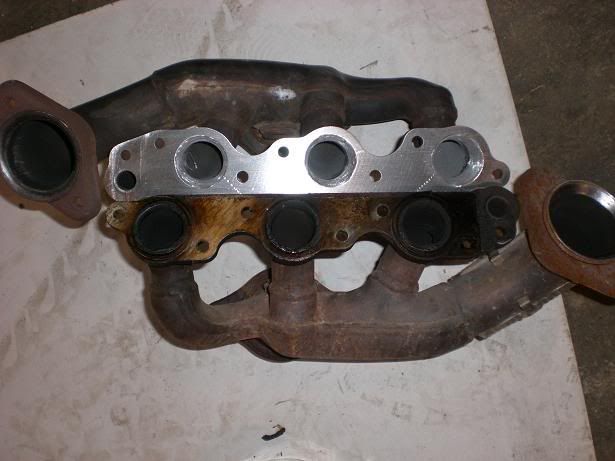
Ported manifolds
I found out how much different the offset is on the downpipe, as the manifold that is bolted on is from a GTP, and the old one is from the Riviera. I wasn't aware of the offset until after the porting and welding, otherwise I would have used the one from the riviera. I had to buy a dipstick tube from a Grand Prix since the Riviera one wouldn't clear the GTP manifold.
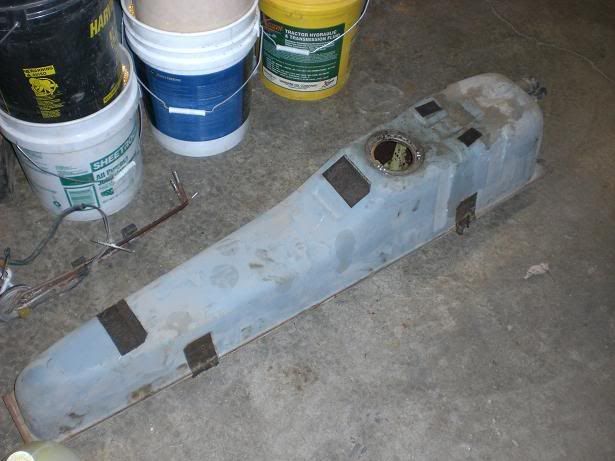
Finally scored a solid tank, but it is a rusty mess inside.
After some thinking, I've decided that putting this setup in my 86 would be a stupid move. Theres nothing wrong with it, so why waste the time swapping another engine in? GM is supposed to make collision repair parts available for at least 10 years after the car is discontinued (so 1998 in this case), so I am hoping to find a dealership that may still have some for sale. Getting this car on the road will still take a lot of work and money, but I've already bought tons of parts anyway, so I may as well use them. It's starting to warm up outside, so hopefully I get to working on this thing regularly again.
[This message has been edited by toadson (edited 08-05-2009).]
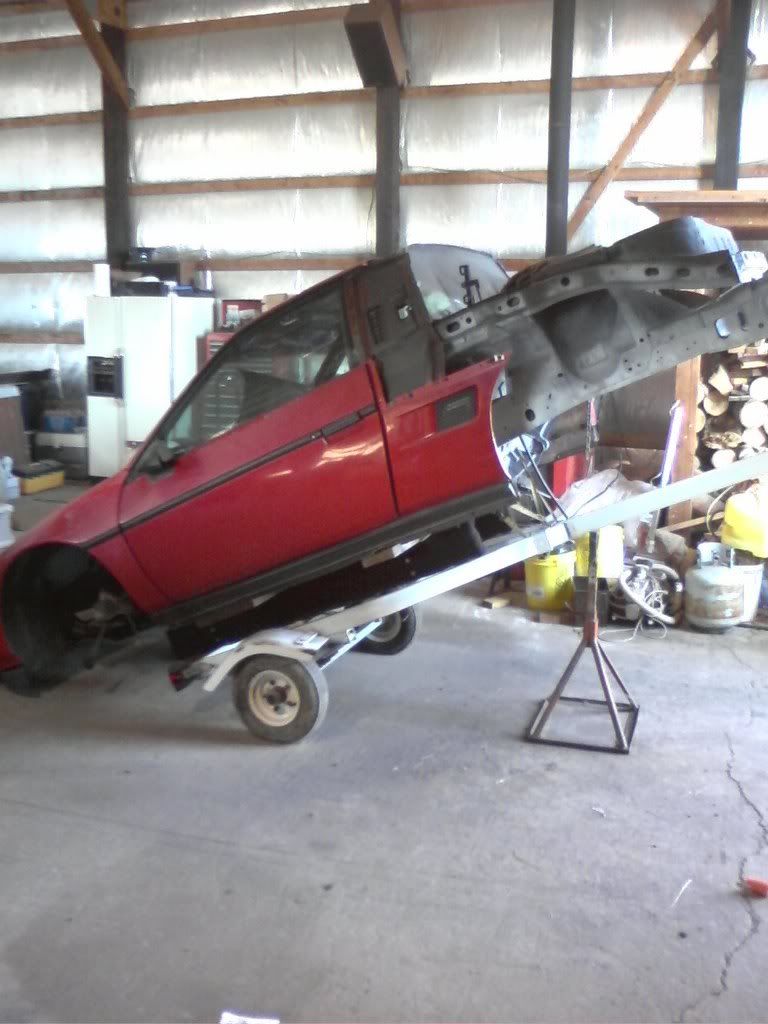
Thanks to Tim (tesmith66), I got my hands on everything I needed to fix the frame rails. I've got the car sitting on a Jet Ski trailer now so I could move it around. I've had this thing sitting around for way too long, and I've now got new(to me) frame rails in place.
Tell me this isn't the most redneck thing you've ever seen:
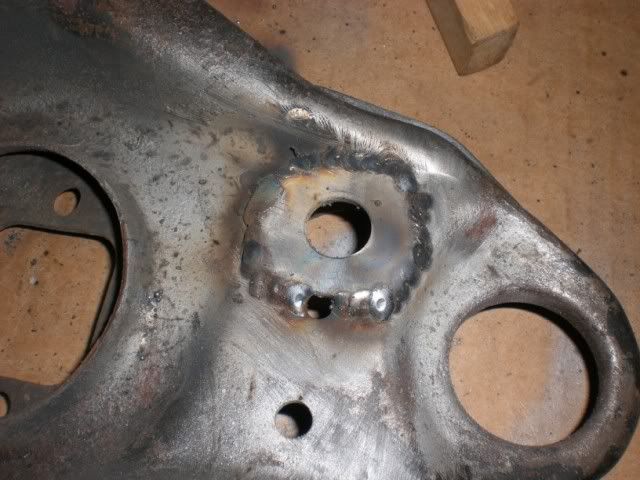
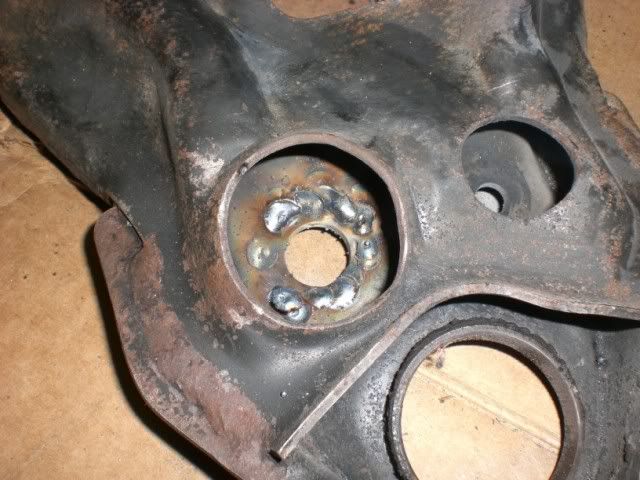
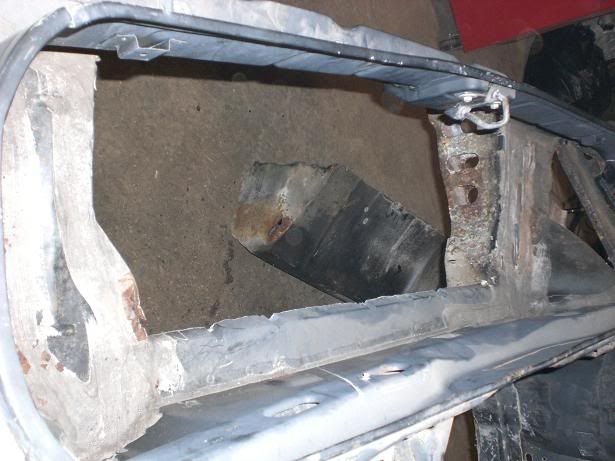
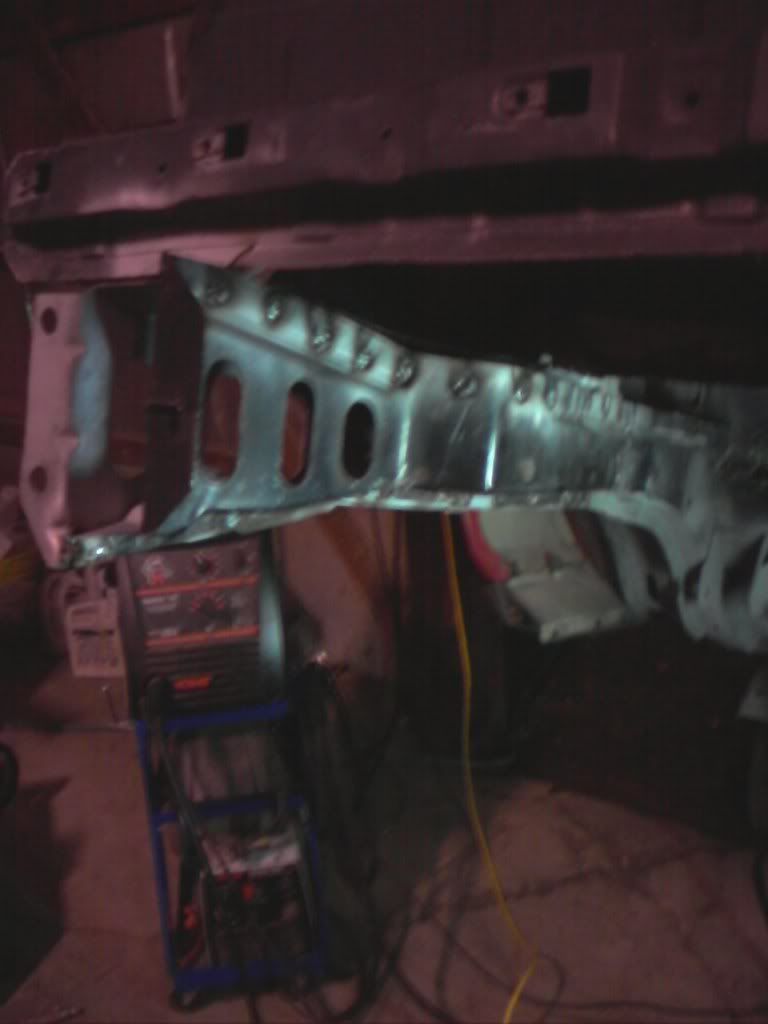
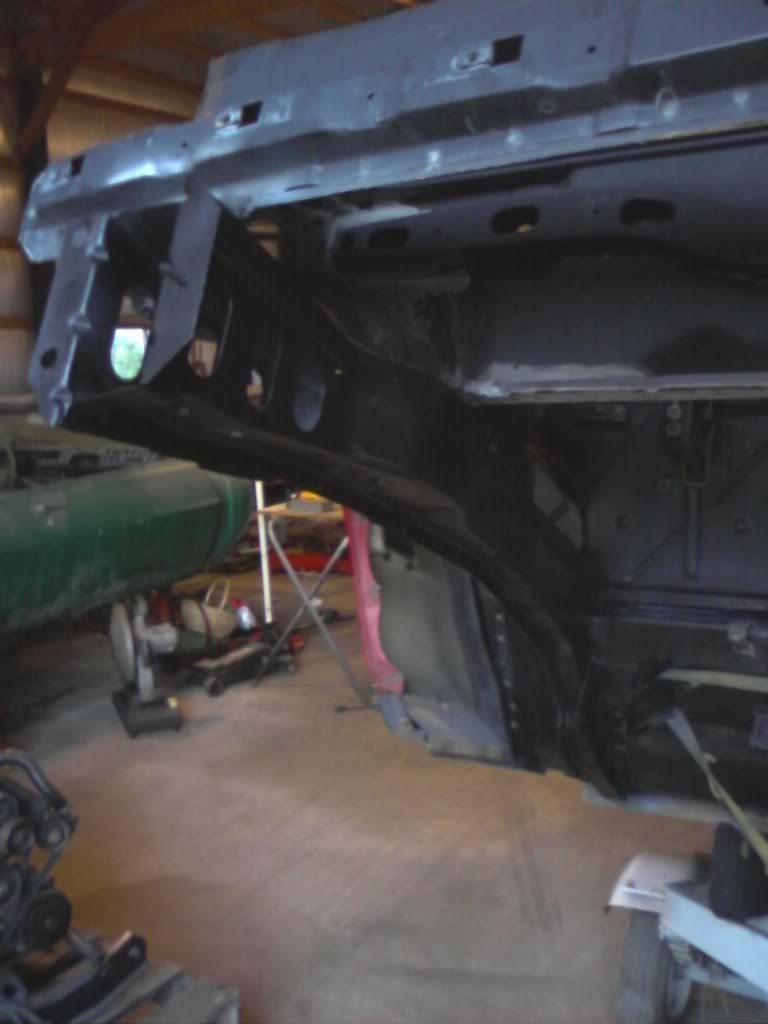
I took quite a few pics of my frame rail progression, but I'm just going to post the two pictures i took after I was done doing plug welds:
Basically, I cut all the spotwelds from the inner frame rail on both sides and replaced them. I kept the outer rails intact to keep alignment as close as possible. The inner rails could use a little extra support where I had to butt weld the new inner rail to the old, so I plan to use thin sheet metal I can heat and bend around the inside of the rail, around the butt weld, and plug weld in place.
I also picked up some bolts for the cradle and welded two nuts to some flat sheet metal to fit inside of the frame rail. After some grinding and wire wheeling tomorrow, I should have the frame rails and engine compartment painted and ready for the engine. There is one transmission mount I am going to redesign before I install the engine into the car though, but hopefully it will be in there soon!
[This message has been edited by toadson (edited 08-05-2009).]
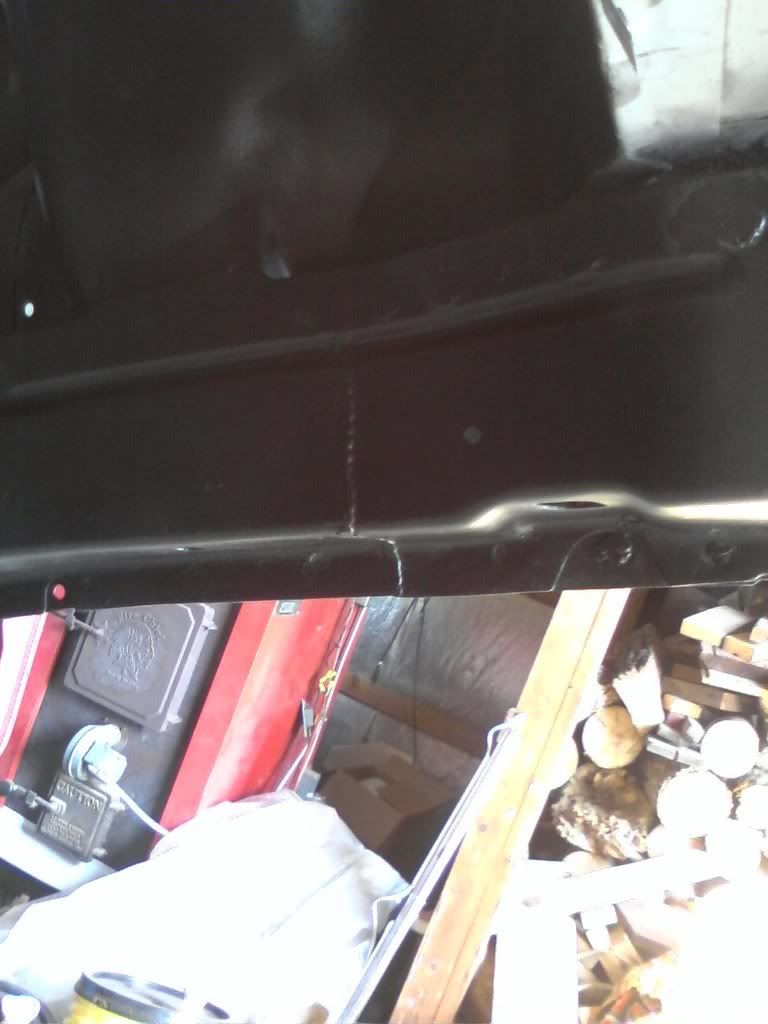
Rails are practically done. Still need to weld the extra support sheet metal around the butt welds, shoot some paint on that, some rust righter into the rails and some undercoating over everything to top it off. Hopefully it keeps the thing from rusting for quite some time.
As soon as I redo the transmission mount and tie up a few other loose ends, I should be able to install the engine in the car. I'd like to get the front end assembled with Rodney's lowering balljoints and get the rear suspension on so I can have a rolling car.
[This message has been edited by toadson (edited 08-05-2009).]
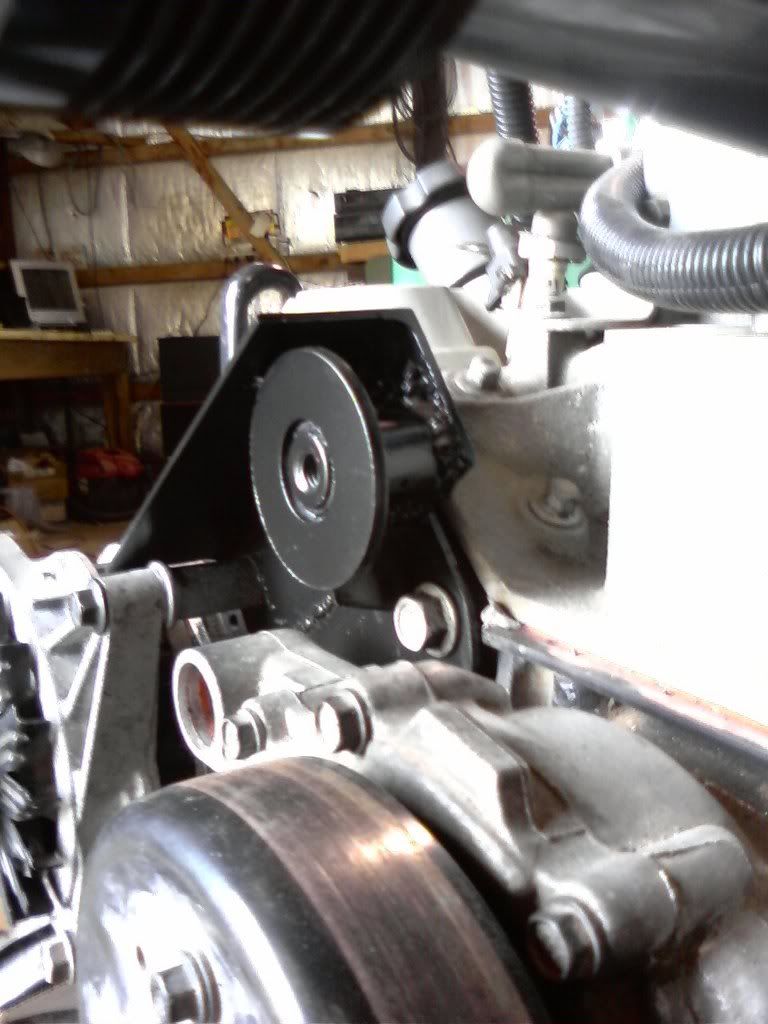
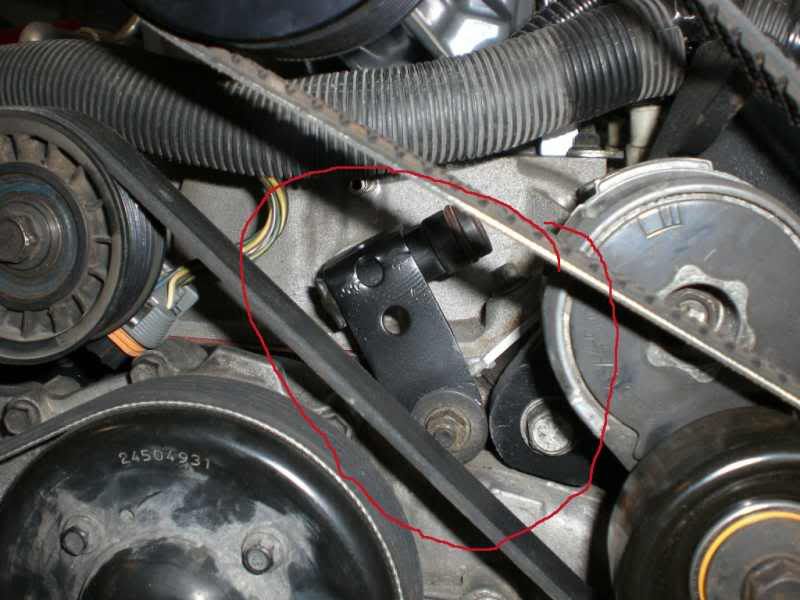
If everything goes smoothly, the engine will be in the car tomorrow. The only real progress I made was installing a tensioner in place of my embarrassing solid idler bracket. I used a 93 Taurus SL tensioner and made up a bracket that should hold up well. These pics are taken on my phone, and some of them turned out pretty terrible. I plan on bringing my good camera tomorrow to take some more pics of the belt setup and whatever else.
Here is a crappy pic of the butt weld on my frame rails
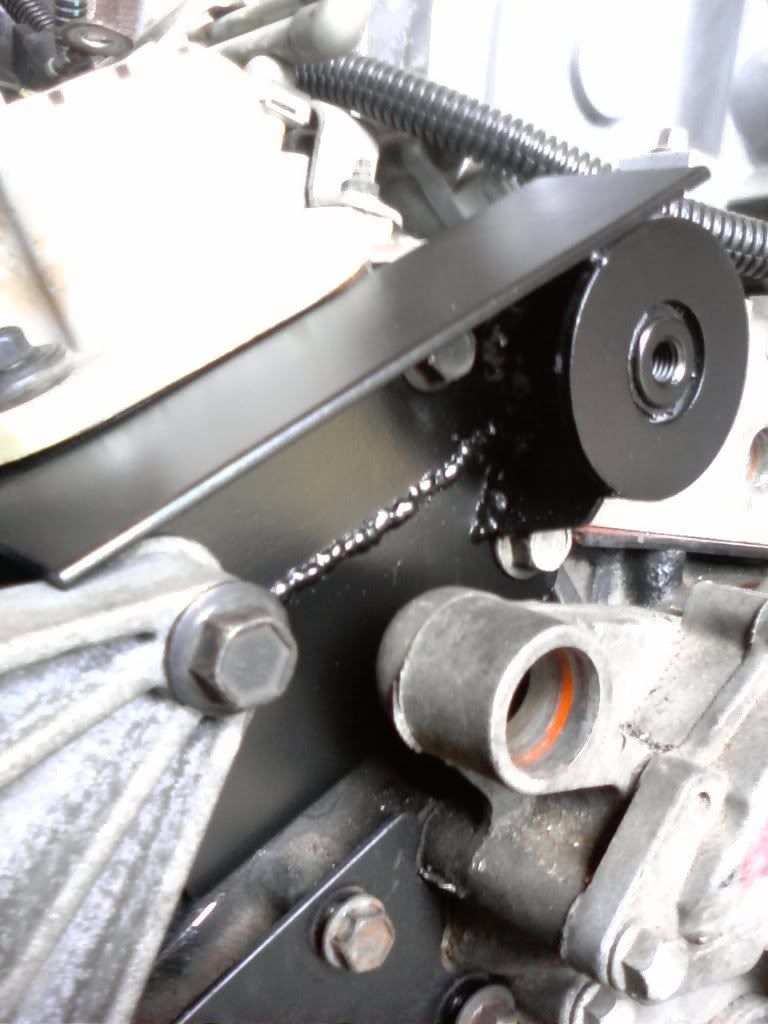
This is the bracket that took me forever to figure out a good design. In these pics, I haven't drilled the hole that keeps the tensioner from pivoting.
Shot of the belt in place
[This message has been edited by toadson (edited 08-05-2009).]
I cleaned up the underside of the floor today and painted it. I also made the cuts for the alternator doghouse, so there is actually some clearance now. I got out the Riviera wiring harness and was going to start messing with that, but I don't have a Fiero engine harness so I'm going to have to get one from somewhere before I get any wiring done. The gas tank didn't clean up as well as I was hoping, so I'll need to get some more muriatic acid to get the rest of the rust out. Once I get it clean, I can put the tank in the car, and I will start running the fuel, A/C, and transmission cooler lines.
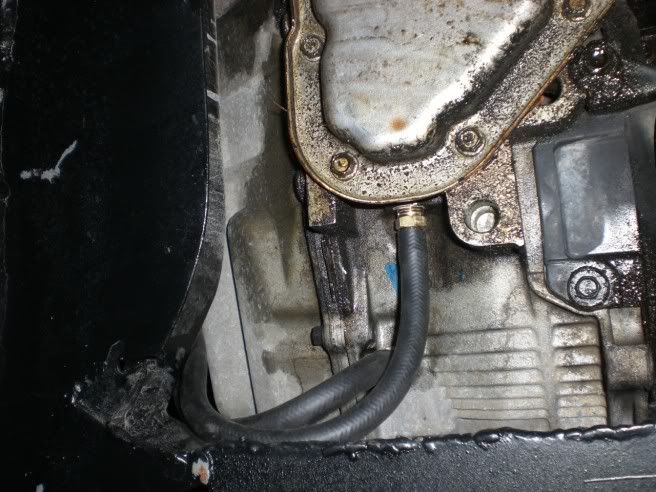
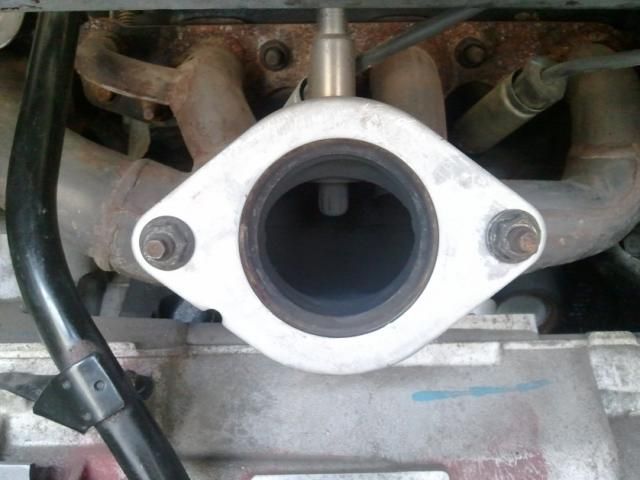
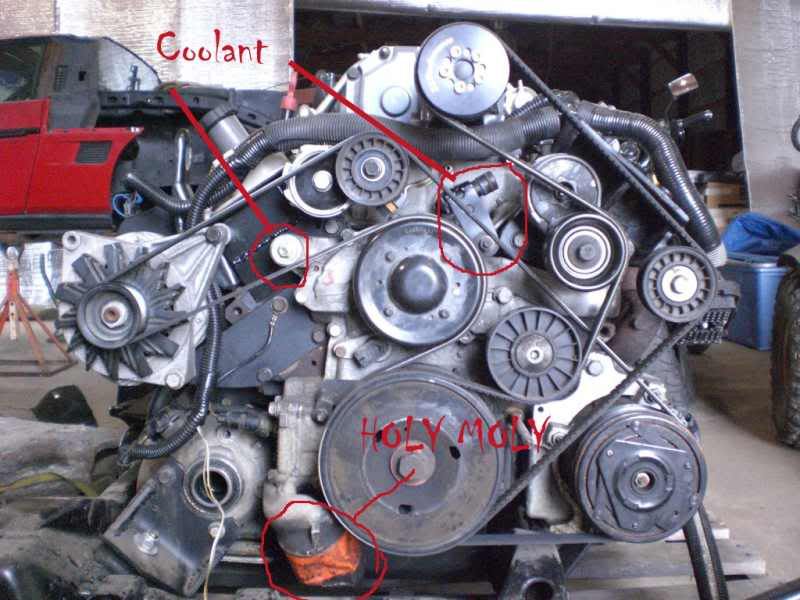
The first pic just shows the bracket I made to keep the 90* fitting from coming out of the intake port. I'm using that to feed the heater core. The other port is blocked off, as I'm hooking the return line for the heater hose to the return fitting on the passenger side coolant tube. I can't remember if its just 88's or 87's too that have this fitting on the coolant pipe.
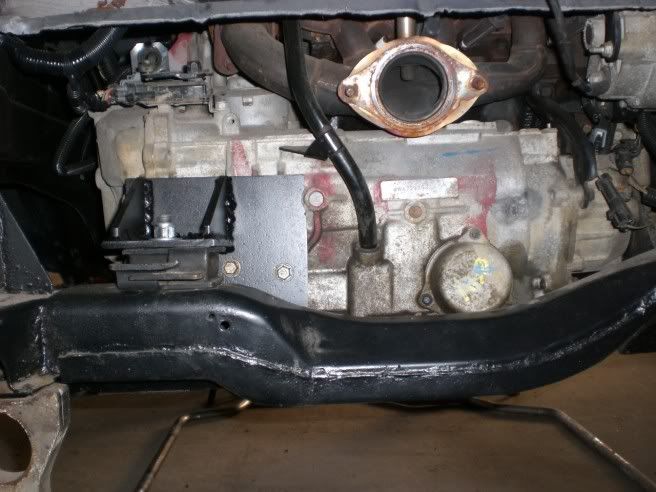
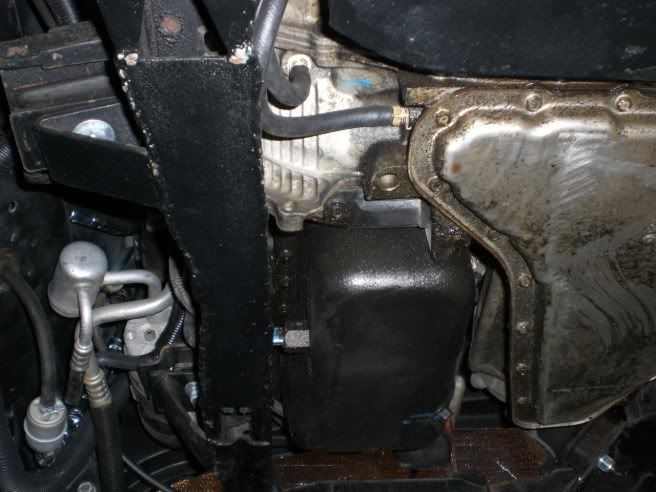
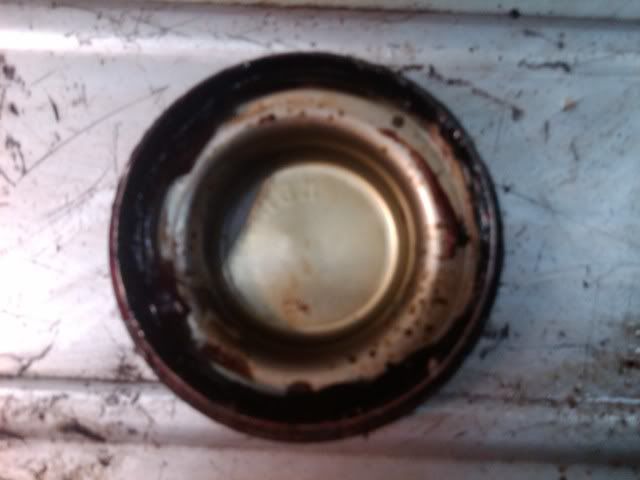
As for the oil filter, there is plenty of clearance there. The junkyard workers probably smashed it when they removed it from the car. I could fit a longer oil filter on there if I wanted, but that definitely wasn't the cradle smashing the filter Haven't needed to change it yet, but I will before it runs!
By the way, thanks again to Tim I have a start on the wiring. Hopefully I will get a lot done tomorrow and Sunday, but I doubt I will get it all done before the weekend is over.
It's a one inch rubber freeze plug. A bolt runs though it, and as you tighten it, it expands back inside the port. Darkhorizon gave me the idea, so I can't take credit.
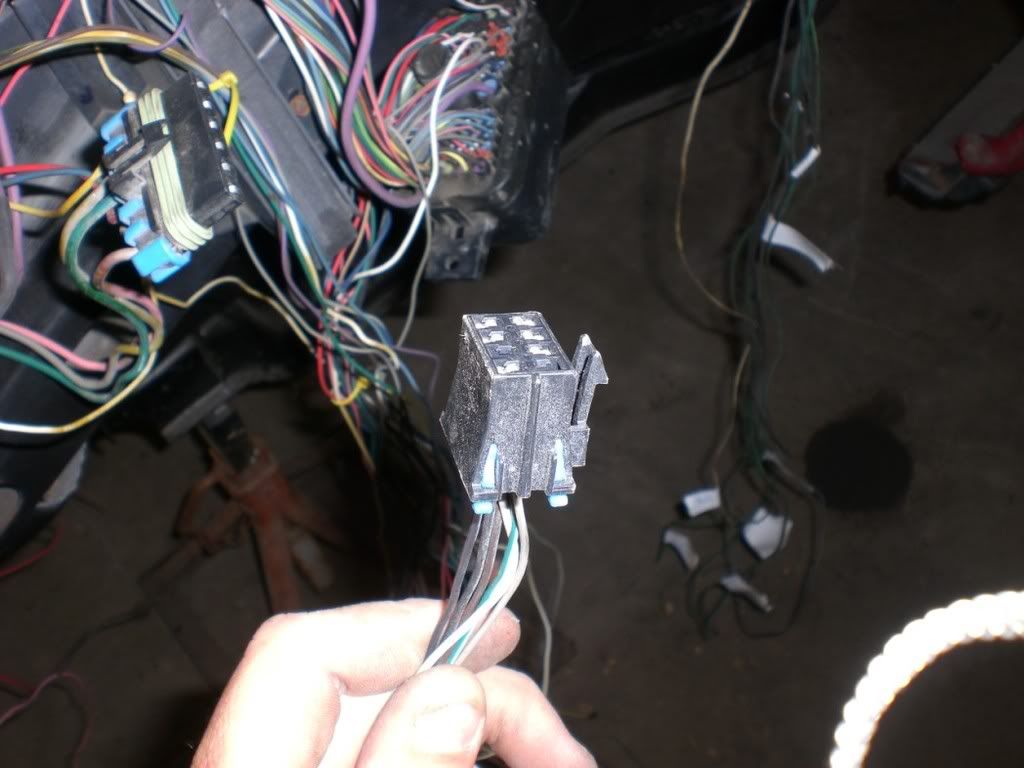
Wasn't sure what these plugs were for, but I figured they were pretty much useless. I eliminated them and the extra huge rectangular connector.
This is what I am stuck on. This connector plugs into the engine harness, and some extra wires come out of it that were cut upon removal of the donor vehicle. The wires I am unsure about are the ones heading south in the picture. The rest connect to the engine harness.
I ended up swapping out the interior/c500 harness with another I had. I added in the TCC brake switch wiring into this harness so I should be good to go. The harness that was already in the car had two wires that went to the brake switch for the brake lights, and the brake light switch I scored from the junkyard required a three wire connector for the brake lights and a two wire connector for the TCC switch. I just thought swapping the harness out would be easier than messing with the brake light wiring, since my interior is gutted and the harness unhooked from everything.
I have the c203 wiring finished, and some random ground wires and C500 wires to finish hooking up. I also figured out that the transaxle range switch does not have large enough wires for the starter solenoid wire coming from the c500 block, so I need another one with the correct wiring so I can finish wiring it up. The PCM wiring needs to be cleaned up and organized, and the coil packs still need mounted. Once I take care of these issues, the wiring should all be done. Then I can start with the rusty gas tank, and all the other fun tidbits of restoring this car.
Wow, it's been a while since I've been here. The wiring on the car is done, and I made a new motor mount bracket for the rear of the car. I just started working on the car again in the last few weeks, and have finally collected some more parts. If everything goes smoothly, I am planning on starting the engine up to see if it runs within the next few weeks. I made a trip to the junkyard with my buddy (Toasterman on here), and he performed the miracle of removing some fastback windows for me without damaging them (further) at all. I paid $140 for all the junk you see here. All of it is for my 88, with the exception of the wheel well liners.
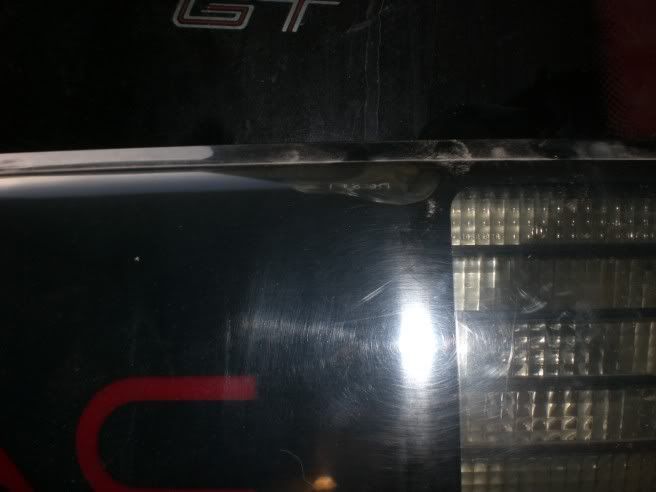
Sadly, the left tail light has a hole in it. I only bought it so I would at least have a set of tails for when this thing is road ready. If it could only be fixed...
I apologize that these pics are so terrible. My Blackberry has the worst camera I've ever seen. Here are a few pics of the engine, not that much has changed.
The new motor mount bracket I made before painting and installation.
Next to the old bracket it's replacing
Again, the combination of bad lighting in my shed and a crappy camera make for poor pictures. From here on, I'm going to use my real camera and take as many pictures as I can in the daylight. It's getting warmer out now, so I'm getting more and more work done on this project.
[This message has been edited by toadson (edited 02-07-2009).]
I took a couple of pictures with my good camera today. Just some of the same stuff from my last post.
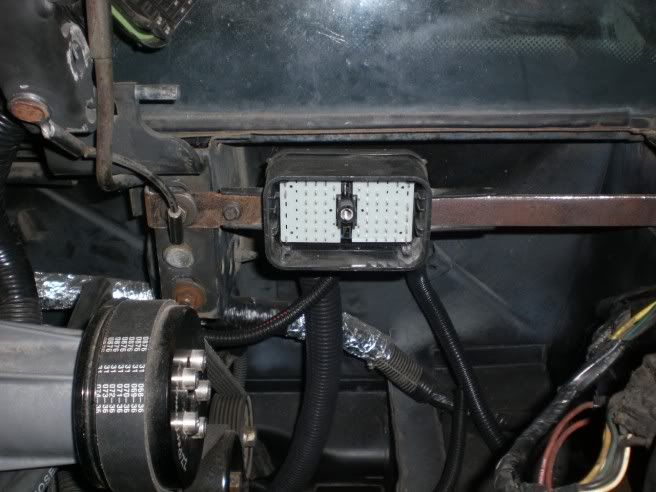
C101 block
This is the worst spot on my good tail light I picked up Saturday.
This is from the passenger side rocker panel. It should be fun to fix.
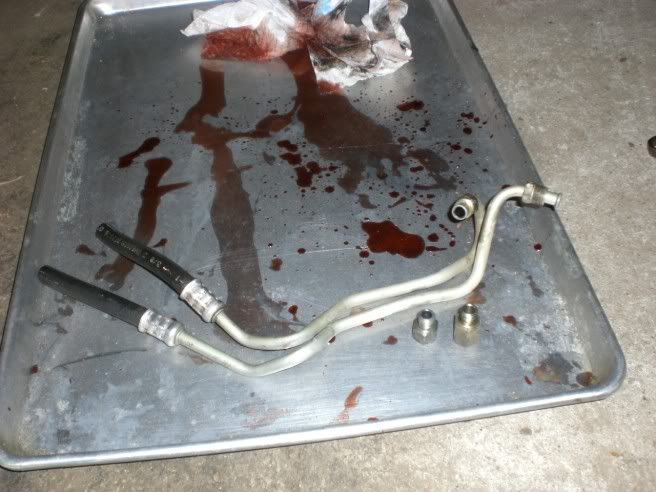
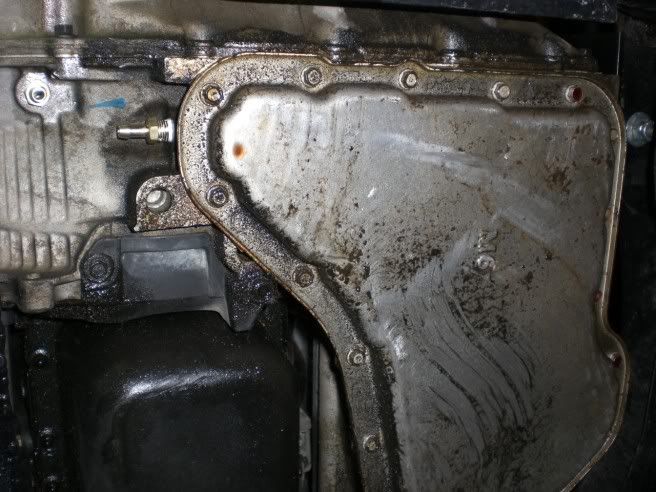
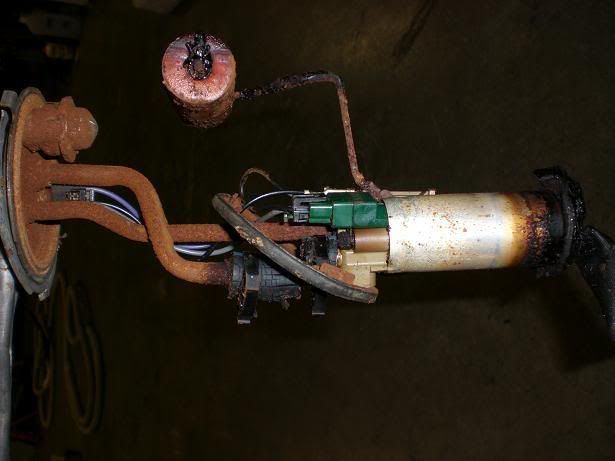
I managed to install the coolant pipes and transmission cooler lines today. I am using the stock Fiero transmission cooler lines, which are 5/16". The lines coming from the 4t65 are 3/8", which causes a problem. What I decided to do was remove the stock lines and adapter from the 4t65 and replace them with a fitting that has a 5/16" barb on the end. Here is a pic of the stock lines and fittings:
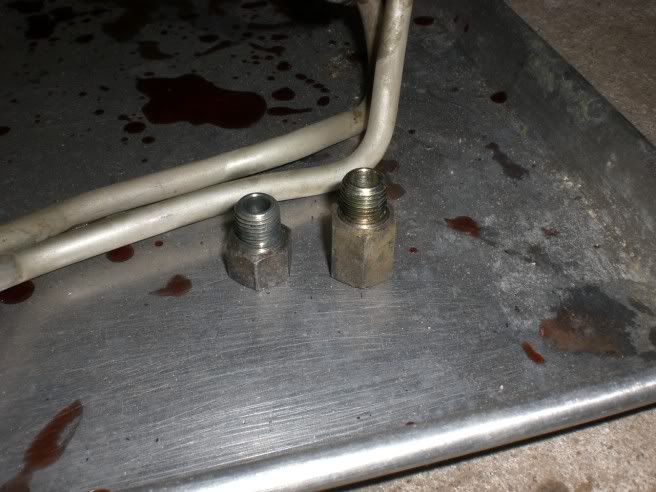
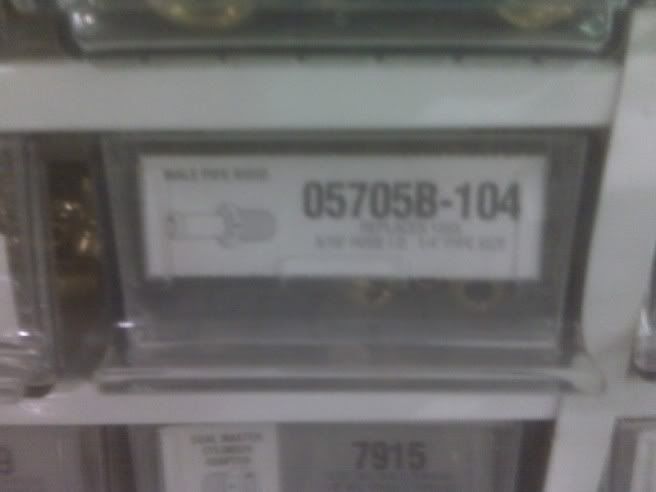
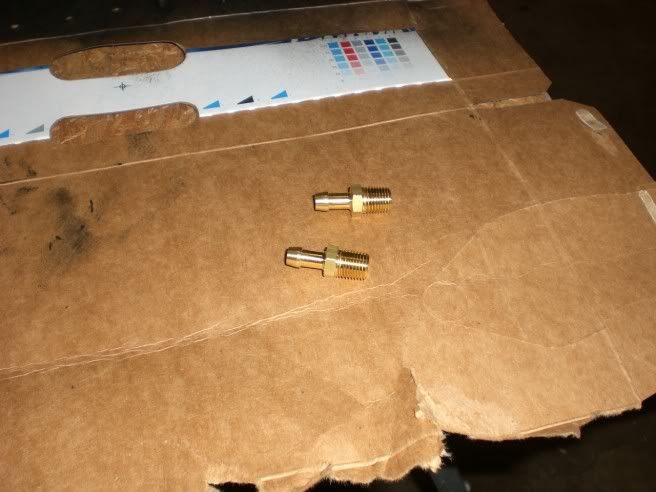
I went to NAPA and found these fittings. They are 1/4" pipe thread with a 5/16" barb. They were about $3 a piece. Part # 05705B-104 I google search the part number just to make sure it would show up. This link shows pictures of several adapters and their sizes. You can see the part number for the fitting I bought there: http://www.trexservice.cl/p..._FA_057_b_series.pdf
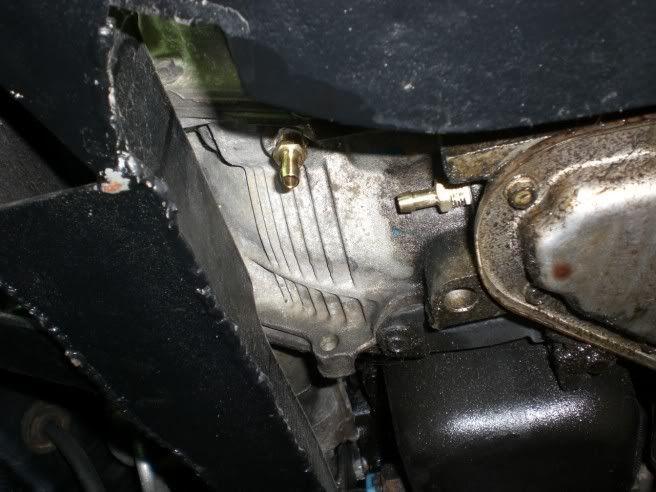
Here they are threaded into the transmission. They weren't tightened up in these pictures:
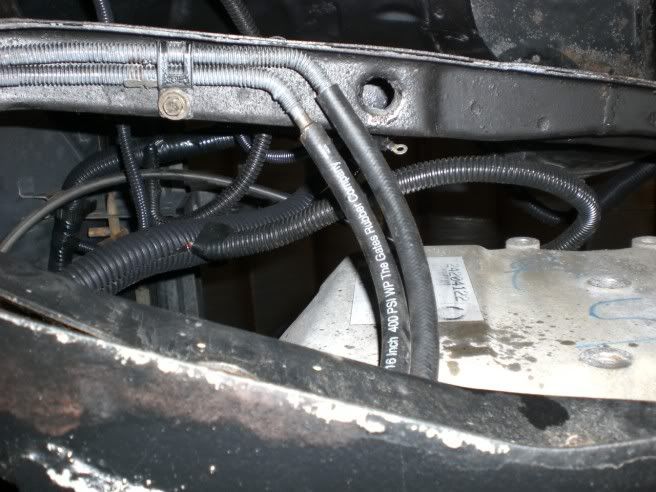
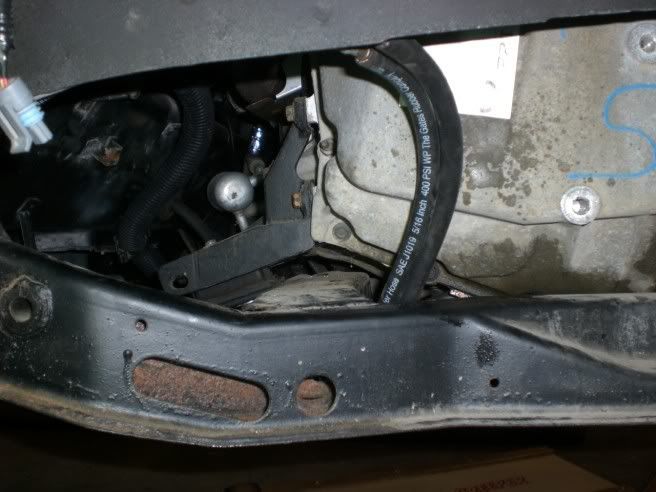
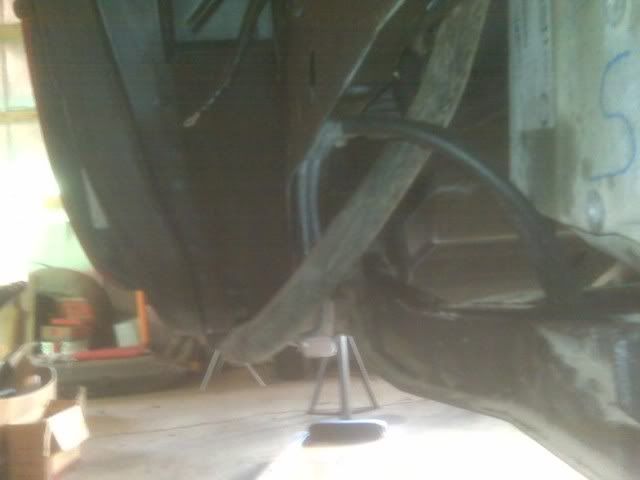
I also bought 3 ft of transmission cooler line at NAPA, which was about $9 total. It is rated for 400 PSI, so it should never explode on me. Here are a few pics of the routing I am planning to use. I want to use some wire loom on each line to protect it from rubbing on the frame. I will also use fuel injection clamps on them, but need to buy a few.
[This message has been edited by toadson (edited 02-09-2009).]
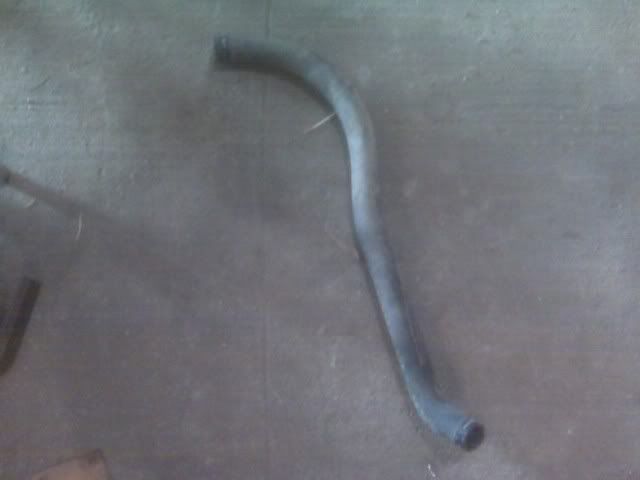
I've been trying to figure out the coolant hoses the past few days, and managed to get lucky on one of them. I found a coolant hose in the back of one of our trucks at the farm, and it fit perfectly for the drivers side that connects the engine to the coolant pipe. It is GM part #15977346. I've already googled and found the Gates part number, which is 22228. The hose at Rockauto is less than $9, so you can't beat that. It fits a 96-98 fullsize Chevy truck with a 4.3 V6. We used to have a truck like that, which explains why we had the hose. You've gotta love having junk vehicles just sitting around.
Anywho, here are some pictures of it. I didn't have my camera with me, so I had to use the Blackberry again.
I'm thinking about ordering Dayco #71126 for the passenger side. Somebody else on the forum used this hose and posted pictures for a NA 3800 swap if I remember right, and it looks like the closest one to fitting that I've found so far. I also need an upper radiator hose for the front, so I may just order both and have the coolant hoses done.
[This message has been edited by toadson (edited 02-15-2009).]
After a few more trips to the junkyard and emptying my wallet, I started up my Fiero for the first time.
The Dayco #71126, which apparently fits mid 80's Mustangs with 3.8 v6's, did work for my passenger side coolant hose. I wouldn't recommend it for an 88 with 4 cyl tubes, but I could see how it would fit well on the longer coolant tubes. I had to cut off about 2 inches and twist it a bit to make it fit. For my battery, I am relocating it to the front. I've found that the power cables from the Rivieras with the L67's have a wire that works perfectly for this. It is close to 10 ft long, and is very heavy gauge wire. I hooked one end of the cable up to the starter, and this end also had an 8 gauge wire coming off of it which I hooked to the alternator. I then ran a large power wire from the C500 block to the alternator to get power to everything. For now I just sat the battery on a block of wood next to the cradle and hooked it up there.
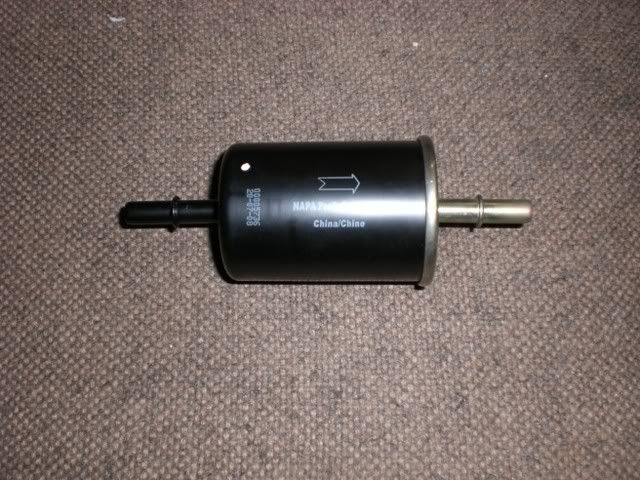
I had some fun last night when first cranking it over. The first issue was a fuse blowing. It was a 10A fuse, and popped after the fuel pump ran for only a second. I slipped in a 15 A fuse, and upon inserting it with the key on, the fuel pump relay was going nuts. I think the fuse was half blown and barely making a connection, so I tried another 15A fuse with no problems. Finally, the fuel pump was priming and we began to crank over the engine, until I heard something pouring out on the ground. My fuel filter had busted. This was a stupid mistake by me. I went to autozone, found a filter with 3/8" fittings, not knowing whether it was rated for high pressure or not. Obviously, it wasn't.
Today I made a trip to Napa to try and find a high pressure filter with two barbed ends. I am running all rubber high pressure line for the fuel, so most typical fuel filters would not work for me. After some thinking, I had the parts man grab a full size 1997 Chevy van filter, because it had the plastic quick connects on each end. If you remove these, there are barb like ends on each side. I will have to upload the pics I have in a few days, along with the part number in case anyone is interested, just for future reference.
So I installed the filter. It held up fine to the pressure. I thought I had the transmission in park, so we decided to try and start the car just to make sure it ran. We cranked it over, it fired up and ran for about 2 seconds and died. Transmission fluid had leaked out where the axles slide into the tranny, so I cleaned up the stockers I had and slid them into place to keep the fluid from leaking.
Upon the second start, the axles started spinning, and the next thing I knew there was axle grease everywhere. I thought it was pretty hilarious, even though it left a greasy mess. I didnt even think about the gear selector switch being backwards, so of course I had it in 1st instead of park.
So after these couple of messes we fired it up with no fluids leaking or shooting out. I made sure to keep a fuel pressure gauge on it, and during each run it was right at 50 PSI. Each time it only ran for a few seconds, so the next step was to install some coolant. After filling it up, I tried to see how the engine would run. I'm not sure what is going on, as I didn't have my scanner working, but the engine doesn't want to idle. When it does idle, it idles very low and runs rough before it dies. If I give it some throttle, it sounds normal like it should and smooth. I had a recent problem with my 3.1 swap in my 86, and it turned out to be a stuck egr valve. I tried tapping around on the egr while it was running, but had no luck. I should get around to scanning it Wednesday, so I hope I can get a good scan and post the log.
[This message has been edited by toadson (edited 03-03-2009).]
IIf anyone is interested, I have a pic of my fuel filter I am using. Since I am using all 3/8" lines for the fuel lines, I needed a fuel filter with barbed ends that could hold up to the high pressure. I went to NAPA and ordered a filter for a fullsize 97 Chevy van. I don't have the part number, but it looks like this: It comes with two plastic clips which you remove, and it had barbs to keep the hose from slipping off. It's been working great so far.
My rough idle issue could have been due to a few things, First off, there was a vacuum port on the throttle body I had forgotten to cap off (same thing happened on my 3.1 swap), I also didn't have the vacuum port under the blower attached to the fpr, as it was only connected to the throttle body. Once I found the right diagram (the one I had must have been from a 97), I got it all straightened out. It now runs smooth and idle without giving it any throttle. I posted a short video which doesnt show much, but that the engine is running.
[This message has been edited by toadson (edited 03-05-2009).]
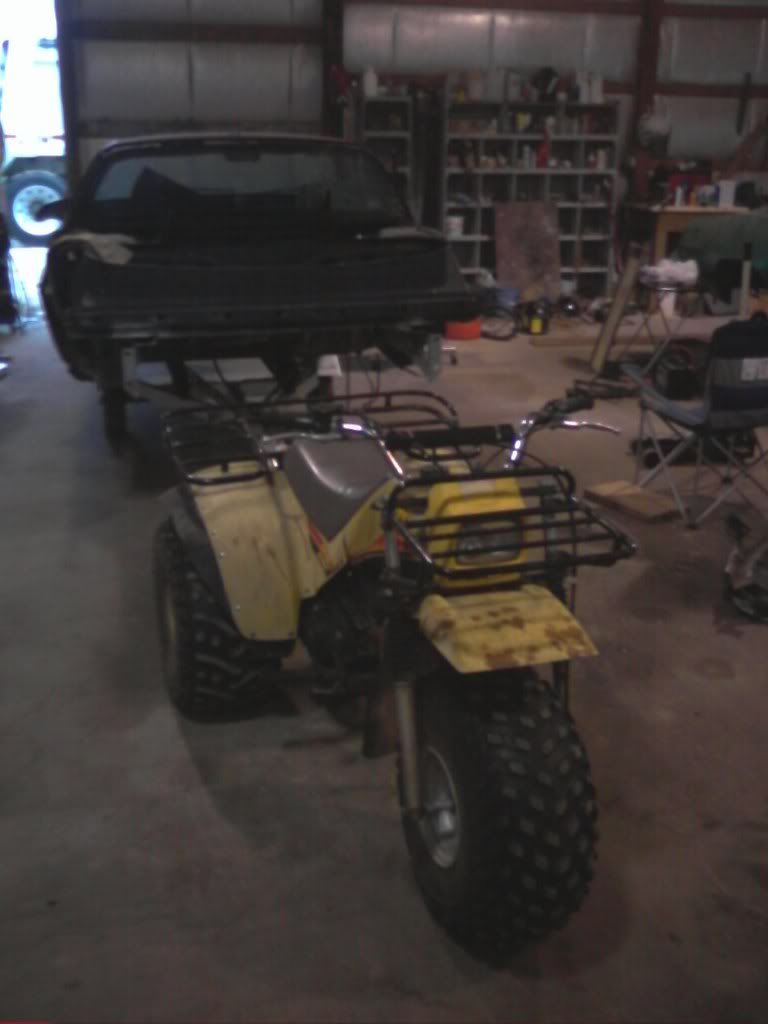
I'm bringing this thread back from the grave once again. I recently re-organized my photobucket albums, and updated the entire thread so there shouldn't be any broken links. Not a lot of progress on the Fiero. There is a large crack I still need to weld on the spaceframe, and the rust still needs repaired that I found under the rocker panel. I POR-15'd the floor and installed some carpet, but not much besides that. I have my own powdercoating oven and gun now, and plan to powdercoat the suspension parts this week. I have been spending too much time buying atvs for cheap and fixing them up, working on our trails out in the woods, and also cleaning and adding on to our shed. This poor car has sat in the same spot for a long time now and I hope to at least get it on wheels soon.
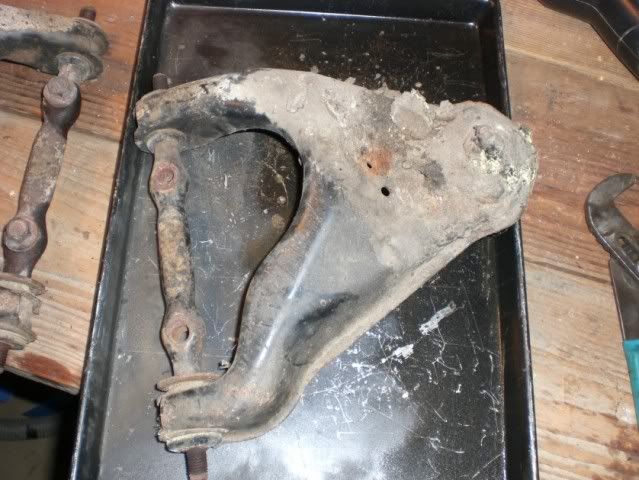
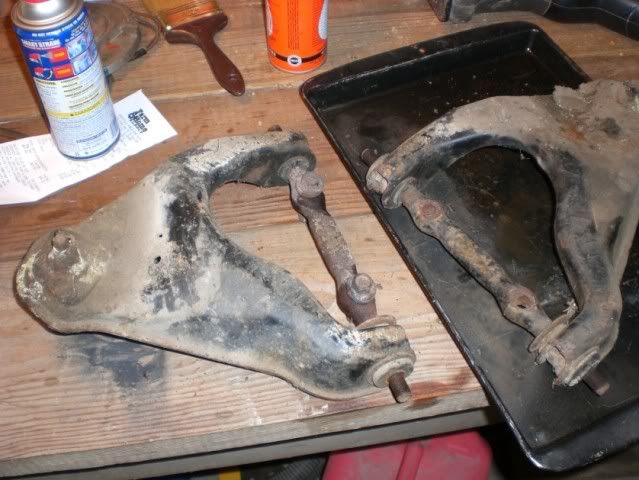
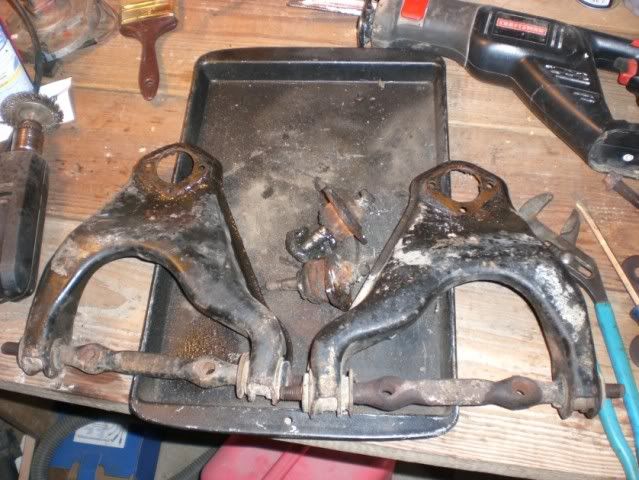
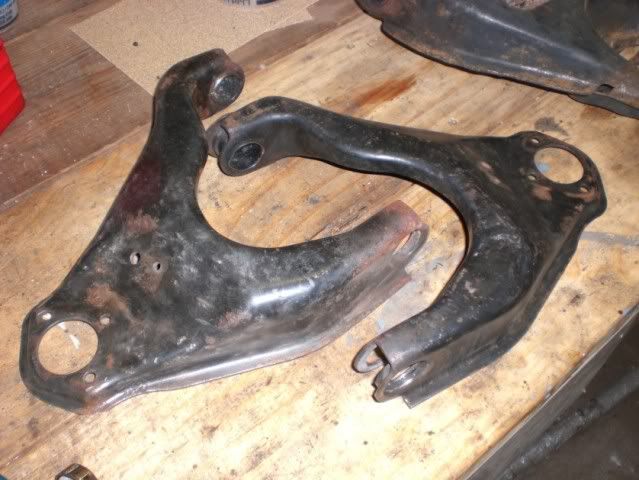
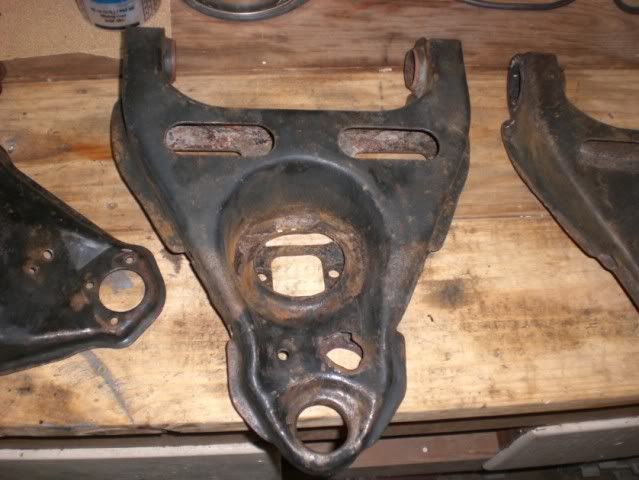
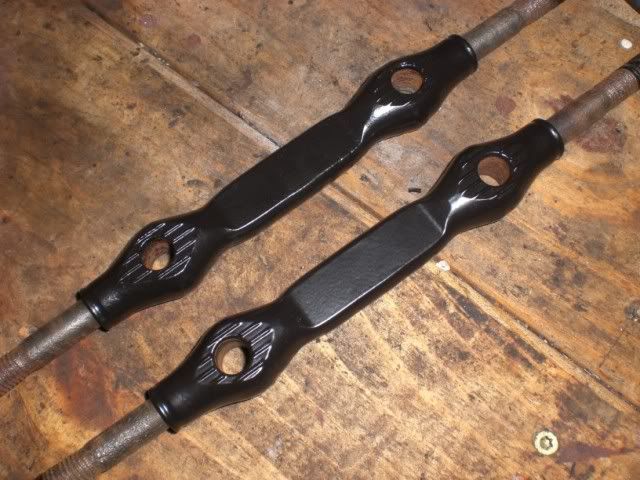
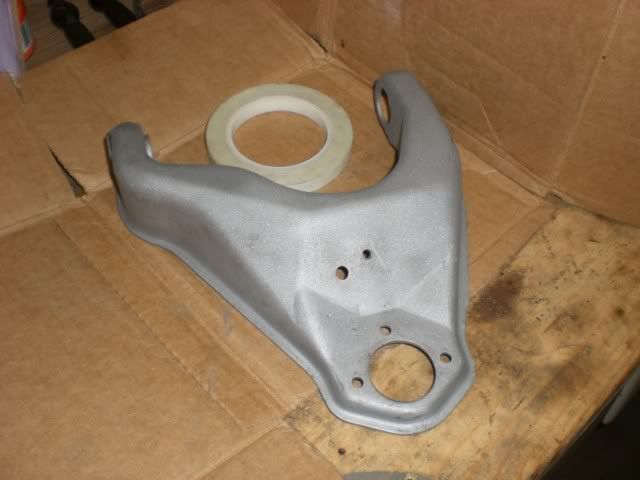
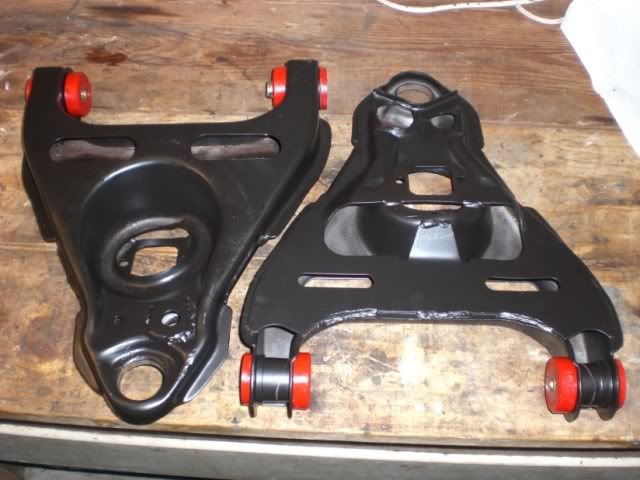
I've got the control arms stripped down and ready to sandblast and powdercoat. Before I powdercoat them though, I need to fix the hole for the end links. You can see why in the pictures.
This is before I stripped them
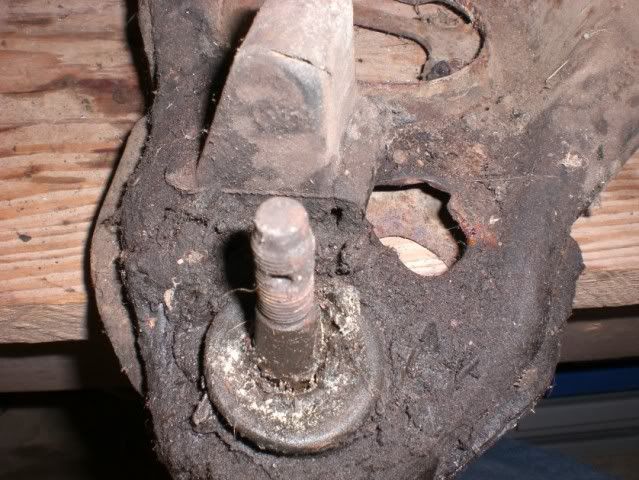
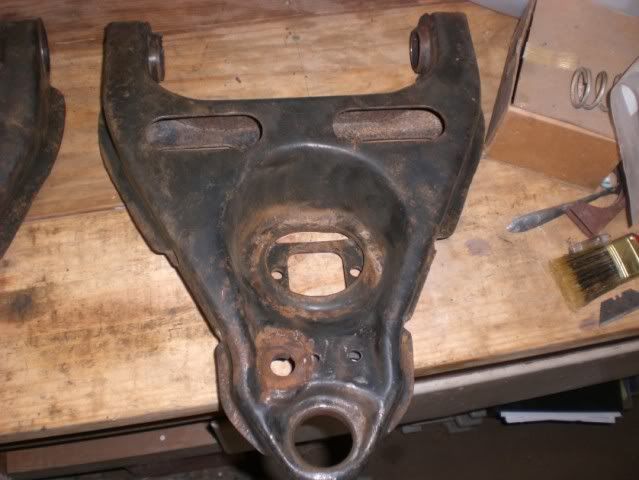
Balljoints removed
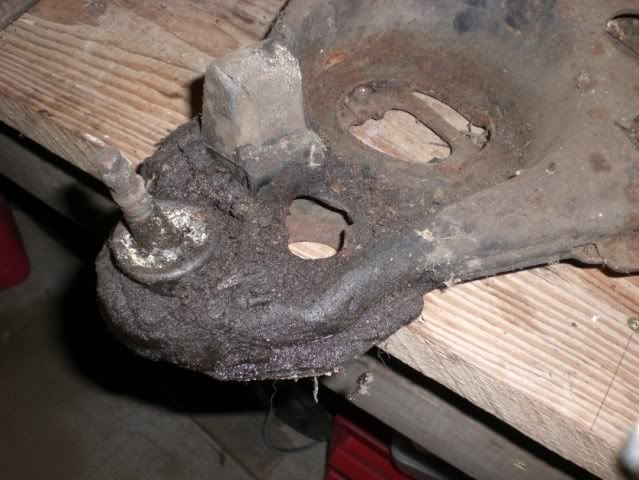
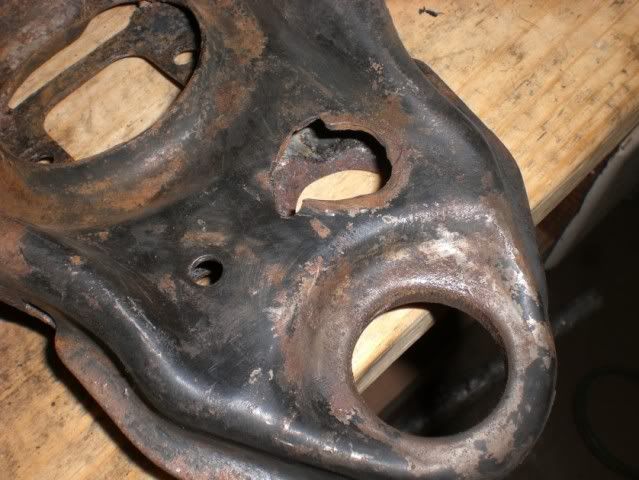
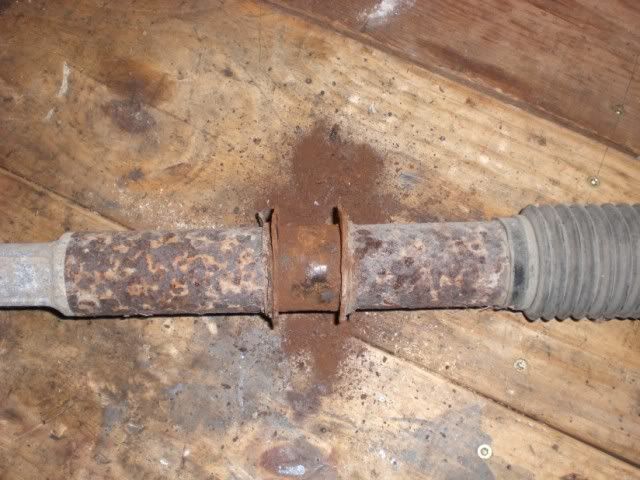
Here is the hole for the endlink I am talking about
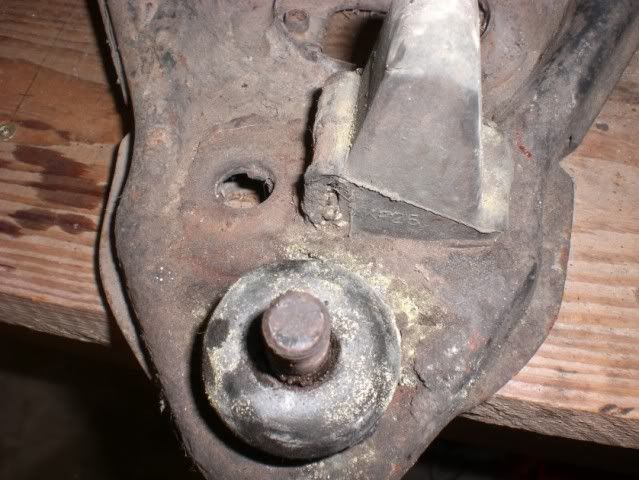
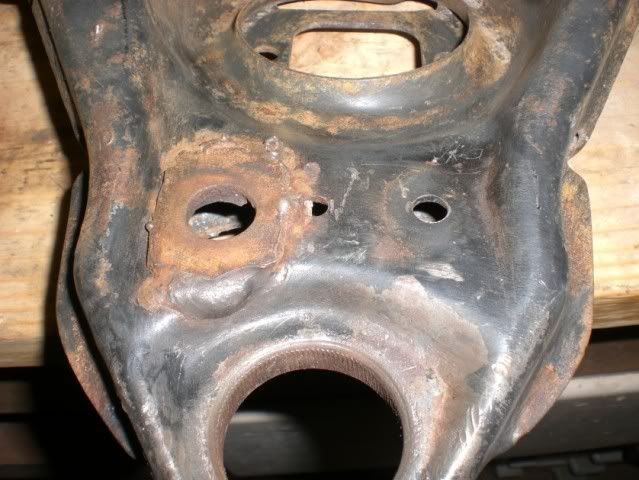
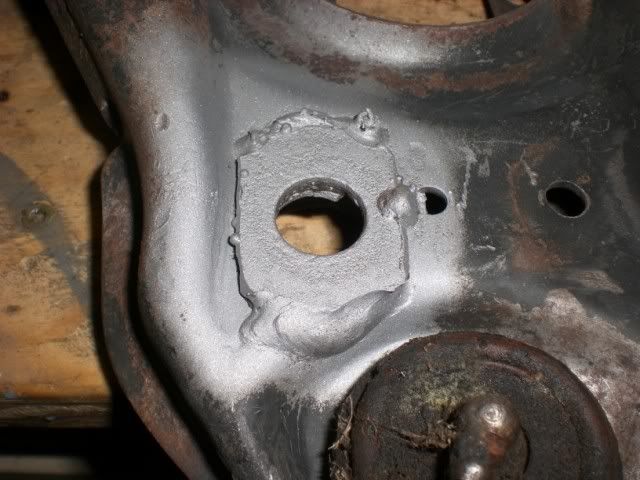
Here is the other LCA. It looks as if someone welded part of a washer on where the end link hole is supposed to be. I'm not sure if both had been busted and only one side fixed, or if this actually how it comes from the factory. I'm highly doubting it is factory, but you never know sometimes.
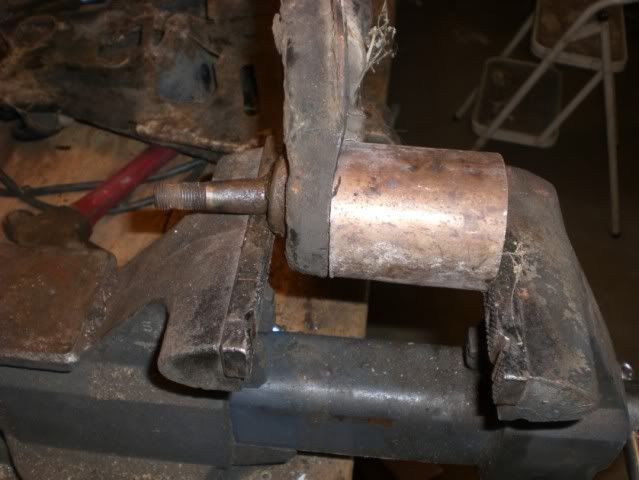
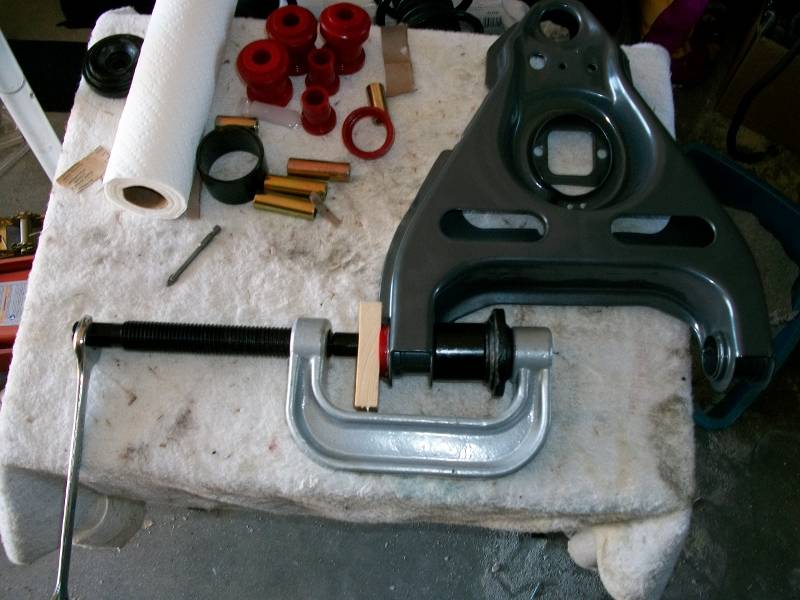
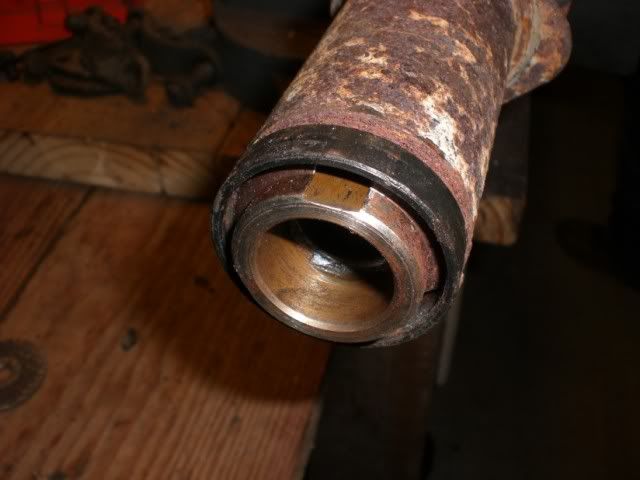
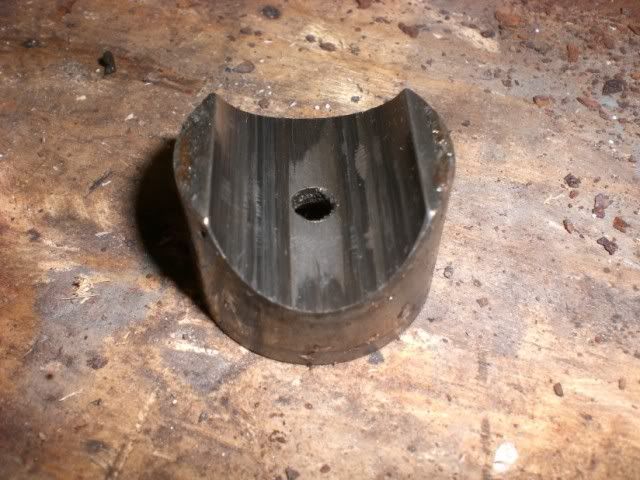
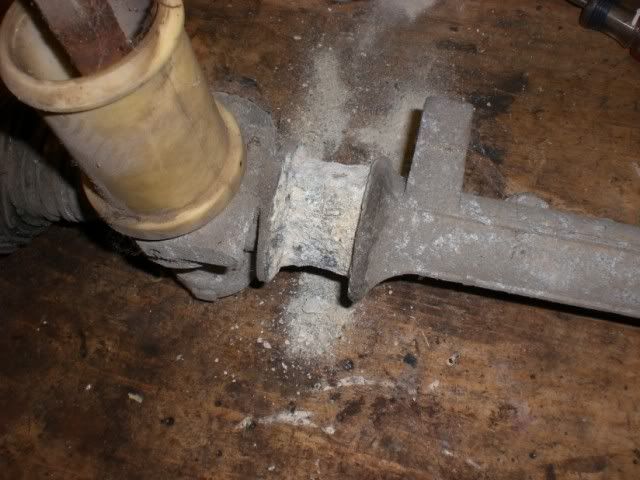
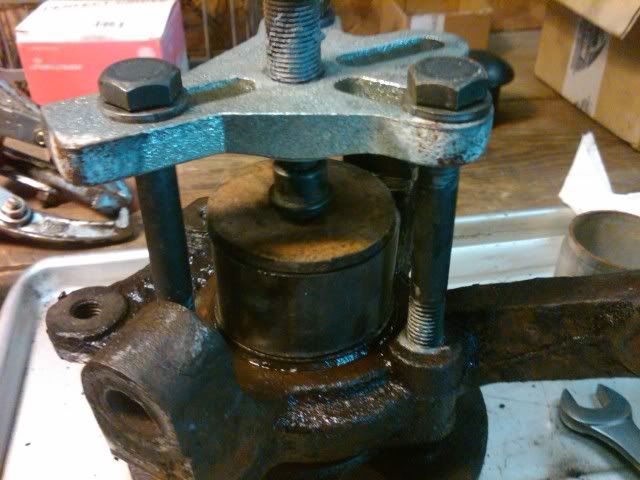
This is how I removed the lower balljoints. A piece of pipe and a vice. I also had to tap on them with a hammer once I had them under pressure and they popped right out.
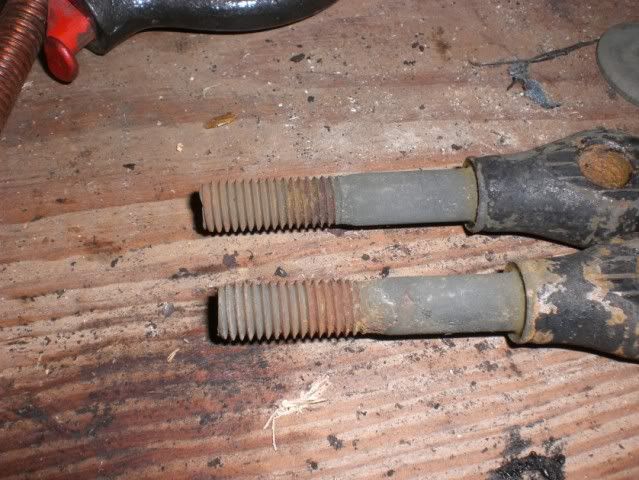
The upper control arm bolts before and after I dipped them in muriatic acid.
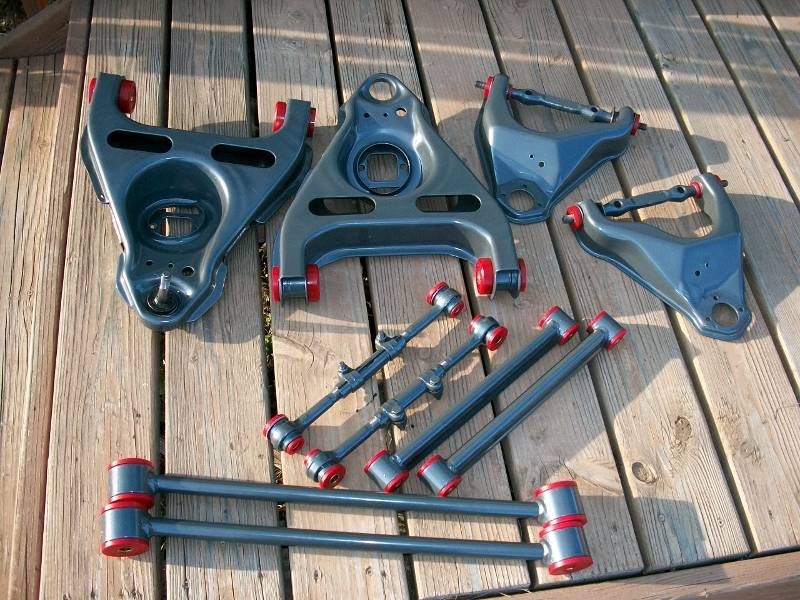
The control arms after being wire wheeled
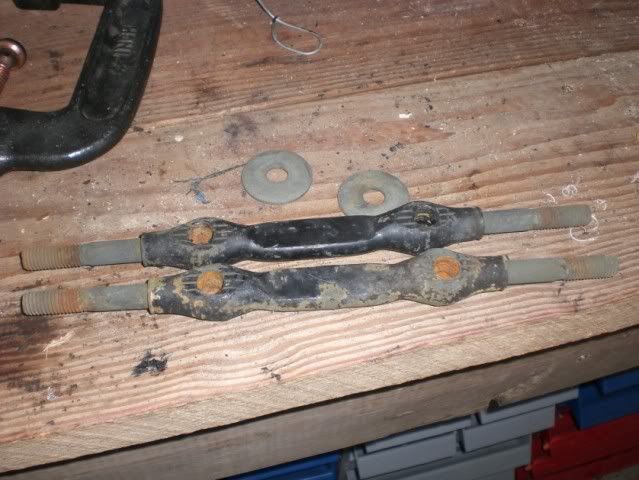
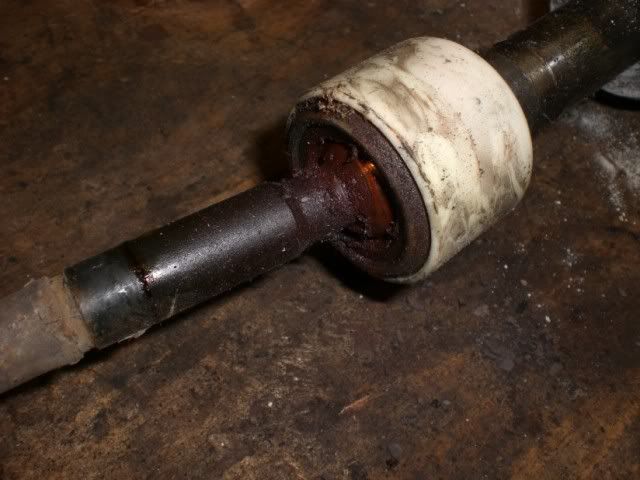
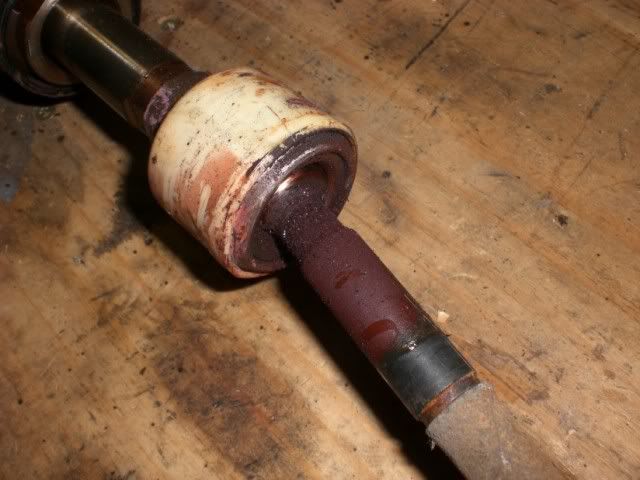
Another dilemma I have is finding some new bushing sleeves. I had to remove one on each upper control arm so I could remove the bolt, and one on each lower control arm is rusted out. I'm most likely going to have to buy new rubber bushings and remove them from the sleeves, but I hope someone makes just the sleeves so I don't have to spend $40 on four sleeves.
Did that, but I had to remove one metal sleeve out of each UCA to remove the bolt and destroyed them in the process. One sleeve in each LCA is rusted out beyond use. It sucks.
Speaking of sleeves, I wonder if you could get some stainless exhaust pipe the same OD as the sleeves, and push them in. Even if it's a bit thicker than the original metal, the poly has a bit of give in it..
Thanks for those pics! The suspension parts look great! At least I know now that someone has welded a washer on one of mine. I'm not sure if they got tore up in a wreck or what could have ripped the end links out of the LCA's. I have thought about trying to find some pipe for the bushings, but with my luck nothing will fit. I'm checking around tomorrow for rubber bushings, so I hope to find something.
Also, since you do your own powdercoating, I was wondering how you masked off the control arm bushing sleeves. I have some silicone plugs to use for that sort of thing, but I don't think I have any THAT big. I have some high heat tape I can use on masking off threads on bolts, but it might be a bit awkward using that to mask off the sleeves. Did you get your set up from Eastwood or somewhere else? I got the starter kit off of there and it's worked great so far.
I didn't do the powder coating, but the shop that did it used some kind of green high temperature tape, rolled into inverted cones for the threaded spots, hub bores, etc.
The inside of the bushing sleeves were just sand blasted, and had minimal powdercoating on them. The lowers were powdercoated inside the sleeves as well, and it presented no problems... Actually, it made it easier to push the greased bushings in. I know the Ogre says not to grease the outside of the bushings, but the instructions said to, so I followed manufacturer's recommendations and greased the bejeebus out of everything.
So it took me forever to finally get all the control arm bushings I needed. I picked up my order at Advanced a few days ago, and of course they only gave me one upper bushing. They claimed they were out even at their warehouse, so I had to order one form NAPA. I got it today, and now need to decide how to remove the rubber. It'd be nice to not burn them out so I could possibly re-use the rubber someday, but if I can't find a good way I'll just have to let em burn.
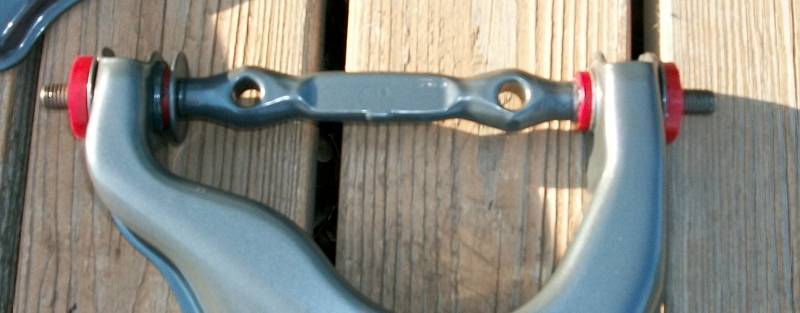
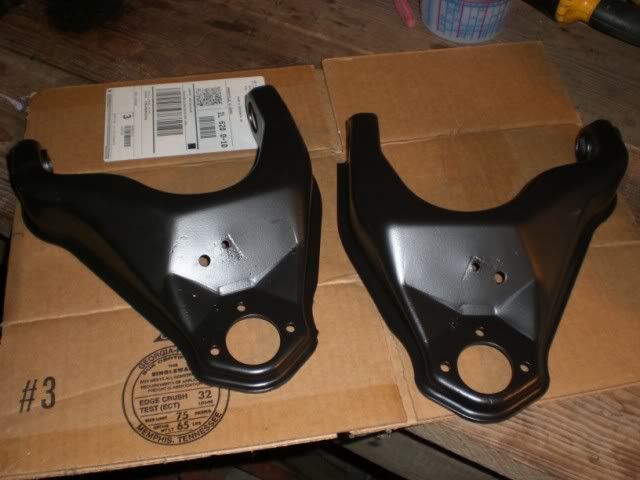
I blasted and powder coated both upper control arms. They turned out great, even though you can see where the rust has pitted them and whatnot. I didn't mask off the control arm bushing sleeves, and the polyurethane bushings still just slide right in. I need to decide soon if I want to drill holes for grease zerks so I can grease the bushings while they're on the car. I also went ahead and fixed my lower control arms where they were busted. It doesn't look the greatest, but it should suffice. Here's a few pics of everything.
After blasting
Powder coated
This is someones fix on one control arm. I basically copied it to fix the other control arm that was busted in the same spot.
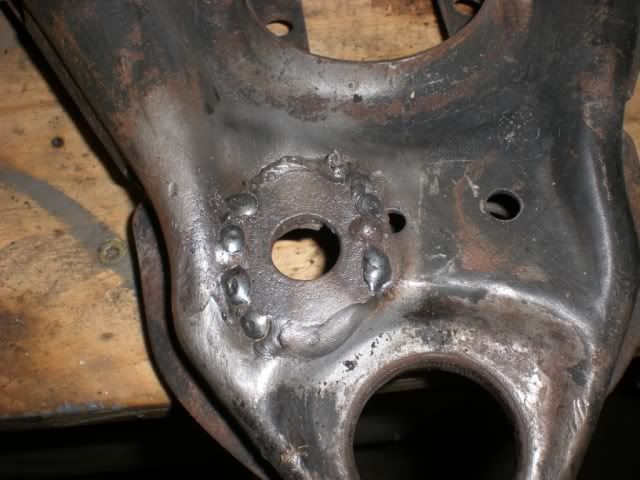
After I added some weld
Here's the other control arm. Notice how many cracks there were
Welded in a large washer
Welded the underside too. Needed to weld the cracks as best I could.
[This message has been edited by toadson (edited 08-24-2009).]
Wow, been two years since I got the engine in and over a year since I've updated the thread. Amazing how time flies. I moved the car home maybe 6 months ago to finish it up.
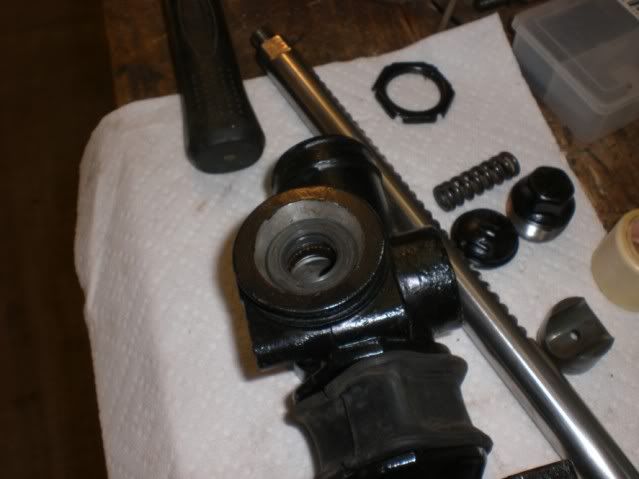
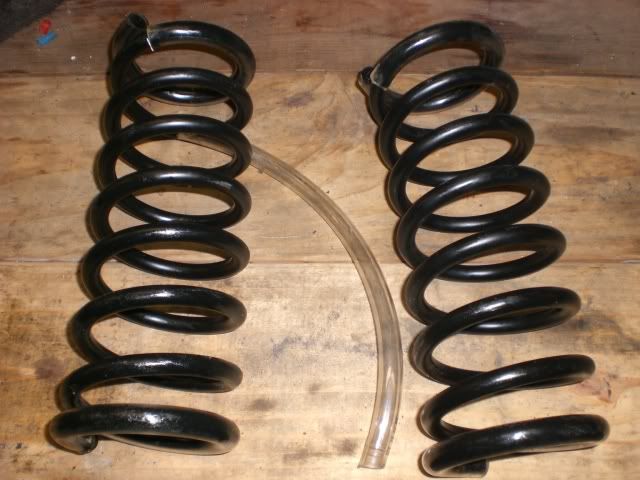
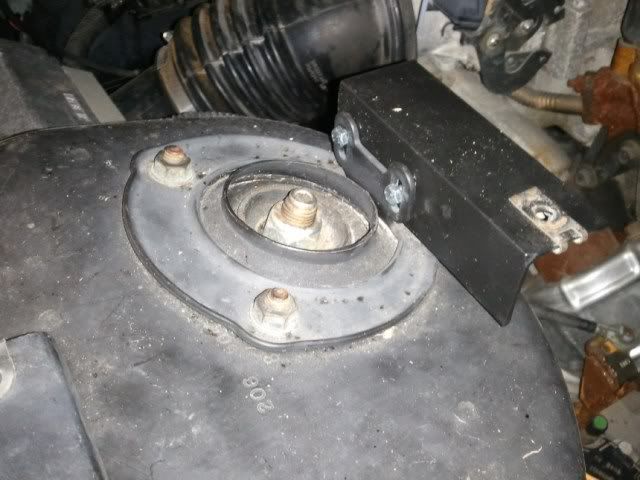
I have all the suspension installed. I bought new KYB shocks and struts. I also tried to powder coat about everything I could. I painted the spindles with POR-15. After a while, I noticed some small rust spots coming through the paint everywhere, so I hit it with a second coat. I also regreased the front wheel bearings and did the same with the rears and painted everything with POR-15. I rebuilt the steering rack and installed Rodneys bushing even though the old one seemed perfectly fine.
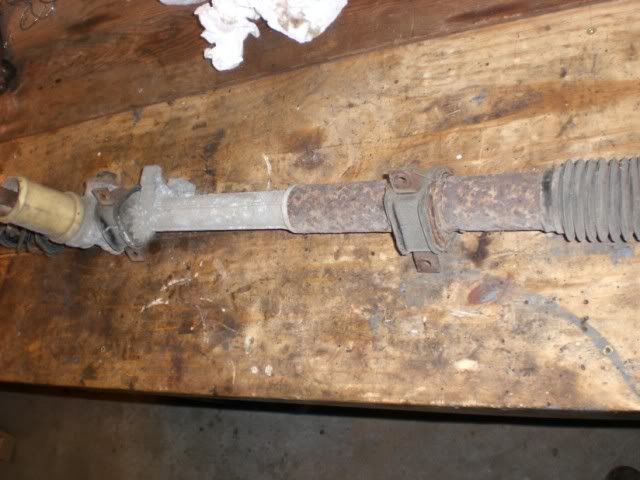
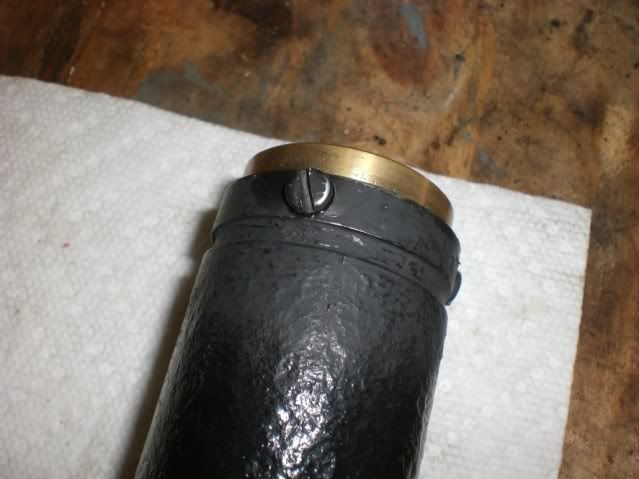
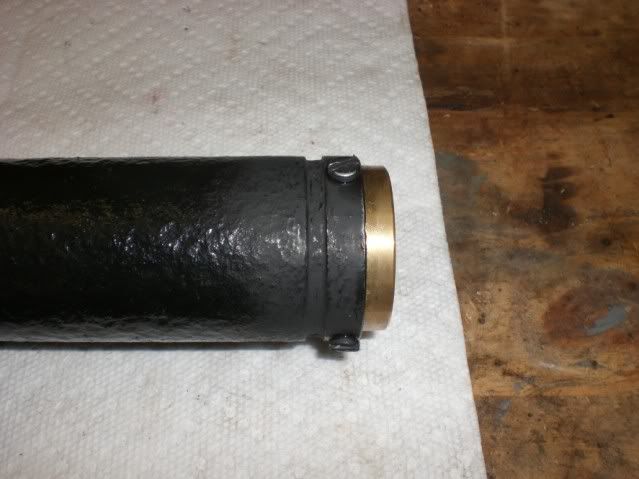
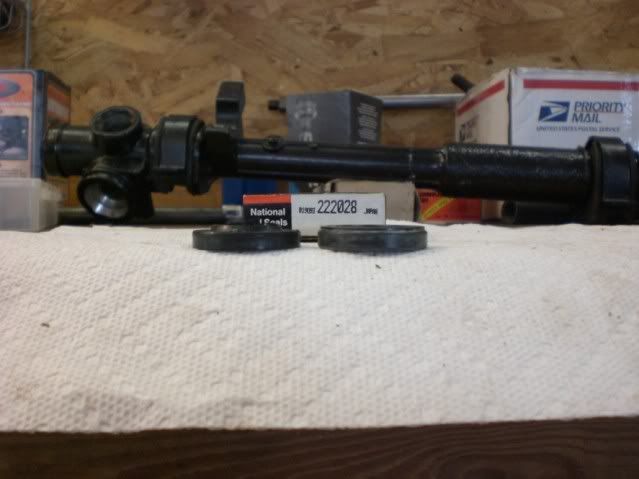
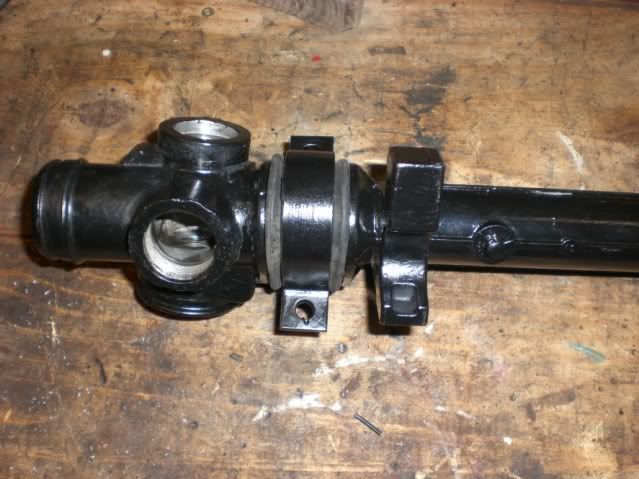
Here are some pictures of the steering rack:
This didn't look so healthy
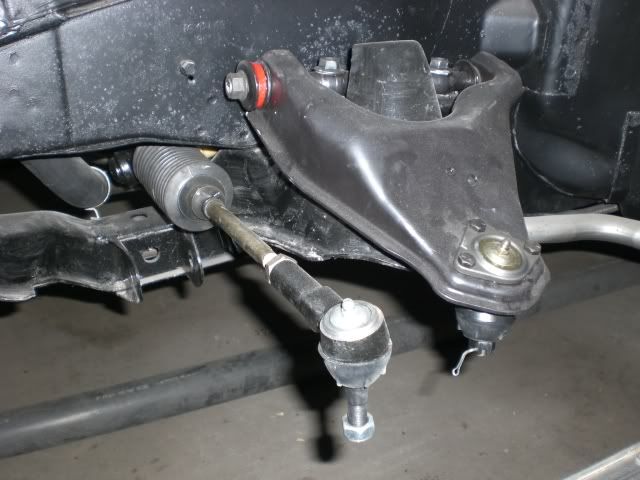
Inner tierods were shot
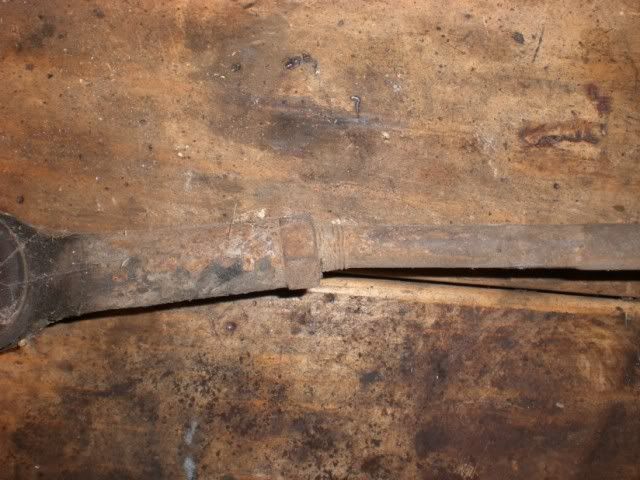
Good example of corrosion:
This tie rod was also bent:
I used self tapping screws to hold Rodneys bushing in place. I used three of them.
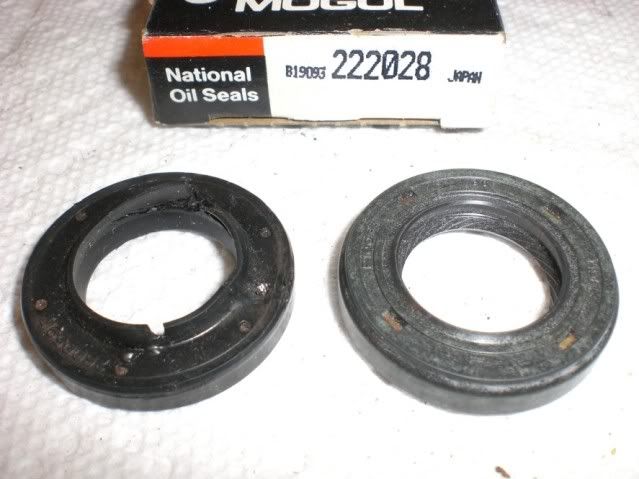
I tore up the pinion seal, so I found a suitable replacement here, part no. 222028
The rack after being painted with POR-15
Just a few suspension shots, still need to upload all the pics of the suspension after it was all installed.
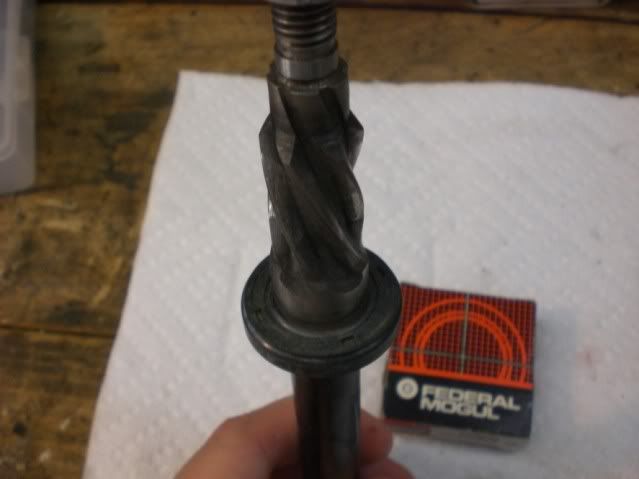
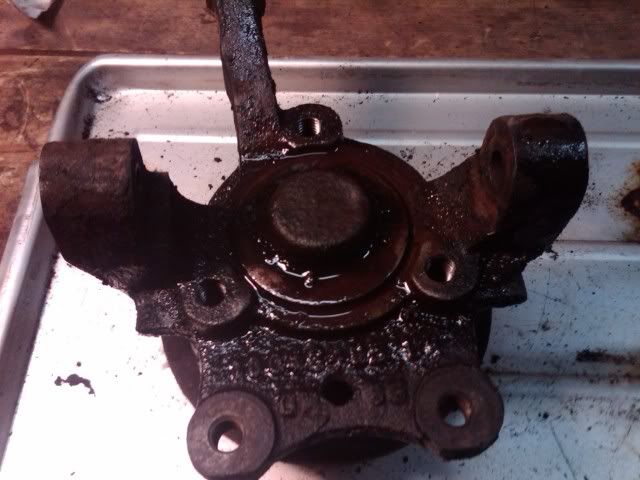
This is how I removed the spindle from the front hub.
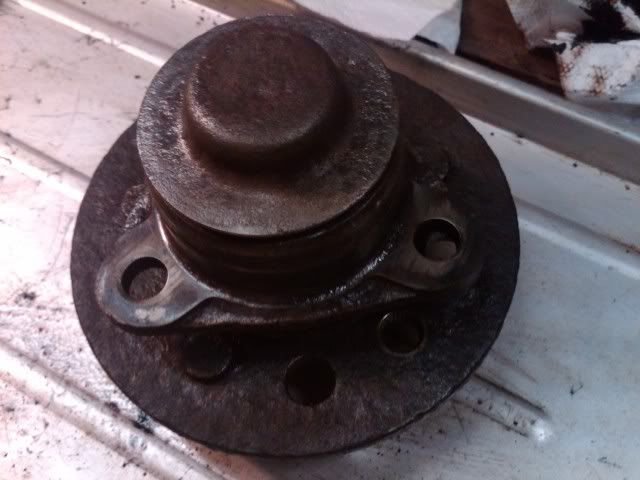
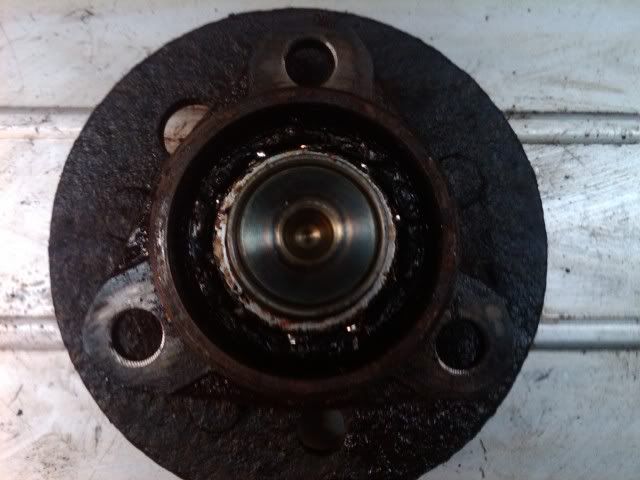
Front bearing cap
The wheel bearing itself. This is as far as you can get to clean and regrease them.
I used marine wheel bearing grease on all of the wheel bearings. Again, I have more pictures that aren't uploaded.
As for axles, that took me a while to figure out. I ended up using two inner GTP tripods because the Riviera tripods were too large. I started a thread here when I was assembling the axles and gathering ideas: [IMG]https://www.fiero.nl/forum/Forum2/HTML/110222.html
There are just quotes from that thread: I've finished up my axles and installed them both. Here is what I did for the passengers side.
The axle is drivers side from a Late 90's Lumina with a 3.1 4 speed auto.
Inner tripod cup from 99 GTP, inner tripod assembly from late 90s Lumina, outer joint and axle was from a 95 Corsica axle. A Fiero axle end would work as well.
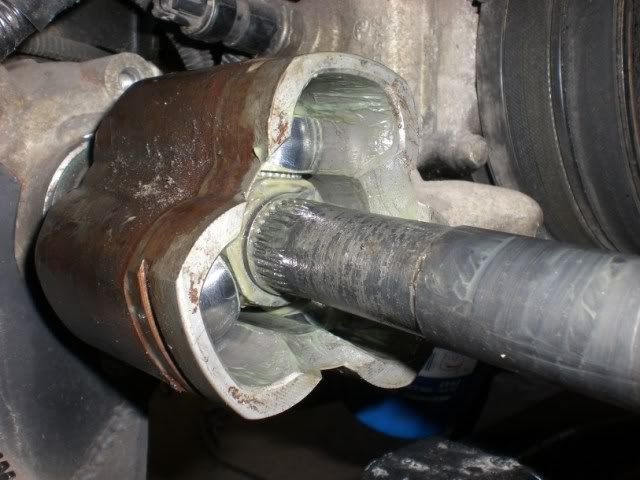
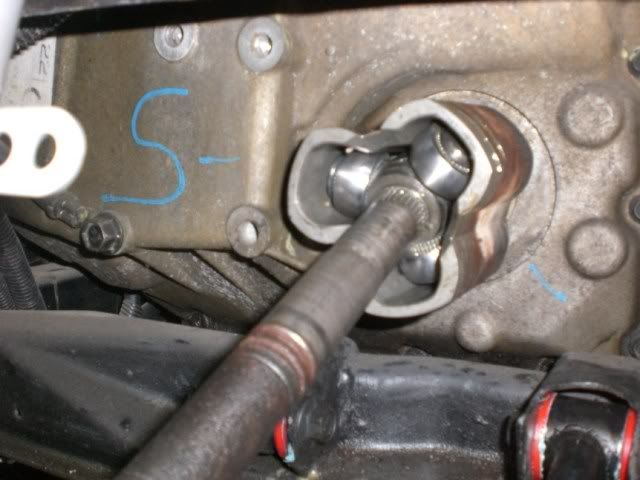
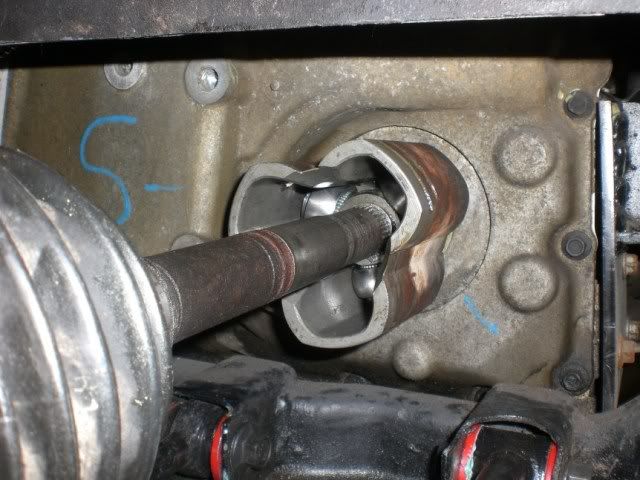
This is how far the axle comes out of the inner cup with the suspension maxed out.
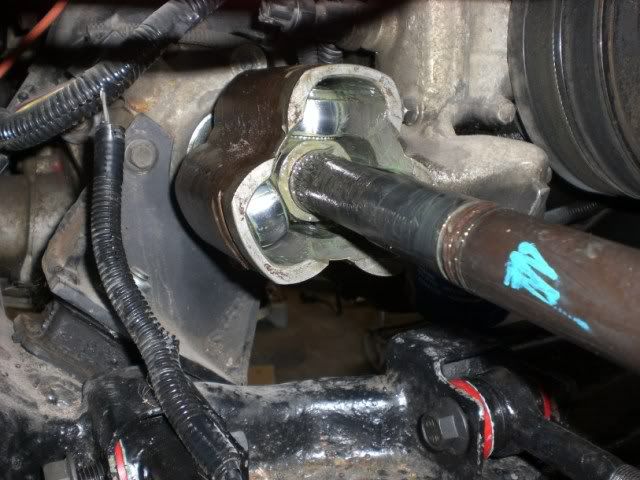
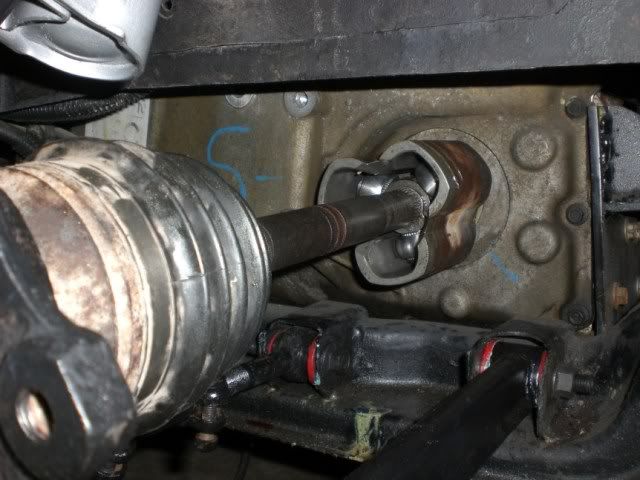
At ride height.
All greased up. The grease is grey so it looks kind of nasty.
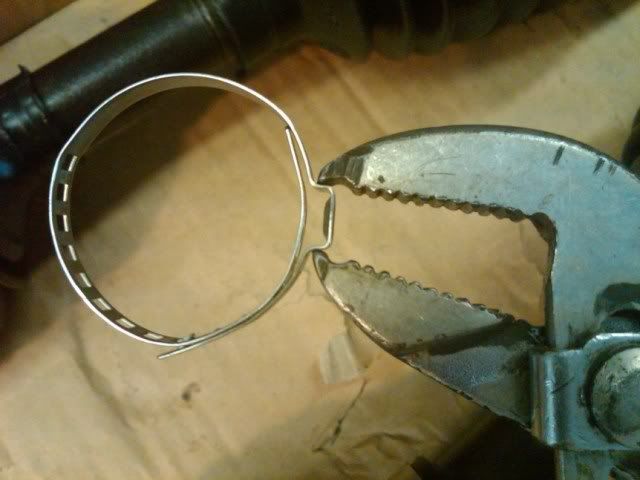
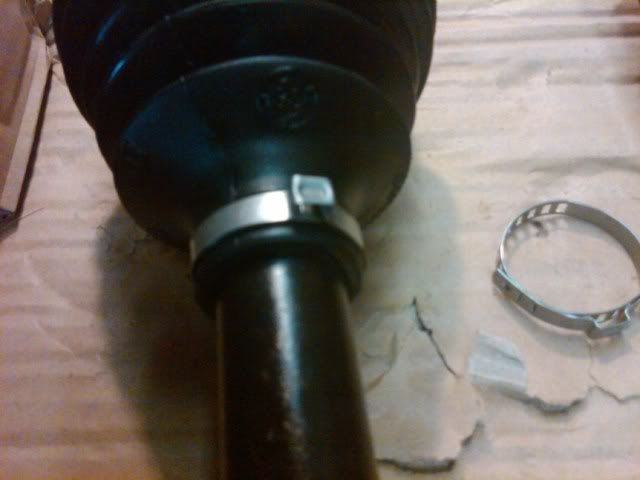
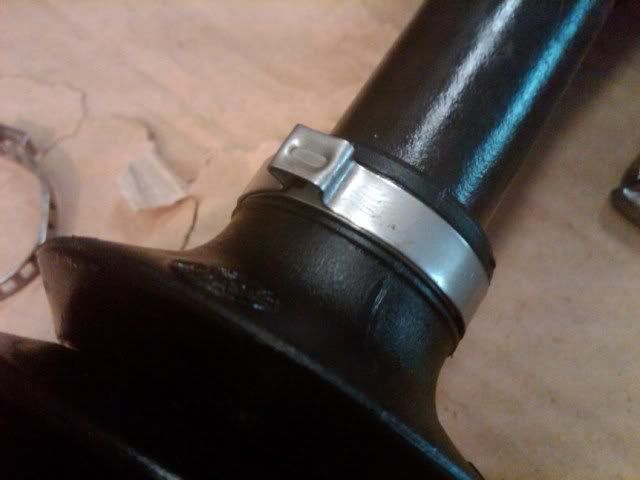
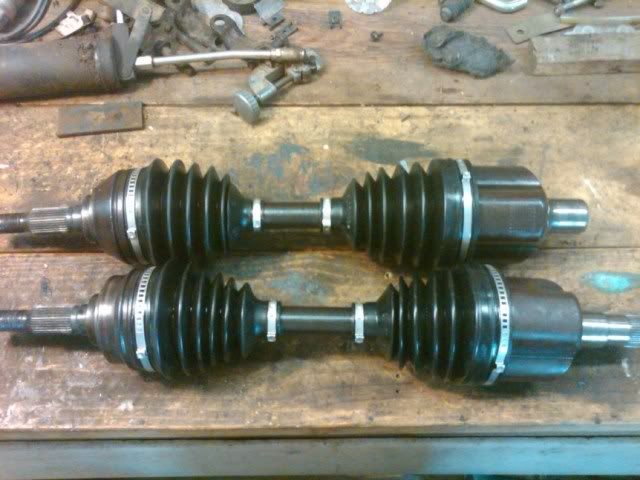
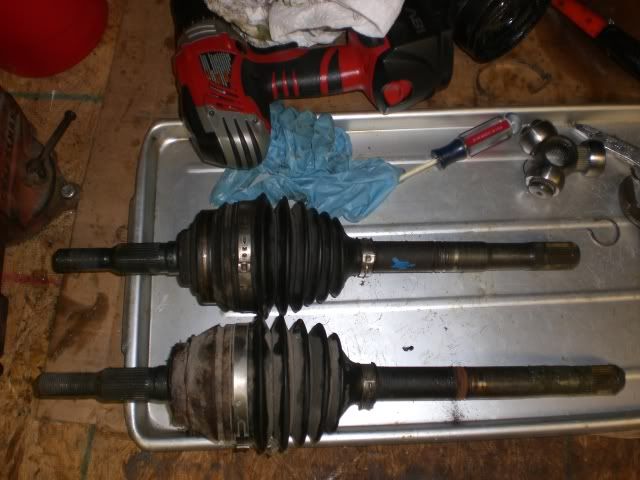
I bought some boot clamps from NAPA. Kind of expensive and not as nice as stock ones, but they worked alright. I used a pair of channel locks that had a tooth on the end that worked pretty well. Finished axle. Drivers side on top, passenger side on bottom.
For the drivers side:
Swapped the Fiero manual axle in its place. Looks great now
Suspension with no load on it
Ride Height
For the hell of it, while I had it at ride height, I knocked the axle in as far as it could go to see how much room I had before it bottomed out in the cup.
Plenty of room, so I've got this side figured out. Now I just have to clean it all up and install some new grease.
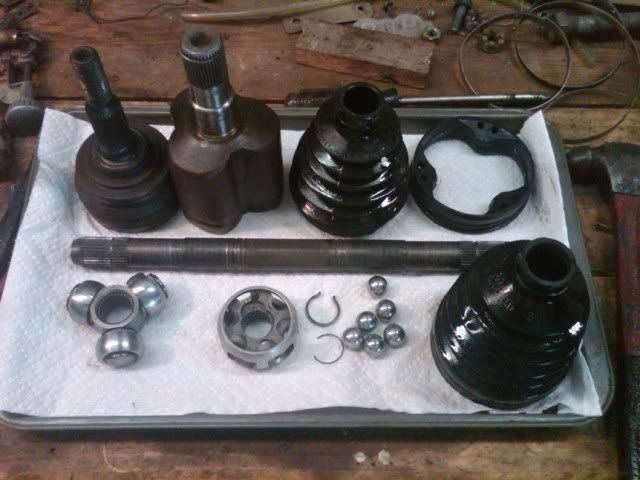
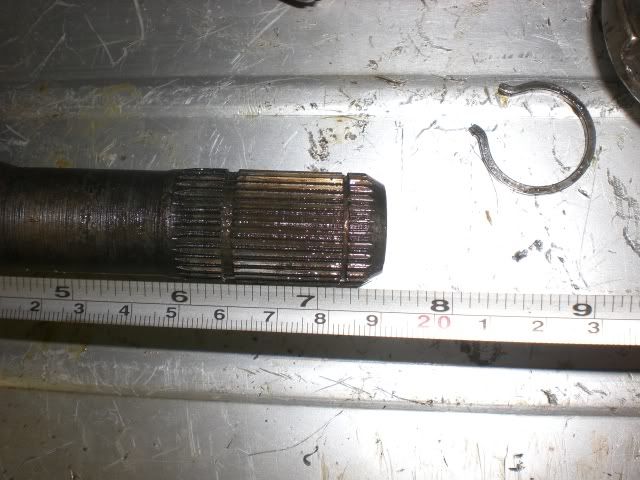
So for this side, this is what I used
Inner tripod cup from a 99 GTP (Drivers side). Inner tripod rollers from a 99 GTP. (Not sure if you NEED these or not, as the Fiero rollers looked pretty much Identical. I just swapped them anyway to be safe) Drivers side manual Fiero axle.
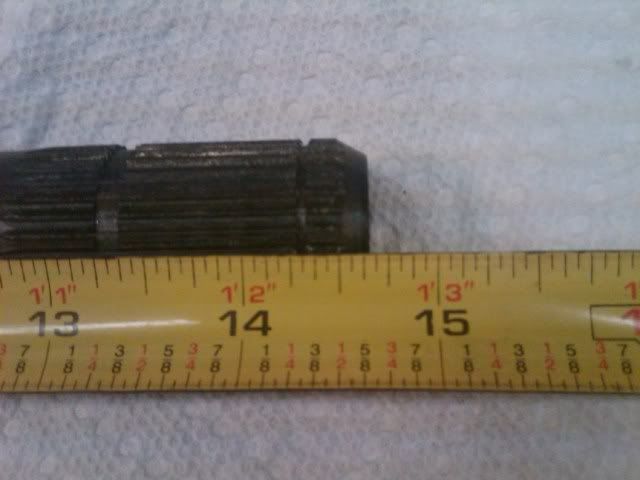
That is all I needed to make it work for my swap. The Corsica axle is about an inch shorter than the Fiero axle from my measurements.
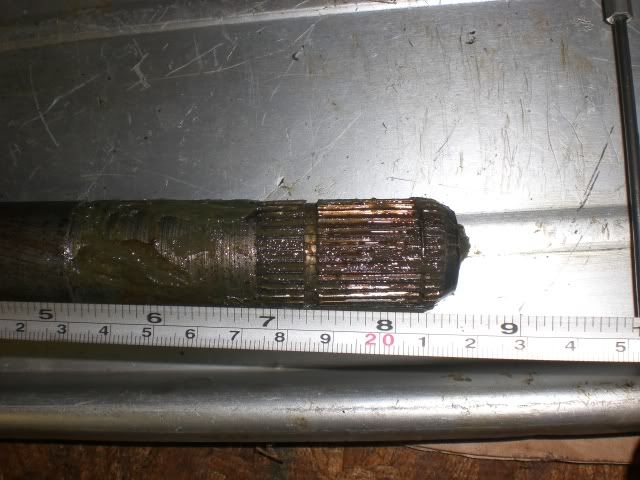
Fiero axle on the bottom
Measured from the boot to the end of each shaft
I'm sure I'm missing some smaller things,but I will try to fill that in later. What I am working on now:
- Shift select brackets - I have these made up, but there is too much flexing/binding for it to work as a permanent solution. I am leaving this in place for now. - Throttle cable - My car was an 88 4 cyl manual. I don't see how this cable will be compatible with the bracket that is mounted on the throttle body or the end of the cable. Of course, both of these can be fixed, but I am still thinking about how to fix the mounting bracket issue. - Passenger side coolant hose. I bought a new hose, but it hits on the front link of the suspension where it bolts to the cradle. I am planning on trying a 71030 hose, which is from an older chevy truck. - Battery mounting - I plan on creating a fiberglass tray for the battery in the spare tire well. I have done this once, and wish I had done a better job. I'd like to mount it somewhere else, but I like having the extra weight up front and easy access to the battery.
I think once I get these problems figured out, I can try to drive the car some. I wouldn't want to take it down the road very far, but it would at least be moveable. Now I just need to keep this thread up to date for a change!
[This message has been edited by toadson (edited 09-16-2010).]
Another long overdue update. I've had the car drivable, but not road legal yet. Just finished up the exhaust. Here is what I used:
3" flange from ZZP
3 Walker #42323 U-bend pipes. I cut one in half and welded that half to the flange to make the beginning of the downpipe.
I then took a ballpean hammer and beat around the edges to prevent any leaks
I began cutting down the u-bends and measuring everything to make sure it would all fit properly. I have some rough measurements that you can see in the pictures of the cuts I made here: http://www.waitingtopanic.c.../88%20Fiero/Exhaust/
There are more pictures at that link than what I am posting here. I did make a small change in exhaust placement than the early pictures show. I had a very small amount of clearance from the drivers side frame rail, so I cut the downpipe a little bit shorter to bring it away from the frame rail.
Once I had everything cut to length, I welded the U-bend to the downpipe. I then welded on the catalytic converter (Magnaflow 53009) and welded the flex section I bought from ZZP onto that. I then welded another u-bend onto the flex section, which curves down to where the muffler will go. I painted all the welds with high-temp paint.
The muffler is a Banks single 3" inlet to two 2 1/2" outlets. It fits an 80's Camaro. I do not have the part number. I found it on the forum here at this link: https://www.fiero.nl/forum/Forum4/HTML/055575.html
I originally clamped it on, but it leaked pretty bad, so I ended up welding it. This is how the exhaust looked thus far:
I needed tailpipes and hangers at this point. I bought a Walker #41433 and #41442 90* bend pipes. The only reason I bought two different numbers, is that Amazon only had one left of each. The difference is one had a larger end to slip over another pipe. I ended up cutting it off as I didn't need it. I cut them to length, and had to swell out the ends about 1/8" to fit them over the muffler and weld them on. I also welded two hangers on, drilled some holes in the unibody frame and ran screws in to hold the tail pipes and the rest of the exhaust in place.
Here are some random pictures once everything was welded up and painted. You can see a part of the gasket on the downpipe flange, so it looks a little odd.
I don't have any pictures of it installed. Doh!
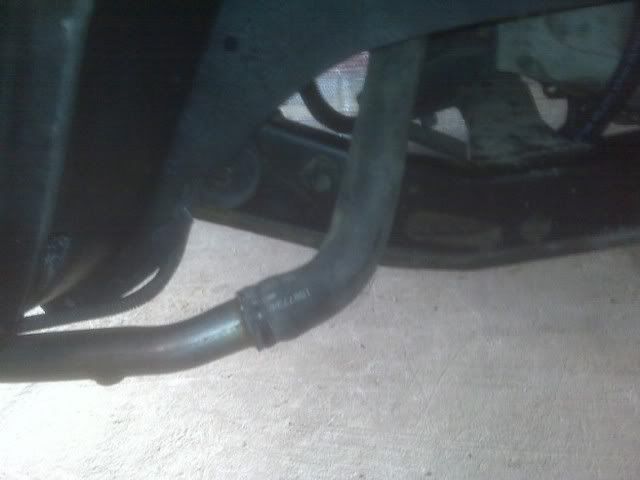
Aside from exhaust, I replaced the right rear coolant hose I had used, as it rubs horribly on the trailer arm. I bought a Dayco #71884 and cut off one end. There are two cuts in the picture. I had tried cutting it a little longer the first time, but it did not fit correctly, so I had to cut it shorter. It doesn't fit perfect, and you have to work one end over the water pump since the hose is the same size on both ends once you cut it up.
I know I've done a lot more to the car since my last post, but I can't remember it at the moment.
EDOT: I'm re-posting all exhaust pictures I have below due to broken links.
[This message has been edited by toadson (edited 09-04-2014).]
Thought I would do a quick update since I never do anymore. By the way, can anyone recommend a good file service other than Photobucket that is free? It always craps out on me when uploading files and I'm getting sick of it. I'm trying Flickr now, but it seems like a pain in the ass to get everything posted and organized how I would like it.
Here is what the car looks like now. About 4 different colors at least.
I've primed the roof and fastback clip with black epoxy primer and wanted to get all the other body panels on to make sure I have everything. Of course I seem to be missing small parts on the fastback swap, so that isn't totally complete. I've also decided I hate the sunroof. Doing the body work on that was a royal pain in the ass. I removed the four tracks so I could paint underneath them and clean them up as well, and it was just a big headache trying to figure out how to reinstall them. I ended up using small, short pop rivets.
The fastback clip had a bunch of cracks in it as well. I hate fiberglass.
I also had a bad decklid hinge I had to change out. Luckily I had a set from an old donor car and swapped both of them in, since my car was originally equipped with the weakest decklid springs, and I now have a fastback lid and wing on the car.
Something else that drove me crazy was the support brackets for the fastback grilles. The notchbacks have a different sized grill, so the bracket will not work. I dug around and found the notchback ones, which did me no good, so I made my own out of angle iron. It was pretty simple and beat trying to find the rare 88 fastback brackets that bolt on to the tops of the strut towers.
The next issue I worked on was getting the tail lights to work. I had no working lights in the rear at all after the fastback swap, not even the third brake light. After searching the forum I found that I needed to move a wire in the C500 block from J9 to G7, which was a light blue wire. Brake lights work how they are supposed to, as do the turn signals and running lights. My car was originally an 88 4 cyl, BUT it also came with another entire wiring harness when I bought it. I forget exactly why I did it, but I swapped out the entire harness, so I have no idea what year or type of Fiero the wiring harness now installed is from. It could have been a fastback since I have hear stories of having to run extra wires to get the tails to function properly.
The third brake light ended up being easy. I was missing a small wiring harness off of my old harness. It connected to the C210 and C305 plugs I believe to get power to the third brake light. The connection was right by the drivers side fuse box under the dash.
Next was the trunk popper. Someone had popped the lock on the fastback decklid with a screwdriver, and a mouse decided to die inside of the hole. I removed the cover that is held on by 4 phillips screws (3 of which were already broken off), and am relying on solely the trunk popper now. It had no power to it at all when the switch was being pressed. I then remembered I needed a relay for it (duh!), so after plugging the relay in.... I still had no power. Now that the car is an automatic, I no longer have a parking brake. While I would like to sometime in the future, I don't even have the mechanism installed yet. After some research, I found that the purple wire that connects to the emergency brake grounds out the relay for the trunk popper. After I grounded this wire, the popper works! Now I need to add a ground wire to the decklid, because it only pops open if you hold down on the lid while you hit the switch.
One crappy job I have to do before I get the car on the road is fix some frame damage. The front right of the car was hit at some point, and the impact bar was pushed back 3/4" - 1". This has buckled some of the metal around the headlight bucket area, and needs pulled back into place before the front bumper will fit correctly. It may be a while before I get around to this. I hope to have the car putting around on the road sometime next year. I think the biggest obstacle now is the frame work up ahead.
Anyway, if anyone has any specific questions feel free to ask!
wow. glad to see that someone has put in a great amount of time to keep a fiero on the road, and with a decent powerplant. the only thing i'm bummed about is all of the exhaust pictures don't work... oh well.
Hard to believe I haven't updated this thread in three years. Not a whole lot to report. I bought some Cavalier Z24 wheels for the Fiero, a new hood to replace the one I cut up atttempting to make an extractor hood, and installed the headlights. A full time job, owning a house, and having two wrecked Grand Prix's I bought to fix have taken up a lot of my time. I have both cars repaired now and on the road, so I can turn my attention back to the Fiero. Planning to paint it, possibly black, and I need to start looking for a dash to swap in. I've done the Camaro dash swap already, and would rather try something else.
I re-uploaded all my exhaust pictures from a few posts ago. Not in any specific order but better than nothing!
Been a while since my last update. Got the Fiero on the road last September only to have transmission issues. Had to rebuild it and while I had the engine cradle out I swapped in a VS cam. Don't have it tuned at this point but it runs great. I still have no dash, so I use the Torque app on android to have gauges for the time being.
I'm thinking about swapping in another Camaro dash as I have one laying around. Need to play with door panels too this go around and see if I can get those to fit. I know others have already and they look much better than the stock Fiero panels. I've got a 3d printer now and anticipate printing off some parts for the interior swap.


 Haven't needed to change it yet, but I will before it runs!