Pennock's Fiero Forum
  Technical Discussion & Questions
  Repainting rusty rocker (sill) panels - Part 1

Post New Topic  Post A Reply
Email This Page to Someone! | Printable Version


next newest topic | next oldest topic
Repainting rusty rocker (sill) panels - Part 1 by br1anstorm
Started on: 08-01-2015 10:41 AM
Replies: 6 (773 views)
Last post by: br1anstorm on 08-02-2015 04:36 PM
br1anstorm
Member
Posts: 225
From: Scotland, UK
Registered: Apr 2008


Feedback score: N/A
Leave feedback

Rate this member

Report this Post08-01-2015 10:41 AM Click Here to See the Profile for br1anstormSend a Private Message to br1anstormEdit/Delete MessageReply w/QuoteDirect Link to This Post
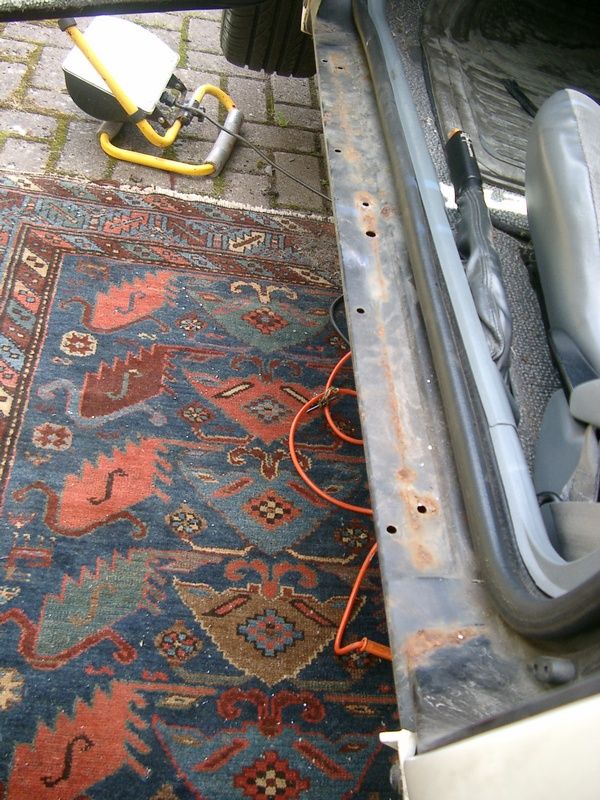
I am trying to keep my '88 Formula rust-free as far as I can without dismantling and reassembling it. Recently I noticed some surface rust at the edges of the rocker (sill)-panel covers along the bottom of the doors. [Translation note: over here we call these chassis-parts "sills" because they go along the bottom of the doors, while "rockers" are engine-components - but I'm using the word rockers for the forum's US readership!].

Anyhow, I thought other Fiero owners might like to check out the state of their rocker-panels (sills). Badly-rusted sills are a failure item in our annual roadworthiness test because in most vehicles these days, the sills are structural load-bearing elements of the chassis frame.

So here's an illustrated guide to what I found, and what I did about it.

Part 1: Removal of the plastic covers

Not as easy as it appears, because of the use of rivets and because of the need to avoid snapping the little plastic tabs.

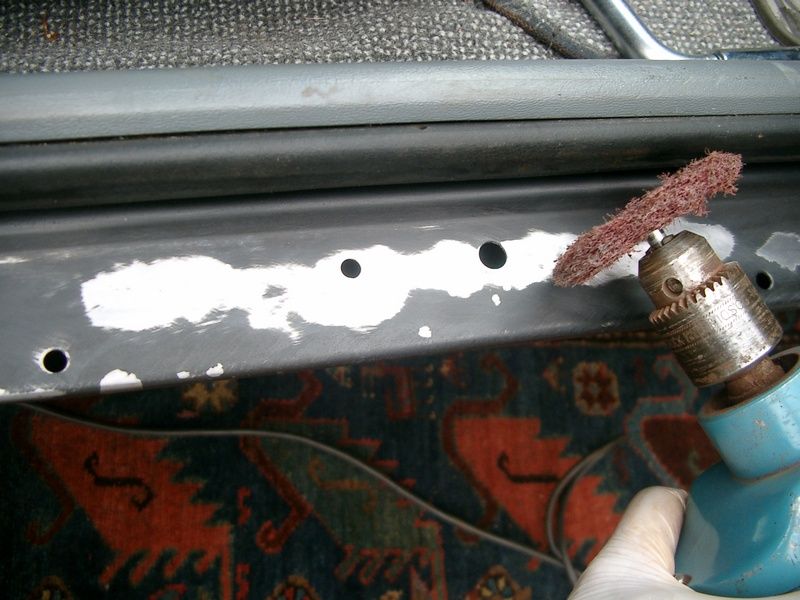
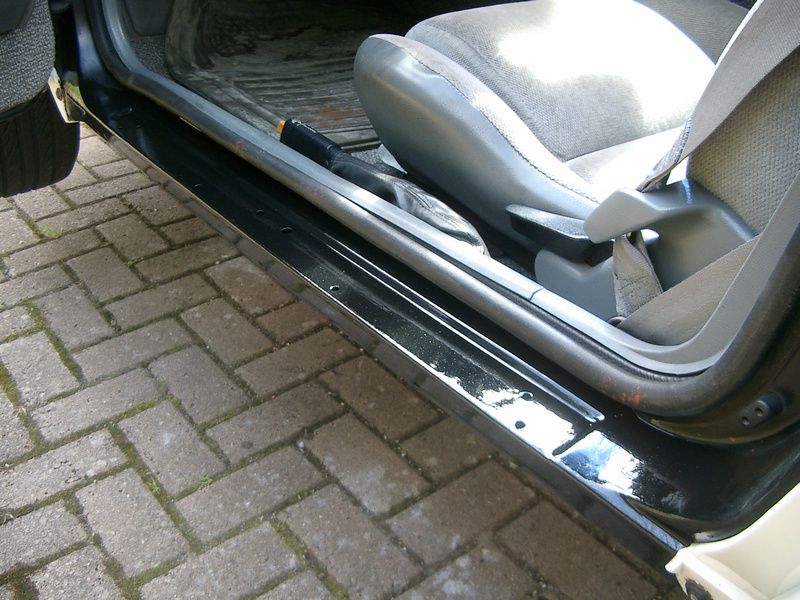
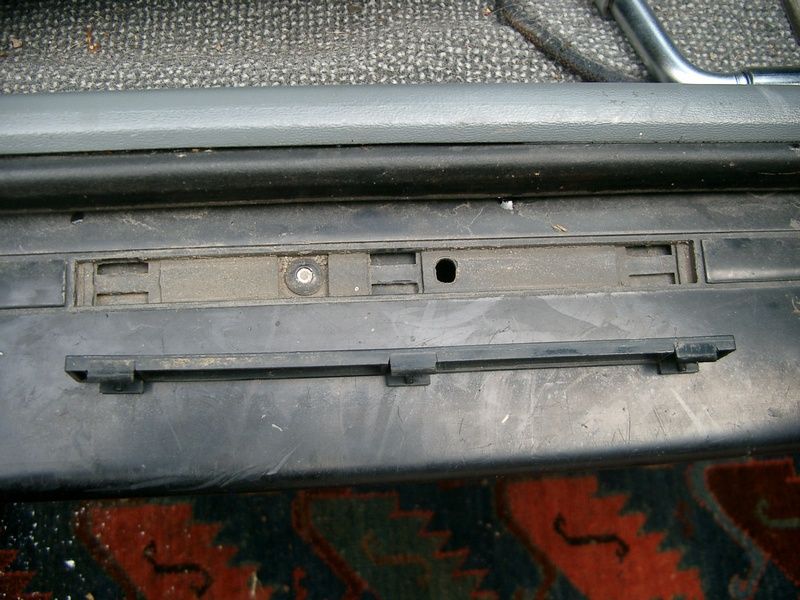
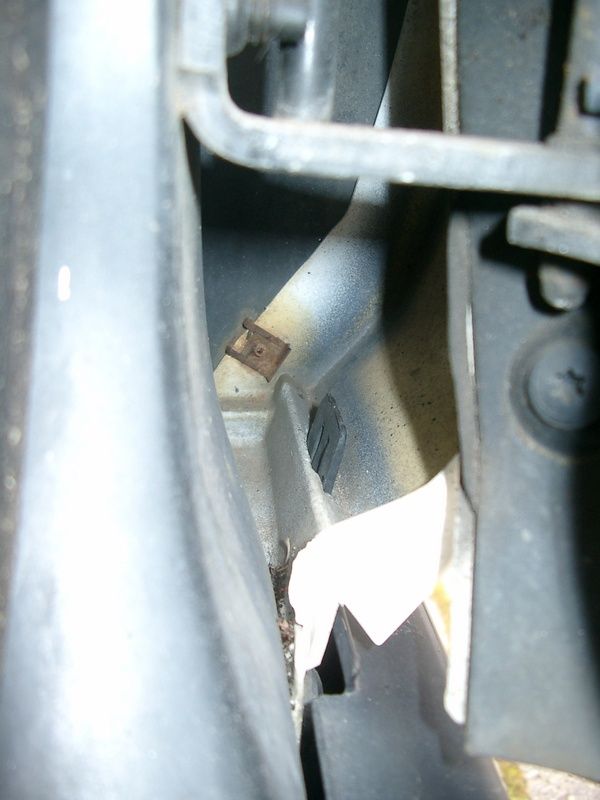
1. pop up the three slim plastic cover-strips in the upper side of the sill using a small flat screwdriver. They cover three rivets. The two smaller covers have little tabs at each end. The longer strip in the middle has three teeth along each side. This pic shows the central one - removed - and the rivet underneath.


2. Unscrew the two small hex-head screws - one at each end of the sill-cover , in the wheel-arches.


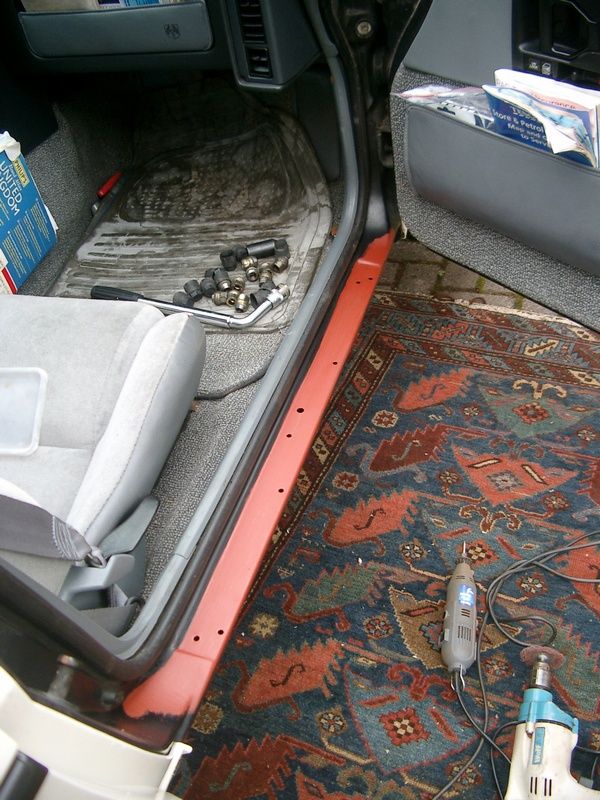
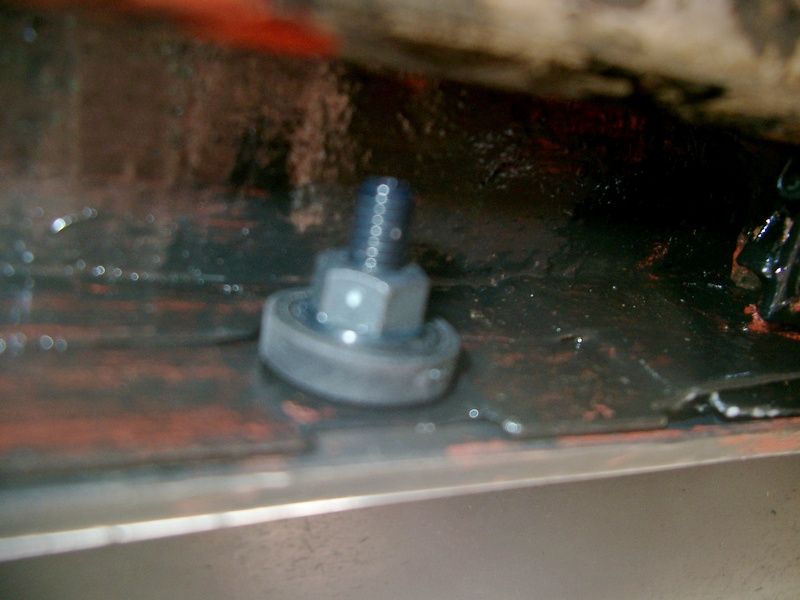
3. Drill out all the rivets. Three on the upper side of the sill, and seven along the lower edge underneath.


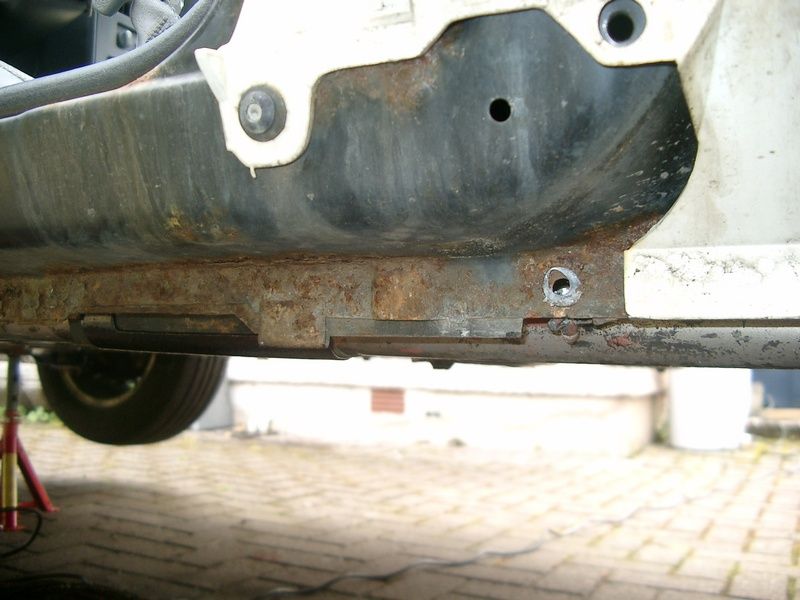
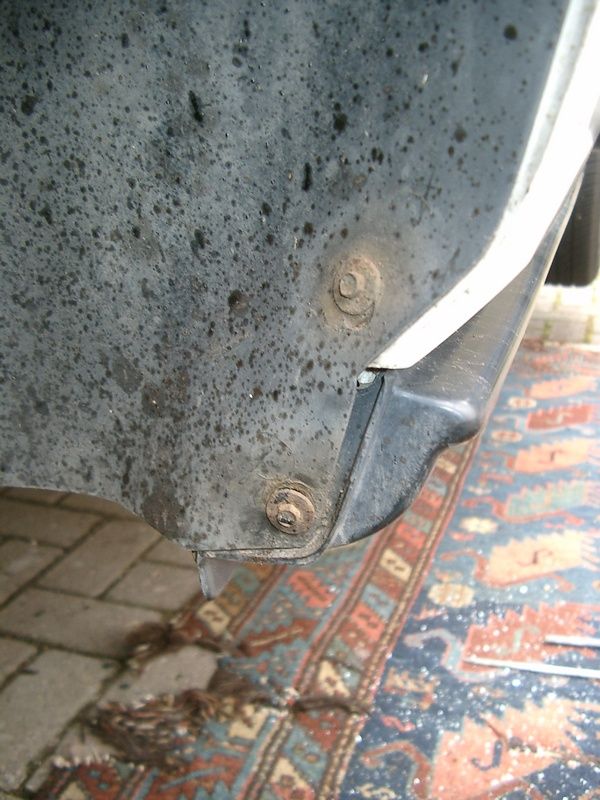
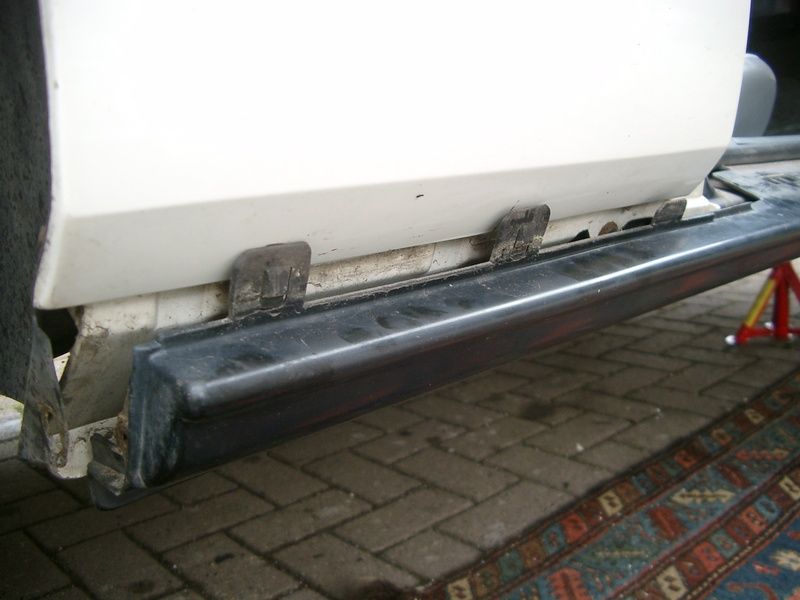
4. Now tilt the plastic sill cover outwards - not too far - from the bottom, and wiggle it to free the tabs which fit into slots in the body panels. It helps to know where the tabs are, and if necessary a slim screwdriver or flat blade can help to pop them out as some of them have little "teeth". There is one which slots into the front wing forward of the front edge of the door ......see this view from inside the hinge area.....


...... two of the three tabs towards the rear (between rear edge of door and rear wheelarch) also have little teeth.....


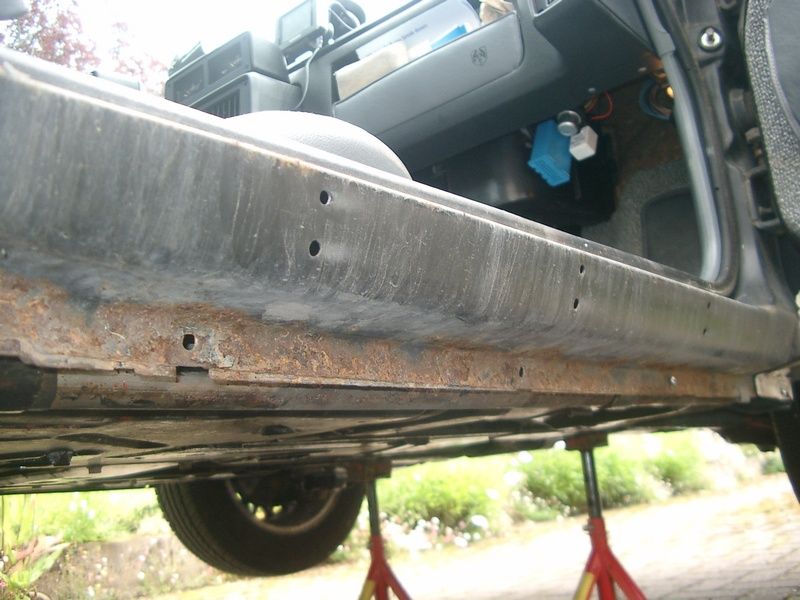
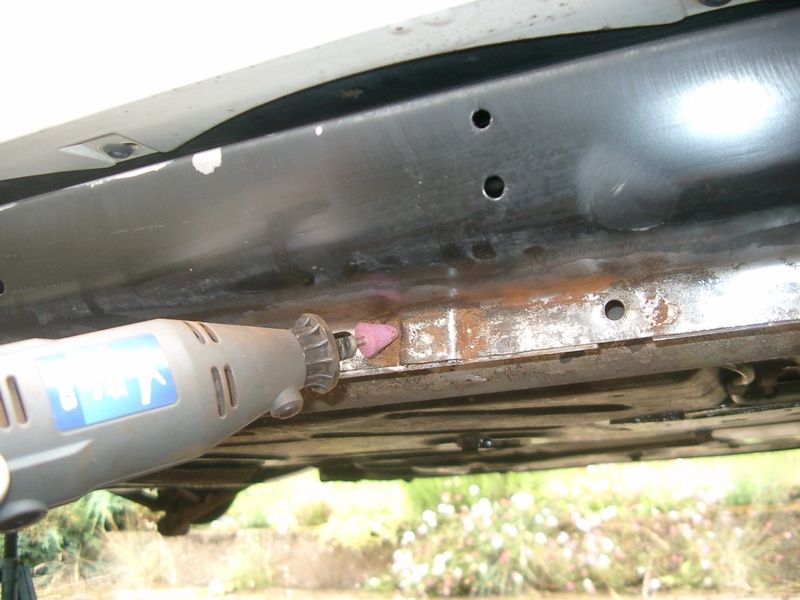
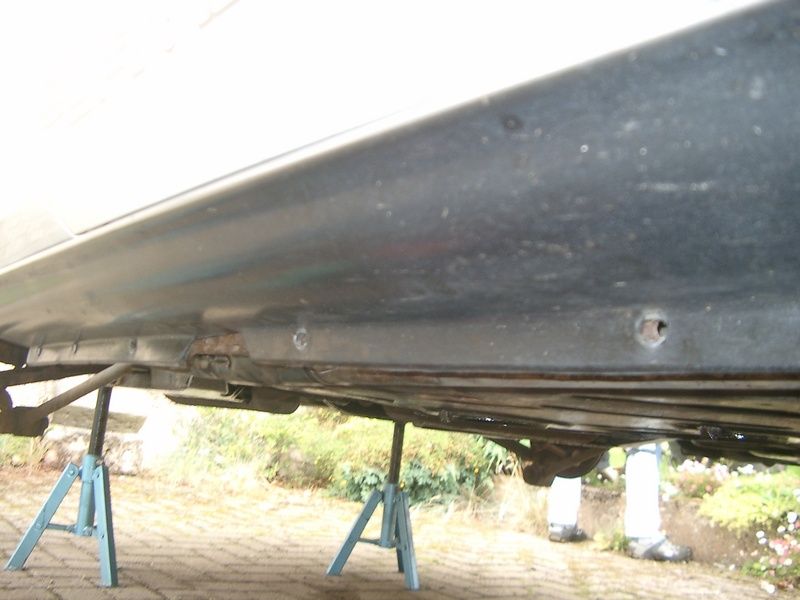
Once the plastic sill-cover is removed, the actual sill panel is visible. There is unlikely to be much rust on the upper side except possibly around the fixing holes. The very predictable bad news is that because the sill panels are spot welded along the bottom, there is ample scope for water to get into the seam and for rust to get a hold.

See next post for Part 2...

[This message has been edited by br1anstorm (edited 08-01-2015).]

IP: Logged
PFF
System Bot
br1anstorm
Member
Posts: 225
From: Scotland, UK
Registered: Apr 2008


Feedback score: N/A
Leave feedback

Rate this member

Report this Post08-01-2015 04:59 PM Click Here to See the Profile for br1anstormSend a Private Message to br1anstormEdit/Delete MessageReply w/QuoteDirect Link to This Post
Here goes with Part 2, the next instalment....

Part 2. Dealing with the rust...?

Fortunately almost all the rust on my car's sills was superficial. There was a bit of cosmetic rust around the rivet holes on the upper side on both left and right sills...


.... but the panels were basically sound. The vulnerable area is the seam along the bottom. Both sides on my car looked a bit ugly....


It's more difficult, but equally necessary, to check the inner sides of the seams - where the coolant pipes run along each side of the car.


So the only thing to do is strip and remove the rust. I used a 3M abrasive fibre wheel in my power drill, and for the little corners and hard-to-reach places a sanding bit in my "Dremel" tool. I felt rather as I imagine a dentist must feel as he tackles tooth-decay!


Then I use a liquid rust-remover/rust-converter - there are various brands, I normally use Jenolite - on and around all the bare metal.

That's the rust-removal done. Onward to Part 3.....

[This message has been edited by br1anstorm (edited 08-01-2015).]

IP: Logged
br1anstorm
Member
Posts: 225
From: Scotland, UK
Registered: Apr 2008


Feedback score: N/A
Leave feedback

Rate this member

Report this Post08-01-2015 05:09 PM Click Here to See the Profile for br1anstormSend a Private Message to br1anstormEdit/Delete MessageReply w/QuoteDirect Link to This Post

br1anstorm

225 posts
Member since Apr 2008
Next stage...

Part 3: Repainting

Simple and standard process. I use Bonda anti-rust primer with zinc (looks like what used to be called red oxide paint).


Then a couple of coats of paint specifically for metal surfaces. I don't like Hammerite, so I use an alkyd resin based paint. It's glossy unlike the original matt black, but that doesn't matter because it is hidden by the plastic covers, It's tough and looks OK.


After painting I sprayed the whole of the inside of each sill with a rustproofing wax from an aerosol can with a long nozzle (Waxoyl or Dinitrol are two brands available in UK - there are doubtless many others).


And that's just about it. All that remains is to clean up and re-fix the plastic sill-covers. I did make one small modification.... see next episode.

[This message has been edited by br1anstorm (edited 08-01-2015).]

IP: Logged
br1anstorm
Member
Posts: 225
From: Scotland, UK
Registered: Apr 2008


Feedback score: N/A
Leave feedback

Rate this member

Report this Post08-01-2015 05:21 PM Click Here to See the Profile for br1anstormSend a Private Message to br1anstormEdit/Delete MessageReply w/QuoteDirect Link to This Post

br1anstorm

225 posts
Member since Apr 2008
And finally......

Part 4: Replacing the plastic sill-covers.

As usual, replacement is the reverse of removal (!). I wasn't keen on re-riveting them in place, as generally I prefer to have fixings which I can un-do again in future. But the holes in the upper side of each sill and sill cover are too large to use self-tapping screws so in the end I put three rivets back into each one and replaced the little clip-in cover panels.

Underneath, I decided to put in bolts and nuts instead of re-riveting along the seams. But as they are exposed to all the water, salt etc from the roads, I wasn't keen to use normal mild steel ones. The solution...... M6 mushroom-head nylon nuts and bolts, with a 1/2" rubber tap washer on the inner side. I even managed to find black ones.....


This last picture isn't quite in focus, but it shows one of these nylon bolts with a tap washer in place, from the inner side.


With those rust-proof fixings, if I ever do need to take the sill-covers off again, it should be an easy job. But with luck the sills will now endure many more years without going rotten.

I hope this might encourage (or inspire?) others to take a look at the condition of their Fiero sills (rocker panels....) . Plastic panels can conceal nastiness underneath. It's not a difficult task, and as with most car maintenance, prevention is a lot better and easier than cure.

[This message has been edited by br1anstorm (edited 08-01-2015).]

IP: Logged
Patrick
Member
Posts: 37341
From: Vancouver, British Columbia, Canada
Registered: Apr 99


Feedback score: (1)
Leave feedback


Total ratings: 464
Rate this member

Report this Post08-01-2015 05:44 PM Click Here to See the Profile for PatrickSend a Private Message to PatrickEdit/Delete MessageReply w/QuoteDirect Link to This Post
Excellent write-up!

I removed the rocker panels recently from my Formula in order to change them from black to silver. I used a foam roller to apply silver (aluminum) Rustoleum type paint on the rockers, and it came out pretty good. I painted the flange along the bottom black though, as I didn't want the irregular shape to stand out under the car.

I like what you used along the bottom flange to re-attach the rockers. I just used galvanized bolts and washers. I dipped the washers and the heads of the bolts into black Rustoleum paint, and brushed anti-seize onto the bolt threads before putting it all back together. Even if it rusts a bit, if I ever take this apart again, it'll be easier than taking those factory rivets out.

[This message has been edited by Patrick (edited 07-16-2024).]

IP: Logged
rogergarrison
Member
Posts: 49601
From: A Western Caribbean Island/ Columbus, Ohio
Registered: Apr 99


Feedback score: N/A
Leave feedback


Total ratings: 551
Rate this member

Report this Post08-02-2015 12:09 PM Click Here to See the Profile for rogergarrisonSend a Private Message to rogergarrisonEdit/Delete MessageReply w/QuoteDirect Link to This Post
Cleaning the rust is easier and more thorough if you use a $15 HF hand sandblaster. It cleans out deep down in pits that sanding and grinding dont get.
IP: Logged
br1anstorm
Member
Posts: 225
From: Scotland, UK
Registered: Apr 2008


Feedback score: N/A
Leave feedback

Rate this member

Report this Post08-02-2015 04:36 PM Click Here to See the Profile for br1anstormSend a Private Message to br1anstormEdit/Delete MessageReply w/QuoteDirect Link to This Post
Ah Roger.... if only.....

If only I had an air compressor! I still have to do things mostly the old fashioned way - by hand and with elbow grease. A power drill is the closest I have got to high tech equipment.
IP: Logged

next newest topic | next oldest topic

All times are ET (US)

Post New Topic  Post A Reply
Hop to:

Contact Us | Back To Main Page

Advertizing on PFF | Fiero Parts Vendors
PFF Merchandise | Fiero Gallery
Real-Time Chat | Fiero Related Auctions on eBay


Copyright (c) 1999, C. Pennock