I recently saved a 1988 Fiero Formula 5spd. Long story short it was bought from someone who daily drove the car and kept records of every part and service since 2000, then 3 days later crashed into a motorcyclist. I gave it a once over and decided it was savable. I am planning 2 phases to the repair. Phase 1: Pull out what can be pulled and get the car as straight as possible, mark all opportunity points. Phase 2: Replace damaged areas.
Tonight I finally got a chance to start disassembling and noticed some things hard tweaked a bit harder than expected, but still do able just curious on others opinions on best course of action.
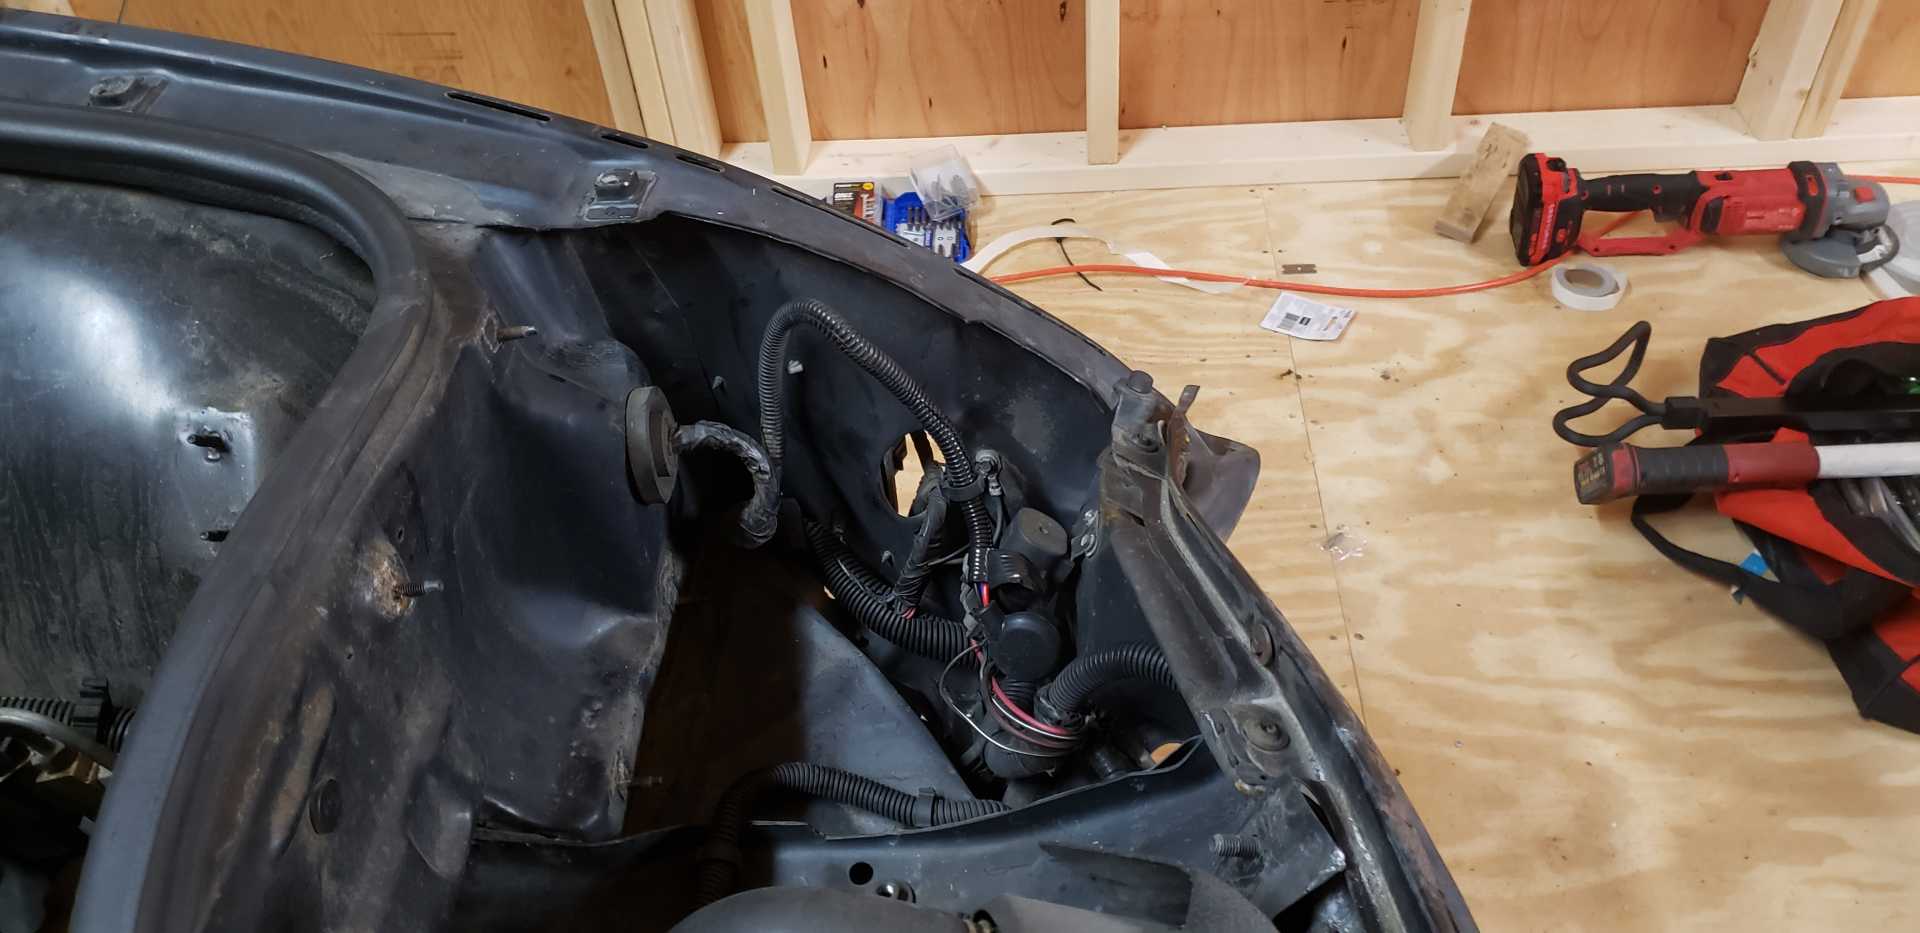
I took some photos for reference on what I am stuck on.
Rough idea on what I was working with
The first plan was to go along the spot welds and body lines where I could and section in part of an apron, core, and headlight bucket.
This is where i was considering sectioning, I don't plan on making this a show piece would just like to repair the gaps and make her fairly sound again. I do want to look and see what I would need to as far as replacing entire apron and core. Now what is throwing me off is the hood mount, not easily replaced nor am I shore best way to do it, you can see a slight tweak in it from the core being pushed into it. Not sure if that area is easily replaced or sectioned.
Whats your input on best direction or maybe some do and do nots.
Whats your input on best direction or maybe some do and do nots.
Cliff has now made it so easy to upload images to this forum. I'm not trying to be a dick, honestly... but is this the best that you can do supplying photos from your phone?
Why are we seeing the entire phone display, which includes a huge black area both above and below the actual photo? Can you not upload just the photos themselves?
It would be so much easier to see whatever the heck it is you're trying to show us if the photos were properly posted and normally sized!
[This message has been edited by Patrick (edited 12-21-2019).]
You could consider taking various reference measurements from the right side, reworking the left side to match & checking the results with fitment of the plastic stuff.
Cliff has now made it so easy to upload images to this forum. I'm not trying to be a dick, honestly... but is this the best that you can do supplying photos from your phone?
Why are we seeing the entire phone display, which includes a huge black area both above and below the actual photo? Can you not upload just the photos themselves?
It would be so much easier to see whatever the heck it is you're trying to show us if the photos were properly posted and normally sized!
WOW! THANK YOU! You know I would have never been able to figure out that welding in that spot isn't as good as going back another 3 inchs. Now, lets clarify I was not aware this site updated to allow uploads nor did I notice it. Figured we were still using PIP. As far as the photos I uploaded they were done that way so I can use my phone to write on the pictures for reference. I am not sure what you are using to view the photos because I can view them fine on the website with detail but not the less.
quote
Originally posted by David Hambleton:
You could consider taking various reference measurements from the right side, reworking the left side to match & checking the results with fitment of the plastic stuff.
Thought cutting and just welding was the right idea? Yes, the fitment checking and measuring is on the course of direction. The question is mostly is there a place you recommend cutting and going back to, or a do and don't point of structure.
You need to check the metal on the driver side cowl for distortion.
Most of the apparent damage is to the front bulkhead, thats easy to see.
Some of the impact force was also transferred back via the upper frame rail.and the lower frame rail to the cowl area.
You need to do a lot of triangulation measurements on both sides and top and bottom of the front compartment to ensure that it is repairable, alignable and will not dog-track after the repair.
I am not sure what you are using to view the photos because I can view them fine on the website with detail but not the less.
I don't know how your posted images look on your phone, but this is how they appear to PC users using a monitor with a resolution of 1920x1080.
On a 23" display, your original photos are the size of postage stamps. I don't believe I deserve a "thumbs down" for bringing this to your attention. It was ultimately for your benefit.
The last images you posted are fine.
[This message has been edited by Patrick (edited 12-21-2019).]
I don't know how your posted images look on your phone, but this is how they appear to PC users using a monitor with a resolution of 1920x1080.
On a 23" display, your original photos are the size of postage stamps. I don't believe I deserve a "thumbs down" for bringing this to your attention. It was ultimately for your benefit.
The last images you posted are fine.
Ultimately here i am confused. The first set of images are acceptable size where as using the new photo upload method they are huge. Either way I am going to chalk it all up to opinion. Now the second part of thumbs down are you telling me to thumbs down you or are you saying I thumbs downed you? Cause I am not interested in either.
You need to check the metal on the driver side cowl for distortion.
Most of the apparent damage is to the front bulkhead, thats easy to see.
Some of the impact force was also transferred back via the upper frame rail.and the lower frame rail to the cowl area.
You need to do a lot of triangulation measurements on both sides and top and bottom of the front compartment to ensure that it is repairable, alignable and will not dog-track after the repair.
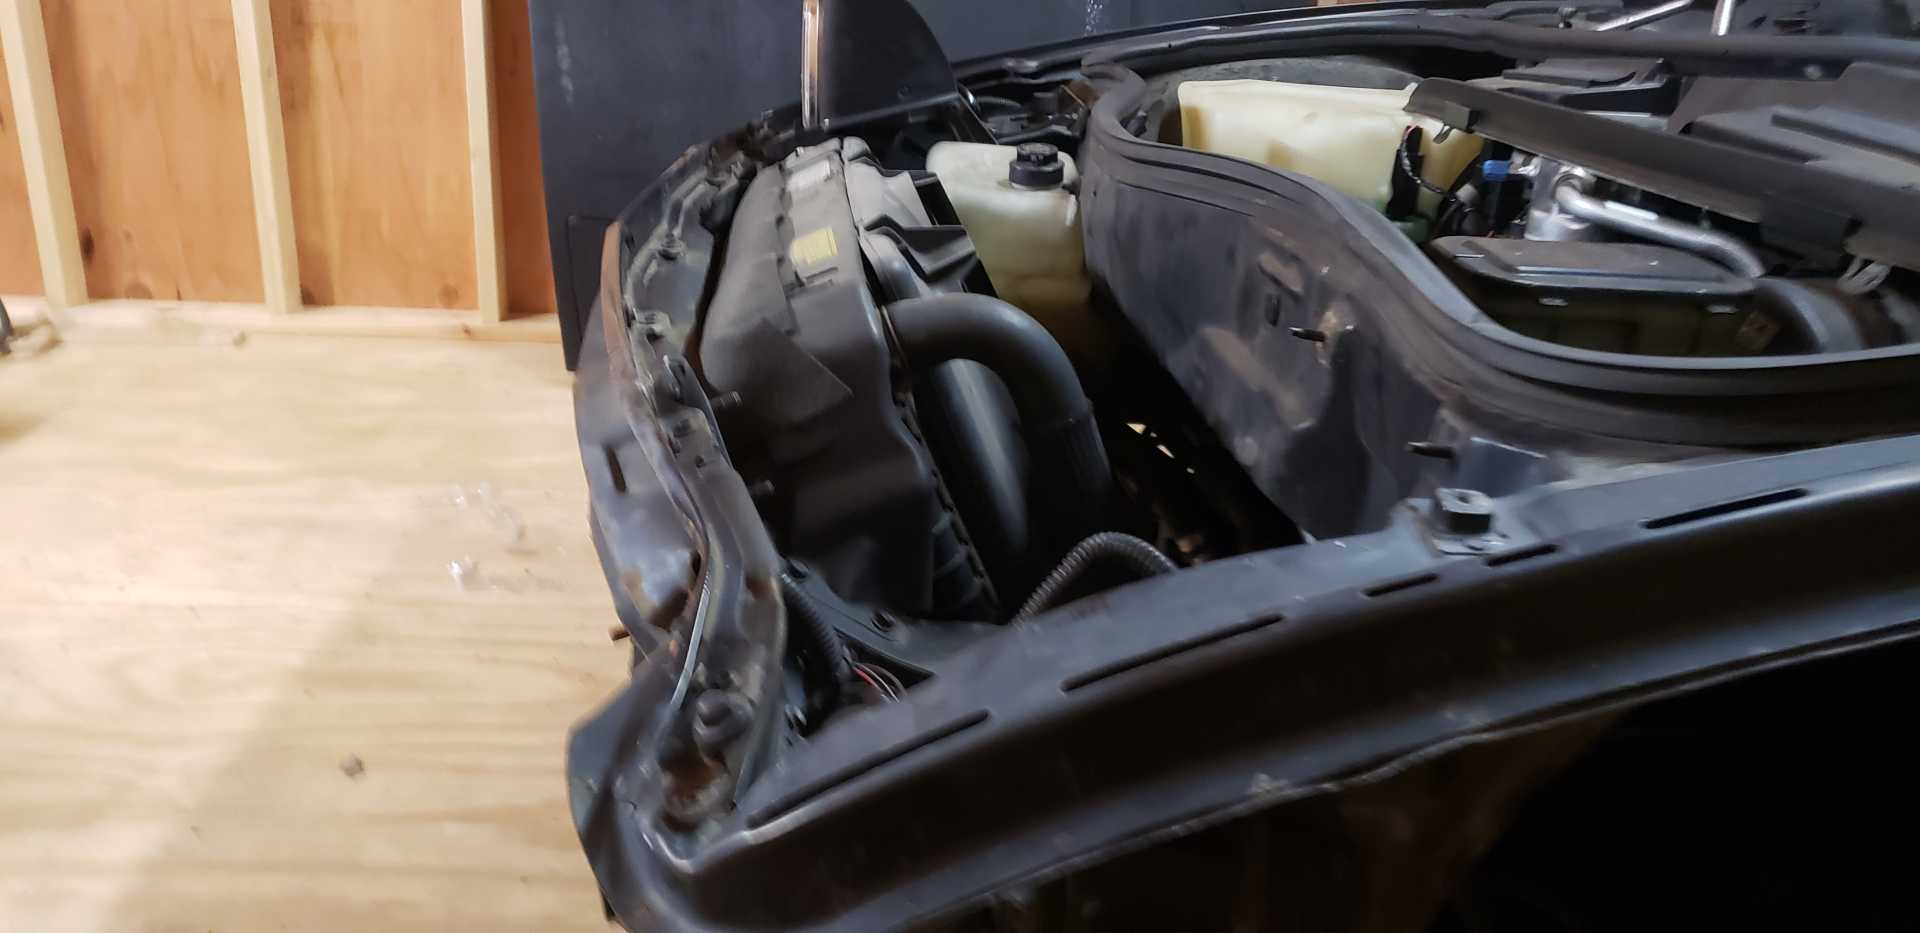
I pulled the cowl cover off, and have no wrinkling or signs of stress.
I'm thinking it's possible to pull it back into place with a body shop puller. Maybe add a little reinforcement... If it were mine, I'd want an opinion from a unibody repair guy.
I'm thinking it's possible to pull it back into place with a body shop puller. Maybe add a little reinforcement... If it were mine, I'd want an opinion from a unibody repair guy.
Spent today heating, pulling and love tapping, and cutting. I removed the sheetmetal where the bottom of light would be. Now I am not to far off aprox 1/8th low on the corner and 1/4 off to the right. Pretty set at this point on just replacing the Sheetmetal. I have follow the spot welds along main rail and apron.
From the looks of the damage I would also measure across the wheelhouses to insure proper hood alignment when you are done. If you are mig welding in new sheet metal you will also need to allow for a small amount of weld joint/metal shrinkage. While most anything can be repaired, must say you've taken on quite a project there.
------------------ " THE BLACK PARALYZER" -87GT 3800SC Series III engine, custom ZZP /Frozen Boost Intercooler setup, 3.4" Pulley, Northstar TB, LS1 MAF, 3" Spintech/Hedman Exhaust, P-log Manifold, Autolite 104's, MSD wires, Custom CAI, 4T65eHD w. custom axles, Champion Radiator, S10 Brake Booster, HP Tuners VCM Suite. "THE COLUSSUS" 87GT - ALL OUT 3.4L Turbocharged engine, Garrett Hybrid Turbo, MSD ign., modified TH125H " ON THE LOOSE WITHOUT THE JUICE "