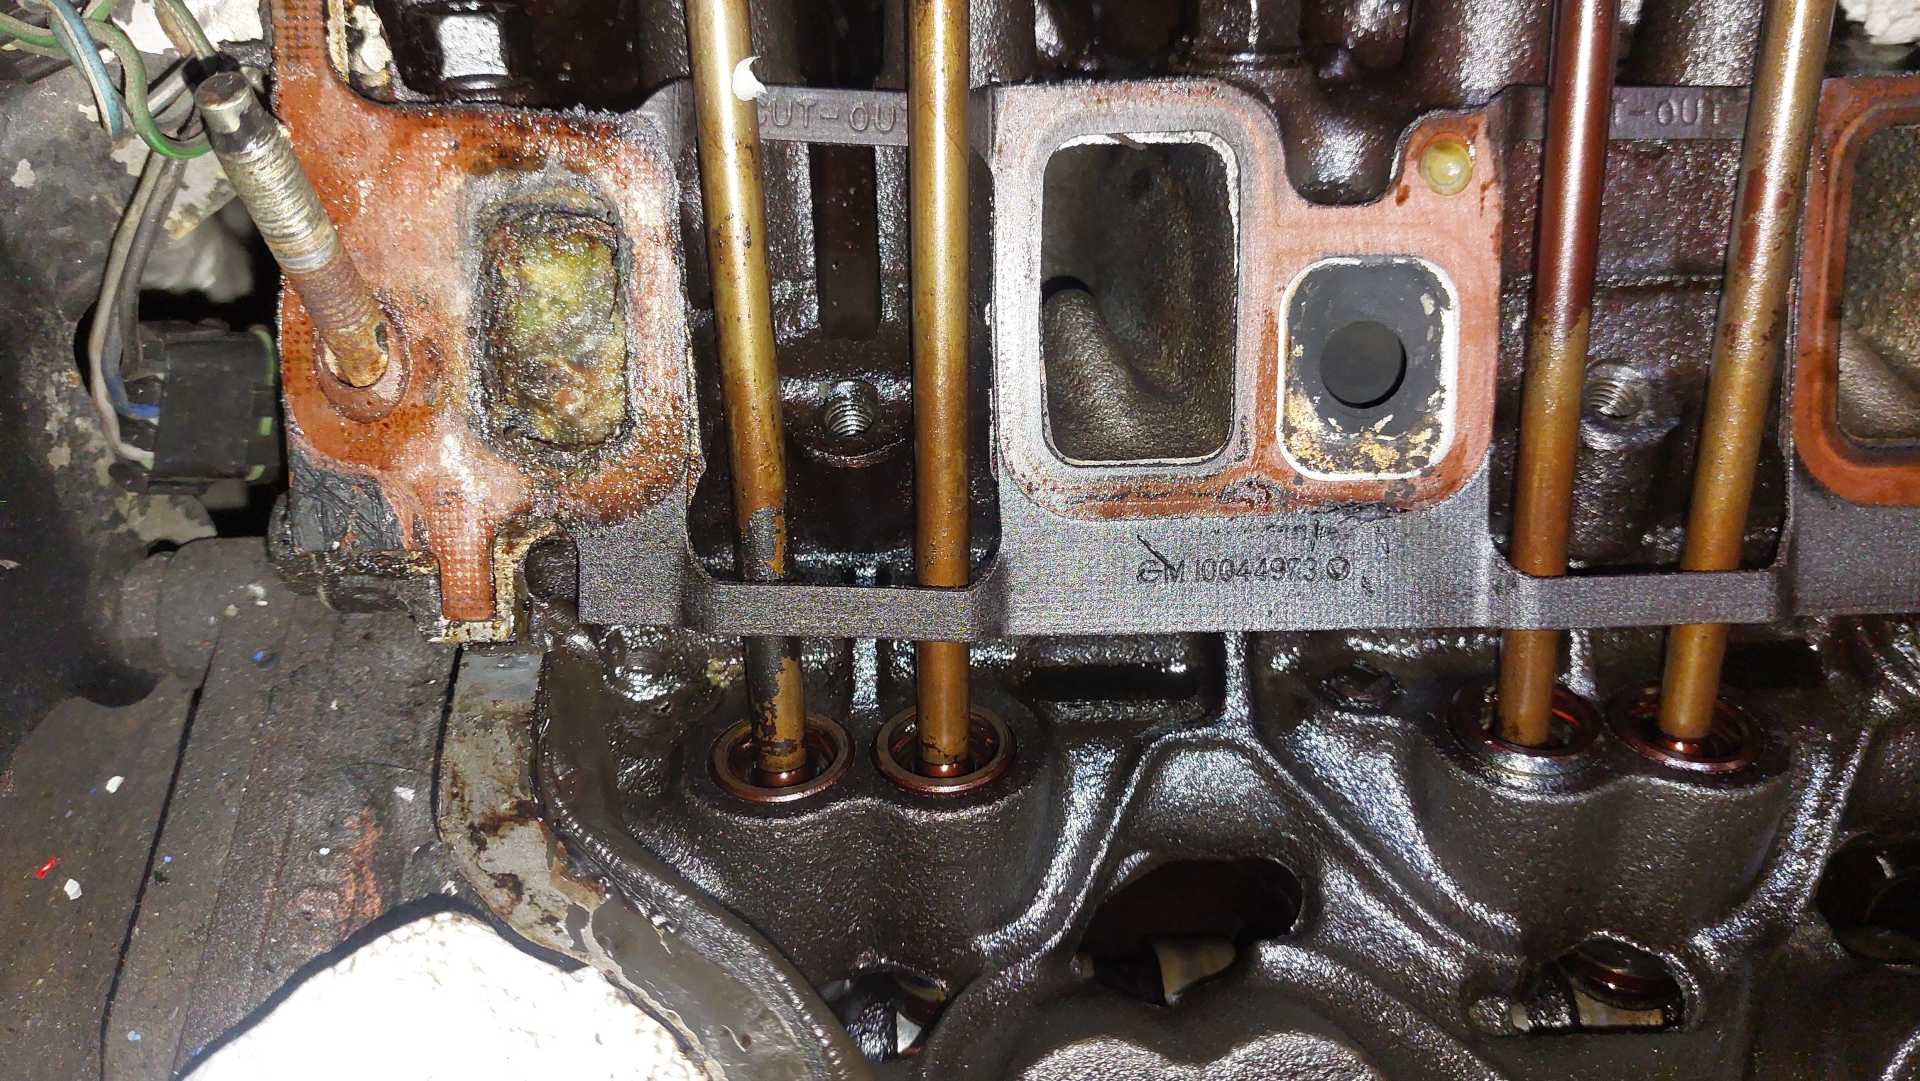
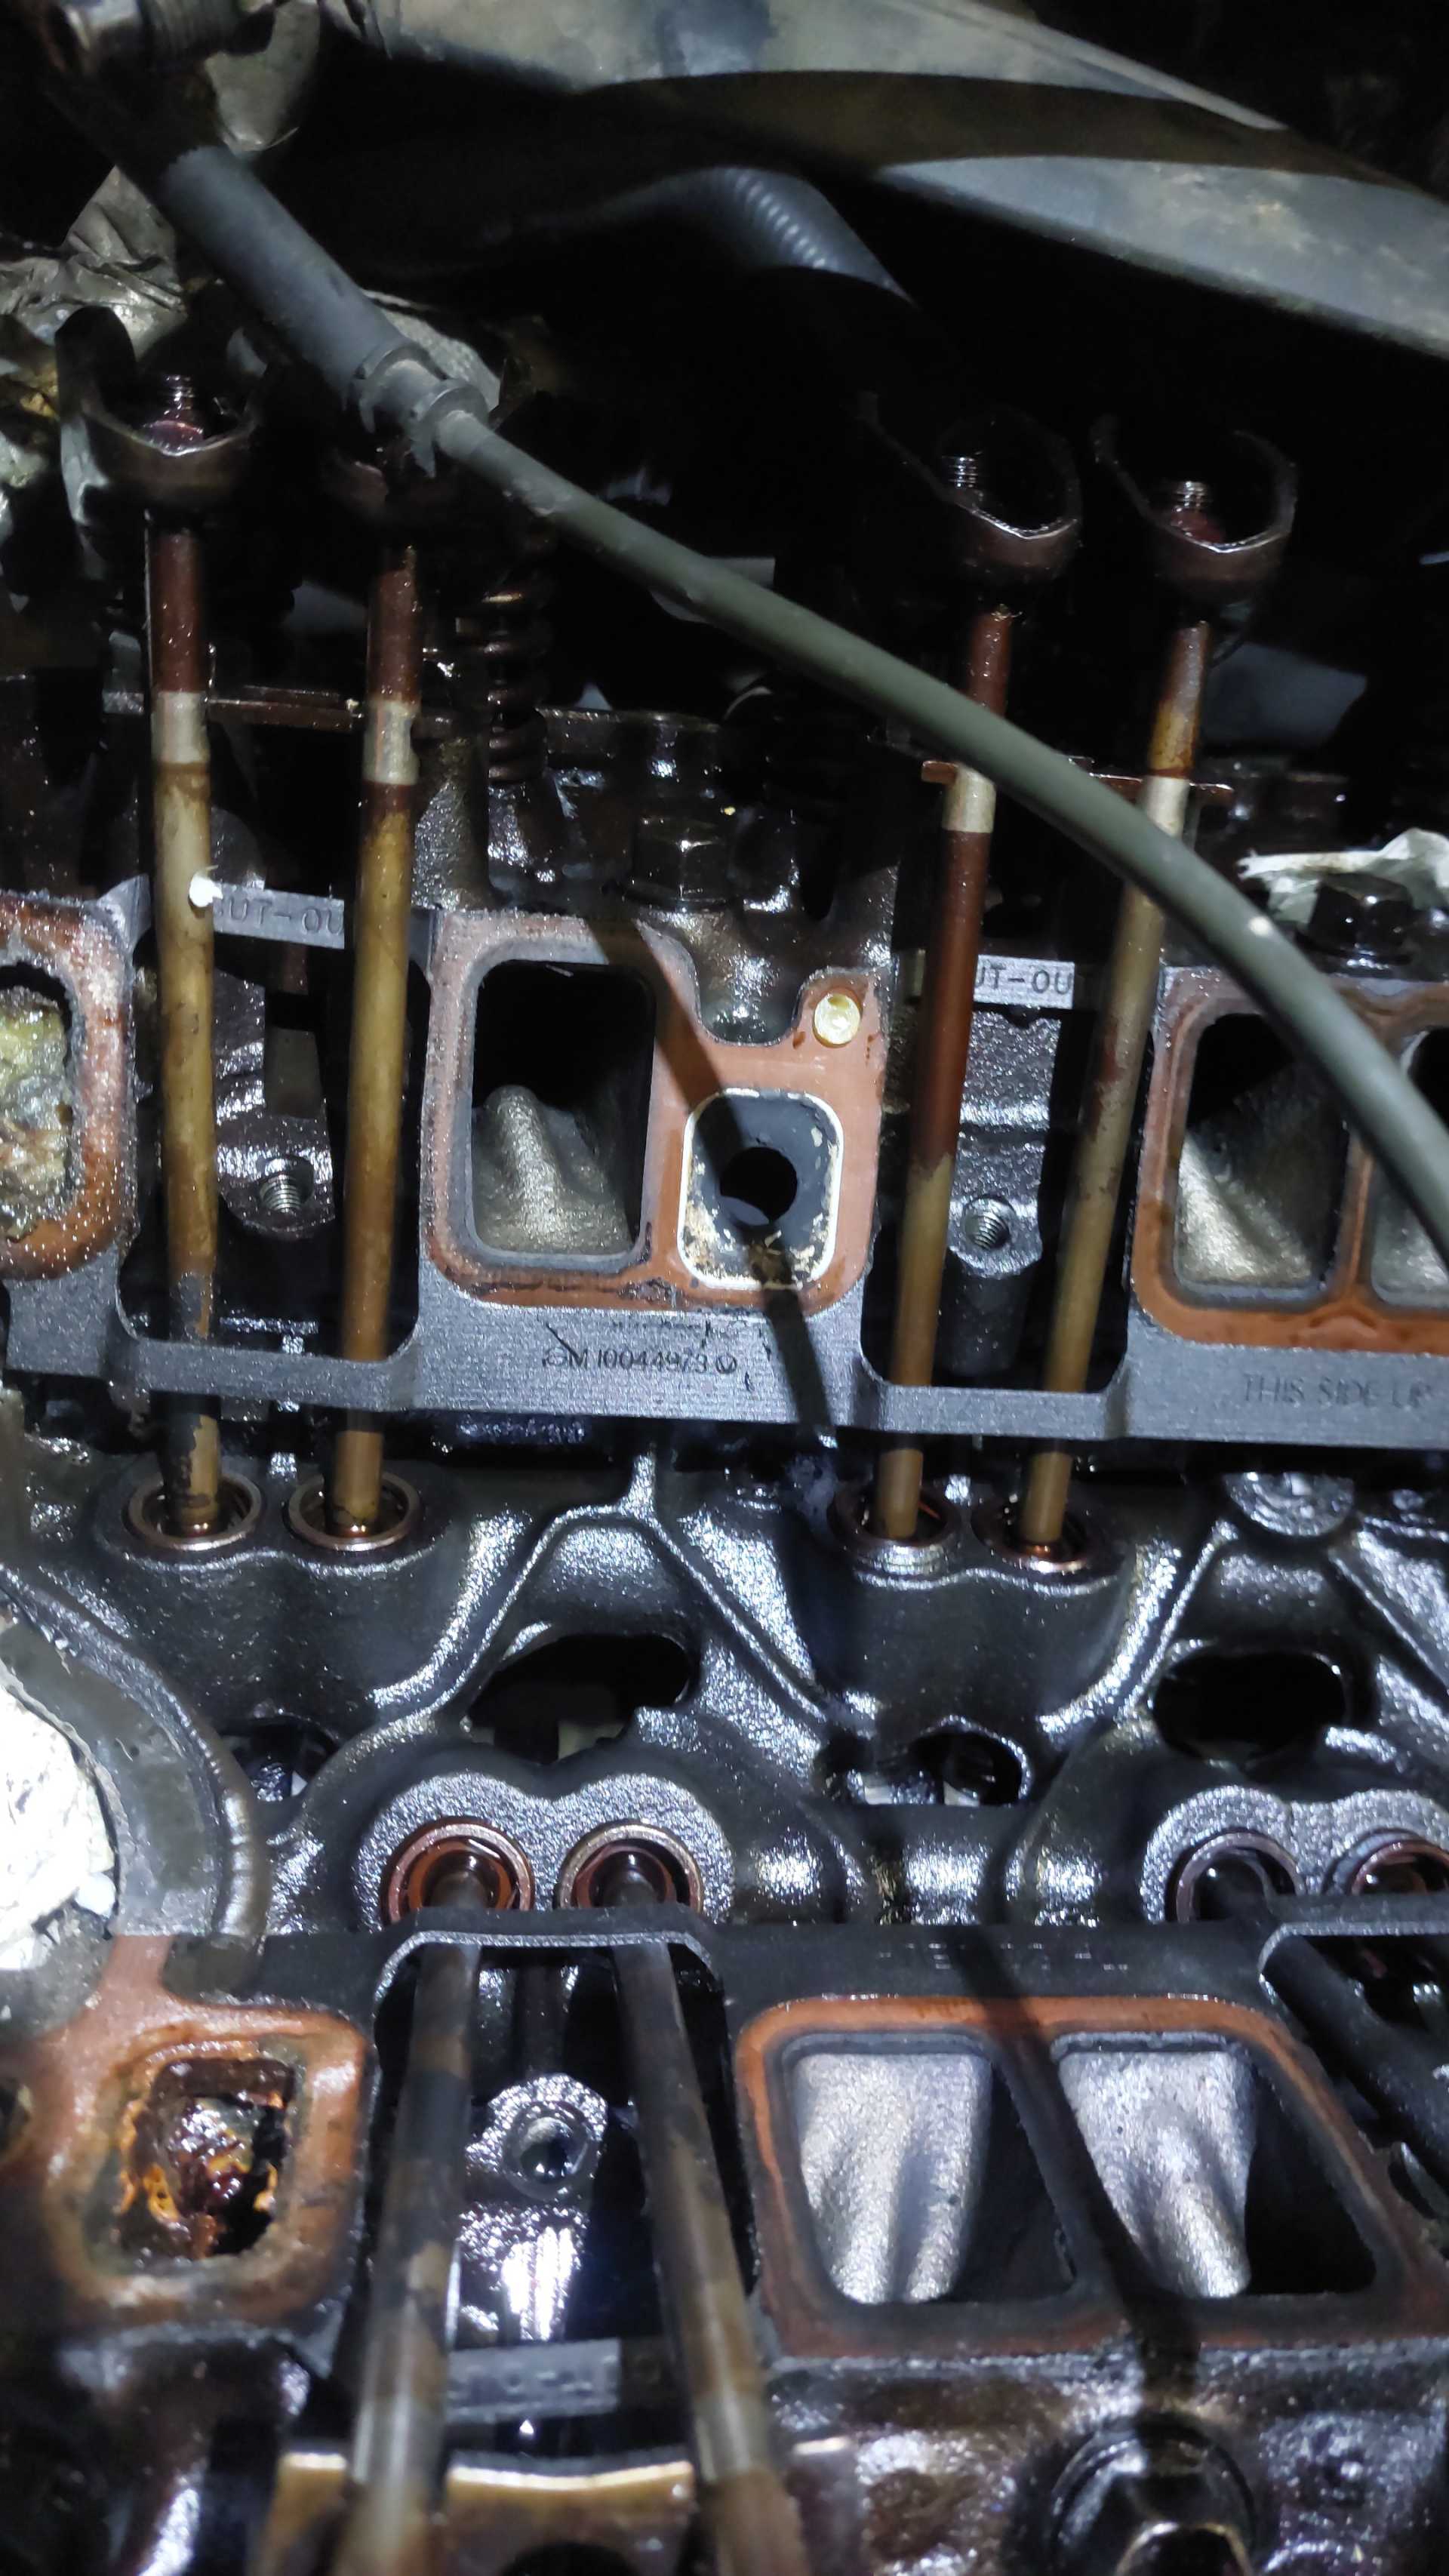
Hello people, I bought a Fiero and I made this account in hope the get alot of information and learn new stuff. I am currently doing a restoration of a fiero, and I removed the lower intake. At this point I wanted to ask, do I have to change the head gasket when it is old? The car has around 66k miles and has been sitting in a garage for 24 years at least, without moving it. Not long ago I learned about valve stem seals, so I am not sure to change them or better get the car running and see if it is really necessary (I have Oil leak stops, dunno if it helps for rubber parts -> valve stem seals). I also understand from a discussion I read somewhere about cutting the gasket, I saw that the Lower Intake Gasket sits behind the push rods, why not just just cut the one part that sits behind out and just place it on? As far as I saw it has not a really purpose, cause the other part will be infront and hold the gasket together.
Or can anyone say since I dissasembled it so far, is there anything else to consider, or to do while I am at the lower intake.
I would be gratefull from the bottom of my heart if anyone can give me answers to this.
For the lower intake gasket, it is best not to cut it, it isn't too hard to remove the pushrods and put it on right, that upper section that you shouldn't cut helps keep the gasket perfectly aligned and prevent it from sliding around as you install the intake, if it slides even a bit, you'll have oil and/or coolant mixing and/or going into your cylinders.
Hello, thank you very much for responding. It is a 1987 V6, best regards
I wish I knew where my old forum post on doing headgadkets was. do note you don't have to do them if you drain the coolant and it's green. anything less than that and you need to do them eventually. the best way to do that is actually to remove the headbolts after draining oil and coolant and lift the head while loosening nothing related to the valve train. then you clean both the block and head carefully to avoid mixing the pushrods between cylinders and then you can reinstall the head with a friend helping to line up the pushrods
or maybe other valve spring compressor can work if have clearance for the rocker. 16550 16750 & related versions.
Leave Head Gaskets Alone.
------------------ Dr. Ian Malcolm: Yeah, but your scientists were so preoccupied with whether or not they could, they didn't stop to think if they should. (Jurassic Park)
First of all thank you from the bottom of my heart for the fast reply, I am surprised I got a response so fast😀 Sry to say I just made a account and this website is kinda complicated I didn't know how to see the new messages, so it might take time for me to respond.
1) So for the Lower Intake Gasket, I saw yesterday on youtube what to do, and I saw a video of somebody using a tool (exactly the one the member mentioned in the link) just to lift the rocket arms and take them out by hand. My question is can I just do that (of course put them back in correct order) without needing to readjust anything? I am not a professional, but don't I have to consider the position of the piston? I mean if the piston is on very top I cannot move the rocket arm, that presses down the spring and eventually moving the valves? When I am not sure about something or I haven't done it before, I make sure to gather as much information as possible, rather than go without thinking🤣
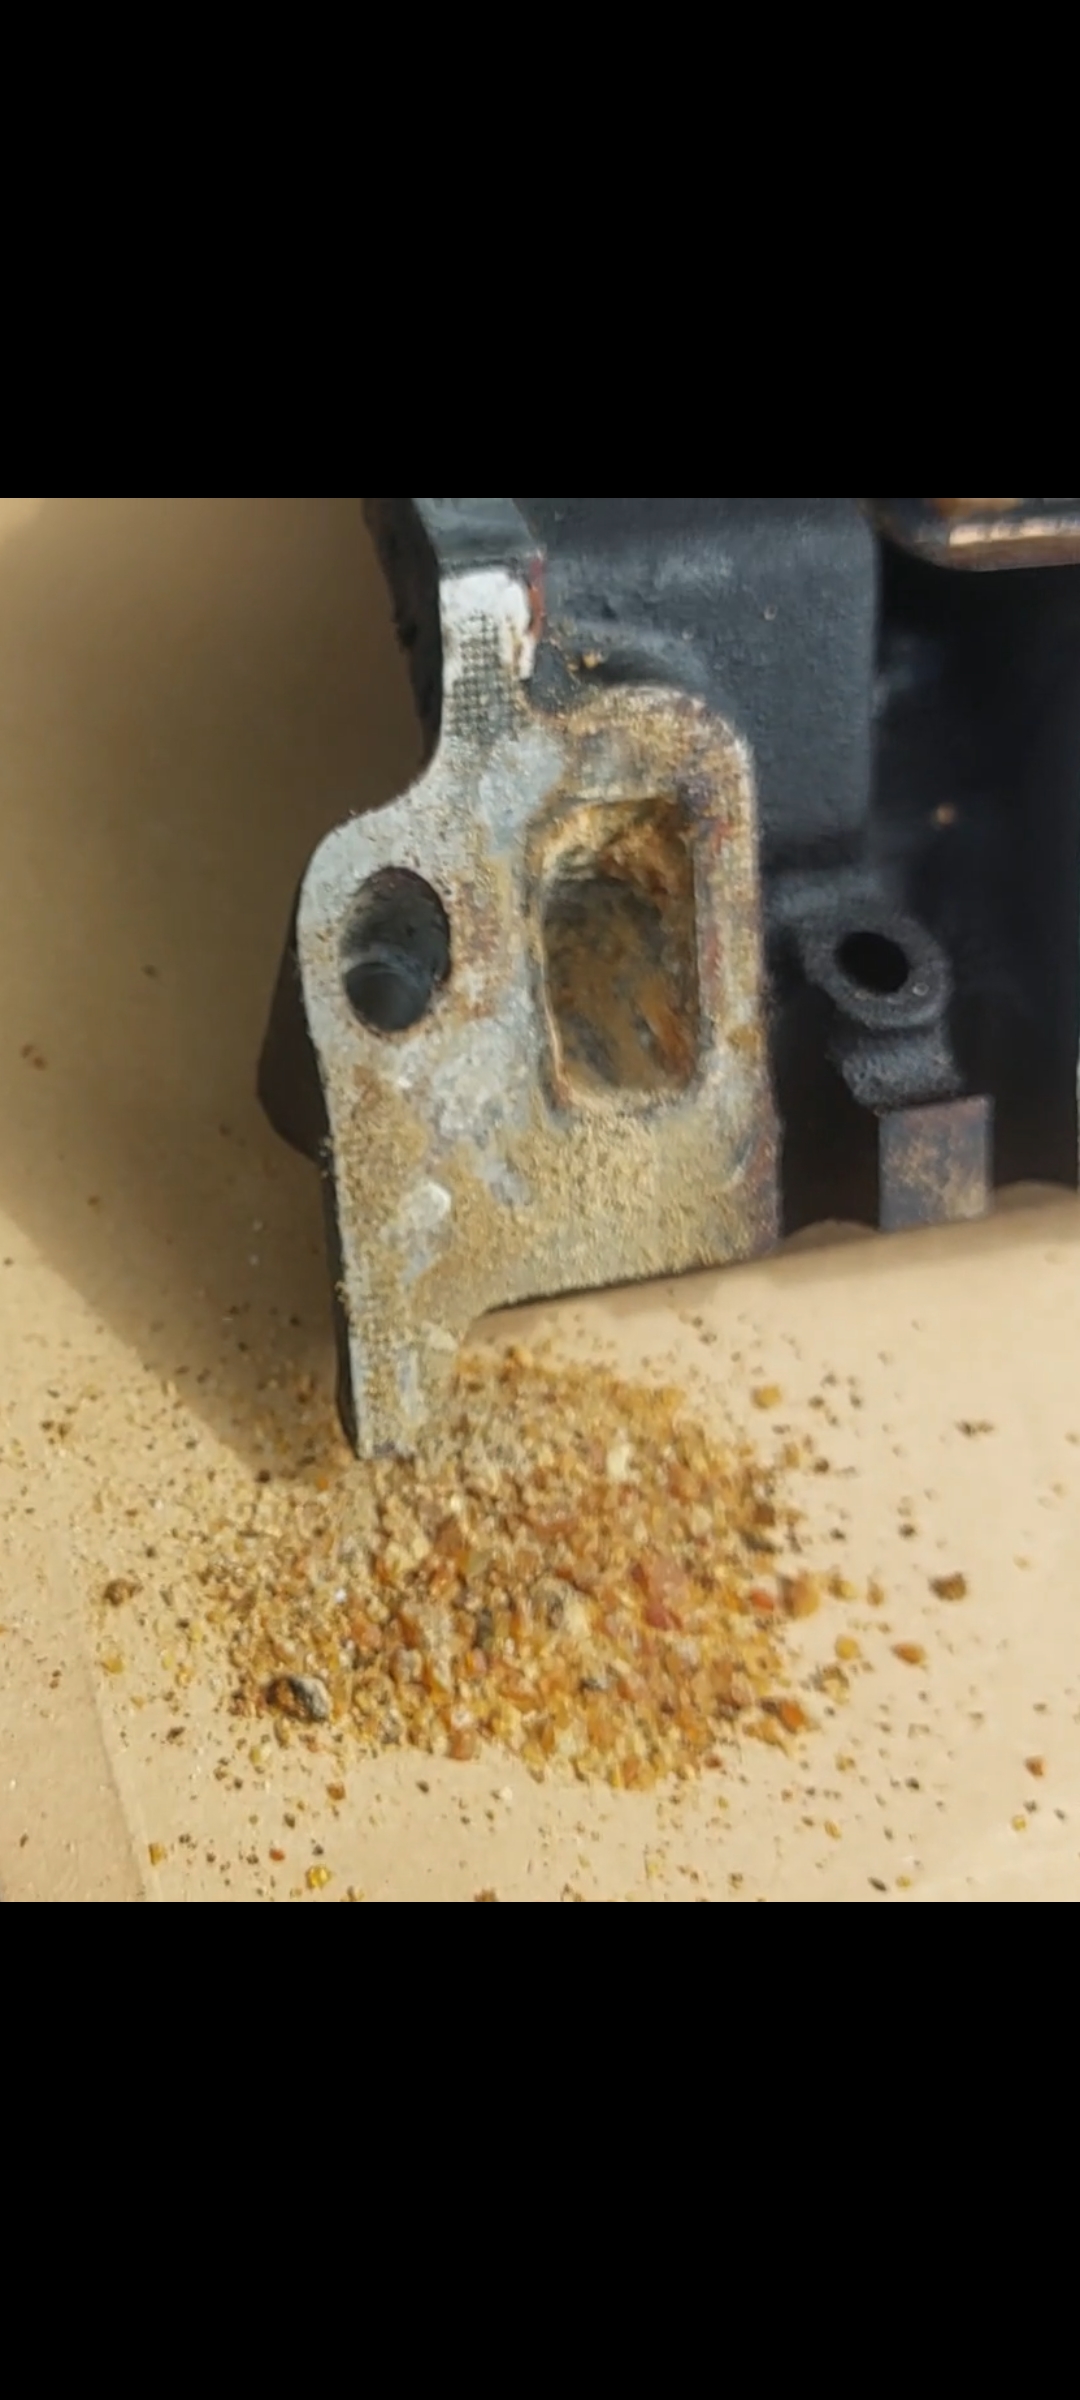
2) You mean like a crack in the head gasket? No I don't know that, cause the car was sitting unfortunatly 24 years and he owner didn't even bother to refill it fill collant (corrosion protection etc) So I saw after removing the lower intake that in the big canals for collant it is all dirty and brown (don't know if it's rust, but looks more like just old sludge) and even 1 canal was completly shut off with some kind residue. It was not hard residue, I just poked it free if a screwdriver. I am little concerned when i put a coolant flush it might clog the radiator's fine canals. (I try to post pictures so you see what I mean)
1) So for the Lower Intake Gasket, I saw yesterday on youtube what to do, and I saw a video of somebody using a tool (exactly the one the member mentioned in the link) just to lift the rocket arms and take them out by hand. My question is can I just do that (of course put them back in correct order) without needing to readjust anything? I am not a professional, but don't I have to consider the position of the piston? I mean if the piston is on very top I cannot move the rocket arm, that presses down the spring and eventually moving the valves? When I am not sure about something or I haven't done it before, I make sure to gather as much information as possible, rather than go without thinking🤣
2) You mean like a crack in the head gasket? No I don't know that, cause the car was sitting unfortunatly 24 years and he owner didn't even bother to refill it fill collant (corrosion protection etc) So I saw after removing the lower intake that in the big canals for collant it is all dirty and brown (don't know if it's rust, but looks more like just old sludge) and even 1 canal was completly shut off with some kind residue. It was not hard residue, I just poked it free if a screwdriver. I am little concerned when i put a coolant flush it might clog the radiator's fine canals. (I try to post pictures so you see what I mean)
And what do you mean by realining the push rods?
As always, I'd be glad to hear from you guys
best regards
1, as long as you don't loosen the nut on each rocker arm, the pushrods should come out, and can be put back in without any issues as long as you keep then in order and right way up, all of the "timing" is done by the camshaft, so if a valve is pushed down because of the piston position, just put a ratchet on the center crankshaft pulley bolt and slowly turn the engine over, not applying to much pressure to the bolt, if your rear end is jacked up (and on jackstands, on level ground, etc. safety first), you can also put it in 4th, chock one wheel so it won't turn, and just turn the other tire, which will slowly turn the engine so that valve is no longer depressed, then you can do the pushrods on that. Should only have to turn the engine once. Do all the pushrods you can, turn it over a bit, then all the other pushrods. Same thing upon reinstallation.
2, I'll let other, more experienced members comment on the head gaskets, I personally would do them, since I'm already so deep, but for someone who has very little experience, it is quite a job.
3, like Carter carb said, if your doing head gaskets and are putting on the head with 6 pushrods flopping around, it's best to have a friend to guide them in and hold them as you install the head. And as the rockers can freely rotate without the pushrods, make sure they are completely centered on the valve stem before any tension is applied (compressor tool when installing pushrods, turning engine over with pushrods installed for other valves, etc.)
Thank you so much, ok then it's all easy removing the push rod, put new gasket for lower intake manifold inside and install push rods in same order that's it.
That's the only problem I am facing right now, should I go further and do Head Gasket + Valve Stem seals too (and also maybe disassemble all components and throw the in ultra sonic cleaner bath. As you mentioned, hopefully there is someone here that knows from experience around head gasket if I should change them or not. (The Picture I uploaded and mentioning the clogged canal, I might be wrong but It leading nowhere, I've seen on the lower intake it is a dead end.
English is not my native language but now I understand what you mean, when I put it back, I somehow have to put the push rods through so they are not loose and maybe fall out, I can really good improvise, I think I'll find a solution for that 🤣
or maybe other valve spring compressor can work if have clearance for the rocker. 16550 16750 & related versions.
Leave Head Gaskets Alone.
Sry I flew past it, alright I'll leave the head gasket alone. I see you guys are from the US, thanks for the tool you linked but they don't ship it to Austria, and I can't find a tool like that here anywhere. Maybe I's called way different here, but in worst case I have to make my own.