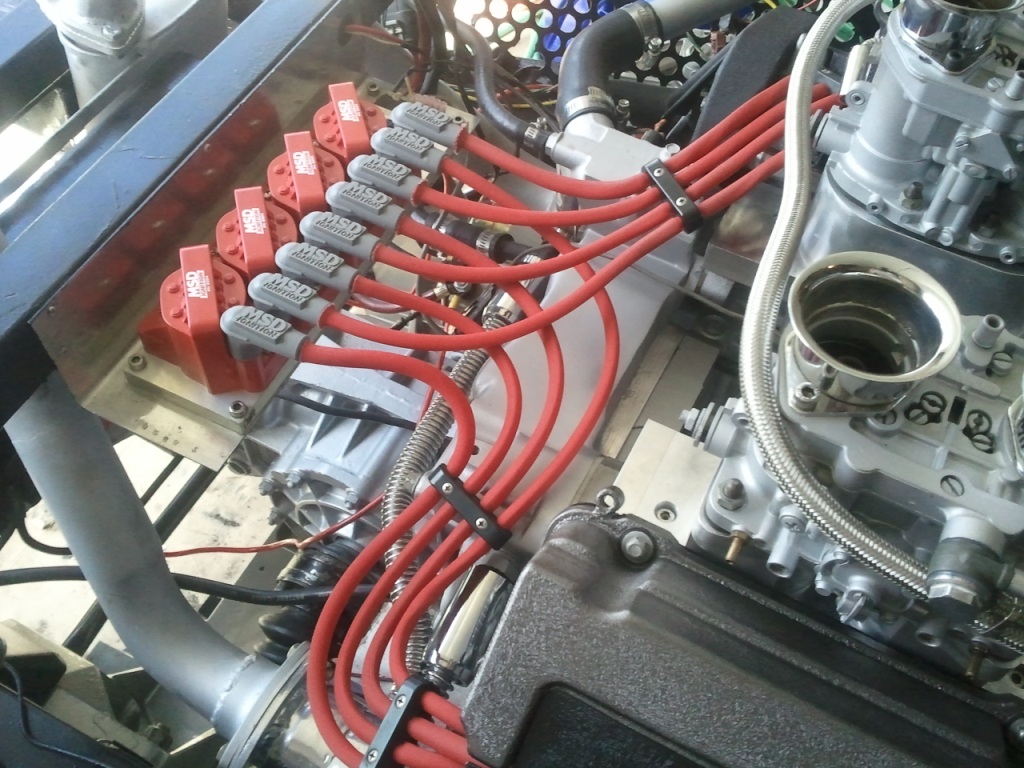
Hi Dan, yes the link you provided is the cover that I've seen around here on kijiji but I prefer the ones from the 2000+ Northstars. I misled you on the wires - I'm ok with the plug wires being exposed now that I've dressed them up. It's the electrical wires I want to hide or tidy up as much as possible as there are not many upgrades I've seen to the plastic split loom I bought. I do have some chromed copper tubing left over and also considered running some wires in braided stainless hose. In case anyone is wondering, the large chrome tubes I used for hiding vacuum hose are $5 bicycle seats posts from Canadian Tire.
P.S. Thanks for adding the decklid emblem to the photoshop - reminded me I have one of those from Bubbajoe to use somewhere
quote
Originally posted by bubbajoexxx: Ryan found the deck emblem today
Gotcha! What about running the wires inside a rubber hose? Makes it look like another hose but hides in plain view. You can cut small holes where the wires exit and the hose is flexible.
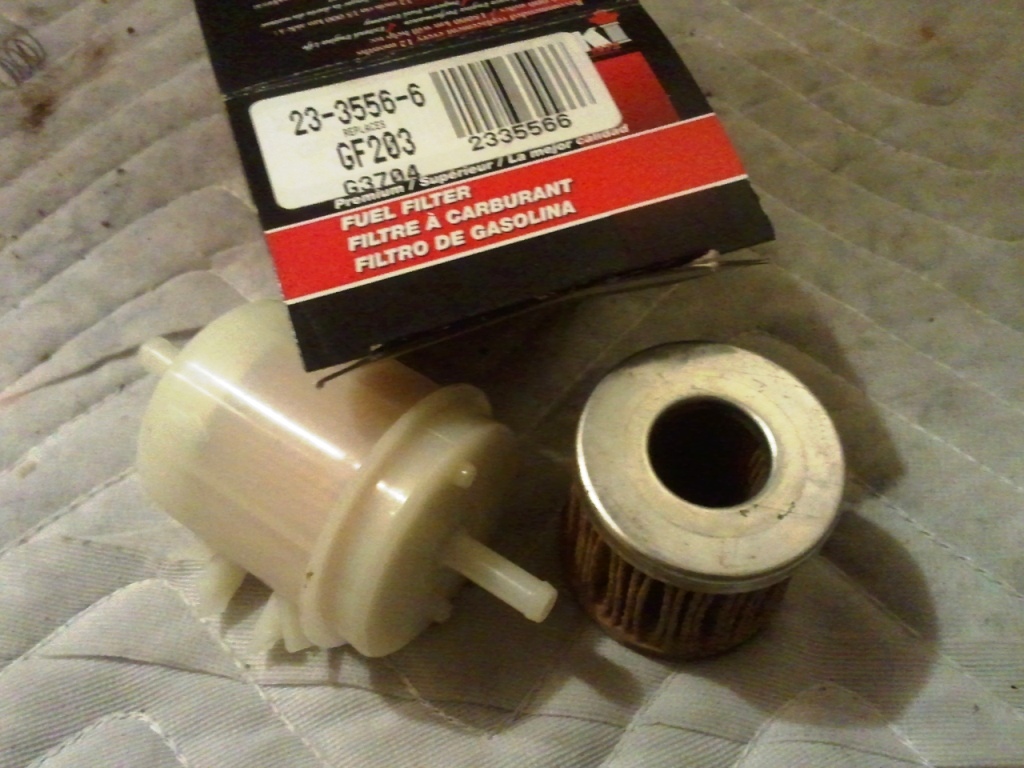
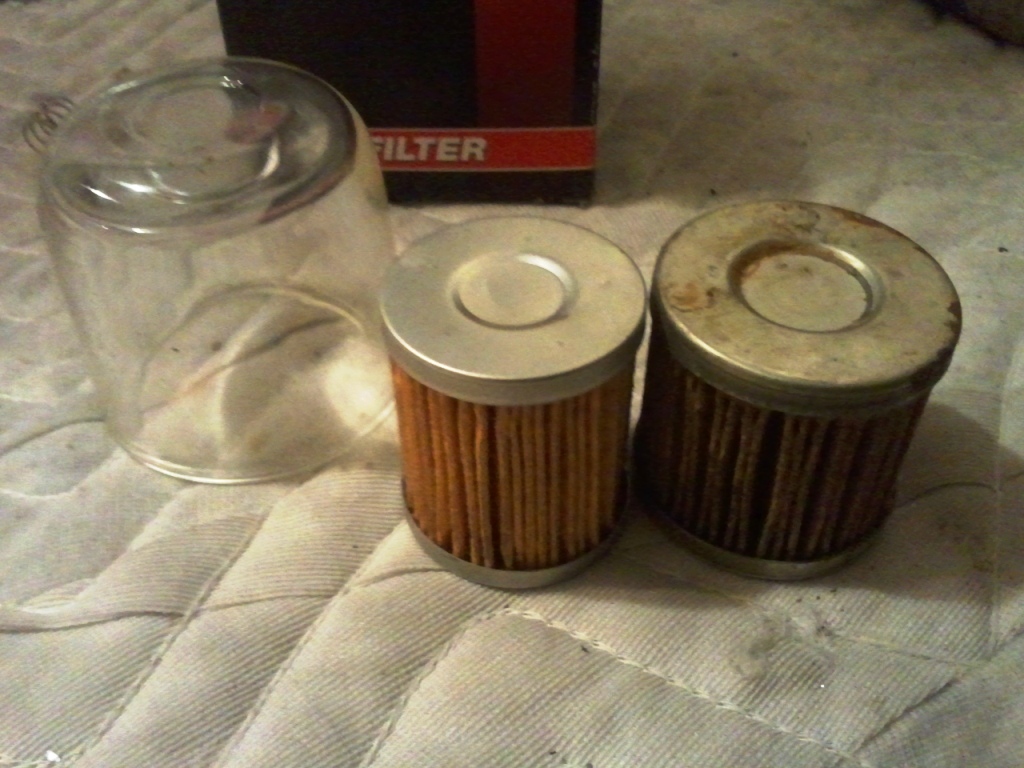
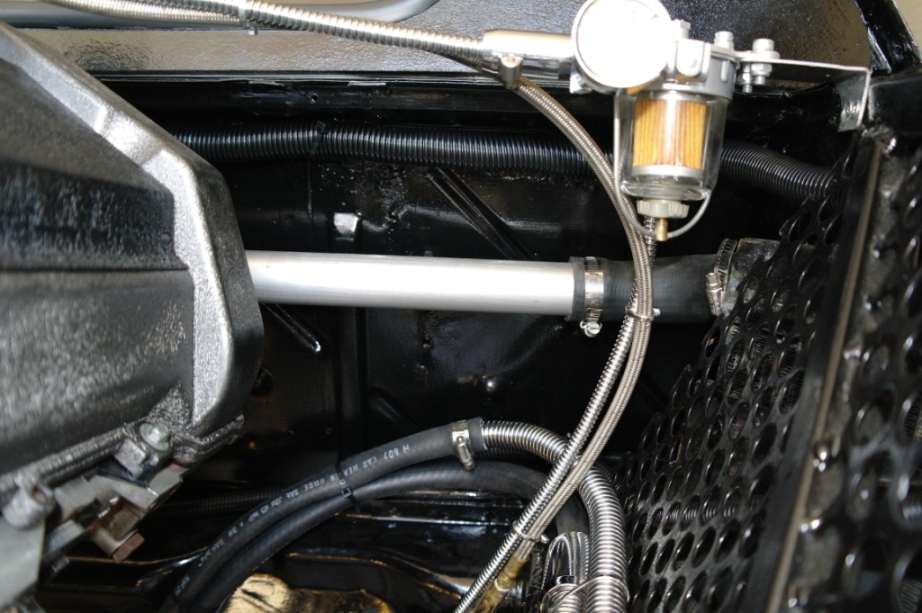
Well the cip1 website doesn't sell just the filter king replacement filter but they advised it is a pretty common filter. I ended up picking up this one that it the correct height but slightly smaller diameter
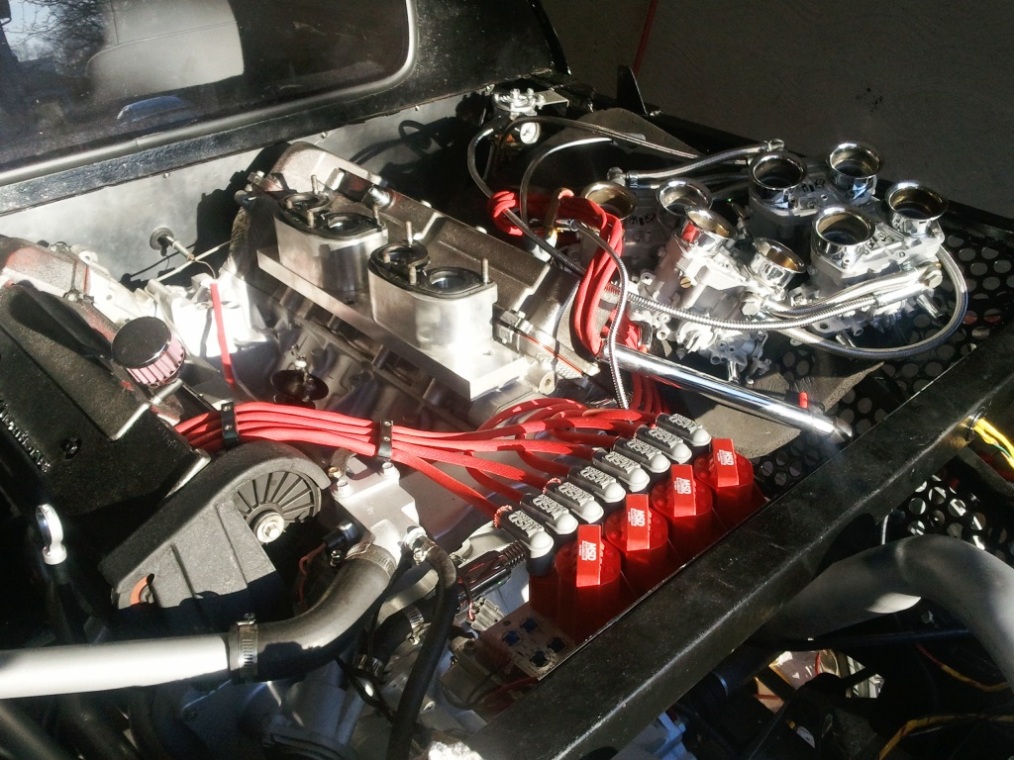
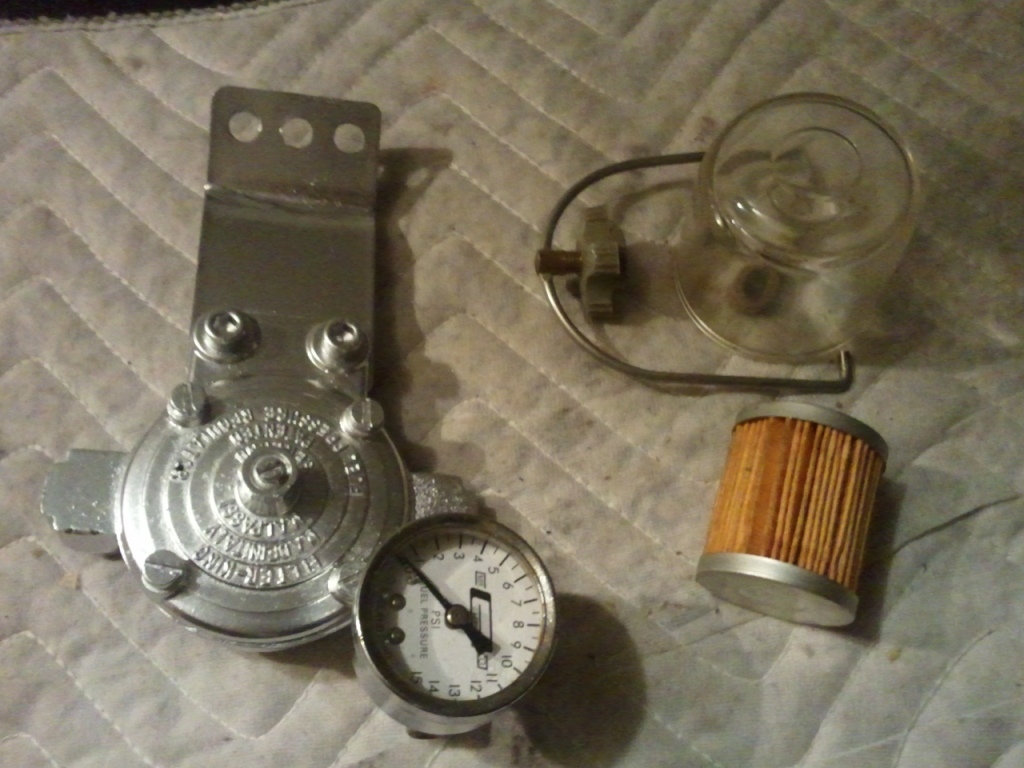
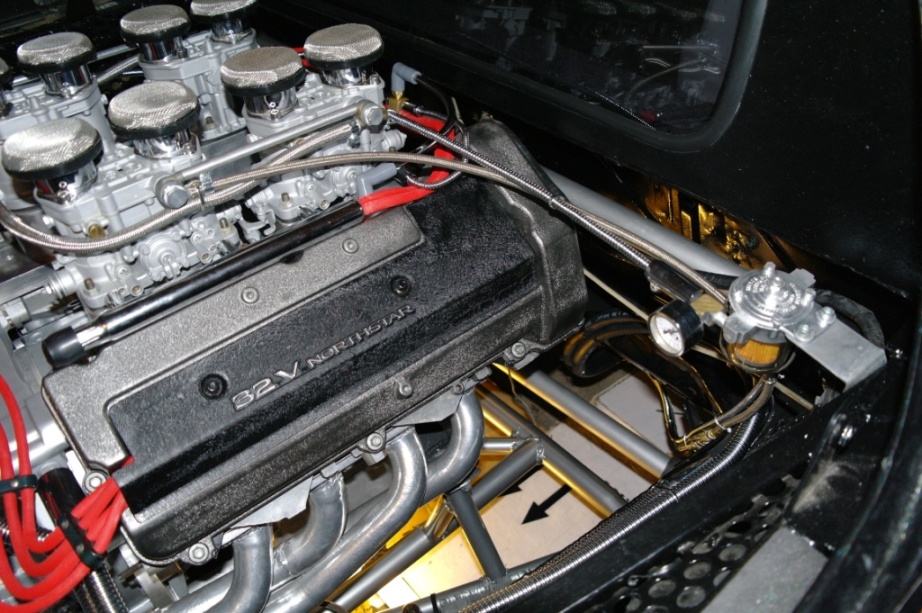
Fuel system is plumbed with 3/8" stainless hose and tubing
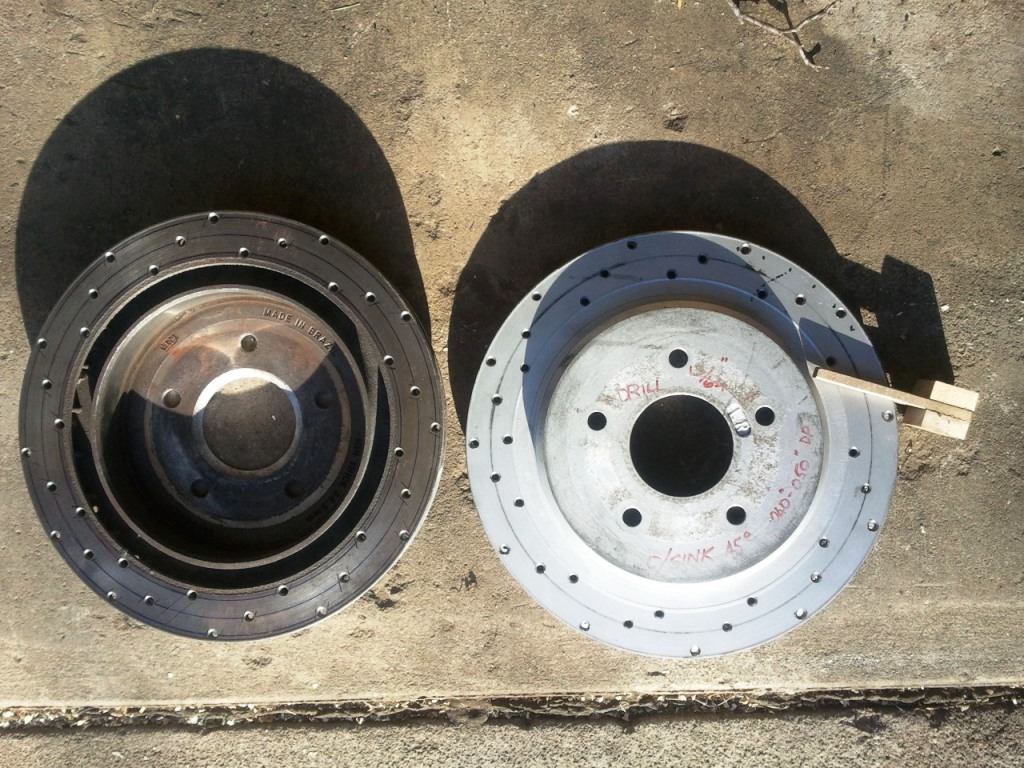
Rear rotors are cross drilled to match the fronts. I owe Grandpa a bottle of scotch for this as he made the jig and drilled them for me
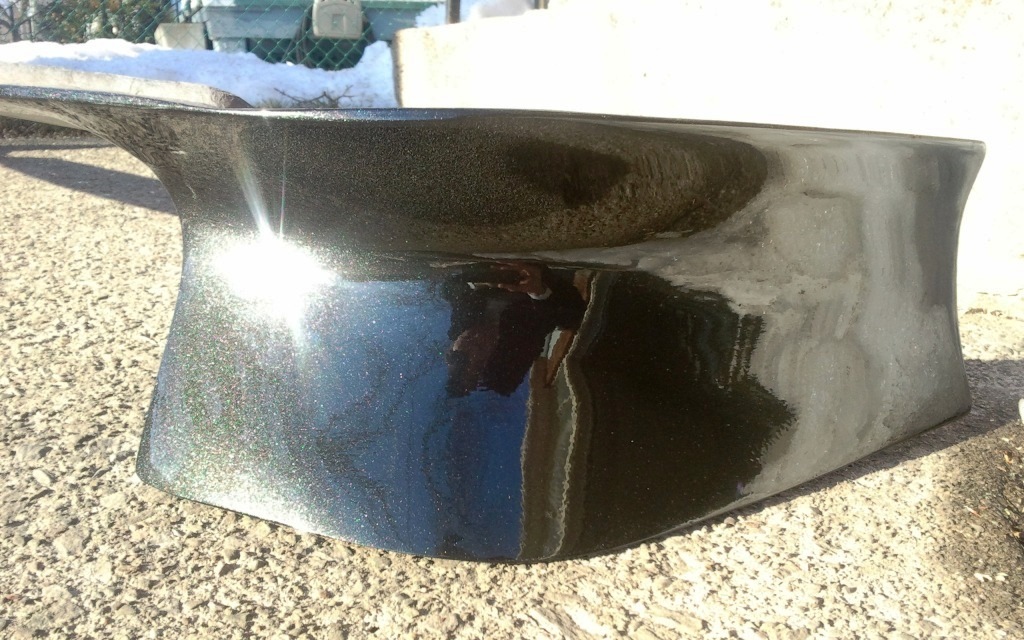
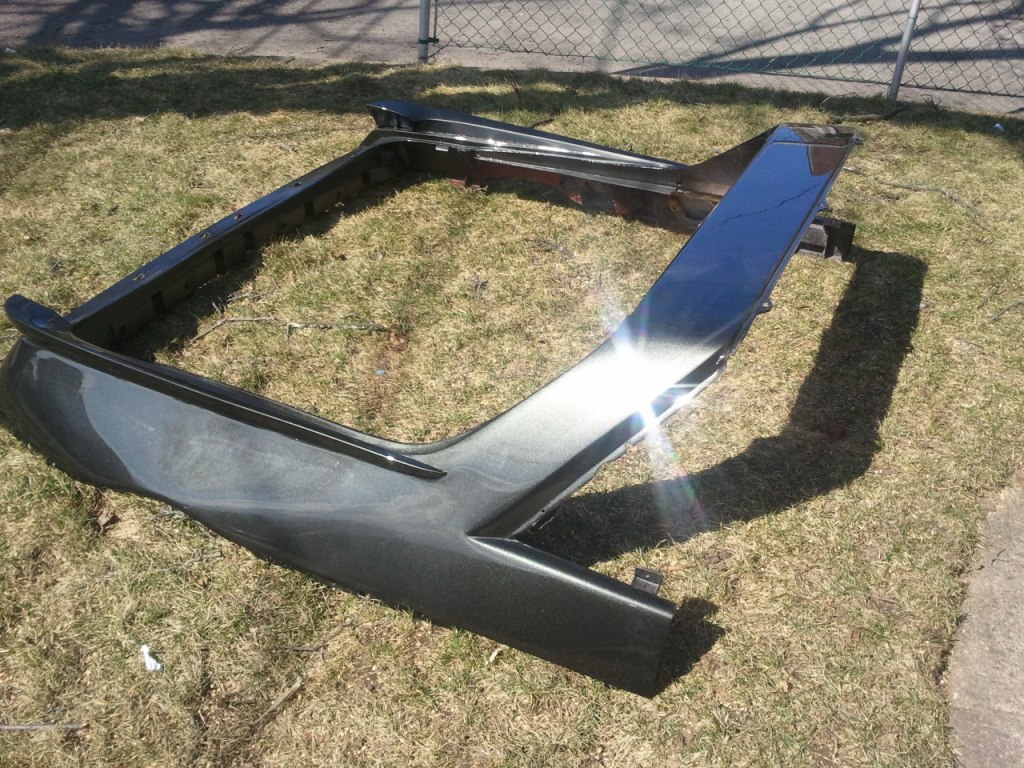
Picked up rest of body parts except roof panel - I have enough paint left so I'm going to paint roof body colour. Here is the rear skirt (sorry cell phone pic)
It's been a while since I checked out your thread... it's really coming together now! How much longer do you expect before you turn the key for the first time?
Originally posted by doublec4: I'm really glad you picked up this car from bubba. Went to a great owner who's finishing it up like it was meant to be! Nice
Could have been yours Chris but I have a feeling you're very attached to your Fiero and I'm glad to see all the compliments it gets here on the forum.
Chris is right though, I am fulfilling a promise to Bubba.
quote
Originally posted by bubbajoexxx: my only wish is the car lives on it what form make no differance to me just as lone as it is not scaped
Buying the project felt more like a job interview that a car purchase
quote
Originally posted by Patrick: I can't believe how little you're asking for it! Only $2000!!! I think the only reason you don't have guys lined up ten deep to buy it is that everyone is afraid they won't be able to do justice to the fine project you've started and haven't quite yet finished.
There is probably some truth to that statement. I have put lots into the project (time and money) to get to to this point.
quote
Originally posted by bubbajoexxx: beleve me it hurts to sell the car but it hurts a hell of a lot more to see it in the yard not being finished because you just cant do it
Bubbajoe you should probably tell the guys that after a couple years downtime you got the itch despite the physical limitations and have a new secret project....
Originally posted by Bloozberry: It's been a while since I checked out your thread... it's really coming together now! How much longer do you expect before you turn the key for the first time?
Thanks, first startup youtube video will be posted here on the thread - I anticipate that happening in a couple weeks...although it's surprising how long the details can take Last night I spent 3-4 hours finishing up the fuel system. Thanks again for your attention to detail on your thread - it inspired the cross drilling of my rear rotors after you documented how easy it can be done.
Plus rating for Gokart Mozart as I can count on you to find ways to help me spend money This company even has shipping from Canada and takes Paypal so I'm in. I'll remove the old plastic loom this weekend to figure out what I need to place an order.
New fuel lines from tank
Adjustable fuel pressure regulator and stainless lines
Yesterday I removed all the old wiring loom, and remounted and covered all wiring on the firewall so I could remount the aluminum cover:
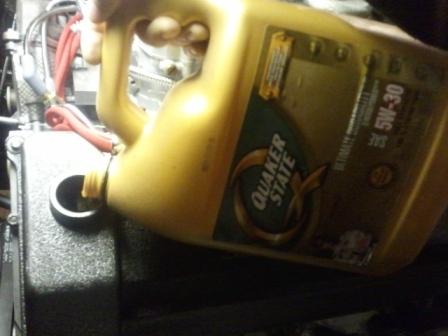
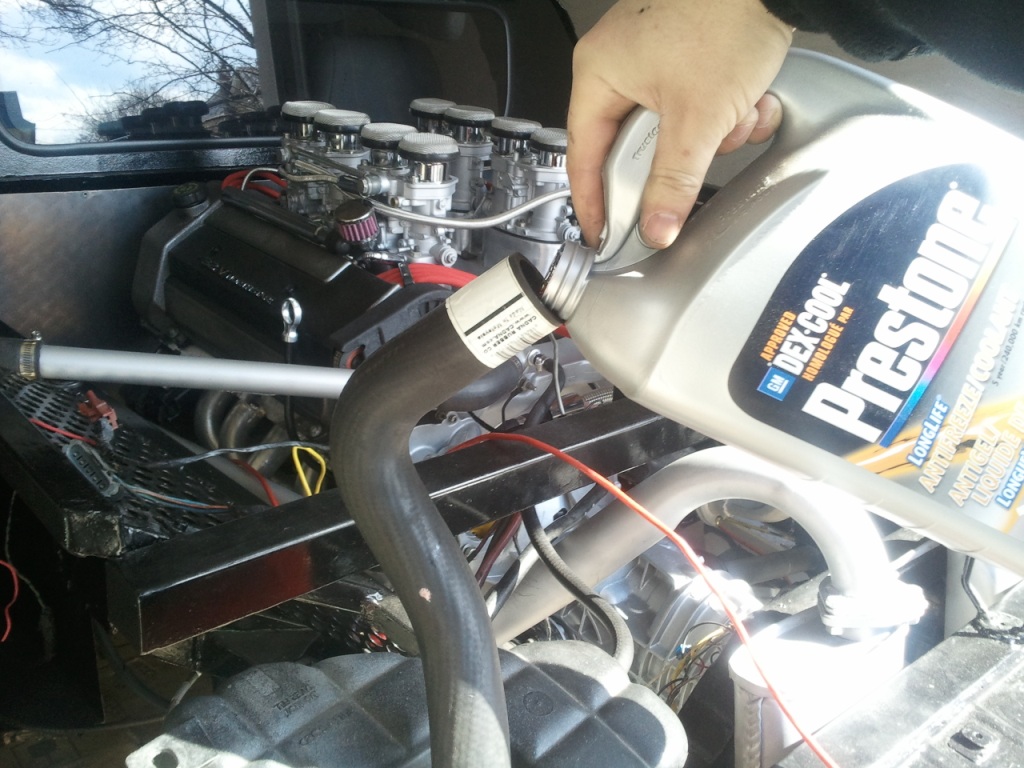
I'm not a big fan of checkerplate so I reversed it, polished the backside of the aluminum panel and fastened using stainless hardware. I also started adding coolant to the system and mounted the throttle cable:
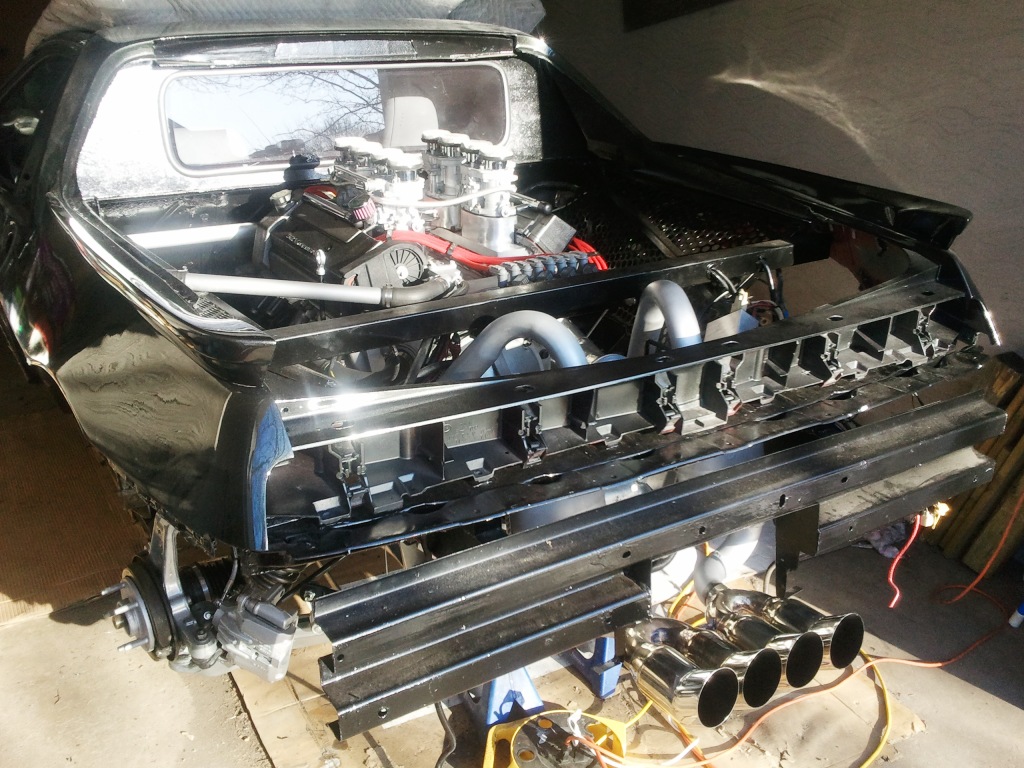
The rear clip was removed so I could paint the underside since some of it is visible in the engine bay:
nice job and very close on balance for a first timmer with the electronics that are used for the ignition and the fuel system very nice in deed you have made me proud of your work
Woohoo! Fire in the hole! (I've got to admit though, you've got more balls than me sticking your head between those untuned carbs and giving the throttle a twirl. I still remember the smell of singed eyebrows decades ago after holding the choke open with my fingers on one of my dad's cars while he cranked it!)
Thanks guys for all the feedback, glad to see many are watching the build. It is a true 1st fire and wasn't in the plans for the night. I was working on the starter and temp rigged a battery to double check my alignment - after one second of cranking it almost started! Rad fans weren't wired, only initial timing set with no advance, fuel pressure was a little high, vacuum ports were closed while two others were wide open with no caps, mixture is whatever is was 2 years ago, idle not set etc... So I quickly grabbed my smart phone and recorded it and it fired first try - how's that for authentic video? Believe me I had no expectation for it to run on the first full crank of the key - these carbs don't even have chokes... The audio quality is poor compared to being there but once it's dyno tuned you'll get a proper video and better sound with my Samsung HD. I had a rad clamp that was a little loose but otherwise no leaks of fuel, oil or coolant.
Here are the pictures:
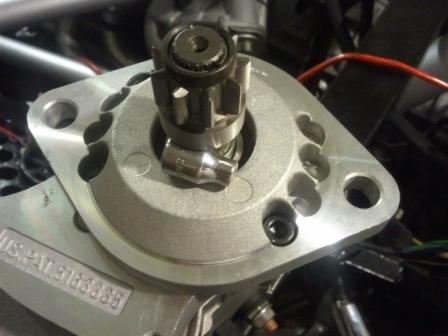
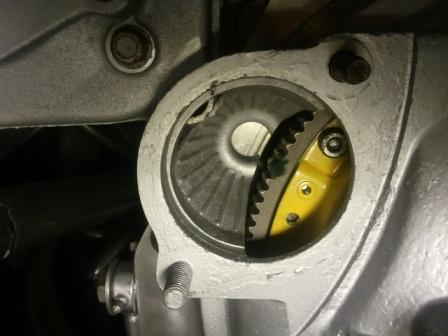
I found position "2" the best one for starter engagement
Of course that one required a mod to make clearance for the 17mm nut
Since I hadn't aligned a starter pinion that I couldn't see before, I used grease to display the clearance to the flywheel I just filled between two teeth on the pinion, installed, removed and measured the remaining grease with wire guage - worked like a champ
While I'm waiting for wire tubing, I'm going to finish the brake system.
I've wondered about the coolant tube crossing the engine bay. It's a bit distracting. What about running it along the side and rear and painting it black?
Regarding the coolant tube, it does need to enter the engine bay at that point due to the wheelwell liner. I know what you mean but with the exhaust behind the water pump, I'd still have to come in at an angle from the back corner. Good suggestion though so it's going on the upgrade list for future tweaks.
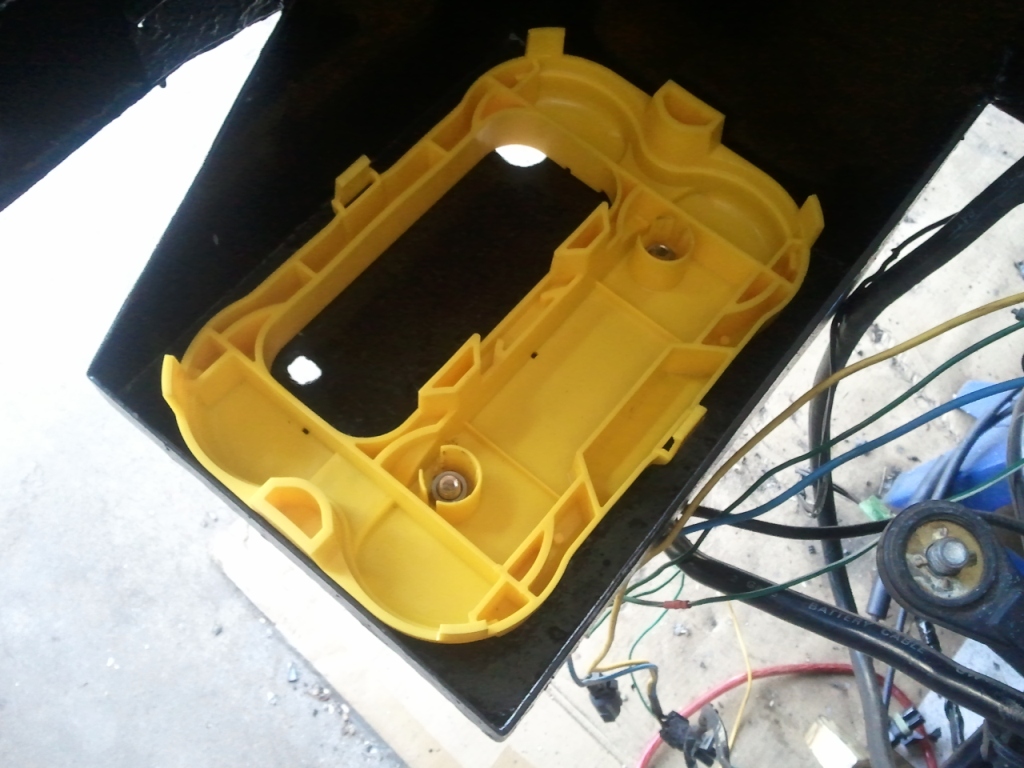
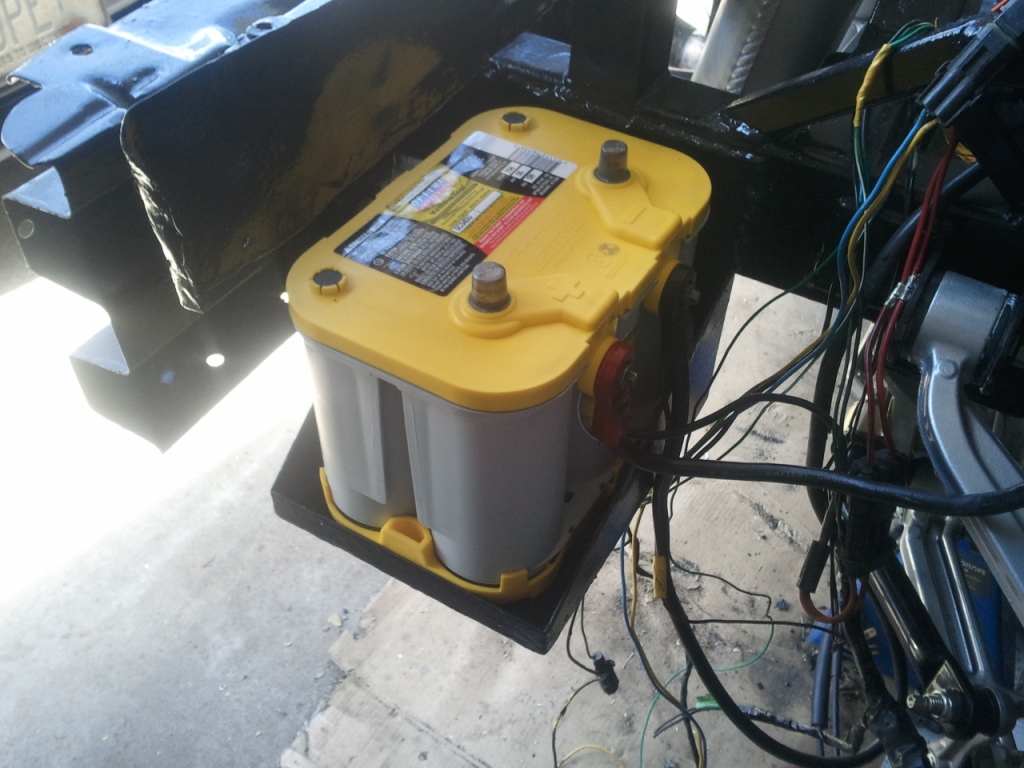
Bolted the battery base in place:
I went with a new yellow top for the benefit of the Alpine amps:
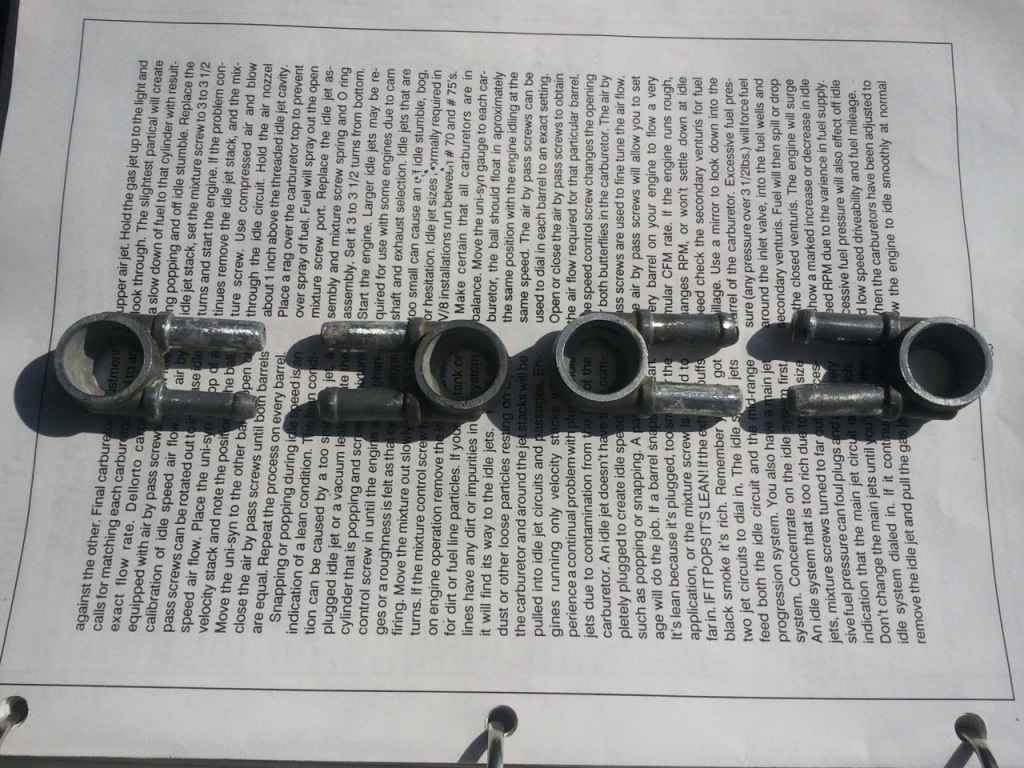
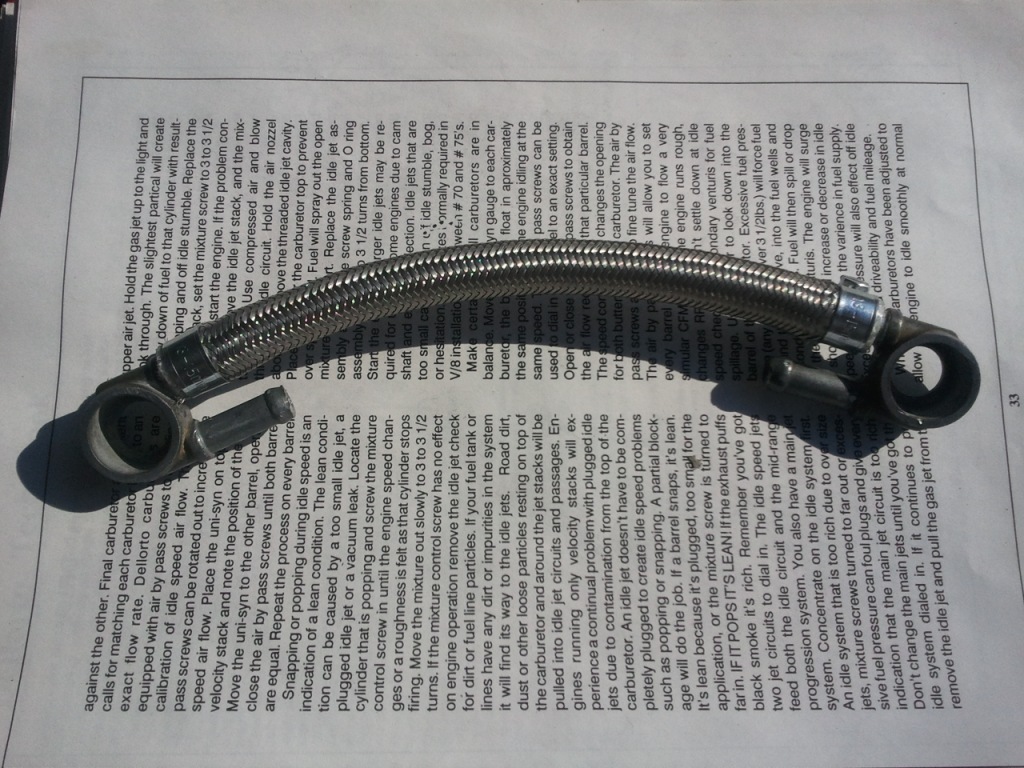
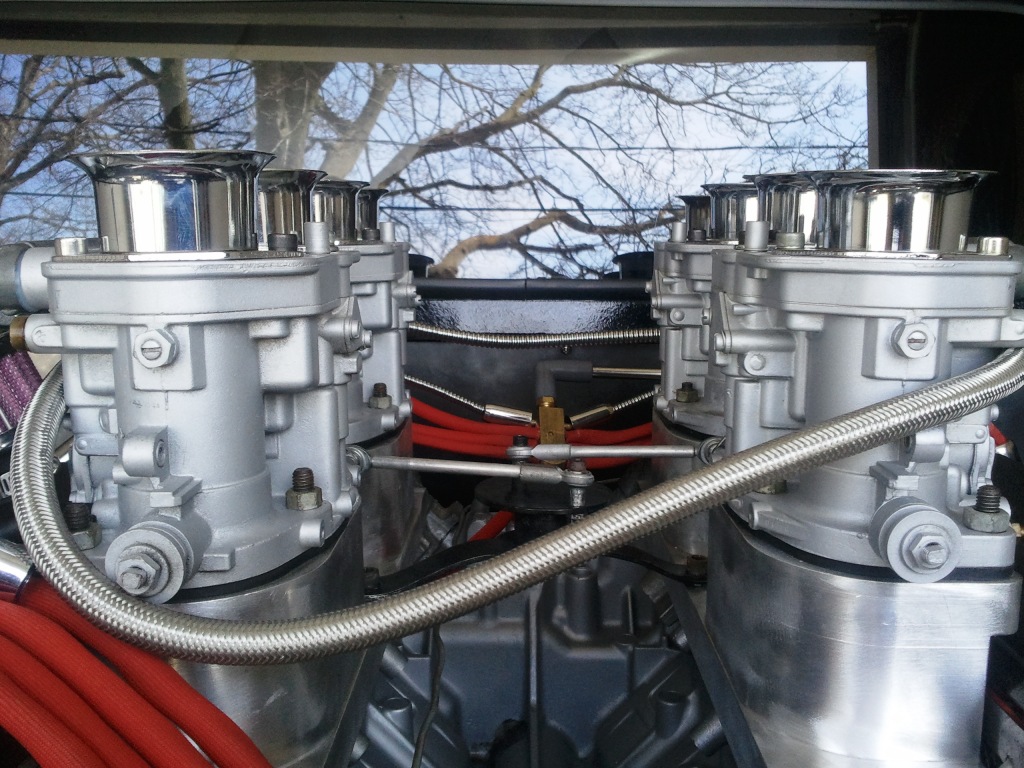
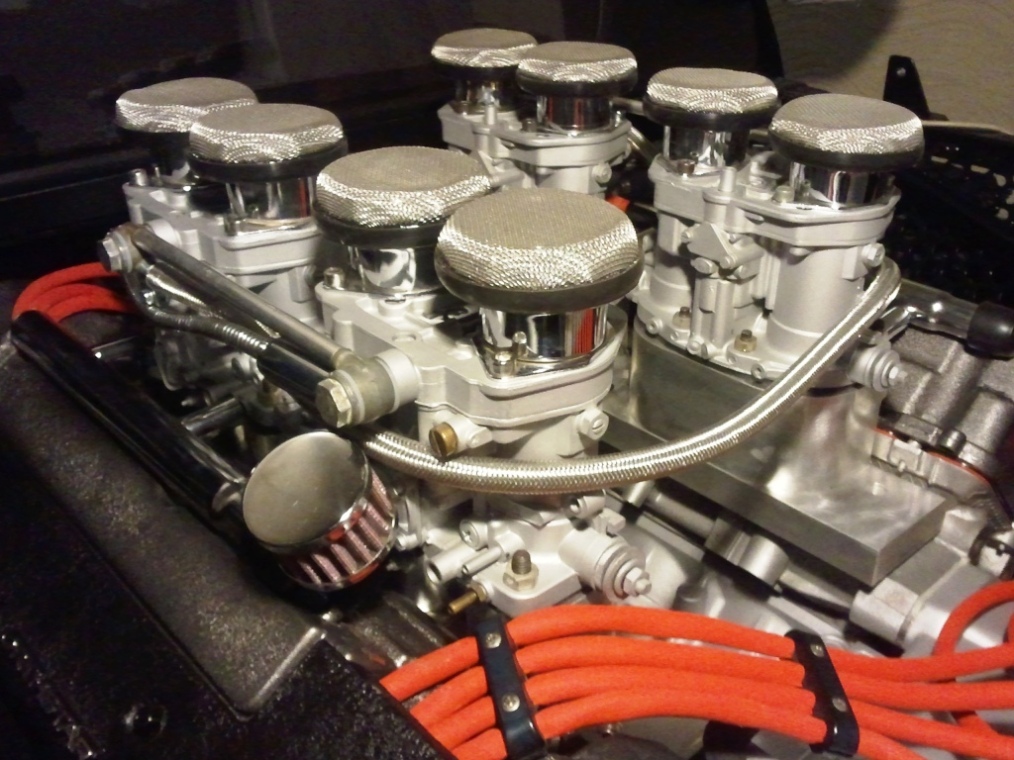
I developed a couple fuel leaks and traced it back to the aluminum tubes between carbs.
I couldn't remove the tubes without damaging them, so I switched over to stainless flex hose to connect the 2 carbs per bank:
My MSD coils finally arrived Friday so there were swapped over as well:
Well I had one of those days where you end up behind where you started. First I adjusted the throttle linkage as it was sticking and I needed to roughly balance both banks:
While trying to sync the carbs, I found a few intake leaks proving the Cadillac gaskets do not work I pulled the intakes off and I'm going to need another solution which will probably involve a paper gasket with fuel friendly RTV gasket silicone:
When you're frustrated, best to take a breather or switch to another task. I switched gears to the brakes and made some progress...
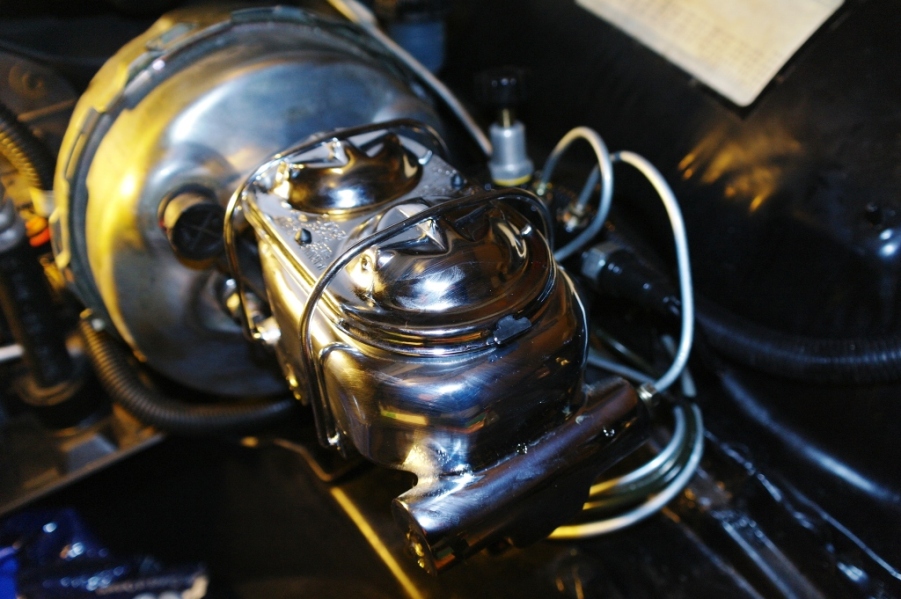
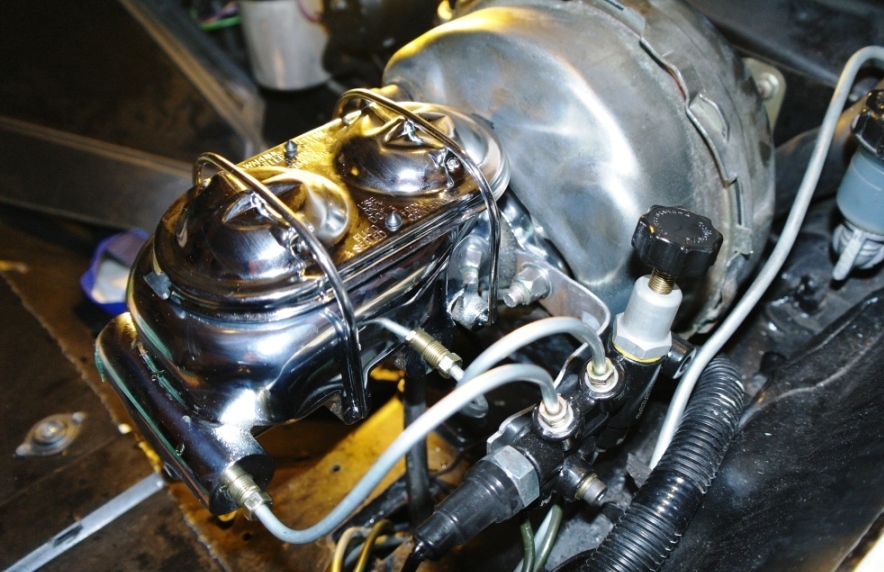
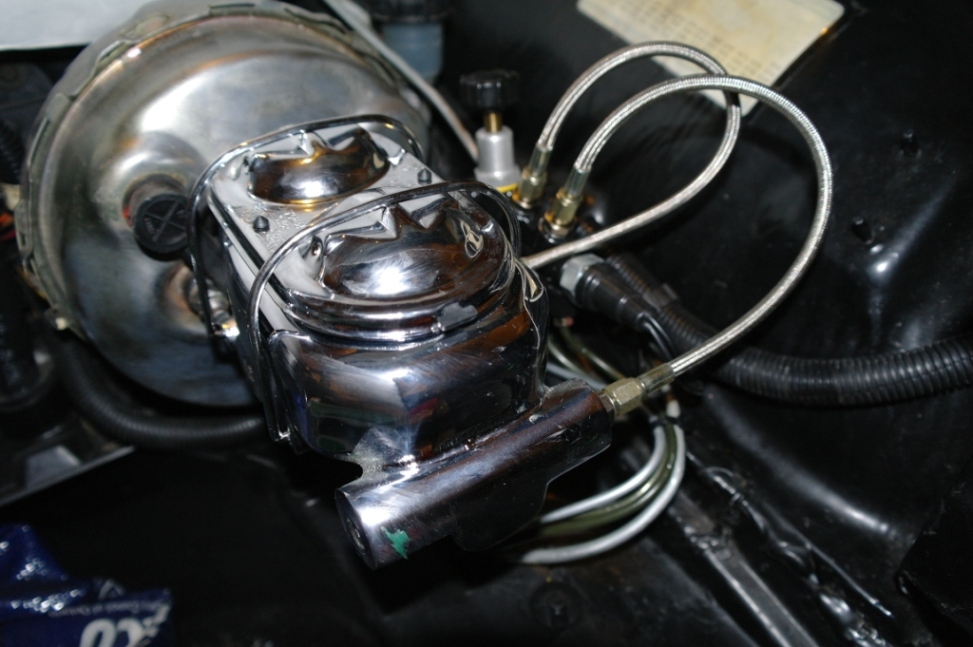
First I upgraded the Corvette Master Cylinder to a Chrome finish version:
After it was bench bled I redid the lines to the Wilwood unit with aluminum:
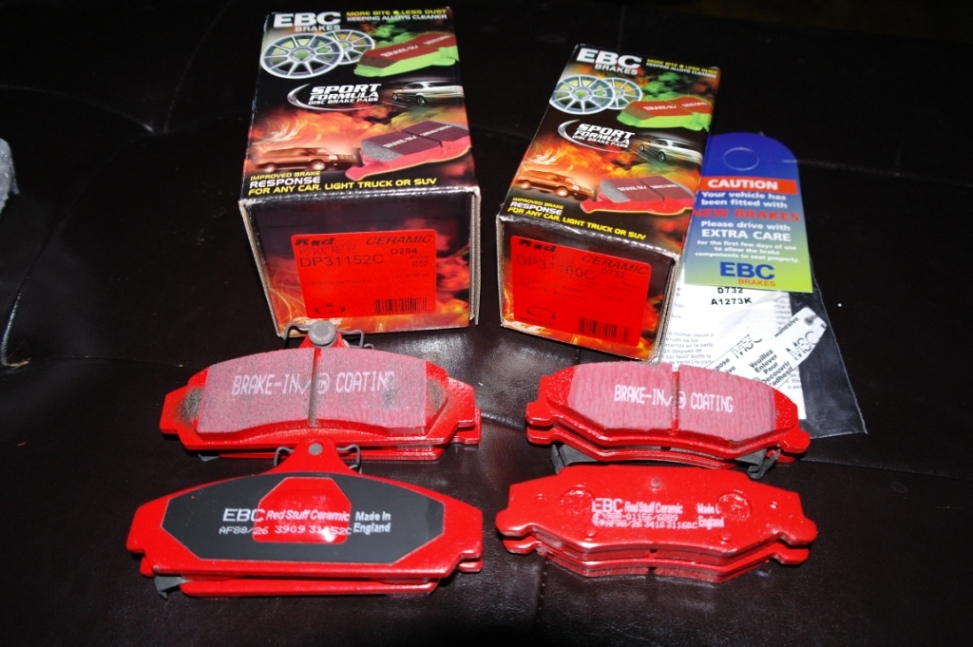
My EBC red stuff pads arrived a while ago that I chose for the low dust compound:
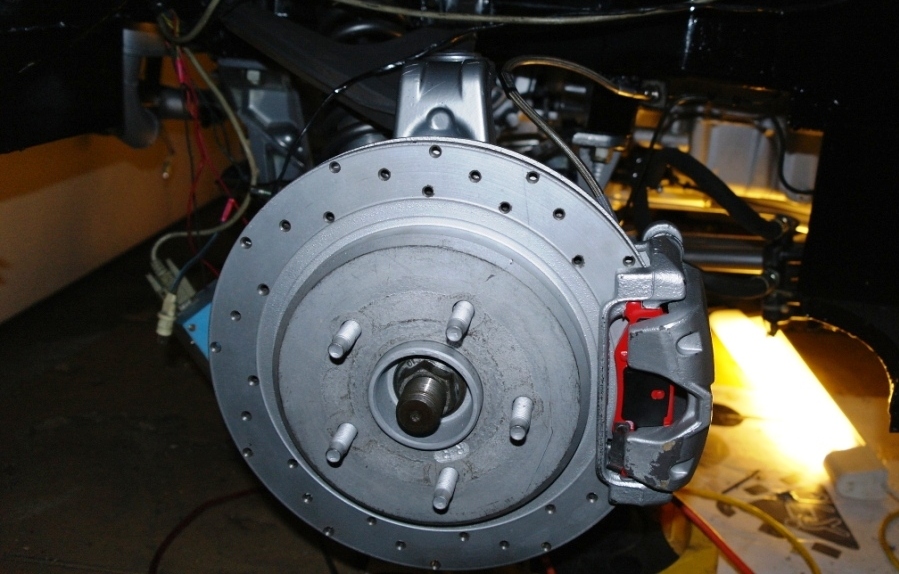
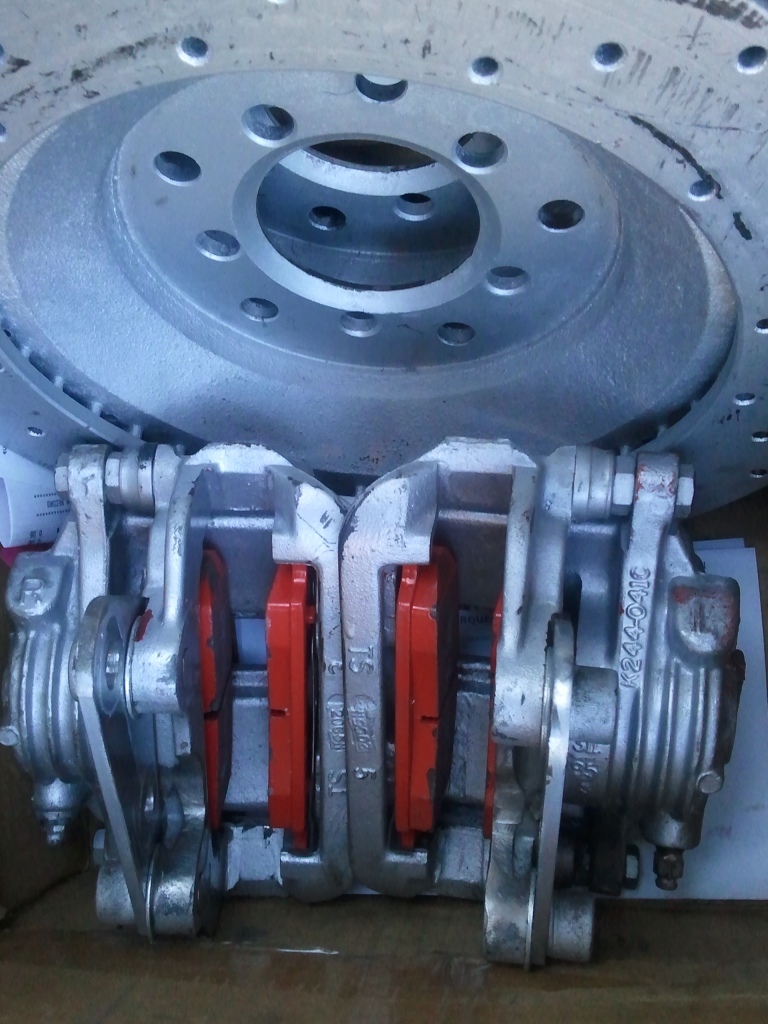
I finshed up the rears with the cross drilled rotors and Russell stainless flex lines:
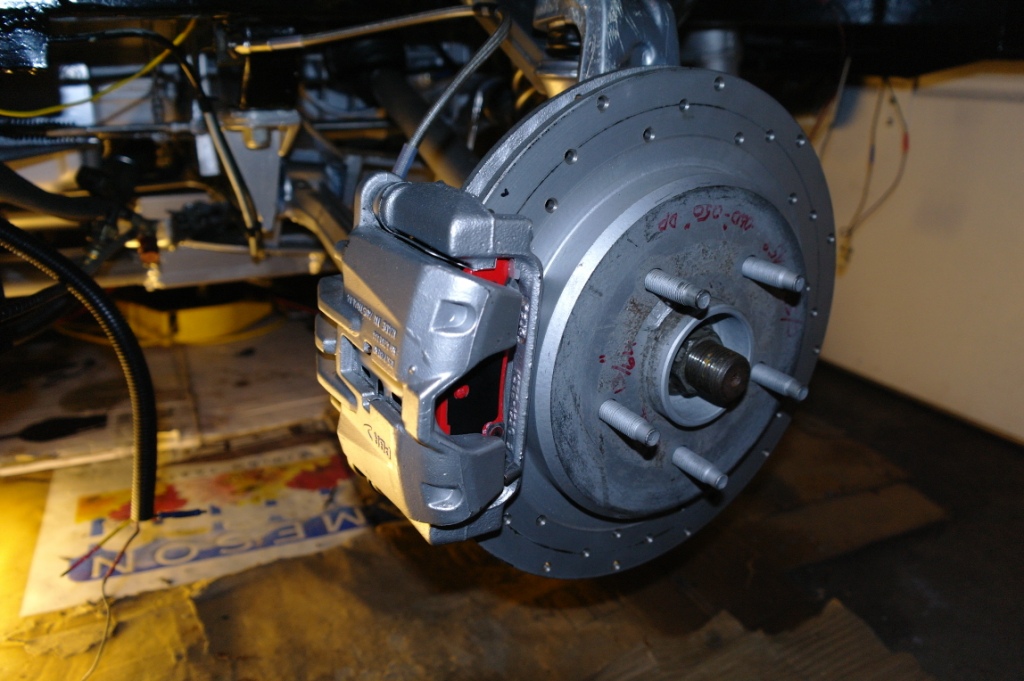
These are C5 Corvette calipers, pads and rotors:
For the C4 Corvette front brakes, I had a problem of the rotors not fitting between the pads!
I thought maybe the piston in the caliper didn't retract all the way but the other side had the same issue. It's weird because the EBC 84-87 Corvette part number is correct and they fit otherwise. I checked the stock Corvette vented rotor thickness specs and new rotors are 0.79" while minimum spec is 0.72" and my used ones are 0.77". So buying new rotors won't solve the problem either. It doesn't make sense machining new pads and no one locally had OEM pad in stock to compare pad thickness. Any suggestions how to solve this?
there are 2 diferent sets of pads for the 84 to 87 corvette the pabs you have there are for the heavy duty brakes not the standard duty brakes there is a big difference is pad thickness between the sets get the standard duty pads and they will fit other wise you will need to get these shaved to fit
Well two parts store couldn't figure out what was wrong with the pads when I brought them in with the calipers and rotors. Turns out I had the inboard and outboard pads reversed. All I could do was laugh at myself since this is really the easiest possible solution. I also learned avoid to asking technical questions at parts stores that have unknowledgable seniors, kids and women working at them.
Joe, here are the stainless lines installed - they fit great and look like a nice upgrade to me
Unbelievable. Just spent almost the whole day going through this thread. My body hurts just from reading all this, I can only imagine the pain of building it. How many years? Hours? Dollars? Amazing, my hat is off to you both, along with my shirt, shorts and rhinestone studded thong.
Originally posted by Will: I would be concerned that too much braided stainless in the system (as opposed to hard tubing) is going to compromise pedal feel.
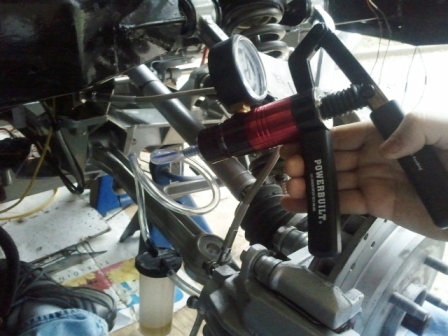
The four rubber flex hoses were replaced with stainless which should give a firmer pedal. The other two pieces are 9 inches long so I don't expect to feel a difference. I bled the brakes on the weekend - took a while to get ALL the air out of the new hard lines. I'll post how the brake road test goes will these pads, stainless flex hoses and the adjustable proportioning valve.
[This message has been edited by Fiero2m8 (edited 04-19-2011).]


 It's been a while since I checked out your thread... it's really coming together now! How much longer do you expect before you turn the key for the first time?


 I think the only reason you don't have guys lined up ten deep to buy it is that everyone is afraid they won't be able to do justice to the fine project you've started and haven't quite yet finished.
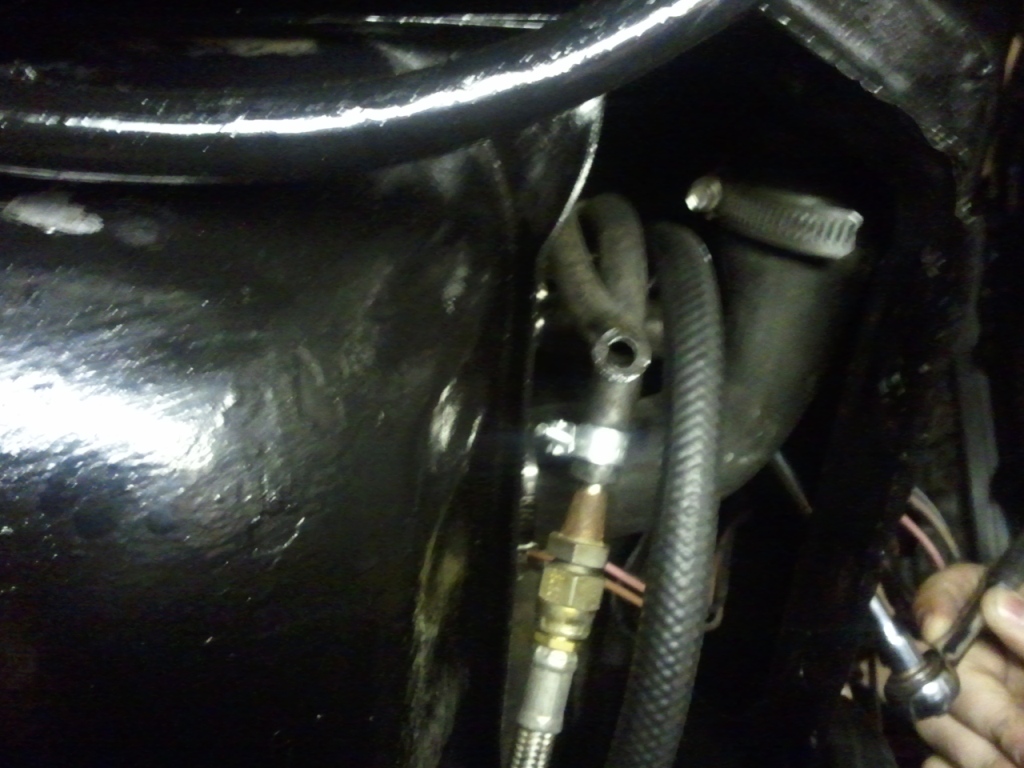


 I still remember the smell of singed eyebrows decades ago after holding the choke open with my fingers on one of my dad's cars while he cranked it!)