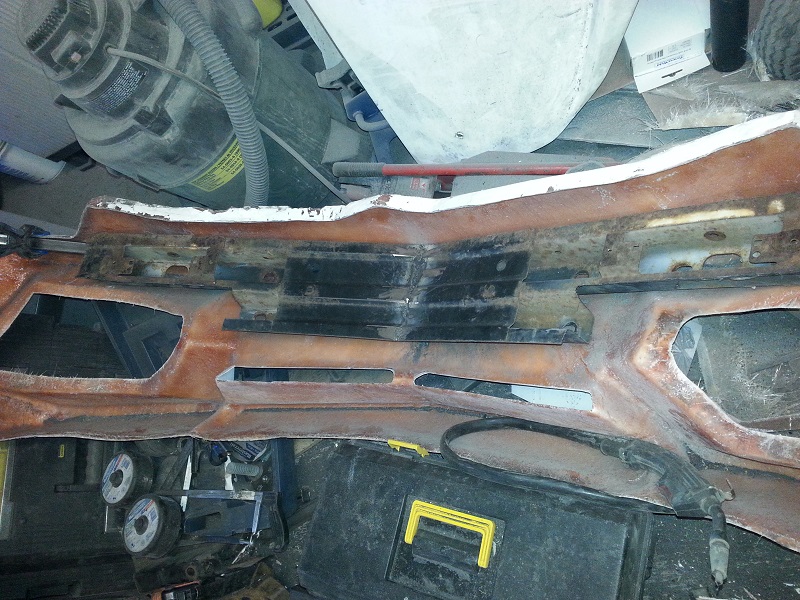
I've started adding the main structural bracing that goes across the dash (replacing the material removed to lower the dash), down the door jams, along the side skirts, then up to the roll bar and to the upper frame stretch section. I'm using 1" x 3" x 1/8" rectangular steel, which should provide the necessary additional strength required. In conjunction with the new roof cage, there should be more than enough stiffness in the body to resist flexing and compensate for any portions of the body that have been removed.
First structural member:
[This message has been edited by Neils88 (edited 11-30-2024).]
Fair bit of work completed today. Finished the driver's side structural framing, and got part way through the passenger's side. I'll be using the structural framing as the connection point for all the panel framing. Much easier to weld to it than the spaceframe since it is all 1/8" steel.
[This message has been edited by Neils88 (edited 11-30-2024).]
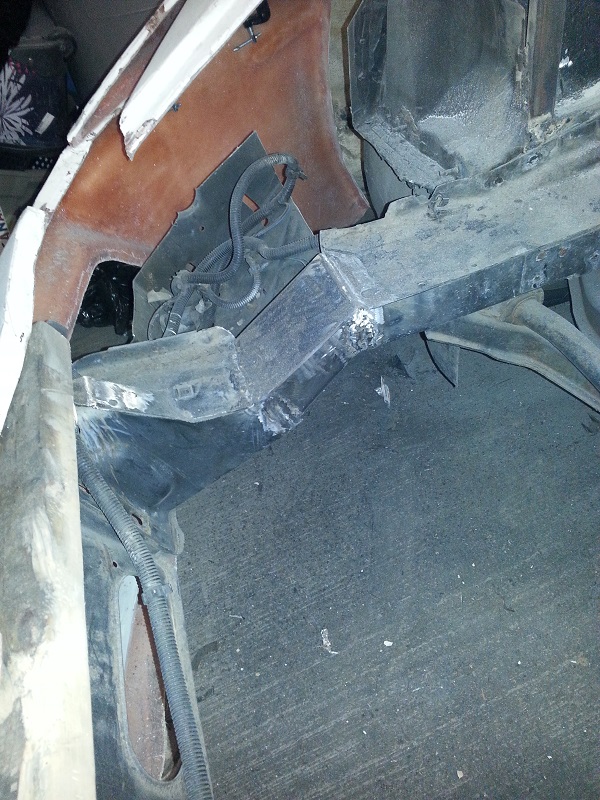
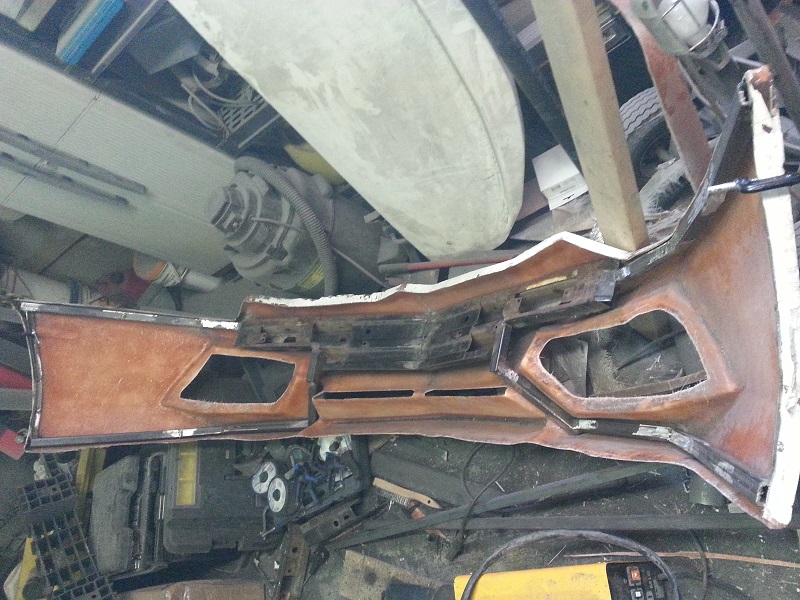
Finished up with the passenger side structural work, and also fitted the rear hatch supports. These consist of two beams that go from the roof framing towards the rear of the car. Right now they are level, but once I confirm the exact location required for the roof structure (it's still loose since I need make sure everything ends up correctly located with respect to the wheel wells), then I'll be able to form them to the correct angle and secure them just behind the shock towers. These beams won't be connected to the hatch, they will simply be a resting point for when the hatch is closed, with some height adjustable rubber supports that will help ensuring the correct alignment of the hatch. I'm also planning on some fiberglass edge trimming internal to the engine compartment duplicating what is found in the real Aventador engine compartment (keeps thing tidy and pretty. ), of course these will be attached the beams as well.
[This message has been edited by Neils88 (edited 11-30-2024).]
Received a box load of the smaller parts today. Mirrors, grill housings, gas fill cover, rear light moldings, gauge pod and some interior trim pieces. It's like Christmas!
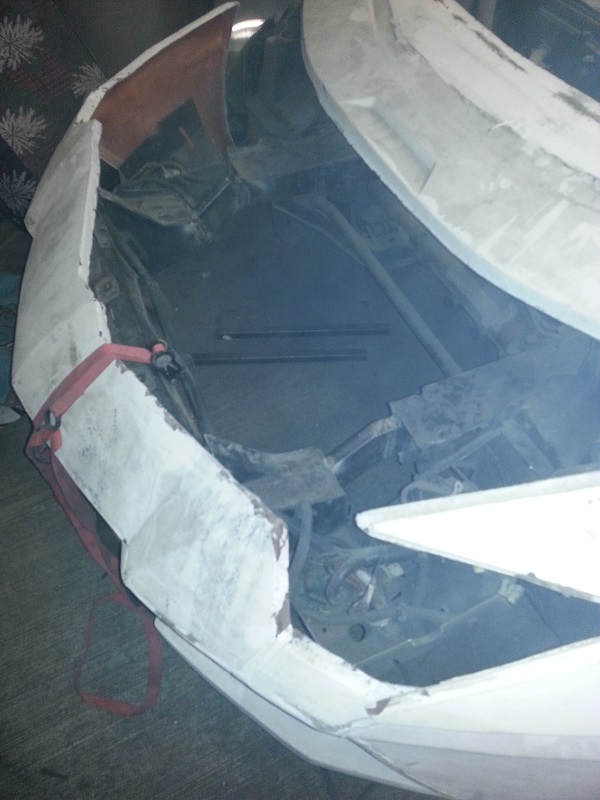
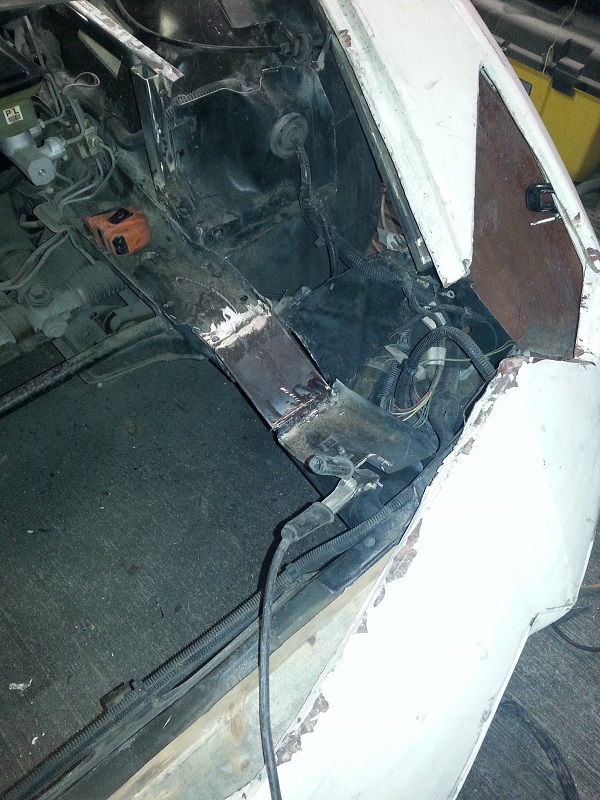
I did a little work on the front end today. I adjusted the front support so that it will be at the correct height for the front bumper molding and the hood latch etc. I welded in two angled extension pieces to get the right angle and connect the front support to the spaceframe. I'll also add the metal bumper rail at the very front. I'll be creating a large forward trunk box to fit into that open area between the rails.
(sorry for the smoky pic. I'll try to take a better one later)
Nice picture showing the gauge pod sort of in the right location. The dash will be trimmed for it so sit low down and in the correct spot. But for now, you get the idea.
Next up is the new front structural members that connect the structural cross brace to the forward A-pillars and provide structural supports for the door hinges.
[This message has been edited by Neils88 (edited 11-30-2024).]
Here's a better pic showing the two angle supports used to lower the forward part of the frame rails. I'll be boxing in the frame rails to give it a stock look.
[This message has been edited by Neils88 (edited 11-30-2024).]
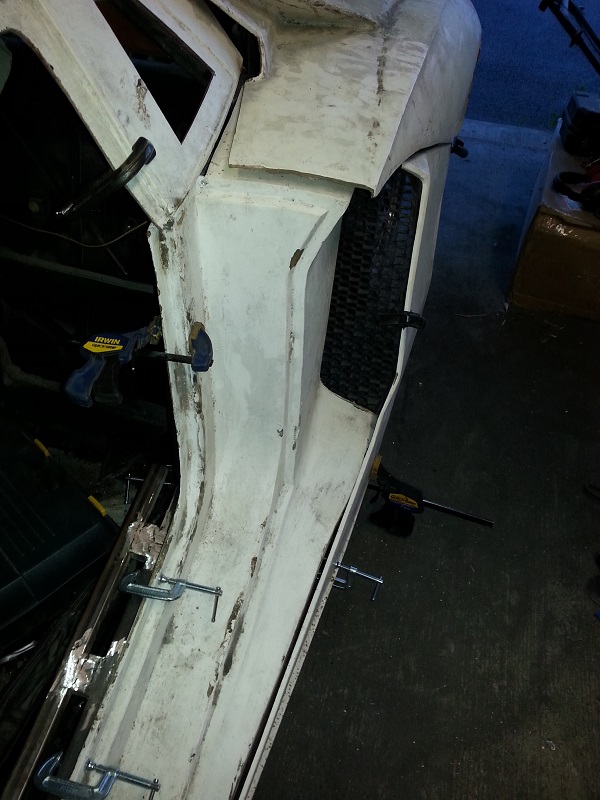
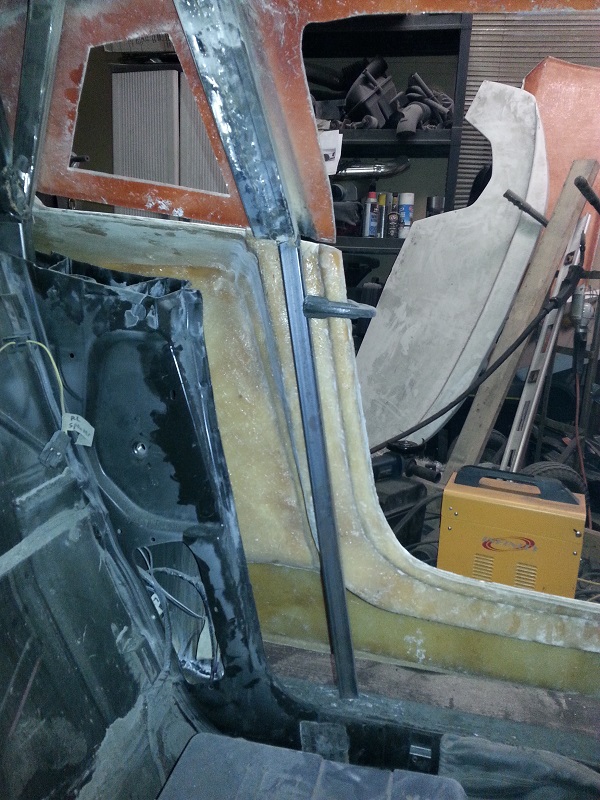
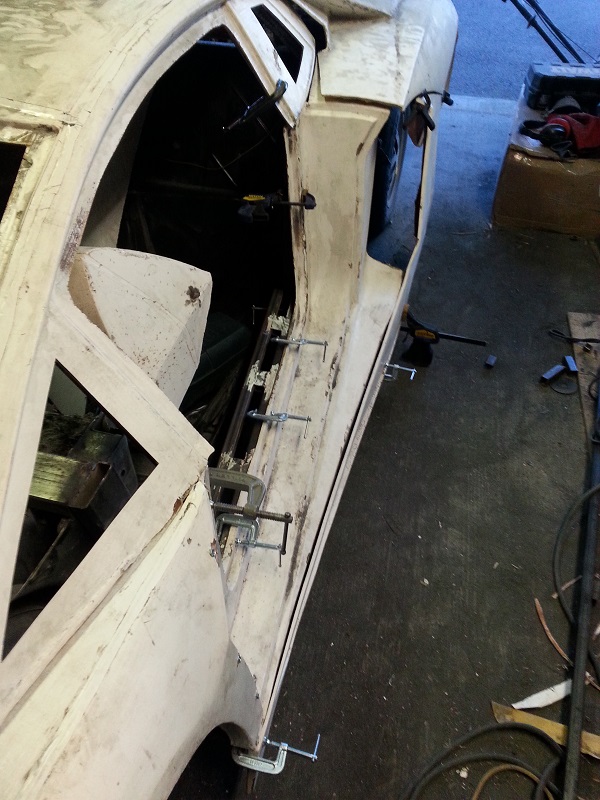
I started to look at the fender / A-pillar / door jamb area. It's a complicated area to get everything aligned and structurally sound. Three panels come together at that one point. I started by welding two vertical supports, one to the rear portion of the A-pillar and the other to the forward part of the B-pillar. This allows the door surround panel (i.e. the panel that completes the door opening) to be properly positioned which is great for alignment of the door jamb area. I next made a curved beam that supports the front fender from the A-pillar vertical support all the way to the front bumper support. (I'll post some pics in a day or two). Once I get everything aligned and welded, I'll repeat it on the other side.
I finally got around to posting a few pics to show some of the work done in the last couple days. Slow progress, but still feels like it is moving along steadily.
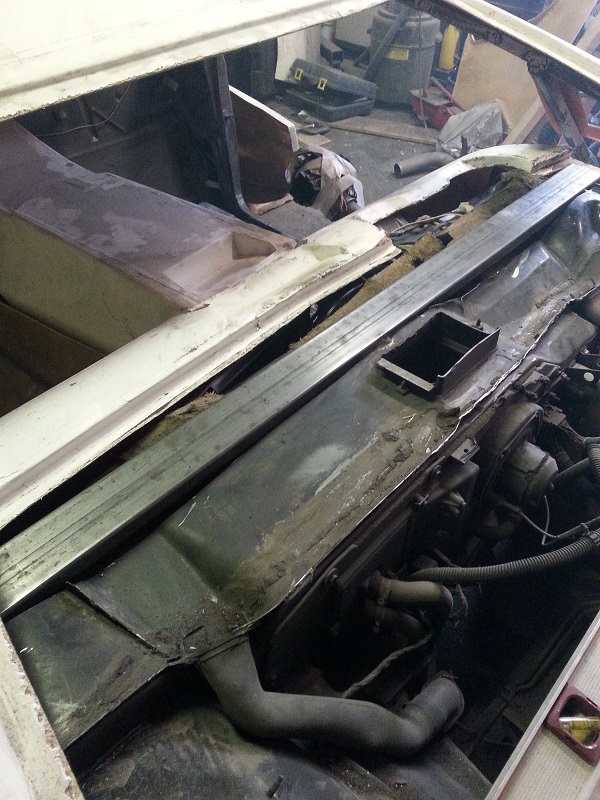
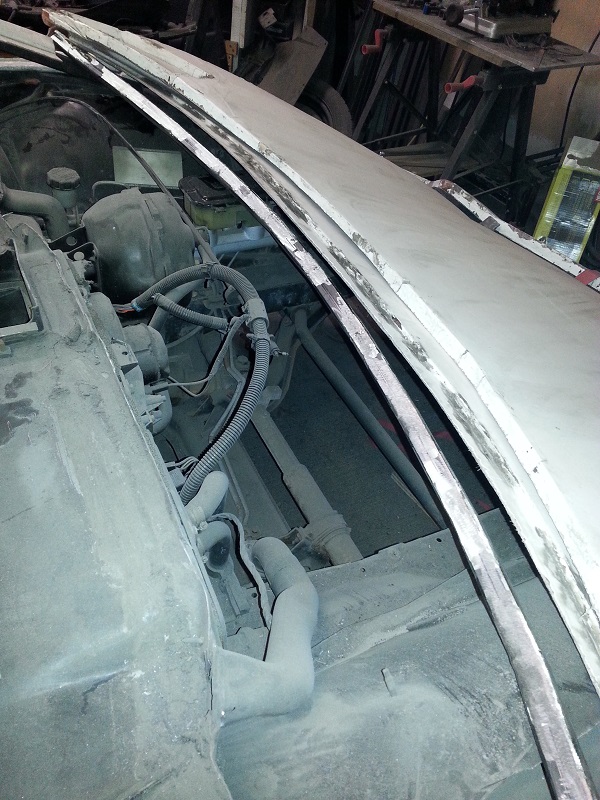
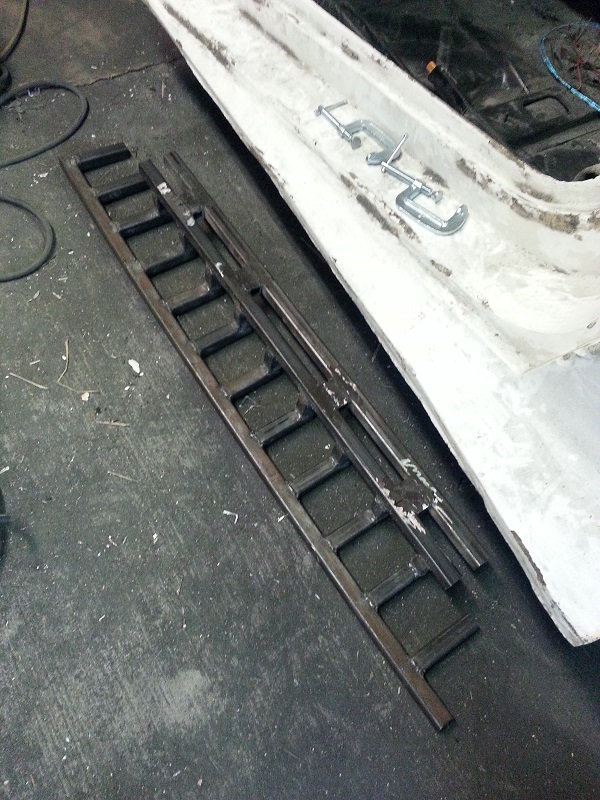
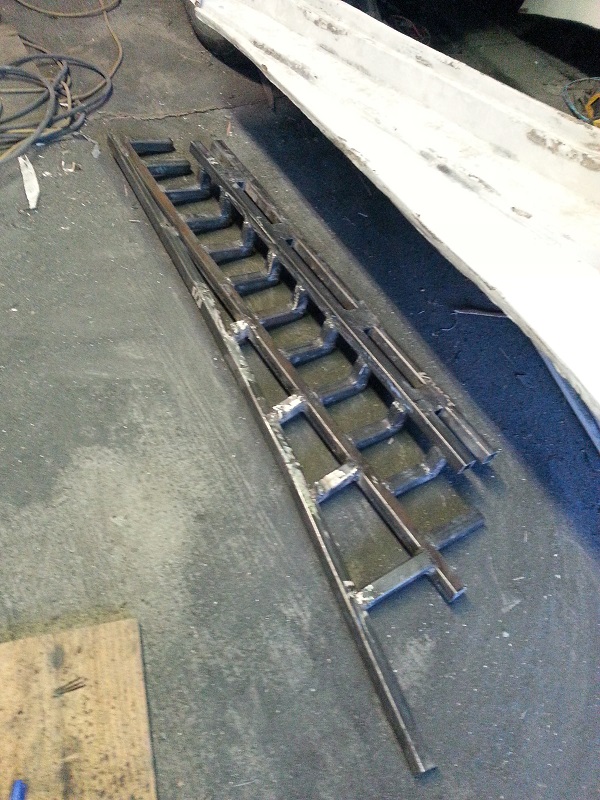
I took some time to create a beam that supports the bottom of the windshield. It's a compound curve. I find the best way to do them is to make a series of slits (3/32" cut-off disk) every 6" or so (depending how tight the curve is) along one side of the beam. The cut is deep enough to slice completely through 3 of the 4 sides. Then you can bend the beam so that it follows the curve in one axis. Pick one of the two sides adjacent to the side that was not cut and carefully weld all of the cuts along that side (I start by tacking all sides to stop any unwanted movement). Once all the cuts on that one side have been welded, you can use the cut-off disk to cut slits in the three other sides. Two sides already have slits, but since the beam has been bent at each of the slits the cut-off disk will end up widening the cuts, plus the previously uncut side gets cut at the same time. Now you can follow the same procedure and bend the beam in the other axis, tack and weld.
The pic shows the support beam roughly where it will end up. It will be aligned and welded to the A-pillars.
I'm also starting to build up the support structure for the side panels. The next three pics show how the side panels are actually angled front to back. This will require a significant structure to ensure it is completely rigid since anyone getting in or out of the car will have come in contact with the panelling just to get by. The support structure will also hold the door latches and door hinges.
[This message has been edited by Neils88 (edited 11-30-2024).]
Just my 2 cents from what i've seen over the years:
quote
Originally posted by Neils88:
This project has been divided into three parts:
1) Initial engine swap. I just couldn't leave the Iron Duke in this, so I decided to start the project by installing a 4.9L V8. This ensured that I would at least have a little horsepower once the body kit was completed. It actually also helped me learn more about the Fiero since this is the first one I've owned.
Exactly. The best way to start and where most guys make a big mistake.
quote
Originally posted by Neils88:
2) The body kit. This is the main part of the build and the focus of this thread. I am planning on keeping the build as close to the real Aventador as I can, but reserve the right for some artistic license when required.
Now you're starting to scare me. This is a BIG undertaking that most guys (including me) badly underestimate. Forget accuracy and keep things moving along. it's EASY to get wound up in details, the project stalls and before you know it you're out of energy and ambition.
quote
Originally posted by Neils88:
3) Longitudinal engine swap. Once the body kit is finished, I plan on taking advantage of the 12.8" stretch. I plan on building a new cradle for the engine, and getting the entire engine build running before actually installing it. I'm expecting the engine build to take quite a while and I don't want the car out of action longer than it has to be. Once the engine/tranny are up and running then I'll do the install during the winter while the car is parked. Ideally I'll be looking at installing a 760Li V12. Though the exact engine choice will be confirmed once I finish the body kit and can get accurate measurements.
HUGE bad idea. Get it done and enjoy it. Something this exotic is a near guarantee that all the time, effort and expense you put in so far will end up as an unfinished project on Craig's list.
Just my 2 cents from what i've seen over the years:
HUGE bad idea. Get it done and enjoy it. Something this exotic is a near guarantee that all the time, effort and expense you put in so far will end up as an unfinished project on Craig's list.
I appreciate your advice. Definitely some good points. But I think you may have misunderstood Phase 3 of the project. When I reach Phase 3, the car will be finished and I will be out having fun with it. I plan on building the engine on a new cradle and getting it to the point where it is up and running, completely independently of the Aventador. I will definitely not be touching the Aventador until the engine/transmission is completely 100% ready to be installed...and then it will go on only during the winter, giving me about 6 months to get it finished before spring (other than tuning, which obviously needs to be done while I can drive it). If for some reason I cannot complete the build of the longitudinal engine (for whatever reason), then this won't impact the Aventador since it already will be on the road.
Another thing....I have severe osteoarthritis in my back. I use projects such as this for therapy. It keeps me active. For me, the process of building something like this is almost more fun than the end result. I don't have any time limit for completing the project. As a mechanical engineer, I am really looking forward to doing the engine build. Have faith.
[This message has been edited by Neils88 (edited 07-18-2015).]
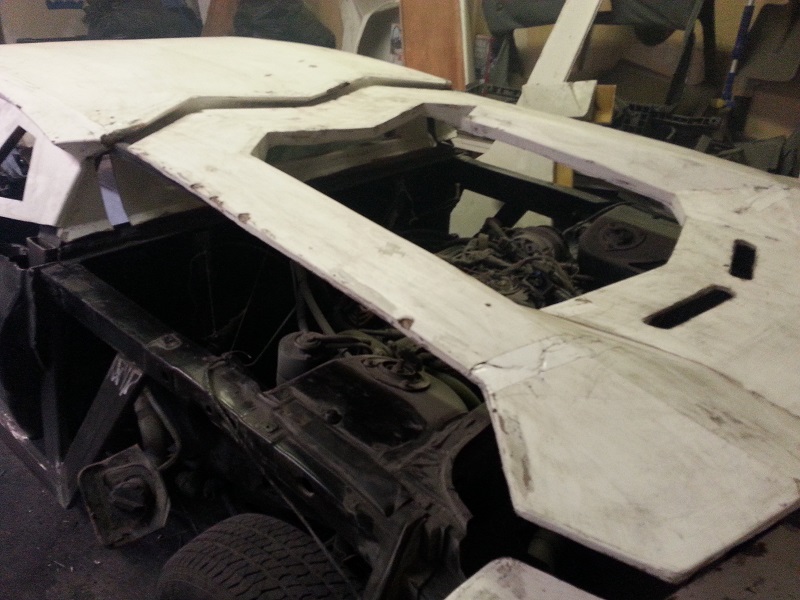
Finished up the windshield framing today, and also got the roof framing lined up (finally) and tack welded in place. I won't completely commit to welding the roof in place just yet I have a little flexibility of alignment with the front fenders, but not much flexibility on the rear fenders. I want the rear fenders framed in and bolted in place before I do the final welding.
The pics below show the lower windshield support welded to the A-pillars, plus the two vertical stiffeners (second pic) that ensure the windshield support stays at the exact location required with respect to the front framing. The last pic shows the lower fiberglass panel and the windshield in place. The windshield fits cleanly with no gaps.
[This message has been edited by Neils88 (edited 11-30-2024).]
I appreciate your advice. Definitely some good points. But I think you may have misunderstood Phase 3 of the project. When I reach Phase 3, the car will be finished and I will be out having fun with it. I plan on building the engine on a new cradle and getting it to the point where it is up and running, completely independently of the Aventador. I will definitely not be touching the Aventador until the engine/transmission is completely 100% ready to be installed...and then it will go on only during the winter, giving me about 6 months to get it finished before spring (other than tuning, which obviously needs to be done while I can drive it). If for some reason I cannot complete the build of the longitudinal engine (for whatever reason), then this won't impact the Aventador since it already will be on the road.
oooops. You're right. i didn't get that. Good plan.
quote
Originally posted by Neils88:
Another thing....I have severe osteoarthritis in my back. I use projects such as this for therapy. It keeps me active. For me, the process of building something like this is almost more fun than the end result. I don't have any time limit for completing the project. As a mechanical engineer, I am really looking forward to doing the engine build. Have faith.
very sorry to hear about your back. But if you need another project, i can definitely help you get more therapy .
oooops. You're right. i didn't get that. Good plan.
That's ok. You see it all too often that people bite off more than can chew and don't realize the complexity of the work. I'm hoping that by documenting it, people who want to build a kit like this will see how much work it really takes. You definitely need a range of skills, determination and patience. You are also correct about not getting caught up too much in the details. That's why certain parts of the build will be primarily focused on functionality and aesthetics, without duplicating the real car, i.e. poetic licence.
quote
Originally posted by PaulJK:
very sorry to hear about your back. But if you need another project, i can definitely help you get more therapy .
You'll have to get in line. My wife wants a Ferrari....
Finished up the windshield framing today, and also got the roof framing lined up (finally) and tack welded in place. I won't completely commit to welding the roof in place just yet I have a little flexibility of alignment with the front fenders, but not much flexibility on the rear fenders. I want the rear fenders framed in and bolted in place before I do the final welding.
The pics below show the lower windshield support welded to the A-pillars, plus the two vertical stiffeners (second pic) that ensure the windshield support stays at the exact location required with respect to the front framing. The last pic shows the lower fiberglass panel and the windshield in place. The windshield fits cleanly with no gaps.
Hi! How would you address working with the brake and clutch components down there. By the way nice work!
Hi! How would you address working with the brake and clutch components down there. By the way nice work!
I intend on having two removable panels. The first will be one of the "trunk" walls that will be adjacent to (just forward of...) the brake master cylinder. The second will be part of the fiberglass panel directly above the brake master cylinder. This will allow access, but it will still be a little tight. The key things I factored into this were routine maintenance such as opening the reservoirs while topping up fluids and more major repairs such as complete replacement of the brake master cylinder. I also will require another removable panel at the back wall of the trunk should I need access to the HVAC components. I will try to make the panels as inconspicuous as possible.
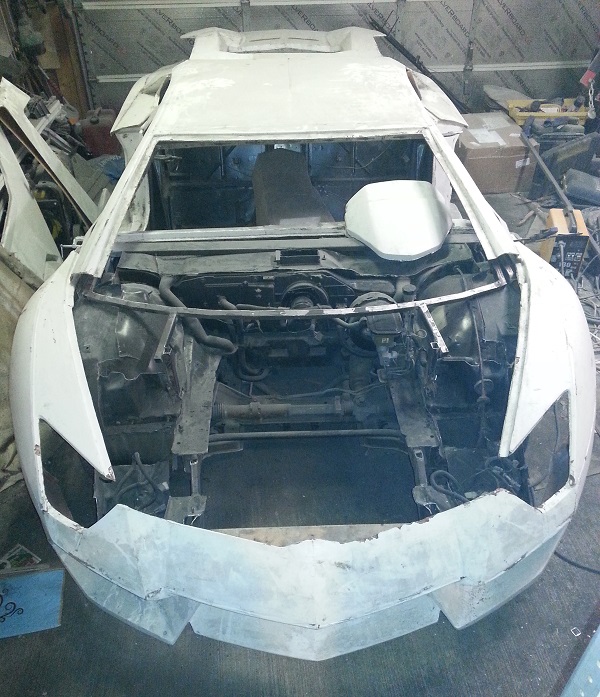
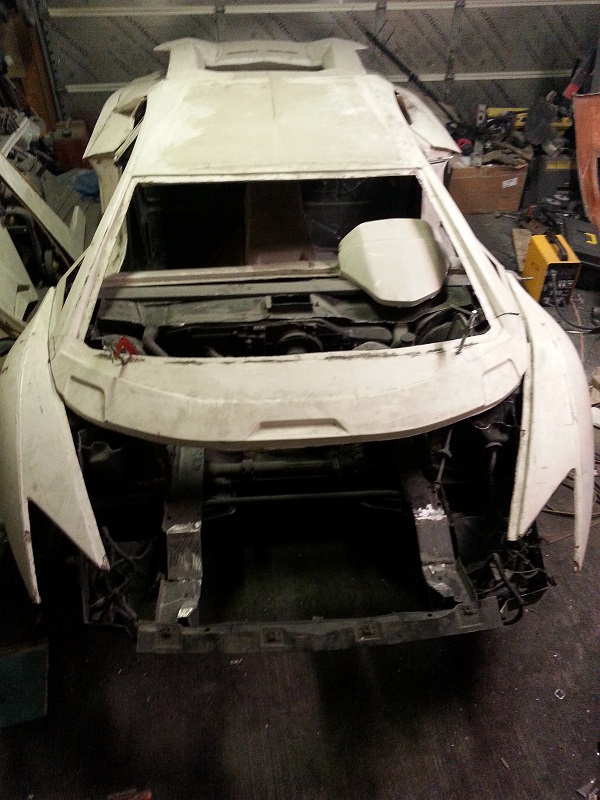
Here's a pic showing the alignment of the front fenders and bumper. The support framing is starting to get a little easier as the pieces get lined up. Hopefully I'll make some more progress this week.
[This message has been edited by Neils88 (edited 11-30-2024).]
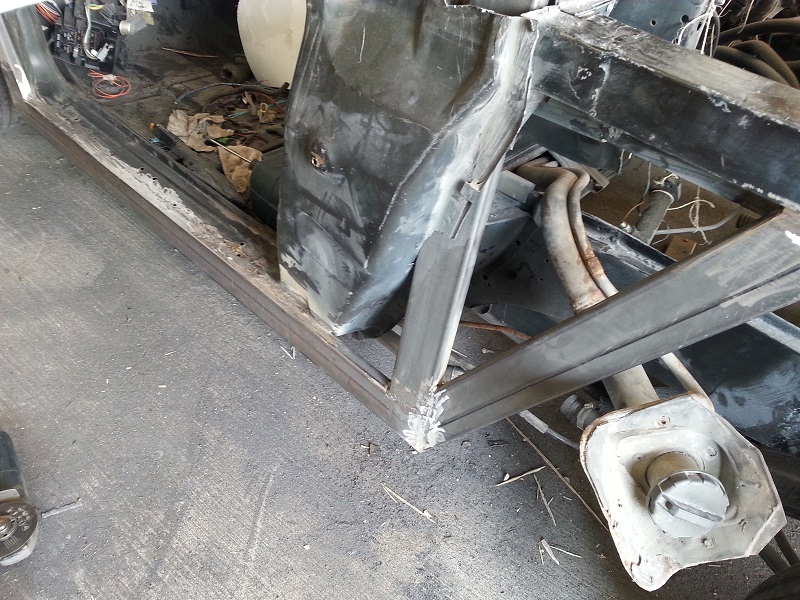
Started to box in the cut sections of the front frame rails. Another part that probably will never be seen by anyone, but I hate leaving things undone.
[This message has been edited by Neils88 (edited 11-30-2024).]
Finished boxing in both of the front cut frame rails. Eventually everything will get painted.
I'll be building a nice trunk as soon as I pick up some sheet metal.
The pic shows the fender alignment is getting closer, but I still haven't built the framing under the fenders and the front bumper. Once the framing gets done, I'll be able to bolt these panels in place. I'll try to set them up so that I am able to make fine adjustments to panel positioning.
[This message has been edited by Neils88 (edited 11-30-2024).]
The kit had the corner vents integral to the hood. However this made the hood a little too long to open properly with normal hinges. I decided to remove the two corners of the hood like they are on the real Aventador. I'll put an opening in the fiberglass below and build some small vents to cover the openings. The shorter hood will definitely open better.
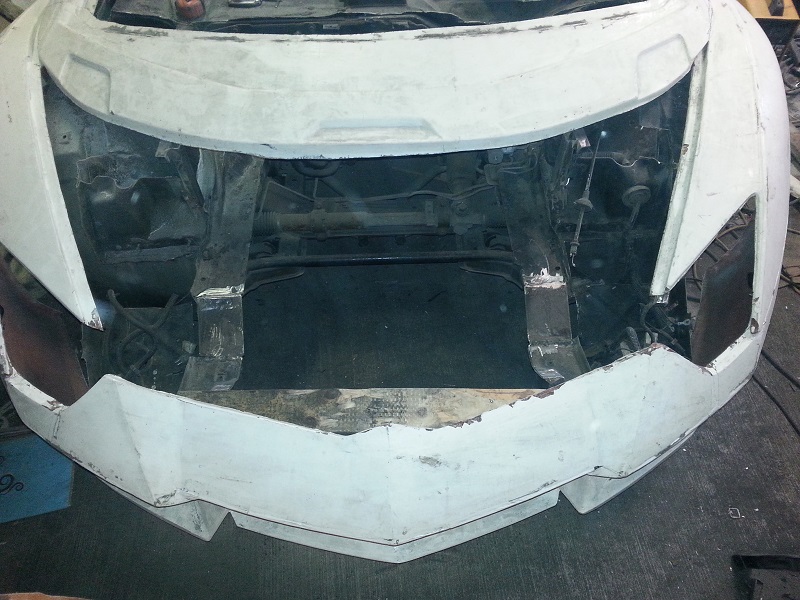
I've removed the front bumper molding temporarily to build an inner frame.
I've adapted the metal from the Fiero bumper to fit inside the Aventador bumper molding. I'll add some brackets to allow me to align the bumper when securing it back to the front of the car.
I'll be adding some select framing. It'll be a balance between strength, weight and support. The fiberglass is quite thick, so I won't need as much support as originally expected. This will help keep the weight down. The top frame is required to allow the fenders to be bolted to the bumper molding, again with the ability to adjust the panel alignment.
[This message has been edited by Neils88 (edited 11-30-2024).]
Sorry for the busy picture...had the front bumper sitting in a messy area of the garage while building the internal framing (pieces of dead Fiero everywhere ). I've integrated the front bumper into the framing. Of course the Aventador is significantly wider than the Fiero. Next step will be the adjustable brackets giving fine control of the panel alignment.
This also raises the issue of how exactly to secure the fiberglass panels to the framing. It needs to be a strong enough bond so that there is no obvious movement throwing off the alignment between panels, while taking into account the different thermal expansion properties between steel and fiberglass. The plan is to use a combination of an adhesive, layers of fiberglass where possible and appropriate and mechanical fasteners, again, where possible and appropriate.
[This message has been edited by Neils88 (edited 11-30-2024).]
I'd like to give a special shout out to Glenn, down in Rhode Island (GlennGdman on PFF). I wasn't around to work on the car over the weekend, since my wife and I were off on a road trip over to Boston. At Glenn's invitation, we took a side trip down to Rhode Island for a visit. Glenn is working on the exact same Aventador body kit, but is using a tube frame chassis instead of a donor Fiero. He's done a great job with it so far! Hopefully we'll be able to get both the cars together one day for some pics.
I ordered the rims for the car (custom drilled with 5x100 bolt pattern). They are a very similar style to one of the stock rims of the Aventador. I decided on rim sizes similar to those used by newer Corvettes. Front: 19"x8.5" Rear: 20"x10". I wasn't able to get 12" for the rear in any styles that I liked, but am happy with the size I finally ended up with since the tires will still be more than wide enough, yet the tires will remain somewhat affordable.
These are the M580 Bespokes from Avant Garde.
Arraut Motorsports will be custom fitting the necessary lowered widetrack suspension once the rims (and tires) arrive.
[This message has been edited by Neils88 (edited 11-30-2024).]
I'd like to give a special shout out to Glenn, down in Rhode Island (GlennGdman on PFF). I wasn't around to work on the car over the weekend, since my wife and I were off on a road trip over to Boston. At Glenn's invitation, we took a side trip down to Rhode Island for a visit. Glenn is working on the exact same Aventador body kit, but is using a tube frame chassis instead of a donor Fiero. He's done a great job with it so far! Hopefully we'll be able to get both the cars together one day for some pics.
Neil,
It was nice to meet you and to talk "car" for a few hours.... It is nice having someone else to work hings through on the build!! Love the rims you chose, I am calling them to have your order shipped to a new address... HA
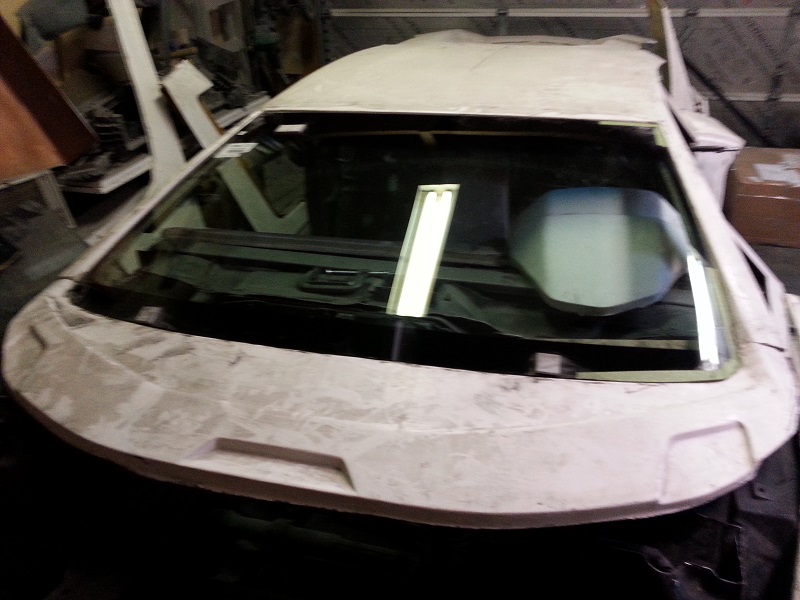
What are your plans for the bottom edge of the windshield? The OEM one comes closer to the hood and the Infinity one stops shorter....
It was nice to meet you and to talk "car" for a few hours.... It is nice having someone else to work hings through on the build!! Love the rims you chose, I am calling them to have your order shipped to a new address... HA
What are your plans for the bottom edge of the windshield? The OEM one comes closer to the hood and the Infinity one stops shorter....
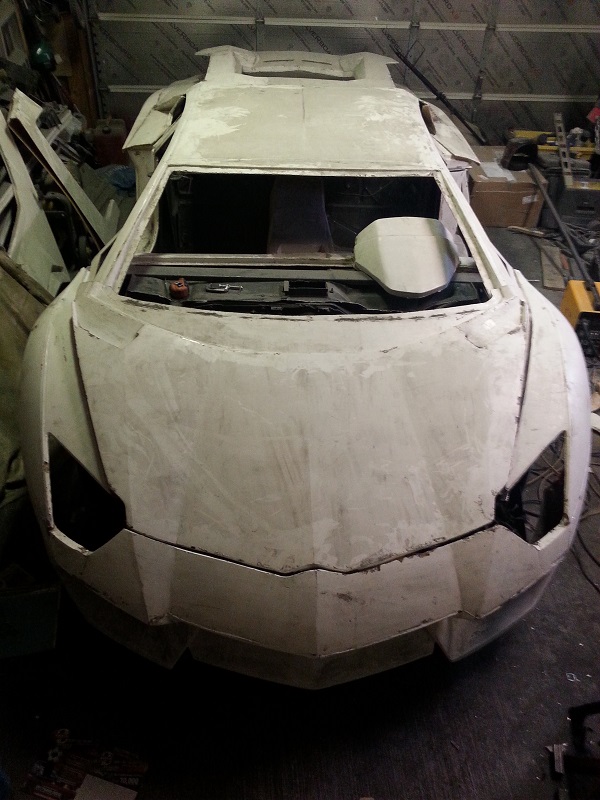
As you can see from the pic below, the fiberglass molding (the part you didn't get with your kit) is designed for the complete Infiniti windshield surround. There is a an extra "filler piece" where the OEM windshield would have gone. I plan to keep that piece the same colour as the hood so that it will blend in (as it does in the pic). I will also mount the wiper arms low down along that piece (assuming it looks good once I test fit them there). Of course it might end up being better to paint that lower section black so that it blends in with the bottom of the windshield... I think I'll be playing with photoshop later.
[This message has been edited by Neils88 (edited 11-30-2024).]
After a 3/8" transverse realignment of the front part of the roof frame, I tacked the A and B pillars in place (right now the roof frame is just sitting on these 4 points). I continued with the front bumper alignment, but noticed that the wheels no longer seemed properly centered in the wheel wells. I re-measured the wheel well alignment and discovered that in all the previous efforts to get the correct transverse alignment, I had somehow allowed the roof frame to shift forward about 7/8". I cut the tack welds and shifted the roof frame back. Hopefully this completes the roof frame alignment.
...now back to aligning the front bumper...
[This message has been edited by Neils88 (edited 11-30-2024).]
I must have been really tired a couple of days ago when I detached and realigned the roof. I started work on the bumper again yesterday, and something didn't seem right. Somehow I shifted the roof 7/8"...in the wrong direction. I moved it forward to where it should be and tacked the A-pillars...I won't bother tacking the B-pillars yet....
I secured a 1"x3" (1/8") cross beam to the forward frame members, set up to allow for small transverse and vertical movements. After getting the bumper roughly aligned, I welded a couple of small brackets connecting the bumper to the cross member. I'll now be able remove them and properly weld them together. Once reinstalled, I'll be able to make fine adjustments to the alignment of the bumper.
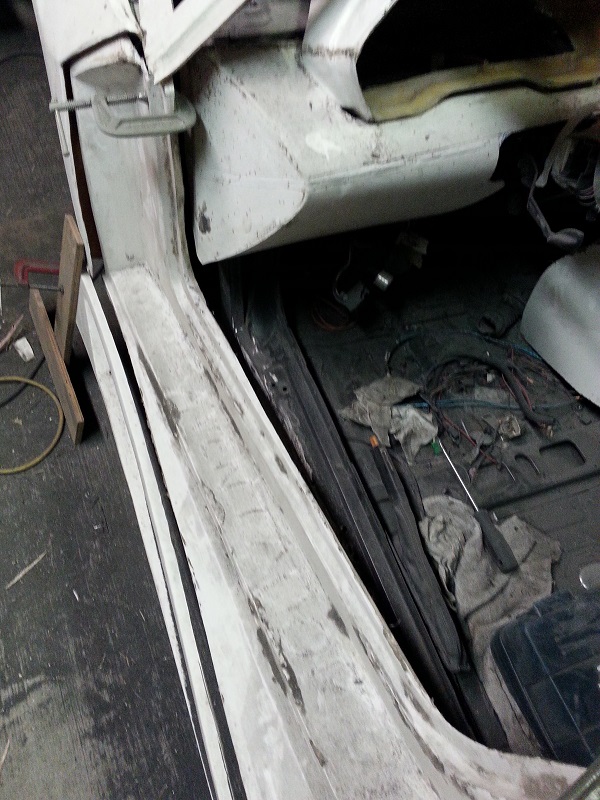
Started work on the rocker panels. Due to their location, and being higher and wider than other vehicles, means they'll get a little bit of abuse as people get in and out. As such I'm going to make sure they are well supported. I don't want any large, unsupported fiberglass areas. The framework will extend under the full rocker panels, and tie together everything from the door latch forward to the door hinge.
[This message has been edited by Neils88 (edited 11-30-2024).]
I spent a lot of time tonight changing the A(2) and B pillar angles (just on driver's side for now). As they were, there wouldn't have been any way to open the windows fully. I did my best to approximate the angle on the real car from pictures. I'm happy with the location of the B-pillar and the resulting angle, but the A(2) pillar didn't finish up quite where I wanted, so I'll have to cut it and move it a little more. Obviously they need to have the same angle or the window won't seal properly.
I also started to add some vertical supports along the rocker frame base. These get a little complex as they move forward due to the slight angle change required for each one. The small gap where the two panels meet will get tighter once I have enough support posts to anchor the bottom panel too.
Also I roughly fitted the side grill (yes, that's a real Aventador side grill ). I'll need to do a fair bit of work to get it to fit perfectly (note that the rear fender panel is not even close to aligned or fitted yet), but it looks pretty good for just being thrown in there...
[This message has been edited by Neils88 (edited 11-30-2024).]
Found out my new custom rims that were supposed to be shipped this week, are now delayed for a month. ...AND....UPS lost my two radiators that were just shipped on Monday.
The grill looks good in there.... fitment is not all that great though... Could you pull a couple dimensions off this for me so I can get an idea how much modification my needs to use these grills...
* It looks like the angle section in the lower right can be taken up by making an inner section for the trim piece. * how much do we need to move the fiberglass back and down to get the grill to fit?


 ), of course these will be attached the beams as well.


 Just found this thread.

 I have a little flexibility of alignment with the front fenders, but not much flexibility on the rear fenders. I want the rear fenders framed in and bolted in place before I do the final welding.

 But if you need another project, i can definitely help you get more therapy


 Hopefully we'll be able to get both the cars together one day for some pics.
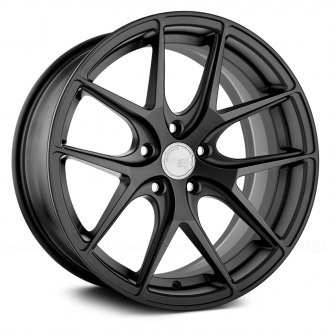
 I think I'll be playing with photoshop later.


 I moved it forward to where it should be and tacked the A-pillars...I won't bother tacking the B-pillars yet....
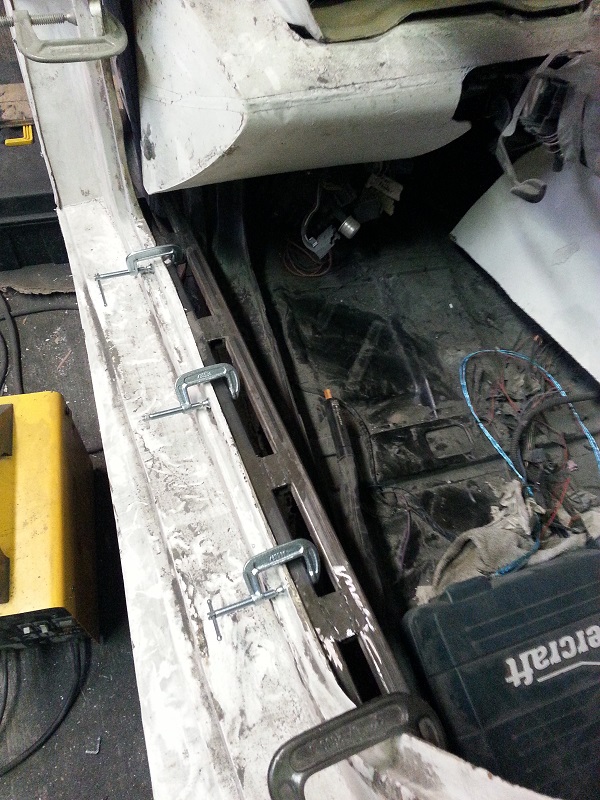

 ). I'll need to do a fair bit of work to get it to fit perfectly (note that the rear fender panel is not even close to aligned or fitted yet), but it looks pretty good for just being thrown in there...