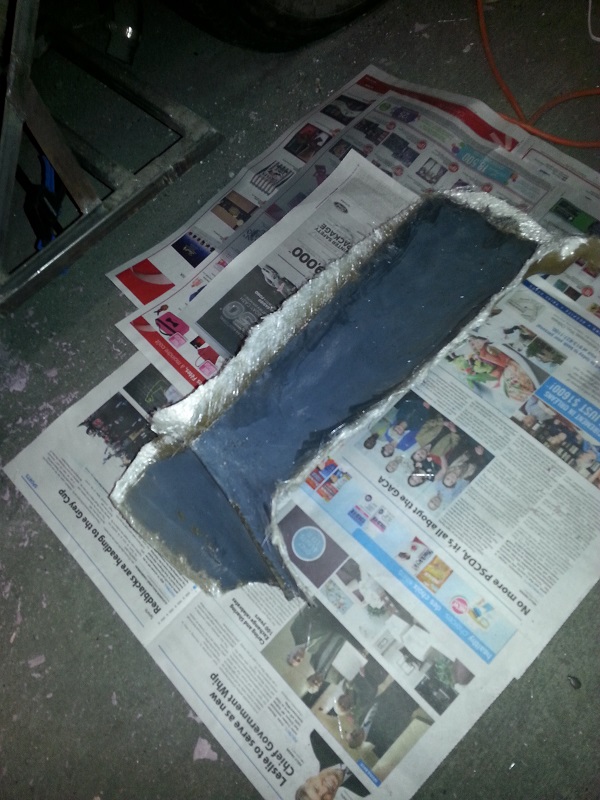
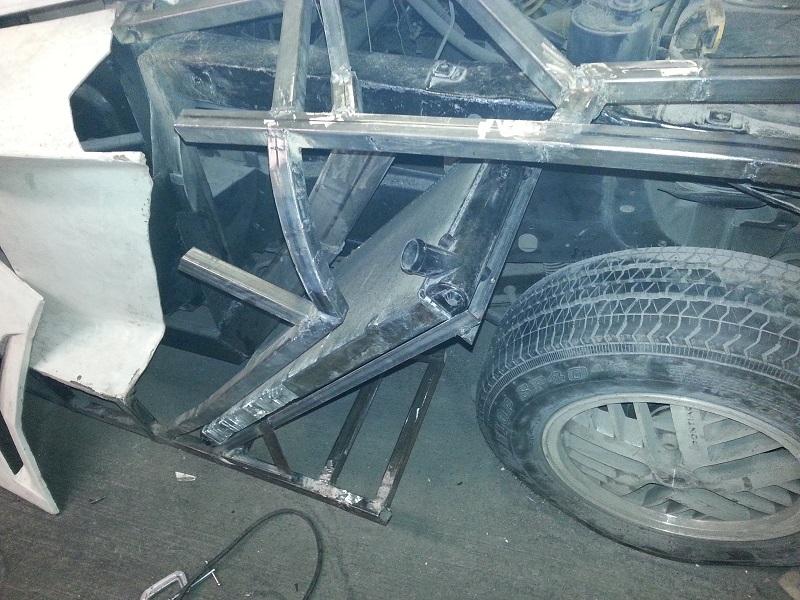
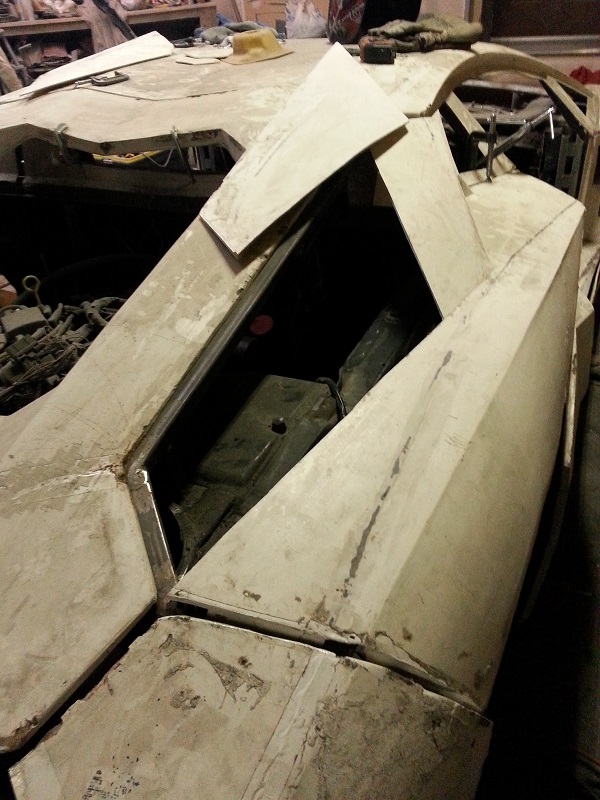
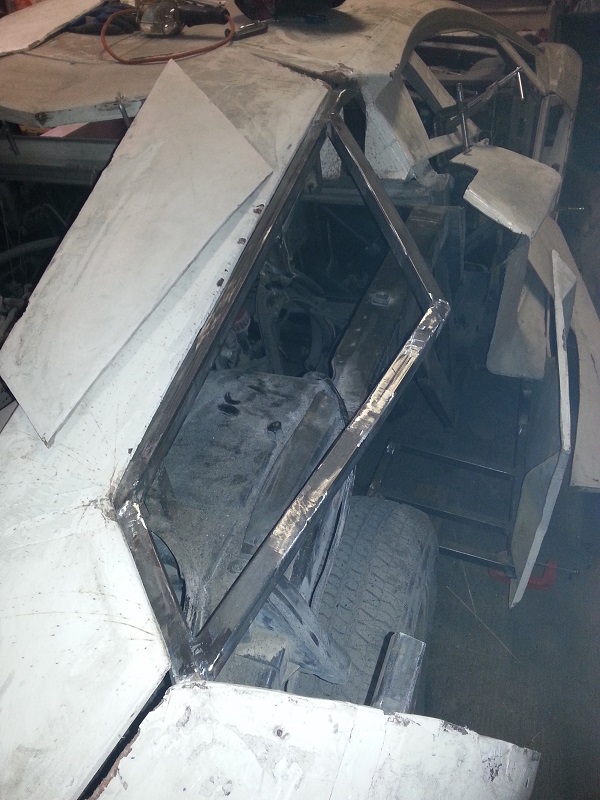
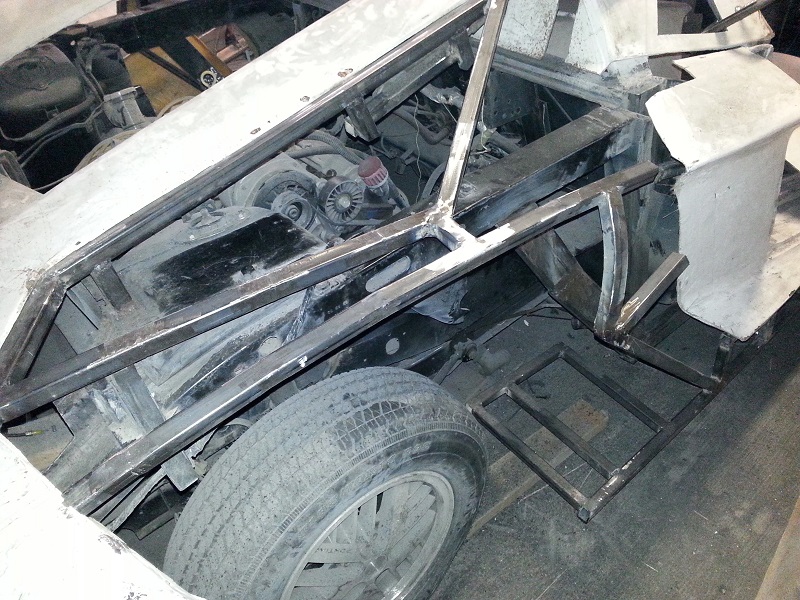
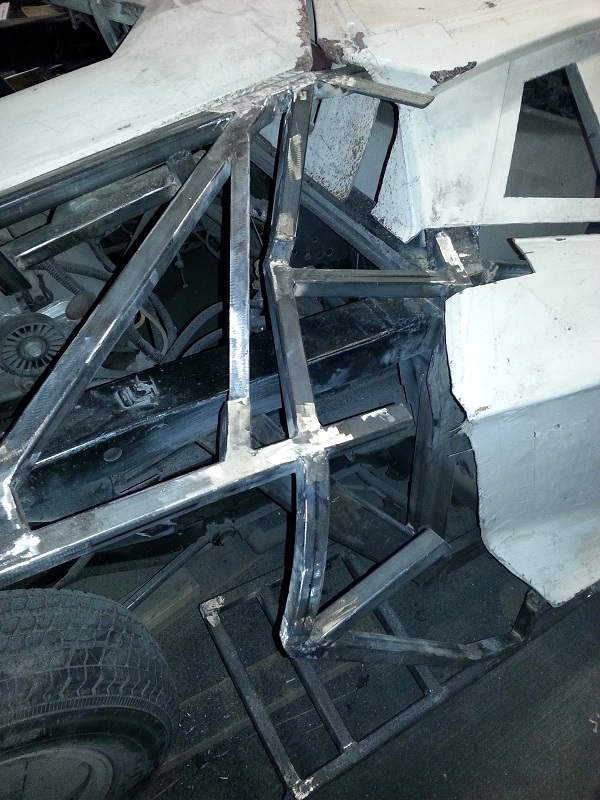
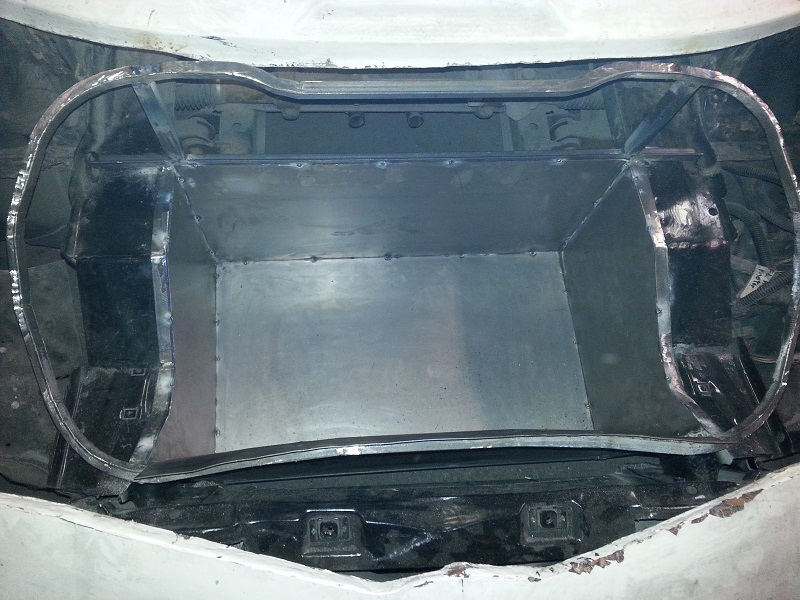
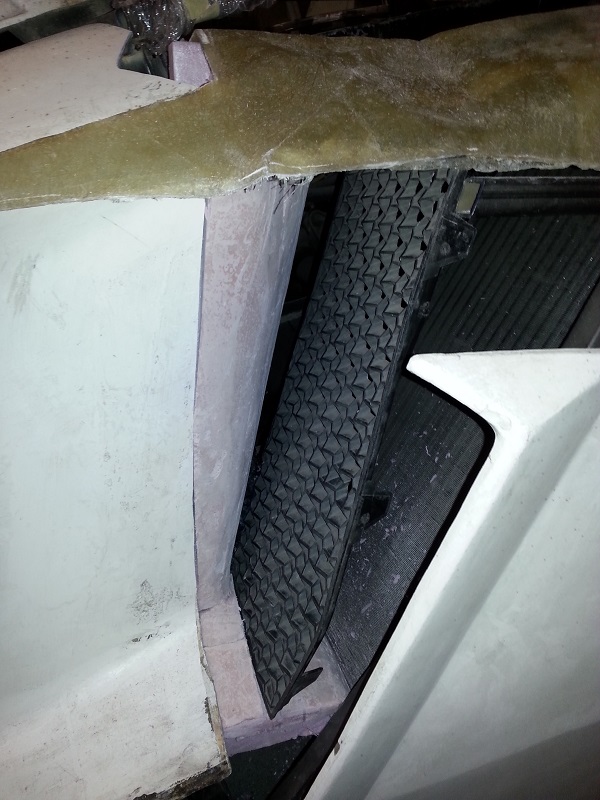
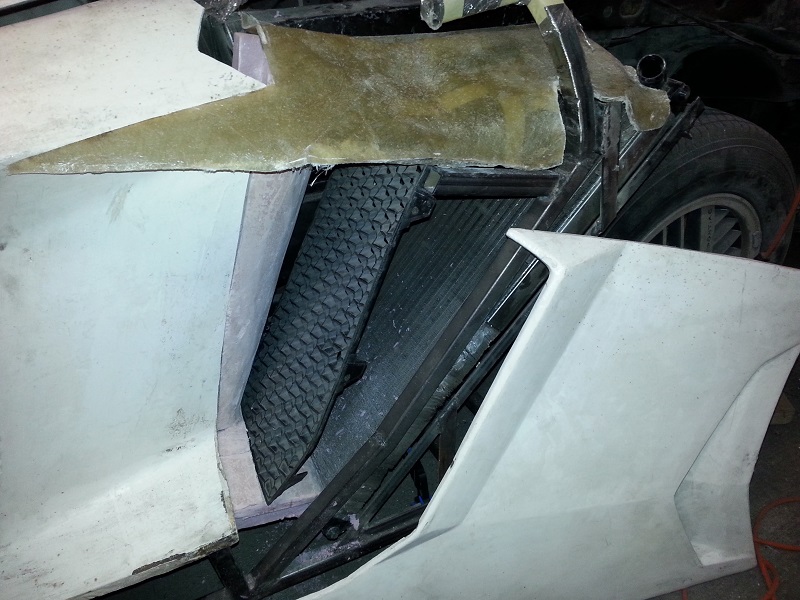
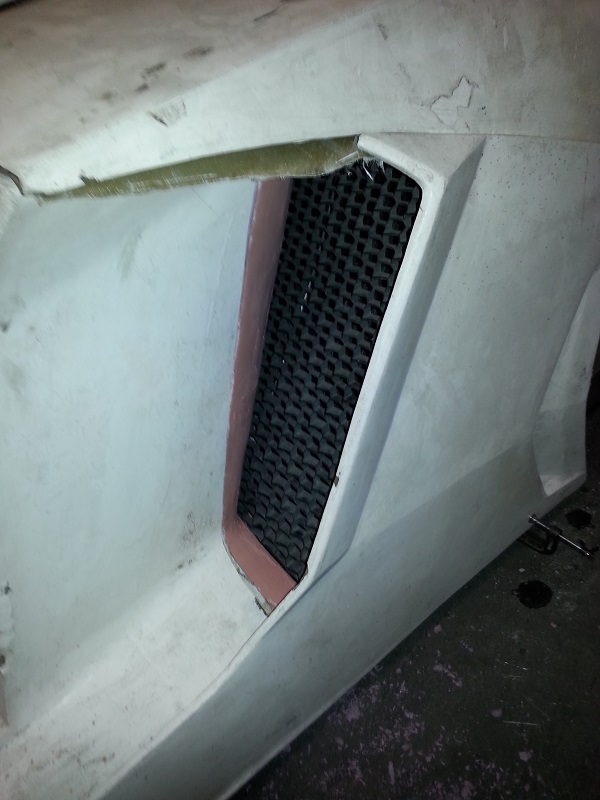
I have continued the work on the fender-vent framing. Admittedly, it is quite complex. Each panel will be mechanically fastened to the support frame. I've also removed the final vent (first pic shows it attached, and the second pic shows it removed). This is the smaller inner vent that is used for the engine air intake. As can be seen in the second pic, there really is only about half the vent panel actually there. This will have to be corrected. The vent framing is almost complete, though I will require an additional upper support beam for the engine air intake vent. I'll work on that after I repair the vent itself.
I'm going to move on to setting up the main vent grill support next. My friend Glenn has sent me a number of detailed pictures taken of the grill set-up from his 1:8 scale Pocher model. The detail on his model is amazing...way better than my little 1:24 scale model. I also need to finish securing the radiator and supporting it sufficiently for when it is full of water. The securing mechanism will need to allow easy (somewhat) removal and installation of the radiator.
[This message has been edited by Neils88 (edited 12-01-2024).]
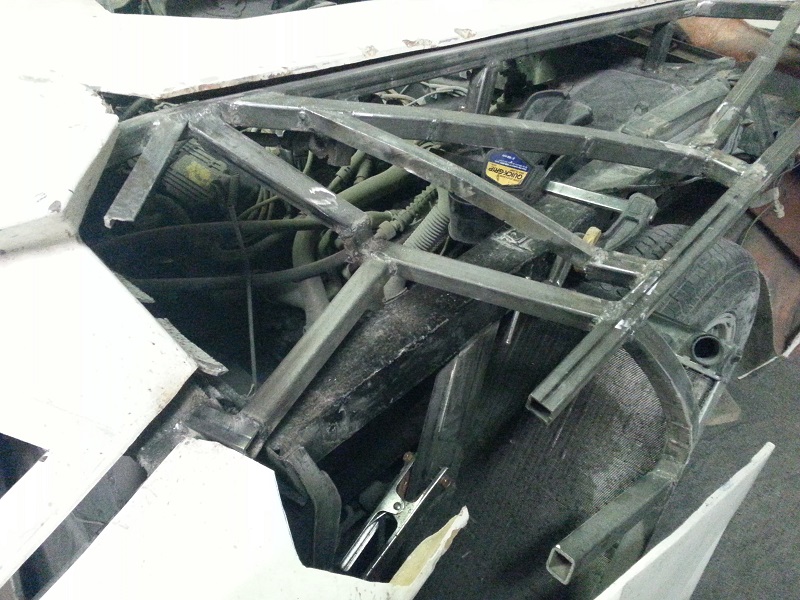
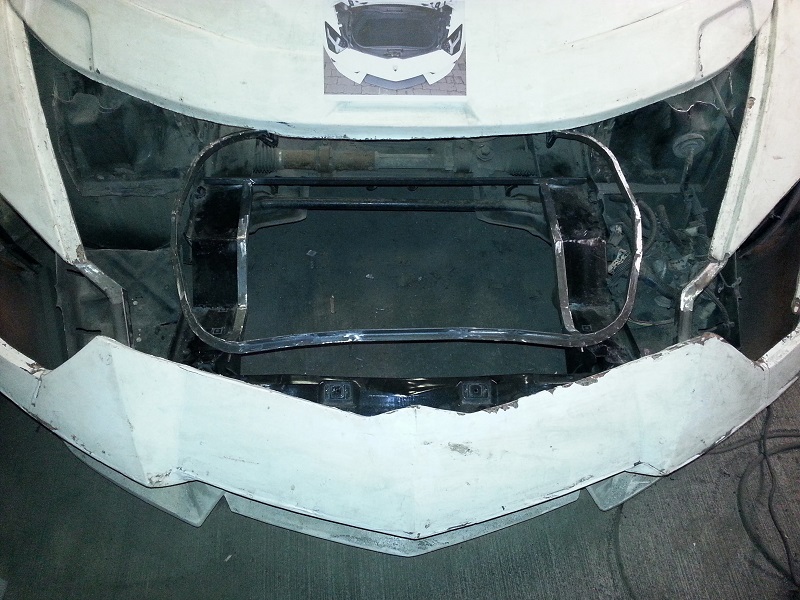
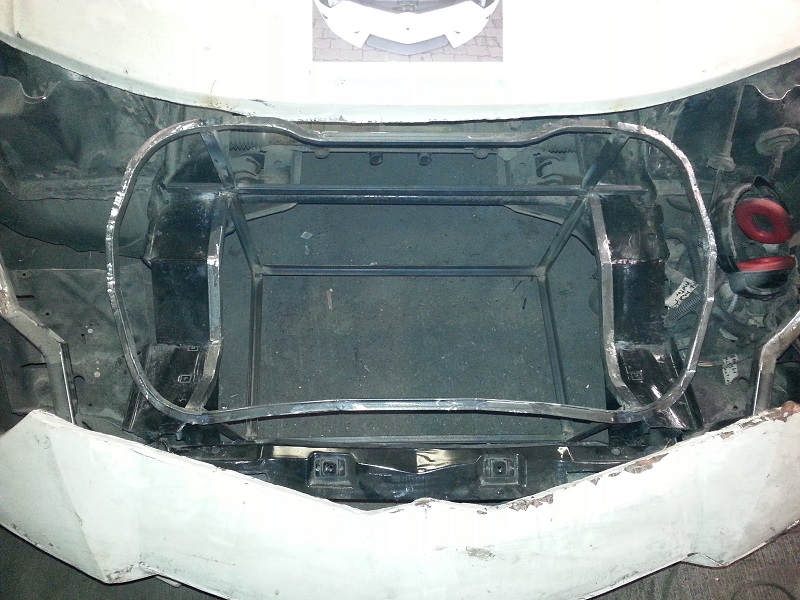
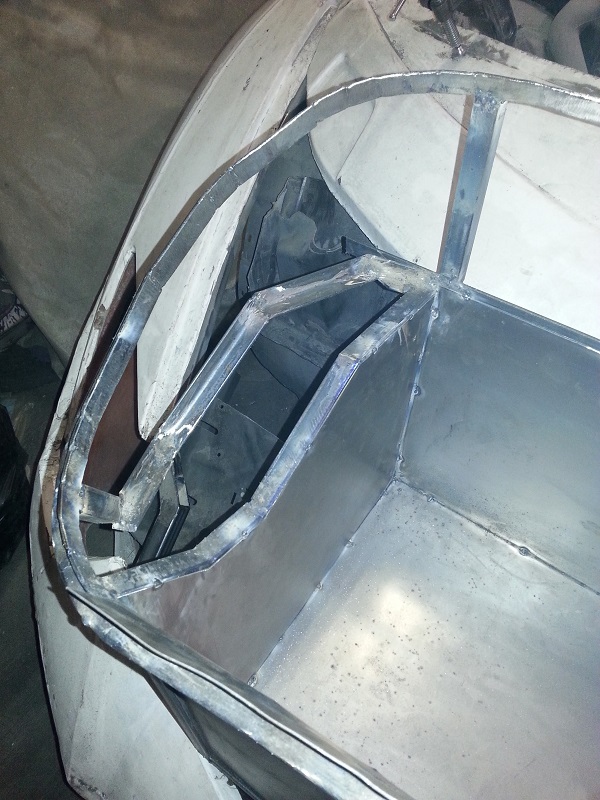
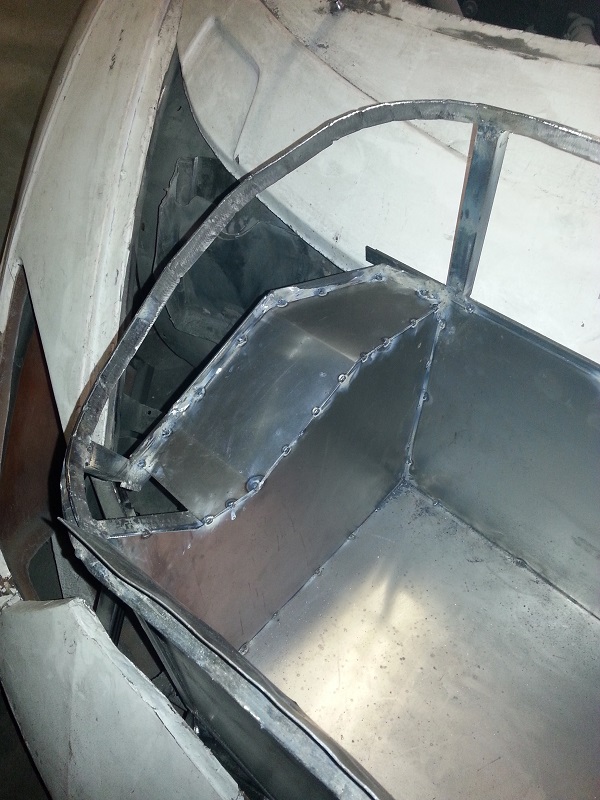
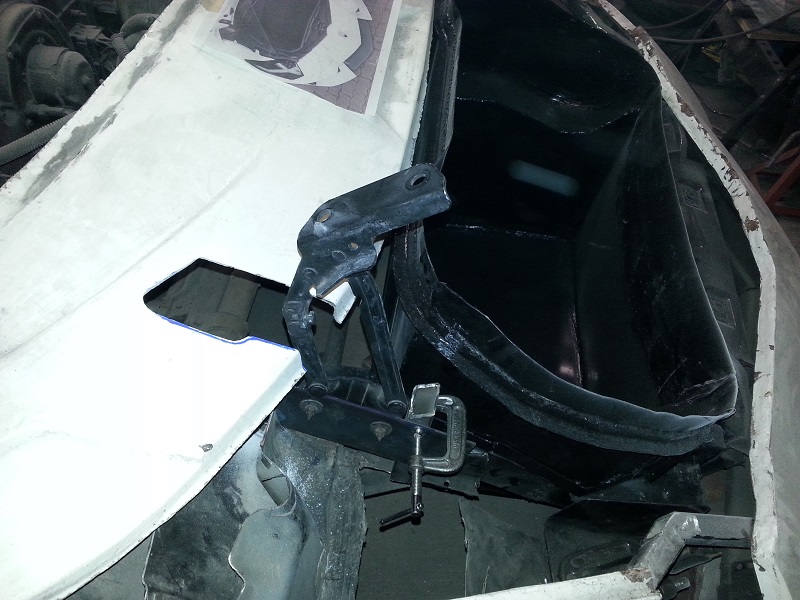
I put together a frame that will support the radiator around its full perimeter. The radiator will be soft mounted on a rubber gasket and bolted at both ends to the frame. The supporting frame will be bolted at four points - two brackets on the bottom edge, and then two additional upper brackets, one connecting the outside edge of the frame to the fender frame (shown in 3rd pic) and the final one connecting the upper inside edge to a point next to the vacuum canister. Each bracket is bolted in place (or at least will be after I drill the holes ) and the whole unit comes out in one piece.
[This message has been edited by Neils88 (edited 12-01-2024).]
With all the steel you have used I think you have added a few pounds to that Fiero frame...HA I like how you made the radiator frame support come out as one unit. Just make sure you can get to the radiator hoses otherwise that point will be mute..
Yes...I did worry about what the net weight would be. Surprisingly, the large rocker framing structures look heavy, but they really aren't bad. I've stripped a fair bit of Fiero metal off and have it stored in a large bin. I almost can't lift it! So hopefully I'll break even. I'll definitely have to take it to the scale once it's finished. Maybe I'll take bets at that time...
I spent a lot of time determining the best hose run and making sure the ports were properly accessible. I had to make a few trade-offs in positioning, but I think the end result is pretty good. The radiator fan will also be part of the removable unit. I'll have to take care designing the air conveyor and the wheel well cover so as not to impede on the removal. I will also have to run two long transverse coolant pipes along the firewall since I'll be running the radiators in parallel. This of course adds a little extra complexity to the system, but I should tons of cooling capacity.
I'm going to concentrate on getting the passenger side caught up to the driver's side. I started today by correcting the angle of the structural post and constructing the radiator base support. Everything will just be an exact mirror image of the driver's side framing. If there are any slight deviations in the passenger side panels, I'll adjust them to exactly match the driver's side panels to that everything is properly balanced visually.
[This message has been edited by Neils88 (edited 12-01-2024).]
I cut the active vent from the rear passenger side fender. After checking it closely against the driver's side vent, I noticed that there is a definitely shape discrepancy between the two vents (about a 1/2" off at the worst point, tapering down to where it should be. I will endeavor to make sure they are as closely matched as possible. This will take a little work...not so much to match them, but to deal with the vent openings after. I spent a little extra time this evening just getting the fender properly aligned so that I can next build the support frame (which should end up accurately duplicating the driver's side fender support frame).
[This message has been edited by Neils88 (edited 12-01-2024).]
I've been sick for almost two weeks now (flu), and as you can tell by the lack of posts I haven't gone near my garage. The downside is that I've had lots of time just sitting on the couch...which has given me lots of time to spend lots of money ordering parts online Though I'm still not feeling 100%, I finally made it into the garage today for a couple of hours.
Today's work, carried on with the passenger side fender framing. I got the active vent frame complete...consisting of a couple of compound-curve beams tied together. Tomorrow I'll see how much more framing I can get done. I can see the light at the end of the tunnel....
[This message has been edited by Neils88 (edited 12-01-2024).]
I finished the rear passenger side fender framing today.
I'll need to separate the next two vent panels currently attached to the fiberglass fender panel, then I can finish the vent panel framing. This will take a lot of care to ensure that I exactly match the dimensions and lines of the driver's side. There are a number of small panels and it will be noticeable if the two sides don't match exactly.
[This message has been edited by Neils88 (edited 12-01-2024).]
The passenger side rear vent framing is now basically complete. I did my best to make sure that it closely matches the driver's side, but I'll still be able to do fine adjustments to the actual panels when they get mounted. I didn't get a chance to put together the passenger side radiator frame insert, so I'll put that on my to-do list.
Tomorrow I'm hoping to start the front trunk & hood....
[This message has been edited by Neils88 (edited 12-01-2024).]
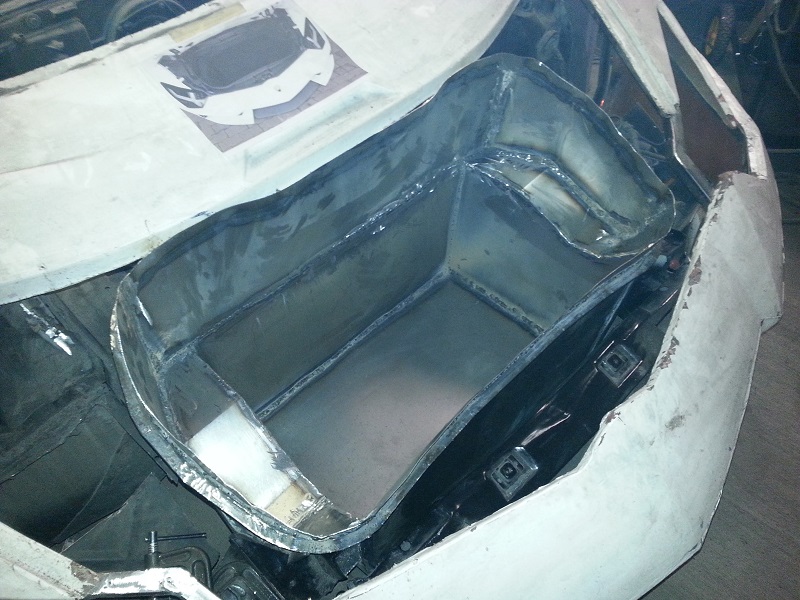
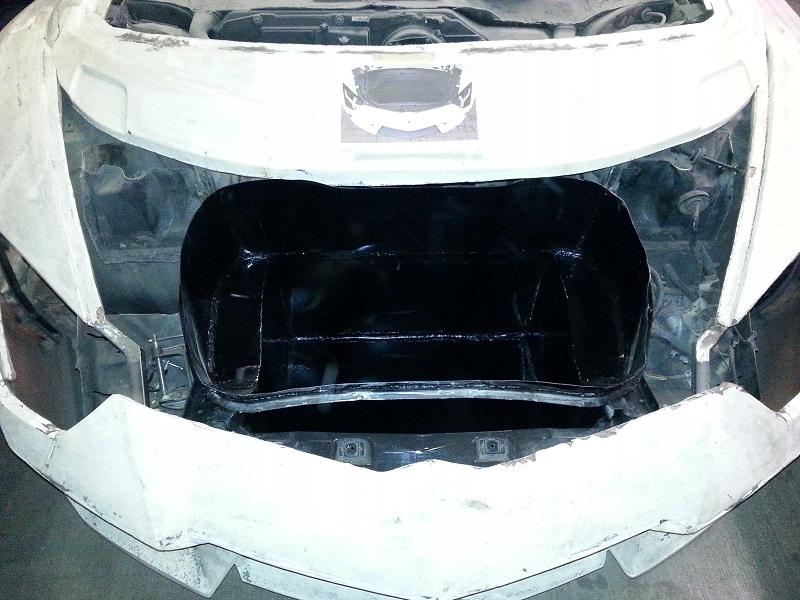
I started to shape the top trunk support brace. This will be located close to the top of the trunk lip, but not actually right at the top. The upper lip will simply be the 18 gauge sheet metal that makes up the trunk walls. The support brace will be an inch lower and will be the securing point for the fiberglass trim covers that go all around the trunk. The support is made from 3/4" angle, and curved to approximately match the shape of the real thing. The trunk itself will have a slightly different overall shape due to the location of the frame rails...but it'll be close enough. The best thing will be that the trunk will be held in by 4 screws. Once the 4 screws are removed (and a couple of wires for the trunk light and 12Vdc power outlet are disconnected), the trunk will lift straight out giving complete access to the brake/clutch components, HVAC box and steering rack.
[This message has been edited by Neils88 (edited 12-01-2024).]
I decided to mill the Lamborghini logo into some foam. This is a prototype for the valve covers. I just wanted to see how it would turn out. I'm not sure of the exact size, so it may have to be scaled up a little bit. This was at the limit of the length of my mill, so if it needs to be any larger I'll have to mill it in two stages. Unfortunately, I blew the bearing on my router about a minute into the cut. I let it keep running for the full program (45 minutes to mill)...but some of the lines look like they were drawn by a drunk monkey (most noticeable in the picture below at the bottom of the lettering).
[This message has been edited by Neils88 (edited 12-01-2024).]
Once it's all together, I'll finish welding the seams (just tacking them right now), prime, paint and then use a sealant inside and outside. Externally, the sealant will stop water and debris getting between the steel panels and the trunk framing. This will help limit the chance of premature corrosion. Of course the trunk will be finished with some nice carpeting.
[This message has been edited by Neils88 (edited 12-01-2024).]
Rhino Lining or the such is awesome for so many reasons. Look into doing something of that nature to finish off the frunk, trunk, wheel wells, and undercarriage.
I wanted to ask what you are using for tubing, size and thickness, and how are you bending it?
Take care,
Bob
Merry Christmas, Bob!
The sizing depends on the location and the function. I commonly use 1"x1" square tubing with a wall thickness of 0.1". This was increasd to a wall thickness of 0.125" for areas having more loading. I also used plate up to 3/16" for some high stress areas. I make all the curves by cutting slits and bending as required. Most of the stuff bends easily once it has been slit. I have some even thinner tubing (1/2" x 1" with a thickness of 0.065") that will be used for a few other areas like the hood.
[This message has been edited by Neils88 (edited 12-25-2015).]
Rhino Lining or the such is awesome for so many reasons. Look into doing something of that nature to finish off the frunk, trunk, wheel wells, and undercarriage.
Looking great.
Merry Christmas, Tony! I'll take a look at that stuff. There are a few areas where this could work well (such a under the rocker framework)
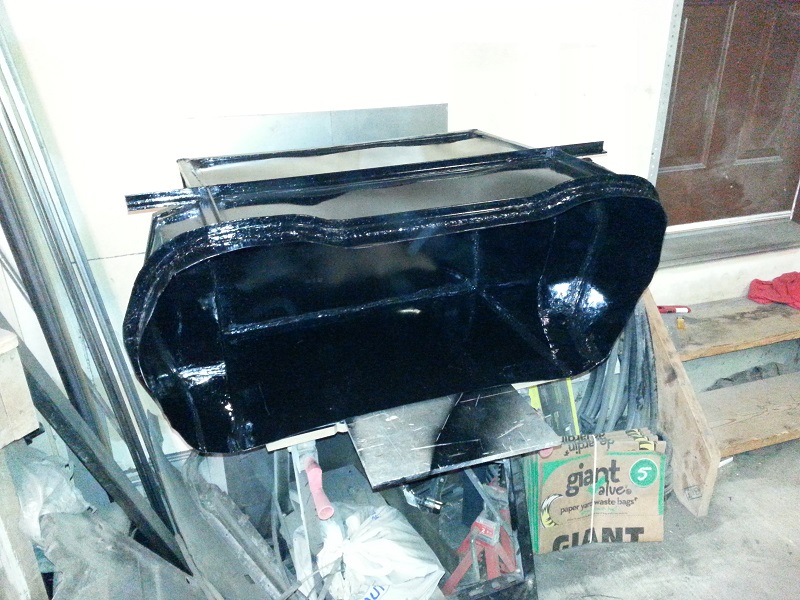
The trunk is now all welded together. Tomorrow I'll paint and seal it, then I'll be able to start building the hood framing. I left some extra height on the trunk lip. I'll be able to trim this down to account for the hood height, the hood framing, the fiberglass that will encapsulate the hood framing and the trunk seal.
[This message has been edited by Neils88 (edited 12-01-2024).]
The trunk is painted and sealed. The sealant will take a few days to completely cure so not much I can do with it for a while.
I decided to finally get to some fiberglassing today. I started by creating a foam mold for the upper part of the air conveyor for the driver's side main vent. I'm using a standard 2 part polyester resin and 1.5 oz mat fiberglass. After getting everything setup, measured and mixed, I went ahead and glassed two layers of mat. Now for the bad part. It's been two hours and the resin still hasn't gelled. I was very careful on my measurements, the temperature in the garage is ideal, yet nothing! I've never had this happen with any resins that I've used in the past. If it takes much longer, I'm just going to pull all the wet fiberglass off and discard it. First time I've used this brand of resin...may be the last!
[This message has been edited by Neils88 (edited 12-01-2024).]
Originally posted by Neils88: I decided to finally get to some fiberglassing today. I started by creating a foam mold for the upper part of the air conveyor for the driver's side main vent. I'm using a standard 2 part polyester resin and 1.5 oz mat fiberglass. After getting everything setup, measured and mixed, I went ahead and glassed two layers of mat. Now for the bad part. It's been two hours and the resin still hasn't gelled. I was very careful on my measurements, the temperature in the garage is ideal, yet nothing! I've never had this happen with any resins that I've used in the past. If it takes much longer, I'm just going to pull all the wet fiberglass off and discard it. First time I've used this brand of resin...may be the last!
Turns out this resin has a thin film set time of 3 hours at 78°F. I think that was actually one of the reasons I had bought this one instead of the type I normally get. I guess I had forgotten that. I'll see if I'm happy with the result when it finally cures.
The top part of the air conveyor is almost complete. I'll need to trim once it's finished curing. Still need to perfect my fiberglassing technique. I haven't glassed any parts in quite a few years, but so far I'm happy with how it is turning out. I have about a dozen air conveyors to build (which are all hidden from view)...so I'll get lots of practice before I start into the visible parts... Ok...I probably won't get to all these up front...
[This message has been edited by Neils88 (edited 12-01-2024).]
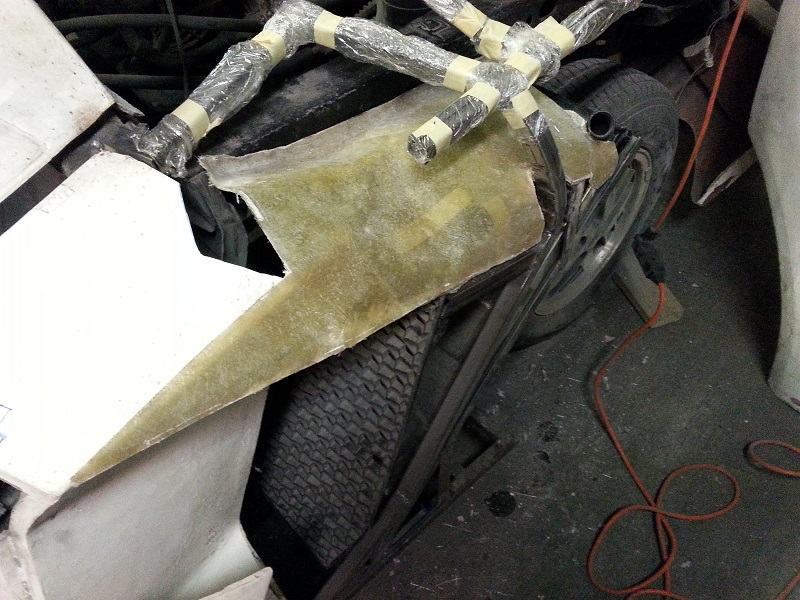
When I made the top of the air conveyor, I simply made a female foam mold, covered it with a thin sheet of plastic and layed up the fiberglass. This worked fine for the top of the conveyor because of the location, but I'm going to switch up my technique and start building plugs, and then use those to produce molds. A lot more effort involved, but I'm hoping the end result will be much better. The two pics below show the next foam plug in place, supporting the grill, and creating the expanding opening of the vent. I've cut the main door opening panel back a little. I've opted to have a tight curvature for the opening to match the grill width, rather than bringing the panel to the grill width with a gradual curvature. This helps deal with the "Fiero" parts behind the panel, especially the gas fill line (which I've now elected to move to the passenger side, the same as on the real Aventador.). The bottom of the plug curves down to the bottom of the radiator. The plug will be finished with body filler, sanded and primed with a high build primer.
[This message has been edited by Neils88 (edited 12-01-2024).]
I've spent a little bit of time adding body filler and sanding the surface smooth. I just finished it up with three coats of high build primer. I'm letting that set for a while, then I'll finish sanding it, polishing, waxing, etc and make the mold. Good thing I only have about 40 or so parts to make....
While waiting for the paint to dry, I reinstalled the trunk. Fits perfectly. ...a little bit cleaner than everything around it...
I also started installing the hood hinges. I've drilled some flat plates for the hinges and welded them at one end to a support. Once I'm happy with the hinges I'll build up bracing for the plates to hold everything securely.
...Unfortunately, nothing ever goes smoothly. After getting the hinge plates put in place and installing both the hinges I found that I couldn't seem to get them aligned throughout their travel. They seemed to move completely differently and ended up in different locations. I tried adjusting them, but this didn't help. Finally took them off and noticed that their linkages are completely different lengths. This sucks since these are OEM Lamborghini hinges that I ordered from Europe. Turns out they sent me a wrong hinge. Now I'm going to have to wait a while for a replacement.
[This message has been edited by Neils88 (edited 12-01-2024).]
I agree with you on the bucks, then molds then finished parts,. They end up coming out so much nicer and allows for gel coat to be used as a surface. When using just fiberglass mat as the final surface, over time the mat strands will imprint through the paint. The only way to fix that is either spray gel coat over the mat surface and finish or do as you are doing and make molds that then have finished parts. My opinion is that making the molds really helps to create a nice finished product.
Hey Don it is nice to see you watching this build!!!
Neil, I have known Don for something like 15 years now when we both were building 355 Ferrari's. He is now building probably the closest looking 308/328 I have ever seen. Amazing attention to detail and fiberglass skills. Pick don's brain if you need any suggestions.
I agree with you on the bucks, then molds then finished parts,. They end up coming out so much nicer and allows for gel coat to be used as a surface. When using just fiberglass mat as the final surface, over time the mat strands will imprint through the paint. The only way to fix that is either spray gel coat over the mat surface and finish or do as you are doing and make molds that then have finished parts. My opinion is that making the molds really helps to create a nice finished product.
Looking good and keep the updates coming.
Cheers Don
quote
Originally posted by GlennGdman:
Hey Don it is nice to see you watching this build!!!
Neil, I have known Don for something like 15 years now when we both were building 355 Ferrari's. He is now building probably the closest looking 308/328 I have ever seen. Amazing attention to detail and fiberglass skills. Pick don's brain if you need any suggestions.
Thanks Don. I've got a little bit of experience with making fiberglass prototypes, but very little experience making finished parts. I appreciate any hints and tricks you throw my way, especially if you see me doing anything wrong. I figure I'm going to improve my techniques as I progress...so many parts to build. I'll be taking them slowly, and hopefully not making too many costly mistakes. I'd love to see a link to your Ferrari build thread if you have one...
I pulled the first female mold this morning. It only stuck a little in a couple of points, but actually came apart very easily. The detail was lost on one recessed groove that will hold the grill, but that will be easy to fix. I will give the mold a finish sanding just to ensure the surface is perfect before I make the final part. The edges also need to be trimmed as well.
[This message has been edited by Neils88 (edited 12-01-2024).]
I usually apply 4-5 coats of the honey bee mold wax and then brush on two coats of PVA release agent to ensure minimizing the sticking points. A good coat of unwaxed gel coat goes in first and then a thin woven cloth layer, usually 1/2 oz. and then a few layers of mat for thickness and strength. Parts come out very nice and the gel coat will still harden and cure because the little wax in everything is pulled out to the mold surface. Using unwaxed gel coat also removes the need to sand that gel coat before adding on the fiberglass layers and gives a better finished product.
I used 5 coats of Carnauba wax and a couple coats of PVA. The only real issue was along that ridge you can see in the picture. But that appears to be from me not sanding and finishing it properly (it was a tight spot to get into). It just ended up with a little bit of a rough surface along one part of the ridge, but that looks like it will be easy to fix since being reversed, it is now easy to get to. I don't actually need to sand the whole surface, just polish it. I ordered un-waxed gelcoat, so I'll be able to lay up the part properly once it arrives.


 This will have to be corrected. The vent framing is almost complete, though I will require an additional upper support beam for the engine air intake vent. I'll work on that after I repair the vent itself.
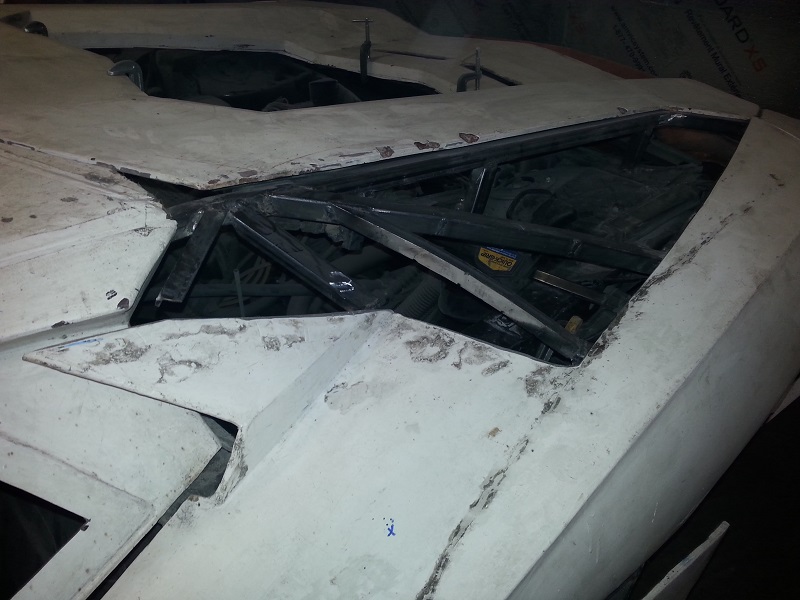


 ) and the whole unit comes out in one piece.
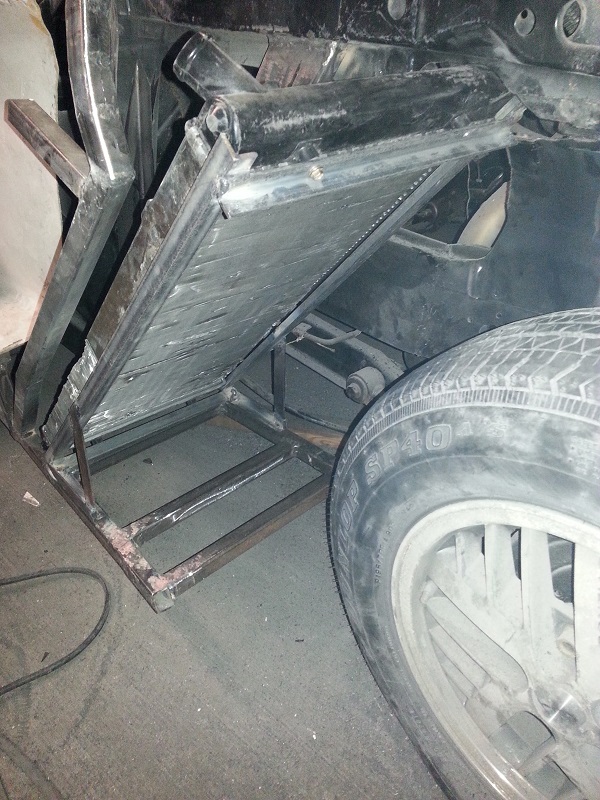

 I'll definitely have to take it to the scale once it's finished. Maybe I'll take bets at that time...
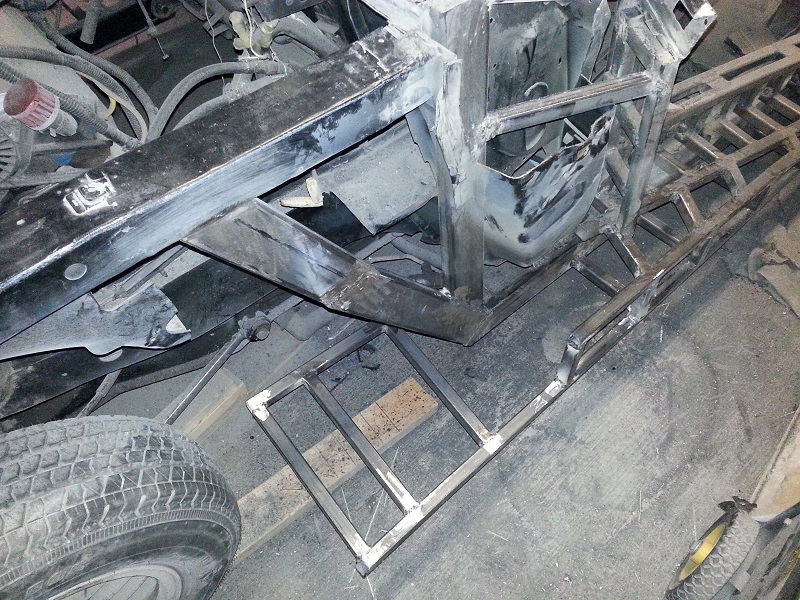
 Though I'm still not feeling 100%, I finally made it into the garage today for a couple of hours.

 I let it keep running for the full program (45 minutes to mill)...but some of the lines look like they were drawn by a drunk monkey (most noticeable in the picture below at the bottom of the lettering).
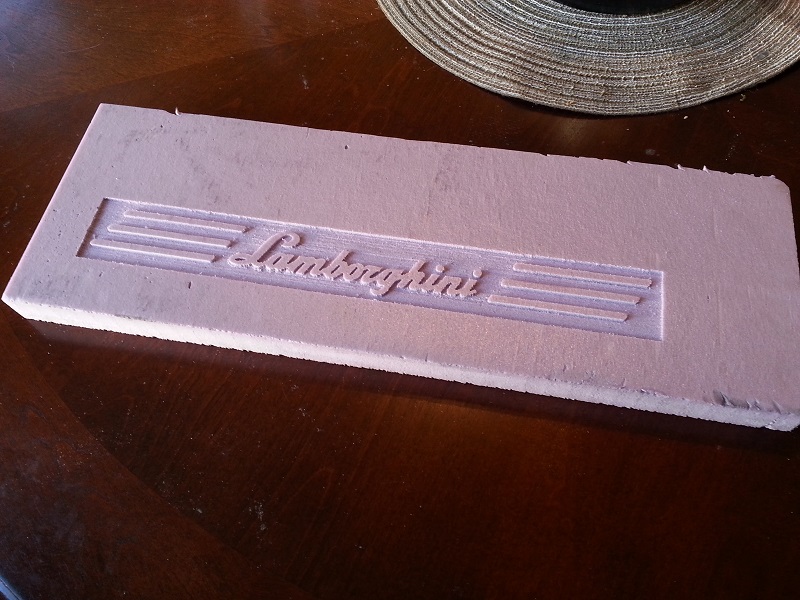


 I was very careful on my measurements, the temperature in the garage is ideal, yet nothing!
  I've never had this happen with any resins that I've used in the past. If it takes much longer, I'm just going to pull all the wet fiberglass off and discard it. First time I've used this brand of resin...may be the last!
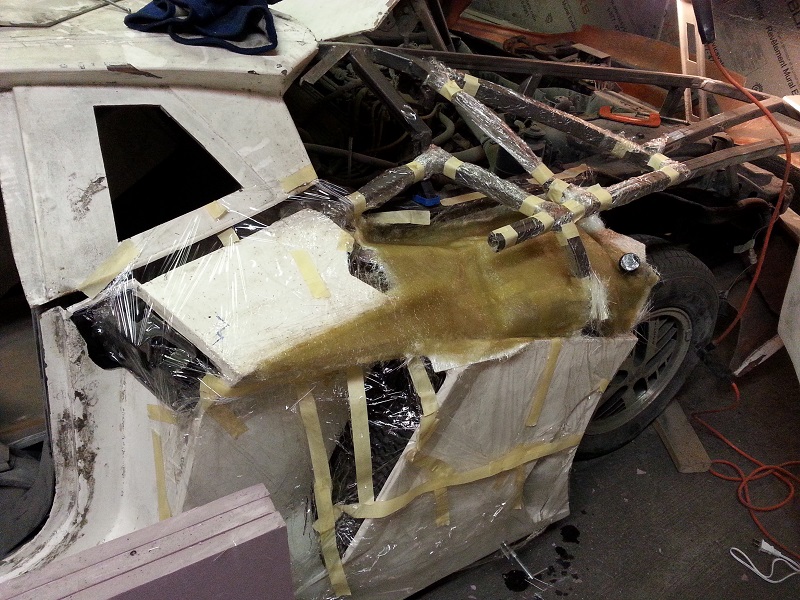


 I tried adjusting them, but this didn't help. Finally took them off and noticed that their linkages are completely different lengths. This sucks since these are OEM Lamborghini hinges that I ordered from Europe. Turns out they sent me a wrong hinge. Now I'm going to have to wait a while for a replacement.
 I figure I'm going to improve my techniques as I progress...so many parts to build. I'll be taking them slowly, and hopefully not making too many costly mistakes. I'd love to see a link to your Ferrari build thread if you have one...